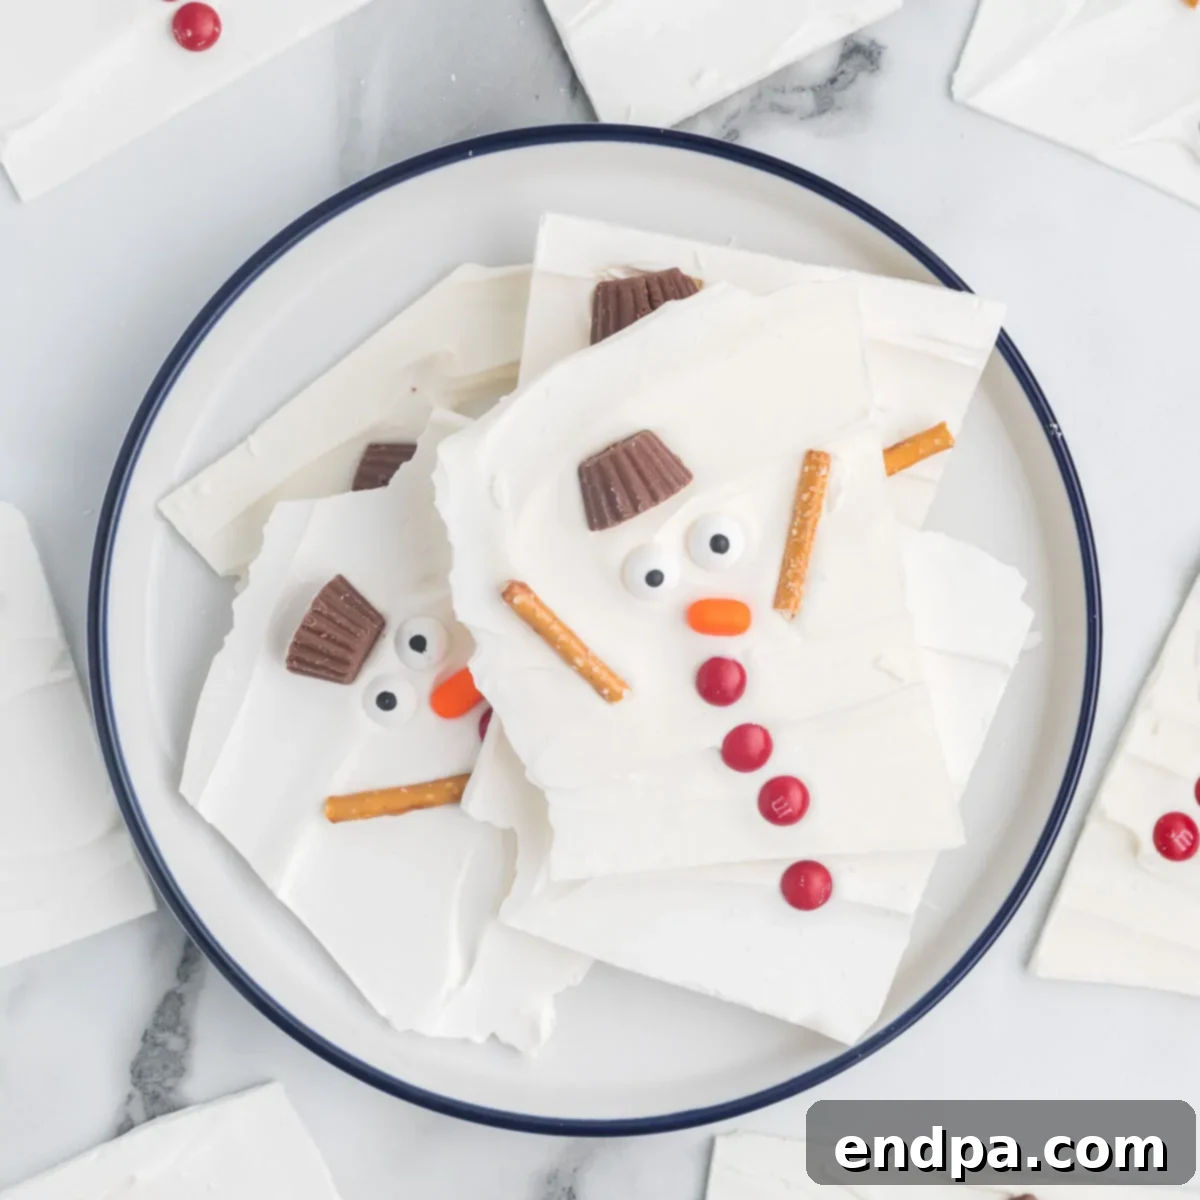
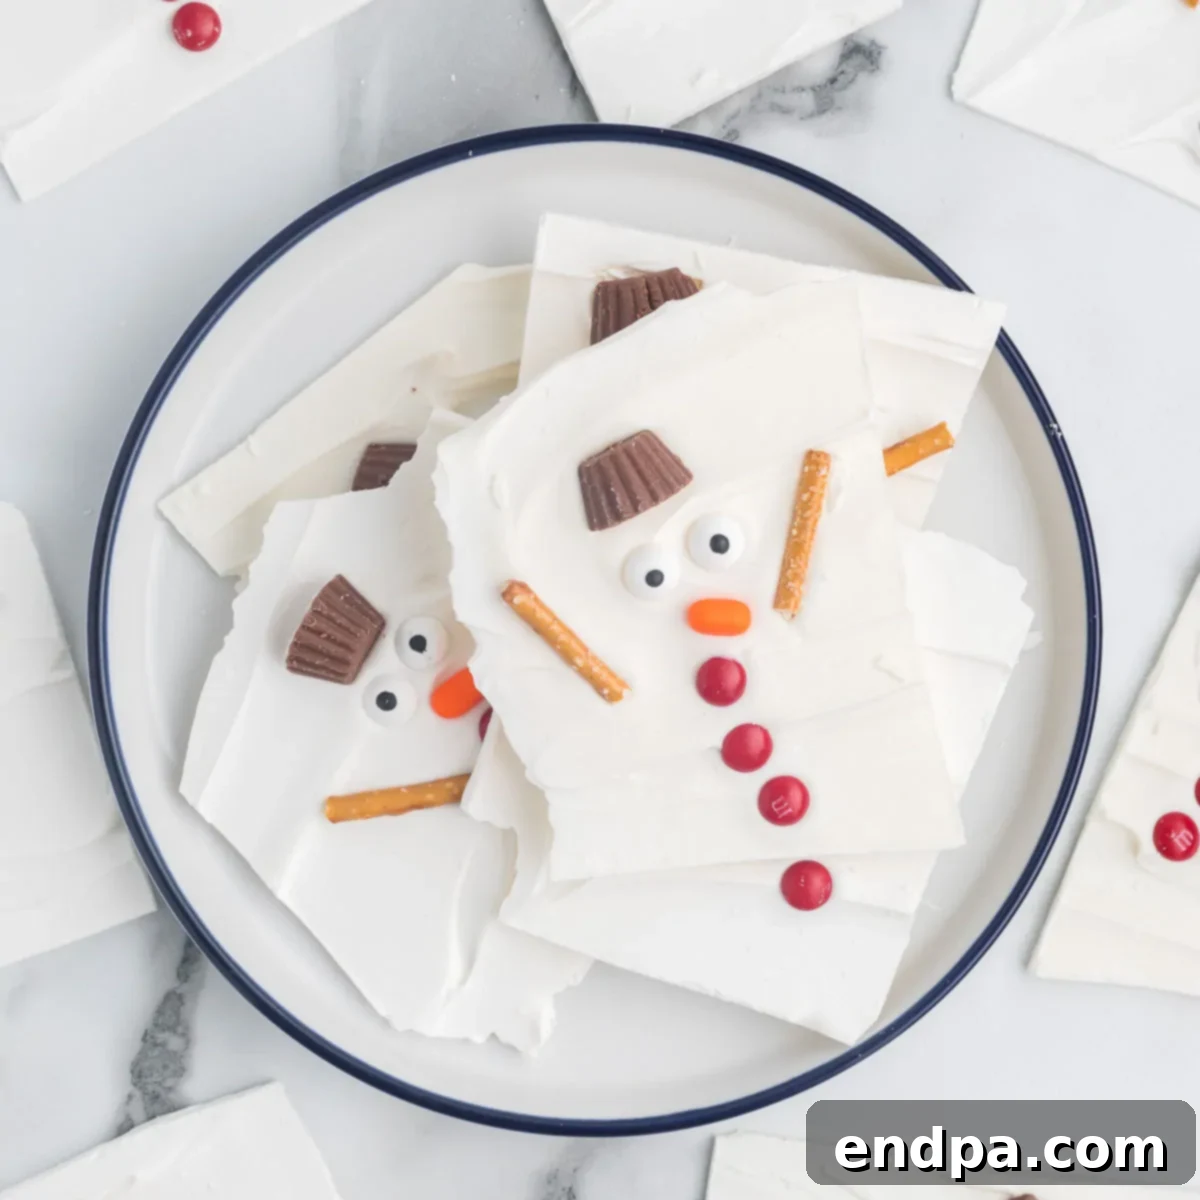
Melted Snowman Bark is an incredibly easy no-bake recipe that captures the whimsical spirit of the Christmas season. With just a few simple ingredients, this delightful holiday treat comes together effortlessly, making it perfect for festive gatherings and last-minute celebrations. Its charming appearance and sweet flavor ensure it’s a hit with both children and adults.
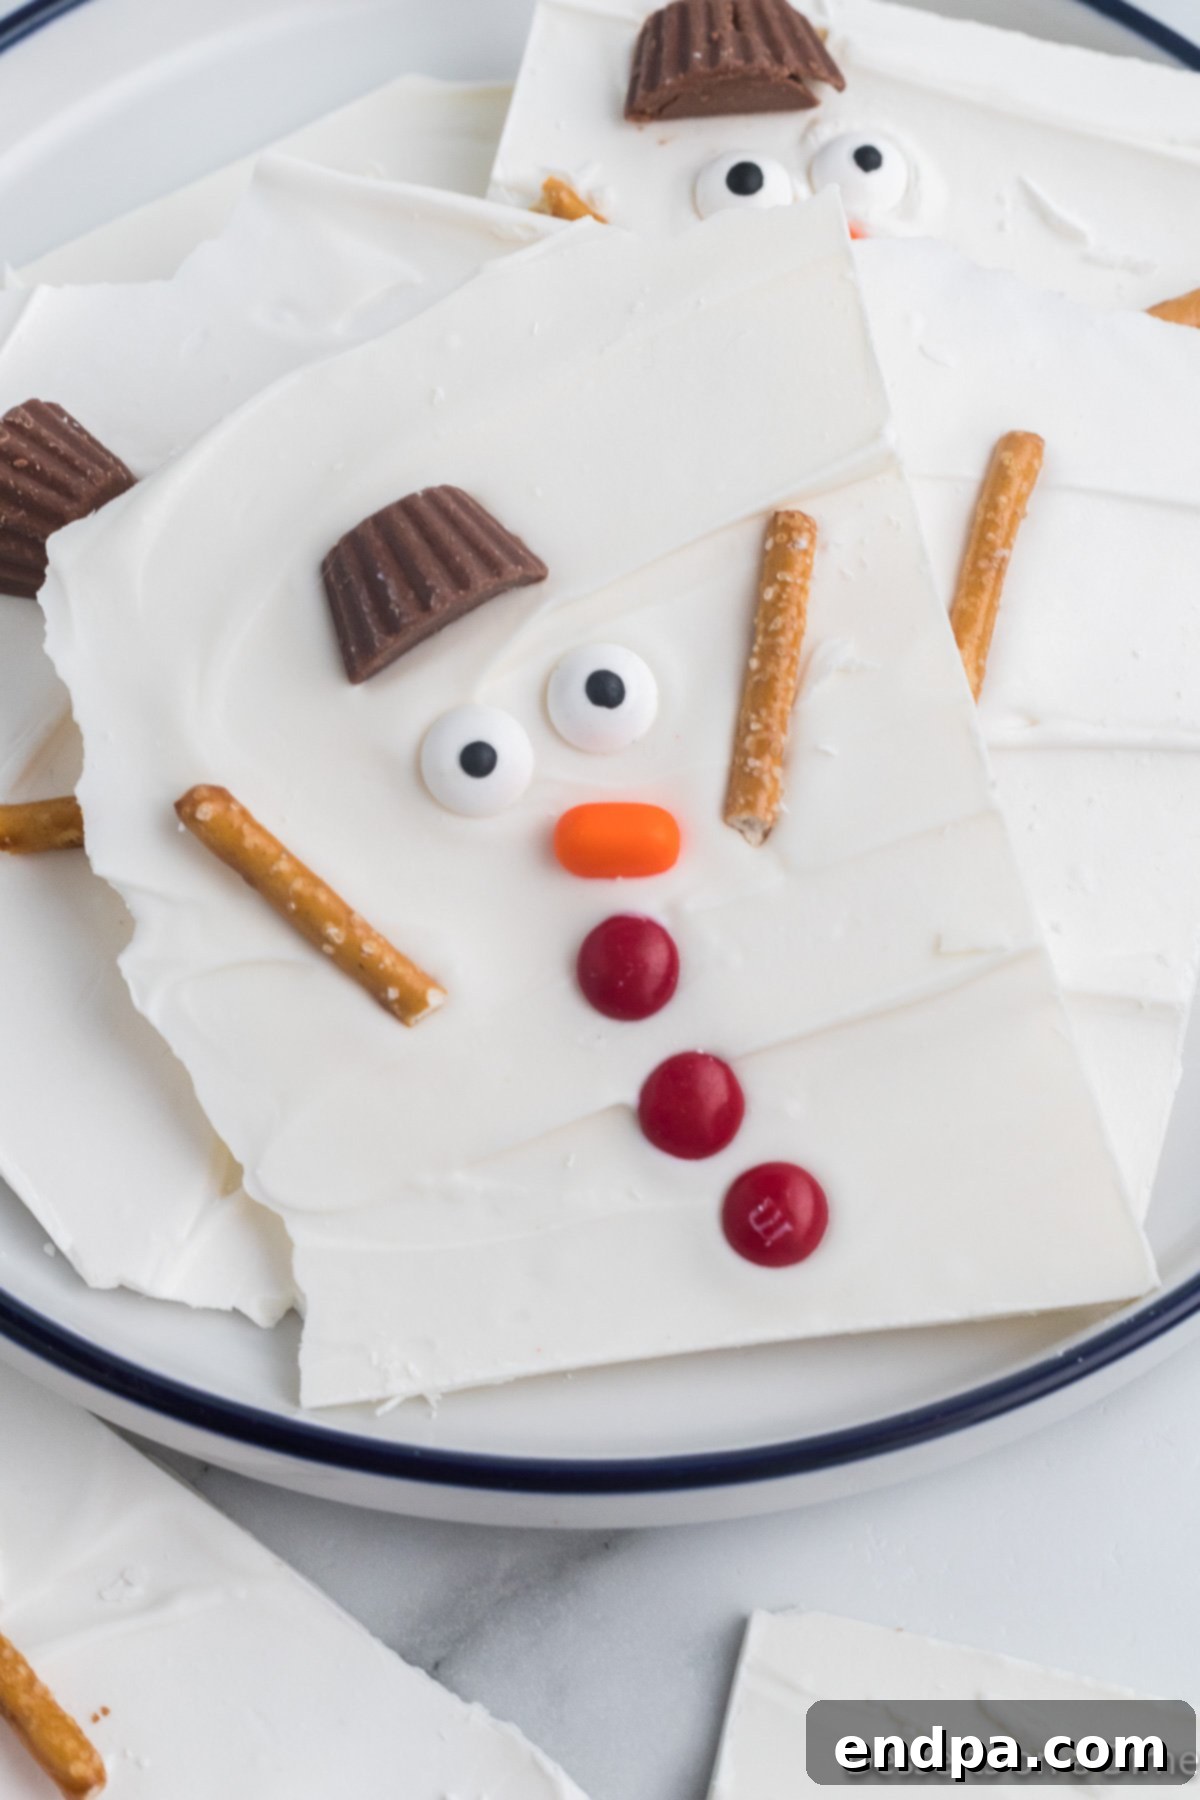
This Snowman Chocolate Bark is a cherished Christmas dessert that has brought joy to our family for years. Its whimsical design, featuring playful “melted” snowmen, makes it a truly unique addition to any holiday dessert spread. Beyond its visual appeal, it’s remarkably simple to create, allowing you to spend less time in the kitchen and more time enjoying the magic of Christmas.
Each bite of this creamy bark offers a delightful blend of rich chocolate and a medley of candy toppings. It’s not just a dessert; it’s a fun, interactive project that families can enjoy making together. If you love cute snowman-themed treats, be sure to also try our Melted Snowman Cookies and Snowman Chocolate Covered Oreos for more festive fun!
What’s in this post: Melted Snowman Bark
- Why You’ll Adore This Melted Snowman Bark
- Essential Ingredients for Snowman Bark
- Creative Variations to Customize Your Bark
- Step-by-Step Guide: How To Make Melted Snowman Bark
- Expert Tips for Perfect Snowman Bark
- Proper Storage for Freshness
- More Irresistible Christmas Bark Recipes
- Melted Snowman Bark Recipe Card
Why You’ll Adore This Melted Snowman Bark
This charming recipe is similar in its simplicity to our popular 2-Ingredient Chocolate Bark, but with a delightful holiday twist. What truly sets this recipe apart is its creative and festive topping: an array of candies and pretzels artfully arranged to resemble adorable, slightly melted snowmen. This whimsical design transforms a simple chocolate bark into a captivating centerpiece for any holiday gathering.
The entire preparation process for this Melted Snowman Bark is incredibly easy, making it accessible for even novice bakers. It requires minimal effort and can be ready to chill in under 30 minutes, allowing you to quickly create a stunning dessert without stress. It’s truly the best sweet treat for busy holiday schedules, offering maximum impact with minimum fuss. Beyond being a fantastic dessert for your own family, it also makes a thoughtful and impressive homemade gift for friends, neighbors, teachers, or hosts. Package it in clear bags with festive ribbons, and you have an instant, heartfelt present that everyone will appreciate.
The joy of making this bark extends to its versatility. You can involve children in the decorating process, turning it into a fun family activity. Watching their creativity unfold as they assemble the snowman faces and arms adds another layer of festive cheer. Each piece of bark is a canvas for unique snowman personalities, ensuring that no two pieces are exactly alike. This personal touch makes every serving feel special, embodying the warmth and individuality of homemade holiday treats. Whether you’re looking for a quick dessert, a fun activity, or a memorable gift, Melted Snowman Bark ticks all the boxes.
Essential Ingredients for Snowman Bark
Crafting this delightful Melted Snowman Bark requires a selection of readily available ingredients, most of which you might already have in your pantry or can easily find at any grocery store during the holiday season. The key is to choose good quality ingredients to ensure the best flavor and texture for your bark. Here’s what you’ll need:
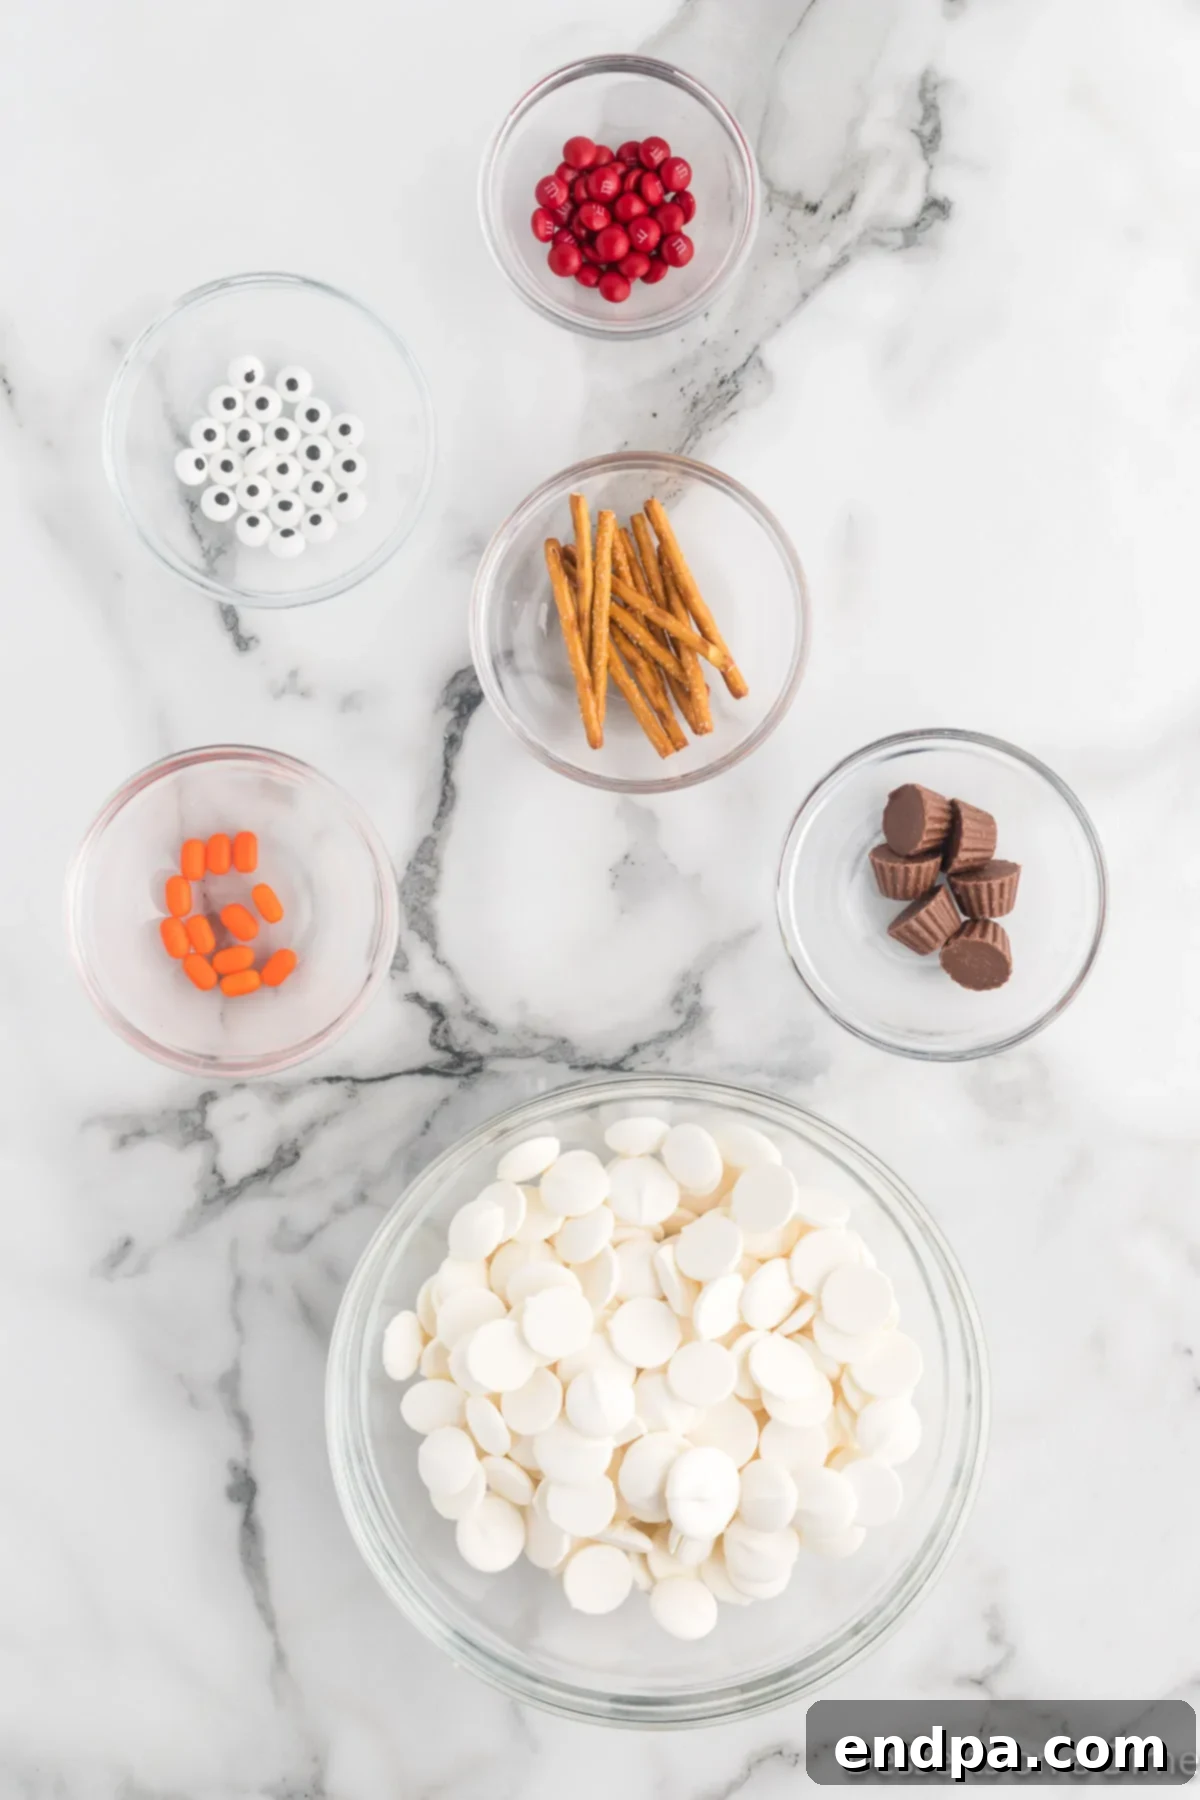
- Melting White Chocolate: The foundation of our bark. We highly recommend using high-quality melting chocolate, such as Ghirardelli or Wilton candy melts, as it provides a consistently smooth and fluid melt, ensuring a beautiful, even base for your snowmen. While white chocolate chips can work, they often require a touch of shortening or coconut oil to achieve the desired pourable consistency.
- Mini Reese’s Peanut Butter Cups: These miniature treats are absolutely perfect for creating the snowmen’s iconic hats. Their small size and distinct shape make them ideal for adding a touch of charm and a delicious peanut butter flavor to each snowman.
- Small Candy Eyes: No snowman is complete without expressive eyes! These fun, edible googly eyes add character and a playful touch to your melted snowmen, making each one unique and endearing. They are widely available in baking aisles during the holidays.
- Orange Tic Tacs: These tiny, vibrant orange candies serve as the perfect “carrot” noses for your snowmen. Their elongated shape and bright color instantly bring the snowman’s face to life. If you can’t find Tic Tacs, any small, narrow orange candy would work as a substitute.
- Mini M&M’s: These colorful, button-sized chocolates are ideal for decorating the snowman’s body. It’s crucial to use the mini size, as regular M&M’s tend to be too large and might overpower the delicate melted snowman design. They add a nice pop of color and a satisfying crunch.
- Pretzel Sticks: The slender pretzel sticks are essential for forming the snowmen’s arms. Their slightly salty crunch also provides a wonderful contrast to the sweetness of the chocolate and candies, balancing the flavors beautifully.
You’ll find the complete ingredient list with precise measurements and detailed instructions in the comprehensive recipe card further down this post.
Creative Variations to Customize Your Bark
While the classic Melted Snowman Bark is delightful on its own, don’t hesitate to experiment with these variations to suit your taste, use ingredients you have on hand, or cater to different dietary preferences. Customizing your bark makes it even more special!
- Orange Sprinkles for Noses: If orange Tic Tacs are hard to find or you prefer a different texture, orange sprinkles (especially the longer “jimmie” style ones) or even small pieces of dried apricot cut into tiny triangles can make excellent carrot noses for your snowmen.
- Chocolate Chip Eyes: For a simpler look or if you don’t have candy eyeballs, mini chocolate chips can be used as effective substitutes for the eyes. Simply place two mini chocolate chips pointed-side down for a classic dot-eye effect.
- Colorful Candy Melts: Instead of plain white melting chocolate, consider using colored candy melts for a fun base. Light blue or even a subtle pastel green could create a winter wonderland effect, making your snowmen pop even more. You could also drizzle different colored candy melts over the white bark for an extra artistic touch.
- Nut-Free Option: If there are peanut allergies, simply omit the Mini Reese’s Peanut Butter Cups. You can use large chocolate buttons or even chocolate-covered sandwich cookies (cut in half) as alternative hats.
- Additional Toppings: Feel free to add other small candies or sprinkles to the bark for extra flair. Shredded coconut can mimic snow, while a dusting of edible glitter can add sparkle. Small gumdrops or mini marshmallows could also be fun additions, perhaps as earmuffs or scarves for your snowmen.
- Dark or Milk Chocolate Base: While white chocolate creates the “snow” effect, you could certainly use a milk or dark chocolate base for a richer flavor profile. The snowmen would still stand out beautifully against a darker background.
Step-by-Step Guide: How To Make Melted Snowman Bark
Making this Melted Snowman Bark is an incredibly fun and straightforward process. Follow these simple steps to create your adorable holiday masterpiece.
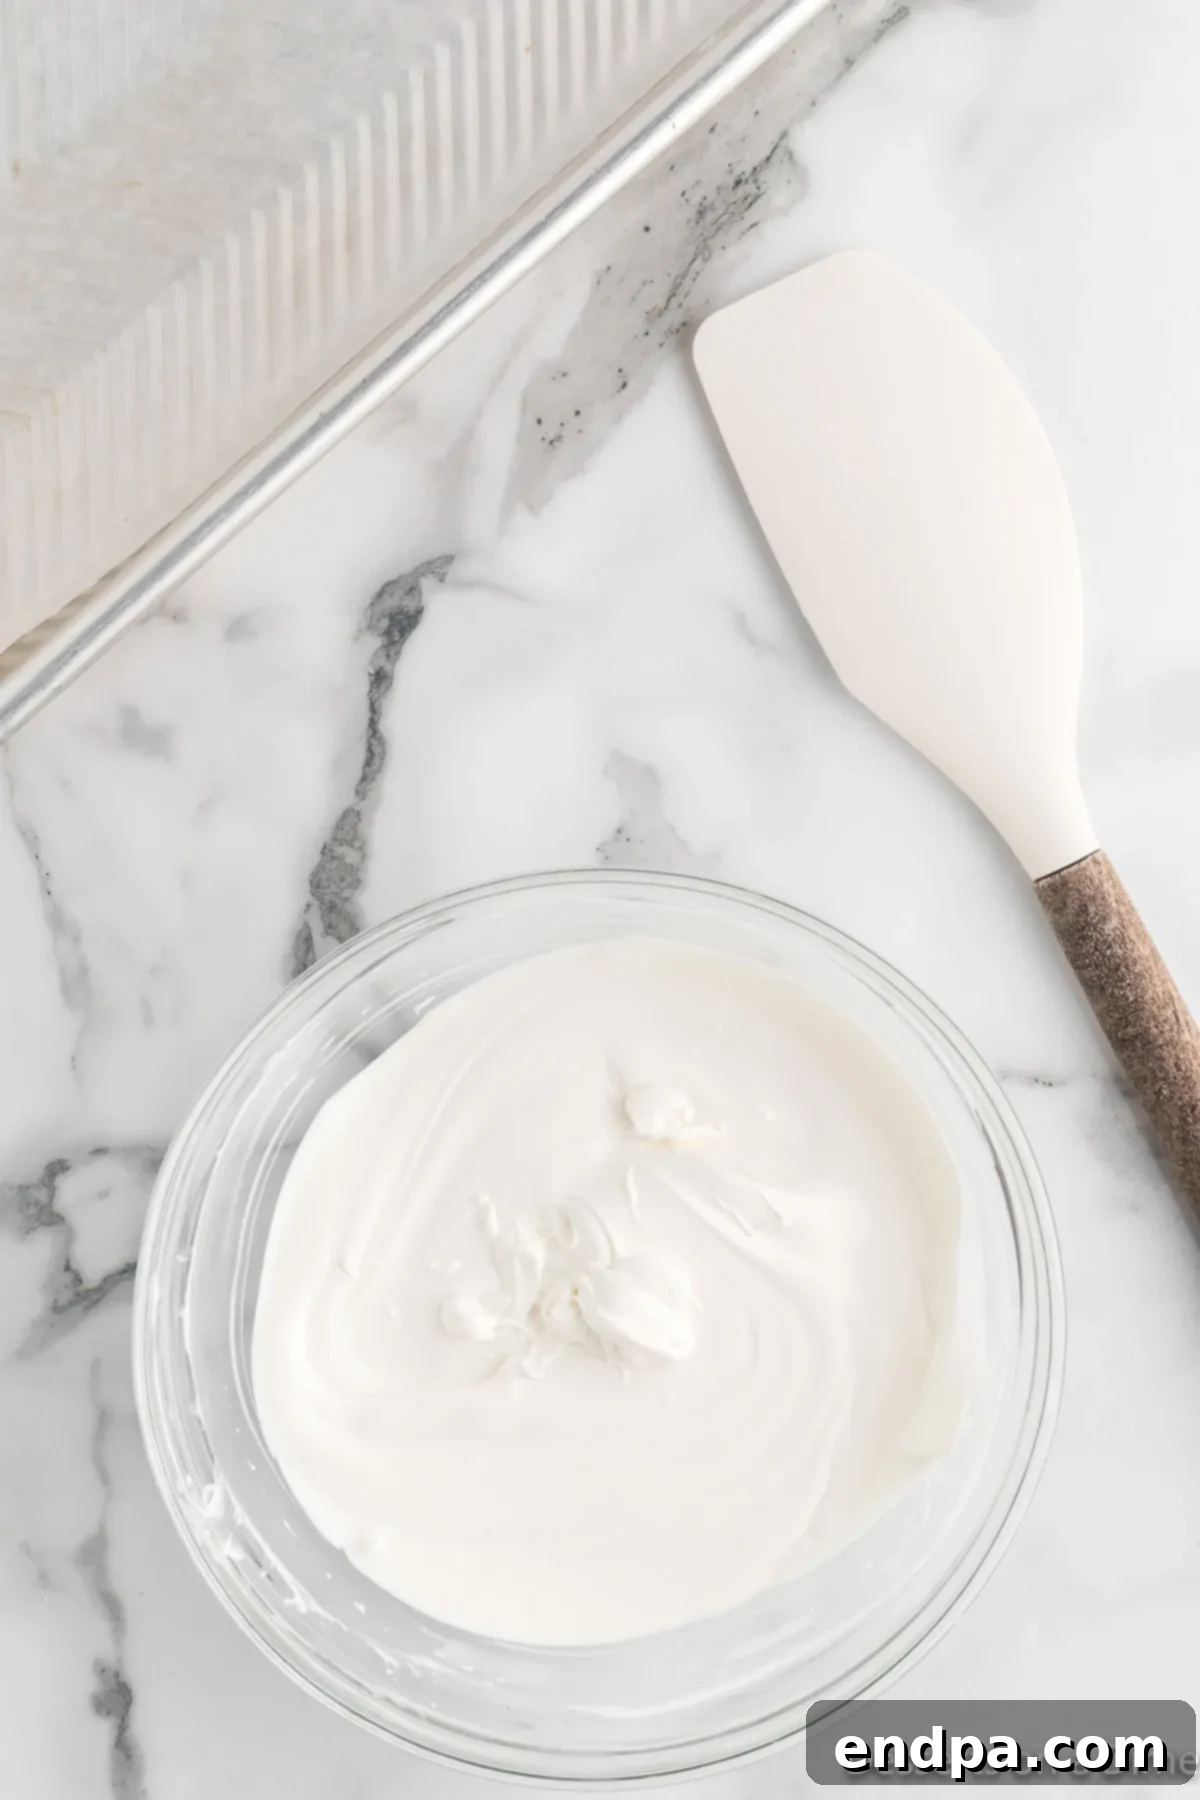
Step 1: Prepare Your Workspace. Begin by lining a standard baking sheet (approximately 9×13 inches or larger) with either wax paper, parchment paper, or a silicone baking mat. This crucial step prevents the chocolate from sticking and makes for incredibly easy removal and cleanup. Next, carefully melt your chosen white chocolate. Place the melting chocolate in a microwave-safe bowl and heat it in 30-second intervals, stirring well after each interval, until the chocolate is smooth and completely melted. Be careful not to overheat it, as white chocolate can seize easily.
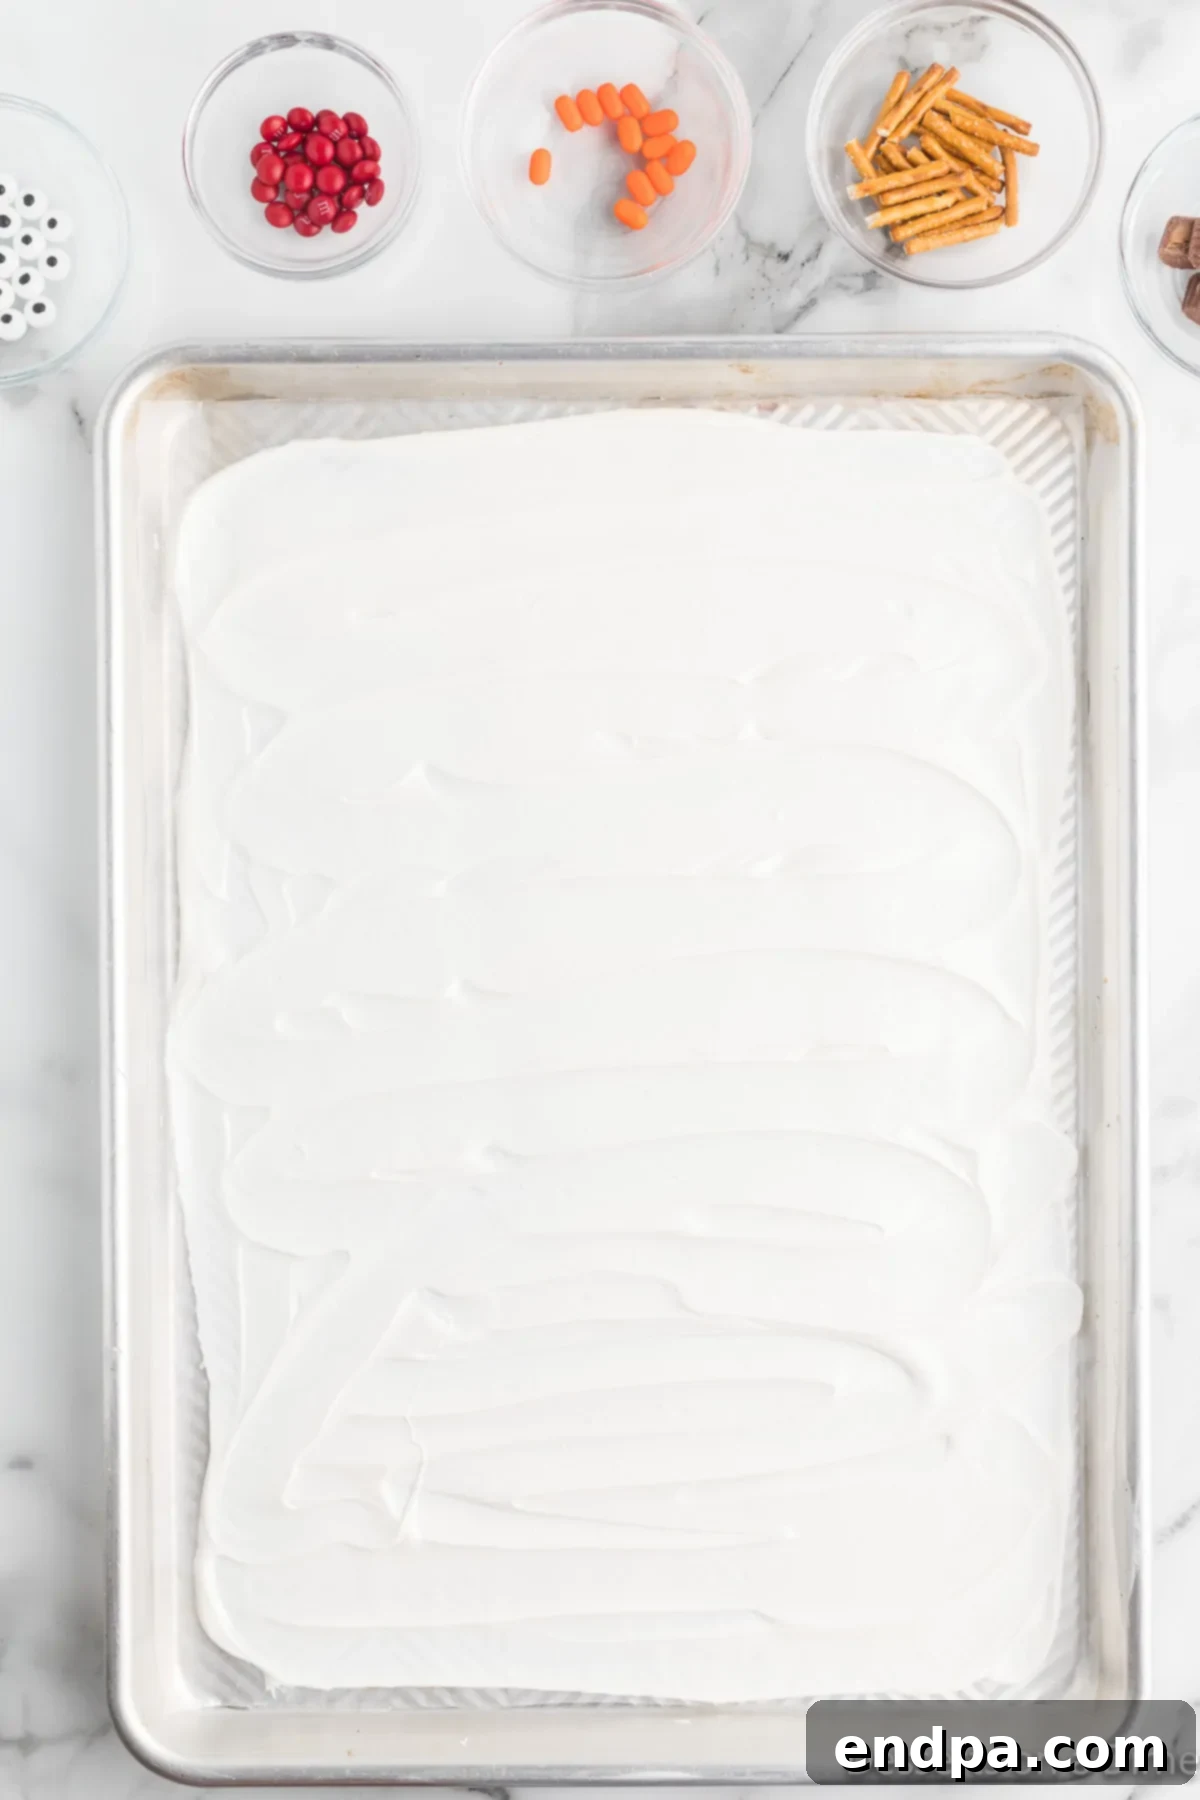
Step 2: Create the Chocolate Base. Once your white chocolate is perfectly melted and smooth, pour it onto the center of your prepared baking sheet. Using an offset spatula or the back of a spoon, gently spread the chocolate evenly across the sheet. Aim for a thickness of about ¼ to ⅓ inch. This layer will serve as the snowy canvas for your melted snowmen. Work relatively quickly, as the chocolate will begin to set.
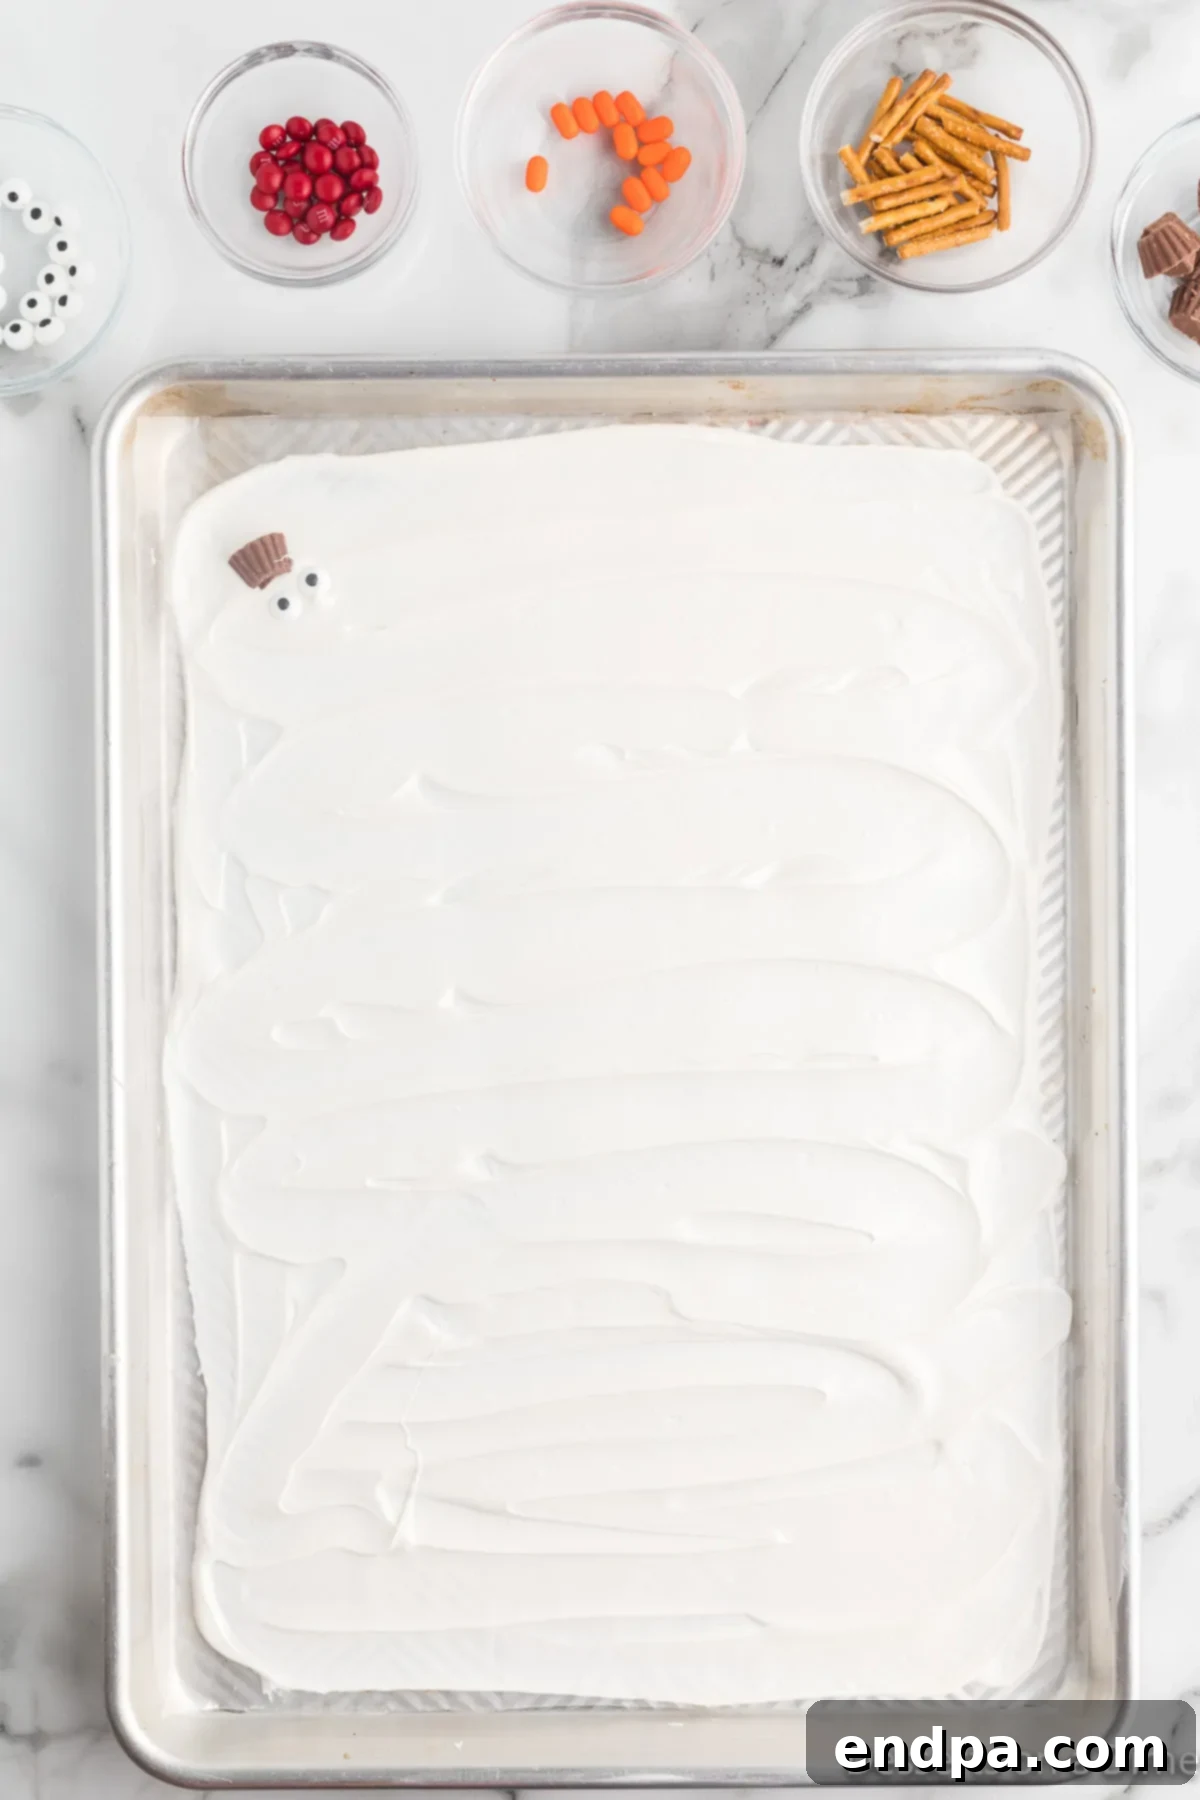
Step 3: Begin Assembling the Snowmen. Before the chocolate sets, prepare your snowman components. Cut each Mini Reese’s Peanut Butter Cup in half. These halves will form the “hats” of your melted snowmen. Next, break your pretzel sticks in half; these will be the arms. Now, carefully arrange these pieces on the still-wet melted chocolate. Place the peanut butter cup halves strategically across the bark, leaving enough space between them for each snowman’s features. These half-cups act as the top of each “melted” snowman’s head.
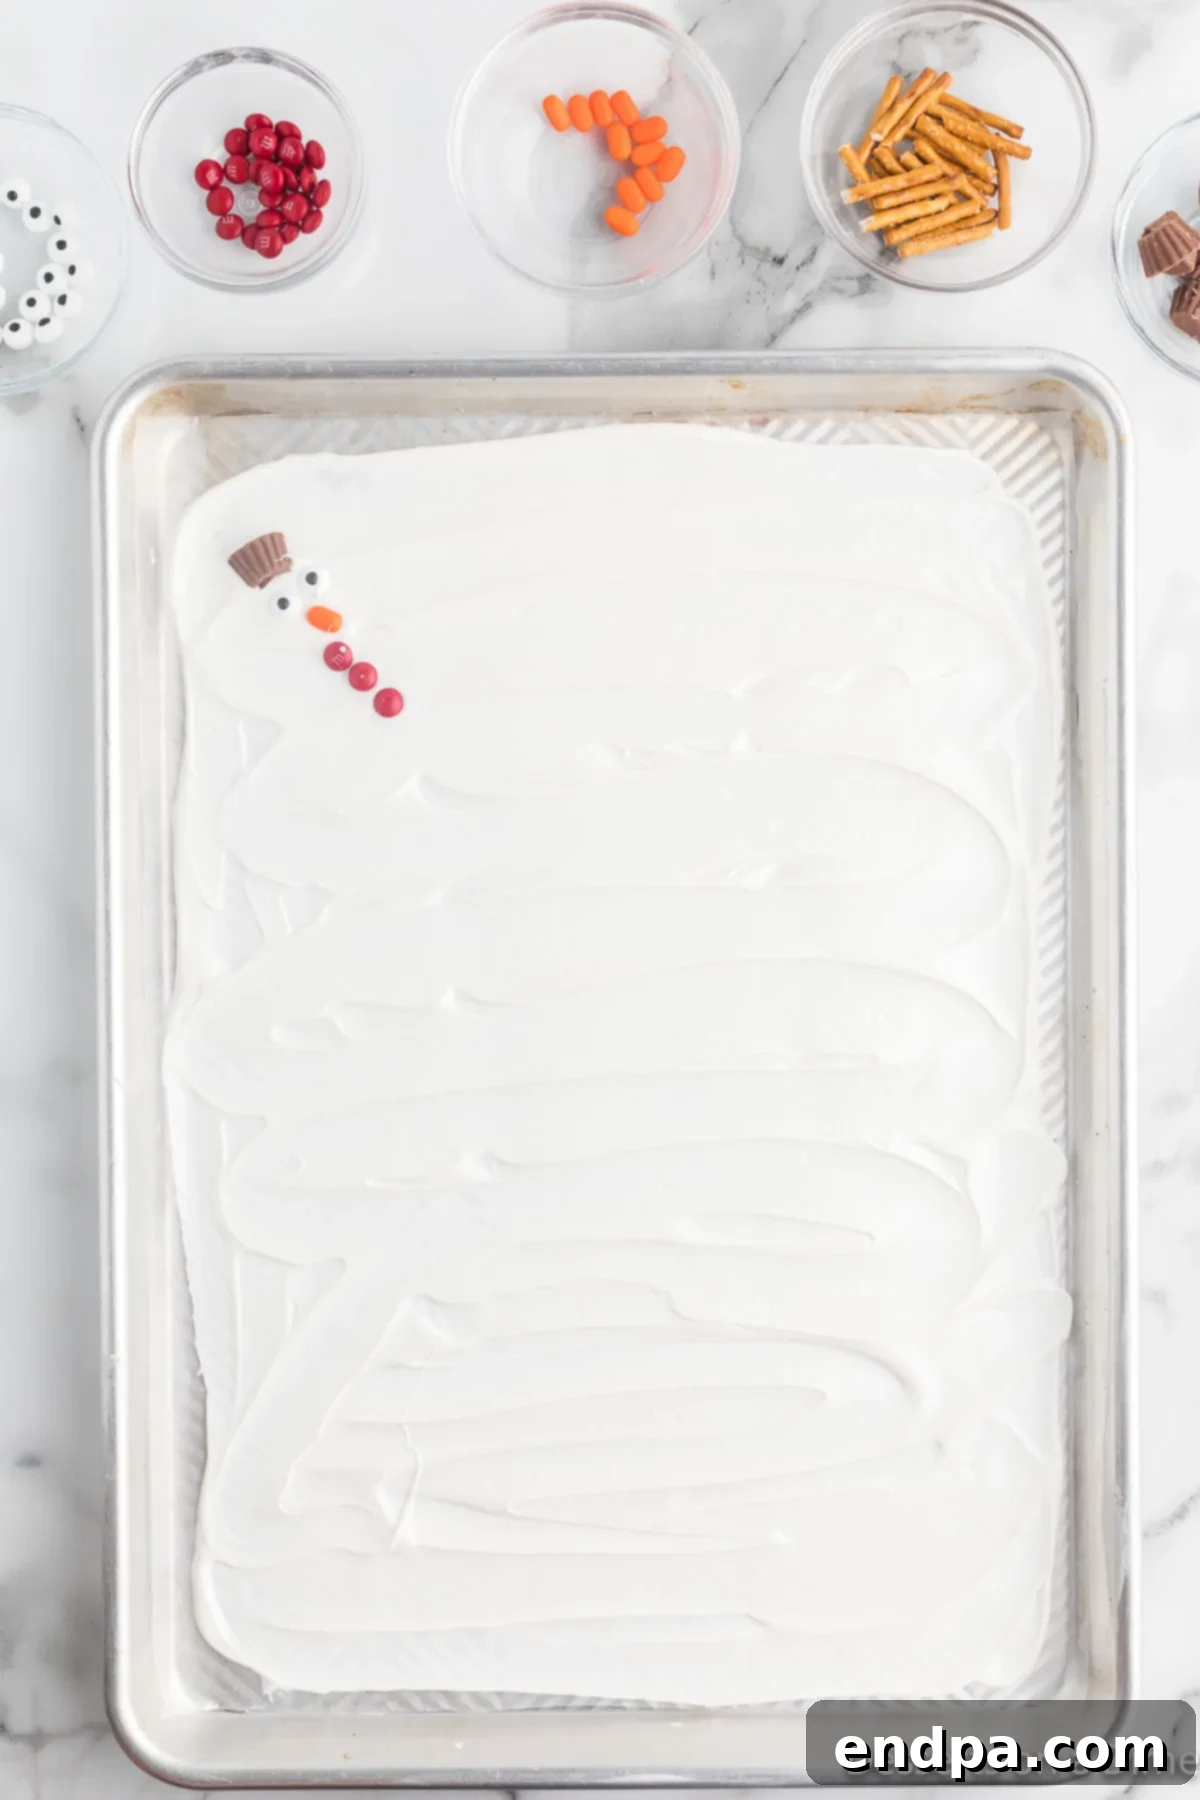
Step 4: Create the Faces and Buttons. With the hats in place, it’s time to give your snowmen their expressions! For each snowman, carefully place two small candy eyes below the peanut butter cup hat. Then, just below the eyes, add an orange Tic Tac for the carrot nose. Finally, use the Mini M&M’s to create the buttons down the snowman’s “body.” Arrange them artistically, perhaps in a line or scattered playfully. The key is to press these candies gently into the soft chocolate so they adhere securely.
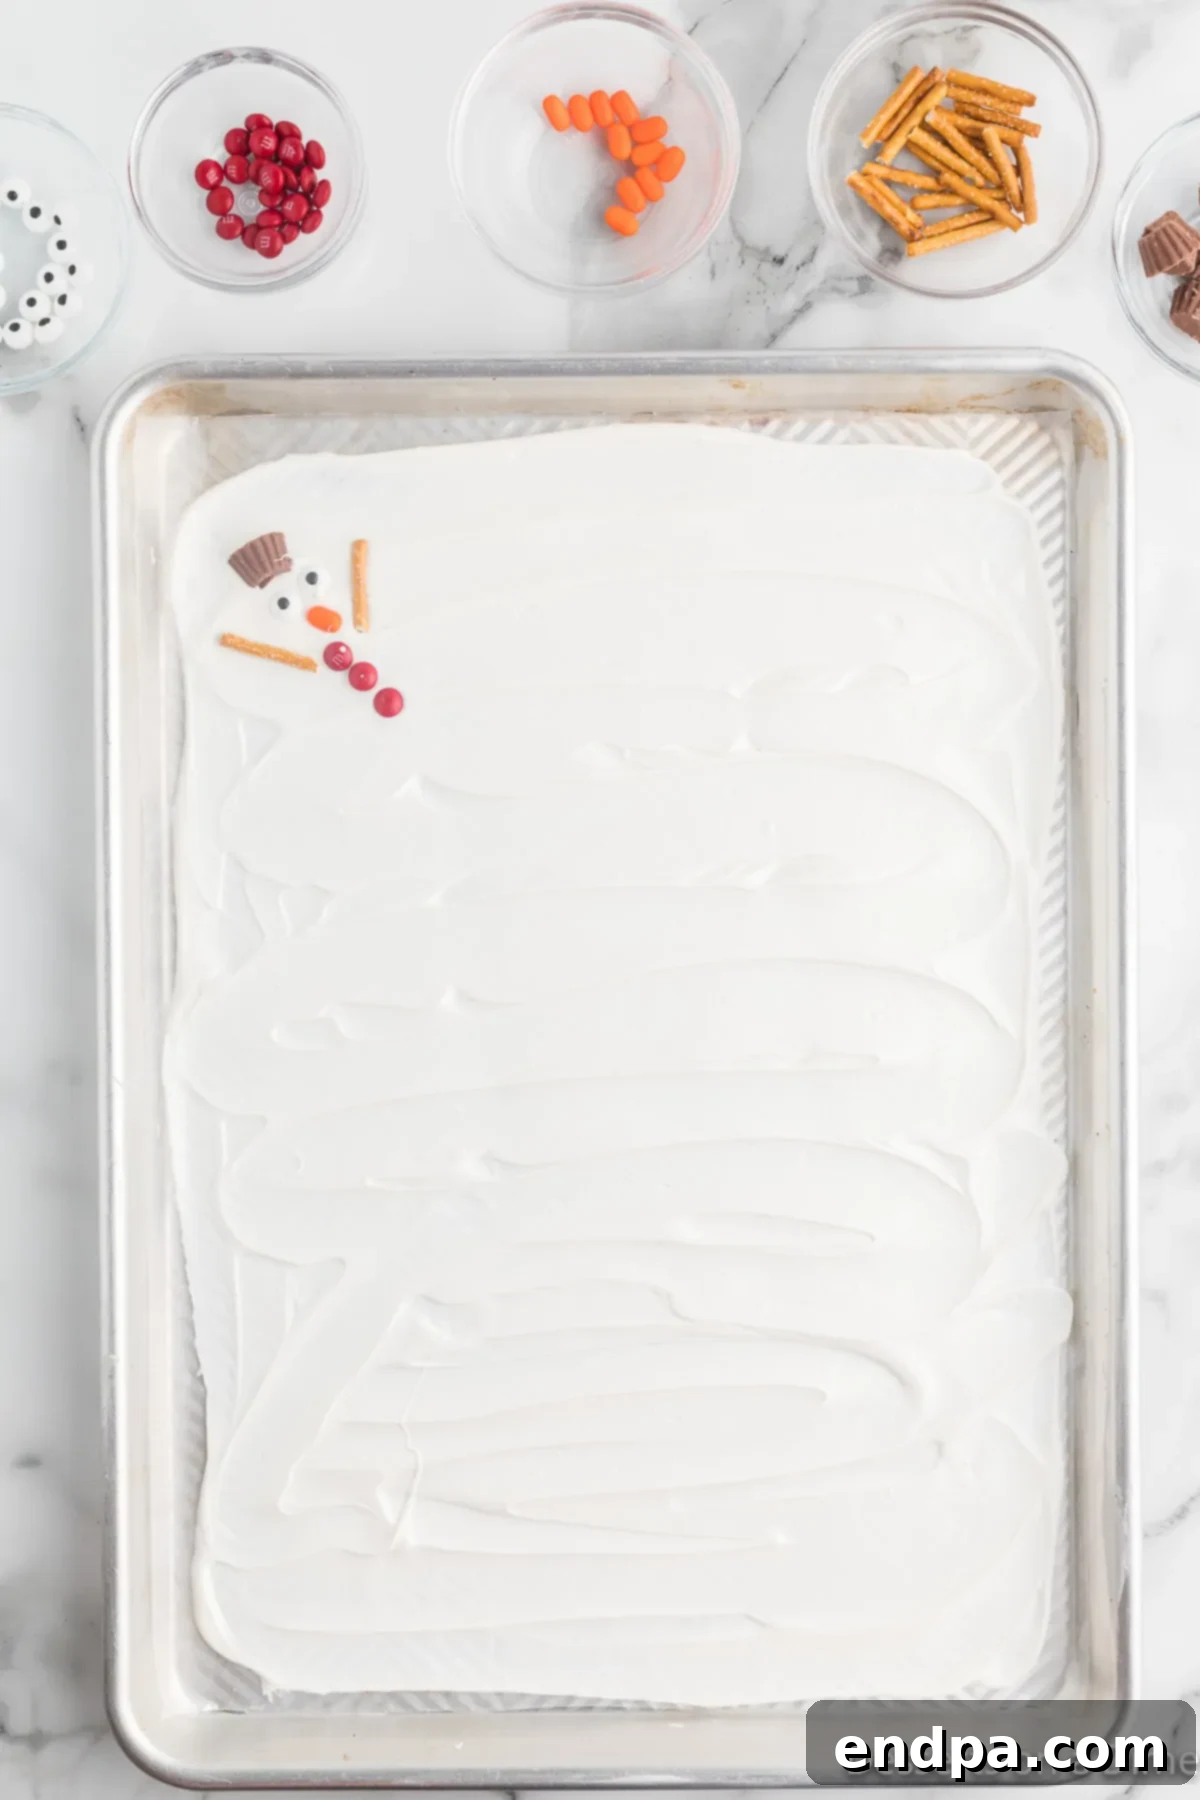
Step 5: Attach the Pretzel Arms. Once the faces and buttons are done, complete your snowmen by adding their arms. Take the broken pretzel pieces and gently press one on each side of the snowman’s body, slightly below the “head” area. Arrange them to look like little twig arms reaching out from the melted snow. The salty crunch of the pretzels offers a wonderful textural contrast to the smooth chocolate and soft candies.
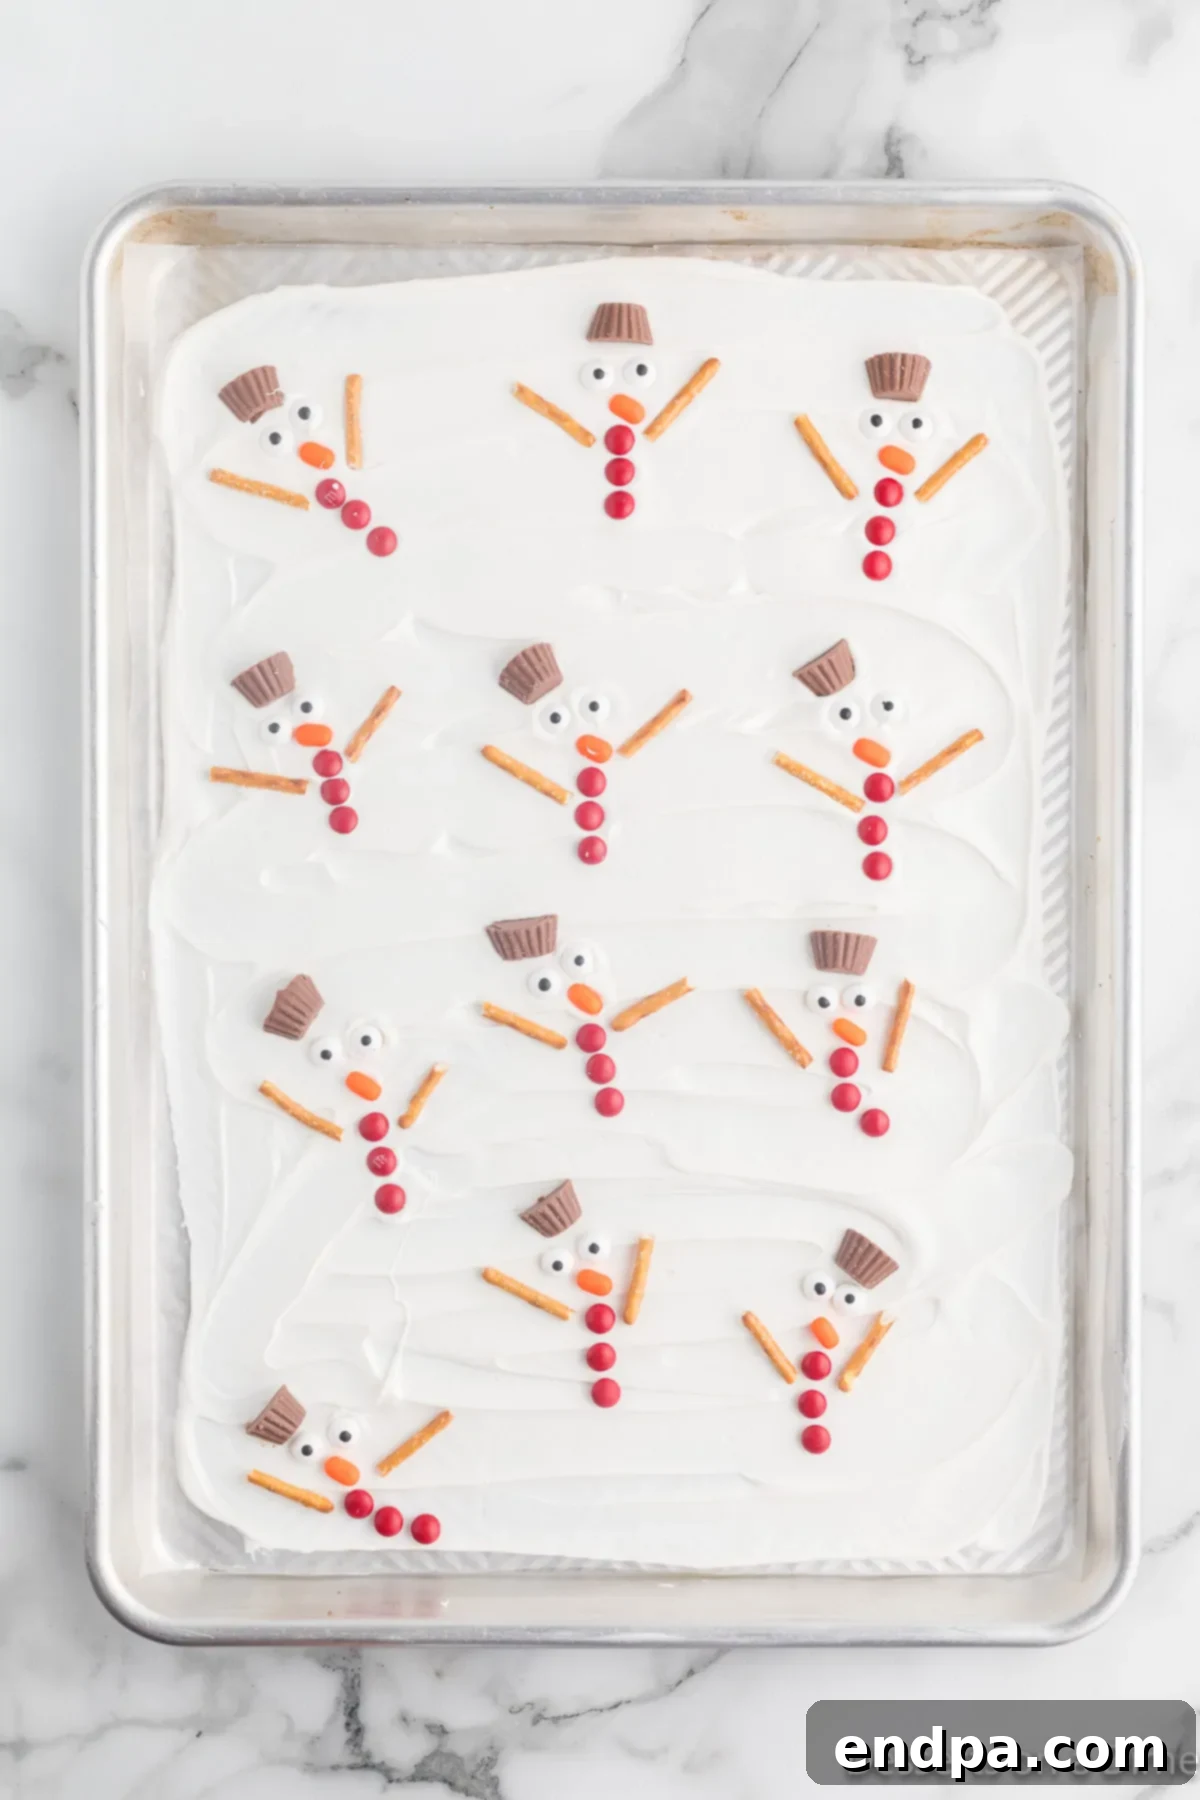
Step 6: Chill to Perfection. Once all your snowmen are fully assembled and adorned with their features and arms, place the entire baking sheet into the refrigerator. Allow the bark to chill for at least 15-20 minutes, or until the chocolate is completely set and firm to the touch. This chilling process ensures that the bark holds its shape and all the toppings are securely embedded.
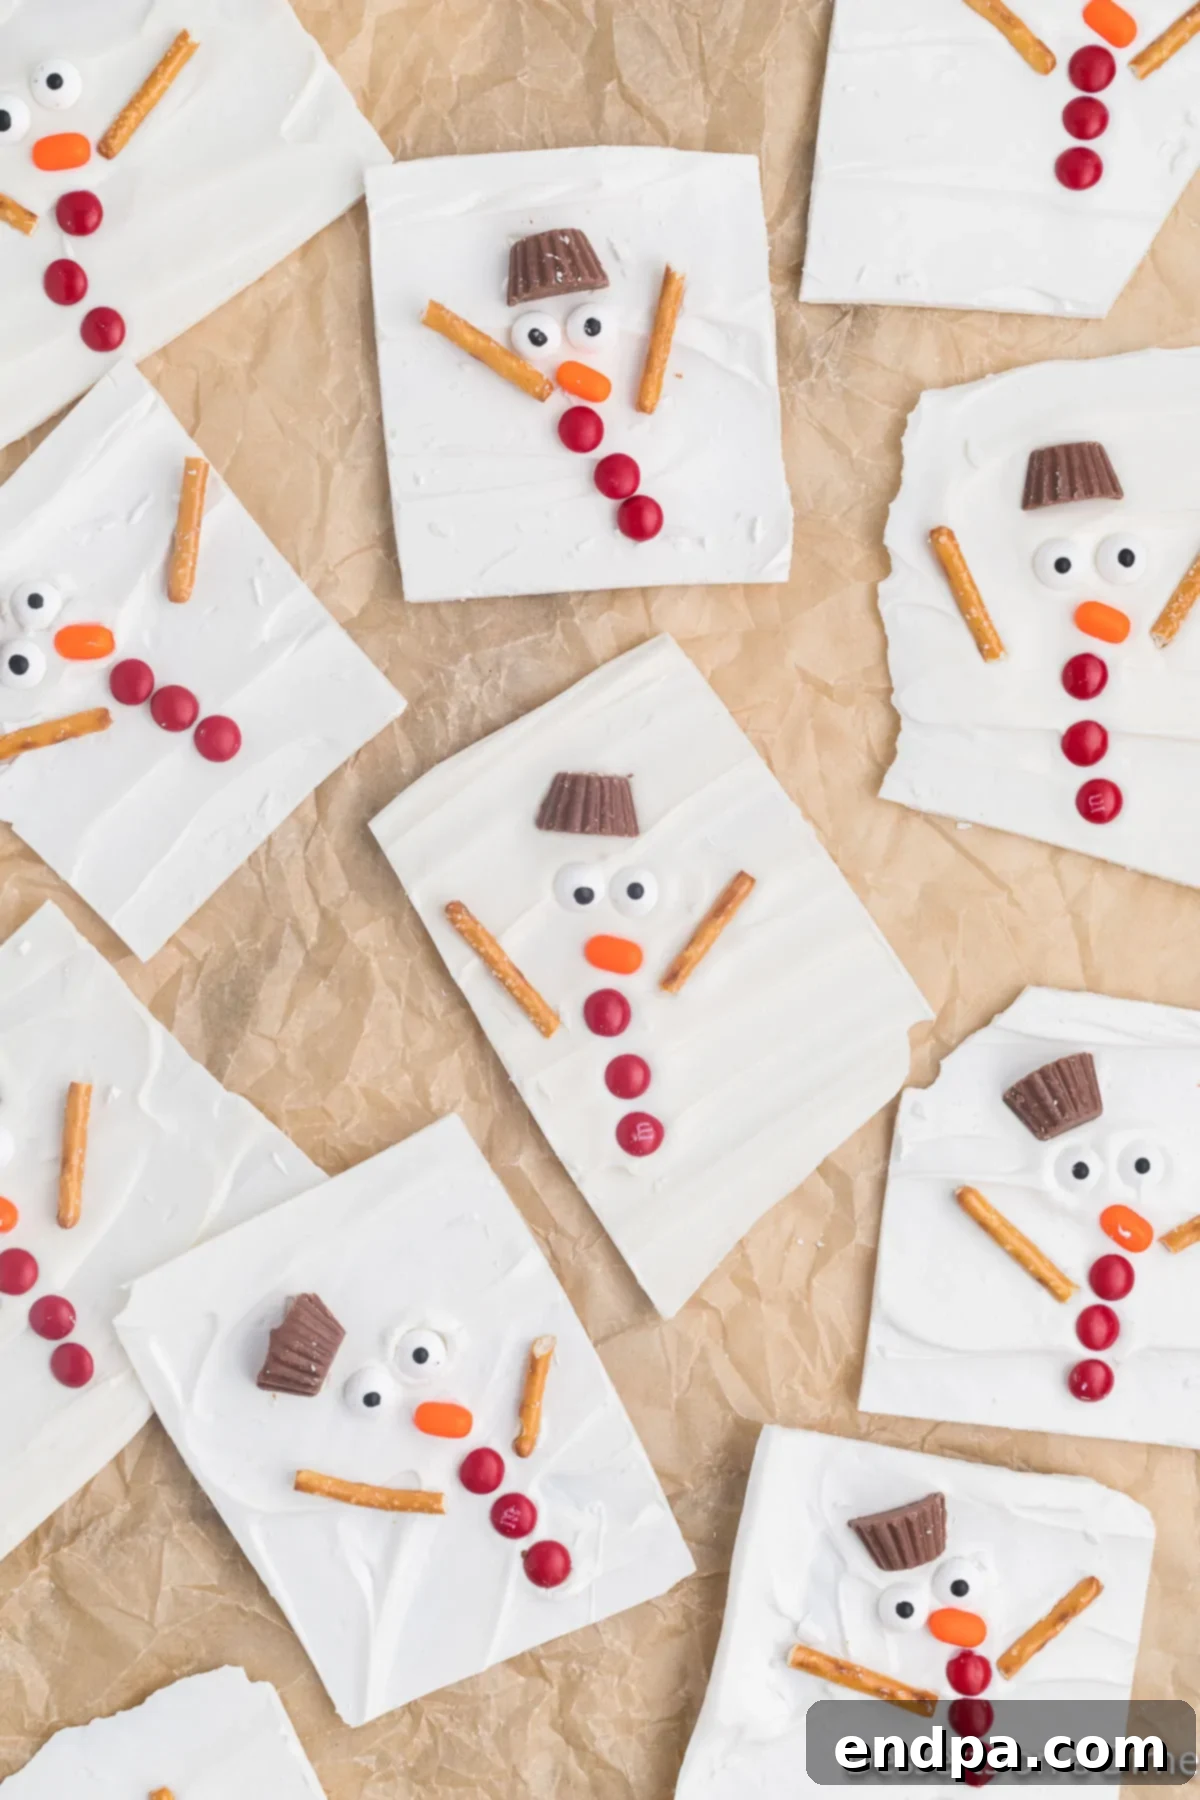
Step 7: Break and Serve. Once the bark is completely hardened, remove it from the refrigerator. You can either gently break the bark into irregular, charming pieces by hand, or for cleaner cuts, use a sharp knife to carefully cut around your snowman designs. The beauty of bark is its imperfect, rustic charm, so don’t worry about perfectly uniform pieces. Each piece will feature a cute melted snowman, ready to be enjoyed.
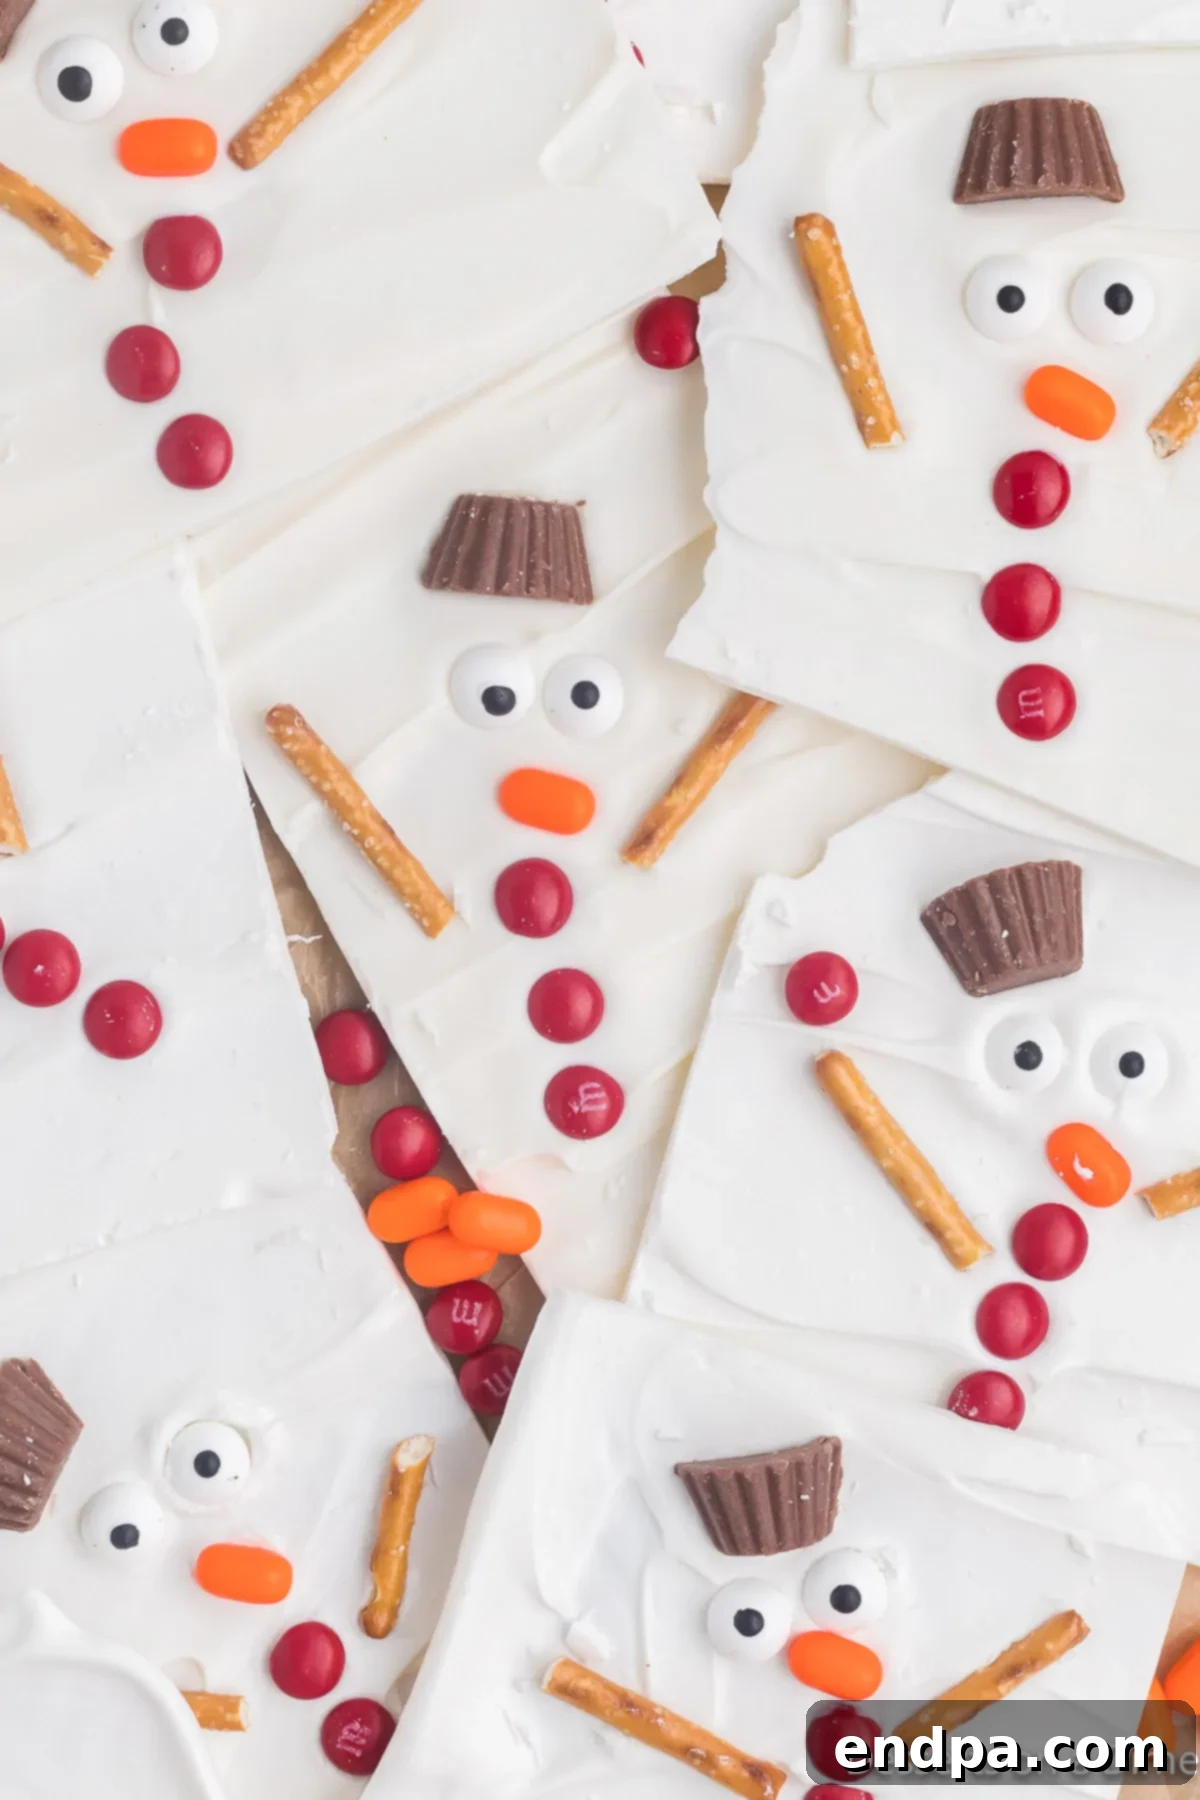
Step 8: Enjoy! Your homemade Melted Snowman Bark is now ready to serve and delight! Arrange the pieces on a festive platter or package them as gifts. This visually appealing and delicious treat is sure to bring smiles to everyone who tries it.
Expert Tips for Perfect Snowman Bark
Achieving perfectly delightful Melted Snowman Bark is simple, especially with a few insider tips. These pointers will help ensure your bark is not only delicious but also visually stunning and easy to make:
- Always Line Your Baking Sheet: This cannot be stressed enough! Lining your baking sheet with parchment paper, wax paper, or a silicone baking mat is crucial. It creates a non-stick surface, making it incredibly easy to lift the hardened bark off the pan without any sticking or breaking, and significantly simplifies cleanup. Without it, you risk a sticky mess.
- For Clean Breaks, Use a Sharp Knife: While breaking the bark by hand offers a rustic charm, sometimes you want more precise pieces, especially if you’re packaging them as gifts. To achieve cleaner cuts, allow the bark to come to room temperature for a few minutes (about 5-10) after chilling. Then, press firmly down with a large, sharp knife where you intend to break or cut the bark. This method helps prevent jagged edges and ensures each snowman piece is perfectly formed.
- Melt Chocolate in Short Intervals: Patience is key when melting chocolate, especially white chocolate. To prevent burning or seizing, always melt it in the microwave in short, 30-second bursts. Stir thoroughly after each interval, even if it doesn’t look fully melted. The residual heat will continue to melt the chocolate as you stir, resulting in a smooth, creamy consistency. If using a double boiler, keep the heat low and stir constantly.
- Add Toppings Immediately: Once the chocolate is spread on the baking sheet, don’t delay in adding your snowman decorations. The melted chocolate will begin to set quite quickly, and if you wait too long, your candy eyes, Tic Tacs, M&Ms, and pretzel arms won’t adhere properly. Work swiftly but carefully to press each piece gently into the soft chocolate, ensuring they are securely embedded before the chocolate hardens.
- Consider the Chocolate Thickness: Aim for a consistent thickness of about ¼ to ⅓ inch for your chocolate base. If the chocolate layer is too thin, it might break too easily. If it’s too thick, it can be hard to bite into and might overpower the delicate toppings.
- Get Creative with Placement: There’s no right or wrong way to arrange your snowmen! Scatter them randomly, create little clusters, or make them look like they’re interacting. This is where the “melted” aspect comes into play – embrace the playful, imperfect nature of their design.
- Involve the Kids: This is a fantastic recipe for getting children involved in holiday baking. They’ll love arranging the candy pieces and creating unique faces for each snowman. Just make sure the hot chocolate is handled by an adult.
Proper Storage for Freshness
To ensure your Melted Snowman Bark remains fresh, delicious, and perfectly festive for as long as possible, proper storage is essential. Once the bark has fully set and been broken into pieces, place it in an airtight container. Layer the pieces between sheets of parchment paper if you have multiple layers to prevent them from sticking together. Store the container in the refrigerator for optimal freshness. When stored correctly, your Melted Snowman Bark can maintain its quality and delightful flavor for up to 2 weeks.
While it can be stored at cool room temperature (below 70°F or 21°C) for a few days, refrigerating it is recommended, especially if your home is warm or humid, as it helps prevent the chocolate from softening or the candies from becoming sticky. Bring it out a few minutes before serving for the best texture.
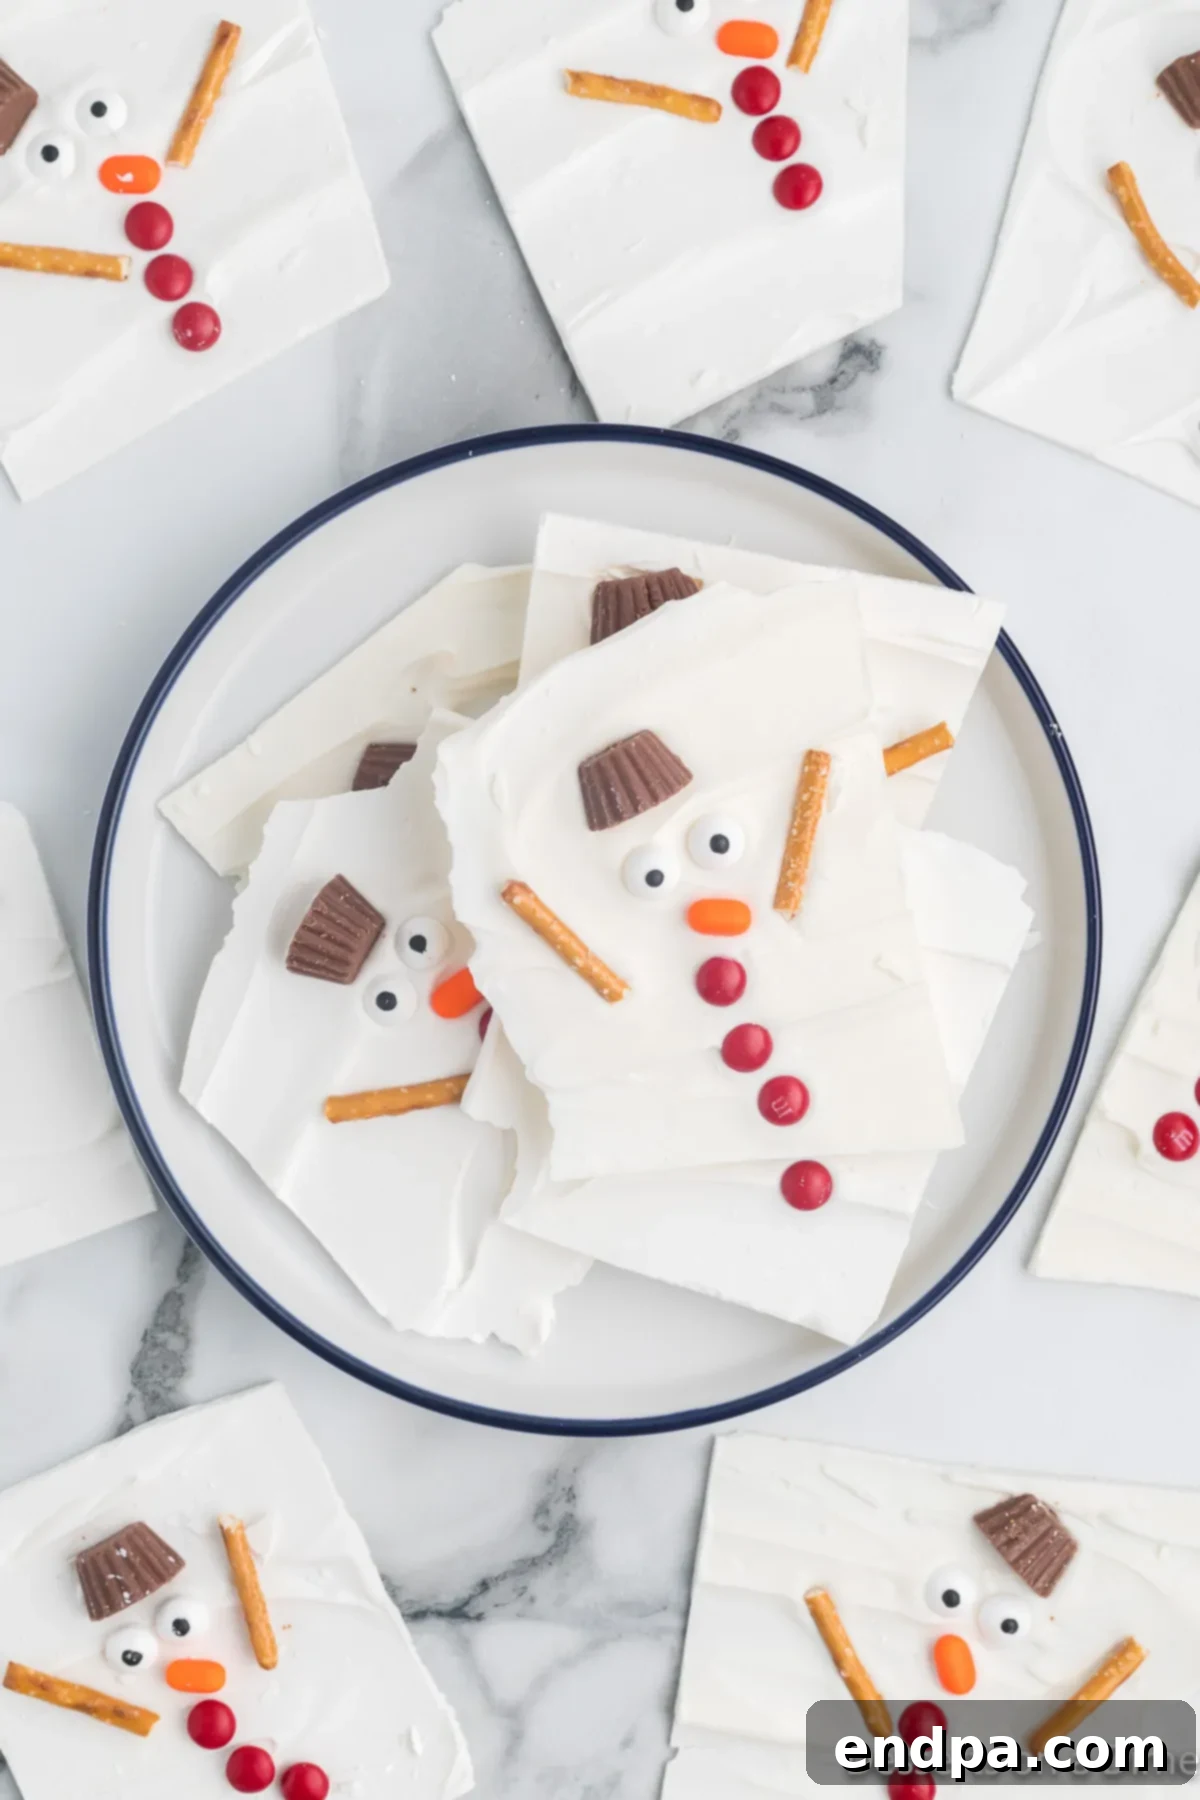
More Irresistible Christmas Bark Recipes
If you’ve fallen in love with the ease and festive charm of this Melted Snowman Bark, you’re in for a treat! Christmas bark is a versatile and wonderful category of holiday confections that offers endless possibilities for flavor and decoration. These recipes are perfect for gifting, holiday parties, or simply enjoying a sweet moment during the festive season. Explore more of our favorite Christmas bark creations:
- Homemade Christmas Bark Recipe: This classic recipe is a staple for the holidays, featuring a rich chocolate base adorned with a colorful array of festive sprinkles and candies. It’s simple, elegant, and always a crowd-pleaser.
- Grinch Bark: Get into the playful spirit of the Grinch with this vibrant green bark! It’s a whimsical and fun treat, perfect for fans of the beloved holiday character, often decorated with red hearts or sprinkles to mimic the Grinch’s transformation.
- Peppermint Bark Recipe: A timeless holiday favorite, this bark combines layers of rich dark chocolate and refreshing white chocolate, generously sprinkled with crushed peppermint candies. Its cool, minty flavor is a quintessential taste of Christmas.
Each of these bark recipes offers a unique flavor profile and a straightforward preparation method, making them ideal for adding variety to your holiday dessert repertoire. They are fantastic for making ahead of time and just as perfect for last-minute party contributions.
Your family will undoubtedly be thrilled with this easy and delightful Christmas bark. We encourage you to try it and experience the joy it brings. Please come back and share your experience by leaving a star recipe rating and a comment once you do!
Melted Snowman Bark
Melted Snowman Bark is an easy no-bake recipe, absolutely perfect for all your Christmas parties. Made with just a few simple ingredients, this festive holiday treat is incredibly quick and a breeze to prepare, ensuring a delightful outcome every time.
15 mins
15 mins
30 mins
12 pieces
American
Dessert, Snack
214 kcal
Carrie Barnard
Ingredients
To make 12 servings of Melted Snowman Bark, gather the following:
- 1 package (12 ounces) Melting White Chocolate, such as candy melts or high-quality white chocolate chips.
- 6 Mini Reese’s Peanut Butter Cups, which will be cut in half to create 12 snowman hats.
- 24 Small Candy Eyes, perfect for giving each snowman character.
- 12 Orange Tic Tacs (or long orange sprinkles) for the distinctive carrot noses.
- 36 Mini M&Ms, which will serve as the snowman’s colorful buttons.
- 12 Pretzel Sticks, to be broken in half for the snowman’s twig arms.
Instructions
- Prepare the Baking Sheet: Line a large baking sheet with wax paper, parchment paper, or a silicone baking mat. This ensures easy removal of the bark once it’s set.
- Melt the Chocolate: Following the package instructions, melt the white chocolate in a microwave-safe bowl. Heat in 30-second intervals, stirring thoroughly after each, until completely smooth and free of lumps.
- Spread the Chocolate Base: Pour the melted chocolate onto the prepared baking sheet. Use a spatula or the back of a spoon to spread it evenly into a thin layer, about ¼ to ⅓ inch thick.
- Prepare Snowman Elements: While the chocolate is still wet, cut the Mini Reese’s Peanut Butter Cups in half. Break the pretzel sticks in half to create the snowman arms.
- Assemble the Snowmen: Strategically place the peanut butter cup halves (as hats) onto the melted chocolate. Below each “hat,” arrange two candy eyes and one orange Tic Tac (nose) to form the snowman’s face. Below the face, add three Mini M&Ms for buttons. Finally, place two broken pretzel pieces on either side of the snowman’s body for arms. Repeat this process to create all your melted snowmen across the bark.
- Chill the Bark: Carefully transfer the baking sheet to the refrigerator. Allow the bark to chill for 10-15 minutes, or until the chocolate is completely firm and set. This step is crucial for the bark to harden properly.
- Break and Serve: Once hardened, remove the bark from the refrigerator. You can gently break it into charming, irregular pieces by hand, or for cleaner edges, use a sharp knife to carefully cut around the snowman designs. Your festive Melted Snowman Bark is now ready to serve and enjoy!
Recipe Notes
Any leftover Melted Snowman Bark should be stored in an airtight container in the refrigerator. It will stay fresh and delicious for up to 2 weeks, making it a great make-ahead treat for holiday entertaining.
Nutrition Facts
Here’s an approximate nutritional breakdown per serving:
- Calories: 214 kcal
- Carbohydrates: 24 g
- Protein: 3 g
- Fat: 12 g
- Saturated Fat: 7 g
- Polyunsaturated Fat: 1 g
- Monounsaturated Fat: 4 g
- Trans Fat: 0.01 g
- Cholesterol: 7 mg
- Sodium: 64 mg
- Potassium: 111 mg
- Fiber: 0.5 g
- Sugar: 23 g
- Vitamin A: 20 IU
- Vitamin C: 0.2 mg
- Calcium: 67 mg
- Iron: 0.2 mg
(Nutrition facts are estimates based on standard ingredient calculations and may vary.)
Pin This Now to Remember It Later
Pin Recipe
