Heart Shaped Chocolate Chip Cookies: The Ultimate Valentine’s Day Treat
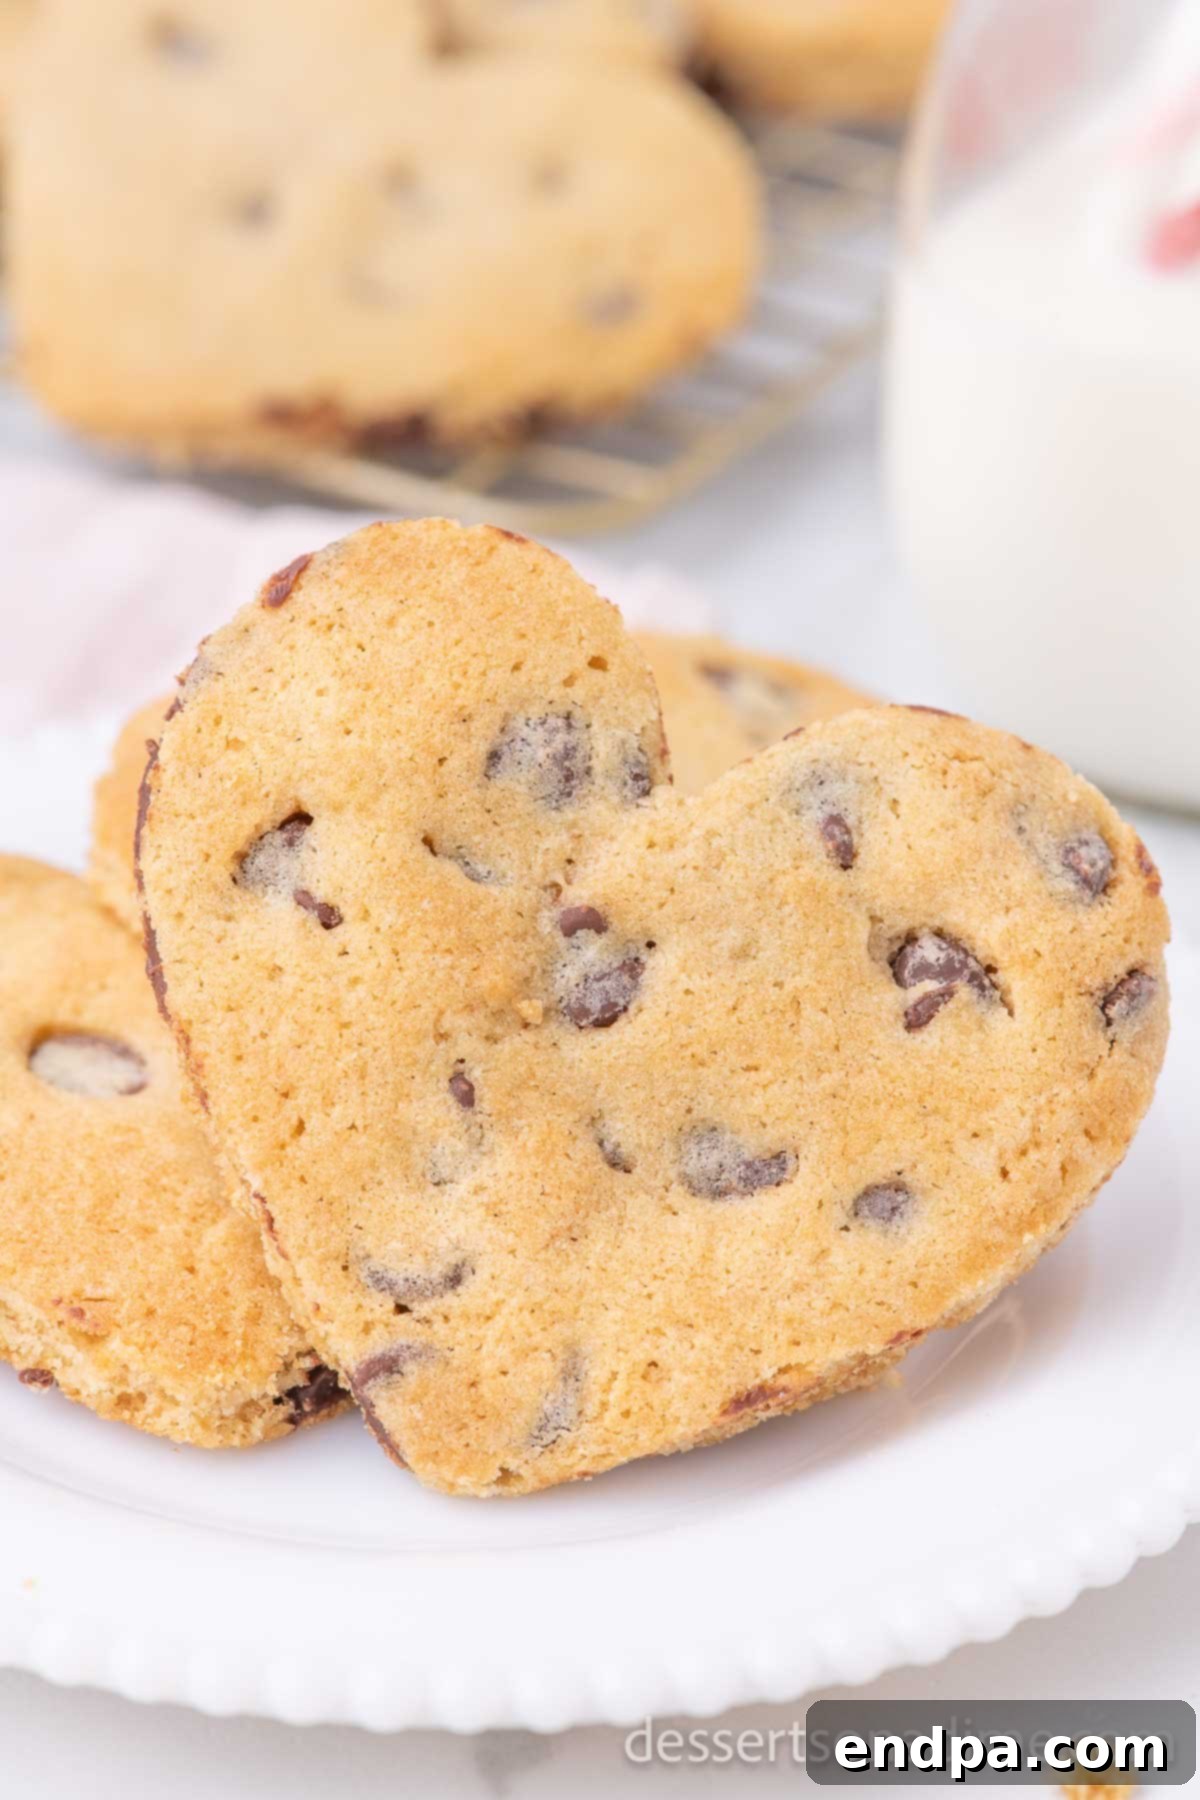
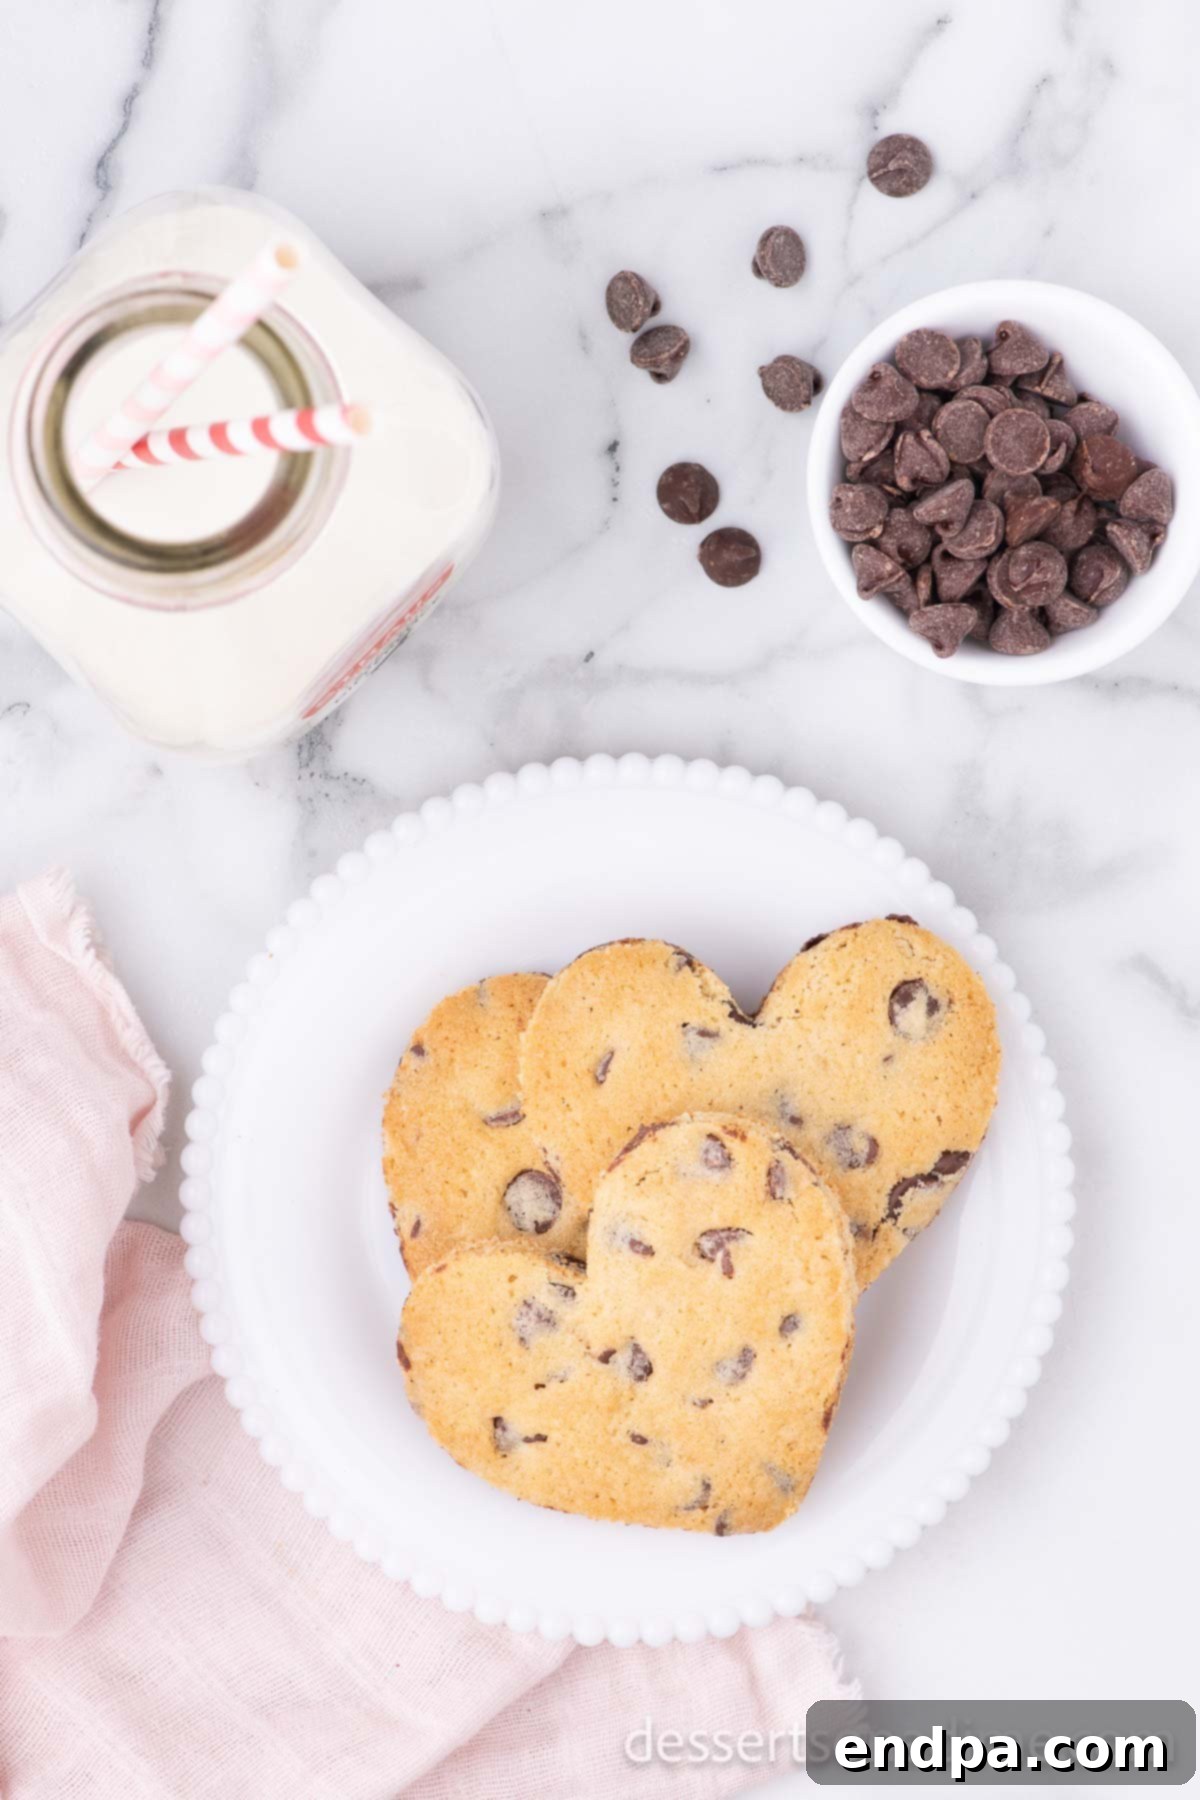
Imagine the delightful aroma of freshly baked cookies filling your home, followed by the irresistible taste of warm, gooey chocolate chip goodness. Now, picture those perfect cookies shaped like hearts, ready to melt hearts (and taste buds!) this Valentine’s Day. Our incredibly easy recipe for Heart Shaped Chocolate Chip Cookies delivers exactly that: soft, chewy, and utterly delicious treats that are ideal for sharing with loved ones or enjoying as a festive snack. Whether you’re planning a romantic gesture, celebrating a special occasion, or simply looking for a fun after-school activity with the kids, these festive heart cookies are sure to bring smiles and satisfy any sweet craving. They are more than just a dessert; they are a delightful expression of affection, perfectly crafted to make any moment a little sweeter.
This delightful twist on a classic chocolate chip cookie recipe makes baking for special occasions effortless and enjoyable. We’ve been perfecting treats for years, and while our Valentine’s Day Cake Mix Cookies are always a hit, these heart-shaped wonders offer that comforting, homemade charm that everyone adores. They’re simple enough for even novice bakers, yet impressive enough to be the star of any Valentine’s Day celebration. Prepare yourself for compliments, as these cookies are not only visually appealing but also bursting with flavor, offering a blissful escape with every bite. Get ready to bake some love and create cherished memories!
Table of Contents
- Why You’ll Fall in Love with This Recipe
- Key Ingredients for Perfect Heart-Shaped Cookies
- Creative Additions and Variations
- Crafting Your Heart-Shaped Chocolate Chip Cookies: Step-by-Step Guide
- Expert Tips for Baking Success
- Storage and Freezing Tips
- More Romantic Valentine’s Day Dessert Ideas
- Heart Shaped Chocolate Chip Cookies Recipe Card
Why You’ll Fall in Love with This Recipe
Our heart-shaped chocolate chip cookie recipe stands out for several reasons, making it an absolute favorite for anyone looking to bake something special and utterly delicious. It’s not just a cookie; it’s a delightful experience from start to finish, promising perfect results that will impress family and friends alike.
- Effortless Heart Shapes with a Cookie Cutter: The undeniable charm of these festive cookies lies in their adorable heart shape, which is surprisingly simple to achieve. Utilizing a standard heart-shaped cookie cutter transforms ordinary cookie dough into uniformly beautiful, perfectly portioned treats. This method simplifies the baking process, making it quick, enjoyable, and yielding consistently attractive results every time. It’s the ideal way to infuse a touch of romance or festivity into your dessert without requiring complicated decorating skills or advanced techniques. Your Valentine’s Day cookies will not only taste incredible but will also look professionally made, adding an extra layer of sweetness to your celebration.
- Unbeatable Homemade Flavor and Freshness: While the convenience of store-bought cookies is tempting, nothing truly compares to the rich, comforting taste and captivating aroma of freshly baked homemade chocolate chip cookies. This recipe leverages classic, wholesome ingredients to create a flavor profile that is profoundly superior to any pre-packaged alternative. Baking from scratch gives you complete control over the quality and freshness of each component, guaranteeing that every single bite is packed with pure, buttery, and intensely chocolatey goodness. Beyond the taste, there’s an inherent joy and satisfaction in creating something delicious with your own hands, an experience that mass-produced options simply cannot replicate. These cookies embody the warmth and love of home baking.
- Perfectly Soft, Chewy, and Irresistible Texture: The quest for the ultimate chocolate chip cookie often ends with achieving that perfect balance: a slightly crisp edge that yields to a wonderfully soft, moist, and chewy center. Our recipe is meticulously developed to deliver precisely this coveted texture. The strategic combination of both granulated and brown sugar, paired with precise measurements of leavening agents (baking soda and baking powder), ensures a cookie that avoids being either too flat and crispy or too cakey and dry. Each mouthful offers that sought-after “melt-in-your-mouth” sensation, complemented by delightful pockets of warm, gooey chocolate chips that make these cookies truly irresistible. They are guaranteed to be a universal crowd-pleaser for any occasion, especially cherished by those who adore a classic soft-baked cookie with a rich, comforting bite.
Key Ingredients for Perfect Heart-Shaped Cookies
Crafting the perfect heart-shaped chocolate chip cookie starts with a selection of high-quality ingredients, each playing a crucial role in achieving that desirable flavor and texture. Understanding the purpose of each component will also help you create these delightful treats with confidence. Here’s what you’ll need to gather:
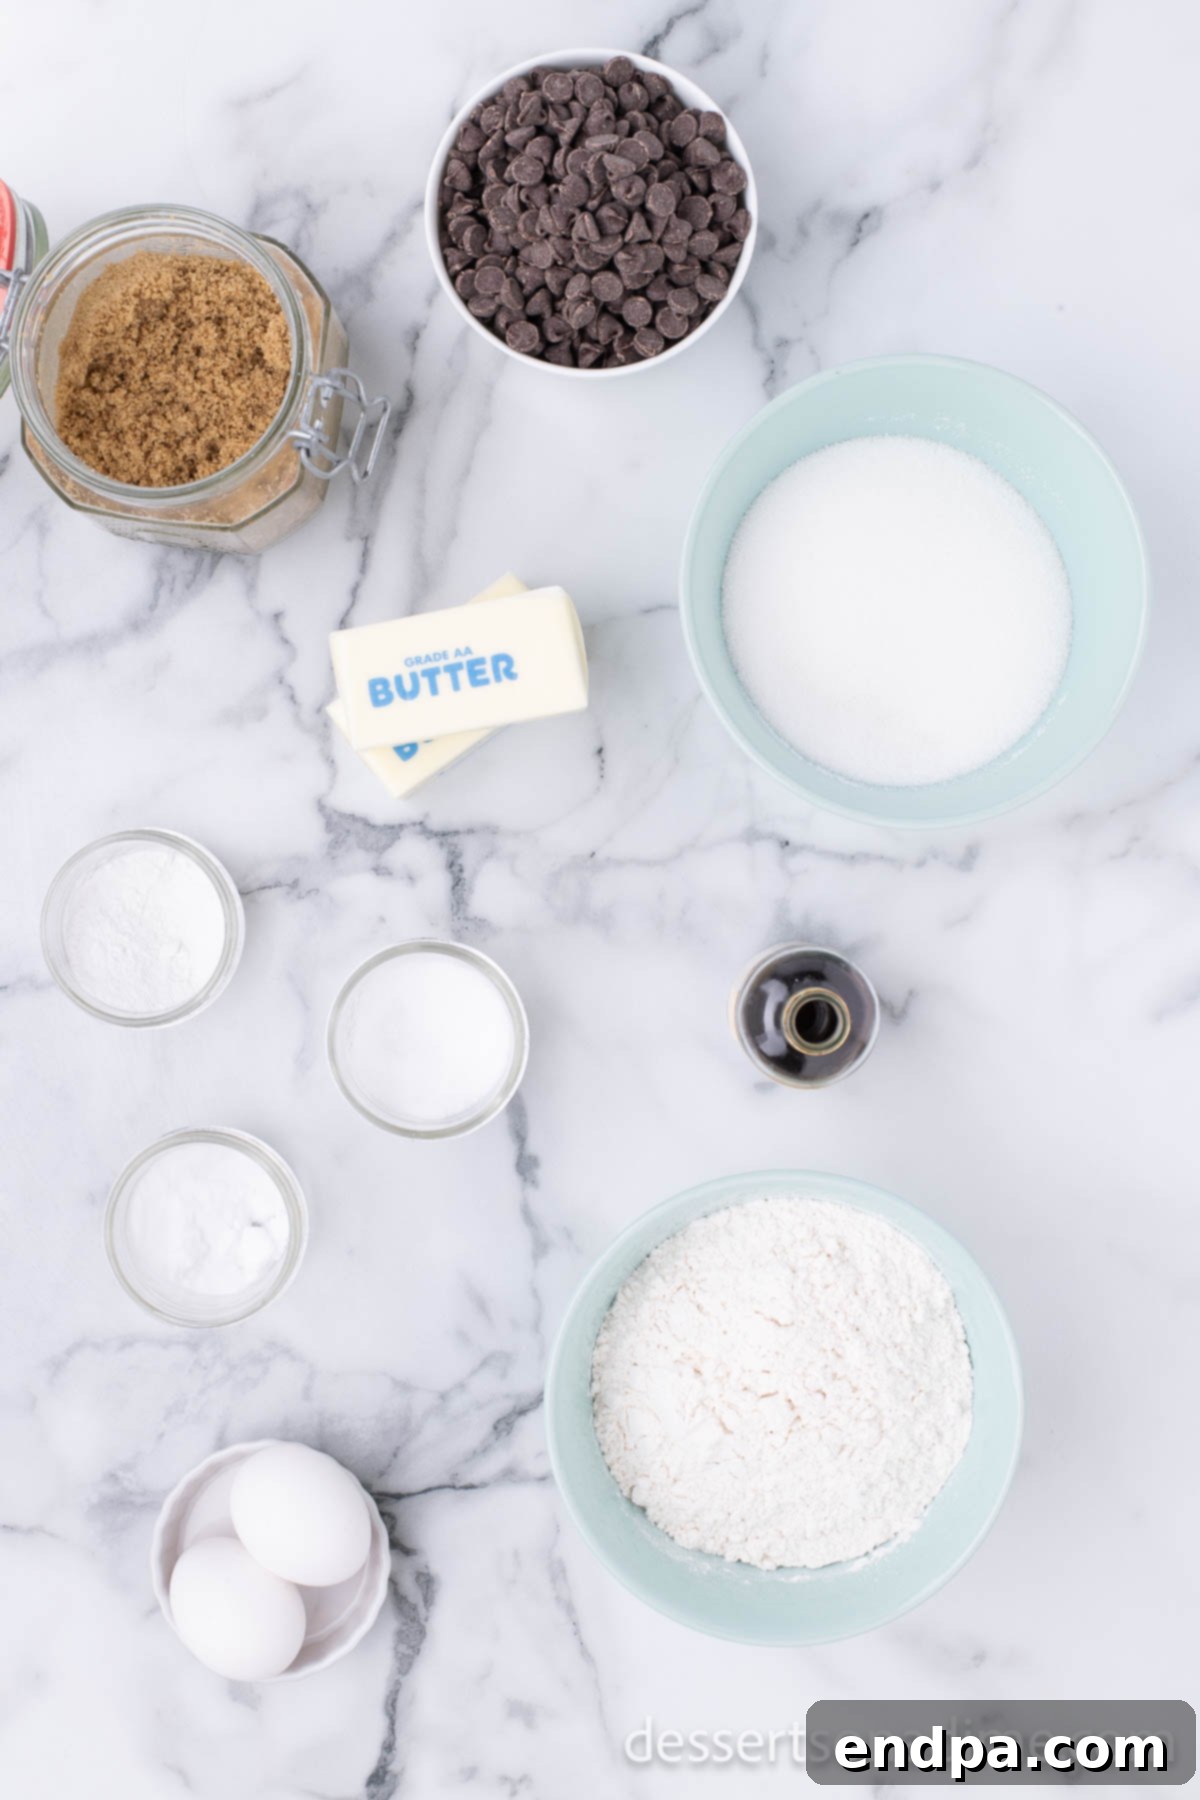
- Unsalted Butter, softened: This is the foundation of rich, flavorful cookies. Using unsalted butter allows you to control the salt content in the recipe, ensuring perfect balance. Softened butter (not melted!) is crucial for creaming properly with the sugars, creating a light and airy base for your cookie dough that contributes significantly to the final texture.
- Granulated Sugar: Provides sweetness and contributes to the slight crispness around the edges of the cookies. It also helps the cookies spread a bit during baking, giving them that classic chocolate chip cookie shape.
- Brown Sugar: A non-negotiable for truly chewy chocolate chip cookies! Brown sugar adds essential moisture and a deeper, more complex molasses-rich flavor compared to granulated sugar alone. This blend of sugars is key to the cookie’s signature soft, chewy texture.
- Large Eggs: Act as a primary binder, holding all the ingredients together, while also providing structure and additional moisture to the dough. It’s important for eggs to be at room temperature, as they emulsify more effectively with the creamed butter and sugar, resulting in a smoother, more uniform batter.
- Vanilla Extract: An indispensable flavor enhancer that elevates and rounds out the overall taste of the cookies. Always opt for a good quality pure vanilla extract for the best results; it truly makes a difference.
- All-Purpose Flour: The primary structural component of the cookies. It provides the necessary gluten development for chewiness and holds the shape. Correct measurement of flour is absolutely vital to avoid overly dense, dry, or crumbly cookies.
- Salt: This unsung hero balances the intense sweetness of the sugars and chocolate, enhancing all the other flavors in the dough. It brings out the depth of the chocolate and prevents the cookies from tasting overly saccharine.
- Baking Soda: A crucial leavening agent that reacts with the acidic brown sugar to produce carbon dioxide, helping the cookies spread slightly and become tender and soft in the center.
- Baking Powder: Another leavening agent, baking powder contributes to the cookie’s lift and ensures a lovely chewiness. The combination of both baking soda and baking powder creates a perfectly balanced rise and texture.
- Semi-Sweet Chocolate Chips: The iconic star of any chocolate chip cookie! Semi-sweet chips offer a perfectly balanced chocolate flavor that isn’t too bitter or too sweet, pairing exquisitely with the rich cookie dough.
Creative Additions and Variations
While these heart-shaped chocolate chip cookies are already a masterpiece, they also serve as a fantastic canvas for your culinary creativity! Feel free to customize them with these delightful additions to make them even more special, unique, and tailored to your taste or the occasion.
- Festive Sprinkles: To truly embrace the holiday spirit, whether it’s Valentine’s Day, an anniversary, or a birthday, sprinkles are your best friend! You can gently fold Valentine’s Day sprinkles (red, pink, and white hearts or classic nonpareils) directly into the cookie dough during the last step of mixing. Alternatively, for a more visible effect, press them gently onto the tops of the formed cookies just before baking. They add not only a beautiful visual appeal but also a fun, slight crunch, making your cookies even more irresistible for gifting or serving.
- Diverse Chocolate Chips: Why limit yourself to just one type of chocolate? Experiment with a variety of chocolate chips to discover new flavor dimensions. You can substitute classic semi-sweet chips with creamy milk chocolate chips for a sweeter, milder profile, or opt for dark chocolate chips for a richer, more intense chocolate experience. For an extra luxurious texture, consider using chocolate chunks, which melt into glorious, molten pools of chocolate within the cookie. You could even combine different types of chocolate chips, like white chocolate and semi-sweet, for a dynamic flavor and visual contrast.
- Nuts for Added Crunch and Flavor: For those who appreciate a delightful textural contrast, folding in half a cup of finely chopped nuts can elevate these cookies. Pecans, walnuts, or almonds are excellent choices. For an enhanced depth of flavor, lightly toast the nuts in a dry pan or in the oven for a few minutes before adding them to the dough – this simple step truly brings out their inherent nuttiness.
- Explore Flavor Extracts: Beyond the essential vanilla, a small amount of other extracts can introduce exciting nuances. A touch of almond extract can add a sophisticated, subtly sweet undertone that complements chocolate beautifully. For seasonal variations, a hint of peppermint extract is perfect for winter holidays, or a dash of raspberry or cherry extract could create a wonderfully fruity-chocolate combination perfect for Valentine’s Day.
- Sweet Candy Bits and Toppings: Get playful by crushing some of your favorite small candies and incorporating them. Think red, pink, and white M&M’s for Valentine’s, or even small pieces of white chocolate candy bars. These additions bring both vibrant color and an exciting new flavor and texture to each bite. Drizzling cooled cookies with melted white or dark chocolate, or dusting them with powdered sugar, also adds an elegant finishing touch.
Crafting Your Heart-Shaped Chocolate Chip Cookies: Step-by-Step Guide
Follow these detailed steps carefully to create perfectly baked, delightful heart-shaped chocolate chip cookies that are sure to impress. Precision in each step ensures the best possible outcome for your festive treats, yielding cookies that are consistently soft, chewy, and full of flavor.
- Step 1: Prepare Your Oven and Baking Sheets. Begin your baking journey by preheating your oven to the precise temperature of 350 degrees Fahrenheit (175 degrees Celsius). Allowing the oven ample time to fully preheat is crucial for even cooking and proper cookie spread. Next, prepare your baking sheets: line them with high-quality parchment paper or reusable silicone baking mats. This indispensable step prevents your beautiful heart-shaped cookies from sticking to the pan, promotes uniform browning across the bottom, and makes cleanup incredibly swift and easy.
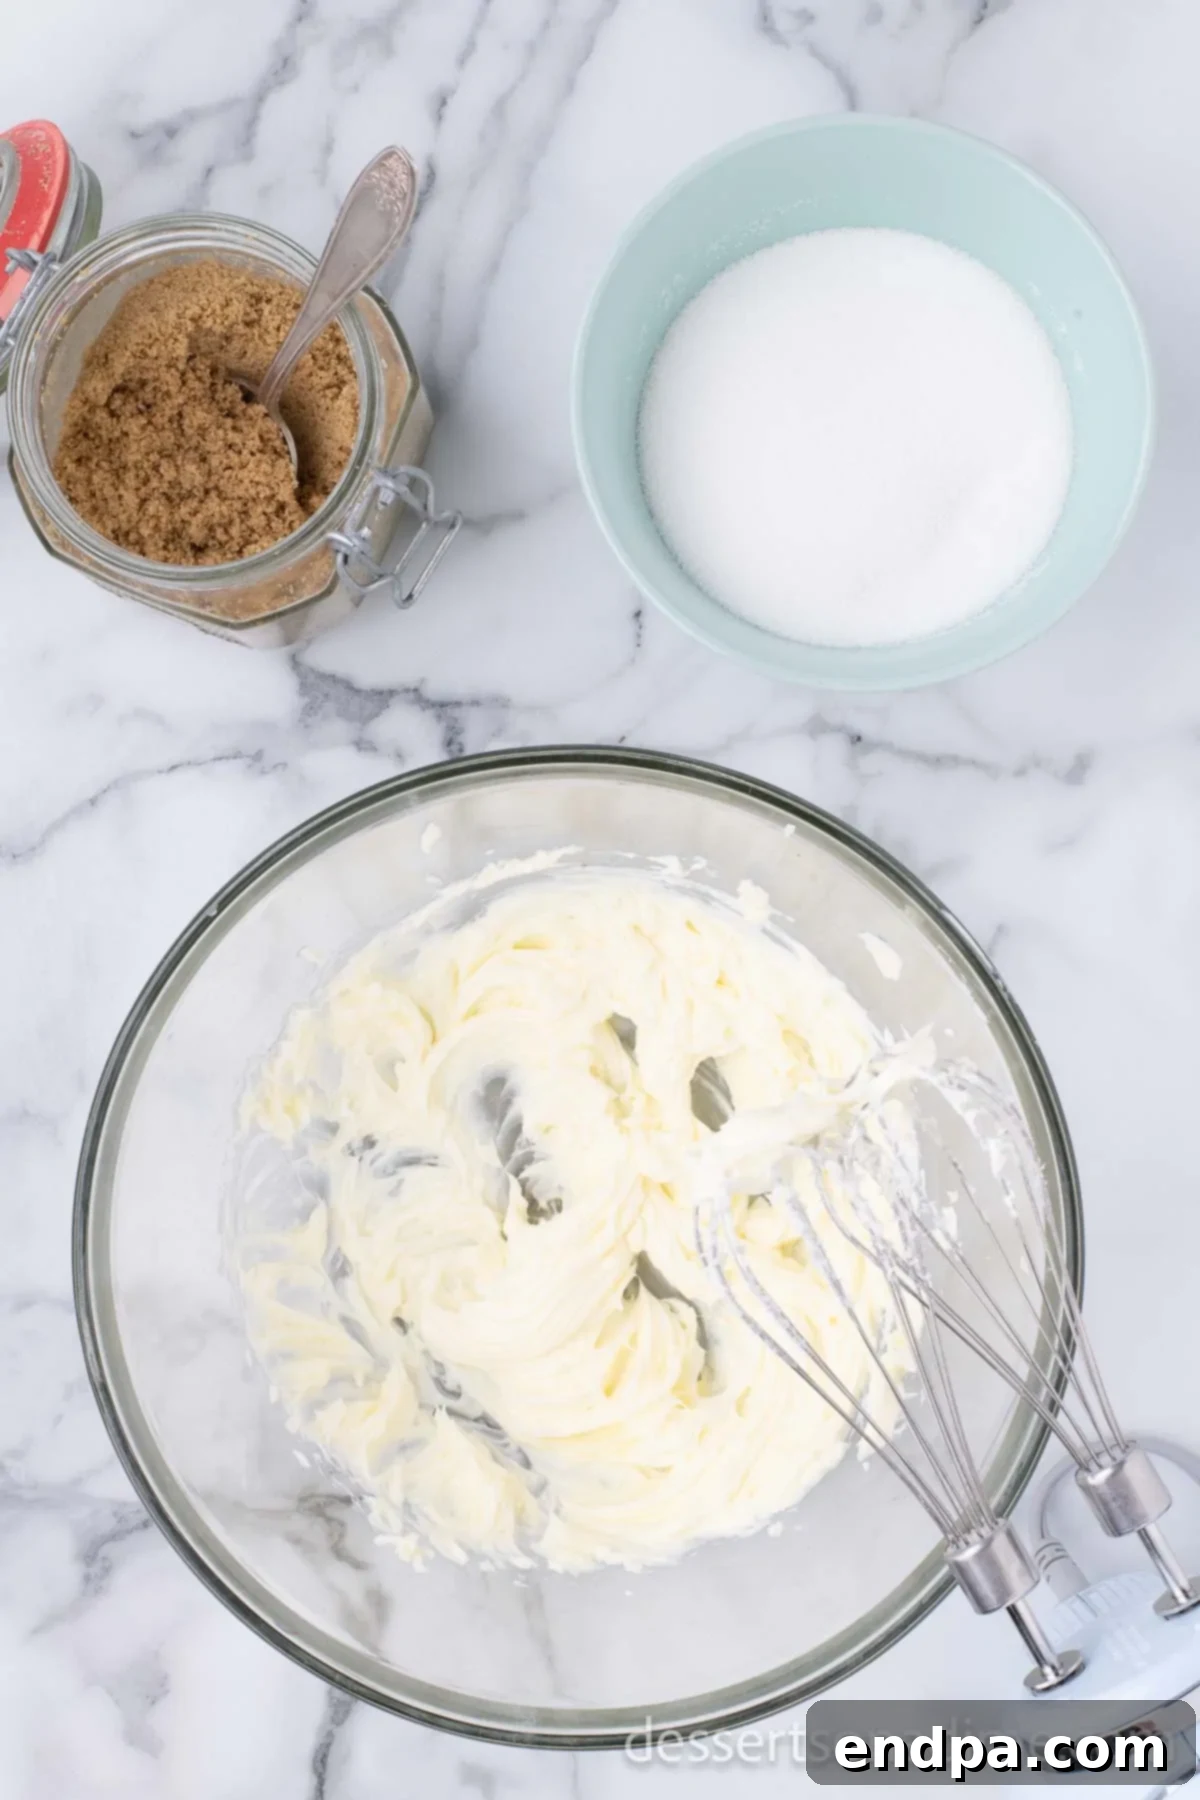
Step 2: Cream Butter and Sugars for an Airy Base. In a spacious mixing bowl, combine the perfectly softened unsalted butter with both granulated sugar and brown sugar. Using either a powerful stand mixer fitted with the paddle attachment or a reliable hand mixer, beat these ingredients together vigorously on medium speed. Continue mixing until the mixture transforms into a light, airy, and noticeably fluffy consistency, with a pale golden color. This vital process, known as creaming, incorporates essential air into the butter and sugar, which is fundamental for achieving the cookies’ desired soft and chewy texture. Remember to pause and scrape down the sides of the bowl frequently with a spatula to ensure all ingredients are thoroughly combined and no pockets of unmixed sugar remain.
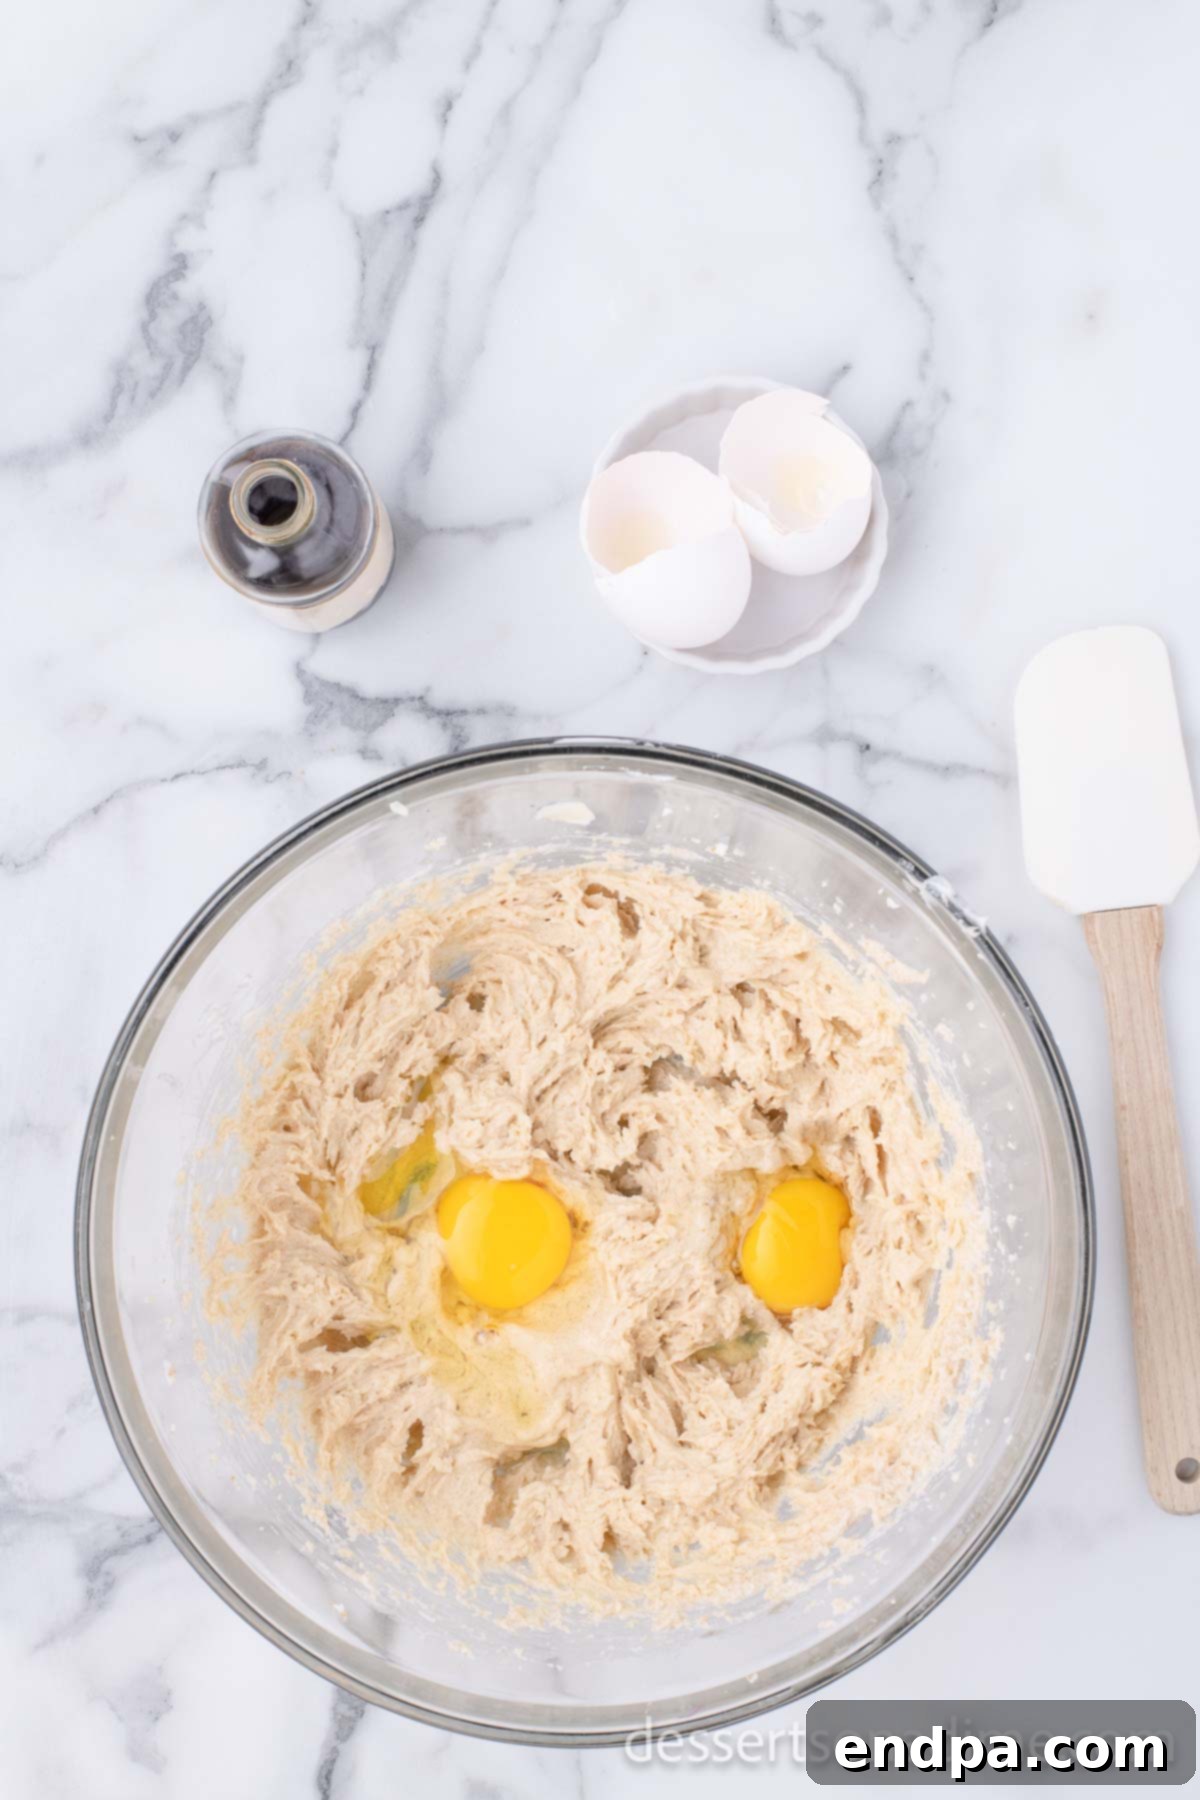
Step 3: Incorporate Eggs and Vanilla Extract. Once your butter and sugars are beautifully creamed, it’s time to add the liquid elements. Introduce the large eggs into the mixture, adding them one at a time. After each egg, beat well until it is fully incorporated into the batter, ensuring there are no visible streaks of egg. Follow this by stirring in the vanilla extract, mixing just until it’s evenly distributed. Exercise caution not to overmix at this stage; excessive beating after adding eggs can overdevelop the gluten in the flour later on, potentially leading to tougher, less tender cookies. The mixture should appear smooth, emulsified, and homogenous, ready for the dry ingredients.
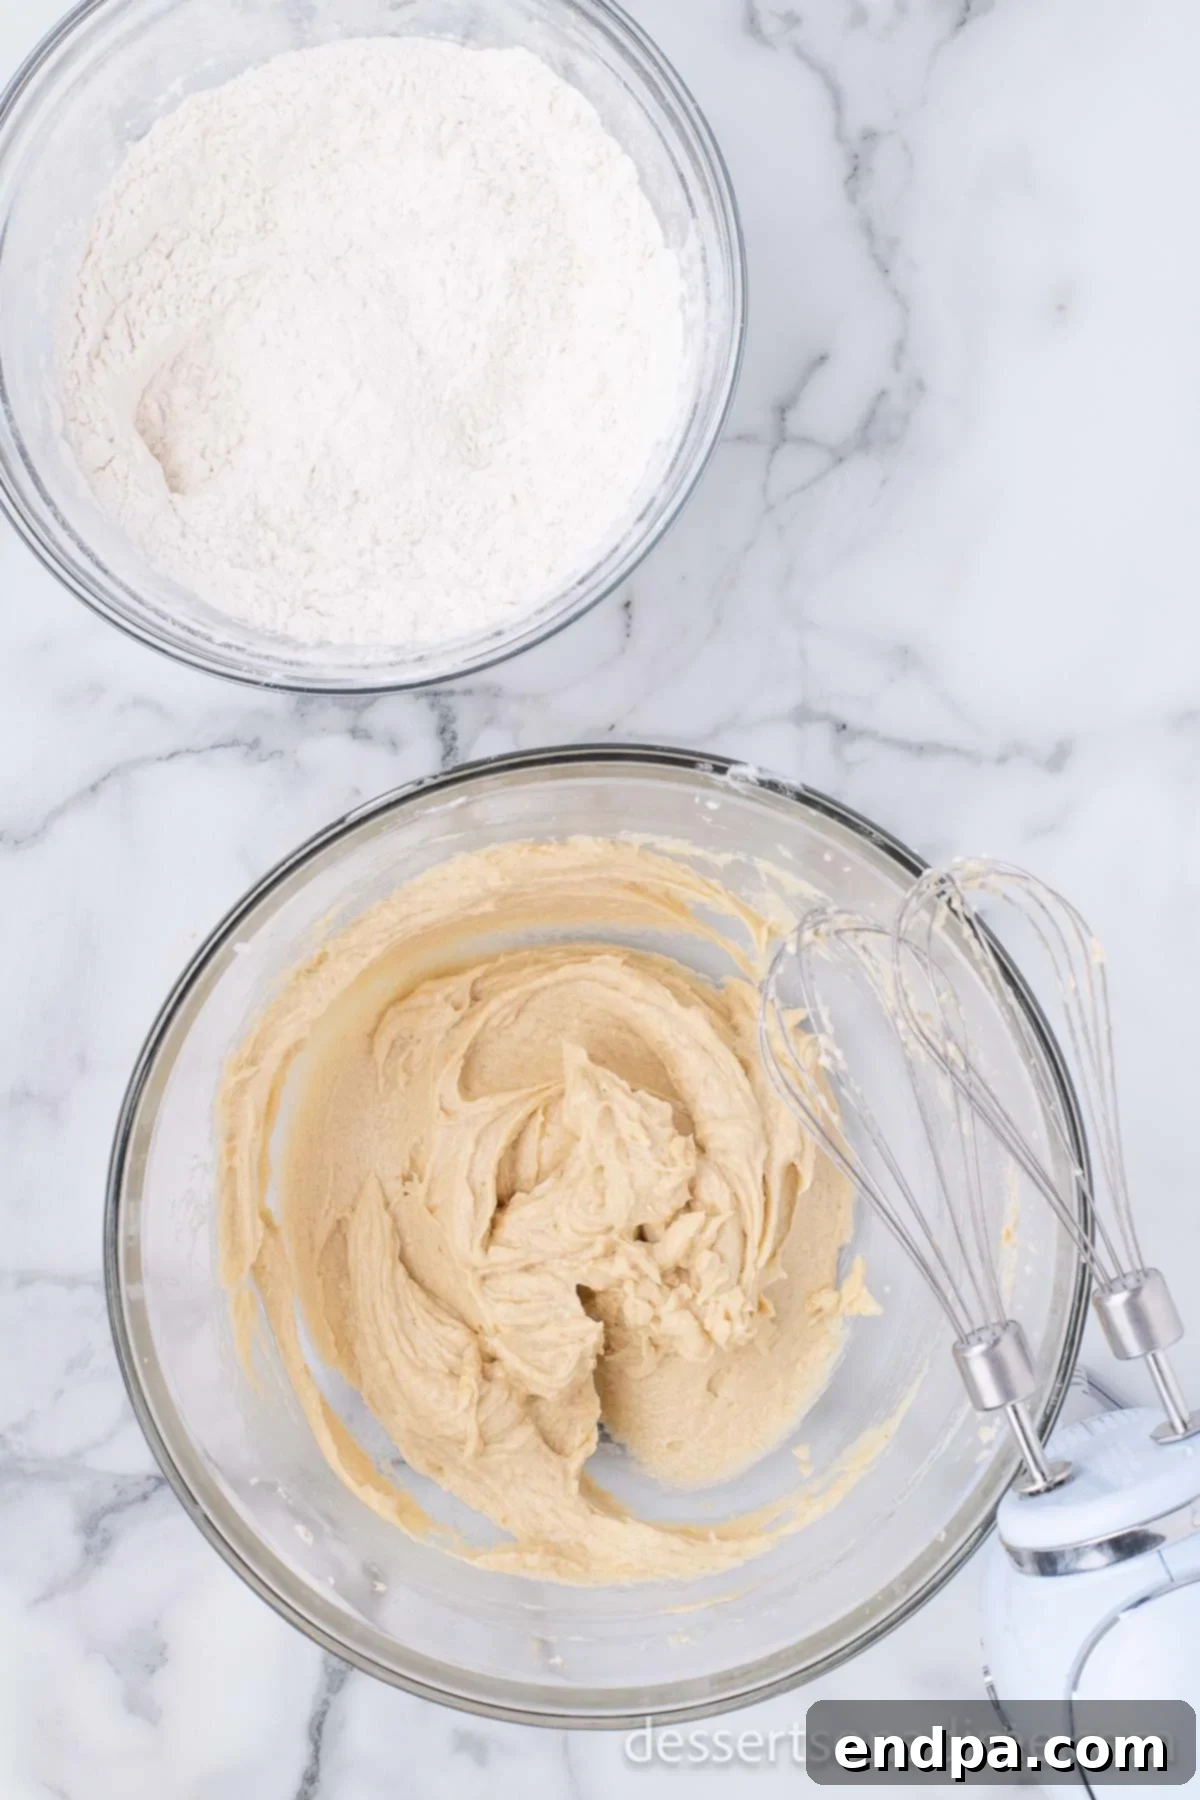
Step 4: Gradually Combine Dry and Wet Ingredients. In a separate, medium-sized bowl, meticulously whisk together your all-purpose flour, salt, baking soda, and baking powder. This crucial preliminary step ensures that all the leavening agents and salt are perfectly and evenly distributed throughout the flour, preventing uneven rising or undesirable pockets of intense saltiness in your finished cookies. Once thoroughly whisked, gradually add this dry mixture to the wet ingredients in the large bowl. Mix on the lowest speed of your electric mixer, or by hand with a spatula, just until the ingredients are combined. The golden rule here is not to overmix! Stop as soon as you no longer see any visible streaks of dry flour. Overmixing develops the gluten in the flour, which can unfortunately result in tough, dry, and less tender cookies.
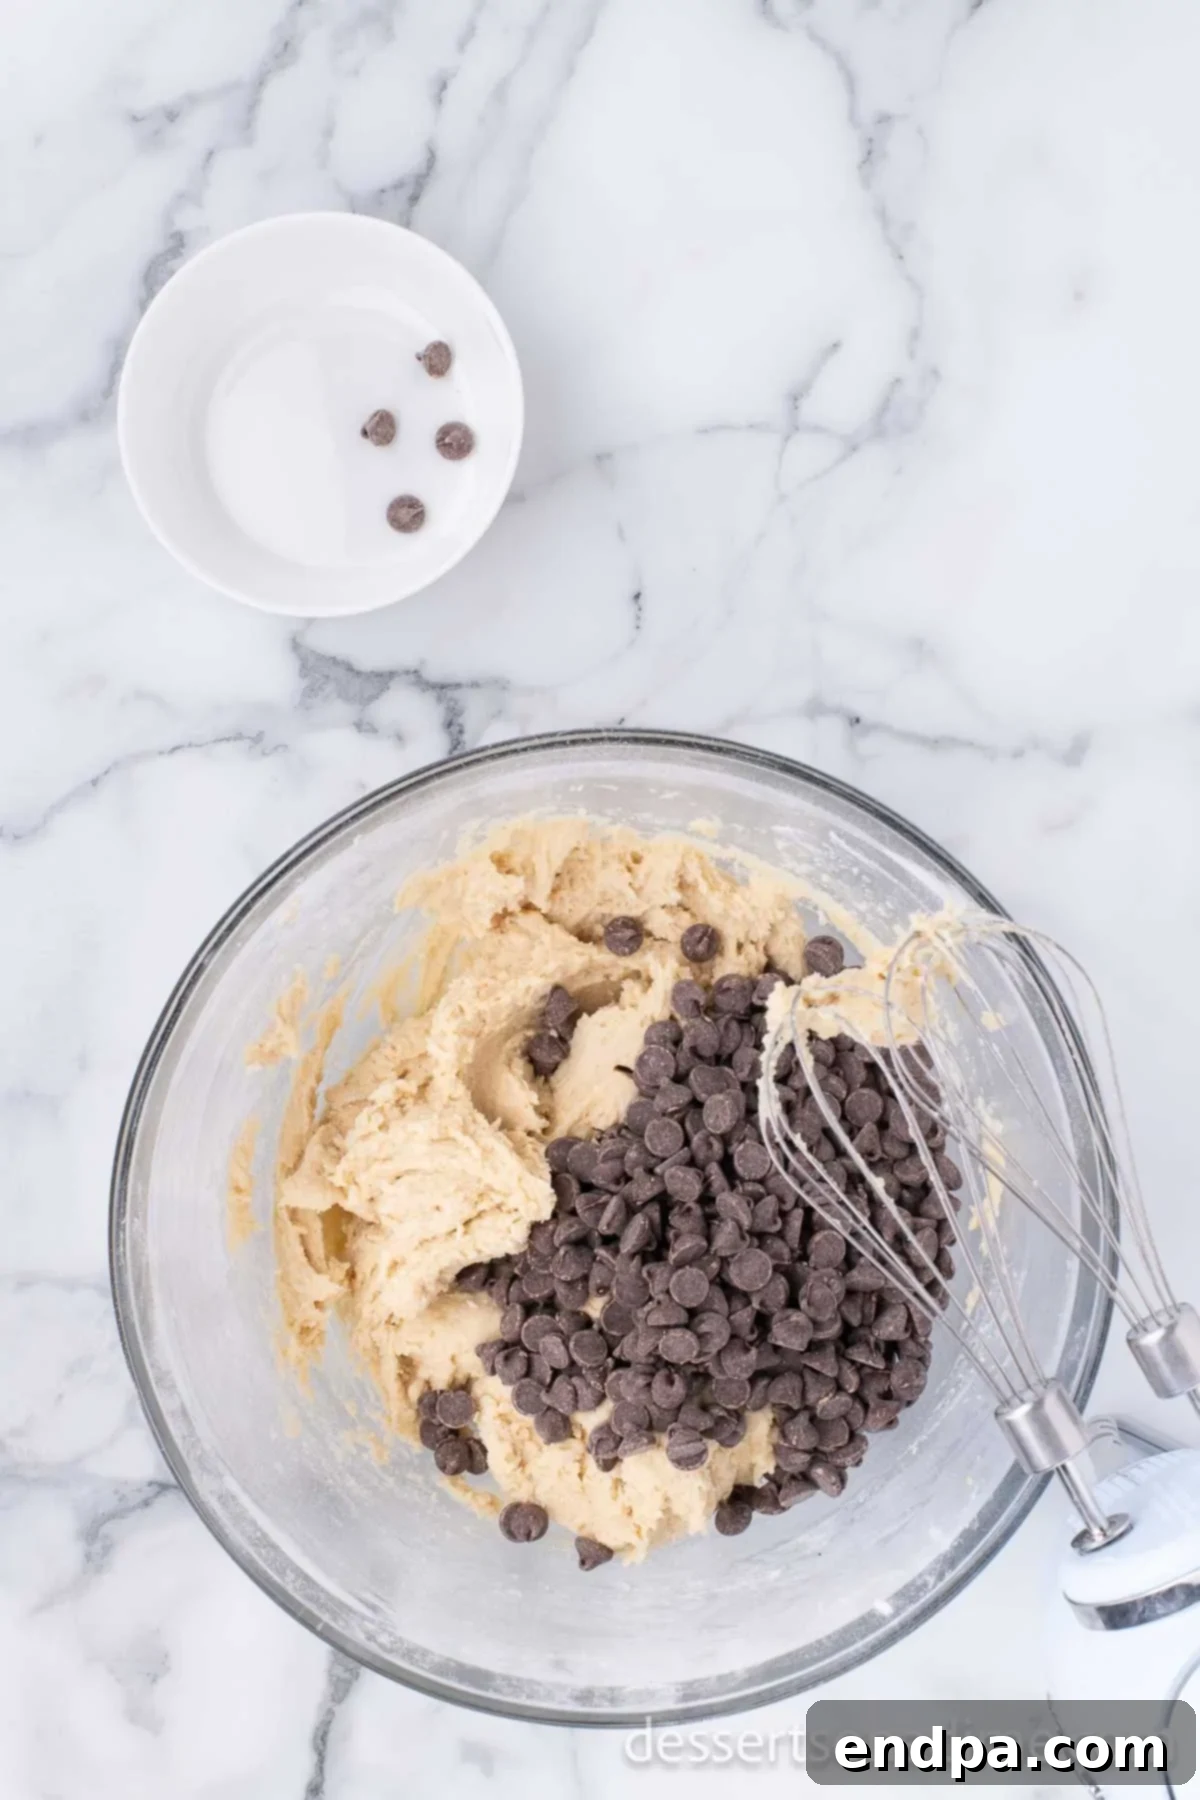
Step 5: Gently Fold in the Chocolate Chips. With your perfectly combined cookie dough ready, it’s time for the most anticipated addition – the chocolate chips! Use a sturdy rubber spatula or a wooden spoon to gently fold the semi-sweet chocolate chips into the dough. Mix just until the chocolate chips are evenly distributed throughout the dough, ensuring every bite will have that delightful burst of chocolate. Avoid using the electric mixer for this step, as it can easily crush the chocolate chips and, more importantly, lead to overmixing the dough. If you plan to add any optional sprinkles, nuts, or other mix-ins, this is the perfect moment to incorporate them gently into the dough.
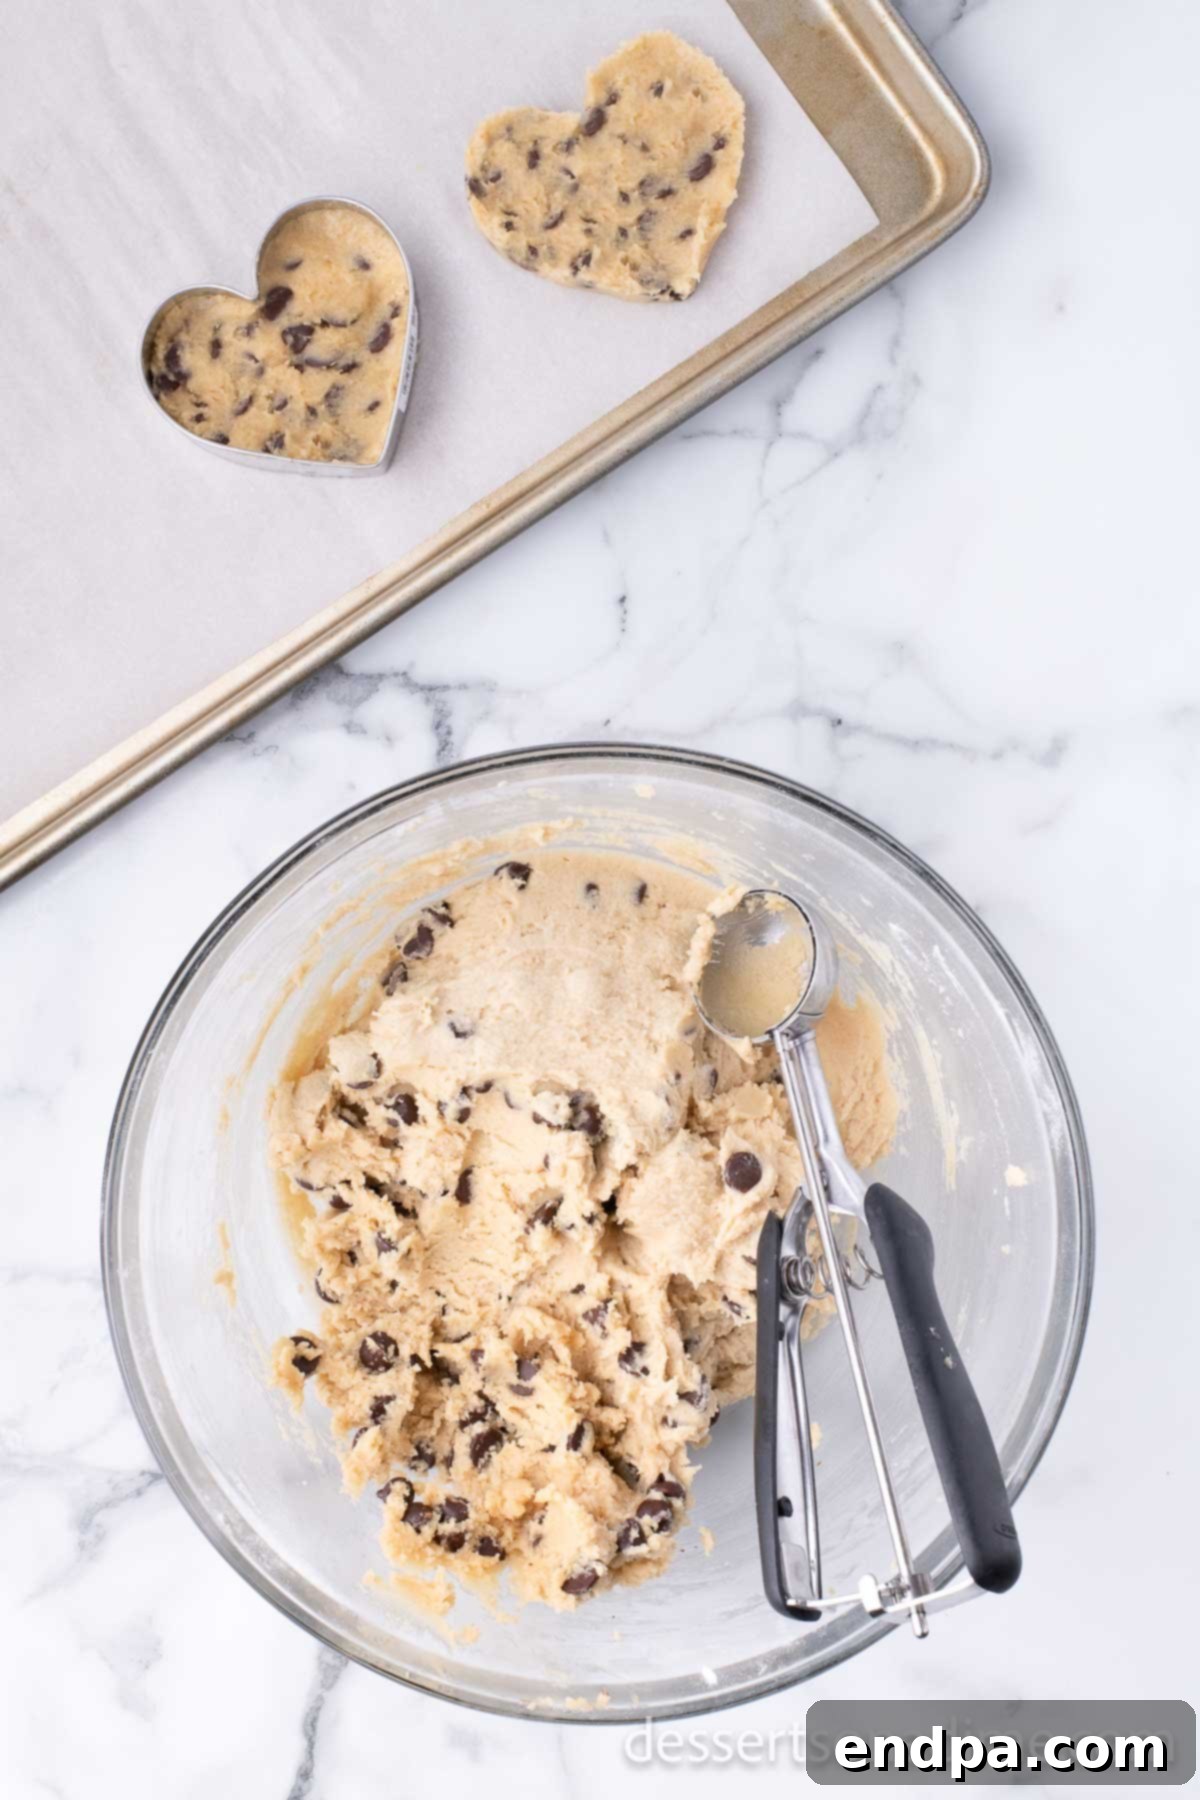
Step 6: Form and Bake the Heart Cookies to Perfection. Now for the artistic touch! Begin by rolling your prepared cookie dough into approximately 1-inch balls. To achieve those adorable, perfectly defined heart shapes, lightly spray the inside of your heart-shaped cookie cutter with a non-stick cooking spray. Place the cookie cutter directly onto your prepared baking sheet, then gently press one of the cookie dough balls evenly into the cutter, ensuring it fills the shape completely. Carefully lift the cookie cutter straight up, leaving behind a beautifully formed heart-shaped cookie on the baking sheet. Repeat this process for the remaining dough, remembering to space each heart cookie about 2 inches apart on the baking sheet to allow for adequate spreading during baking. You may find it helpful to re-spray the cookie cutter periodically to prevent any sticking. Bake in your preheated oven for 9-11 minutes. The cookies are perfectly done when their edges are lightly golden brown, but their centers still appear slightly soft and gloriously underdone. This delicate balance is the secret to achieving that coveted soft and chewy texture. Remember, cookies continue to bake for a few precious minutes even after they are removed from the oven due to residual heat, so resist the urge to overcook them.
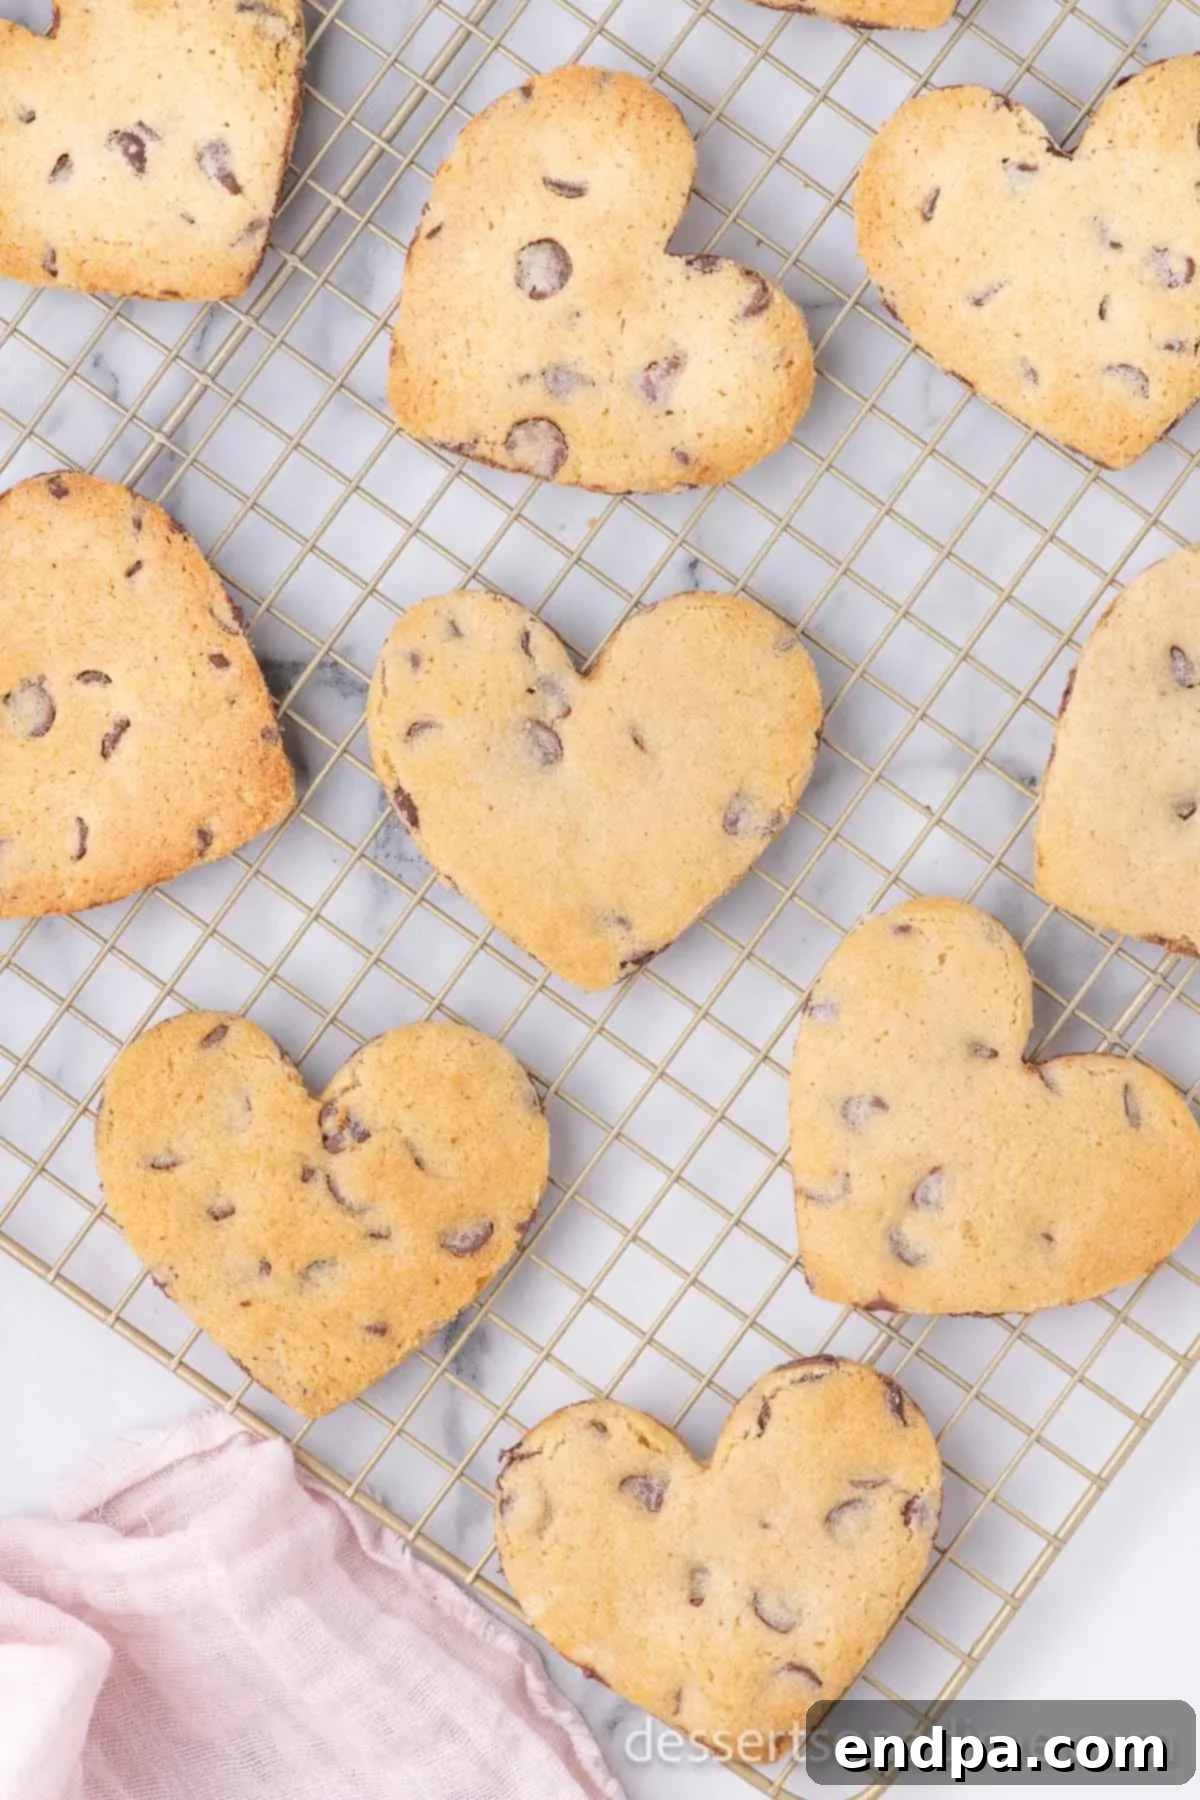
Step 7: Cool and Savor Your Creations. Once your heart-shaped chocolate chip cookies have achieved their golden perfection, carefully remove them from the oven. This next step is crucial for success: resist the temptation to move them immediately! Allow them to rest undisturbed on the hot baking sheet for approximately 5 minutes. This critical cooling period allows the cookies to set, firm up, and finish baking slightly, preventing them from breaking or falling apart when transferred. After this initial resting period, gently transfer the cookies using a thin spatula to a wire cooling rack. Arrange them on the rack to cool completely. Cooling completely ensures they develop their optimal chewy texture and prevents any sogginess that can occur from trapped steam. Please note that exact baking times can vary slightly depending on the calibration of your individual oven, so always rely on visual cues for doneness. Once thoroughly cooled, your beautiful and delicious heart-shaped cookies are ready to be served and lovingly enjoyed!

Expert Tips for Baking Success
Achieving bakery-quality heart-shaped chocolate chip cookies is easier than you think with these expert tips and tricks. Paying close attention to these details will significantly enhance your baking results, ensuring your cookies turn out perfectly soft, chewy, and delicious every single time.
- Bring Ingredients to Room Temperature: This is arguably one of the most important yet often overlooked tips for baking perfect cookies. Always ensure your unsalted butter and large eggs are at true room temperature before you begin mixing. Room temperature butter creams more effectively and smoothly with sugar, creating a lighter, more aerated, and fluffy mixture. This aeration is crucial for the cookies’ signature soft and chewy texture. Similarly, room temperature eggs emulsify better into the batter, leading to a more uniform and consistent dough. If your ingredients are too cold, the dough can be lumpy and dense; if they’re too warm (e.g., melted butter), the butter might incorporate too quickly, resulting in greasy cookies that spread too much.
- Measure Flour Accurately: Precision in measuring flour is absolutely vital for achieving the correct cookie texture. Do not scoop flour directly from the bag with your measuring cup, as this method inevitably packs it down and can lead to you using up to 25% more flour than required, resulting in dry, dense, and tough cookies. Instead, always use the “spoon and level” method: gently spoon the all-purpose flour into your measuring cup until it overflows, then use the back of a straight edge (like a butter knife or the straight edge of a ruler) to level off the excess flour. This ensures you’re consistently using the precise amount of flour needed for the recipe.
- Always Line Your Baking Sheets: For consistent baking results, effortless cleanup, and to guarantee your beautiful heart-shaped cookies do not stick to the pan, always line your baking sheets. Parchment paper is an excellent and readily available choice, providing a reliable non-stick surface and allowing for easy transfer of the delicate cookies once baked. Reusable silicone baking mats are another fantastic, eco-friendly option, offering superior non-stick properties and even heat distribution. Lining your sheets helps to prevent burnt bottoms and ensures your cookies bake uniformly, achieving that perfect golden-brown edge.
- Do Not Overmix the Dough: This is a common pitfall that can drastically alter the texture of your cookies. After you’ve added the dry ingredients to the wet mixture, mix only until they are just combined. Overmixing develops the gluten in the flour excessively, which can unfortunately lead to tough, dry, and less tender cookies with a crumbly texture. As soon as you no longer see any visible streaks of dry flour, stop the mixer. When folding in chocolate chips, sprinkles, or any other additions, always do so gently by hand with a spatula to maintain the delicate structure of the dough.
- Chill the Cookie Dough (Optional but Recommended): For an even chewier cookie with a noticeably richer, more developed flavor, consider chilling your cookie dough. Even a short chill of 30 minutes can make a difference, but an overnight chill (or up to 24 hours) yields the best results. Chilling allows the dry ingredients to fully hydrate, the flavors to meld and intensify, and the butter to firm up. This firming of the butter prevents the cookies from spreading too much in the oven, resulting in thicker, more flavorful, and wonderfully chewier cookies with a beautifully consistent shape.
- Don’t Overcrowd the Baking Sheet: Give your cookies ample space to breathe and spread during baking. Place them at least 2 inches apart on the baking sheet. Overcrowding can lead to uneven baking, as the cookies will block airflow around each other, resulting in some parts being undercooked and others overcooked. It also risks the cookies spreading into each other and losing their distinct heart shapes, making them less visually appealing.
- Watch for Doneness, Not Just Time: Oven temperatures can vary significantly from one appliance to another, so the baking time provided in any recipe should always be treated as a general guide. Instead, pay close attention to the visual cues for doneness: cookies are typically perfectly baked when their edges are lightly golden brown, but their centers still look slightly soft, puffed, and perhaps a tiny bit underdone. They will continue to set and firm up as they cool on the baking sheet. Undercooking slightly will yield that desired gooey, chewy center, while overcooking will inevitably result in dry, hard, and crumbly cookies. Trust your eyes!
Storage and Freezing Tips
Ensuring your heart-shaped chocolate chip cookies stay fresh and delicious is simple with proper storage techniques. Whether you plan to enjoy them immediately or save some for later, here’s how to keep them at their absolute best, preserving their delightful texture and flavor for days or even months.
- Storing Baked Cookies: The golden rule for storing baked cookies is to allow them to cool completely on a wire rack before transferring them. Any residual warmth can create condensation within the container, leading to soggy cookies. Once fully cooled, place your cookies in an airtight container at room temperature. For optimal freshness, place a piece of parchment paper between layers if stacking. They will remain wonderfully fresh and delicious for 3-5 days. For an extra touch to maintain their soft texture, you can even add half a slice of plain bread to the container; the cookies will subtly absorb moisture from the bread, keeping them perfectly soft and chewy.
- Refrigerating Leftovers: If you find yourself with a larger batch of leftover cookies or wish to extend their freshness beyond a few days, refrigeration is a viable option. Store them in an airtight container in the refrigerator for up to 2 weeks. Be aware that refrigeration can slightly alter the texture of chocolate chip cookies, often making them a bit firmer or denser. To restore some of their original chewiness and warmth, bring them back to room temperature before serving, or warm them briefly in the microwave for 10-15 seconds.
- Freezing Cookie Dough for Future Enjoyment: This is a fantastic and highly recommended option for meal prepping or having fresh, warm cookies on demand at a moment’s notice! You can learn exactly how to freeze cookie dough for future use, making baking incredibly convenient. Simply form the raw cookie dough into heart shapes (or traditional balls) as directed in the recipe. Place these formed dough pieces on a parchment-lined baking sheet and freeze until they are completely solid (this usually takes 1-2 hours). Once frozen solid, transfer the individual dough hearts to a freezer-safe zip-top bag or an airtight container, ensuring they don’t stick together. They can be stored in the freezer for up to 3 months without loss of quality. When you’re ready to bake, simply place the frozen dough hearts directly onto a prepared baking sheet and add an additional 1-2 minutes to the recommended baking time.
More Romantic Valentine’s Day Dessert Ideas
If you’re planning a full Valentine’s Day spread, looking for diverse dessert options, or simply want to explore more festive treats beyond our delicious heart-shaped chocolate chip cookies, be sure to check out these other delightful recipes. They are all perfect for expressing your love through the universal language of sweets:
- Valentine’s Day Cake Pops: Fun, bite-sized, and utterly adorable.
- 45 Best Valentine’s Day Cookies: A comprehensive collection of festive cookie ideas.
- Valentine’s Day Sugar Cookies: Classic, customizable, and always a hit.
- Valentine’s Day Brownies: Rich, fudgy, and intensely chocolatey delights.
Heart Shaped Chocolate Chip Cookies Recipe Card

Heart Shaped Chocolate Chip Cookies
These irresistible heart-shaped chocolate chip cookies are wonderfully gooey and boast the perfect texture, making them ideal for Valentine’s Day or any special occasion. Their festive shape adds a touch of charm to a classic favorite.
Yields: 24 cookies
Prep time: 15 minutes
Cook time: 9-11 minutes (approx. 10 minutes)
Total time: 25 minutes
Cuisine: American
Course: Dessert
Author: Carrie Barnard
Calories per serving: 215 kcal
Ingredients:
- 1 cup Unsalted Butter, softened
- 1/2 cup Granulated Sugar
- 1/2 cup Brown Sugar
- 2 Large Eggs
- 2 teaspoons Vanilla Extract
- 2 1/4 cups All-Purpose Flour
- 1/2 teaspoon Salt
- 1 teaspoon Baking Soda
- 1 teaspoon Baking Powder
- 1 1/2 cups Semi-Sweet Chocolate Chips
Instructions:
- Preheat the oven to 350 degrees Fahrenheit (175°C). Line baking sheets with parchment paper or silicone mats.
- In a large mixing bowl, cream together the softened butter, granulated sugar, and brown sugar with an electric mixer until light and fluffy.
- Stir in the eggs one at a time, beating well after each, then mix in the vanilla extract until just combined.
- In a separate bowl, whisk together the all-purpose flour, salt, baking soda, and baking powder.
- On low speed, gradually add the dry ingredients to the wet ingredients, beating until just combined. Be careful not to overmix.
- Gently fold the semi-sweet chocolate chips into the cookie dough by hand using a spatula.
- Roll the cookie dough into approximately 1-inch balls.
- Lightly spray a heart-shaped cookie cutter with non-stick cooking spray. Place the cookie cutter on a prepared baking sheet and gently press a cookie dough ball evenly into the cutter. Carefully remove the cookie cutter.
- Continue forming heart cookies, spacing them about 2 inches apart on the baking sheet. Re-spray the cookie cutter as needed.
- Bake for 9-11 minutes, or until the edges are golden brown and the centers are still slightly soft and underdone. Do not overcook.
- Remove the cookies from the oven and let them rest on the baking sheet for 5 minutes.
- Then, carefully transfer the cookies to a wire rack to cool completely before serving and enjoying.
Recipe Notes:
For the best cookies, ensure all ingredients, especially butter and eggs, are at room temperature. Measure your flour correctly by using the “spoon and level” method to avoid dense cookies. Store baked leftovers in an airtight container for up to 2 weeks in the refrigerator, or freeze cookie dough for up to 3 months for fresh cookies anytime.
Nutrition Facts (per serving):
- Calories: 215 kcal
- Carbohydrates: 24g
- Protein: 2g
- Fat: 12g
- Saturated Fat: 7g
- Polyunsaturated Fat: 1g
- Monounsaturated Fat: 3g
- Trans Fat: 0.3g
- Cholesterol: 35mg
- Sodium: 121mg
- Potassium: 90mg
- Fiber: 1g
- Sugar: 13g
- Vitamin A: 262 IU
- Calcium: 27mg
- Iron: 1mg
We hope you enjoy baking and sharing these delightful Heart Shaped Chocolate Chip Cookies as much as we do. They are truly a labor of love that tastes as good as they look. Don’t forget to come back and leave a comment and star rating to let us know how your batch turned out! Happy baking and happy loving!
