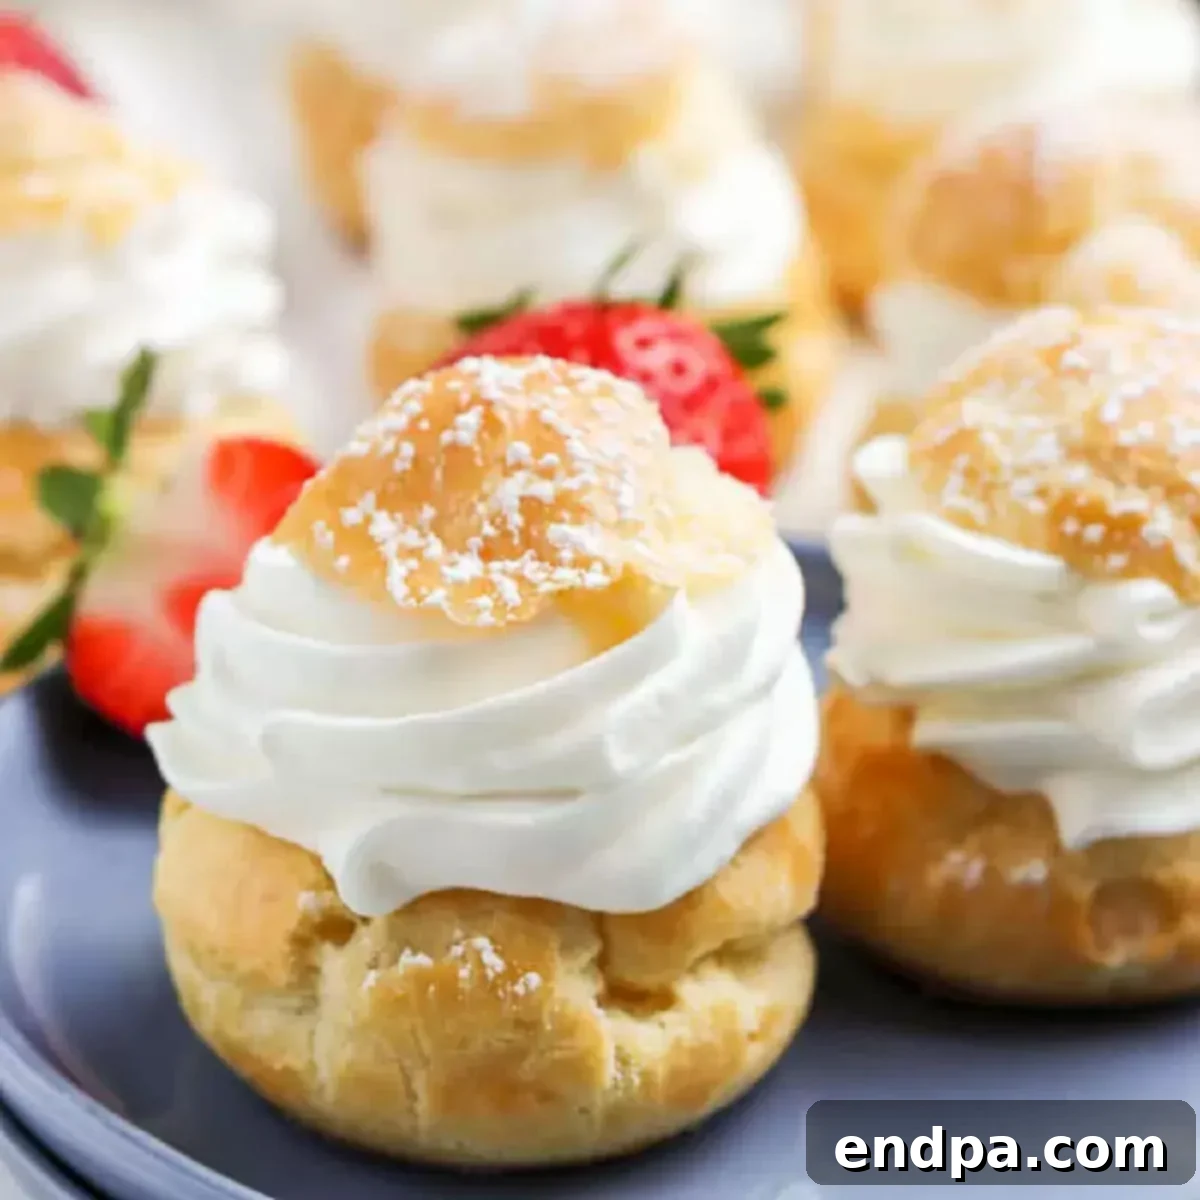
Master the art of creating delightful, bakery-quality **homemade Cream Puffs** with this surprisingly simple recipe. These ethereal treats boast a remarkably **light and fluffy** choux pastry shell, perfectly contrasted by a rich, **decadent sweet cream filling** that melts in your mouth. Get ready to impress your family and friends with this timeless **classic French dessert**.
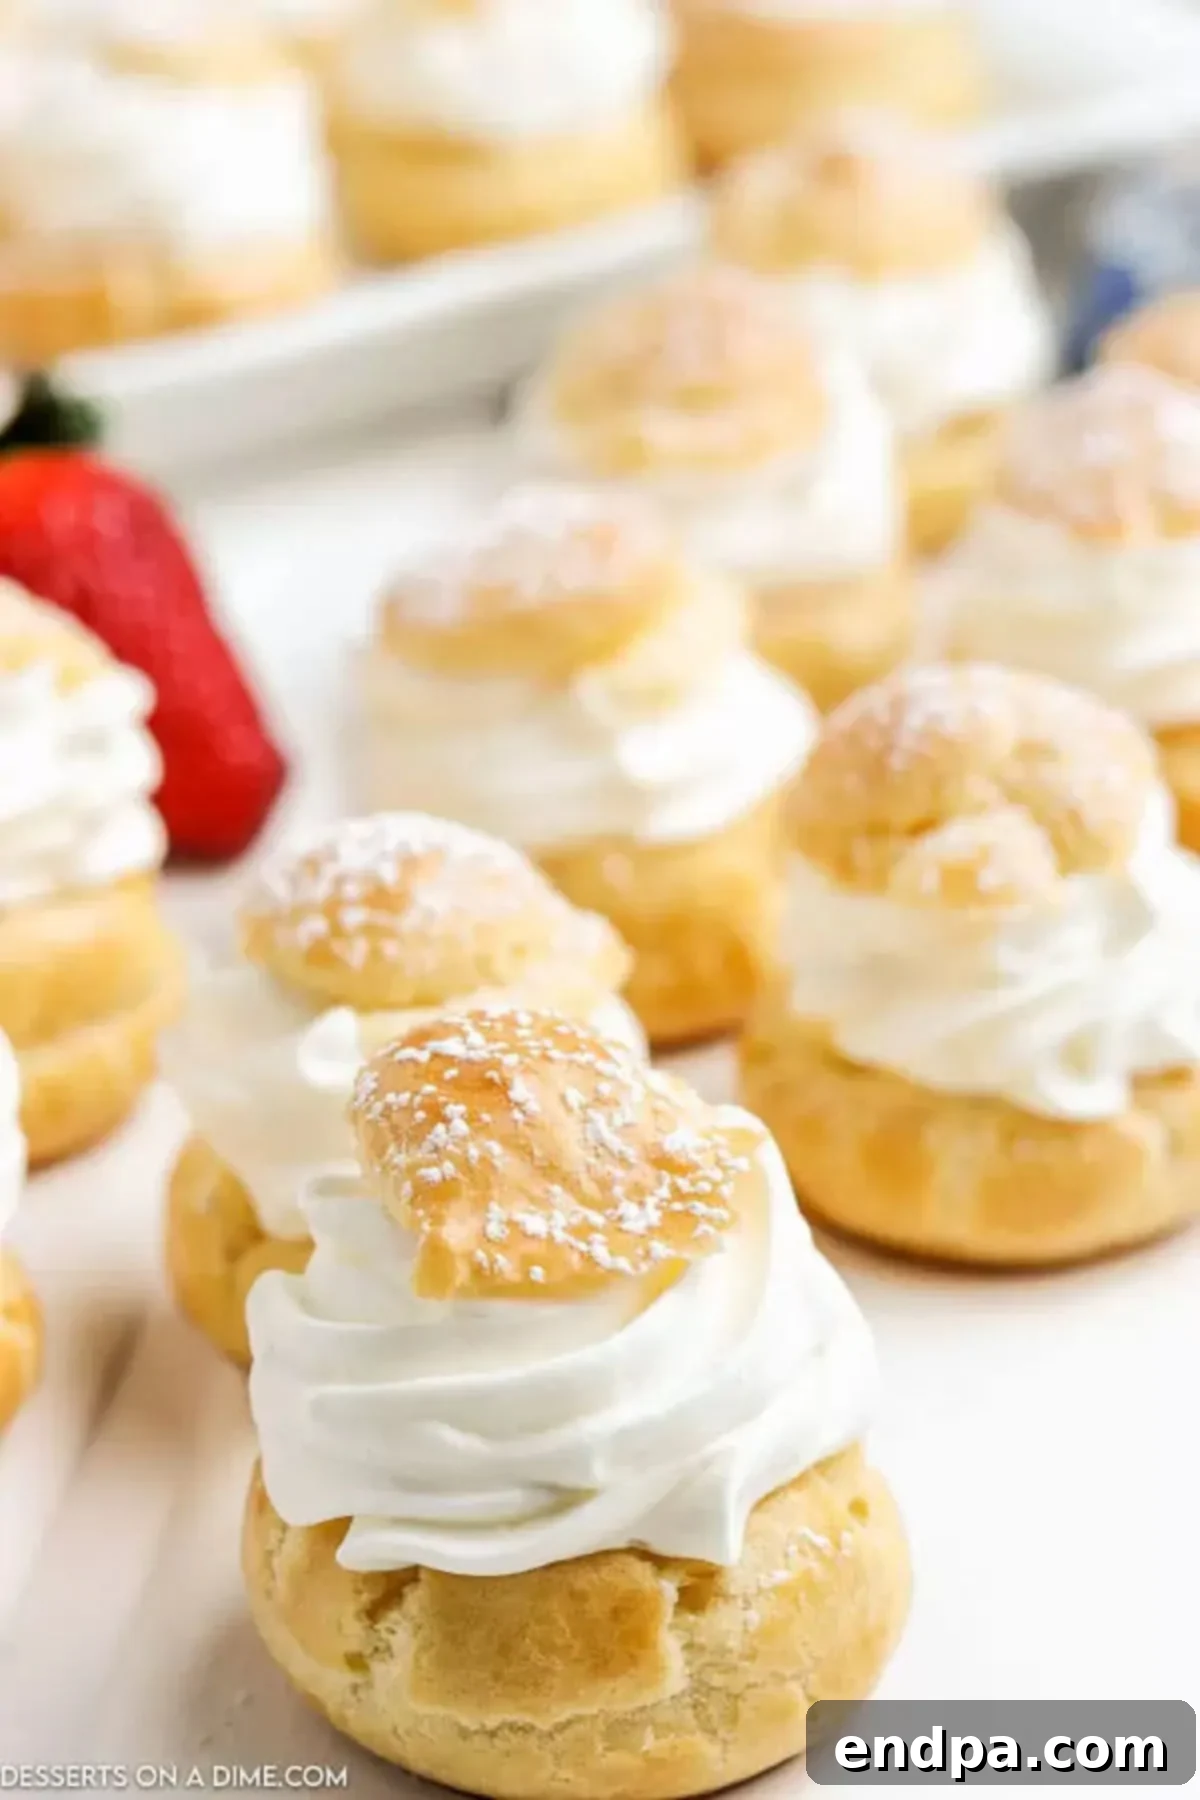
Cream puffs are a testament to simple elegance, offering a delightful combination of textures and flavors. You’ll be genuinely amazed at how straightforward it is to whip up this **oven-baked dessert** right in your own kitchen. Whether enjoyed plain, adorned with fresh berries like strawberries, blueberries, or blackberries, or drizzled with a rich chocolate sauce, these versatile pastries are always a hit. This comprehensive guide will walk you through every step, ensuring your **easy cream puffs** turn out perfect every time, becoming a staple in your dessert repertoire.
Table of Contents
- Why You'll Adore This Cream Puffs Recipe
- Essential Baking Supplies for Choux Pastry
- Ingredients for Perfect Pâte à Choux
- Indulgent Cream Filling
- Step-by-Step Instructions: Crafting Your Cream Puffs
- Frequently Asked Questions About Cream Puffs
- Pro Tips for Flawless Cream Puffs
- More Delicious & Easy Desserts to Try
Why You'll Adore This Cream Puffs Recipe
There's a special kind of magic in creating something so elegant and delicious from scratch. This recipe demystifies **pâte à choux pastry**, showing you just how accessible it is to achieve bakery-quality results at home. Cream puffs, or *profiteroles* as they are often called, are a common sight in patisserie windows, their delicate shells always catching the eye. With our **easy recipe**, crafted using **simple ingredients**, you can recreate that same irresistible charm and incredible taste right in your kitchen.
This **classic French dessert** is traditionally filled with a luscious, **sweet cream filling** and delicately dusted with powdered sugar. It’s a versatile base that can be customized with various fillings and toppings, making it suitable for any occasion, from casual family gatherings to elegant dinner parties. Imagine the delight on your loved ones' faces when you present these beautiful, **homemade cream puffs**. This recipe isn't just about baking; it's about creating memorable moments and enjoying the satisfaction of a perfectly executed dessert that tastes utterly divine.
Essential Baking Supplies for Choux Pastry
Having the right tools can make all the difference in your baking journey. For this **cream puffs recipe**, a few key items will ensure a smooth and successful process:
- Pastry Bag (or Piping Bag): Essential for creating perfectly shaped cream puff shells. While a large Ziploc bag with a corner snipped can work in a pinch, a proper pastry bag offers better control and consistency.
- Silicone Baking Mat: Provides a non-stick surface, ensuring your cream puffs don't stick and cook evenly. It's also reusable and eco-friendly.
- Parchment Paper: A great alternative to a silicone mat, offering easy cleanup and preventing sticking.
- Basting Brush: Useful for applying the egg wash evenly over the pastry shells, which helps achieve that beautiful golden-brown crust.
- Wire Rack: Crucial for cooling your baked cream puffs. Allowing them to cool completely on a wire rack prevents them from becoming soggy and helps maintain their crisp texture.
Ingredients for Perfect Pâte à Choux
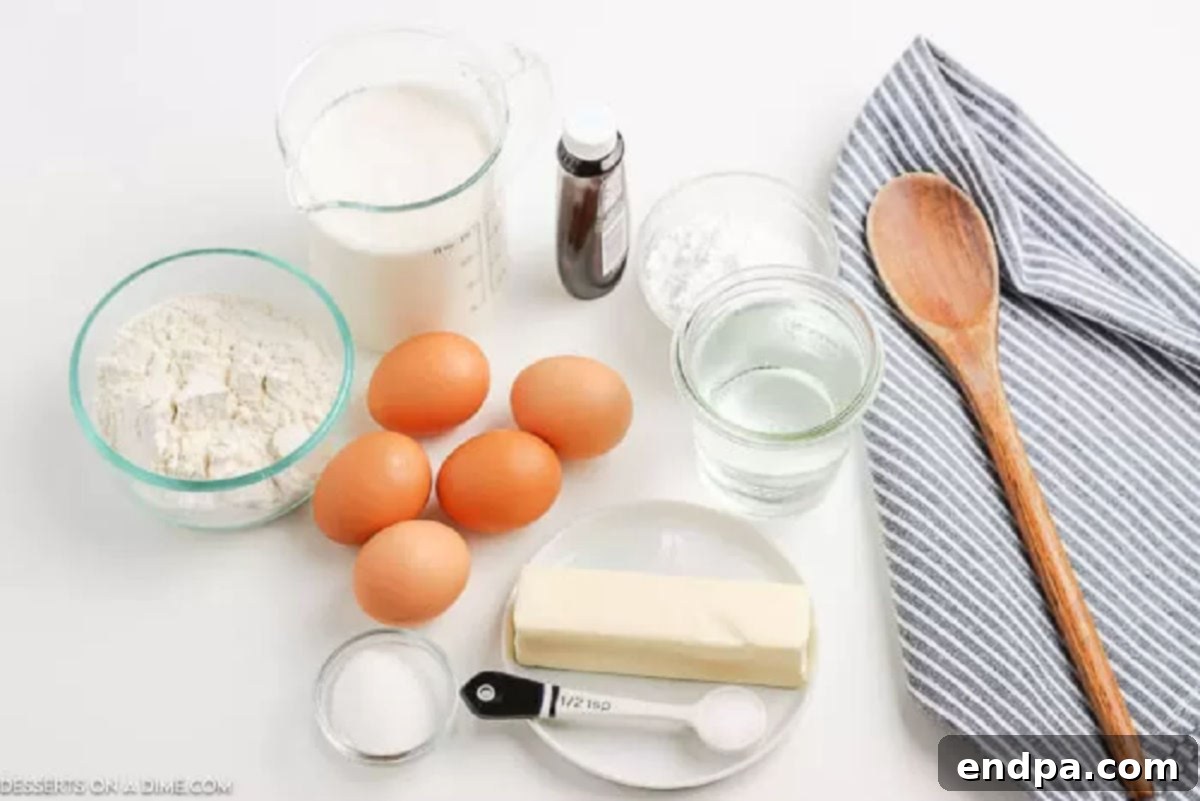
The beauty of **choux pastry** lies in its simplicity. A few basic ingredients combine to create a remarkable dough that puffs up wonderfully in the oven. For the pâte à choux, you will need:
- Water: The liquid base for our choux dough, creating the steam that makes the puffs rise.
- Unsalted Butter: Using unsalted butter allows you to control the overall saltiness of the recipe. Its fat content is crucial for the dough's texture and richness.
- Granulated Sugar: A touch of sugar adds a subtle sweetness to the pastry, balancing the flavors.
- Salt: A pinch of salt enhances all the other flavors in the dough.
- All-purpose Flour: The foundation of the pastry. For accurate measurement, always spoon the flour into your measuring cup and level it off, rather than scooping directly from the bag. This prevents over-packing the flour, which can lead to a dense dough.
- Eggs: Room temperature eggs are essential for emulsifying smoothly into the warm dough, creating the perfect consistency for piping and puffing. You'll need four for the dough and one extra for an egg wash.
Indulgent Cream Filling
The filling is what truly transforms a simple pastry shell into a decadent **cream puff**. Our recipe features a delightful whipped cream filling:
- Heavy Whipping Cream: This is the star of our filling. It absolutely needs to be very cold before you begin whipping it to ensure it achieves maximum volume and stiff peaks.
- Powdered Sugar (Confectioners' Sugar): Provides sweetness and helps stabilize the whipped cream. Sifting the powdered sugar is key to prevent any lumps, ensuring a silky-smooth filling.
- Clear Vanilla Extract: For a pristine white cream, clear vanilla extract is preferred. However, regular vanilla extract works perfectly fine and will impart a lovely warm flavor, though it might give the cream a slight ivory hue.
You can find the complete, detailed list of ingredients with specific measurements in the recipe card towards the bottom of the page.
Step-by-Step Instructions: Crafting Your Cream Puffs
Follow these detailed steps to create beautiful, airy cream puffs from scratch. Precision and timing are key to perfect **choux pastry**!
- Step 1: Prepare Your Workspace. Begin by preheating your oven to 375 degrees F (190 degrees C). This ensures the oven is at the correct temperature for the cream puffs to rise properly as soon as they go in.
- Step 2: Line Your Baking Sheet. Next, retrieve a large baking sheet and line it with either parchment paper or a silicone baking mat. This crucial step prevents the dough from sticking and makes cleanup significantly easier. Proper spacing is also important, so ensure you have enough surface area.
- Step 3: Begin the Pâte à Choux Base. In a large saucepan, combine the water, butter, salt, and granulated sugar. Place the saucepan over medium-high heat and bring the mixture to a rolling boil, ensuring the butter is fully melted and the sugar and salt are dissolved. Once boiling, immediately remove the pan from the heat.
- Step 4: Incorporate the Flour. This step happens quickly! Have your all-purpose flour measured and ready. Add the flour all at once to the hot liquid mixture. Using a sturdy wooden spoon, stir vigorously until the flour is fully incorporated and the mixture forms a smooth ball, pulling away from the sides of the pan. This usually takes about 1 minute of continuous stirring.
- Step 5: Cook the Dough to Develop. Return the saucepan with the dough ball to the stove over medium heat. Continue cooking and stirring constantly for another 1-2 minutes. You'll know it's ready when a thin film forms on the bottom of the pan, indicating that excess moisture has been cooked out of the dough. This step is vital for a light and hollow pastry.
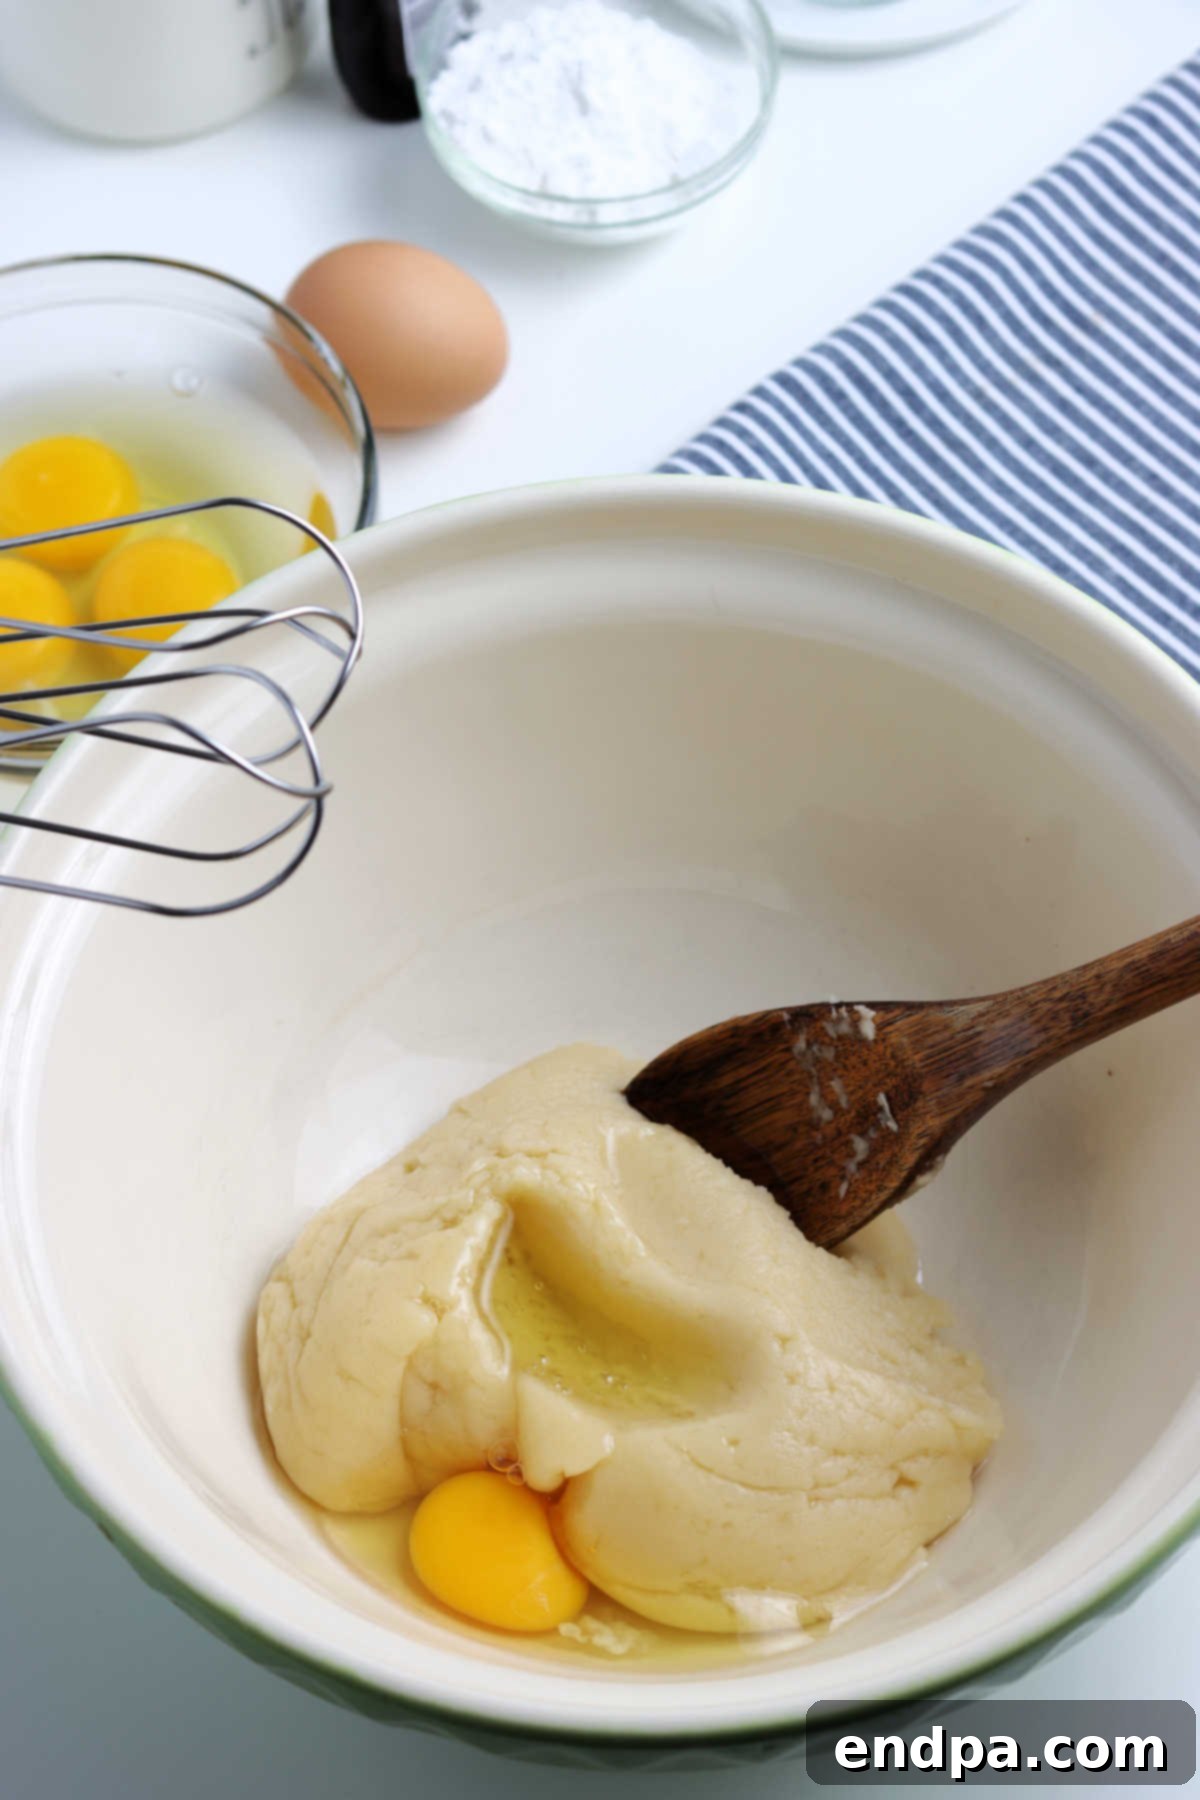
Step 6: Cool and Add Eggs. Remove the pan from the heat and transfer the hot flour mixture to a large mixing bowl. Allow the dough to cool slightly for about 5-10 minutes. While it's cooling, crack the remaining egg into a small bowl, add 1 tablespoon of water, and whisk together to create an egg wash. Set this aside, as you’ll need it later.
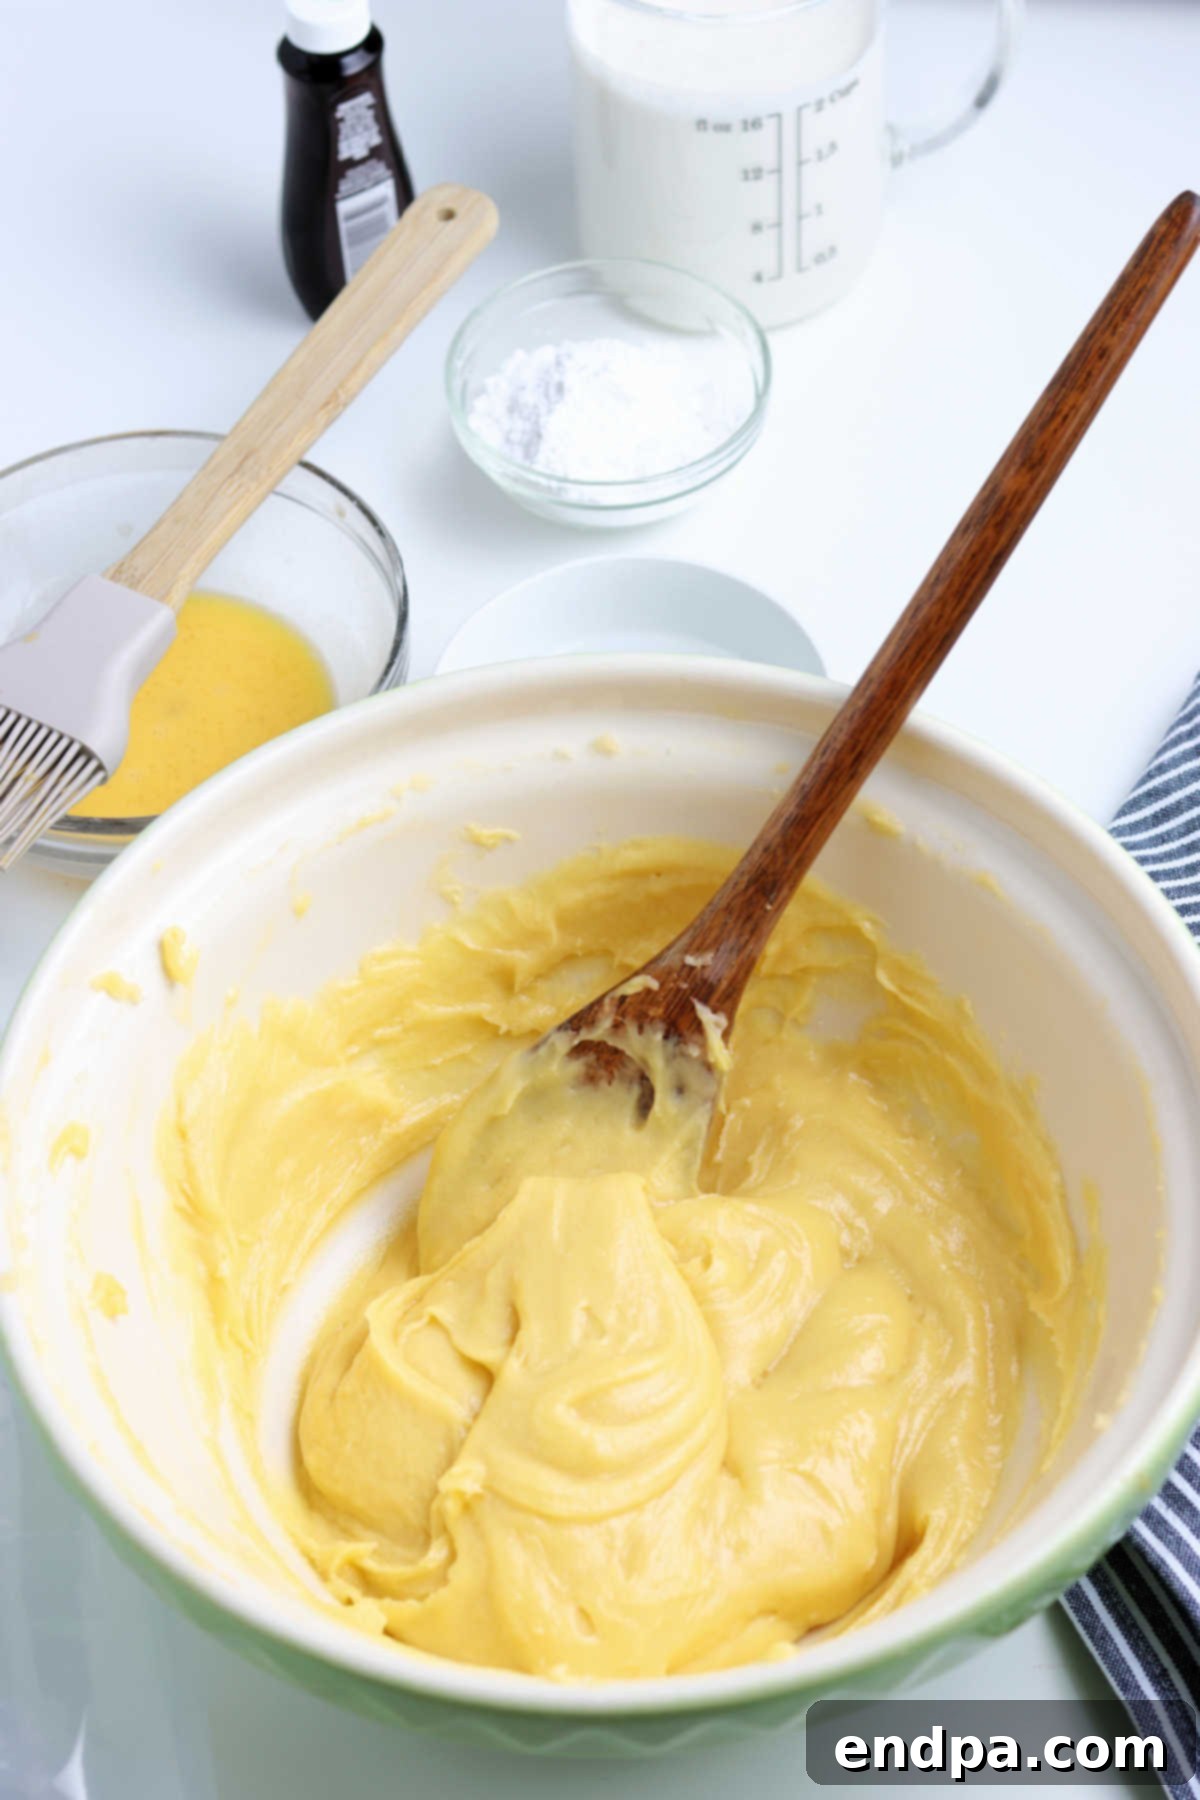
Step 7: Incorporate Eggs One by One. Once the dough has cooled slightly (it should still be warm but not scorching hot to touch), begin adding the four main eggs one at a time. Beat each egg into the dough completely before adding the next. The dough might look curdled or separated initially, but keep mixing until each egg is fully incorporated and the dough becomes smooth, glossy, and falls slowly from the spoon in a "v" shape. This creates the characteristic texture for the **choux pastry**.
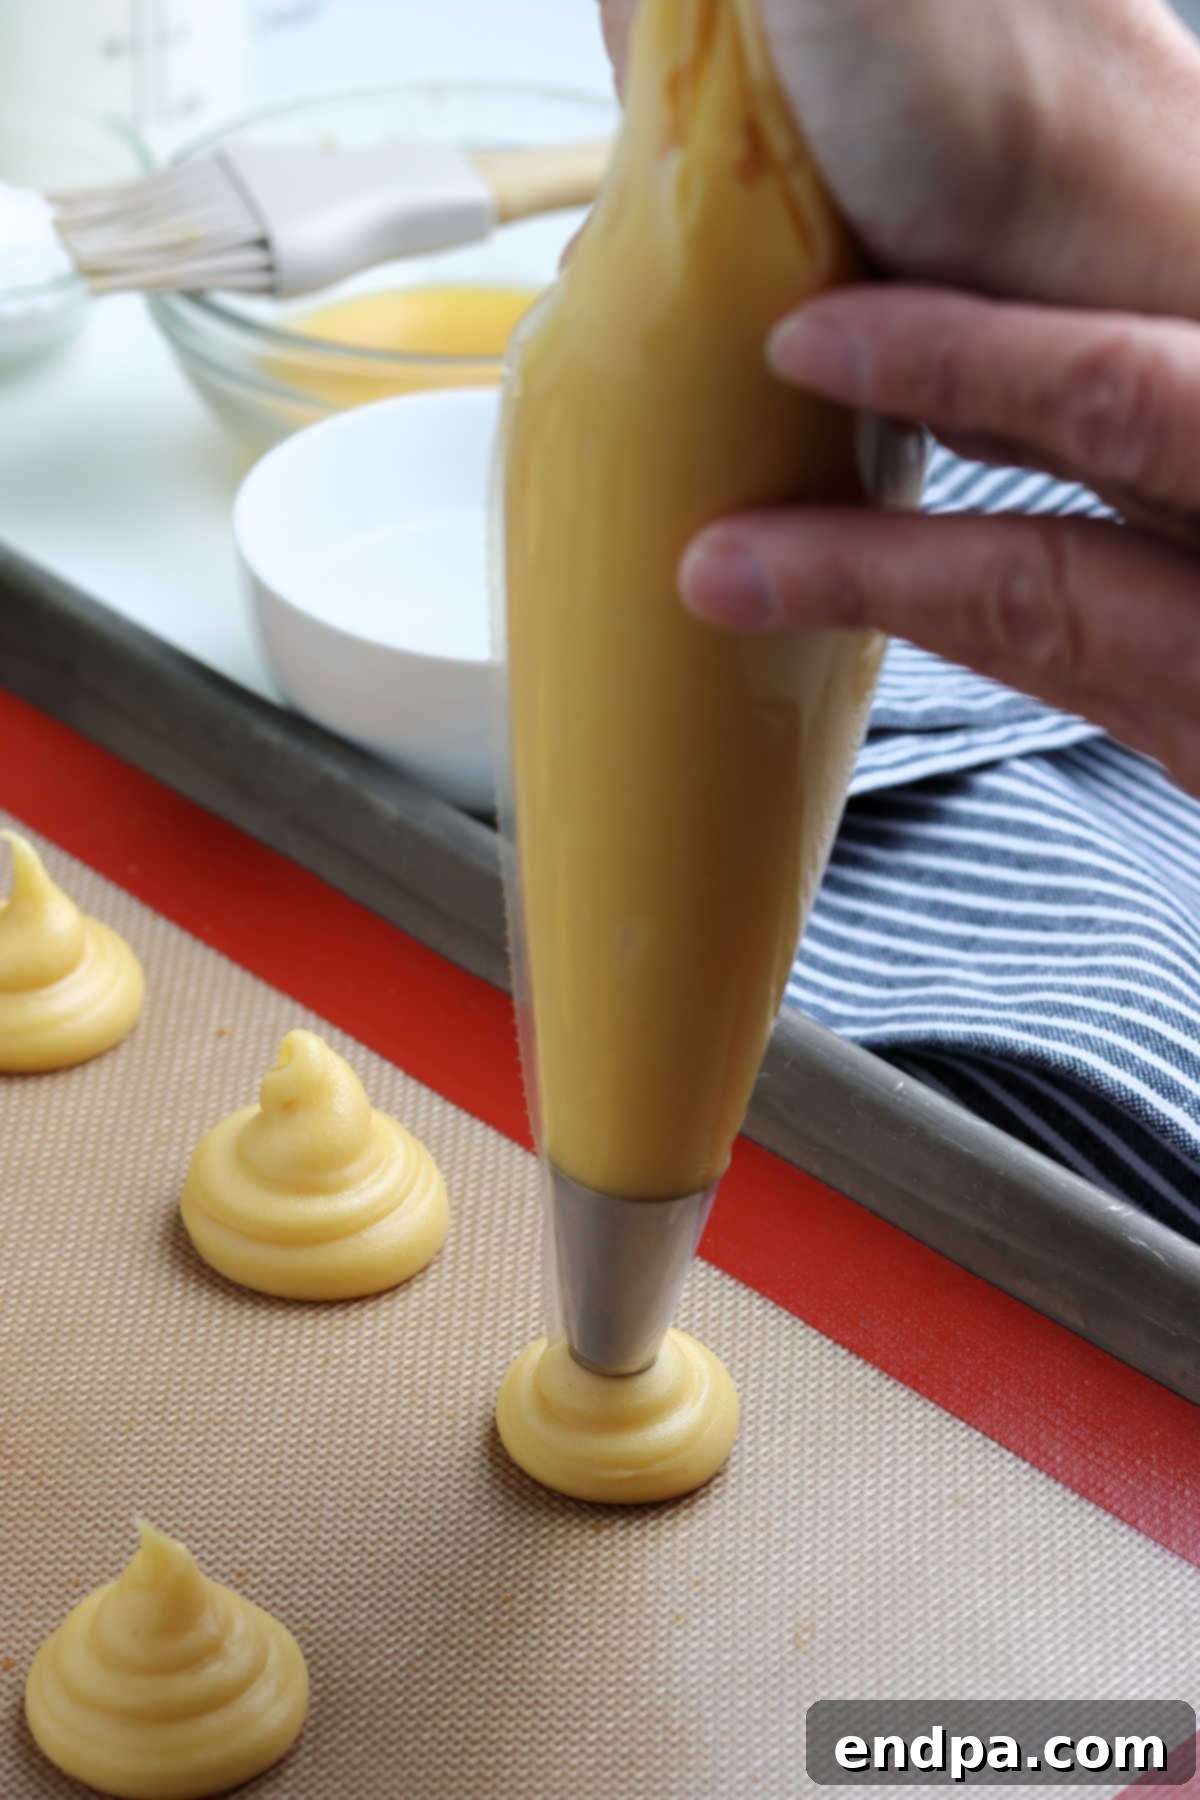
Step 8: Pipe the Dough. Prepare a large disposable decorator piping bag fitted with a large round tip (a 1A or 1M tip works well). Transfer the prepared pastry dough mixture into the bag. Pipe uniform circles, approximately 2 inches in diameter, onto the prepared baking sheet. Leave sufficient space, about 2 inches, between each piped circle to allow for expansion during baking. Consistent sizing helps ensure even baking.
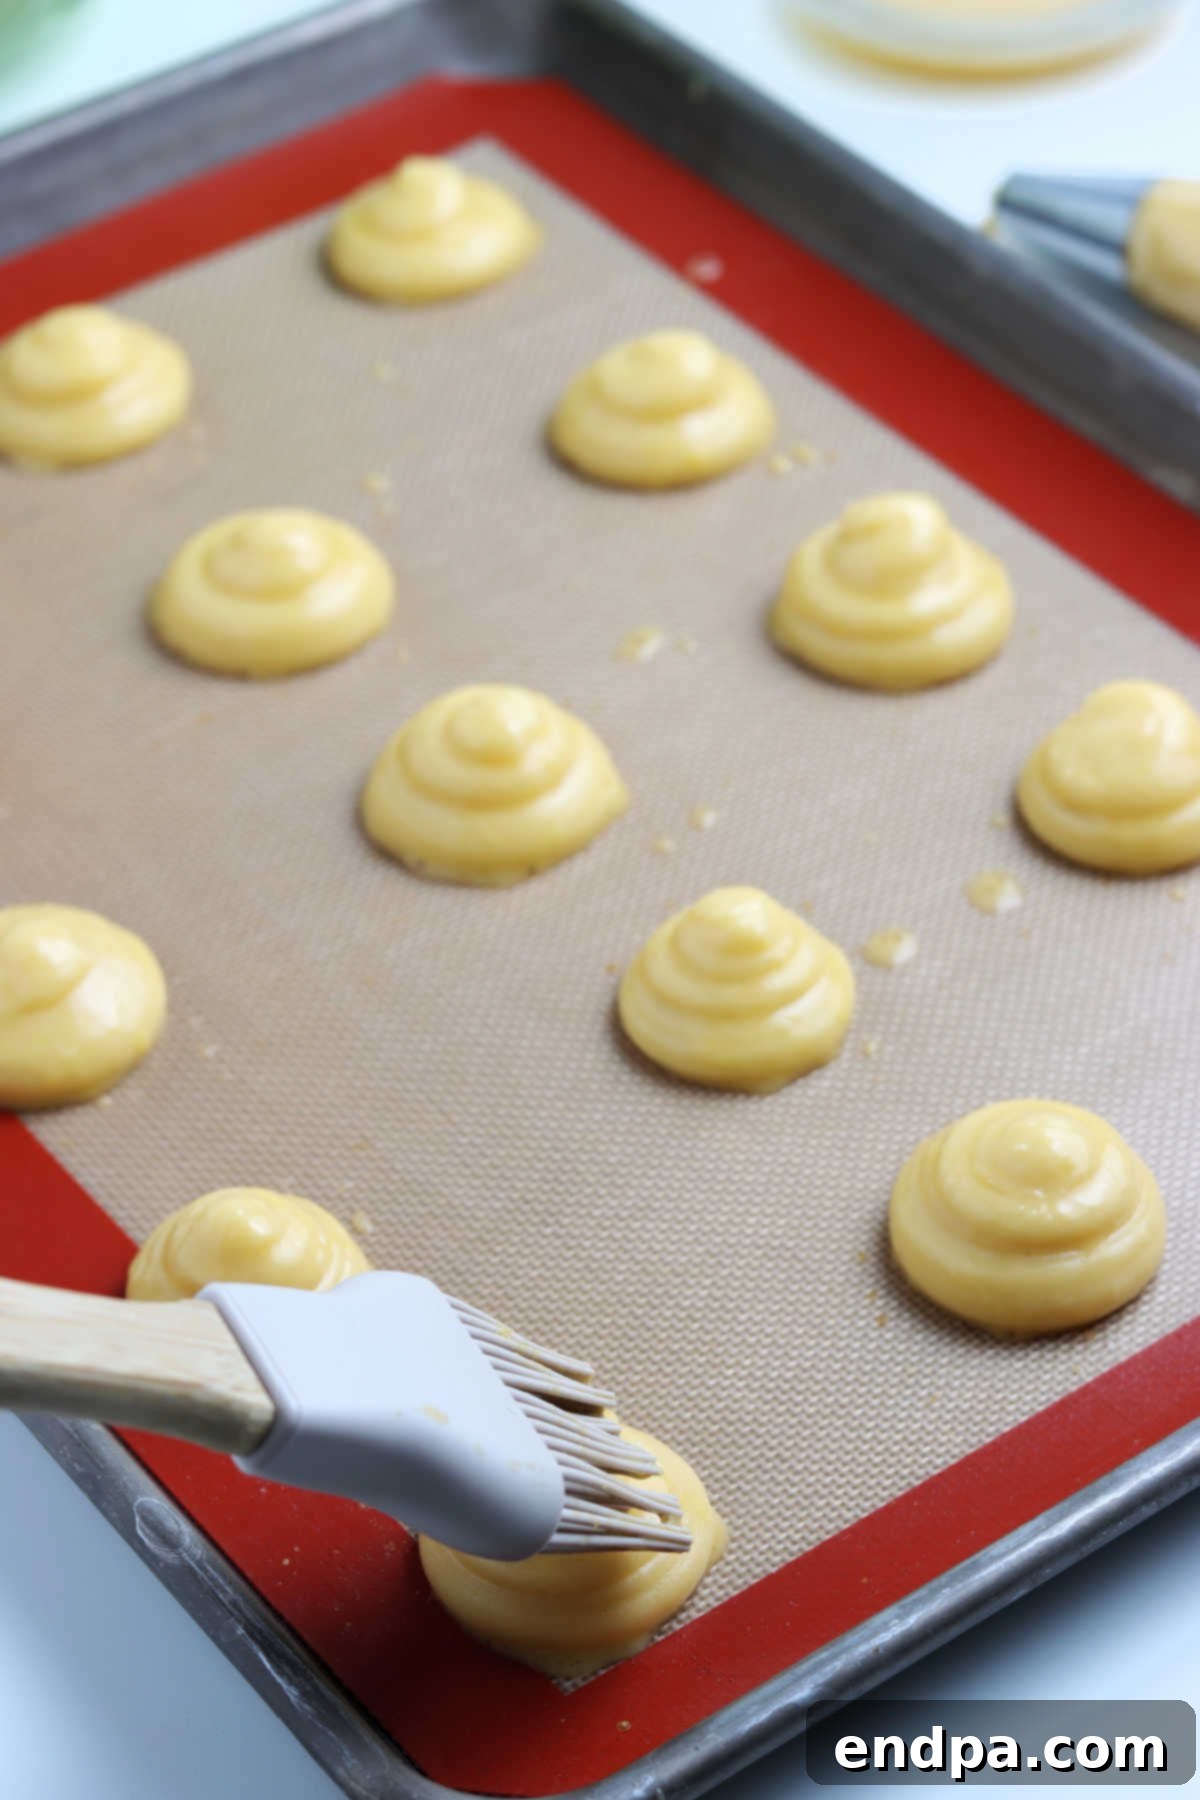
Step 9: Smooth and Glaze. After piping, carefully inspect each dough circle. If there are any pointed peaks, gently moisten your fingertip with water and smooth them down. This helps prevent them from burning in the oven. Then, take your reserved egg wash and lightly brush the surface of each cream puff. The egg wash will contribute to a beautiful golden sheen and a slightly crisp crust.
- Step 10: Bake to Golden Perfection. Place the baking sheet in the preheated oven. Bake for approximately 25-30 minutes, or until the cream puffs have risen significantly, are deeply golden brown, and feel firm to the touch. Avoid opening the oven door during the first 20 minutes, as the sudden drop in temperature can cause the puffs to deflate. Baking time can vary, so keep a close eye on them towards the end.
- Step 11: Cool Completely. Once baked, remove the cream puffs from the oven and immediately transfer them to a wire rack to cool completely. Cooling on a wire rack allows air to circulate around all sides, preventing condensation and keeping the shells crisp. This is crucial before filling.
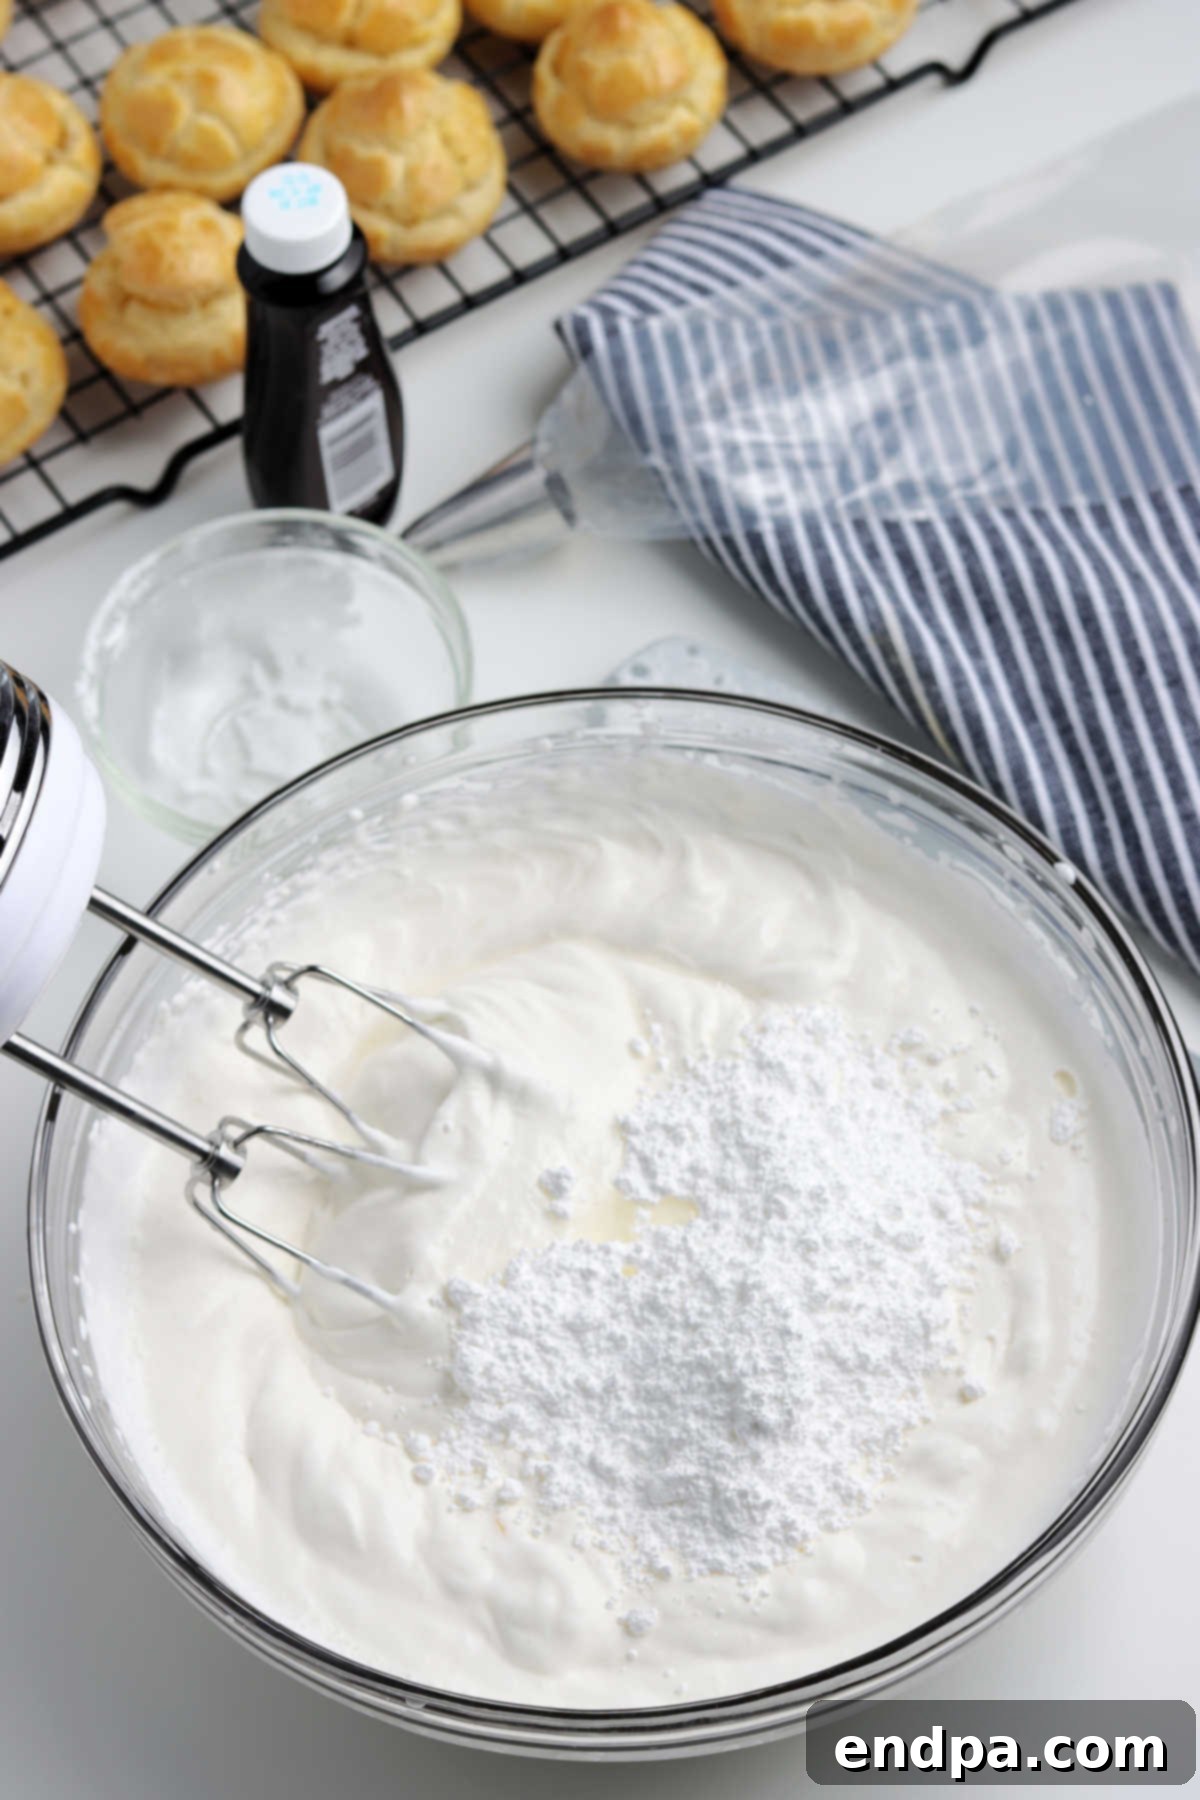
Step 12: Prepare the Decadent Filling. While your cream puff shells are cooling, prepare the **sweet cream filling**. Place a large mixing bowl and your electric mixer beaters in the freezer for about 10-15 minutes to thoroughly chill them. This step is key for achieving perfectly whipped, stable cream. Once chilled, add the very cold heavy whipping cream to the bowl. Beat on medium-high speed until soft peaks begin to form. Gradually add the sifted powdered sugar and the vanilla extract, continuing to beat until stiff peaks form. The cream should be thick and hold its shape.
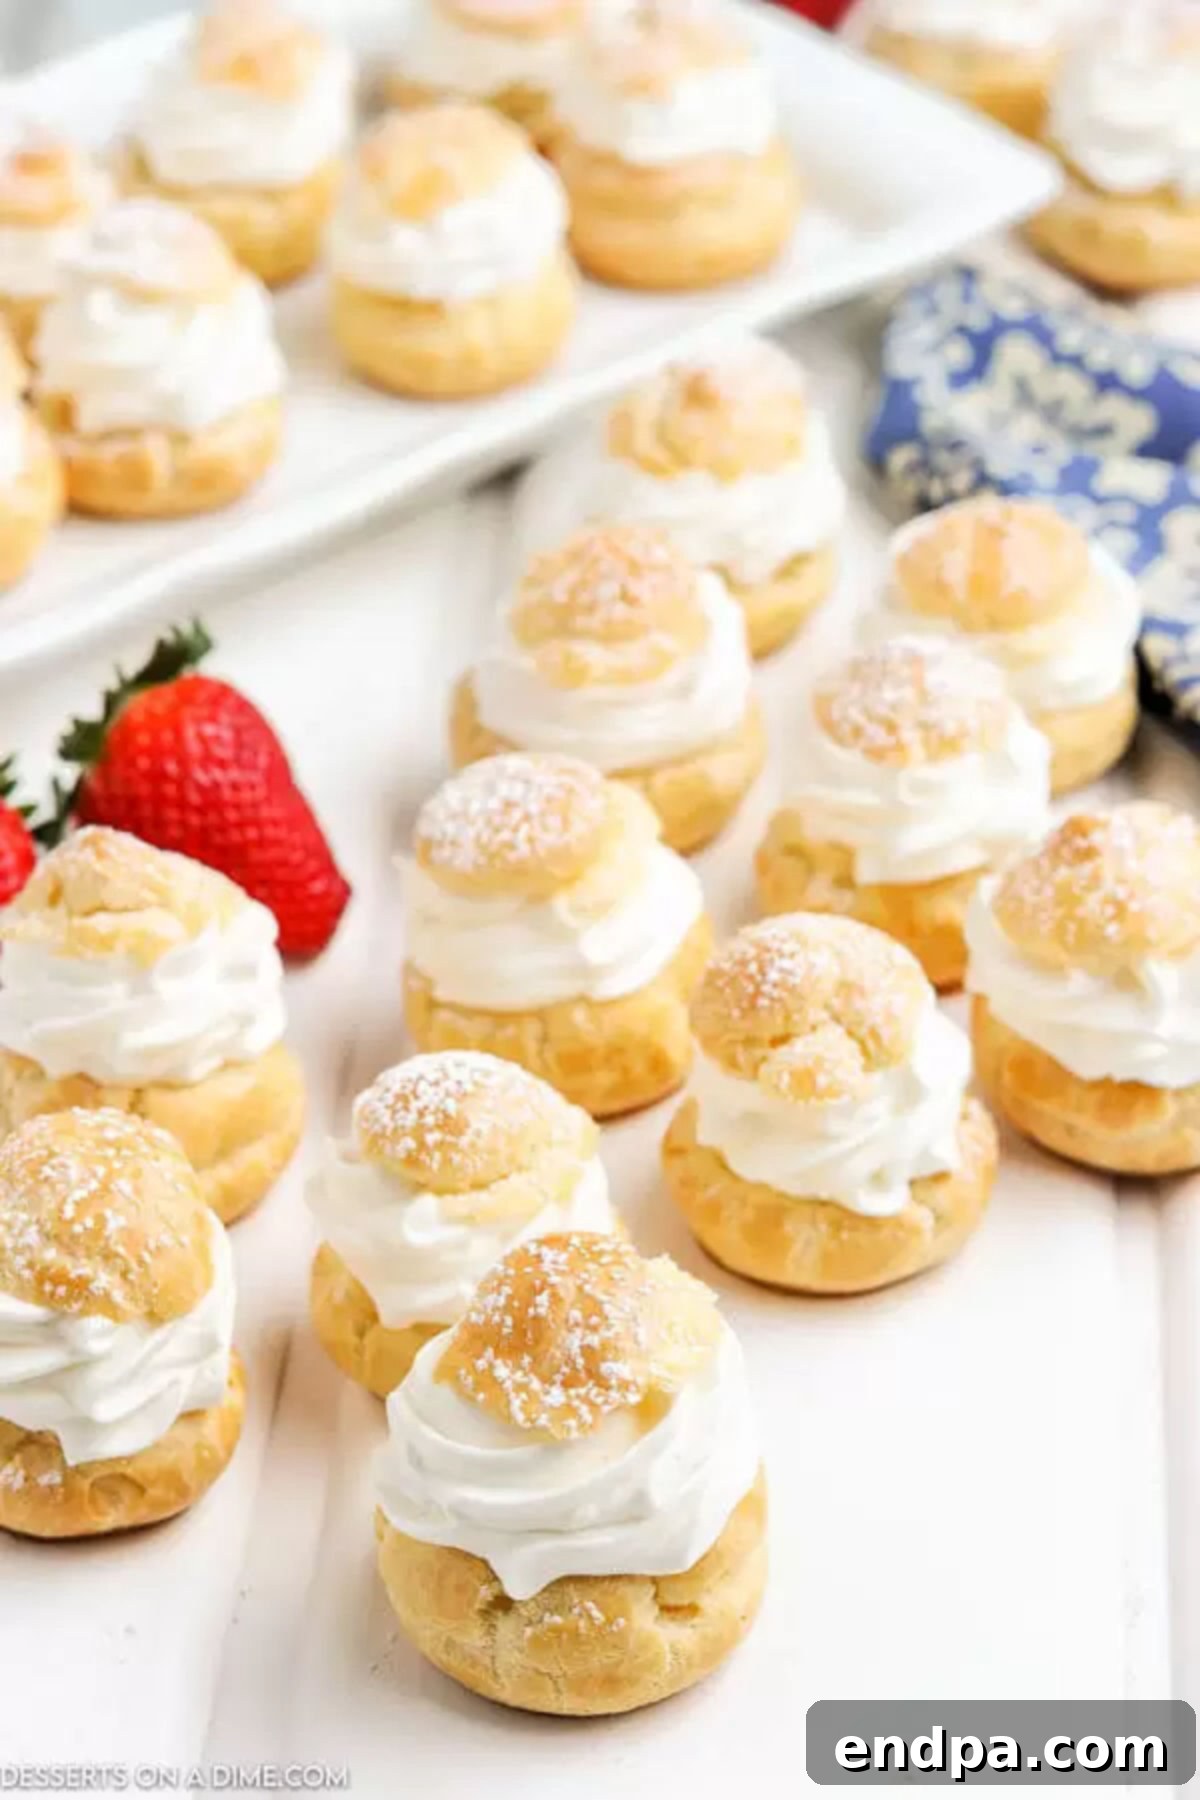
Step 13: Fill the Cream Puffs. Once the cream puffs are completely cool and the filling is ready, it's time to assemble. You can either slice the top portion off each cream puff horizontally with a serrated knife, creating a "lid," or you can poke a small hole in the bottom of each puff and pipe the cream directly inside without cutting. Fill a clean pastry bag fitted with a large round or star tip with the prepared cream filling. Pipe a generous amount of filling into each cream puff. If you cut the tops off, gently place them back on top of the cream.
- Step 14: Timing is Everything. For the best texture and freshness, avoid filling the **homemade cream puffs** more than 4 hours before you plan to serve them. The cream can soften the delicate choux pastry over time.
- Step 15: Garnish and Serve. The final touch! Lightly dust the filled cream puffs with extra powdered sugar for a classic look. For added freshness and color, garnish with your desired toppings, such as fresh strawberries, raspberries, or a drizzle of chocolate. These small details truly elevate the presentation of your **decadent dessert**.

Frequently Asked Questions About Cream Puffs
Several factors can cause your beautiful **homemade cream puffs** to deflate:
- Incorrect Dough Consistency: Ensure the pâte à choux ingredients are combined at the right temperature. The water-butter mixture needs to be hot when you add the flour, allowing the starch to gelatinize. Cooking the dough on the stove until a film forms is crucial for drying out excess moisture.
- Overcrowding the Baking Sheet: It's essential to leave adequate space (at least 2 inches) between each cream puff on the baking sheet. This allows for proper air circulation and steam to escape, which is necessary for them to expand and maintain their structure without collapsing.
- Opening the Oven Door Too Soon: Resist the urge to peek during the first 20-25 minutes of baking. A sudden influx of cold air will cause the delicate steam-filled structure of the cream puffs to collapse, leading to deflation.
- Underbaking: If cream puffs are removed from the oven too early, before their internal structure has fully set and dried, they will often deflate as they cool. They should be deeply golden brown and firm.
To maintain their delightful puffiness, proper storage is key. Unfilled cream puff shells can be stored in an airtight container at room temperature for up to 24 hours. Once filled with the **sweet cream filling**, place your leftover cream puffs in an airtight container and refrigerate them for up to 2-3 days. The cooler temperature helps preserve the cream's stability and prevents the pastry from becoming overly soft too quickly.
Cream puffs are undeniably best when served immediately after being filled with cream. However, if you need to prepare them in advance, aim to fill them no more than 4 hours before serving. This timing strikes a balance, allowing the flavors to meld slightly without the moisture from the cream making the pastry soggy. For optimal crispness, keep the shells separate from the filling until just before serving.
The traditional **cream puff filling** consists of rich, **heavy whipping cream** expertly blended with powdered sugar. A hint of vanilla extract is then added to infuse it with a delightful, warm flavor. While clear vanilla extract helps maintain the cream's pure white color, regular vanilla extract can also be used, imparting a slightly deeper hue and equally delicious taste.
Unfilled cream puff shells should not be stored in the refrigerator for longer than an hour, as the humidity can cause them to soften. If you plan to make the shells in advance and fill them later, store them at room temperature in an airtight container for up to 24 hours. For filled cream puffs, they must be refrigerated in an airtight container and are best consumed within 2-3 days for optimal freshness and texture.
Yes, you absolutely can freeze cream puff shells! You can freeze them for up to 2 months. The key is to freeze the cream puff shells *without* the filling. Once baked and completely cooled, arrange the unfilled shells in a single layer on a baking sheet and freeze until solid. Then, transfer them to a freezer-safe bag or container. When you're ready to serve, simply thaw them at room temperature or refresh them in a warm oven for a few minutes before filling.
Pro Tips for Flawless Cream Puffs
- Baking Sheet Preparation: Always line your baking sheet with parchment paper or a silicone baking mat. This ensures your **choux pastry** doesn't stick and promotes even baking, making cleanup effortless.
- Forming Consistent Balls: When piping the dough, apply even pressure and lift straight up to create uniform, rounded balls. Consistency in size leads to consistent baking. If you notice any small peaks, gently smooth them down with a wet finger before baking.
- Timing the Filling: It's crucial not to fill your **homemade cream puffs** more than 4 hours before serving. The moisture from the cream can cause the delicate pastry shells to become soggy, diminishing their delightful texture.
- Optimal Filling Method: For a classic presentation, we recommend cutting the top off the pastry horizontally. This creates a "lid." Then, generously fill the bottom half with your luscious cream and gently place the top back on before serving. Alternatively, a small hole can be poked in the bottom, and the cream piped directly inside.
- Preheating is Paramount: A properly preheated oven is vital. The high initial heat helps create a burst of steam, which makes the cream puffs rise rapidly and creates their signature hollow interior.
- Room Temperature Eggs: Ensure your eggs are at room temperature. They emulsify much better into the warm choux dough, resulting in a smoother, more consistent batter.
More Delicious & Easy Desserts to Try
If you enjoyed making these **easy cream puffs**, you might love exploring other simple yet impressive dessert recipes:
- Divinity Candy Recipe
- Angel Food Cupcakes Recipe
- Homemade Whoopie Pies Recipe
- Lofthouse Cookies Recipe
- 3 Ingredient Strawberry Icebox Cake Recipe
- Lemon Cupcakes Recipe
We hope you thoroughly enjoy making this amazing recipe for **Cream Puffs**. They are a truly rewarding **homemade dessert** that's perfect for any occasion. Once you've tried this delightful recipe, please share your experience by leaving a comment and a star rating. We love hearing from you!
Pin
Cream Puffs Recipe
5 from 13 votes
Ingredients
- 1 cup water
- ½ cup 1 stick unsalted butter
- ½ teaspoon salt
- 1 ½ teaspoons granulated sugar
- 1 cup all-purpose flour
- 4 eggs plus 1 for egg wash
- Filling
- 2 cups very cold heavy whipping cream
- ¼ cup powdered sugar plus more for dusting
- ½ teaspoon clear vanilla extract ** see notes
- Garnish optional
- Strawberries
- Blackberries
- Raspberries
Instructions
- Preheat oven to 375 degrees F (190 degrees C).
- Line a large baking sheet with parchment paper or a silicone mat.
- In a large saucepan, add water, butter, salt, and sugar.
- Bring to a boil over medium-high heat. Once boiling, remove the pan from heat.
- Quickly stir in the flour with a wooden spoon until well combined and the mixture forms a ball, about 1 minute.
- Return the pan to the stove and continue cooking over medium heat, stirring constantly, until a thin film forms on the bottom of the pan (about 1-2 minutes).
- Remove from heat and transfer the mixture to a large bowl. Let it cool slightly for 5-10 minutes.
- Add the 4 eggs, one at a time, beating to incorporate each egg completely before adding the next. The dough should be smooth and glossy.
- Make an egg wash by whisking the remaining egg with 1 tablespoon of water. Set aside.
- Transfer the dough mixture to a large disposable decorator pastry bag fitted with a large round tip.
- Pipe 2-inch diameter circles onto the prepared baking sheet, leaving about 2 inches between each puff.
- If necessary, moisten your finger with water and gently smooth out any pointed peaks on the piped dough.
- Lightly brush the surface of each cream puff with the prepared egg wash.
- Bake at 375 degrees F (190 degrees C) for 25-30 minutes, or until the puffs have risen, are deeply golden brown, and feel firm. Avoid opening the oven door during the first 20 minutes.
- Remove from the oven and allow to cool completely on wire racks.
- For the Cream Filling:
- While cream puff shells are cooling, place a large mixing bowl and your electric mixer beaters in the freezer to chill thoroughly.
- When the cream puffs are cooled, remove the bowl and beaters from the freezer.
- Add the very cold heavy cream to the chilled bowl and beat on medium-high speed until soft peaks form.
- Gradually add the powdered sugar and vanilla extract, continuing to beat until stiff peaks form and the cream is firm.
- Fit a clean pastry bag with your desired tip (round or star) and fill with the prepared cream.
- To fill, either cut the top portion of each cream puff off with a knife, fill with pastry cream, and replace the top.
- Alternatively, you can leave the cream puff whole and pipe the filling into a small hole poked in the bottom.
- Fill the cream puffs no more than 4 hours prior to serving for best results.
- Dust with powdered sugar or garnish with fresh berries, if desired.
- Store filled cream puffs in the refrigerator.
Recipe Notes
Nutrition Facts
Pin This Now to Remember It Later
Pin Recipe
