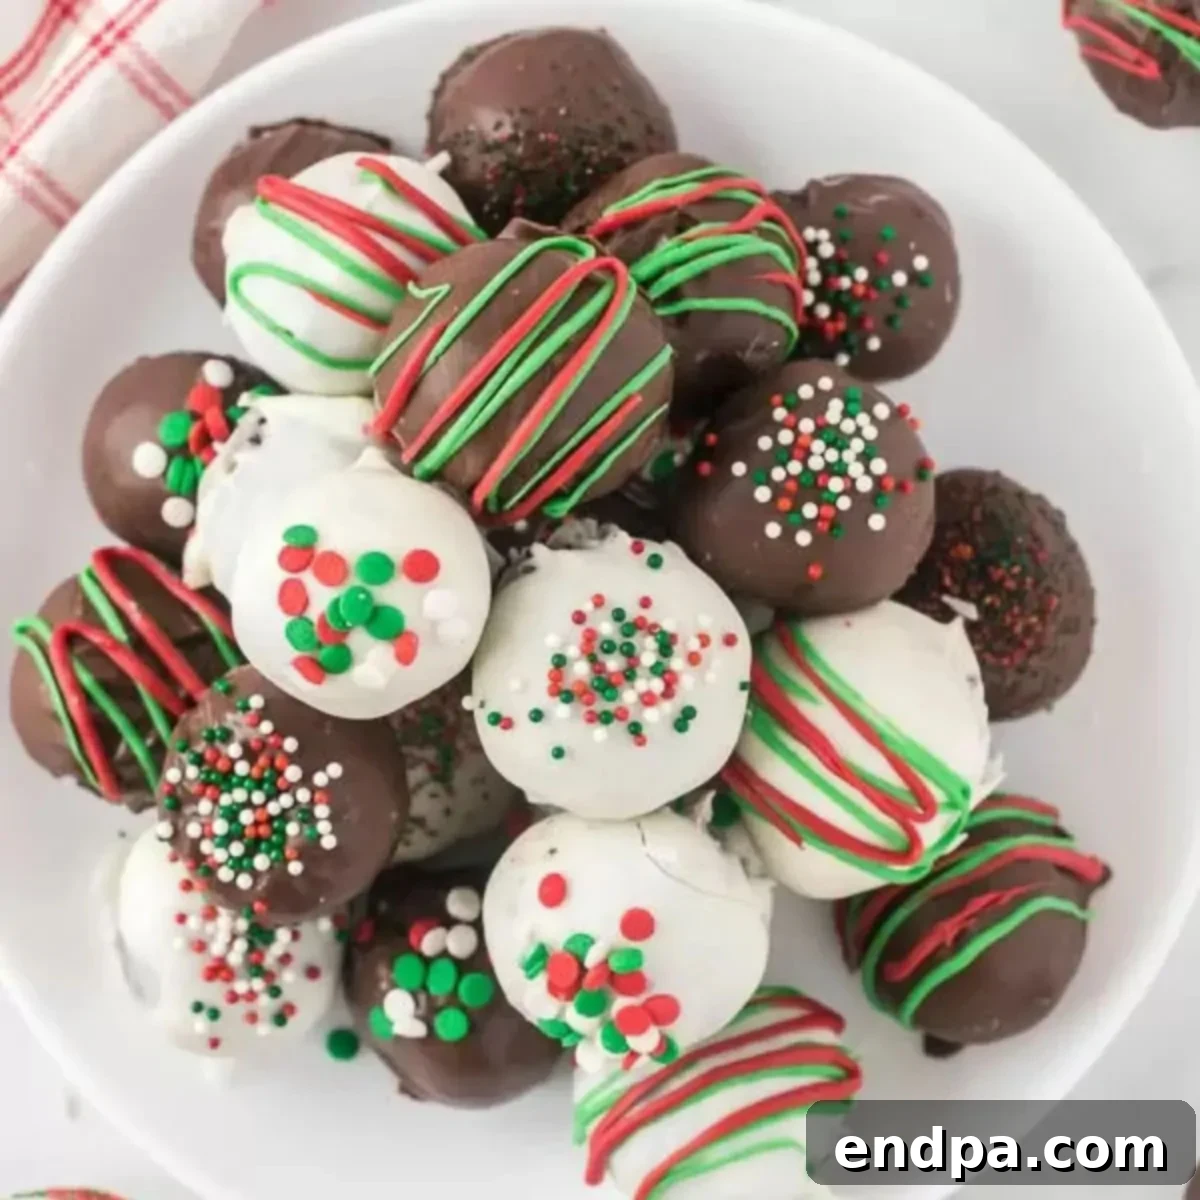
Easy Christmas Oreo Balls: The Ultimate No-Bake Holiday Treat
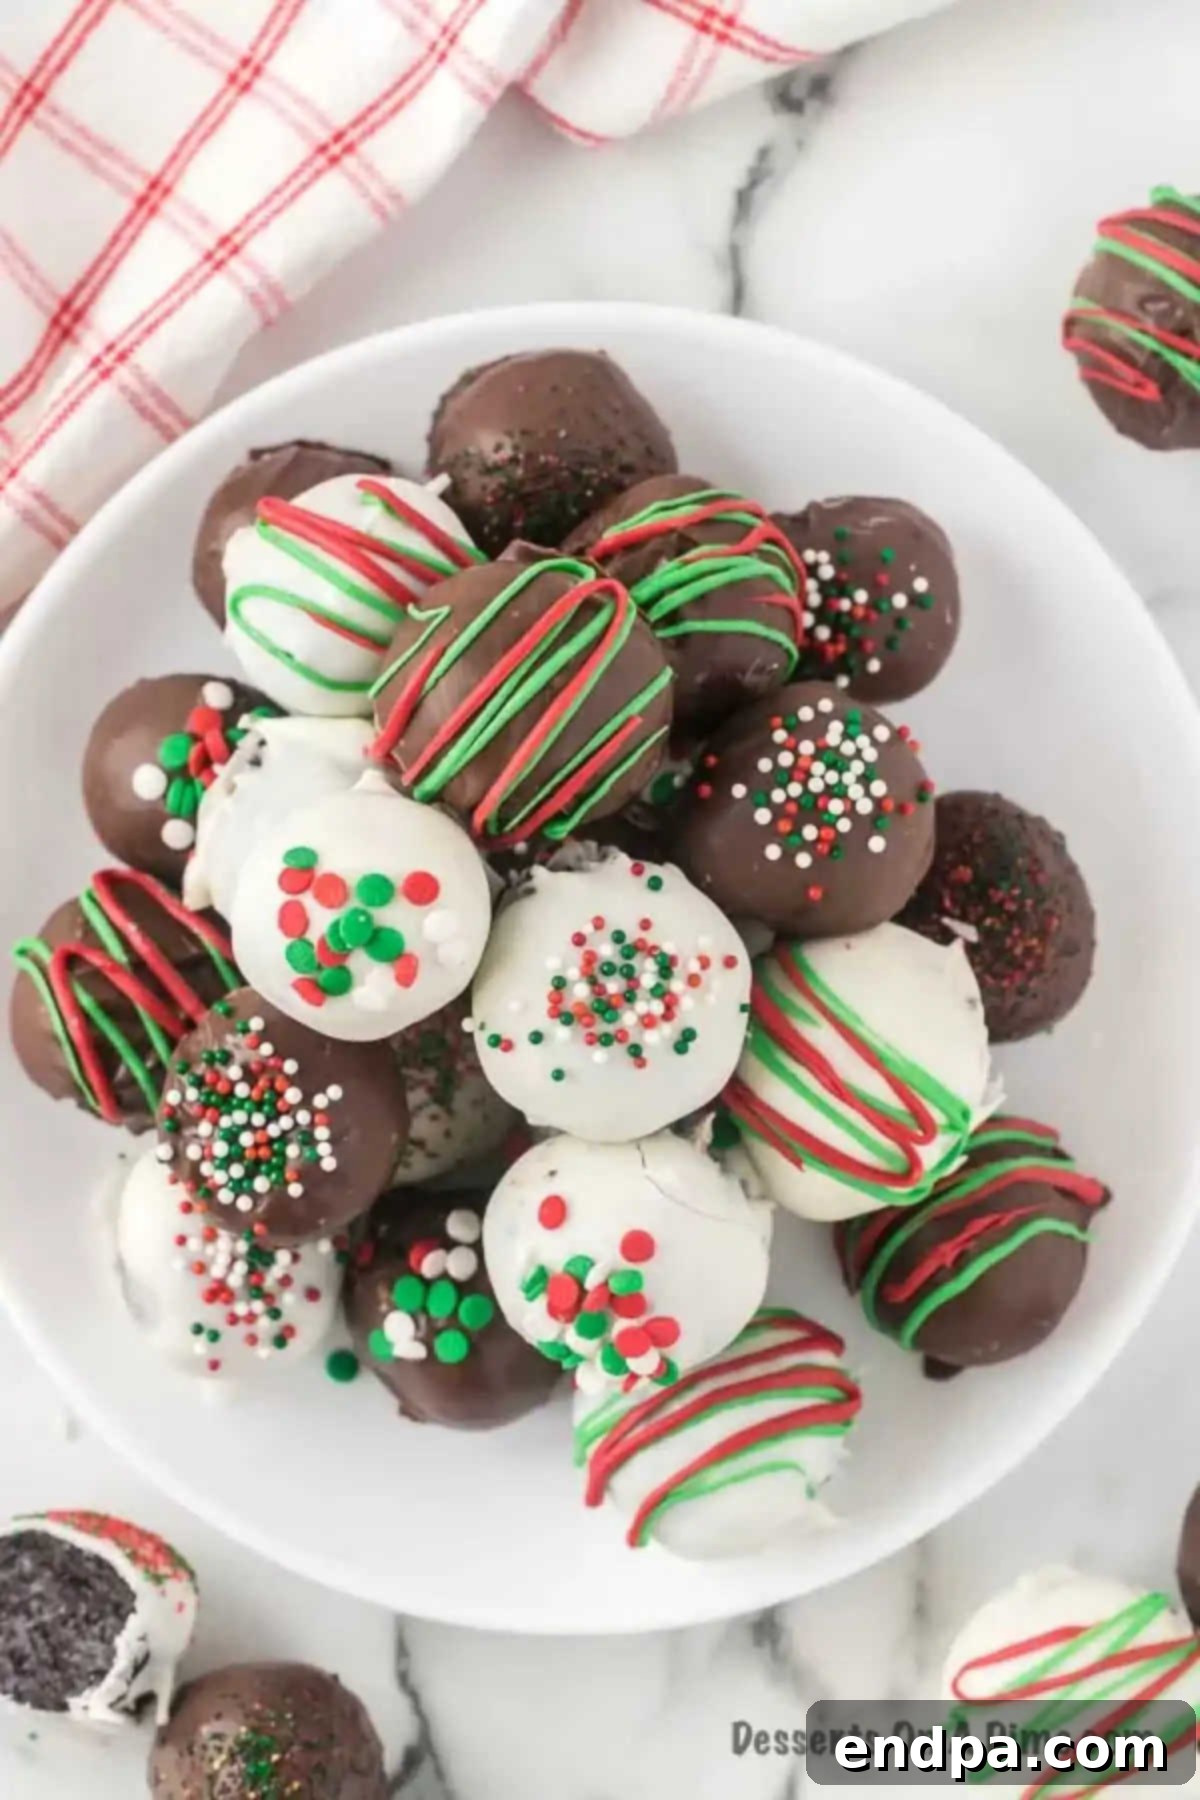
Transform your holiday dessert table with these incredibly simple yet utterly delicious Christmas Oreo Balls. A truly festive and easy-to-make treat, these decadent no-bake truffles are perfect for adding a touch of magic to your seasonal celebrations. Combining the rich flavor of crushed Oreo cookies with a creamy, dreamy cream cheese filling and a luxurious chocolate coating, they are then adorned with vibrant Christmas sprinkles, making them as visually appealing as they are irresistibly tasty. Forget complex baking; this recipe is all about effortless elegance and pure holiday joy.
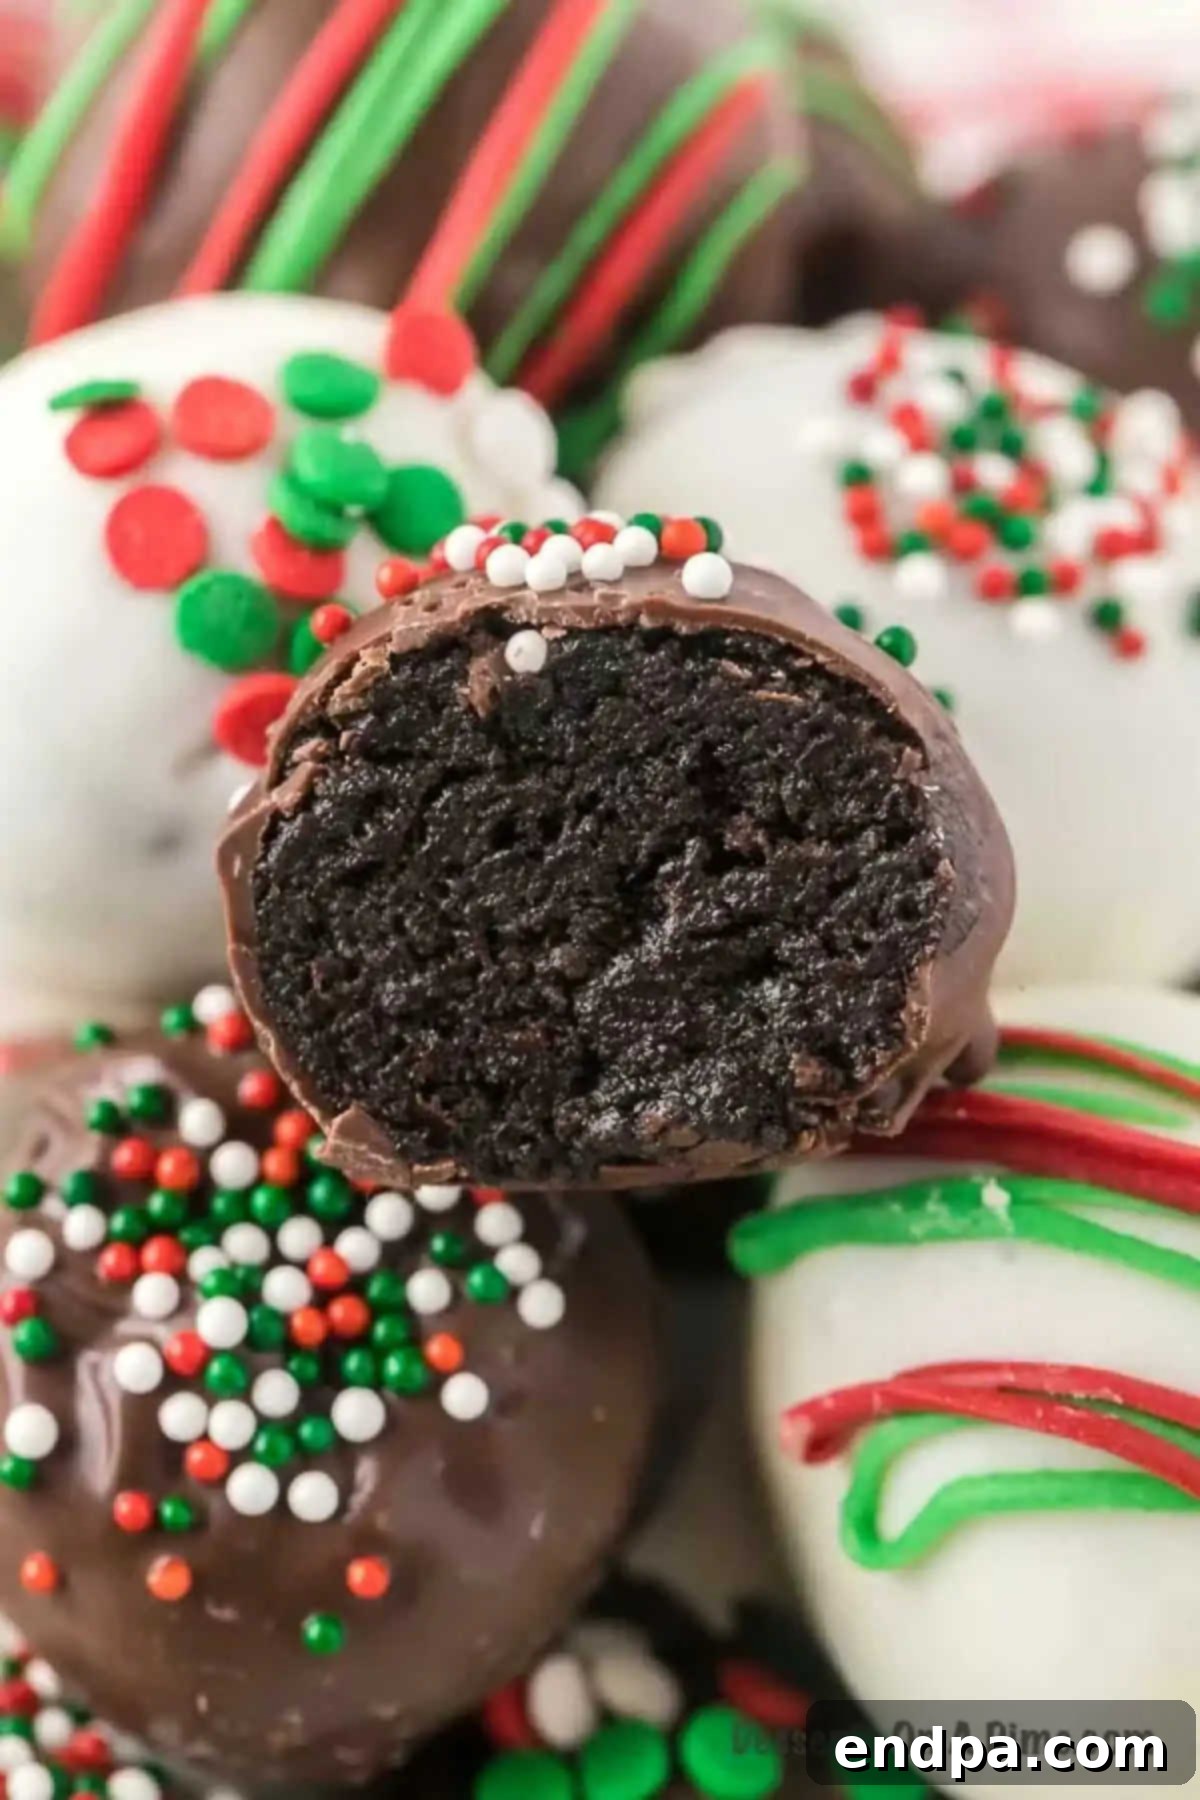
These delightful Oreo cookie balls require minimal time and effort but deliver maximum impact. Their irresistible core, made from just two essential ingredients – finely crushed Oreo cookies and softened cream cheese – offers a textural contrast that’s simply heavenly. Each ball is then generously dipped in smooth, melted chocolate and finished with a flourish of colorful Christmas sprinkles, making them look like tiny edible ornaments. They are not just yummy; they are wonderfully festive, instantly elevating any holiday gathering with their cheerful appearance and delightful taste. Their no-bake nature makes them an ideal activity for all ages, including enthusiastic little helpers in the kitchen.
Year after year, these no-bake treats consistently steal the show on my dessert table. Their charming appearance makes them a fantastic centerpiece, often arranged alongside other beloved holiday treats. Imagine a stunning tiered tray showcasing these festive Oreo Balls next to classic Buckeye Balls, elegant Red Velvet Cake Balls, or even playful Snowman Oreo Balls. This simple recipe ensures you can create an impressive display without the stress of extensive baking, leaving more time for what truly matters during the holiday season.
Table of Contents: Your Guide to Perfect Christmas Oreo Balls
- Why These Christmas Oreo Balls Are a Holiday Must-Make
- Essential Ingredients for Your Oreo Truffles
- Creative Variations to Customize Your Oreo Balls
- Step-by-Step: How to Make Christmas Oreo Balls
- Expert Tips and Tricks for Oreo Ball Success
- Frequently Asked Questions About Oreo Balls
- More Irresistible Christmas Desserts to Try
- Printable Christmas Oreo Balls Recipe Card
Why These Christmas Oreo Balls Are a Holiday Must-Make:
There are countless reasons why this Christmas Oreo Balls recipe has become a beloved staple in homes and holiday parties everywhere. First and foremost, its unparalleled simplicity makes it a favorite among busy hosts and novice bakers alike. You only need a handful of readily available ingredients, transforming them into a show-stopping dessert with minimal fuss. This straightforward approach means less stress during the often-hectic holiday season, allowing you more time to enjoy with loved ones and focus on other festive preparations.
Another major advantage is that this is a truly no-bake treat. There’s no need to preheat the oven, wait for cakes to bake, or worry about precise temperatures. The entire process unfolds efficiently on your countertop, saving energy and keeping your kitchen cool – a definite bonus when you’re already juggling multiple holiday preparations. The quick assembly also means you can whip up a batch last minute if unexpected guests arrive, or even get the kids involved in a fun, mess-free kitchen activity that yields delicious results.
Beyond the ease, the taste is simply divine. The combination of the rich, slightly bitter chocolate of the Oreo cookies with the tangy, smooth cream cheese creates a decadently flavorful filling. Encased in a crisp layer of melted chocolate, each bite offers a delightful contrast of textures and tastes that is incredibly satisfying. These truffles possess a sophisticated sweetness that appeals to all ages, making them a universal crowd-pleaser. They feel indulgent and special, without requiring any advanced culinary skills or specialty equipment.
Furthermore, their versatility is a huge plus. While perfectly suited for Christmas with traditional red and green adornments, they can be customized for any occasion, holiday, or theme, as we’ll explore in the variations section below. They are also excellent make-ahead desserts, allowing you to prepare them days in advance and store them in the refrigerator or freezer. This invaluable feature frees up precious time closer to your event, enabling you to relax and enjoy the festivities. Whether for a holiday potluck, a school party, a thoughtful gift for neighbors, or simply a sweet indulgence for your family, these Easy Oreo Truffles are guaranteed to be a hit every single time.
Essential Ingredients for Your Perfect Oreo Truffles:
Crafting these delectable Oreo cream cheese balls requires just a few key components, each playing a crucial role in achieving that perfect balance of flavor and texture. Opting for quality ingredients, even in simple recipes like this, can significantly enhance the final taste and presentation of your holiday treats.
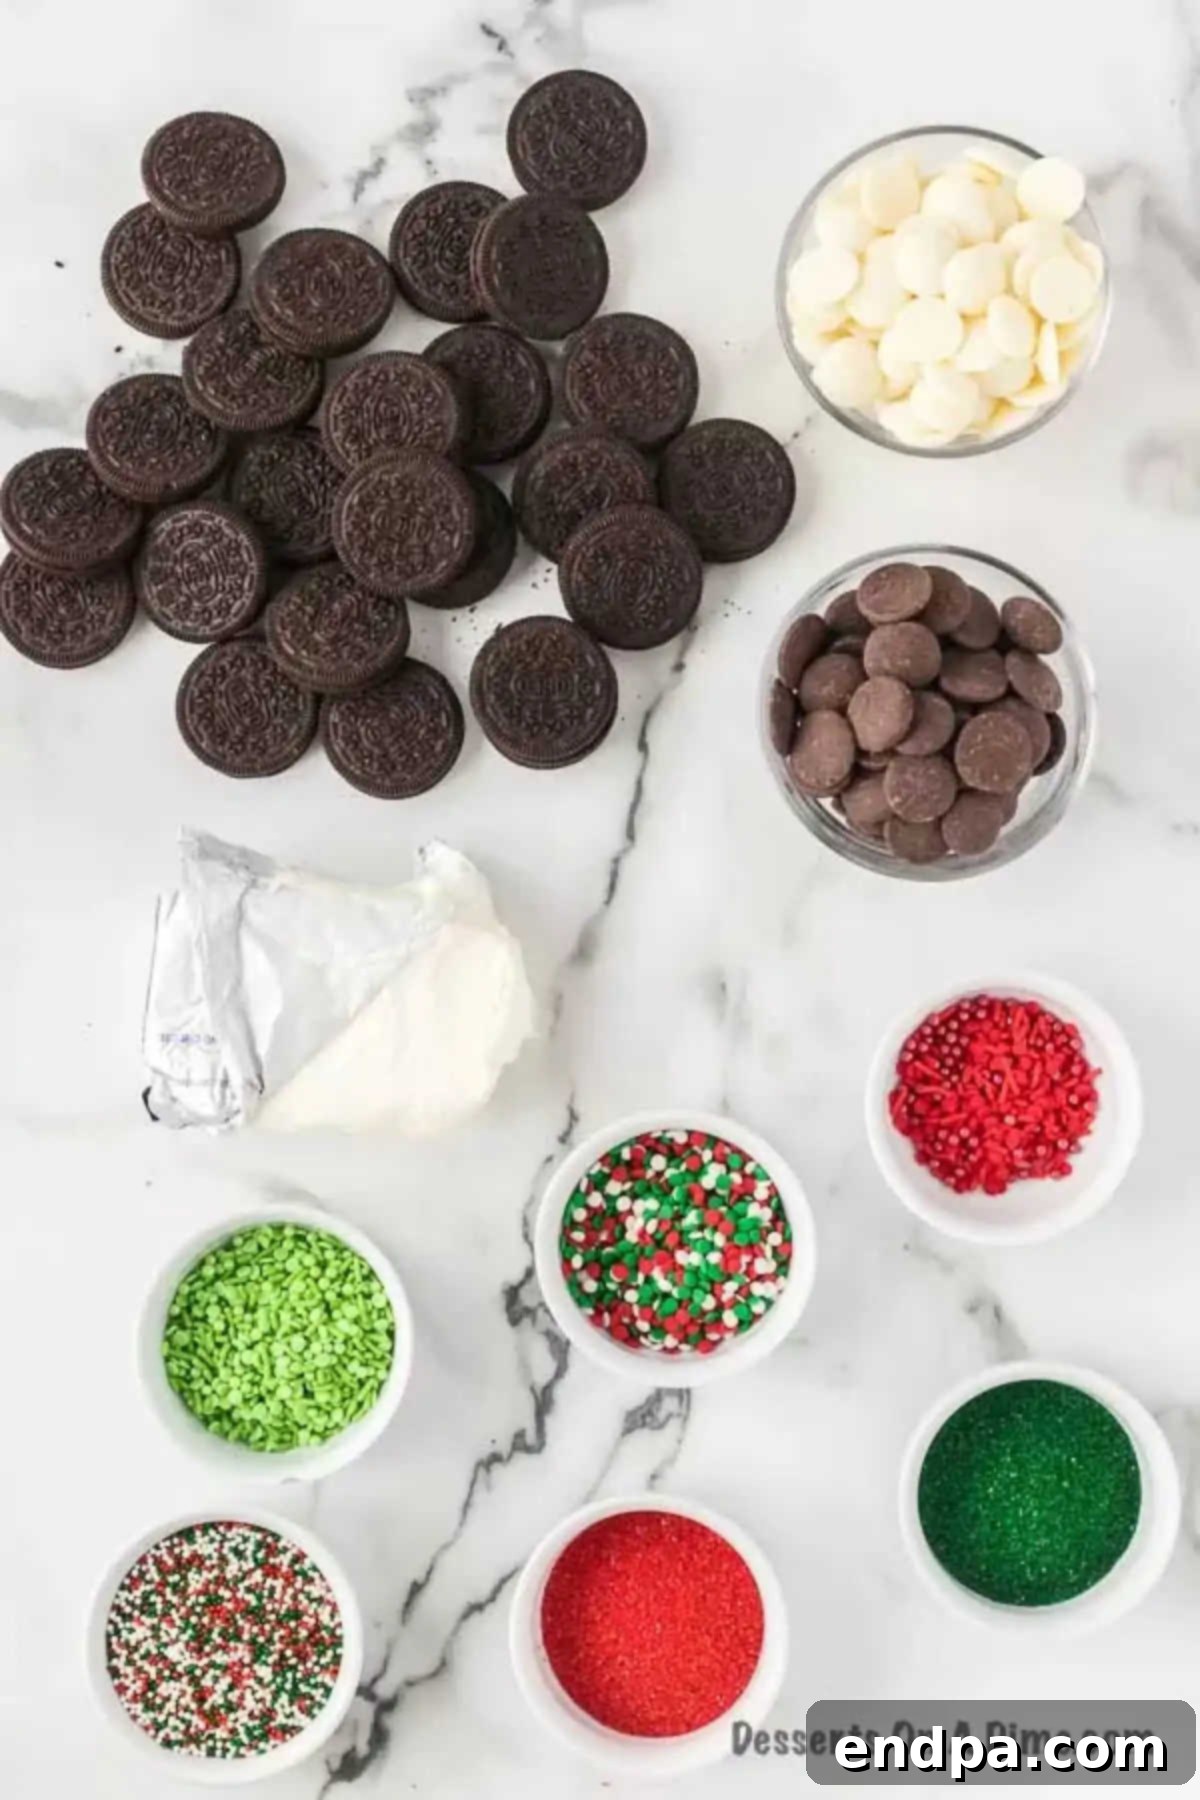
- Cream Cheese: This is the backbone of our truffle filling, providing that essential tangy sweetness and incredibly creamy texture. For the best results, always opt for full-fat, block-style cream cheese, ensuring it’s softened to room temperature before you begin mixing for easier, lump-free blending.
- Oreo Cookies: The undisputed star of the show! A standard 14.5 oz package of original Oreo cookies works perfectly. We’ll be crushing these, cream filling and all, so no need for fancy flavors unless you’re intentionally trying one of our delightful variations.
- Chocolate Dipping Chips: Essential for achieving a smooth, even, and decadent coating. High-quality melting wafers or chocolate chips specifically designed for dipping will yield the best results, ensuring a beautiful, glossy finish that hardens quickly and cracks perfectly with each bite.
- White Chocolate Dipping Chips: To add variety, a lovely contrasting color, and a lighter flavor profile to your holiday spread. White chocolate also serves as a fantastic, bright canvas for colorful sprinkles and festive candy melt drizzles.
- Green Candy Melts: These are specifically for festive drizzles and adding an extra vibrant pop of Christmas color. Candy melts are formulated to melt smoothly and harden quickly, making detailed decoration a complete breeze for even novice decorators.
- Red Candy Melts: Complementing the green, these red candy melts will complete your classic holiday color scheme, allowing for vibrant, eye-catching, and playful designs on your truffles, making them truly stand out.
- Christmas Sprinkles: The ultimate festive touch! Choose an assortment of red, green, and white sprinkles, festive nonpareils, or specific holiday shapes (like tiny stars or trees) to make your Oreo truffles truly sparkle and capture the spirit of the season.
The detailed ingredient list with exact measurements and comprehensive step-by-step instructions can be found in the printable recipe card at the bottom of this post, ensuring you have everything you need to confidently create these holiday masterpieces.
Creative Variations to Customize Your Christmas Oreo Balls:
While the classic Christmas Oreo Balls recipe is perfect as is, part of its undeniable charm lies in how incredibly versatile and adaptable it is. You can easily adapt these no-bake treats to suit different tastes, complement various occasions, or simply to add a unique and personalized twist to your holiday assortment. Here are some fantastic variations to inspire your culinary creativity and ensure your truffles are always a hit:
- Almond Bark for Coating: For a slightly different flavor profile and an often easier melting experience, you can effortlessly substitute almond bark for the chocolate dipping chips. Both white and chocolate almond bark are readily available in most grocery stores and work wonderfully for creating a smooth, quick-setting coating.
- Rich Dark Chocolate: If you’re a connoisseur of deeper, more intense chocolate flavors, swap out the regular chocolate dipping chips for a high-quality dark chocolate. The subtle bitterness of dark chocolate beautifully complements the sweet and creamy Oreo and cream cheese interior, creating a more sophisticated and less sweet truffle.
- Year-Round Sprinkles: Don’t limit these delightful treats to just Christmas! By simply changing the sprinkles, you can adapt them for any holiday or celebration imaginable. Think cheerful pastel sprinkles for Easter or spring parties, romantic red and pink for Valentine’s Day, spooky orange and black for Halloween, or even your favorite team colors for a game day gathering. The decorative possibilities are truly endless!
- Colorful Candy Melts for Any Holiday: Expand your palette beyond just red and green! Utilize other vibrant colors of candy melts to match any theme or occasion. Imagine elegant pink and red drizzles for a charming Valentine’s Day treat, cheerful pastels for spring gatherings or Easter baskets, or even shimmering blue and white for Hanukkah celebrations.
- Fun Oreo Cake Pops: Transform your truffles into charming and easy-to-handle cake pops! Before dipping them in chocolate, gently insert a sturdy lollipop stick into the center of each Oreo ball. This not only makes them easier to eat but also adds a playful, carnival-like element that kids and adults alike will absolutely adore.
- Crushed Candy Toppings: Elevate both the flavor and texture by adding a crunchy layer of crushed candy. For a classic Christmas twist, generously sprinkle crushed candy canes or peppermints over the still-wet chocolate coating for a delightful minty crunch. Other irresistible ideas include crushed toffee bits, mini chocolate chips, or even finely chopped nuts like pecans or walnuts.
- Experiment with Oreo Flavors: While the traditional original Oreo is a perennial favorite, don’t shy away from exploring other exciting Oreo varieties in this recipe! Mint-filled Oreos create an amazing, refreshing peppermint truffle, while peanut butter or golden Oreos can open up a whole new world of delicious flavor combinations. Imagine pumpkin spice Oreos for fall festivities or even birthday cake Oreos for a joyous celebration.
- Oreo Crumb Topping: For an extra layer of concentrated Oreo goodness and sophisticated visual appeal, crush a few additional Oreo cookies and use the fine crumbs as a topping. This looks particularly striking and elegant against the white chocolate-coated truffles, offering a beautiful monochrome contrast and an extra burst of cookie flavor.
- Coconut Flakes: For those who love tropical flavors and added texture, rolling the freshly dipped balls in finely shredded coconut flakes (either toasted for a nutty flavor or untoasted for a softer chew) adds a wonderful dimension and exotic taste.
- Espresso Powder Boost: A tiny pinch of instant espresso powder or finely ground coffee added to the cream cheese mixture can subtly enhance the chocolate flavor of the Oreos, making the truffles taste even richer, deeper, and more complex without making them taste like coffee.
These diverse variations demonstrate how a single, simple base recipe can be endlessly re-imagined and personalized, ensuring your no-bake Oreo truffles are always fresh, exciting, and perfectly suited to any occasion or craving.
Step-by-Step: How to Make Christmas Oreo Balls:
Creating these festive and delicious Christmas Oreo Balls is an incredibly straightforward process, perfect for beginners and seasoned dessert makers alike. Follow these simple, easy-to-understand steps to ensure your truffles turn out perfectly and beautifully every single time, ready to impress your holiday guests.
- Step 1: Prepare Your Workspace. Begin by lining a large cutting board or a baking sheet with parchment paper. This non-stick surface is absolutely crucial for preventing the balls from sticking both before and after dipping, and it will make the cleanup process incredibly easy, especially when dealing with melted chocolate.
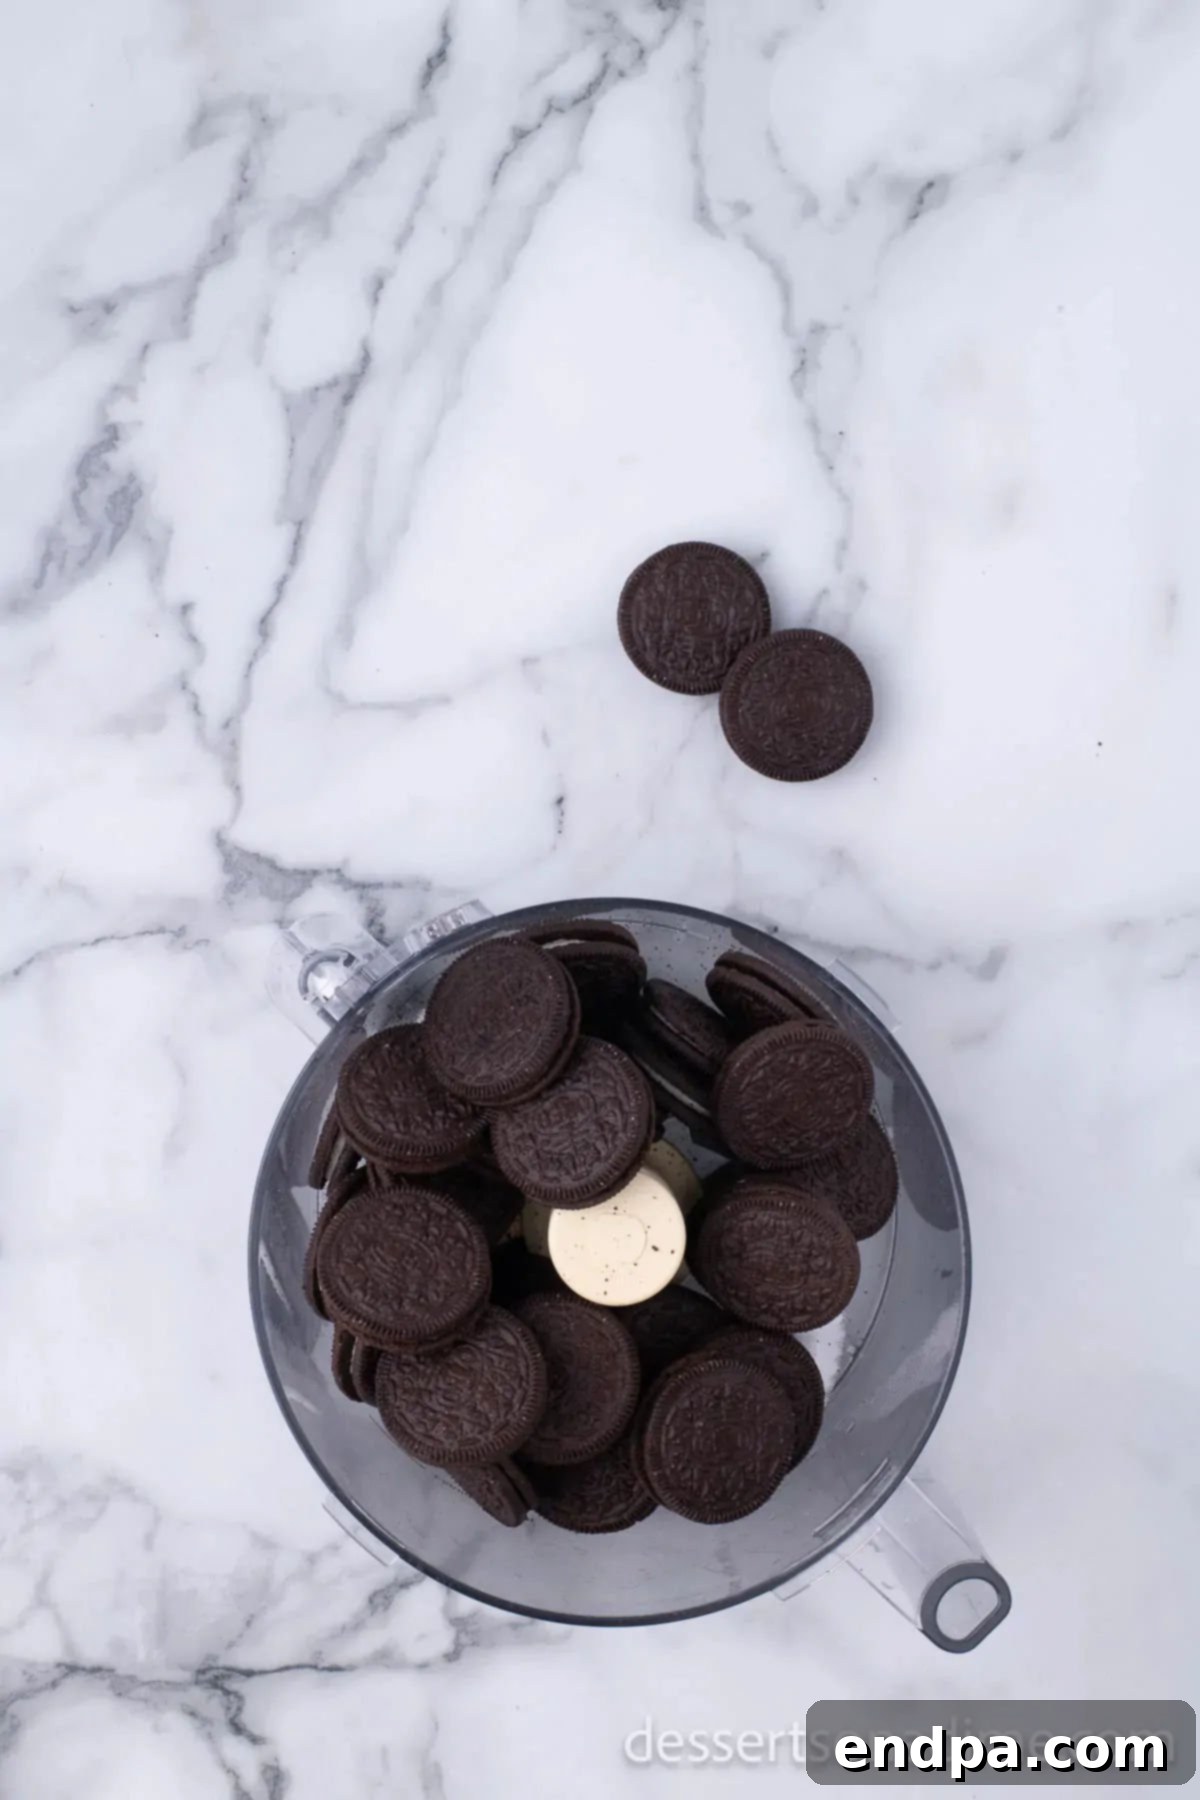
Step 2: Crush the Oreo Cookies. Take your entire package of Oreo cookies (no need to remove the cream filling!) and place them directly into a food processor. Pulse the processor until the cookies are transformed into very fine, sand-like crumbs. The finer the crumbs, the smoother and more cohesive your truffle mixture will be. If you don’t have a food processor, simply place the cookies in a large, heavy-duty Ziploc bag, seal it securely, and use a rolling pin or the back of a heavy spoon to pound them into fine crumbs. Ensure there are no large chunks remaining for the best texture.
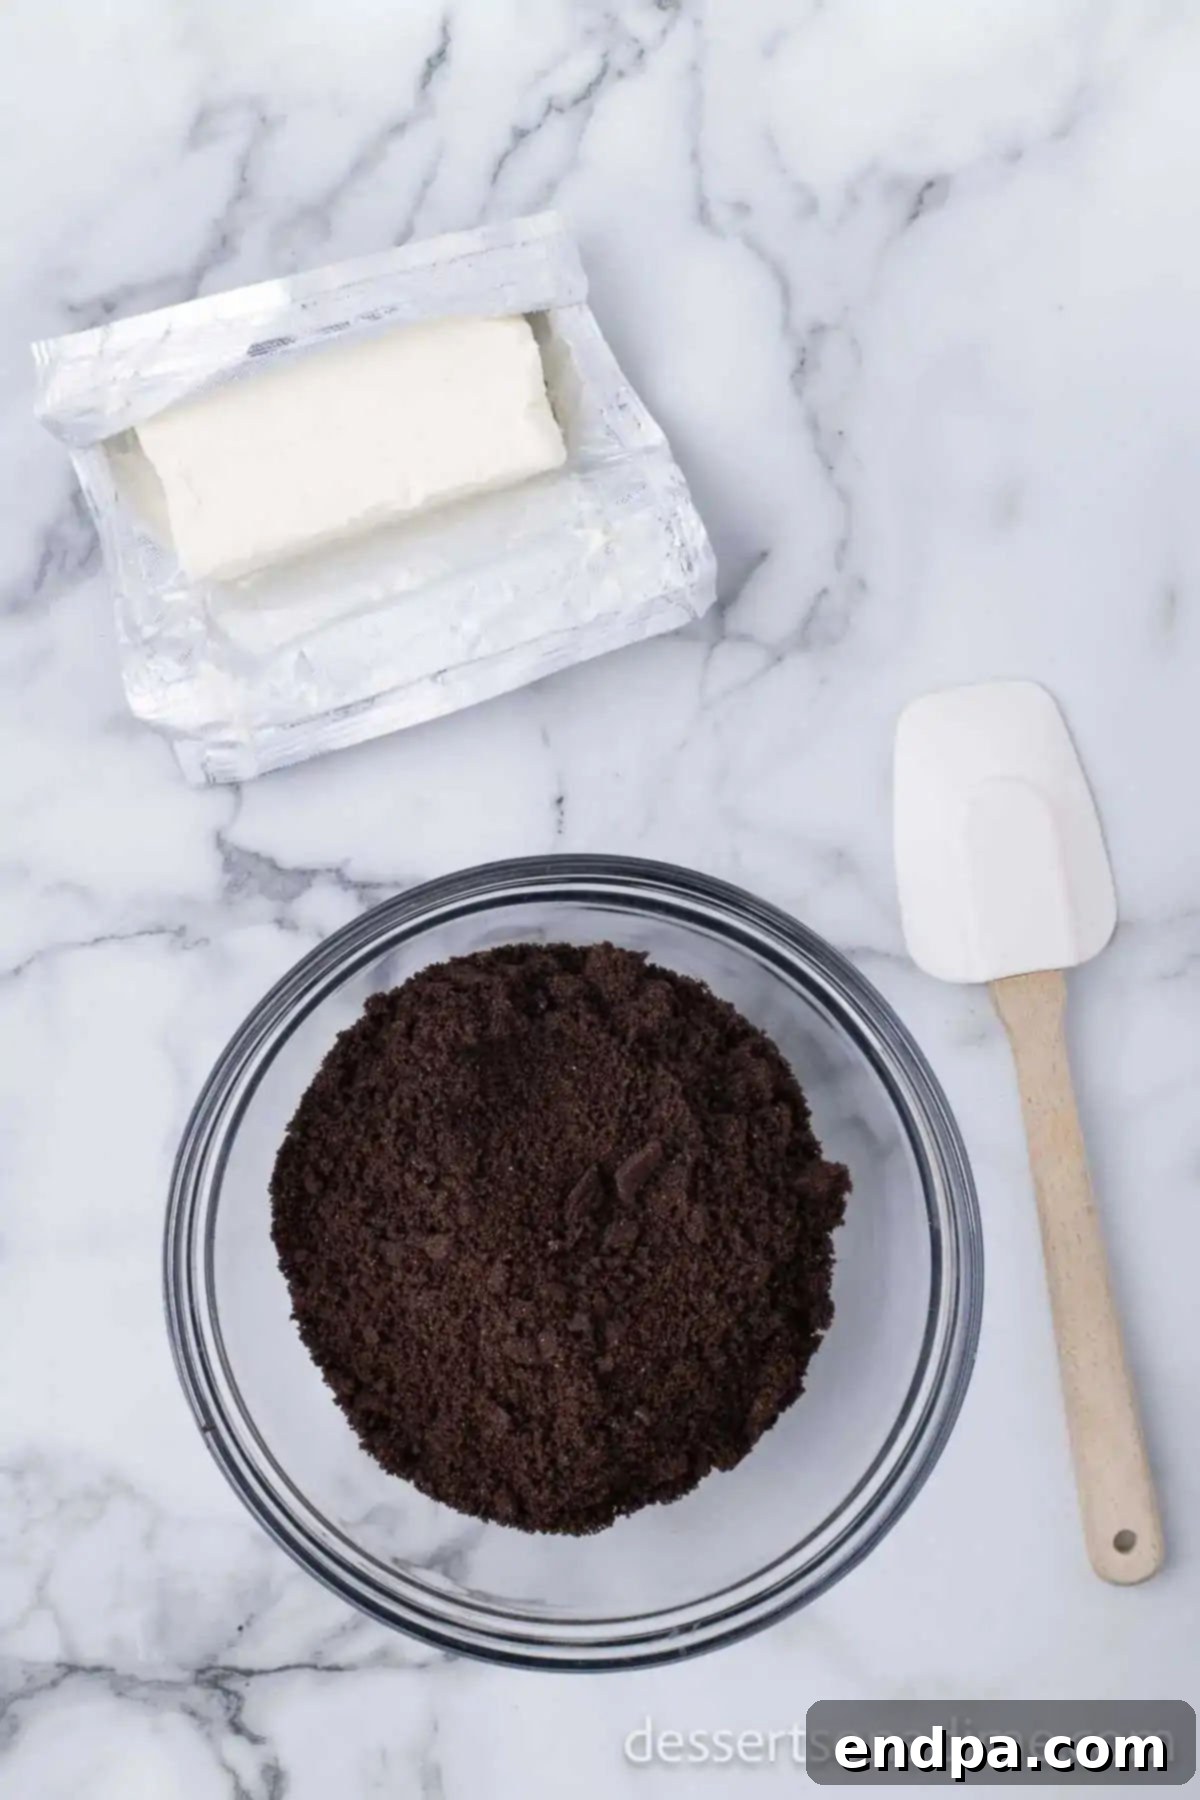
Step 3: Combine Cream Cheese and Crushed Cookies. In a large mixing bowl, combine the softened cream cheese with the finely crushed Oreo cookies. For the quickest and most efficient blending, use an electric mixer (either a stand mixer with a paddle attachment or a hand mixer). Mix thoroughly until the cream cheese is fully incorporated into the cookie crumbs, and you have a uniform, dark, and dough-like mixture. It should be firm enough to roll but still pliable and easily shapeable. Scrape down the sides of the bowl as needed to ensure everything is evenly blended.
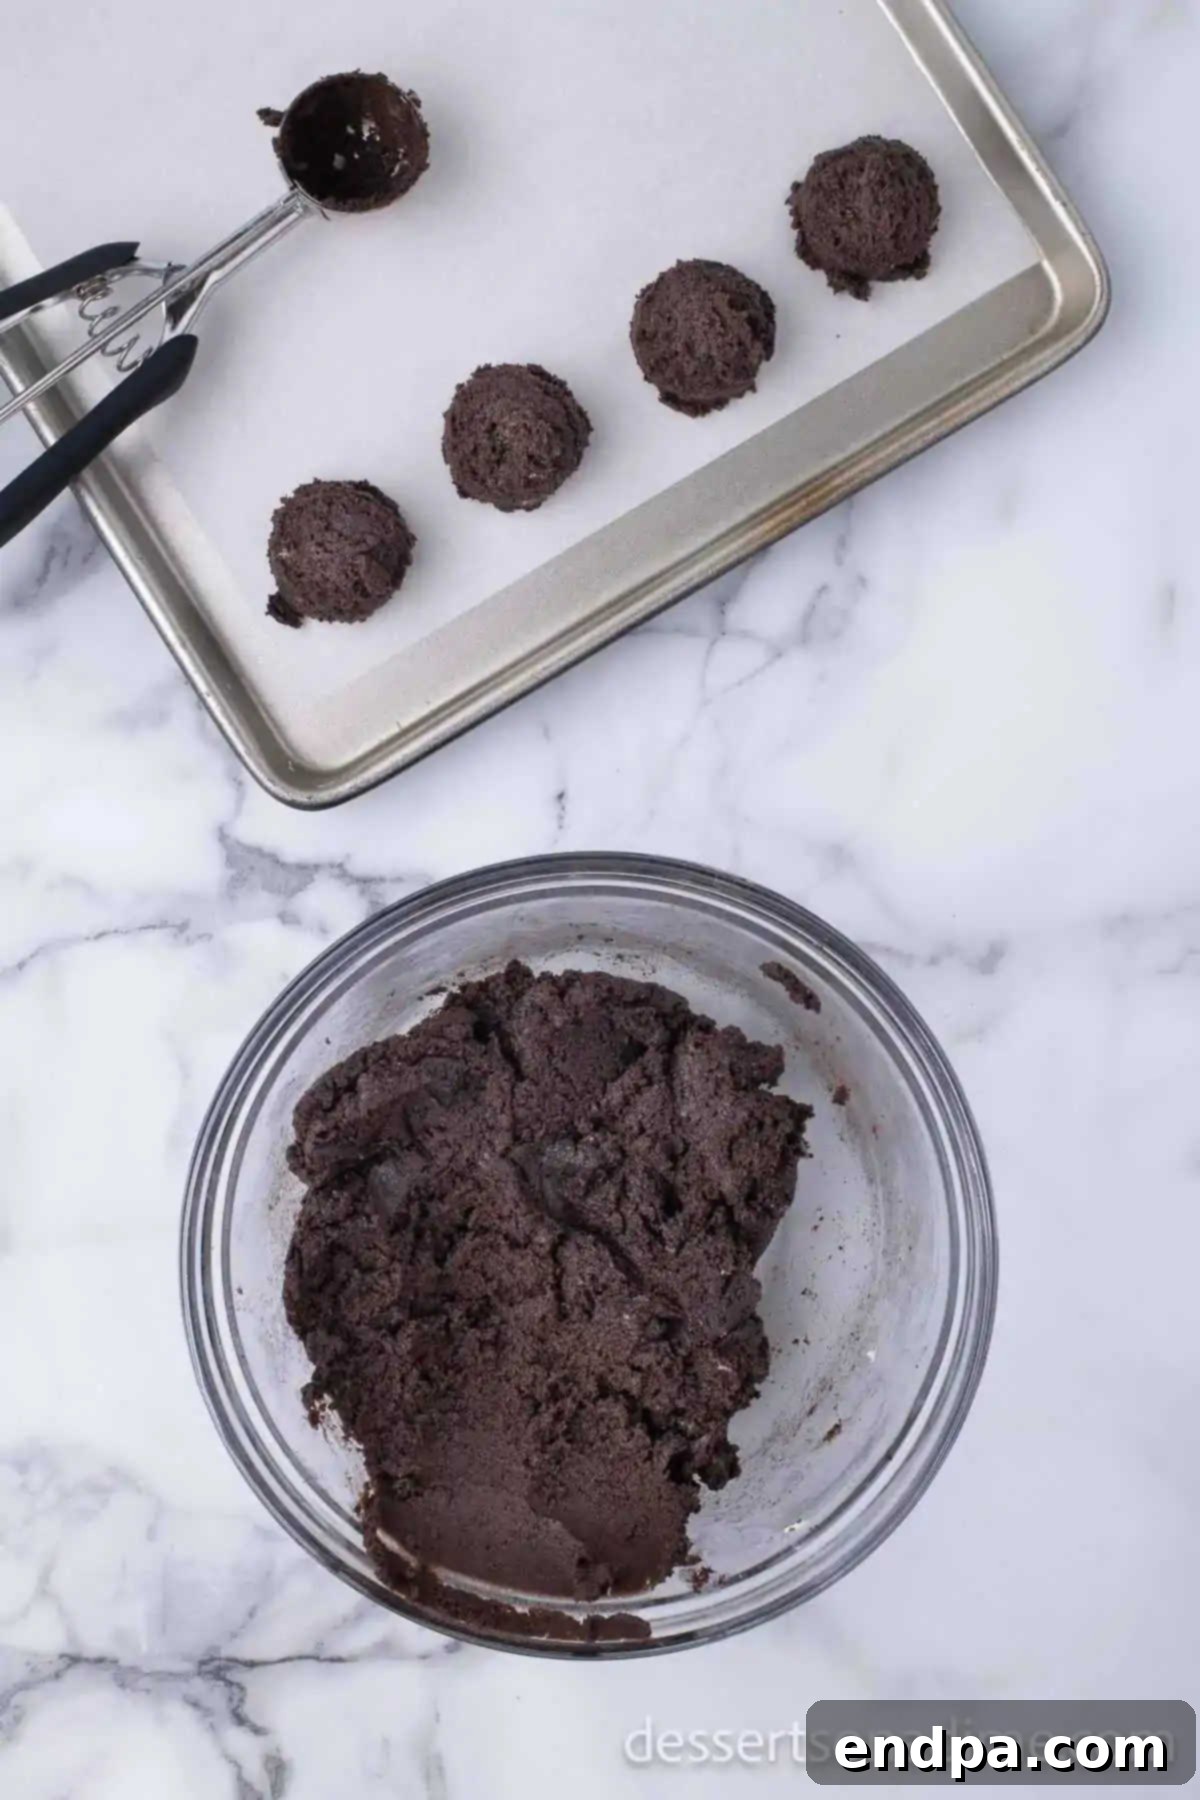
Step 4: Ensure Thorough Mixing. Continue to mix the Oreo and cream cheese blend until the entire mixture is homogenous and smooth. There should be no visible streaks of white cream cheese, and the color should be consistently dark throughout. This ensures an even flavor and texture in every truffle. A stand mixer with a paddle attachment works wonderfully for this step, but a hand mixer is perfectly adequate. Remember to periodically scrape down the sides and bottom of the bowl to guarantee everything is well combined.
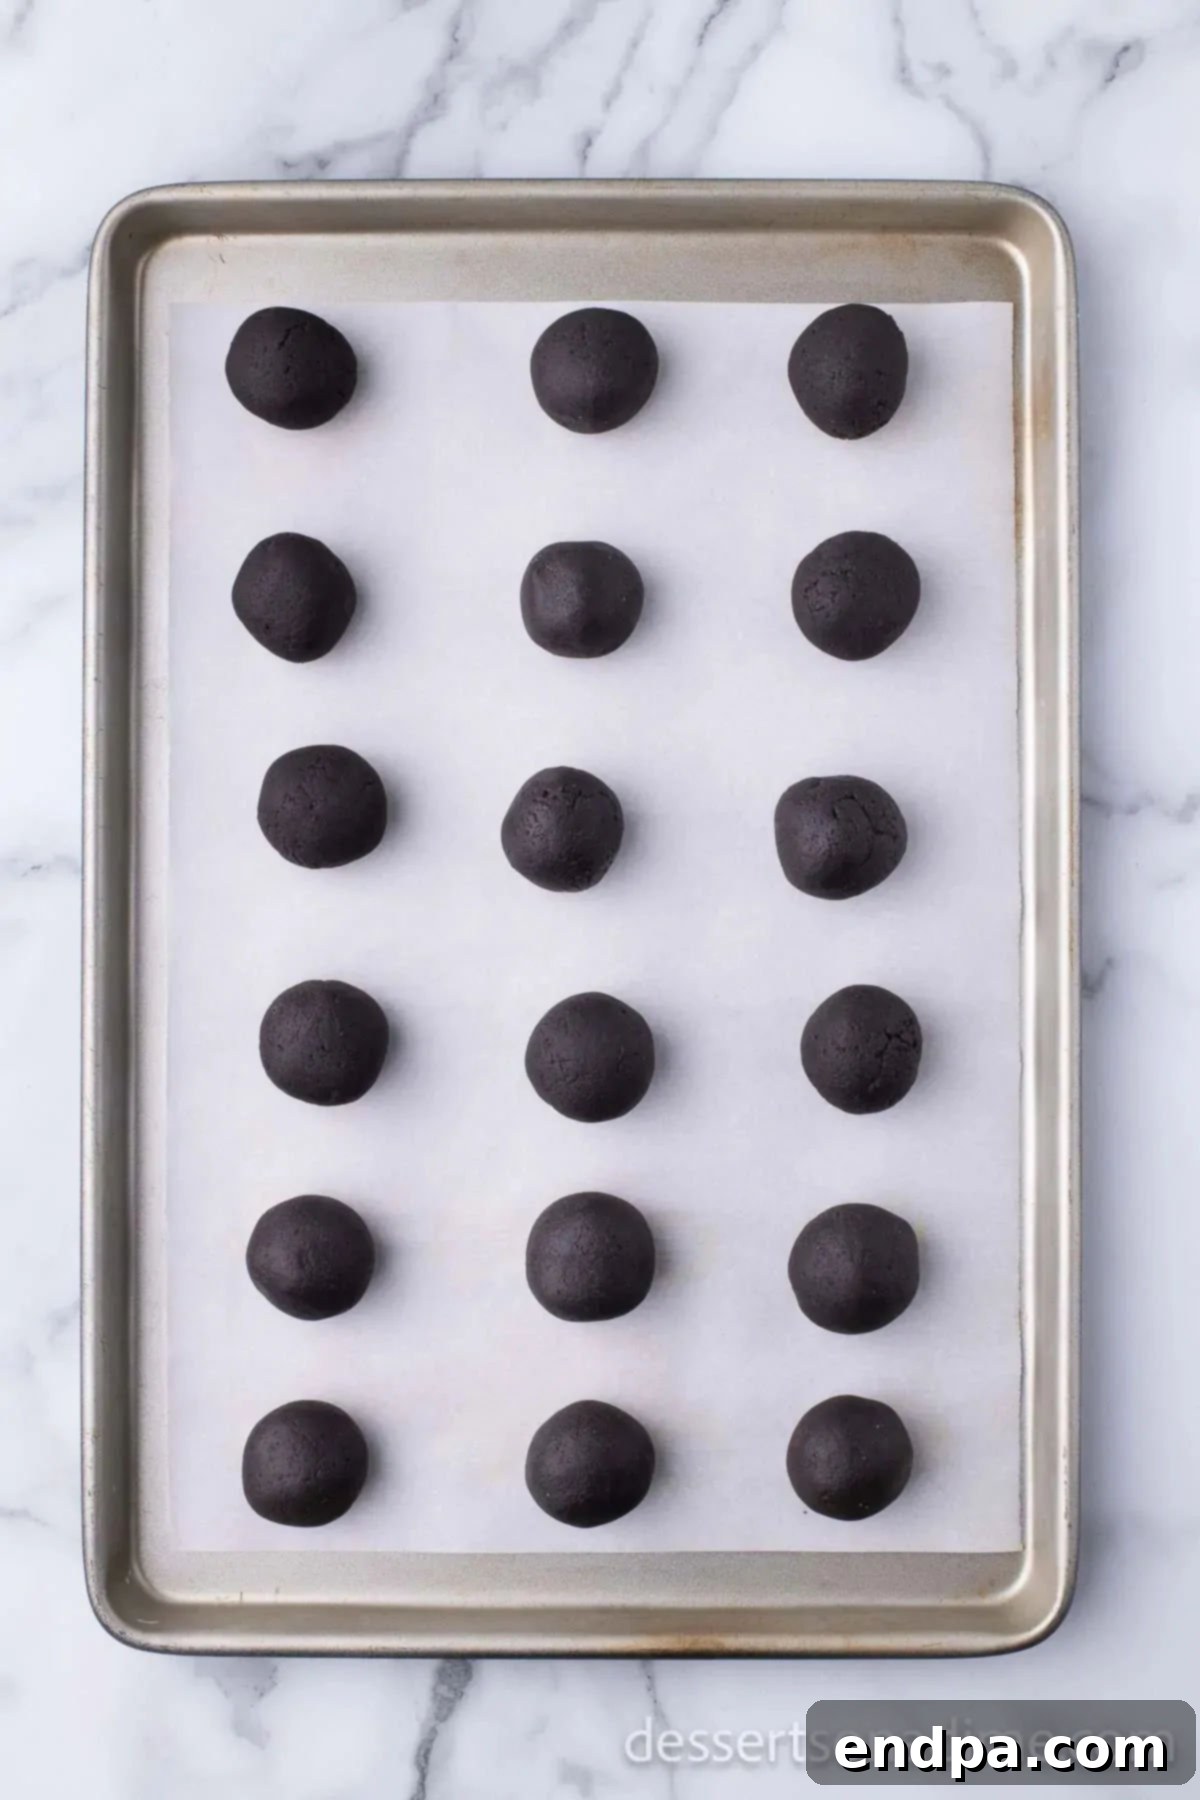
Step 5: Shape and Chill the Oreo Balls. Using a cookie scoop (approximately 1 tablespoon in size for uniform portions) or your hands, roll the mixture into smooth, uniform 1-inch balls. Aim for perfectly round shapes for the most appealing presentation. Place each rolled ball onto your prepared parchment-lined pan, leaving a little space between them. Once all balls are formed, place the entire pan into the freezer for at least 30 minutes. This crucial chilling step is vital as it helps the truffles firm up considerably, making them much easier to dip in chocolate without falling apart or losing their shape.
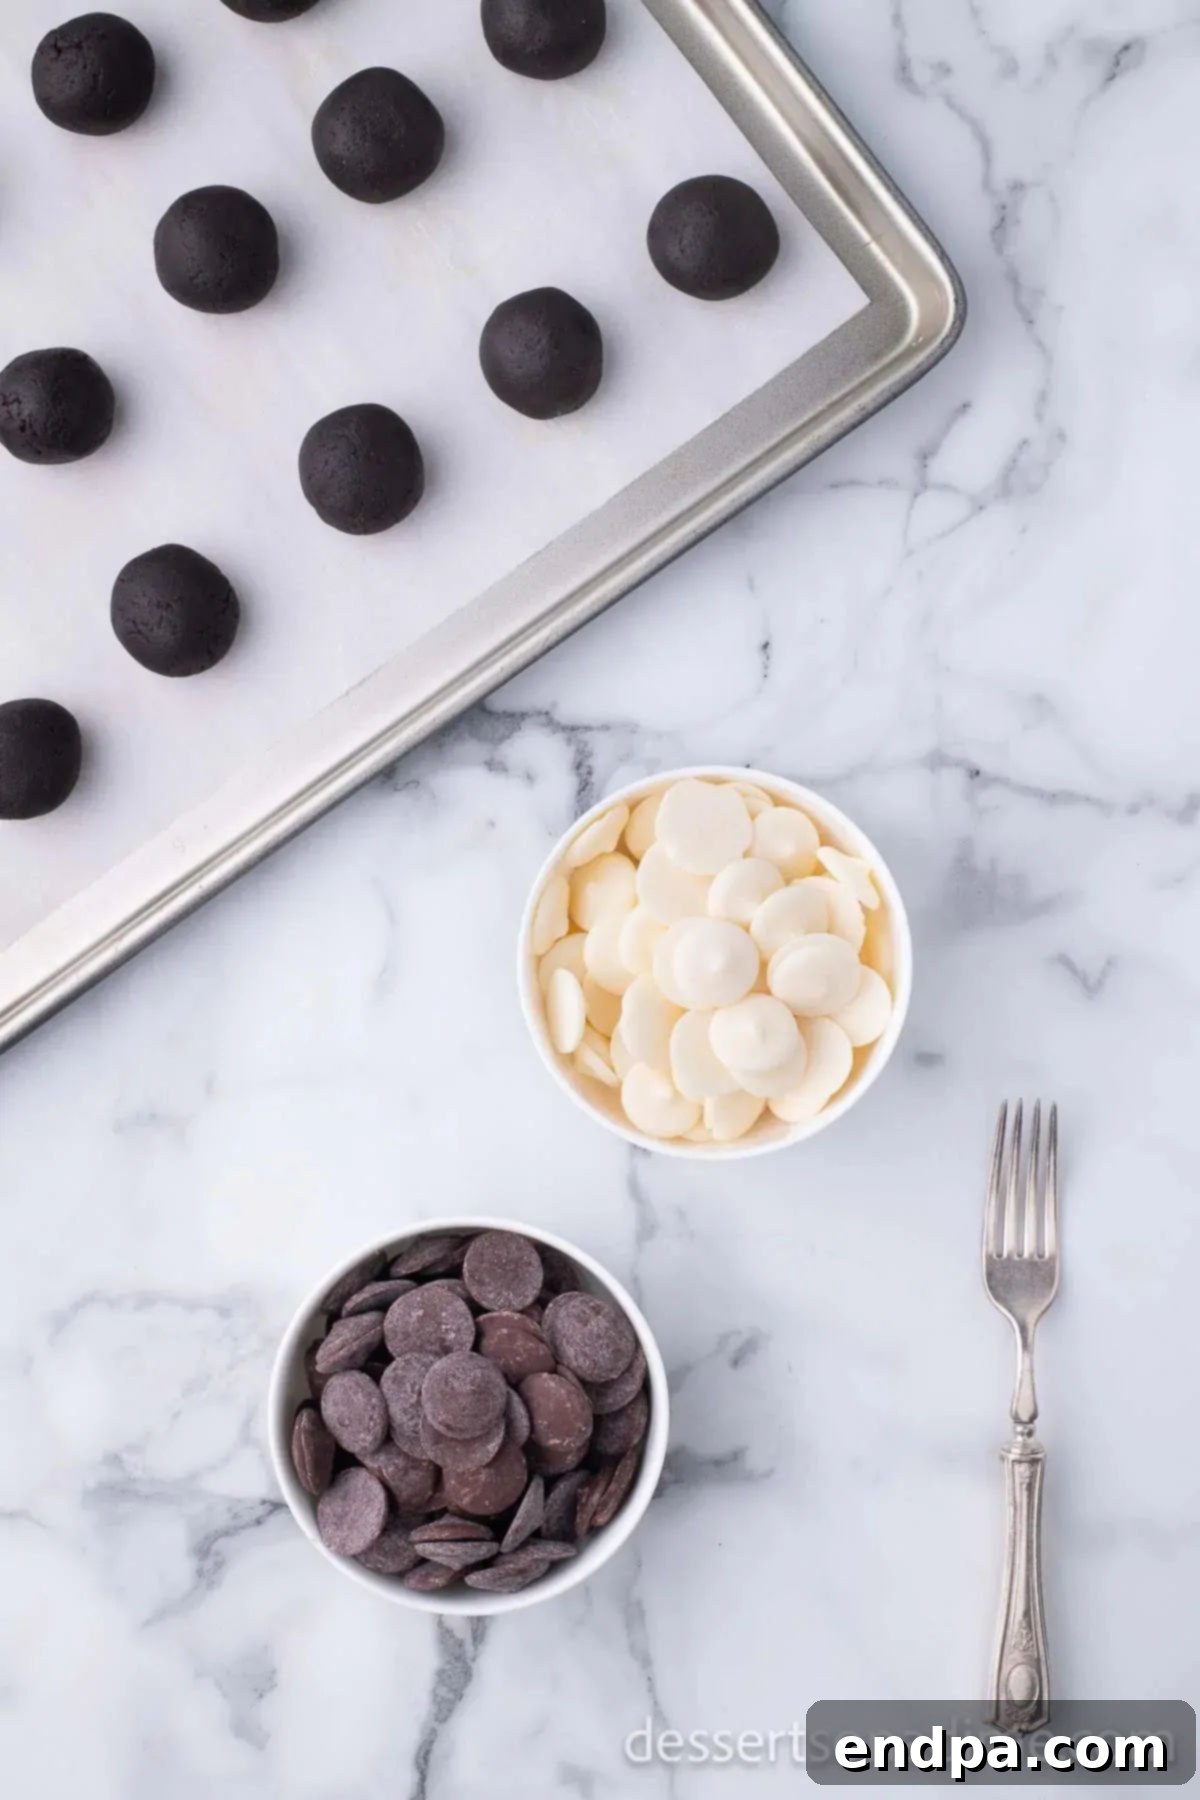
Step 6: Melt the Dipping Chocolates. While your Oreo balls are chilling in the freezer, prepare your chocolate coatings. Place the chocolate dipping chips and white chocolate dipping chips into two separate microwave-safe bowls. Microwave each bowl for 1 minute, then stir thoroughly. Continue microwaving in short 30-second intervals, stirring very well after each, until the chocolate is completely melted and smooth. Be extremely careful not to overheat the chocolate, as this can cause it to seize and become unusable. Alternatively, for a more controlled melting process, you can use a double boiler.
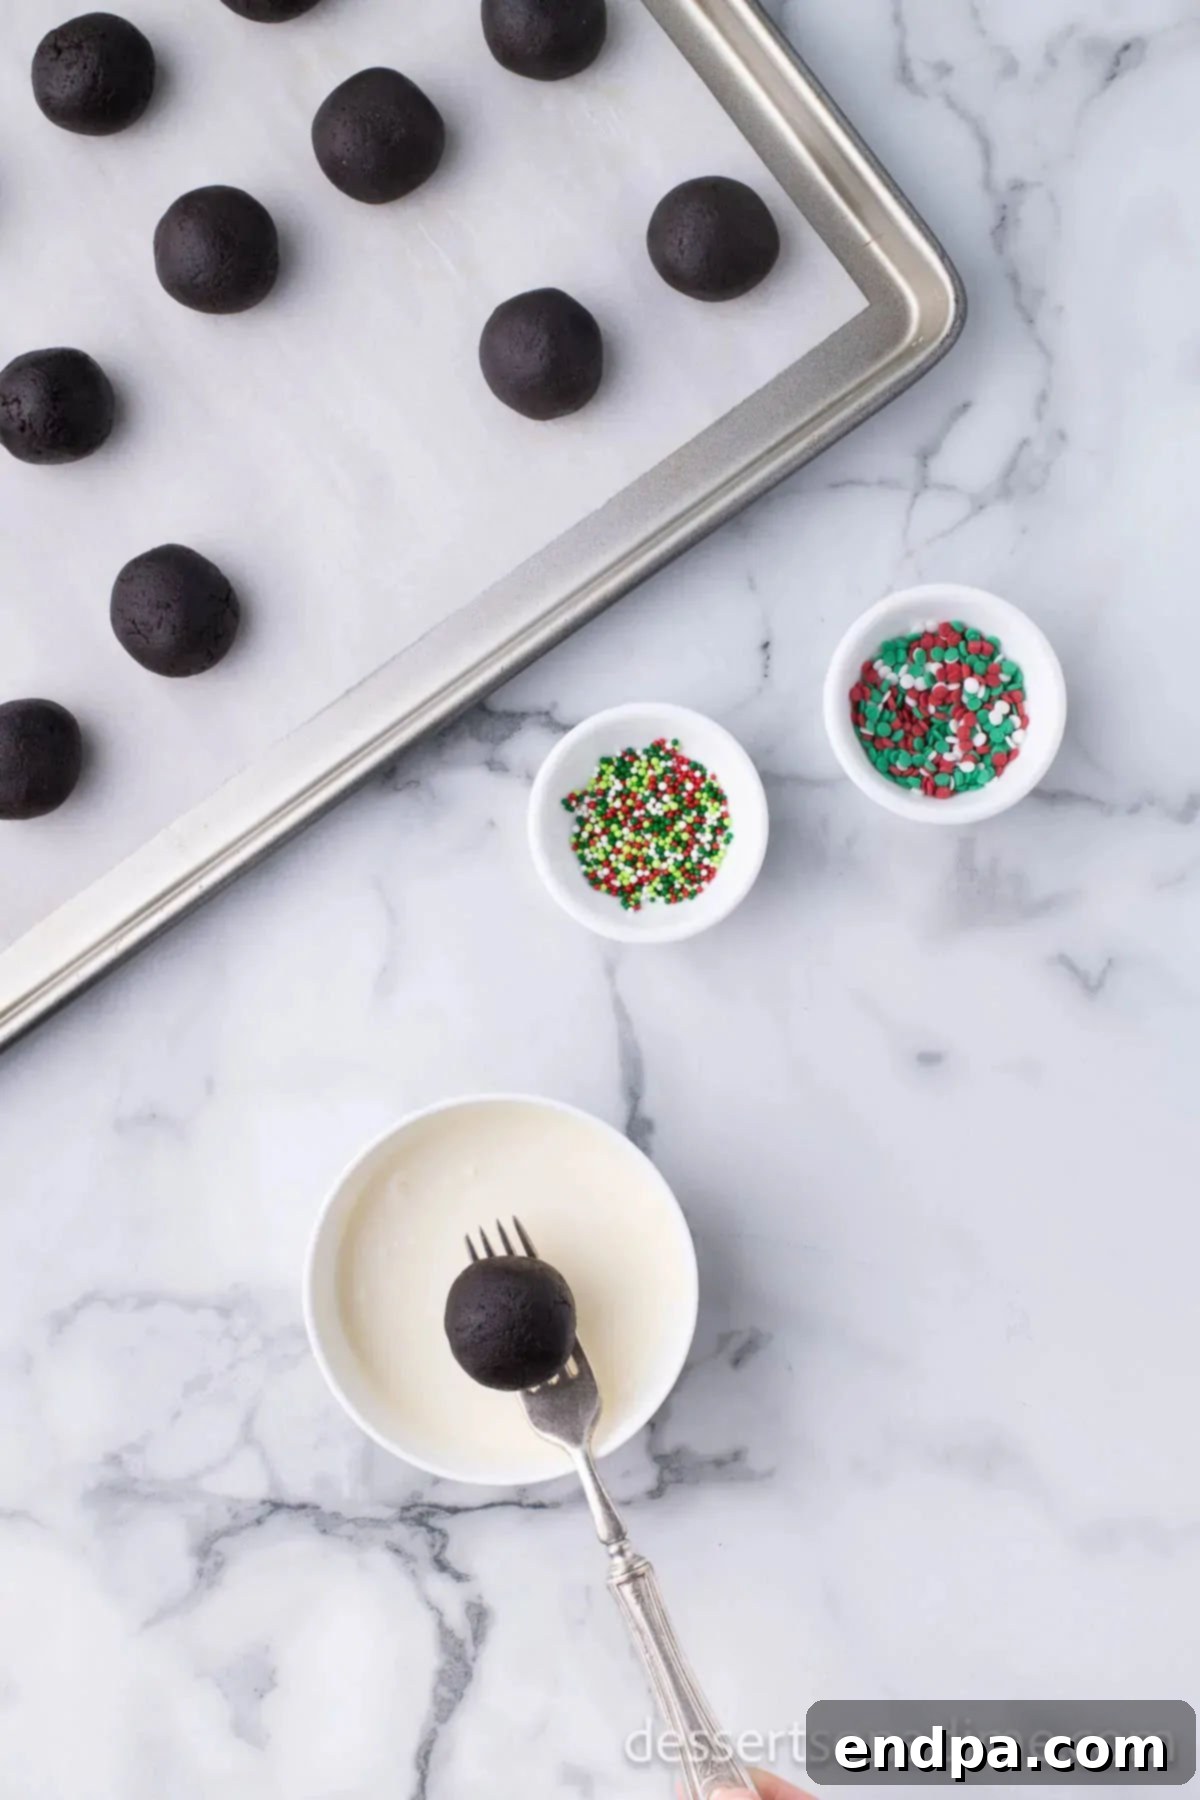
Step 7: Dip the Oreo Balls in Chocolate. Retrieve the well-chilled Oreo balls from the freezer. Using a fork or a specialized candy dipping tool, carefully dip each ball into one of the melted chocolates, ensuring it’s completely coated. Gently tap the fork against the side of the bowl a few times to shake off any excess chocolate before returning the coated ball to the parchment-lined baking sheet. For a beautifully varied and festive look, dip approximately half of your Oreo balls in the rich dark chocolate and the other half in the creamy melted white chocolate.
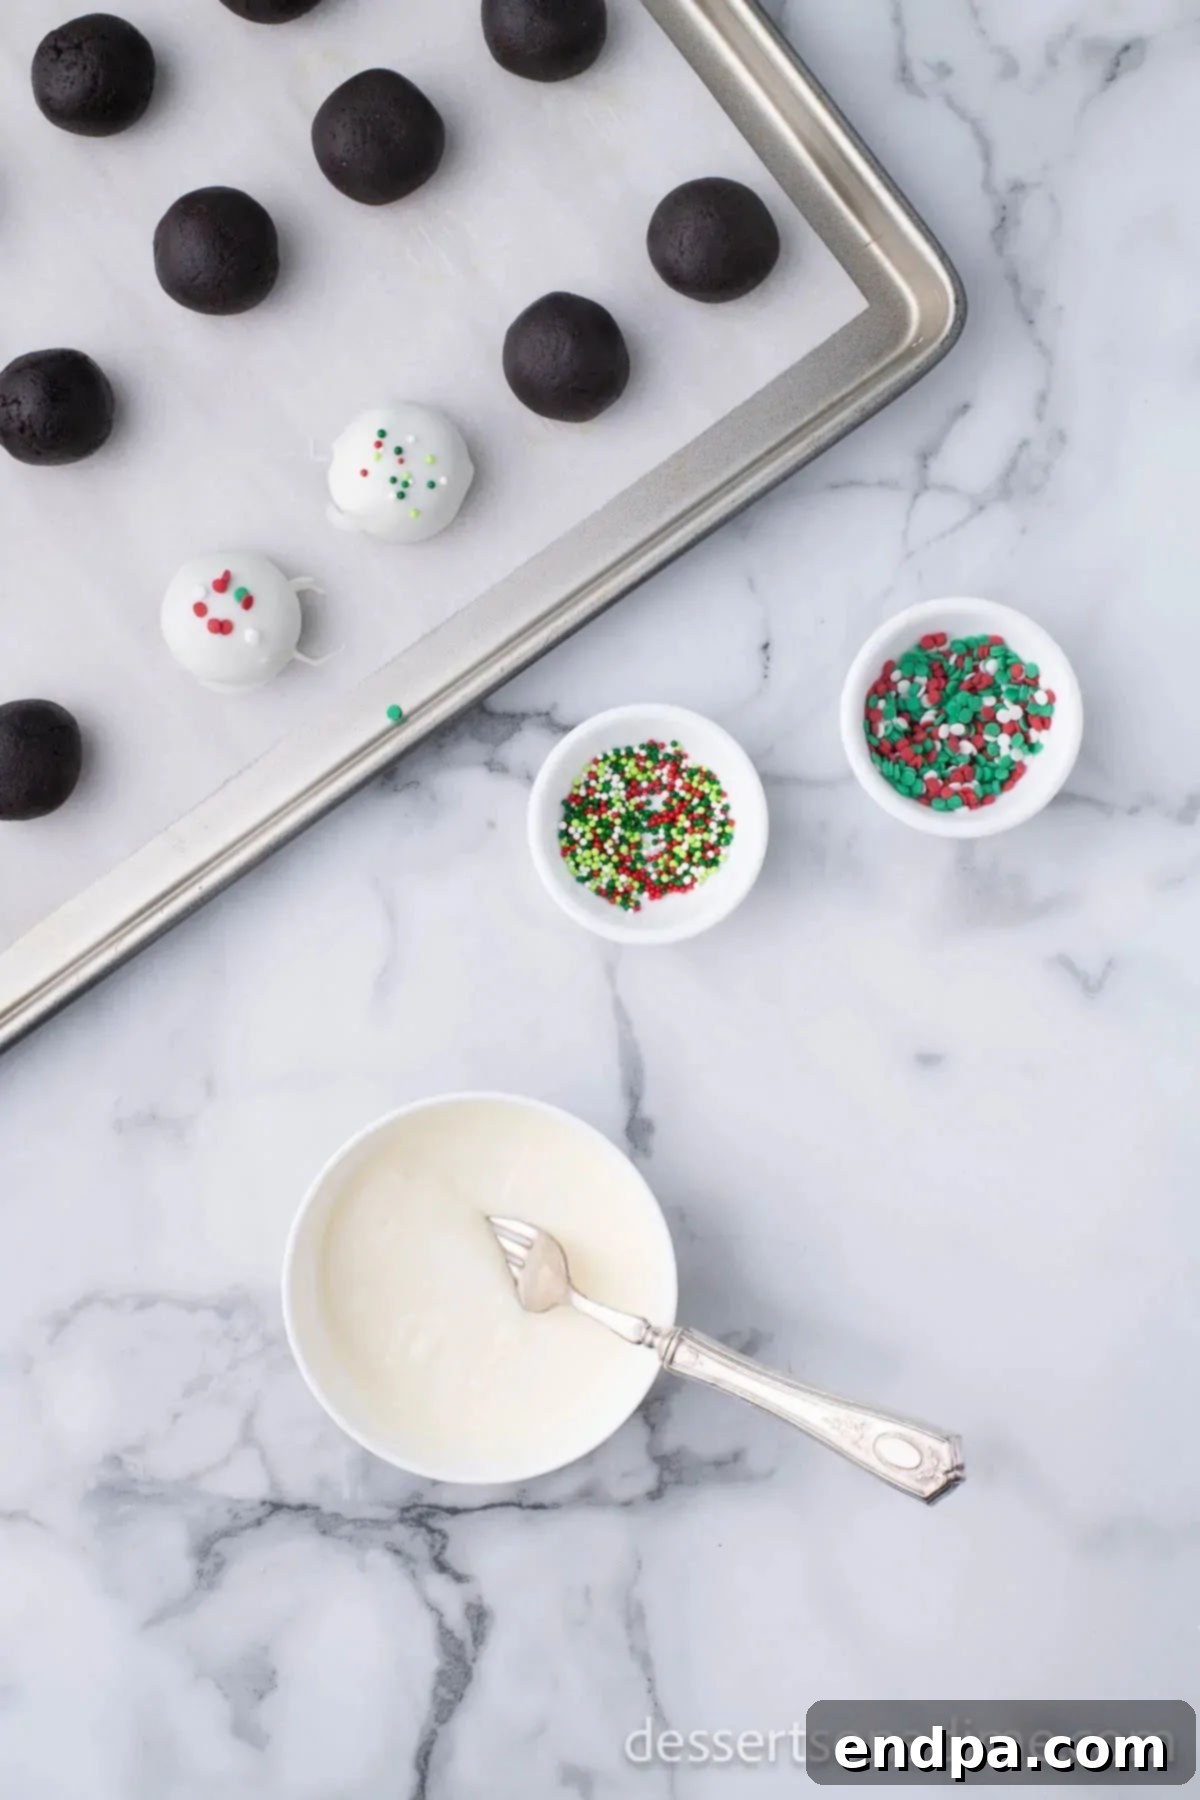
Step 8: Add Sprinkles. Immediately after dipping each Oreo ball (and while the chocolate coating is still very wet and soft), generously sprinkle it with your chosen Christmas sprinkles. This rapid application is crucial because the sprinkles will not adhere once the chocolate begins to harden. Continue this process until all the desired truffles are beautifully coated and festively sprinkled. Allow the chocolate to set completely, either at room temperature or by placing them briefly in the refrigerator for a quicker set. This will ensure the sprinkles are securely attached.
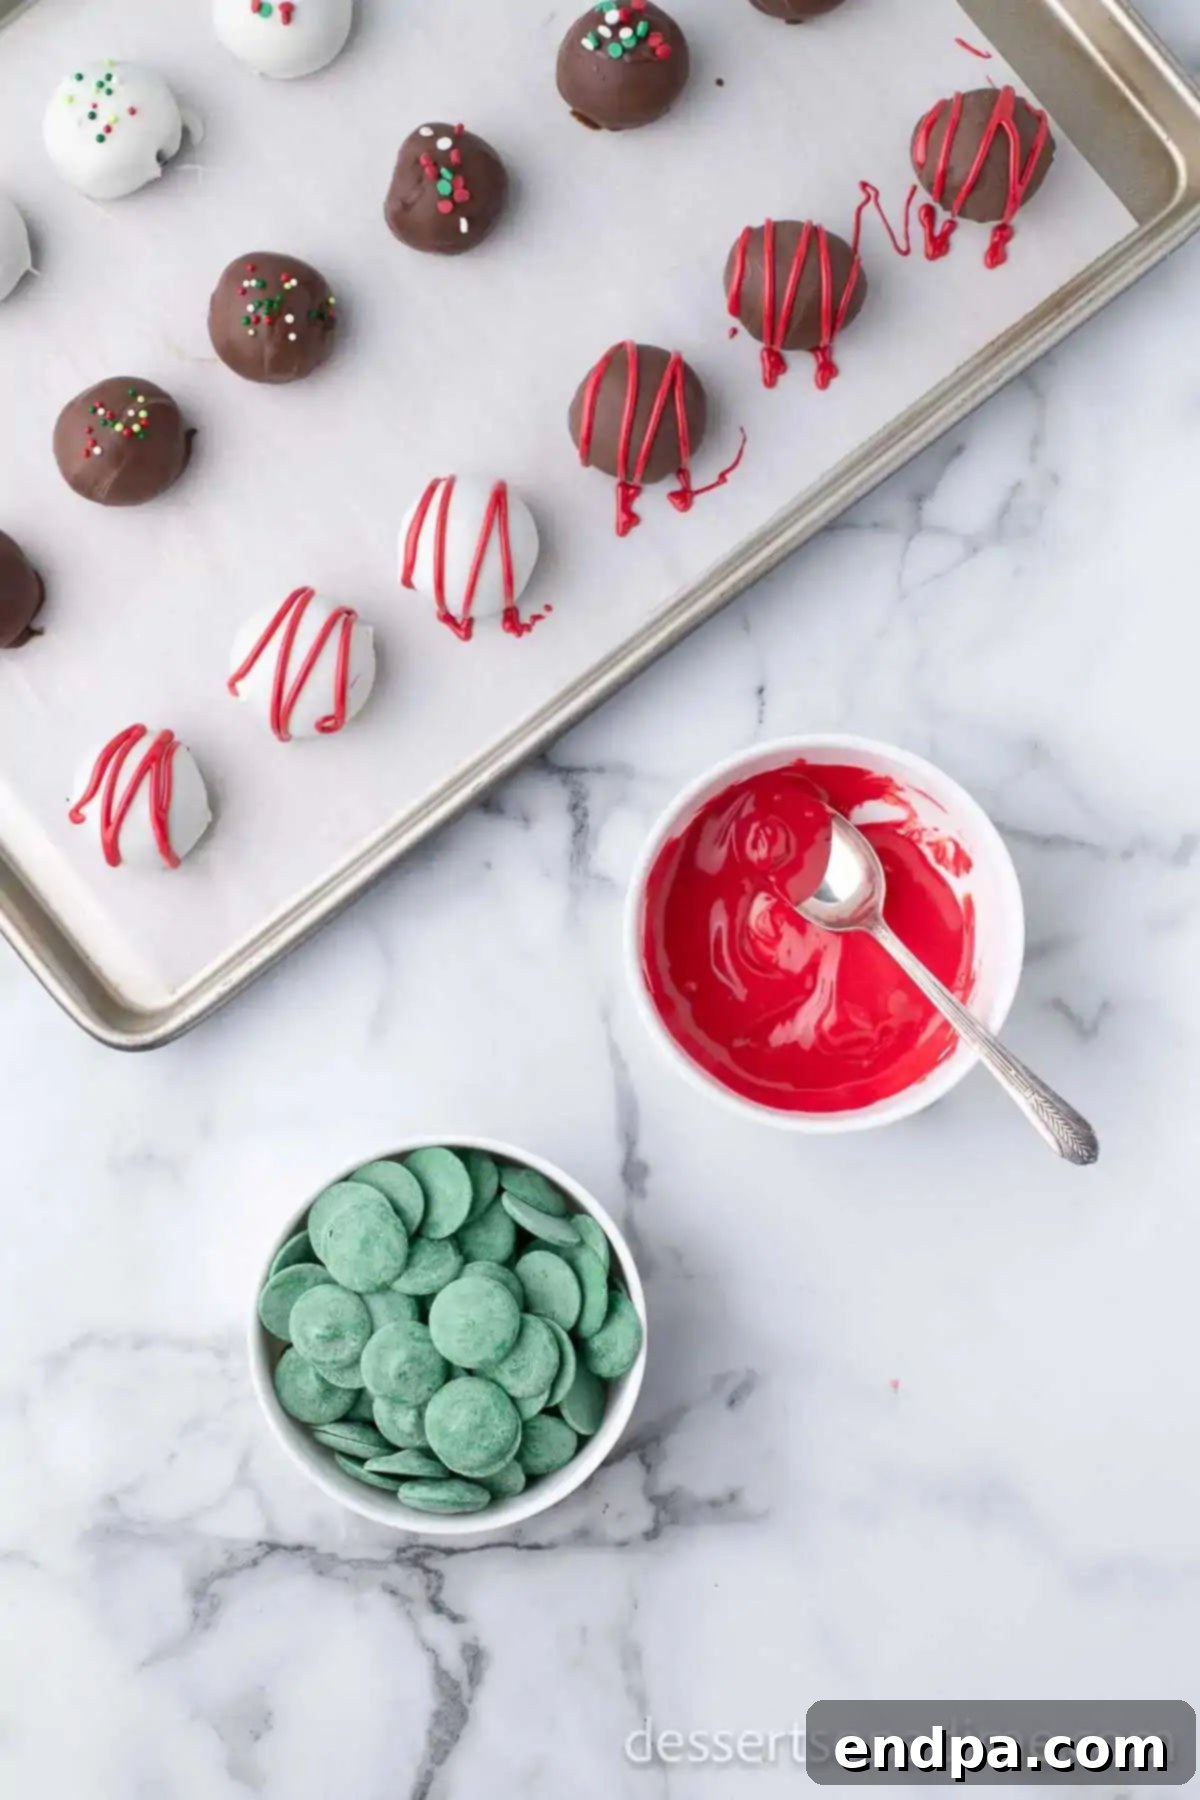
Step 9: Prepare Candy Melts for Drizzling. For an extra decorative flair, prepare your red and green candy melts. Place each color into separate microwave-safe bowls. Melt them by microwaving in short 30-second intervals, stirring vigorously after each interval, until they are smooth and fully melted. If the candy melts appear too thick for easy drizzling, you can add a tiny bit of shortening or a special candy-making oil to thin them out slightly, achieving a more fluid consistency.
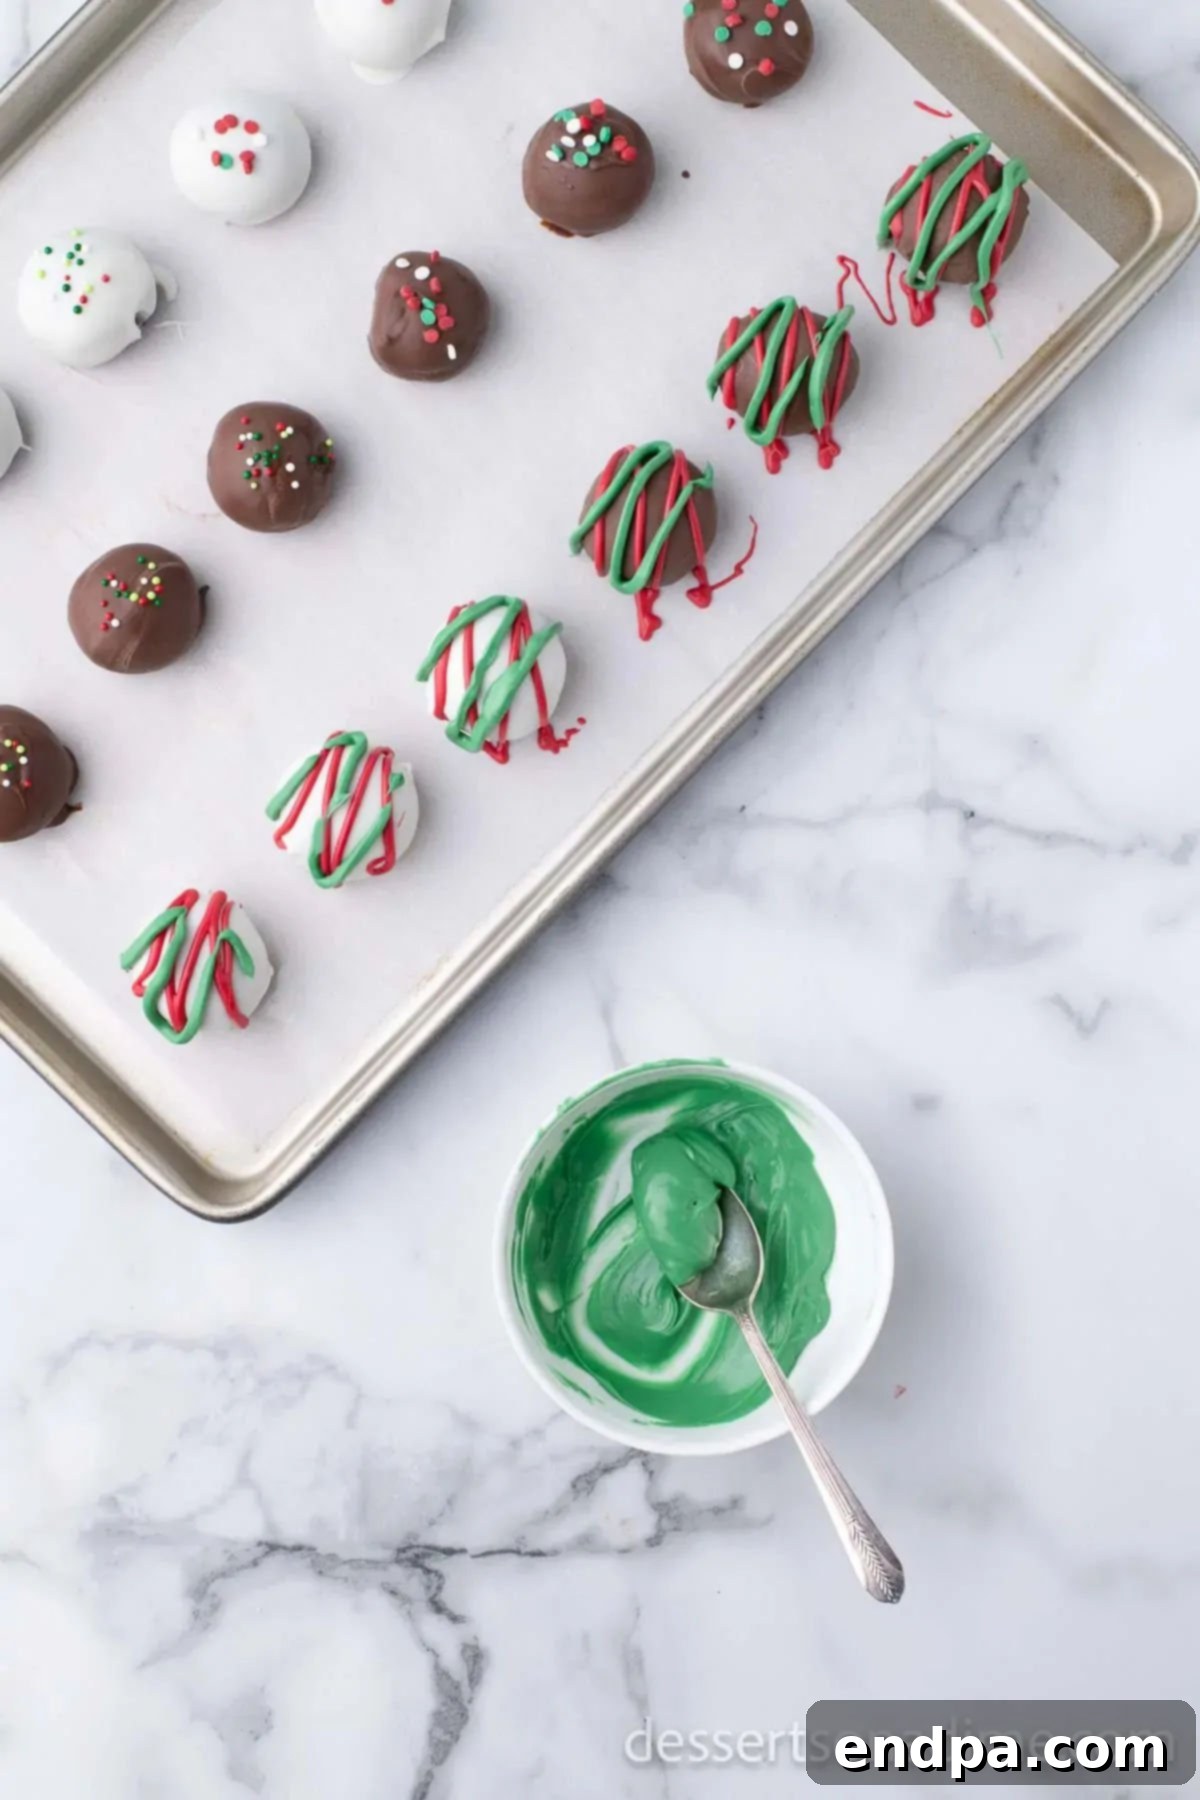
Step 10: Drizzle Over the Truffles. Once the initial chocolate coating on your Oreo truffles has completely hardened (this prevents colors from bleeding), take a fork or a small spoon, dip it into one of the melted candy colors, and then drizzle it back and forth over the truffles. You can alternate colors, create intricate zig-zag patterns, or simply add random swirls. This step is particularly effective on the balls that were not covered in sprinkles, adding visual interest and extra festive appeal to your overall platter. Feel free to get creative with your designs!
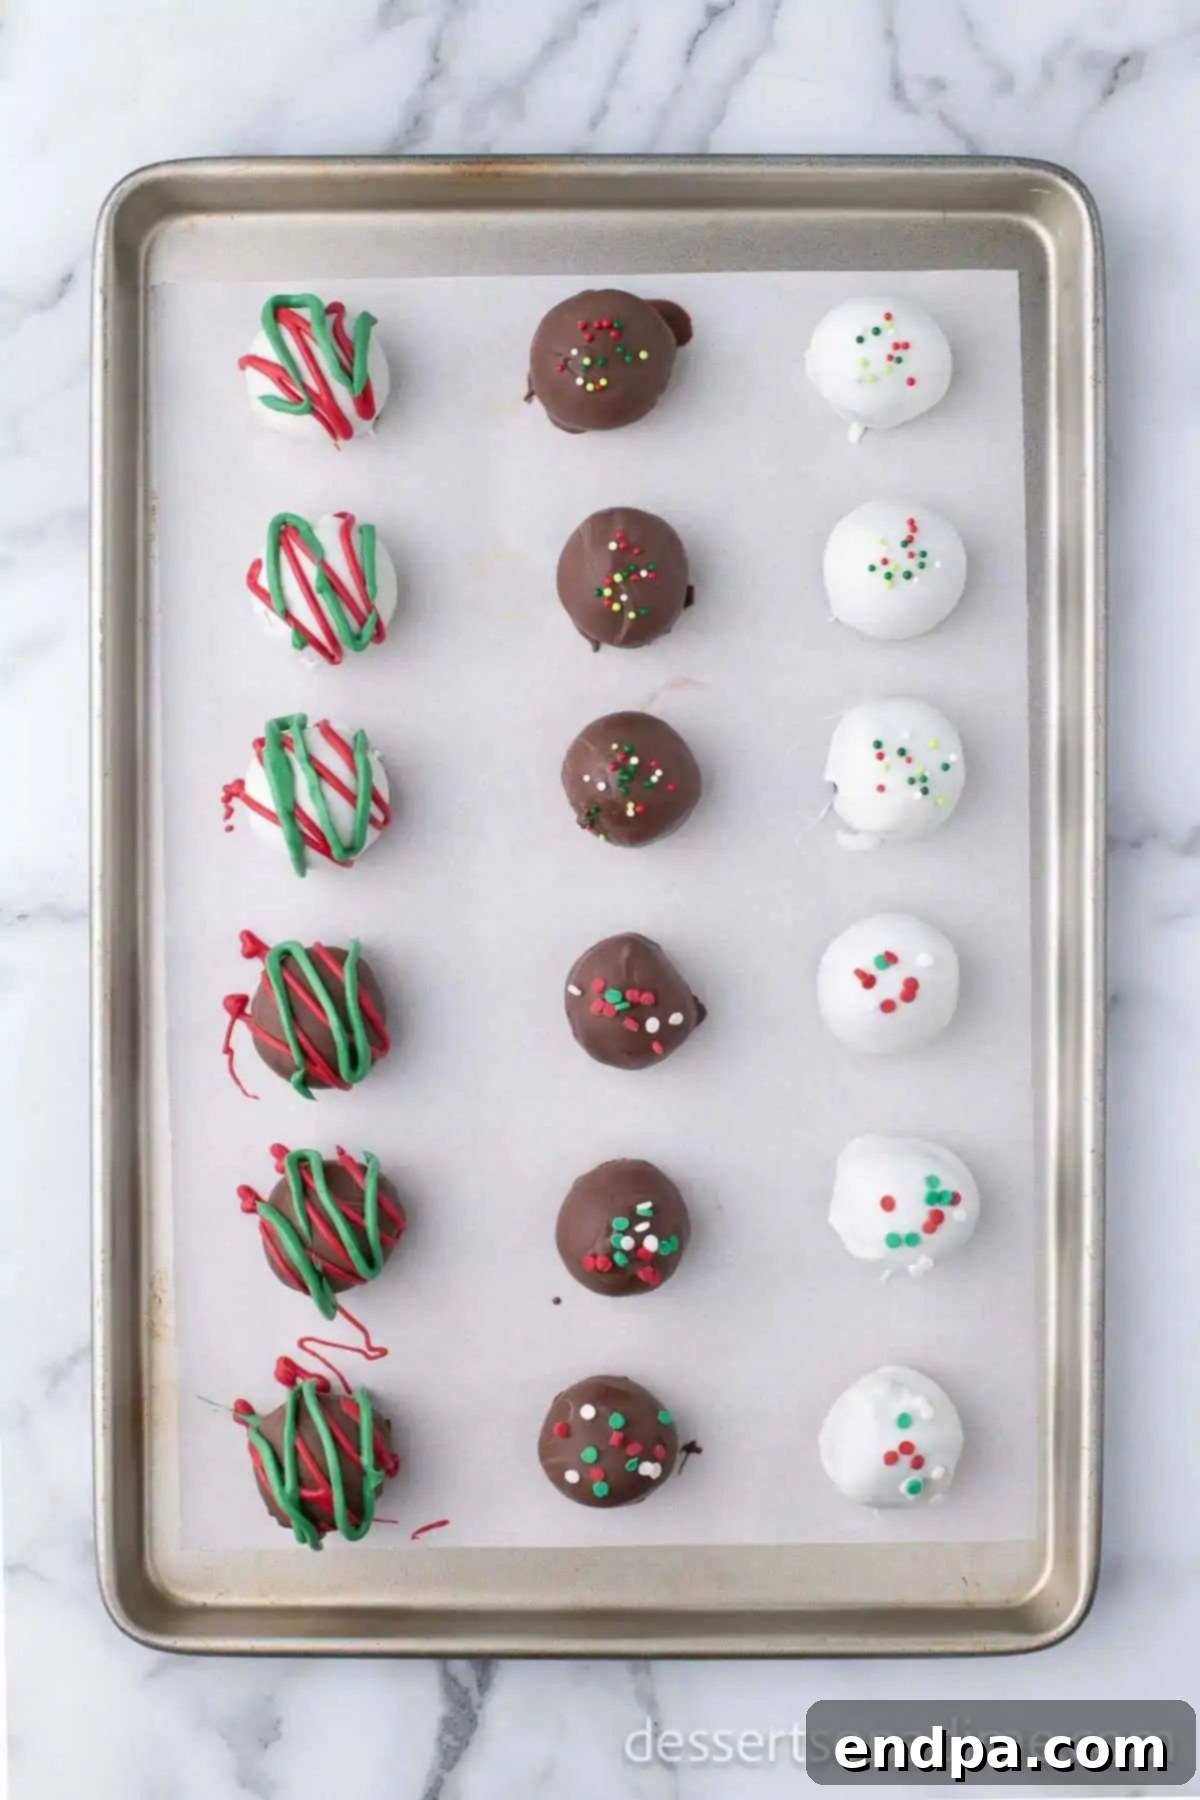
Step 11: Final Setting and Enjoyment. Continue drizzling the melted candy until all your desired truffles have been beautifully decorated. Once decorated, allow the candy melts to harden and set completely. This can be done effectively at room temperature, or expedited by placing them in the refrigerator for about 10-15 minutes until firm. Once fully set, your stunning, homemade, and incredibly delicious Christmas Oreo Balls are ready to be proudly served, joyfully shared, or packaged as delightful, edible gifts for friends and family!
Expert Tips and Tricks for Perfect Christmas Oreo Balls:
Achieving perfectly uniform and delightfully delicious Oreo cream cheese truffles is incredibly easy with a few insider tips. These expert suggestions will help you streamline the preparation process, avoid common pitfalls, and ensure your holiday treats are a resounding success, looking and tasting professionally made:
- The Magic of a Cookie Scoop: For consistently sized and perfectly round Oreo balls, a cookie scoop (approximately 1 tablespoon in size) is your absolute best friend. It not only makes the shaping process significantly quicker and less messy but also ensures that each truffle is uniform, contributing to a professional and appealing presentation on your dessert platter.
- Softened Cream Cheese is Key: Do not skip this crucial step! Ensure your cream cheese is at room temperature and well-softened before attempting to mix it. Cold cream cheese will result in a lumpy, uneven mixture that is incredibly difficult to combine smoothly with the crushed Oreos. Plan ahead and take it out of the refrigerator at least an hour before you intend to start baking.
- Go Full-Fat for Flavor and Texture: While it might be tempting to opt for reduced-fat cream cheese for health reasons, this is one recipe where full-fat is non-negotiable for optimal results. Full-fat cream cheese provides the essential richness, creaminess, and firm texture needed for the Oreo balls to hold their shape perfectly and deliver the best possible decadent flavor.
- Food Processor for Flawless Crumbs: A food processor is undoubtedly the quickest and most efficient way to achieve super-fine Oreo crumbs, which is absolutely essential for a smooth and consistent truffle texture. If you don’t own one, you can still get excellent results by placing the cookies in a sturdy, heavy-duty Ziploc bag and crushing them with a rolling pin. Just be sure to pound them until there are absolutely no large chunks left, aiming for a fine, sand-like consistency.
- Parchment Paper for Easy Cleanup: Always, always line your baking sheets or cutting boards with parchment paper. This simple yet effective step prevents the sticky truffle mixture and melted chocolate from adhering to the pan, making cleanup incredibly easy. It also ensures the delicate chocolate-coated balls can be lifted off cleanly once they are set.
- Thorough Chilling is Non-Negotiable: The freezer chilling step (at least 30 minutes, or longer if needed) is absolutely vital. It firms up the Oreo balls considerably, preventing them from crumbling or melting prematurely when dipped into the warm chocolate. If they’re not firm enough, they will inevitably fall apart in the chocolate, creating a frustrating and messy situation.
- Mastering the Chocolate Dip: When dipping, work with a quick, confident hand, and handle one ball at a time. Use a fork or a specialized candy dipping tool to fully immerse the ball, then allow any excess chocolate to drip off by gently tapping the fork against the side of the bowl. For an even and complete coat, quickly rotate the ball as you lift it. Avoid over-handling to maintain the ball’s shape.
- Prevent Chocolate Seizing: When melting chocolate, do so slowly and carefully, especially in the microwave. Stir frequently between short bursts. If using a double boiler, ensure the bowl holding the chocolate is not touching the simmering water below, and, crucially, that no steam or even a tiny drop of water gets into the chocolate, as this will cause it to seize and become thick and unusable.
- Timing for Sprinkles and Drizzles: Apply sprinkles immediately after dipping each ball, while the chocolate is still wet and receptive, to ensure they adhere properly. For candy melt drizzles, ensure the base chocolate layer is completely set and hardened before applying the drizzles; otherwise, the colors might bleed together and create a messy appearance.
- Make Ahead for Stress-Free Holidays: These Oreo balls are perfect for making in advance, which is a huge bonus during the busy holiday season! You can prepare the truffle mixture, roll the balls, and then freeze them (uncoated) for up to a month in an airtight container. When ready to serve, simply pull them out, allow them to thaw slightly, then dip, decorate, and chill as usual. This saves significant prep work closer to your events.
By diligently following these valuable tips and tricks, you’ll be able to create a batch of homemade Oreo truffles that are not only irresistibly delicious but also beautifully crafted, becoming a memorable and much-requested highlight of your holiday season year after year.
Frequently Asked Questions About Christmas Oreo Balls
How do you easily dip Oreo Balls in chocolate?
The ultimate trick to easy, mess-free dipping is proper chilling! Freezing your Oreo balls for at least 15 to 30 minutes before dipping makes them significantly firm and much less likely to fall apart or melt when immersed in the warm chocolate. Use a fork or a dedicated candy dipping tool to fully immerse each ball. Once coated, gently tap the fork against the edge of the bowl a few times to allow any excess chocolate to drip off. This technique helps create a smooth, even shell and prevents unsightly chocolate puddles on your parchment paper. For an extra smooth finish, you can even lightly scrape the bottom of the truffle against the bowl’s rim as you lift it out.
What’s the best way to drizzle chocolate and candy melts?
Drizzling is a fun and easy way to add a professional and artistic touch to your Oreo balls. Once your candy melts are perfectly melted and smooth (and have cooled slightly so they’re not too hot), you have a few excellent options. The simplest method is to use a clean fork: dip the tines into the melted candy and then, using a quick back-and-forth motion, move the fork across the truffles. For more control, you can transfer the melted candy into a piping bag with a very tiny snip at the tip, or a sturdy Ziploc bag with just a tiny corner cut off. This allows for more precise and delicate lines. Don’t be afraid to experiment with multiple colors for a vibrant, eye-catching design, just ensure the base chocolate layer is fully set first to prevent colors from mixing.
How should I store Oreo balls to keep them fresh?
Oreo truffles are quite resilient and maintain their freshness well! They can be stored at room temperature in an airtight container for up to one week. However, if you live in a particularly warm or humid climate, or if your home is quite warm, it’s highly advisable to store them in the refrigerator. Chilling them helps prevent the chocolate coating from melting, softening, or becoming sticky, thus maintaining their perfect firm texture and appealing appearance. Just make sure they are stored in a single layer or separated by sheets of wax paper or parchment paper if you need to stack them to prevent them from sticking together.
Can you freeze Oreo balls for later?
Absolutely! Freezing Oreo balls is an excellent and highly recommended way to prepare for holiday entertaining well in advance or to simply enjoy them long after the festive season concludes. You have two convenient main options for freezing:
1. Freeze the coated Oreo balls: Arrange the fully decorated and hardened Oreo balls in a single layer on a baking sheet and freeze until they are completely solid. Once frozen, carefully transfer them to an airtight freezer-safe container, separating any layers with wax paper or parchment paper to prevent them from sticking together. They can be stored safely for up to 2-3 months.
2. Freeze the uncoated Oreo balls: This is a fantastic time-saving strategy for busy periods. Prepare the truffle mixture, roll the balls into their desired size, and freeze them on a parchment-lined baking sheet until solid. Then, transfer them to a freezer-safe bag or container. When you’re ready to serve, simply pull them out, allow them to thaw slightly for easier dipping, then proceed to dip them in melted chocolate, decorate, and let them set. This method saves significant prep work during busy holiday periods.
For more in-depth advice and detailed tips on freezing, be sure to check out our comprehensive guide on How to Freeze Oreo Balls.
What kind of Oreos are best for this recipe?
Classic, regular Oreo cookies are generally and highly recommended for this recipe as they provide the quintessential Oreo flavor and ideal texture that pairs perfectly with the cream cheese. It’s best to avoid “Double Stuf” or “Mega Stuf” varieties, as their increased cream filling can sometimes alter the consistency of the truffle mixture, making it a bit too soft or oily. However, as mentioned in our extensive variations section, feel free to creatively experiment with other standard-stuff Oreo flavors like mint, peanut butter, or golden for exciting and delicious twists on the original!
My chocolate seized up! What went wrong?
Chocolate seizing (where it suddenly becomes thick, grainy, and unworkable) usually happens for two primary reasons: it’s either been severely overheated, or, more commonly, even a tiny drop of water has come into contact with it. When melting in the microwave, always go slow with short bursts of power and stir frequently to distribute the heat. If you’re using a double boiler, ensure the bowl containing the chocolate is not directly touching the simmering water and that no steam or water splashes into the chocolate. If your chocolate does unfortunately seize, you might be able to rescue it by vigorously stirring in a teaspoon of vegetable oil or shortening at a time until it smooths out, though the final texture and gloss might be slightly different from perfectly melted chocolate.
More Irresistible Christmas Desserts to Brighten Your Holidays:
If you’ve fallen in love with the effortless ease and undeniable deliciousness of these Christmas Oreo Balls, you’ll be thrilled to discover a whole host of other festive treats that are equally simple to make and perfect for the holiday season. Expand your repertoire of Christmas desserts with these delightful and highly recommended ideas:
- Classic Christmas Fudge Recipe: Indulge in rich, creamy, and wonderfully decadent fudge infused with classic holiday flavors, an absolute must for any festive candy platter or homemade gift box.
- Festive Christmas Cake Pops: Delightful bite-sized cakes on a stick, artfully decorated with whimsical holiday themes and vibrant colors, making them perfect for parties, gifts, and a fun project for the kids.
- Easy Christmas Tree Brownies: Simple, fudgy brownies transformed into fun Christmas tree shapes and creatively decorated with green frosting, colorful sprinkles, and edible ornaments for a quick and charming treat that everyone will adore.
- Charming Christmas Wreath Cookies: A delightful and visually stunning no-bake cookie that beautifully resembles a festive holiday wreath, made with just a few simple ingredients and minimal effort.
- Refreshing Peppermint Oreo Balls: For all the mint lovers out there, these special truffles incorporate the cool, invigorating flavor of peppermint, making them an ideal and refreshing winter treat that perfectly complements the rich chocolate.
- Homemade Hot Chocolate Bombs: Create enchanting chocolate spheres generously filled with rich cocoa powder and fluffy marshmallows. When hot milk is poured over them, they magically melt into a truly delightful and festive hot chocolate experience.
- Classic Gingerbread Men Cookies: The quintessential holiday cookie, perfect for decorating with intricate royal icing designs, colorful buttons, and sharing with family and friends. A beloved tradition that fills the home with festive aromas.
- Decorated Sugar Cookies: Timeless cut-out sugar cookies, serving as the ideal canvas for intricate holiday designs and a cherished decorating tradition for many families during the festive season.
Once you try these delightful Oreo Truffles, you’ll undoubtedly find yourself making them year after year, eager to share their joy with everyone. Their remarkable simplicity, undeniably decadent taste, and wonderfully festive appeal make them an absolute holiday favorite. We would absolutely love to hear about your experience! Please take a moment to leave a comment below and share your star rating after you’ve made these incredible Christmas Oreo Balls. Your valuable feedback not only helps us but also helps other home bakers discover the sheer joy and ease of this fantastic holiday recipe!
Pin
Christmas Oreo Balls
Ingredients
- 8 oz softened Cream Cheese
- 14.5 oz Oreo Cookies regular not double stuff
- 8 oz Chocolate Dipping Chips
- 8 oz White Chocolate Dipping Chips
- 4 oz Green Candy Melts
- 4 oz Red Candy Melts
- Christmas Sprinkles
Instructions
- Line a cutting board or baking sheet with parchment paper.
- Finely crush Oreos in a food processor.
- Combine cream cheese and crushed cookies until well blended in a large mixing bowl.
- Form the mixture into 1″ balls and place them on the prepared sheet.
- Place them in the freezer for 30 minutes.
- Heat both of the dipping chocolates in 2 separate bowls by microwaving for 1 minute stirring and repeating until melted.
- Using a fork, dip each ball into chocolate to completely coat. Shake off excess and return to the tray. Dip half of the Oreo balls in the melted chocolate and the other half in the melted white chocolate.
- Top some of the Oreo balls with the Christmas Sprinkles before the chocolate hardens. Then allow the chocolate to harden at room temperature.
- Then melt the candy melts in 2 separate bowls by microwaving them in 30 second intervals, stirring after each interval until fully melted.
- Drizzle over the chocolate balls without the sprinkles. Allow to harden and then they are ready to enjoy!
Recipe Notes
Nutrition Facts
Pin This Now to Remember It Later
Pin Recipe
