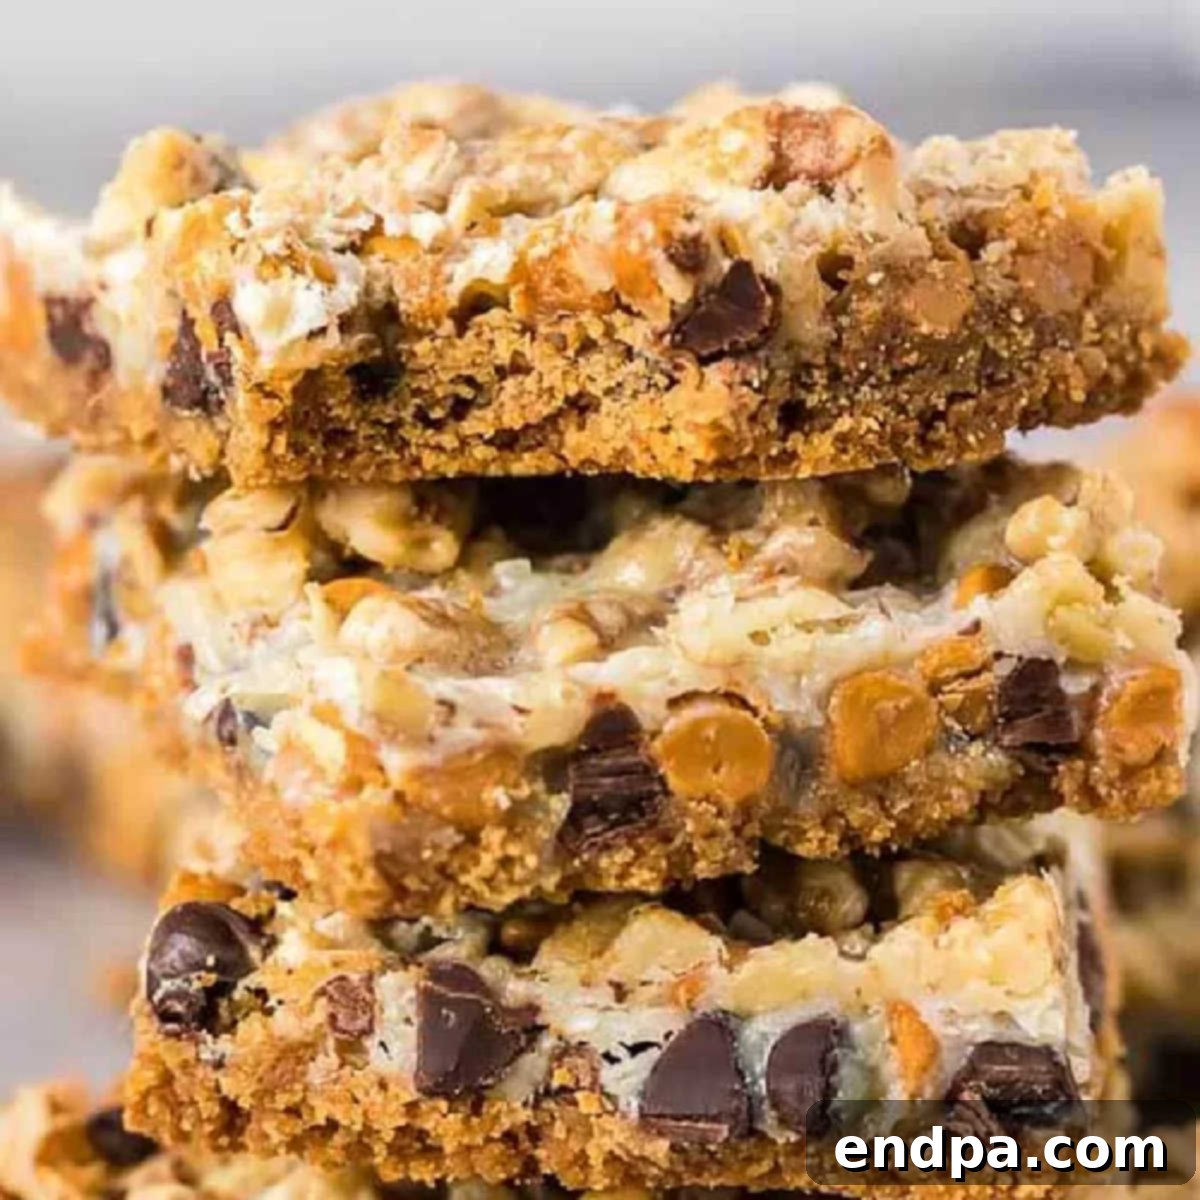
Ultimate Magic Cookie Bars: A Decadent Seven-Layer Delight
Indulge in the unparalleled pleasure of decadent layers of rich chocolate chips, creamy butterscotch, crunchy nuts, and more with this ultimate Magic Cookie Bars Recipe. Each bite offers a symphony of textures and flavors, transporting you to dessert heaven. What makes this recipe truly magical is not just its heavenly taste, but also its incredible simplicity. These seven-layer bars are remarkably quick and easy to prepare, making them an ideal treat for seasoned bakers and novices alike.
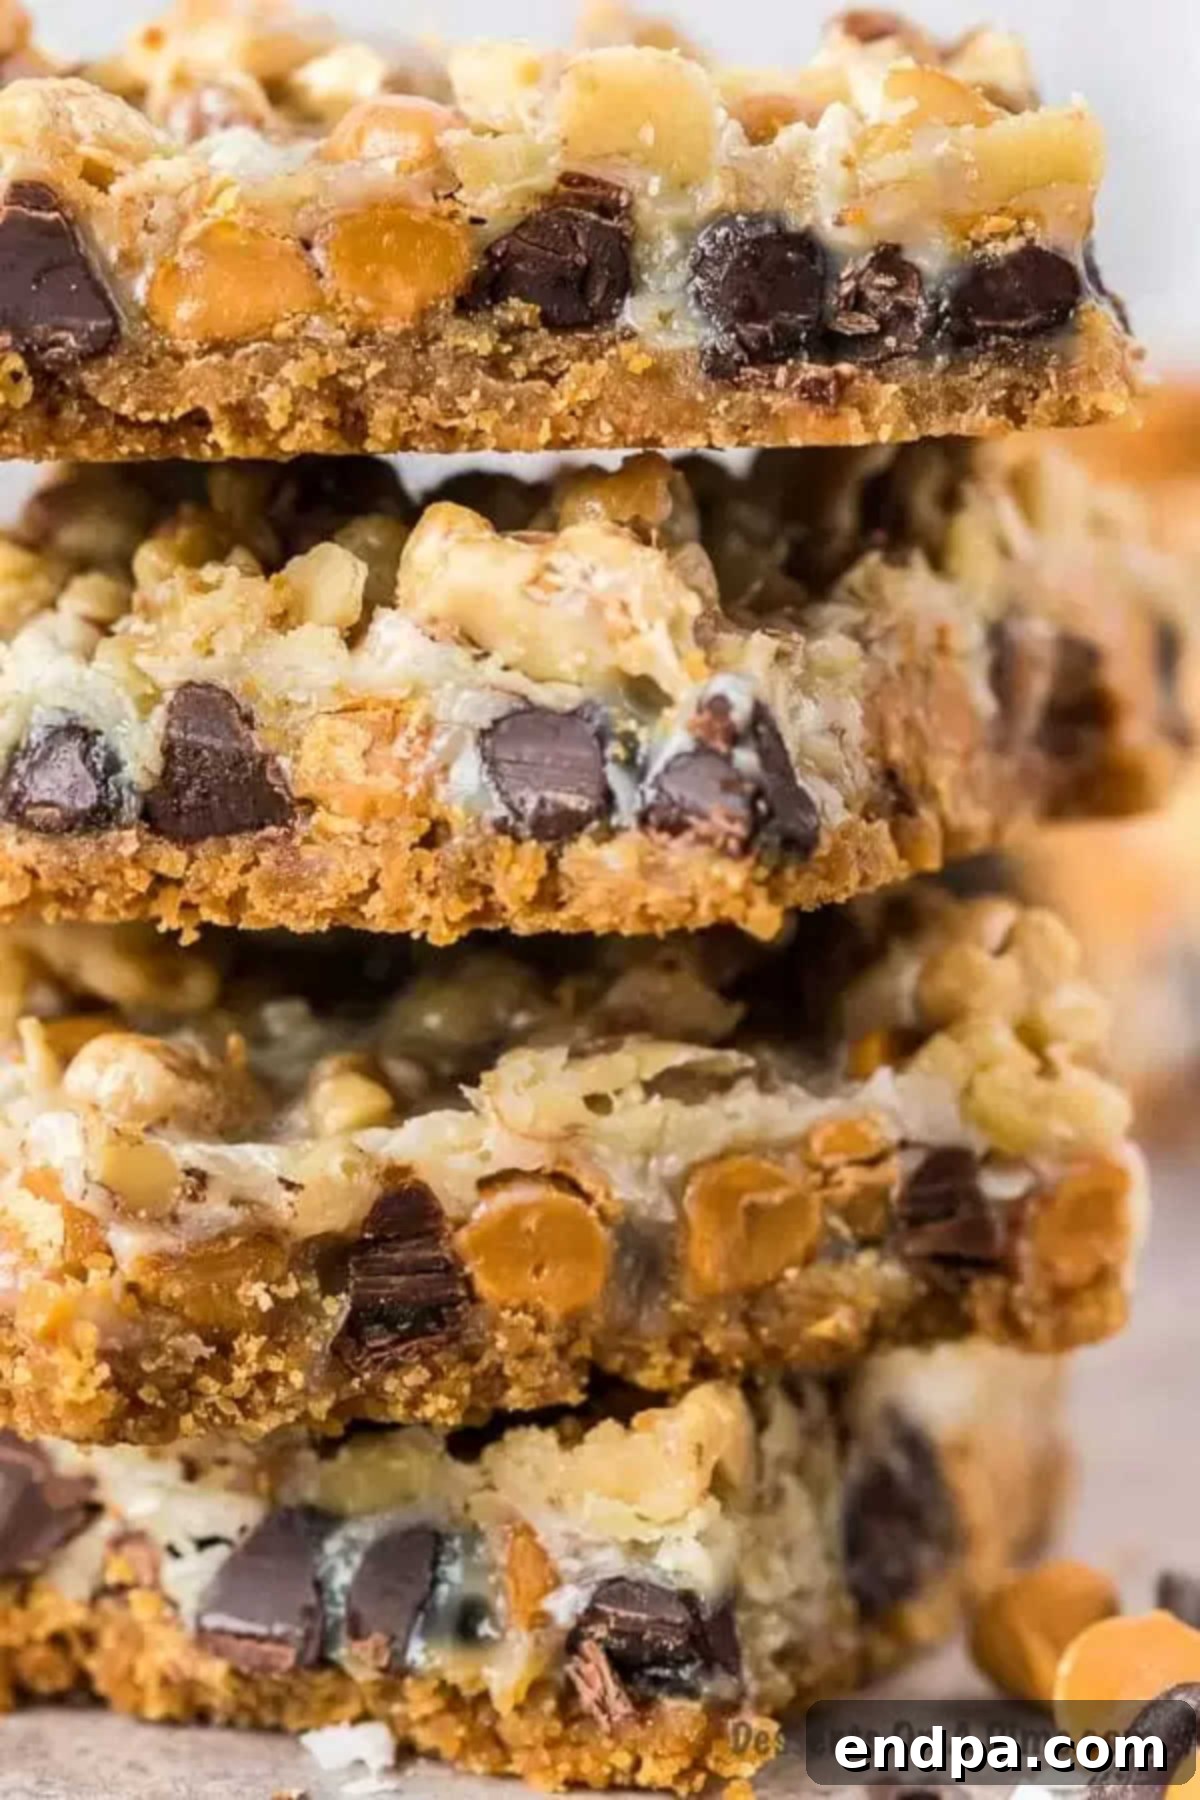
Growing up, few treats held a special place in my heart quite like cookie bars. They evoke a flood of wonderful memories, conjuring images of family gatherings and cozy evenings. If you’ve yet to experience the pure joy of Magic Cookie Bars, consider this your official invitation to pause whatever you’re doing and bake a batch. You’ll soon understand why these “seven layer bars” earn their enchanting moniker – they truly are magical! For those who love creative twists on classics, you might also enjoy exploring Oreo Magic Bars for another delightful variation.
The versatility of dessert bars is simply unmatched. Beyond this classic, our collection features an array of tempting options. Don’t forget to try our beloved Toll House Chocolate Chip Cookie Bars, which bring a timeless cookie favorite into a convenient bar form, or the refreshing Strawberry Lemonade Sugar Cookie Bars, perfect for a lighter, fruity touch. Indeed, we celebrate the endless possibilities with our comprehensive list of 73 Cookie Bar Recipes!
For coconut enthusiasts, we have a variety of recipes that highlight this tropical flavor. Explore our Homemade Mounds Bar Recipe for a rich, dark chocolate and coconut pairing, delightful Macaroon Cookies, or our indulgent Coconut Chocolate Chip Cookies Recipe. Each offers a unique way to enjoy the distinctive taste of coconut in your desserts.
What’s in this Post: Ultimate Magic Cookie Bars Recipe
- The Magic Behind Seven Layers
- Essential Ingredients for Your Magic Bars
- Creative Variations to Customize Your Bars
- Step-by-Step Guide: How to Make Magic Cookie Bars
- Expert Baking Tips for Perfect Magic Bars
- Frequently Asked Questions About Magic Cookie Bars
- More Irresistible Easy Dessert Bars
- Magic Cookie Bars Recipe Card
The Magic Behind Seven Layers: Unpacking Magic Cookie Bars
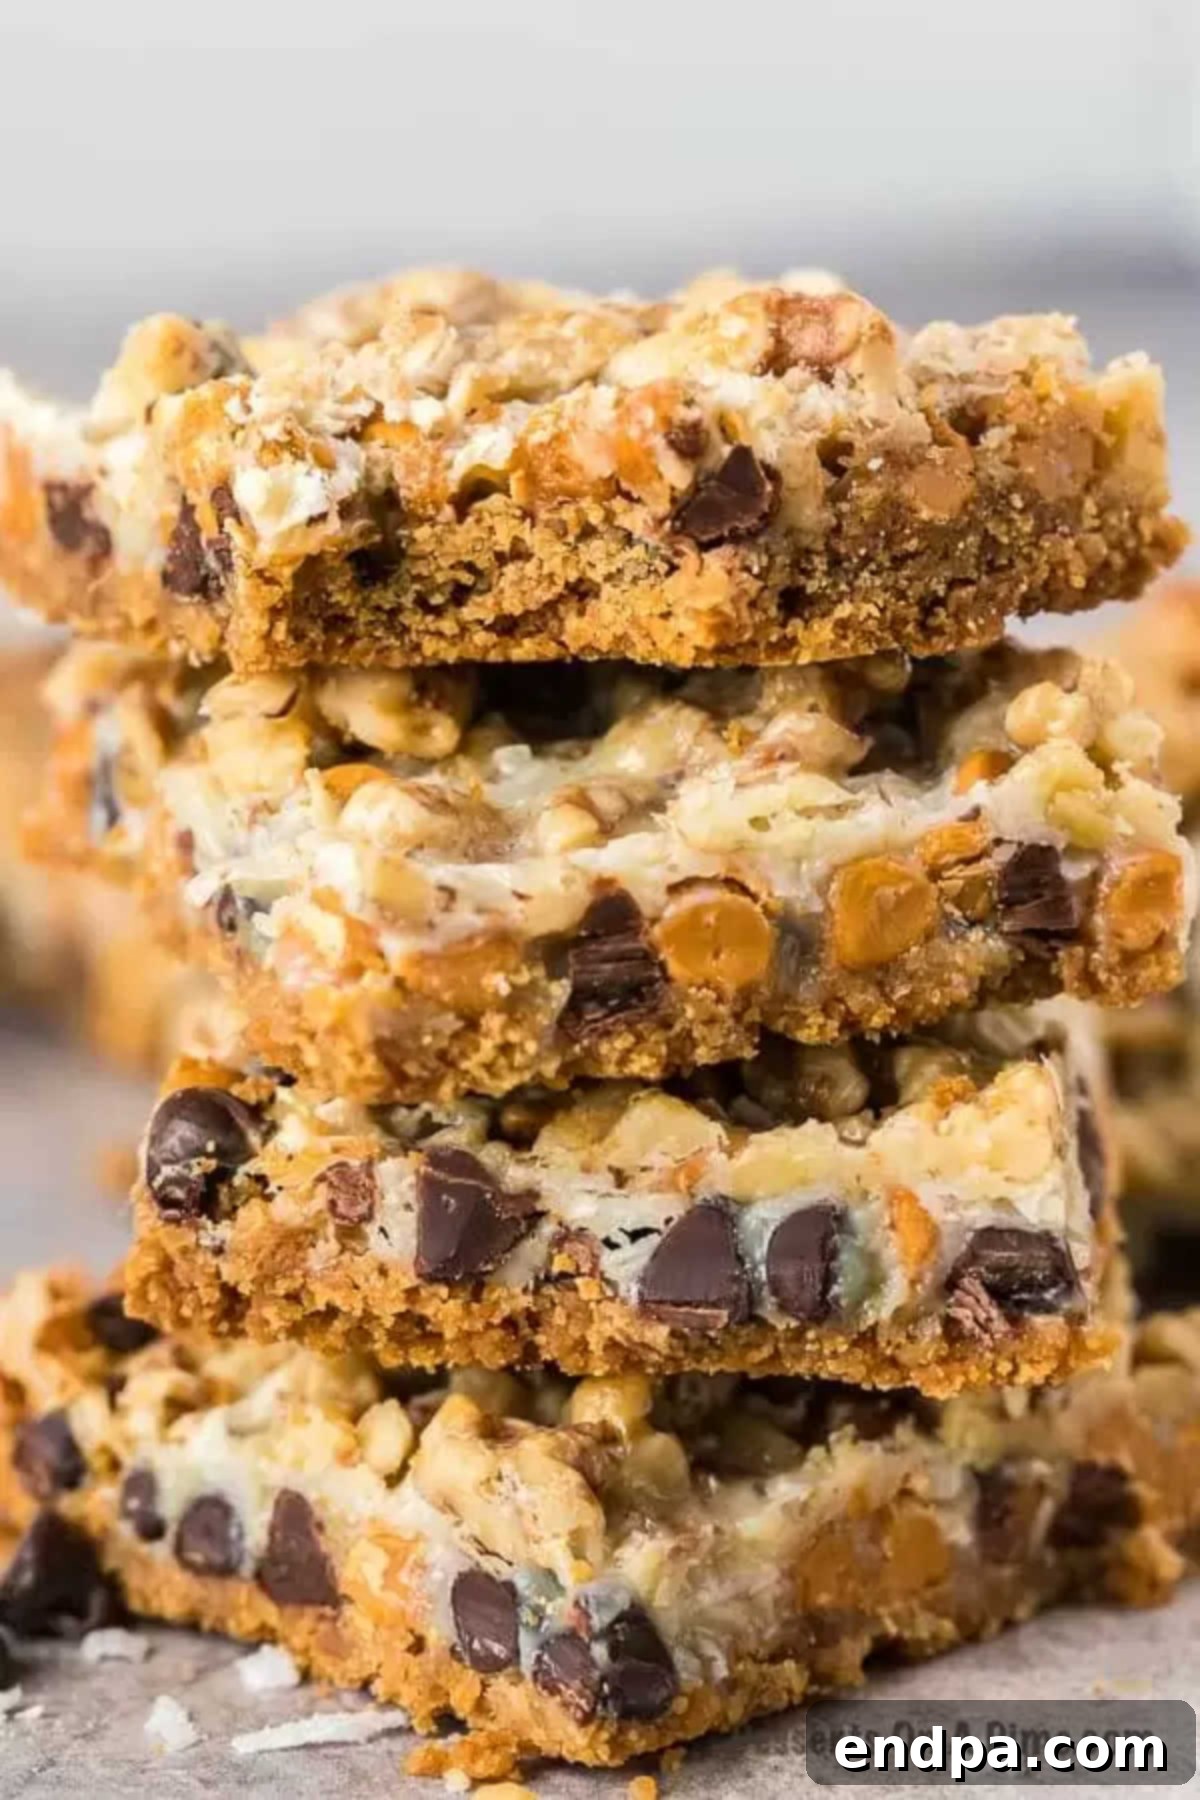
At its heart, the classic Magic Cookie Bar, often lovingly referred to as a “Seven Layer Bar,” is a masterpiece of simple ingredients coming together to create an extraordinary dessert. The beauty of this recipe lies in its elegant layering, each component contributing to the bar’s unique taste and texture. While the recipe is incredibly adaptable, the traditional structure that gives these bars their distinctive charm typically includes these seven delicious layers:
- Golden Graham Cracker Crust: A sweet, buttery base that holds all the magic together.
- Rich Melted Butter: Binds the crust and infuses a foundational richness.
- Sweet Condensed Milk: The “glue” that melts and caramelizes, creating a chewy, gooey texture and sweet, milky flavor.
- Semi-Sweet Chocolate Chips: Providing bursts of classic chocolatey goodness.
- Creamy Butterscotch Chips: Offering a distinct, buttery caramel-like flavor that perfectly complements the chocolate.
- Crunchy Nuts: Typically walnuts or pecans, adding a delightful texture contrast and earthy undertone.
- Sweetened Shredded Coconut: Delivering a tropical chewiness and subtle sweetness that ties all the flavors together.
It’s the combination of these elements, melting and mingling during baking, that creates the truly “magic” experience. Each bite delivers a harmonious blend of crisp, chewy, gooey, and crunchy sensations, making them utterly irresistible.
Essential Ingredients for Your Magic Bars: What You’ll Need
Crafting the perfect batch of Magic Cookie Bars begins with a few pantry staples. The beauty of these ingredients is their accessibility and the incredible flavor profile they create when combined. Here’s a detailed look at what you’ll need to assemble these delightful seven-layer treats:
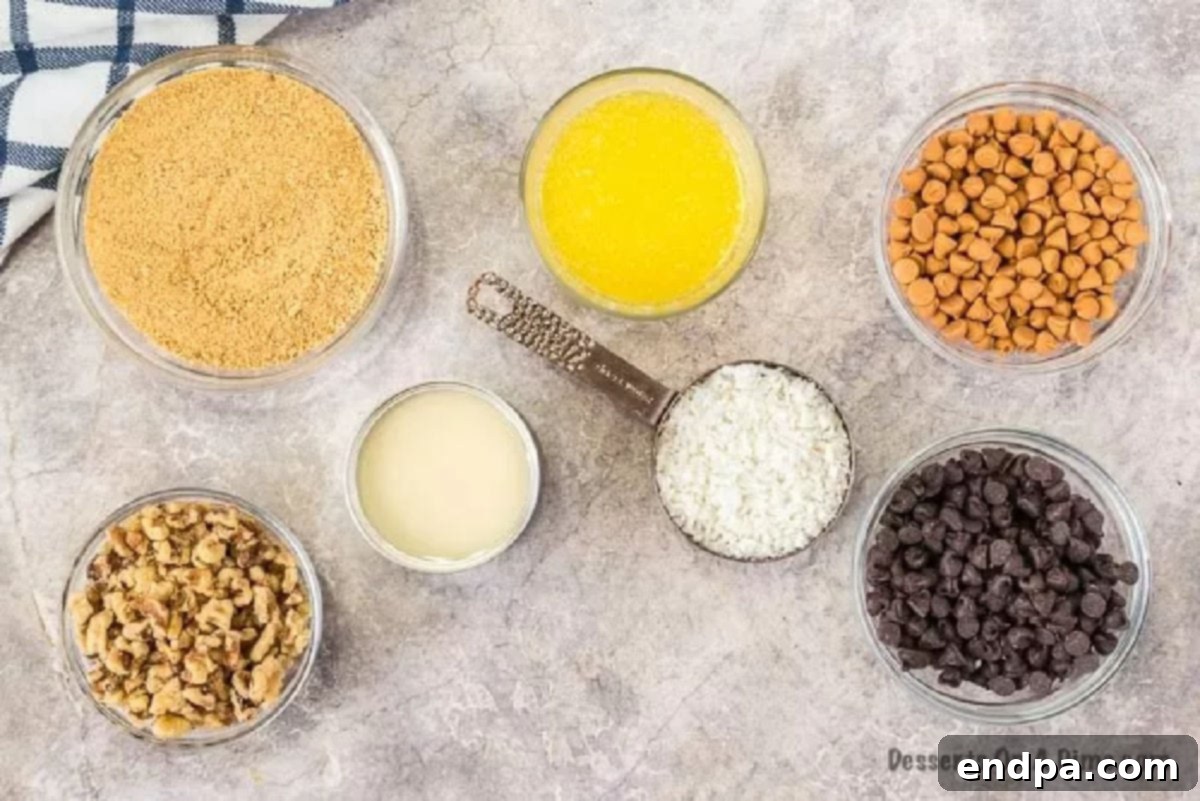
- Melted Butter: This forms the rich base of your graham cracker crust, ensuring it’s perfectly golden and flavorful.
- Semi-Sweet Chocolate Chips: The classic choice for a balanced sweetness and rich cocoa flavor.
- Butterscotch Chips: These are crucial for the distinctive magic bar flavor, offering a buttery, caramel-like sweetness.
- Graham Cracker Crumbs: The foundation of your crust, providing a subtly sweet and crunchy base.
- Sweetened Condensed Milk: The star ingredient that binds everything together, creating that signature gooey, caramelized texture. You can even try our Homemade Sweetened Condensed Milk Recipe for an extra touch!
- Sweetened Shredded Coconut: Adds a delightful chewiness and tropical note, enhancing the overall flavor complexity.
- Chopped Walnuts: Provides a satisfying crunch and nutty depth that complements the sweet layers.
Each ingredient plays a vital role in building the layers of flavor and texture that make Magic Cookie Bars so extraordinary. For precise measurements and detailed instructions, refer to the full recipe card at the bottom of this post.
Creative Variations to Customize Your Bars: Make Them Your Own!
While the classic Magic Cookie Bar recipe is undeniably perfect, one of its greatest strengths is its adaptability. Don’t hesitate to get creative and customize these bars to suit your personal taste or whatever ingredients you have on hand. Here are some fantastic variations to inspire your next batch:
- Change the Crust:
- Chocolate Graham Crackers: Swap regular graham crackers for chocolate ones to create a deeper, richer chocolate base.
- Cookie Crusts: Get adventurous! Use crushed gingersnap cookies for a spicy, warm flavor, or crushed shortbread cookies for a buttery, delicate base. Simply process them in a food processor with melted butter until fine, just like you would with graham crackers.
- Pretzel Crust: For a sweet and salty twist, try using crushed pretzels mixed with butter for the base.
- Experiment with Chips:
- Peanut Butter Chips: If you’re a peanut butter lover, swapping butterscotch chips for peanut butter chips introduces a delightful nutty and creamy flavor.
- Dark Chocolate Chips: For a more intense chocolate experience, use dark chocolate chips instead of semi-sweet.
- White Chocolate Chips: Add a creamy, vanilla-like sweetness with white chocolate chips, which pair beautifully with coconut.
- Add Candy and Toffee:
- Chopped Heath or Toffee Bits: Sprinkle in chopped Heath bars or toffee bits for an amazing caramel and crunch texture boost. They melt slightly into the bars, creating pockets of rich flavor.
- Mini Marshmallows: For an extra gooey, campfire-inspired treat, a layer of mini marshmallows can be added, especially delicious when lightly toasted during baking.
- Nutty Alternatives:
- Candied Pecans: If you happen to have some candied pecans from holiday baking, they make an incredible substitution for regular walnuts, adding an extra layer of sweetness and spice.
- Pecans: Simply chopped pecans can replace walnuts for a slightly different, equally delicious nutty flavor.
- Almonds: Sliced or chopped almonds offer a milder, slightly sweeter crunch.
- No Nuts: If you have nut allergies or simply aren’t a fan, feel free to omit them entirely. You can compensate by adding more chocolate chips or coconut.
- Dried Fruit:
- Dried Cranberries or Cherries: A scattering of dried cranberries or cherries can add a pleasant tartness and chewiness, balancing the sweetness of the bars.
These simple adjustments allow you to transform the classic Magic Cookie Bar into a personalized treat, perfect for any palate or occasion.
Step-by-Step Guide: How to Make Magic Cookie Bars
Creating these heavenly Magic Cookie Bars is surprisingly straightforward, involving just a few simple steps. Follow this detailed guide to ensure your seven-layer delights turn out perfectly every time:
- Step 1: Prepare Your Oven and Pan. Begin by preheating your oven to 350 degrees Fahrenheit (175 degrees Celsius). This ensures even baking from the moment your bars enter the oven. Next, line a 9×13 inch baking dish with aluminum foil or parchment paper, extending the edges slightly over the sides to create “handles.” This crucial step will make it incredibly easy to lift the entire batch out of the pan for cooling and slicing, significantly simplifying cleanup. Don’t forget to lightly spray the foil or parchment paper with non-stick cooking spray.
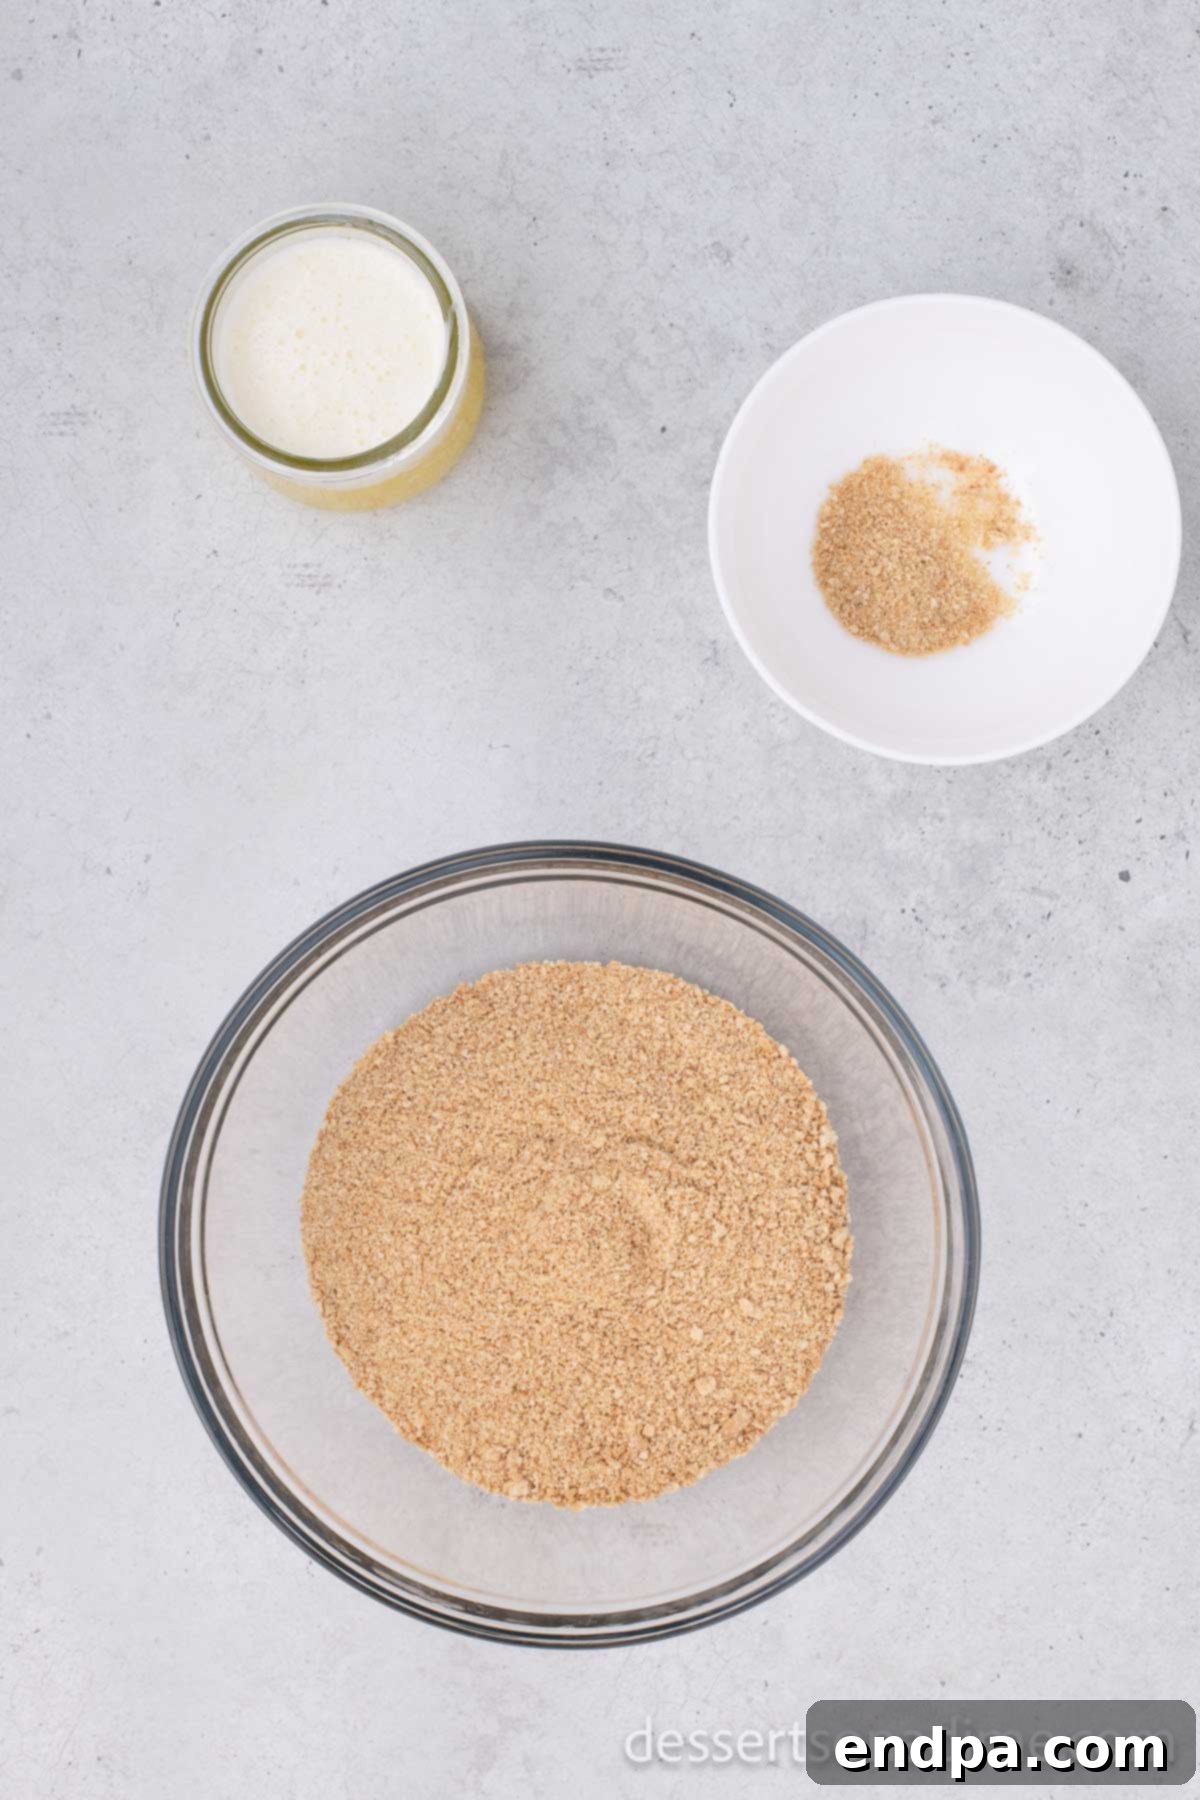
Step 2: Prepare the Graham Cracker Crust. In a medium-sized mixing bowl, combine the finely crushed graham cracker crumbs with the melted butter. You can achieve fine crumbs by using a food processor or by placing graham crackers in a sturdy Ziploc bag and crushing them with a rolling pin. Ensure the butter is thoroughly melted and well-incorporated with the crumbs for a cohesive crust.
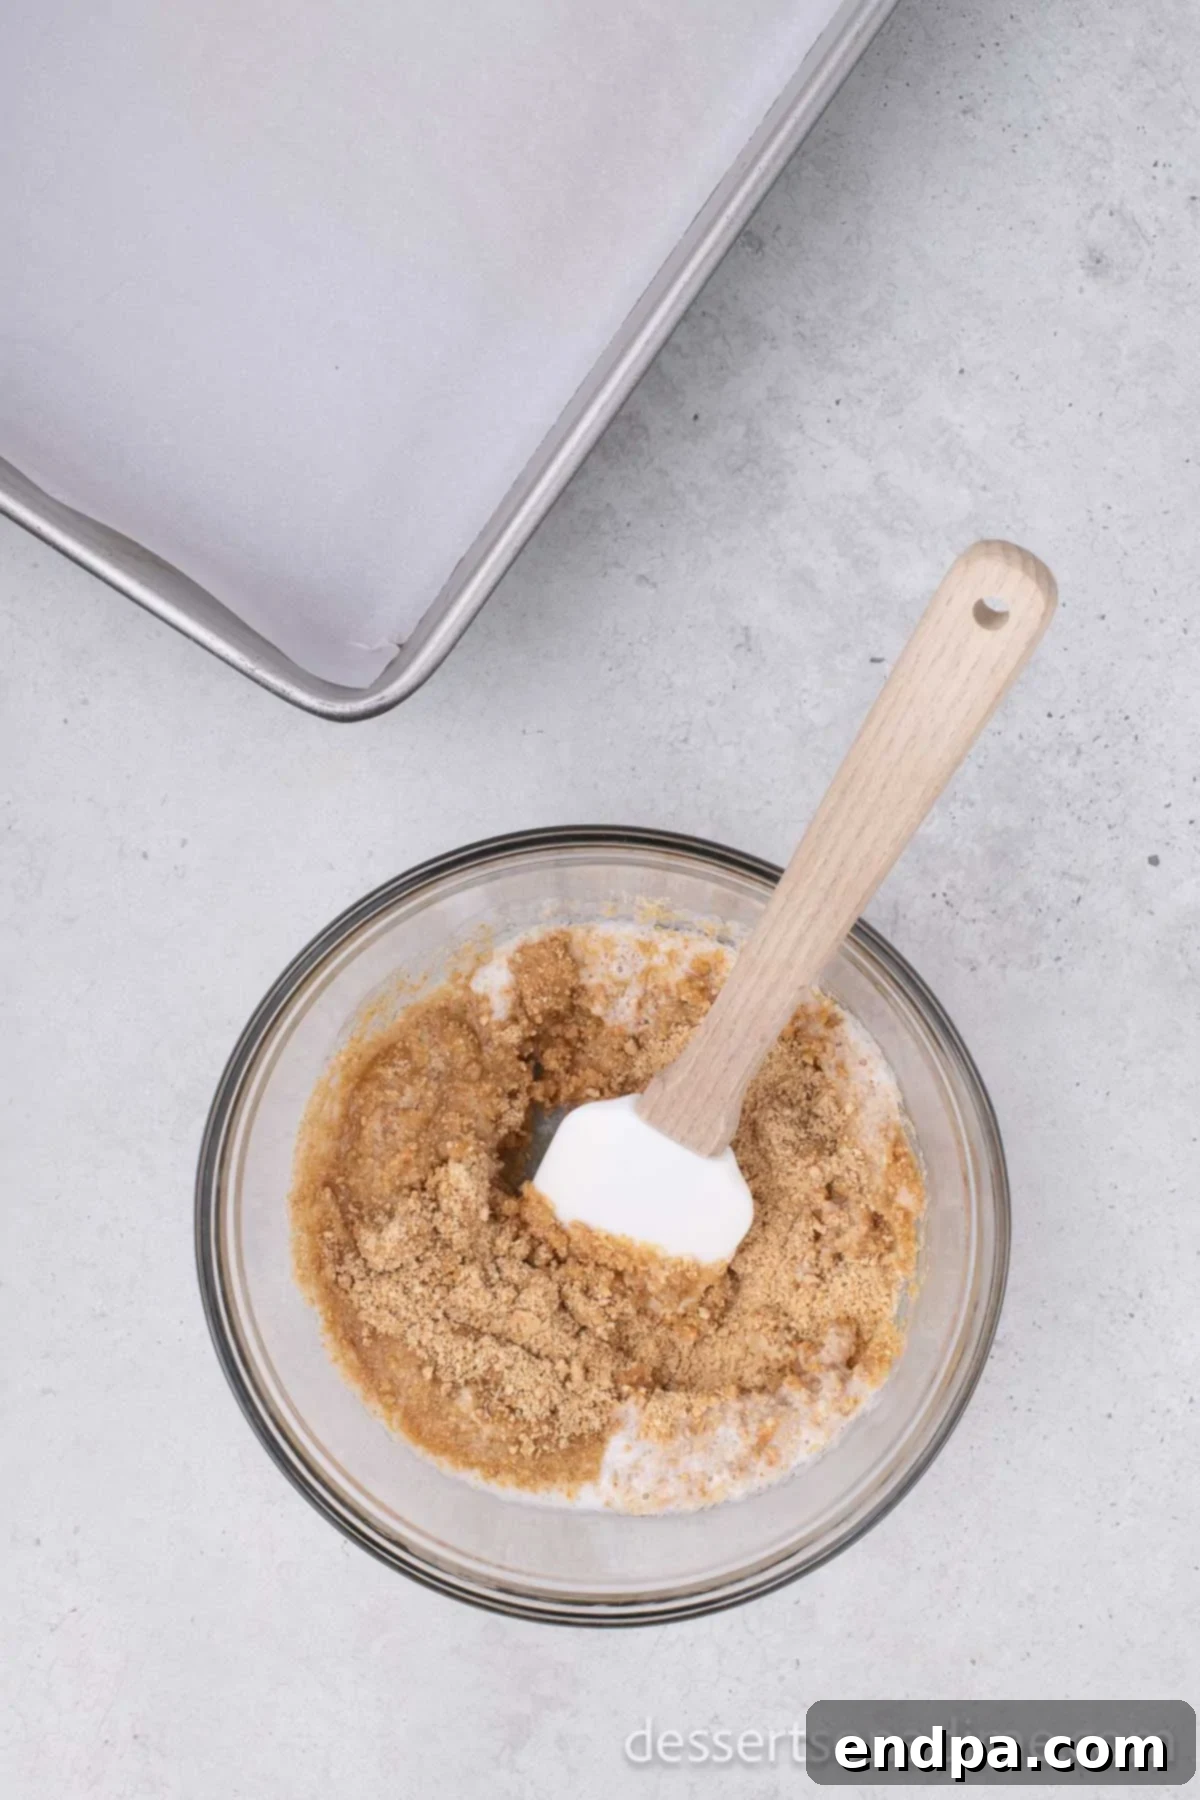
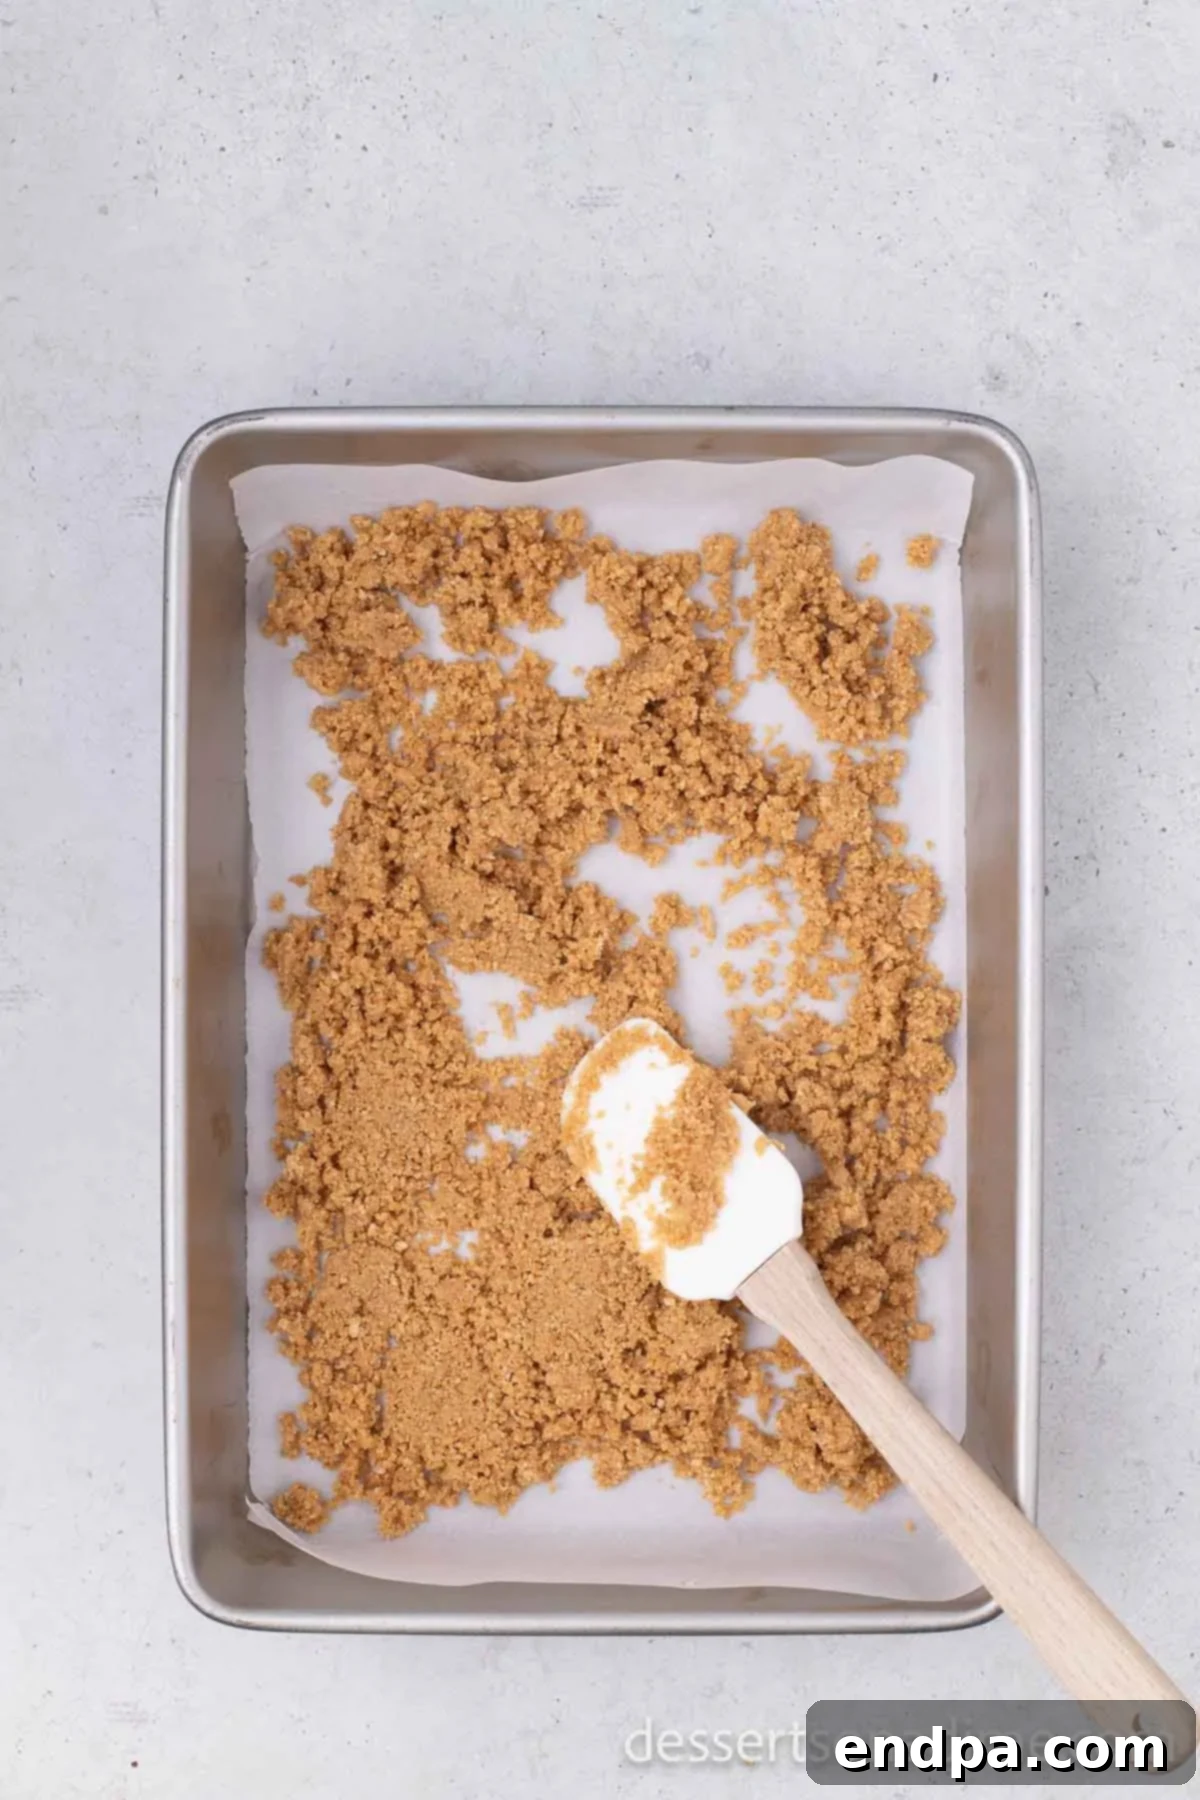
Step 3: Combine and Press the Crust. Mix the graham cracker crumbs and melted butter until they are fully combined and resemble wet sand. Then, pour this mixture into your prepared 9×13 inch baking pan. Using the bottom of a glass or your fingers, firmly and evenly press the mixture across the bottom of the pan to form a compact crust. A well-pressed crust will prevent crumbling when you slice the bars later.
Step 4: Layer the Chocolate Chips. Now for the magic! Evenly sprinkle the semi-sweet chocolate chips over the graham cracker crust. Make sure to distribute them well, ensuring every piece of bar will have a delightful chocolatey bite.
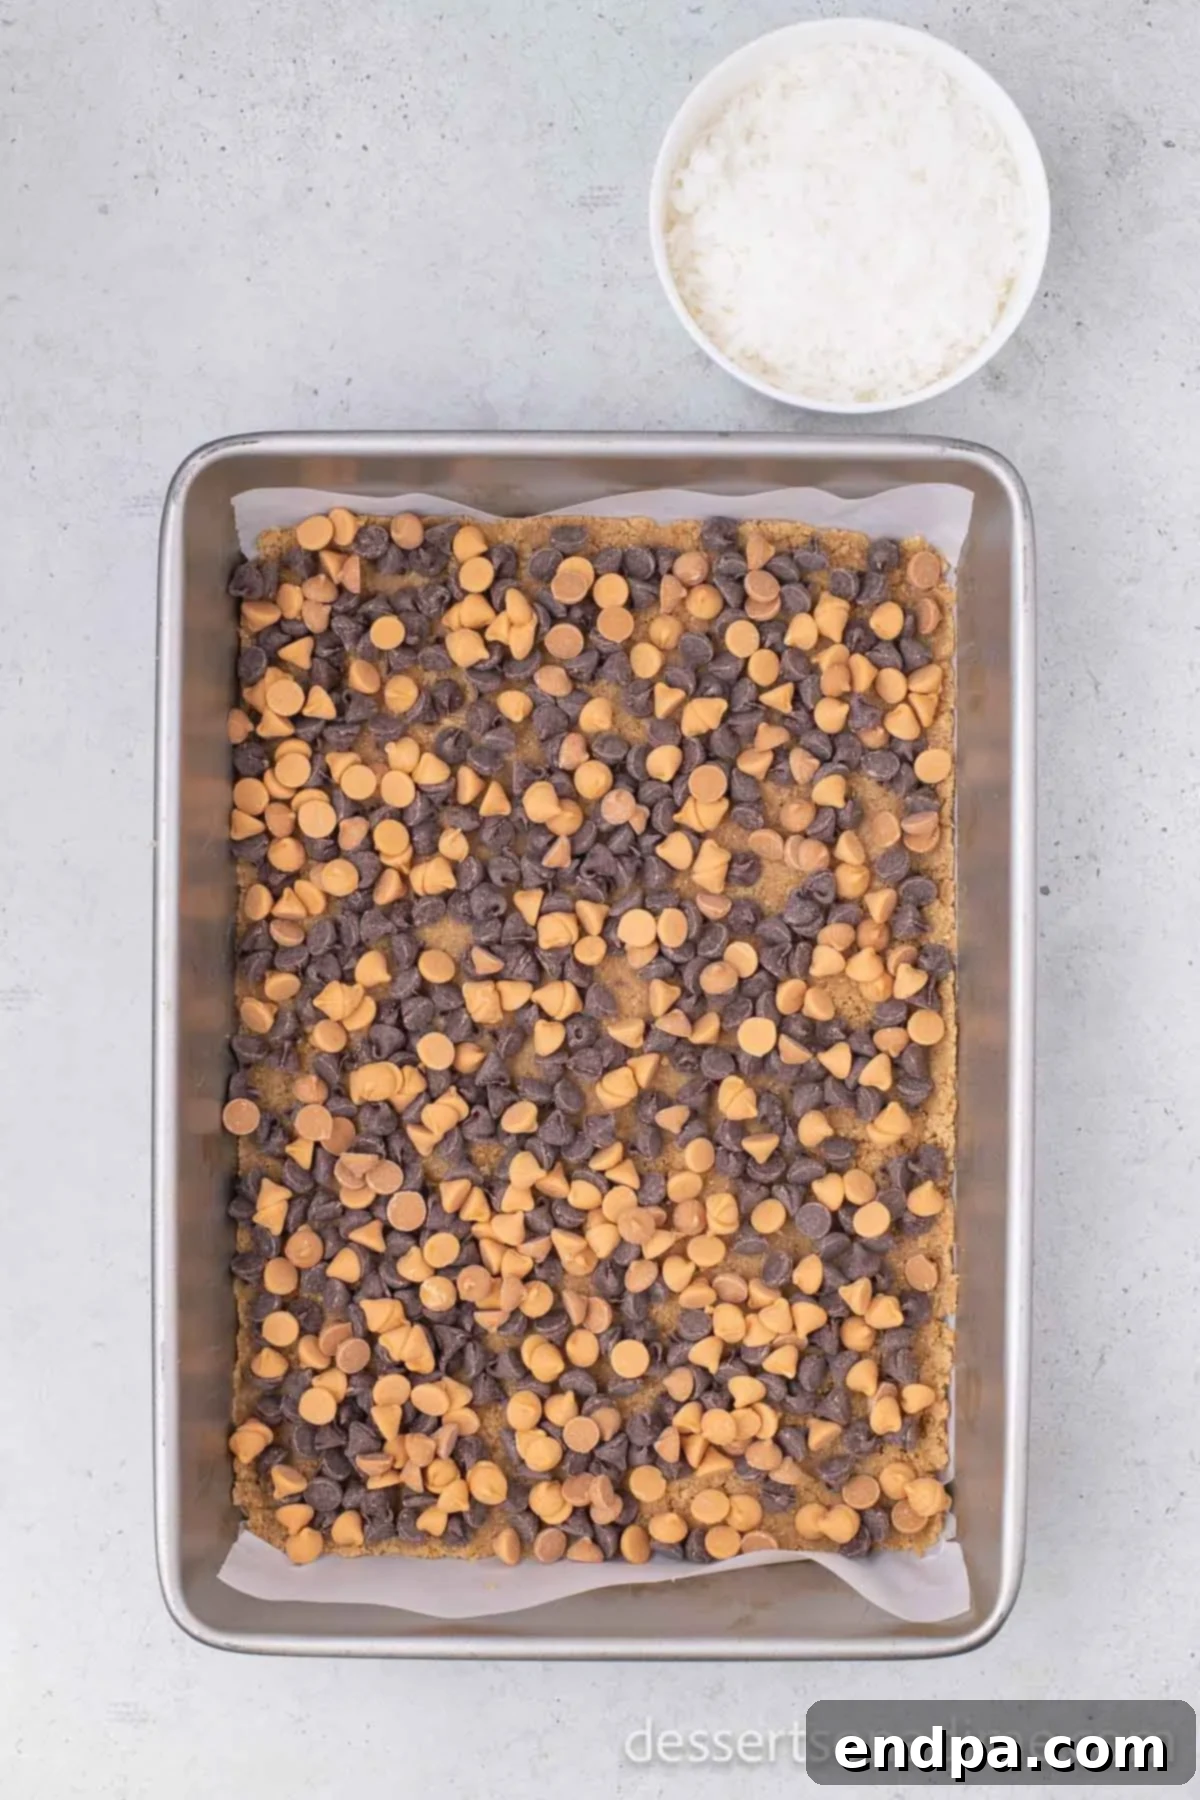
Step 5: Add the Butterscotch Chips. Next, scatter the butterscotch chips evenly over the chocolate chips. These chips are key to the unique flavor profile of Magic Cookie Bars, offering a rich, caramel-like sweetness that perfectly complements the other layers.
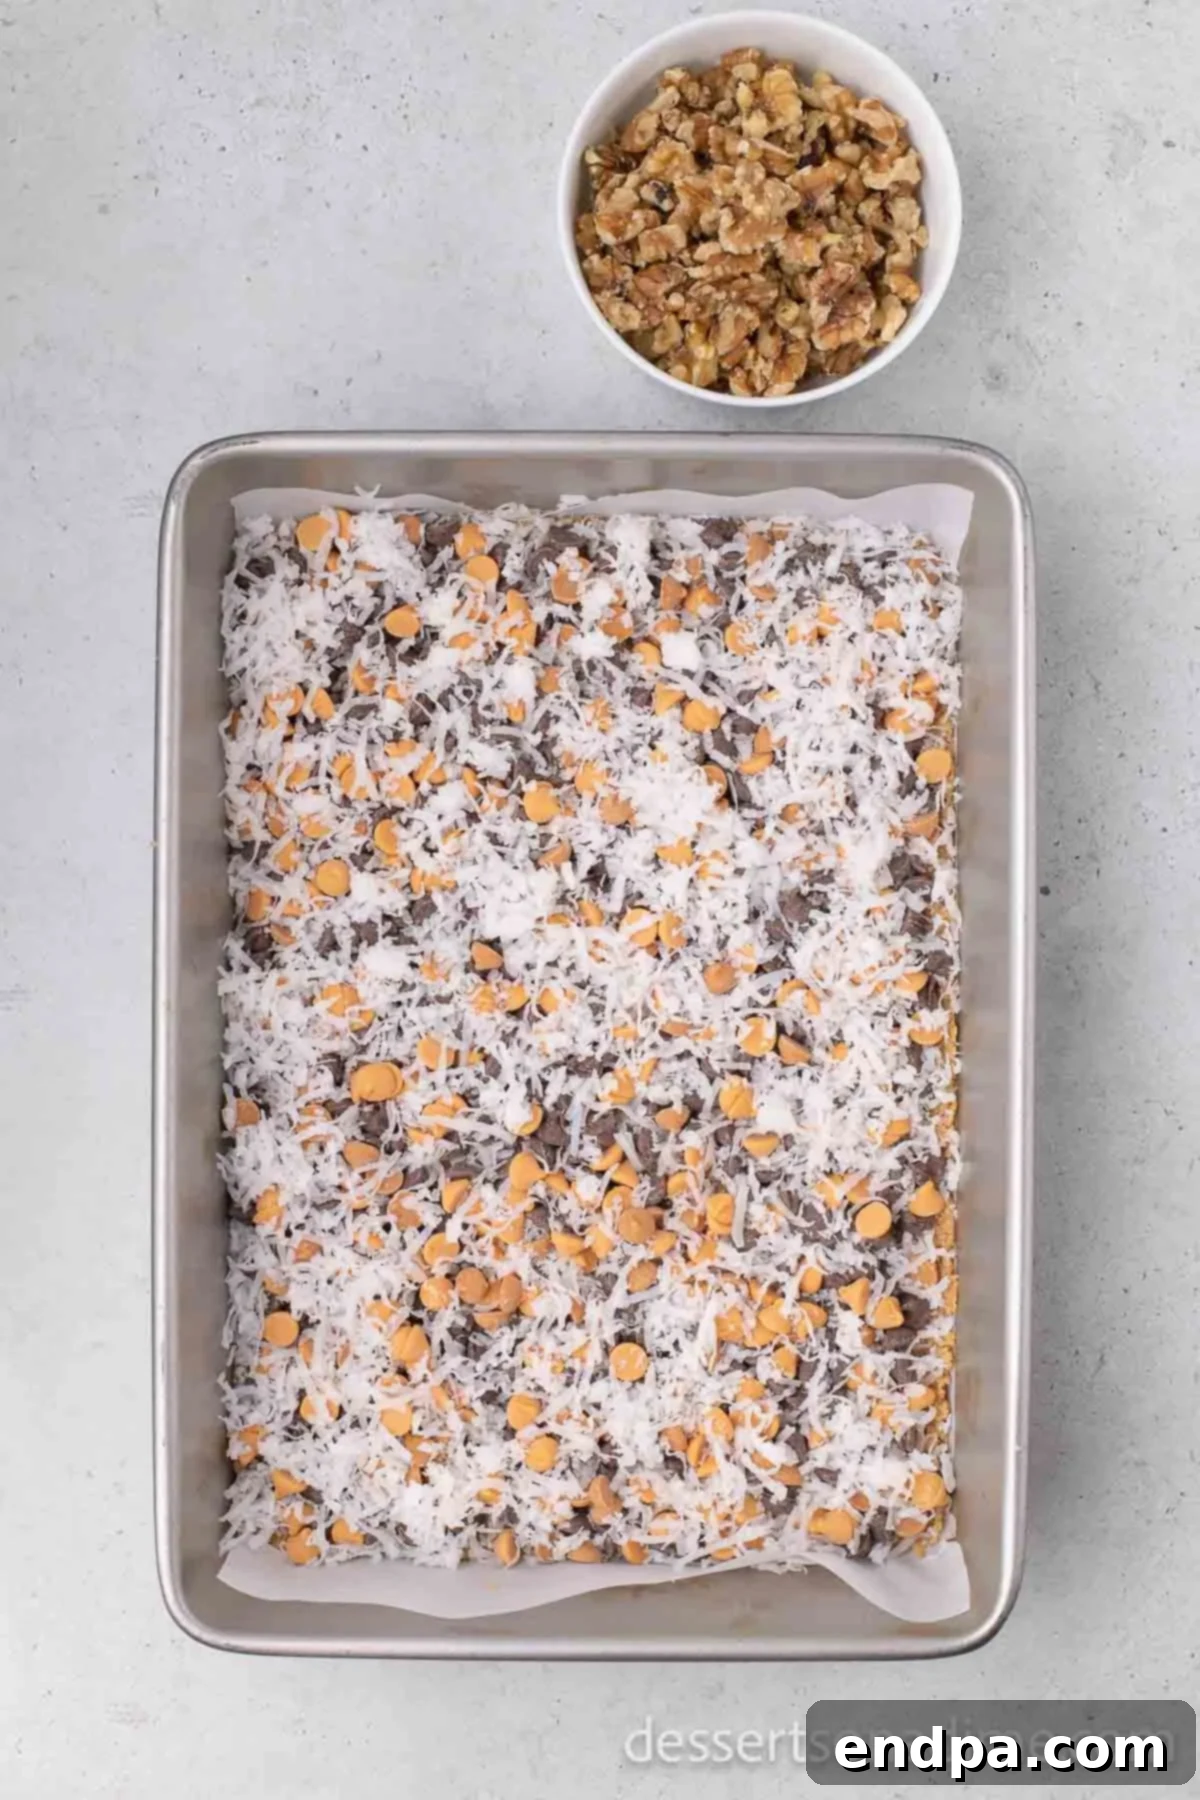
Step 6: Introduce Coconut and Walnuts. Sprinkle the sweetened shredded coconut over the chip layers, followed by the chopped walnuts. These additions bring essential texture and flavor to the bars, with the coconut providing chewiness and the walnuts a satisfying crunch. Ensure an even spread for consistent flavor in every piece.
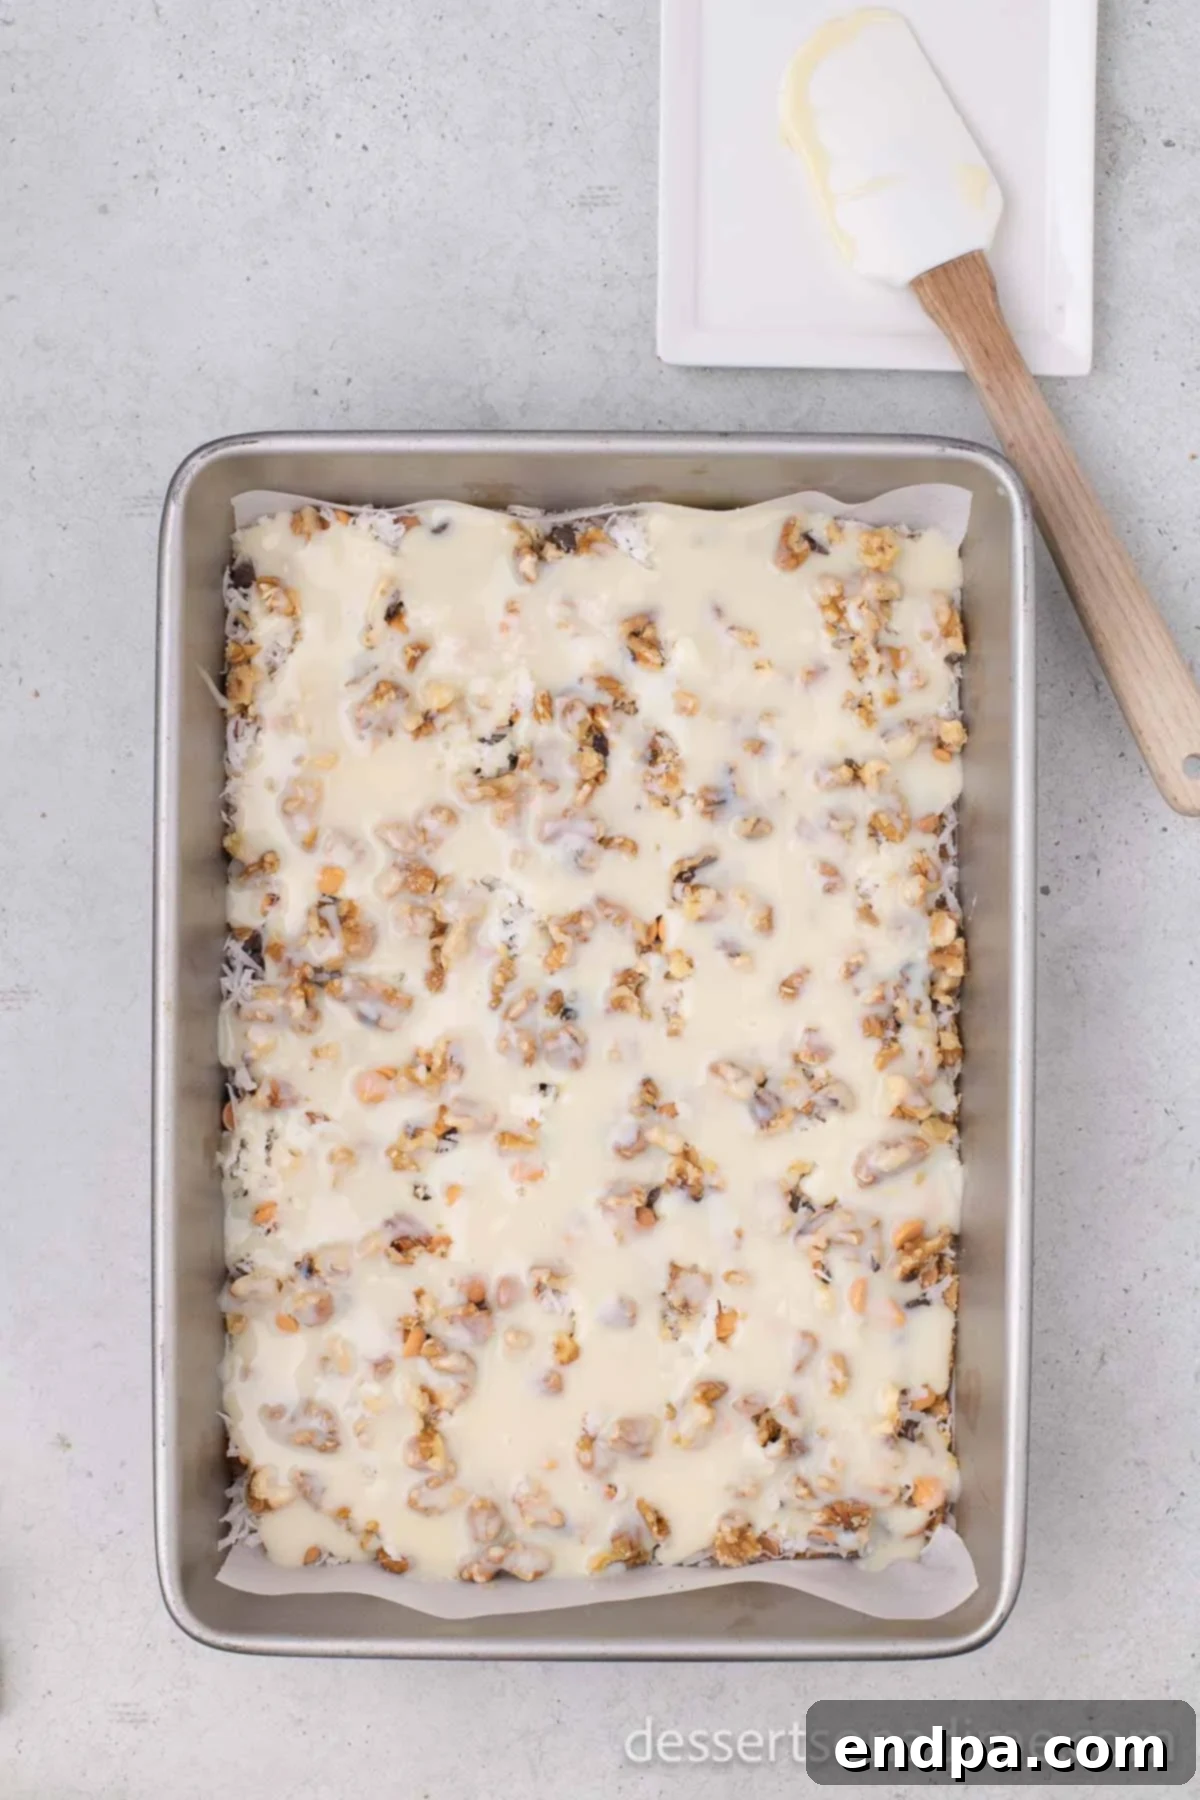
Step 7: Drench with Sweetened Condensed Milk. This is where the “magic” truly takes hold! Carefully pour the entire can of sweetened condensed milk evenly over all the layered ingredients. Use a spatula to gently spread the milk, ensuring it covers all the chips, coconut, and nuts. This milk will caramelize as it bakes, creating the signature gooey, chewy texture that makes these bars so irresistible.
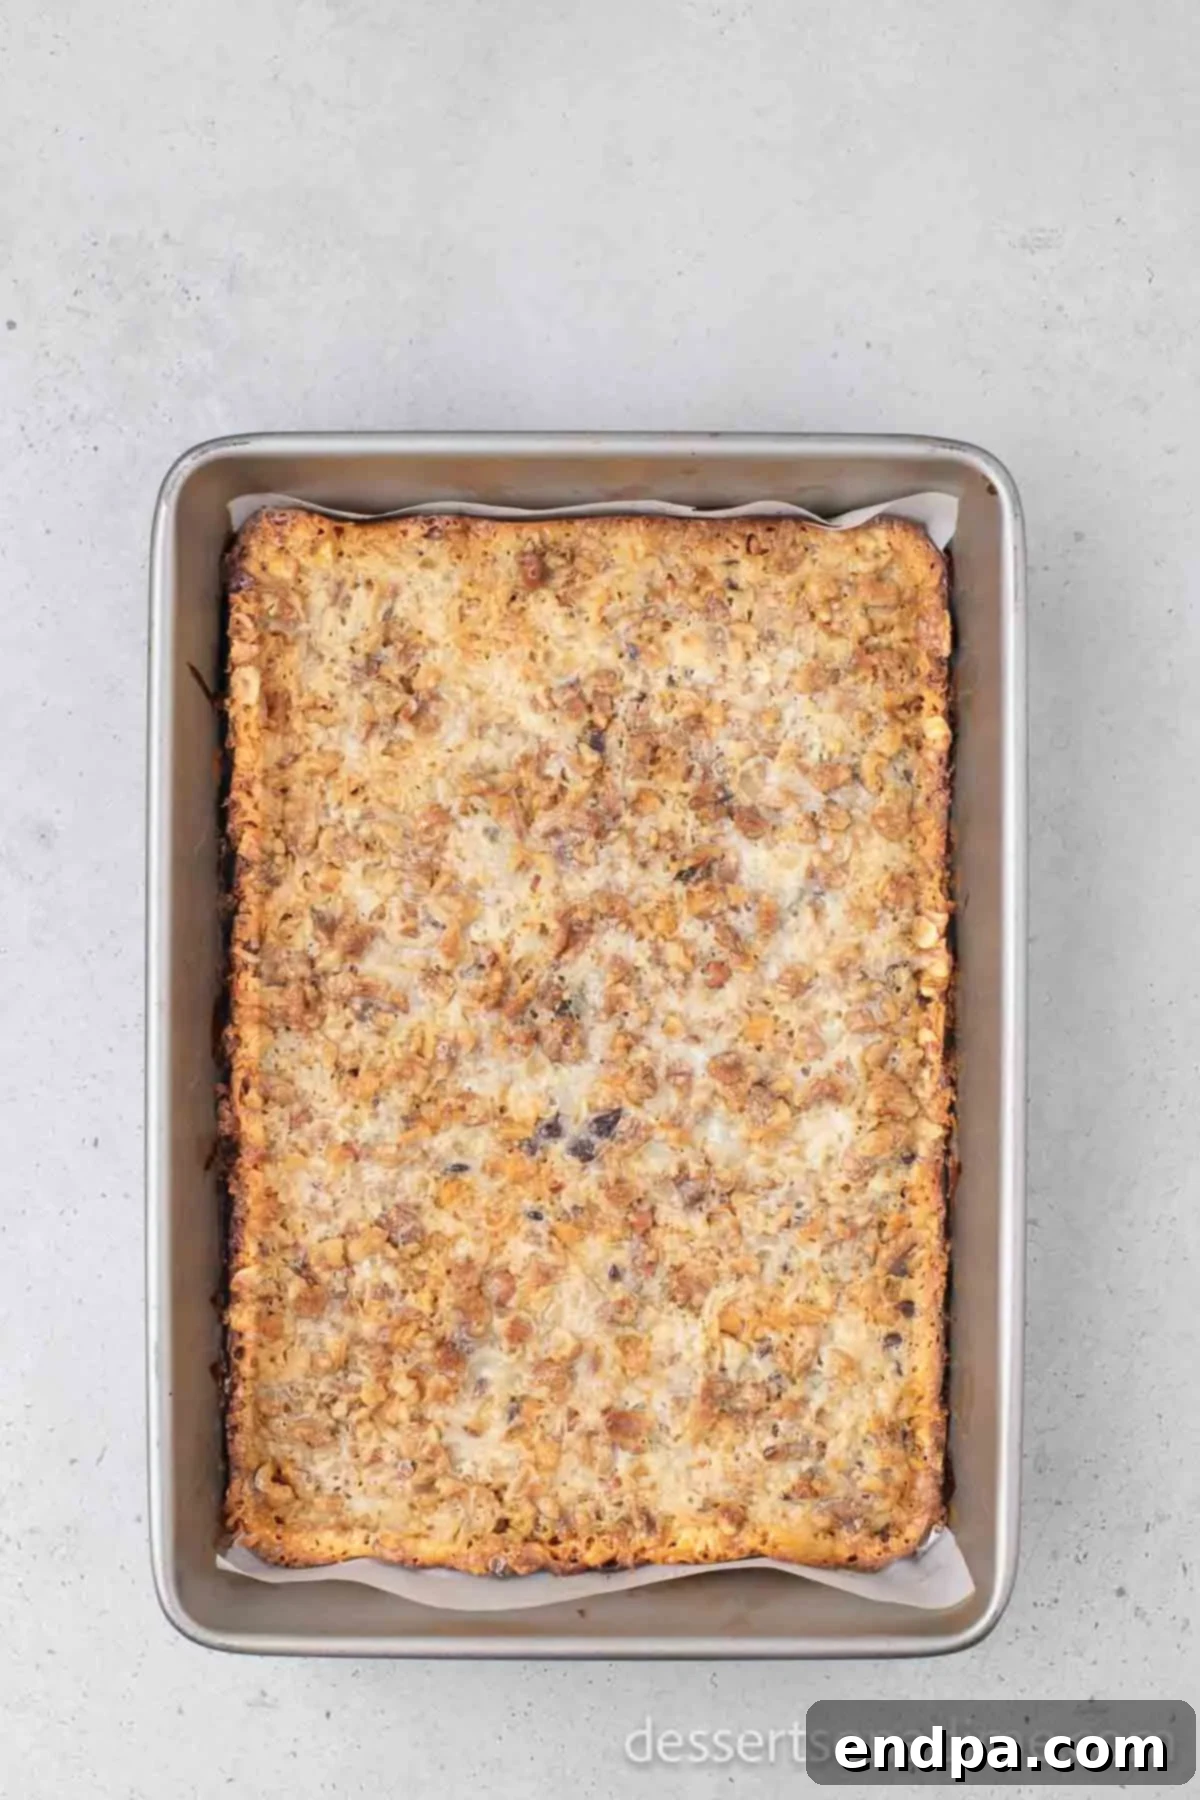
Step 8: Bake to Golden Perfection. Place the pan in your preheated oven and bake for approximately 25-30 minutes. The bars are ready when the edges begin to turn golden brown and the top layers are slightly browned and set. The condensed milk should be bubbling and caramelized. Avoid over-baking, as this can make the bars too firm.
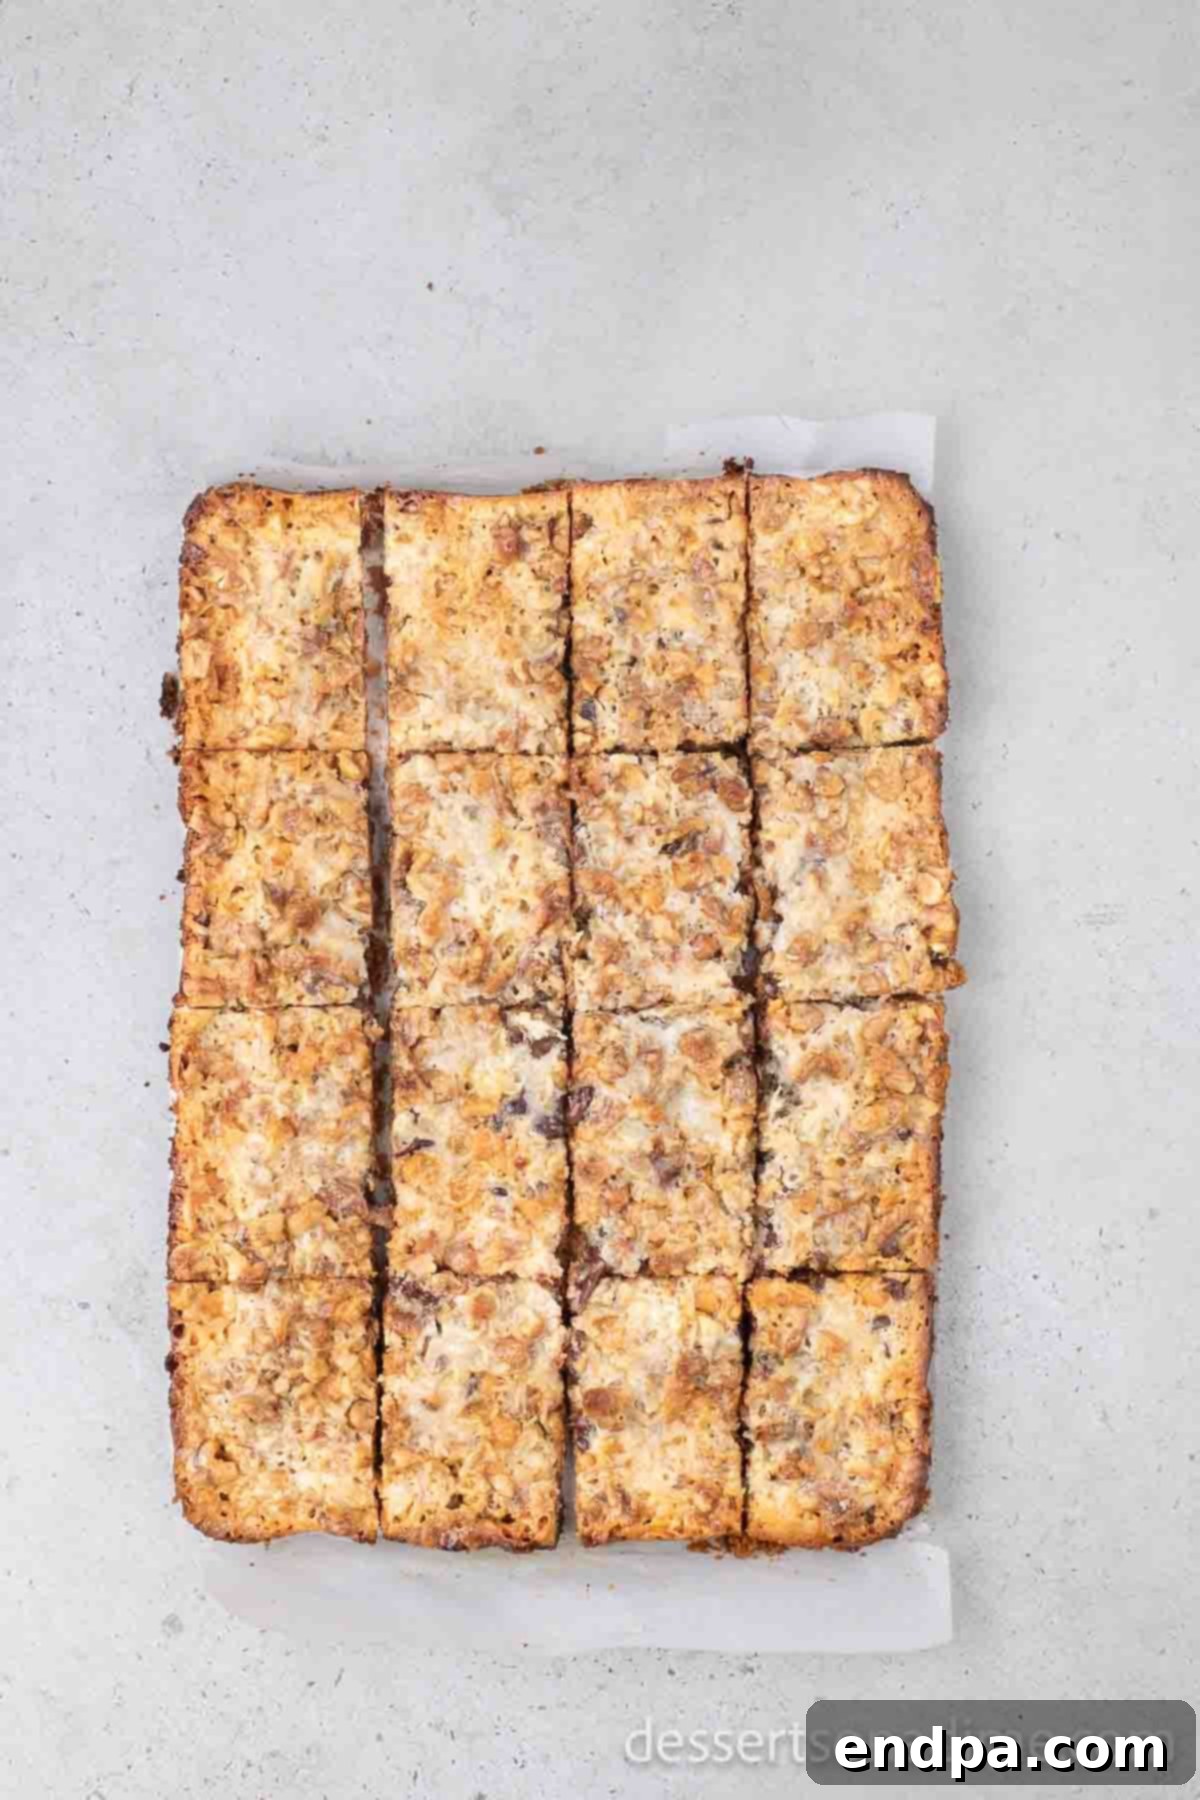
Step 9: Cool Completely and Slice. This step is crucial for perfect bars! Allow the Magic Cookie Bars to cool completely in the pan on a wire rack before attempting to slice them. Cooling solidifies the gooey layers, making for clean, neat cuts. Once thoroughly cooled, use the foil or parchment paper “handles” to lift the entire slab of bars out of the pan. Place on a cutting board, then slice into squares or rectangles of your desired size. Serve and enjoy your homemade seven-layer bliss!
Expert Baking Tips for Perfect Magic Bars: Achieve Flawless Results
While Magic Cookie Bars are known for their ease, a few expert tips can elevate your baking and ensure your bars are absolutely perfect every time. Pay attention to these details for truly flawless seven-layer treats:
- Always Line Your Baking Pan: This is arguably the most important tip! Lining your 9×13 inch baking pan with parchment paper or aluminum foil, leaving an overhang on the sides, creates natural “handles.” This allows you to easily lift the entire cooled batch out of the pan, making for effortless slicing and a much quicker, hassle-free cleanup. Don’t forget to lightly spray the liner with cooking spray for extra insurance against sticking.
- Ensure a Solid Crust: The graham cracker crust is the foundation of your bars. Make sure to combine the graham cracker crumbs and melted butter completely. There should be no dry spots, and the mixture should feel uniformly moist. This thorough mixing ensures the crust is stable and won’t crumble when you’re cutting and serving the bars.
- Press the Crust Firmly: After pouring the crust mixture into the prepared pan, use a flat-bottomed glass or your clean fingers to press it down very firmly and evenly. A well-compacted crust provides a sturdy base for all the other delicious layers and prevents it from falling apart when you take a bite.
- Even Layering is Key: When sprinkling your chocolate chips, butterscotch chips, coconut, and nuts, take the time to distribute them as evenly as possible over the graham cracker crust. This ensures that every single square of your Magic Cookie Bar offers a balanced medley of all seven flavors and textures.
- Spread Condensed Milk Thoroughly: The sweetened condensed milk is the binding agent that creates that signature gooey texture. After pouring it over the layered ingredients, use a spatula or the back of a spoon to gently spread it, ensuring it covers everything as evenly as possible. This guarantees a consistent, delicious chewiness throughout the bars.
- Coconut Preferences: If you’re not a fan of coconut, it’s perfectly fine to leave it out! Simply omit the shredded coconut from the recipe. To maintain the volume and deliciousness, consider adding an extra half cup of chocolate chips or nuts in its place.
- Cooling is Non-Negotiable: Patience is a virtue, especially when it comes to Magic Cookie Bars! It’s absolutely essential to allow the bars to cool completely to room temperature before attempting to slice them. If you cut them too soon, the warm, gooey layers will likely run and become a sticky mess, making clean cuts impossible. Chilling them in the refrigerator for 30 minutes to an hour after they’ve cooled to room temperature can also help achieve even cleaner slices.
By following these simple yet effective tips, you’re well on your way to baking a batch of Magic Cookie Bars that are truly outstanding.
Frequently Asked Questions About Magic Cookie Bars
For the cleanest and neatest slices, we highly recommend cutting your Magic Cookie Bars when they are completely cool. If you attempt to cut them while they are still warm, the gooey chocolate and condensed milk layers will likely create a sticky, uneven mess. The best approach is to first remove the entire slab of cooled bars from the pan using the parchment paper or foil liner. Place the slab on a sturdy cutting board. Use a sharp, non-serrated knife and wipe it clean between cuts to ensure crisp edges. Since these bars are rich and sweet, cutting them into smaller squares often makes them more enjoyable, allowing everyone to savor each decadent bite without feeling overwhelmed.
To keep your delicious Magic Cookie Bars fresh, place them in an airtight container. They can be stored at room temperature for up to 3-5 days. For longer freshness, especially in warmer climates, you might consider storing them in the refrigerator, which can also help firm up the gooey layers for a chewier texture.
Absolutely, Magic Cookie Bars are excellent for freezing! In fact, some people enjoy them straight from the freezer for a wonderfully chewy, chilled treat. To freeze, ensure the bars are completely cooled. Slice them into individual portions and arrange them in a single layer on a baking sheet lined with parchment paper. Freeze for about an hour until firm, then transfer the frozen bars to a freezer-safe airtight container or freezer bag. Layer them with parchment paper between each layer to prevent sticking. They will stay fresh in the freezer for up to 2 months. Thaw at room temperature for about 30 minutes, or enjoy frozen!
Yes, these bars are a fantastic make-ahead dessert! They actually tend to taste even better the next day as the flavors meld and deepen. You can bake them a day or two in advance and store them at room temperature in an airtight container. If you plan to serve them further in the future, freezing them as described above is an excellent option.
More Irresistible Easy Dessert Bars: Expand Your Baking Repertoire!
If you’ve fallen in love with the ease and deliciousness of Magic Cookie Bars, you’ll be thrilled to discover a world of other simple yet sensational dessert bar recipes. These are perfect for parties, potlucks, or simply satisfying a sweet craving with minimal effort. Here are some more easy dessert bars to add to your baking list:
- No Bake Pumpkin Dream Bars Recipe: A seasonal favorite that requires no oven time, perfect for fall gatherings.
- Easy Pecan Pie Bars Recipe: All the rich, nutty goodness of pecan pie in a convenient, shareable bar format.
- Easy Slutty Cheesecake Bars Recipe: A playful and indulgent combination of cookie, Oreo, and cheesecake layers.
- Grinch Cookie Bars: Fun, festive, and vibrantly green, these are perfect for holiday cheer.
- Lemon Bars: Bright and zesty, a classic for a refreshing sweet treat.
- Brownie Bars: A timeless classic, often elevated with various toppings or mix-ins.
Don’t wait to try this yummy Magic Cookie Bars recipe for a truly great treat! We’re confident it will become a new favorite in your kitchen. Please come back and leave a comment once you do – we’d love to hear about your experience and how much you enjoyed these magnificent seven-layer bars!
Pin
Magic Cookie Bars
15 minutes
25 minutes
40 minutes
12
American
Dessert
444
Carrie Barnard
Ingredients
- 1 1/2 cup Graham Cracker Crumbs
- 1/2 cup Melted Butter
- 1 cup Semi-Sweet Chocolate Chips
- 1 cup Butterscotch Chips
- 1 cup Sweetened Shredded Coconut
- 1 cup Chopped Walnuts
- 1 14oz can sweetened Condensed Milk
Instructions
- Preheat your oven to 350 degrees F (175 C).
- Line a 9×13 inch baking pan with aluminum foil or parchment paper, ensuring an overhang on the sides for easy lifting. Spray the lining with non-stick cooking spray.
- In a mixing bowl, combine the graham cracker crumbs and melted butter until well blended.
- Press the graham cracker mixture firmly and evenly into the bottom of the prepared 9×13 inch pan to form a compact crust.
- Evenly sprinkle the semi-sweet chocolate chips over the graham cracker crust. Follow with a layer of butterscotch chips, then the sweetened shredded coconut, and finally the chopped walnuts. Ensure each layer is distributed as evenly as possible.
- Carefully pour the sweetened condensed milk over all the layered ingredients. Use a spatula to gently spread the milk, ensuring it covers the top as evenly as possible.
- Bake for 25-30 minutes, or until the edges begin to turn golden brown and the top layers are lightly browned and set.
- Allow the bars to cool completely in the pan on a wire rack before attempting to slice them.
- Once thoroughly cooled, lift the entire batch out of the pan using the liner, slice into bars, and enjoy your magical creation!
Nutrition Facts
Carbohydrates 52g,
Protein 6g,
Fat 25g,
Saturated Fat 12g,
Cholesterol 24mg,
Sodium 192mg,
Potassium 302mg,
Fiber 3g,
Sugar 41g,
Vitamin A 280IU,
Vitamin C 1mg,
Calcium 127mg,
Iron 2mg
Pin This Now to Remember It Later
Pin Recipe
