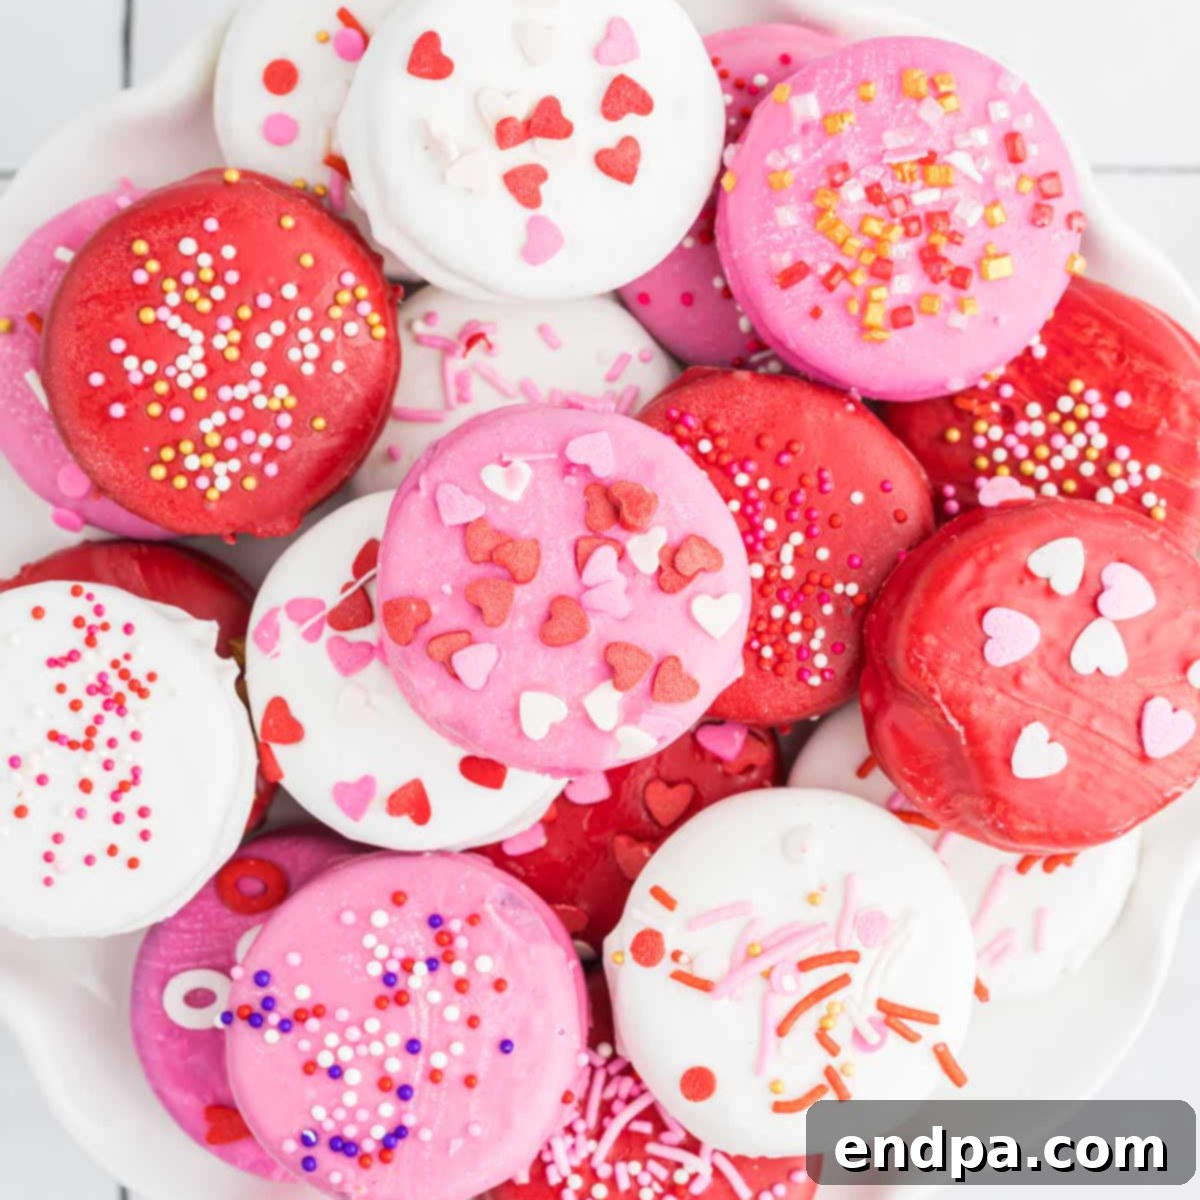
Craving a sweet, simple, and irresistibly festive treat that requires absolutely no baking? Look no further than these delightful Valentine’s Day Chocolate Covered Oreos! Perfect for busy schedules or budding bakers, this recipe transforms classic Oreo cookies into a gourmet-looking dessert with just three essential ingredients. Whether you’re making a special treat for loved ones, preparing a charming gift, or simply indulging your sweet tooth, these chocolate-dipped Oreos are a guaranteed hit that capture the spirit of Valentine’s Day beautifully.
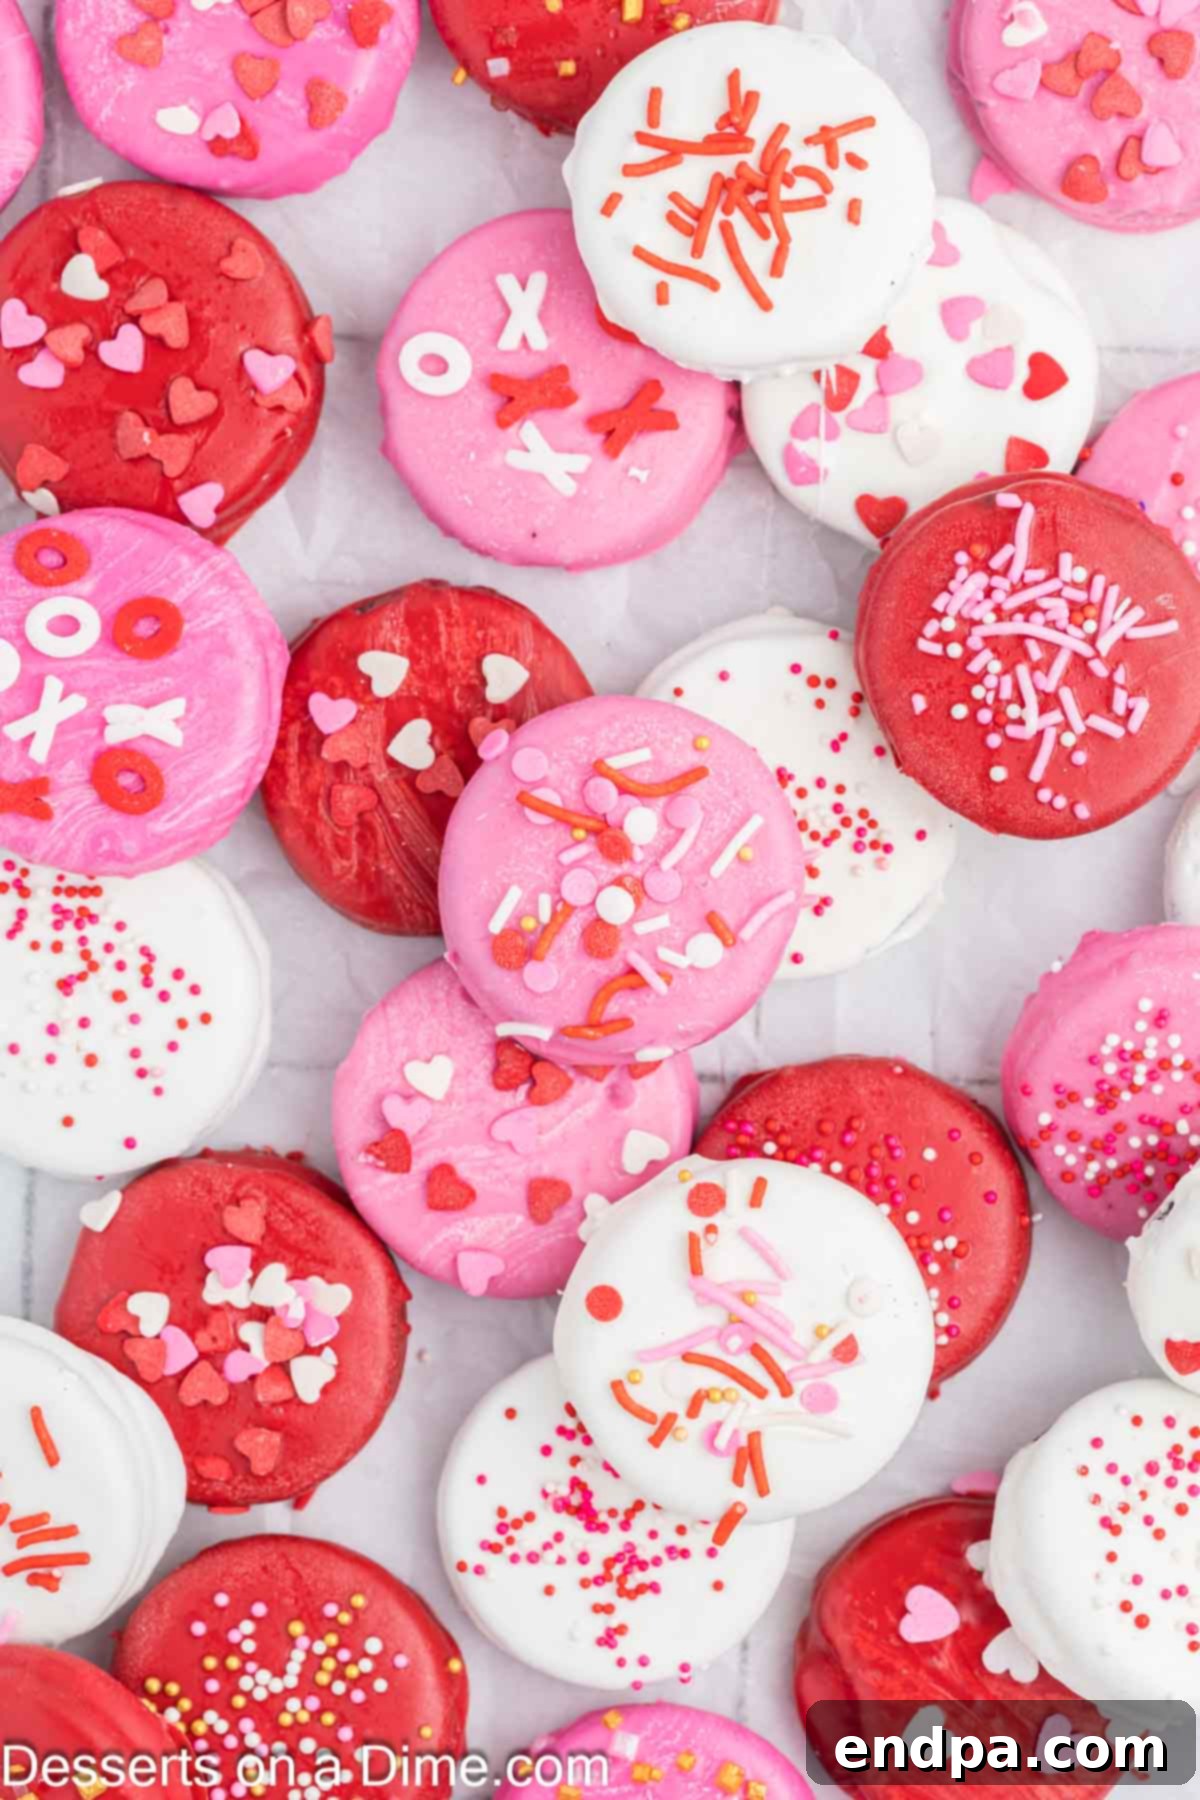
Oreo cookies are a beloved classic for a reason – their rich chocolatey wafers and creamy filling make them universally appealing. By giving them a festive Valentine’s Day makeover, we’re elevating a simple cookie into a show-stopping dessert. This no-bake recipe is not only incredibly easy, making it accessible for cooks of all skill levels, but it’s also incredibly versatile. It’s a fantastic addition to any Valentine’s Day celebration, fitting right in with the most charming holiday cookies and treats.
Inspired by the popularity and sheer deliciousness of white chocolate-covered Oreos, we knew we had to create a special version for Valentine’s Day. The combination of crisp Oreos, smooth candy coating, and vibrant sprinkles makes for an enchanting dessert that’s as fun to make as it is to eat. Get ready to impress with minimal effort!
Table of Contents
- Why This Recipe Works
- Ingredients You’ll Need
- Creative Variations & Customization
- How to Make Valentine’s Day Chocolate Covered Oreos
- Expert Tips for Perfect Dipped Oreos
- Frequently Asked Questions
- More Easy Valentine’s Day Treats
- Valentine’s Day Chocolate Covered Oreos Recipe Card
Why This Recipe Works
This recipe stands out for its undeniable simplicity and impressive results. With just three core ingredients, anyone can whip up a batch of these beautiful Valentine’s Day treats in no time. The magic lies in coating delicious Oreo cookies in smooth white candy melts and adorning them with festive sprinkles. The process is straightforward, requiring no baking, complex techniques, or fancy equipment, making it a perfect project for a relaxing afternoon or a fun activity with children.
Not only are these treats incredibly easy and quick to prepare, but they also offer a stunning visual appeal. The vibrant colors of Valentine’s Day sprinkles against the crisp white chocolate coating create a professional, bakery-quality look. They are ideal for celebrating Valentine’s Day at home, bringing to a party, or giving as a thoughtful, homemade gift. Imagine presenting these charming Oreos in a cute gift box – it’s a gourmet surprise that will surely delight any friend, family member, or significant other!
Beyond their charm, these chocolate-covered Oreos are also budget-friendly, utilizing readily available ingredients that won’t break the bank. They offer a high reward for minimal effort, proving that homemade treats don’t have to be complicated to be spectacular. If you happen to have leftover Oreo cookies from this project, don’t let them go to waste! You can easily transform them into other delicious desserts like Oreo Dip, ensuring every cookie finds its delicious purpose.
Ingredients You’ll Need
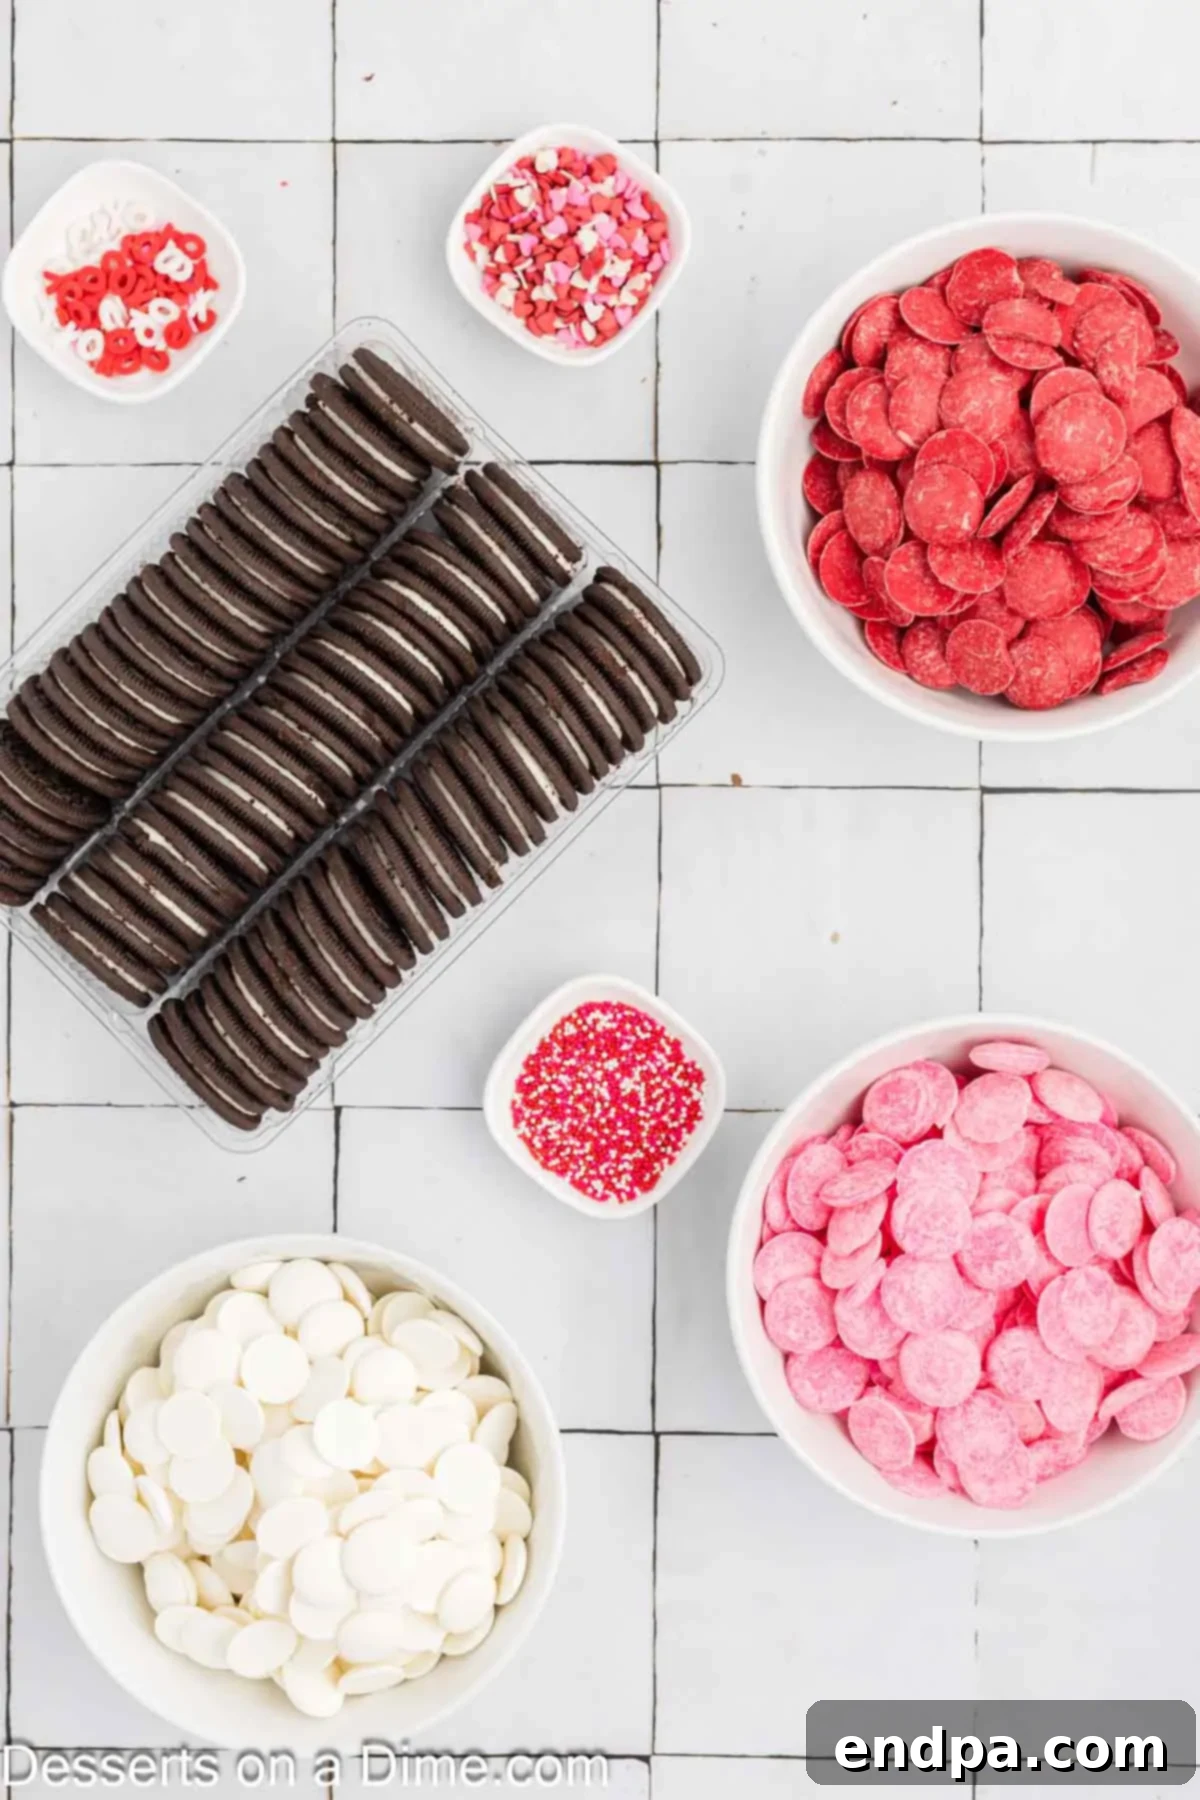
The beauty of this recipe lies in its minimal ingredient list, proving that you don’t need a pantry full of exotic items to create something truly special. Here’s a closer look at what you’ll need to make these delightful Valentine’s Day Chocolate Covered Oreos:
- Oreo Cookies: For the best results, we recommend using regular Oreo cookies. Their classic size and filling are perfect for dipping. Double-stuffed or thin Oreos can work, but regular ones tend to hold up better and provide a more balanced chocolate-to-cookie ratio.
- White Candy Melts: These are crucial for achieving that smooth, vibrant coating. You can typically find Wilton melting wafers or similar brands in the baking aisle of most grocery stores, often near the chocolate chips or cake decorating supplies. Candy melts are specifically designed to melt smoothly and harden quickly, making them ideal for dipping. While white is classic for Valentine’s, you could also find pink or red candy melts for a bolder look.
- Red, Pink, and White Sprinkles: This is where you bring the Valentine’s Day theme to life! Choose an assortment of festive sprinkles in shades of red, pink, and white. There are countless options available, from classic nonpareils and jimmies to cute heart-shaped sprinkles or themed mixes. Feel free to pick any Valentine’s Day sprinkles that catch your eye and spark joy!
That’s it! With these three simple components, you’re ready to create a batch of stunning chocolate-covered Oreos that are perfect for sharing or enjoying all to yourself. The complete list of ingredients with specific measurements can be found in the recipe card at the bottom of this page.
Creative Variations & Customization
While the classic Valentine’s Day Chocolate Covered Oreo is a star on its own, this recipe is incredibly adaptable, inviting you to unleash your creativity! Here are some exciting variations to make your dipped Oreos even more unique and suited to any occasion:
- Explore Topping Options: Sprinkles are just the beginning!
- Crushed Candy: Think crushed peppermints for Christmas, M&M’s for birthdays, or even crushed freeze-dried raspberries for an elegant touch.
- Coconut: Toasted coconut flakes add a lovely texture and nutty flavor.
- Nuts: Finely chopped almonds, walnuts, or pecans offer a delightful crunch.
- Chocolate Drizzles: After the main coating sets slightly, drizzle contrasting colored candy melts or melted chocolate (milk, dark, or white) over the top for an artistic flourish.
- Edible Glitter or Dust: For an extra touch of glamour, dust with edible glitter or pearl dust before the coating fully sets.
- Cookie Crumbs: Crush additional Oreos (or other cookies) for a delicious textural contrast.
- Experiment with Oreo Flavors: Don’t limit yourself to traditional Oreos!
- Golden Oreos: Offer a vanilla base that pairs beautifully with various candy melt colors and toppings.
- Red Velvet Oreos: Already festive, dipping them in white chocolate or cream cheese-flavored candy melts would be divine.
- Seasonal Flavors: Keep an eye out for limited-edition Oreo flavors that can add an extra layer of excitement to your treats.
- Try Different Chocolate Types:
- Milk Chocolate: If you prefer the classic taste of milk chocolate, simply dip your Oreos into melted milk chocolate chips or melting wafers. Everyone loves a good chocolate-dipped cookie! Melting milk chocolate in the microwave is just as easy as candy melts.
- Dark Chocolate: For a more sophisticated and less sweet option, dark chocolate provides a wonderful contrast to the sweet Oreo filling.
- Colored Chocolates: Beyond white, consider using pre-colored candy melts in various shades to match your theme.
- Adapt for Other Holidays and Occasions: The versatility of this recipe extends far beyond Valentine’s Day. Simply change the color of your candy melts and the style of your sprinkles to suit any celebration:
- Patriotic Oreos: Use red, white, and blue candy melts and sprinkles for July 4th or other patriotic events.
- Christmas Oreos: Green and red candy melts with festive holiday sprinkles make perfect Christmas treats.
- Birthday Parties: Match the birthday theme colors with appropriate sprinkles and decorations.
- Halloween: Orange or purple candy melts with spooky sprinkles would be a fun Halloween treat.
- Baby Showers: Pink or blue candy melts with pastel sprinkles are adorable for baby announcements.
These variations demonstrate how a simple base recipe can be transformed countless ways, making it a staple for all your celebration needs.
How to Make Valentine’s Day Chocolate Covered Oreos
Creating these delightful chocolate-covered Oreos is a straightforward process that yields impressive results. Follow these simple steps for a batch of perfectly festive treats:
- Prepare Your Workspace: First, line a baking sheet with parchment paper or wax paper. This is a crucial step that will prevent the Oreos from sticking and make cleanup significantly easier once the chocolate has set.
- Melt the Candy Melts: Place your white candy melts in a microwave-safe bowl. Heat the candy melts in 30-second intervals, stirring thoroughly after each interval. This method is essential to prevent the candy from burning or becoming clumpy. Continue heating and stirring until the candy is completely smooth and melted. Alternatively, you can use a double boiler on the stovetop and melt the candy according to package directions, ensuring a gentle, even melt.
- Add Sprinkles Immediately: As soon as you’ve dipped an Oreo and removed the excess candy, place it onto your prepared baking sheet. While the coating is still wet, liberally sprinkle your chosen Valentine’s Day sprinkles over the top. It’s important to add the sprinkles right away, as the candy melts will begin to set quickly, and the sprinkles won’t adhere if you wait too long.
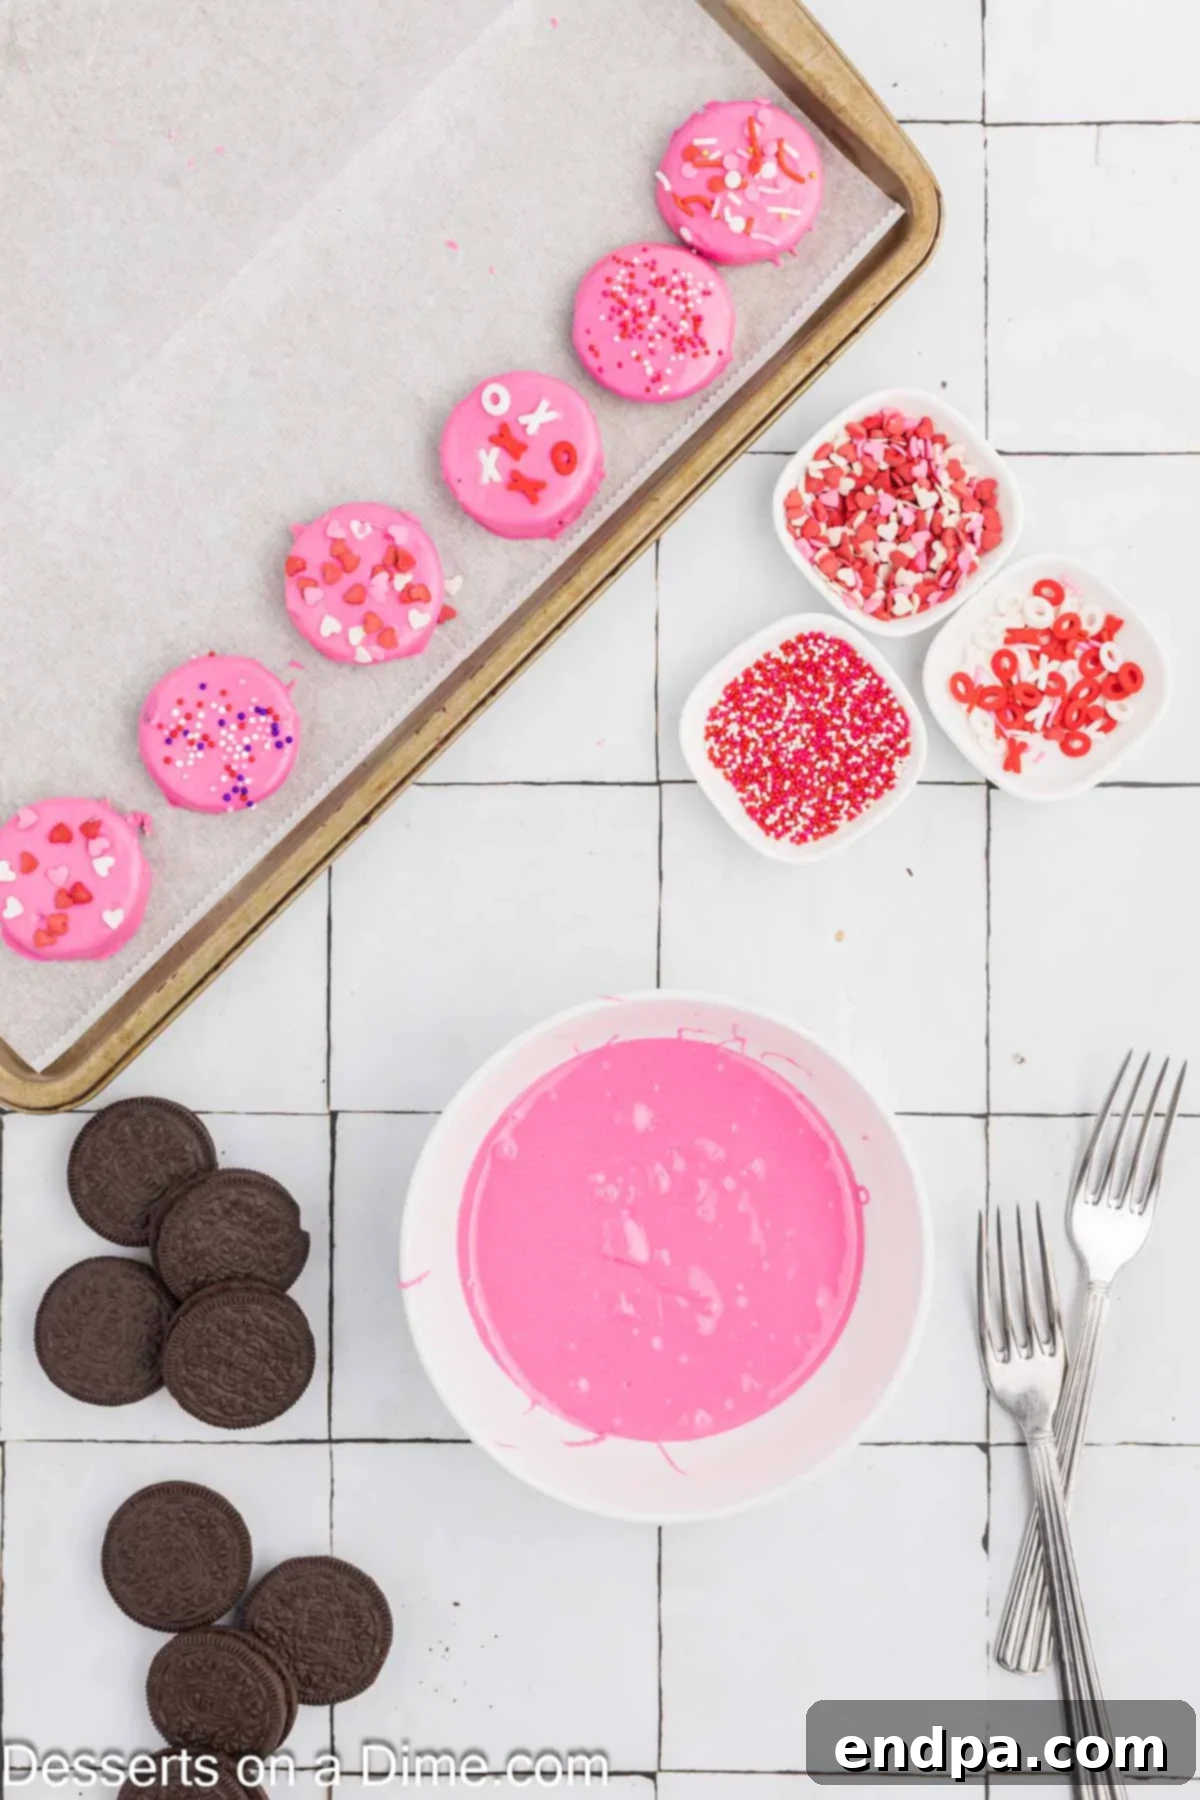
Step 2 continued: Proper melting technique is key to achieving a smooth, professional finish. Stirring frequently distributes the heat and helps the melts become perfectly fluid.
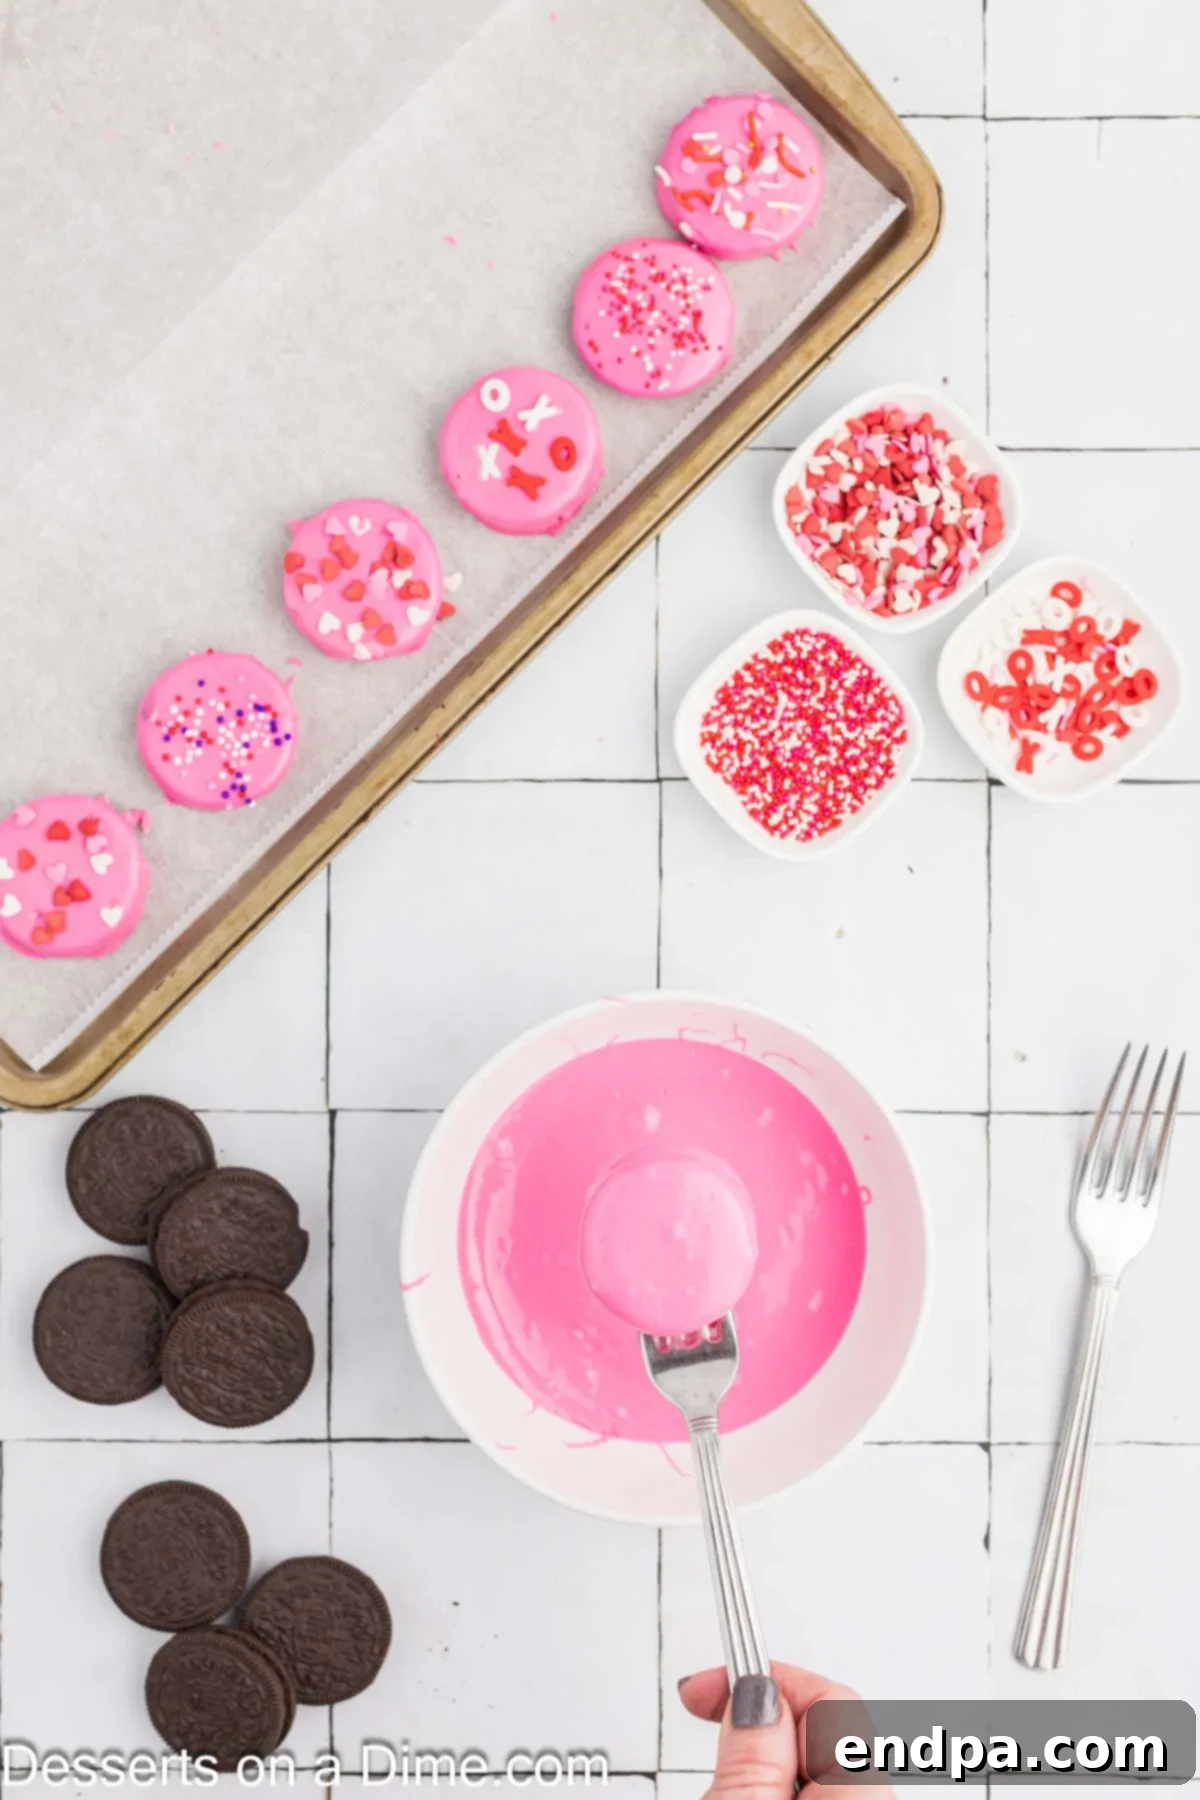
Step 3. Dip the Oreos: Once your candy melts are perfectly smooth, carefully place an Oreo cookie into the melted candy. Use a fork to fully submerge and then gently lift the Oreo out. Lightly tap the fork against the side of the bowl to remove any excess candy coating. This helps ensure a clean, even layer without too much buildup.

Step 4 continued: Work quickly but carefully. You can use different sprinkle combinations for variety.
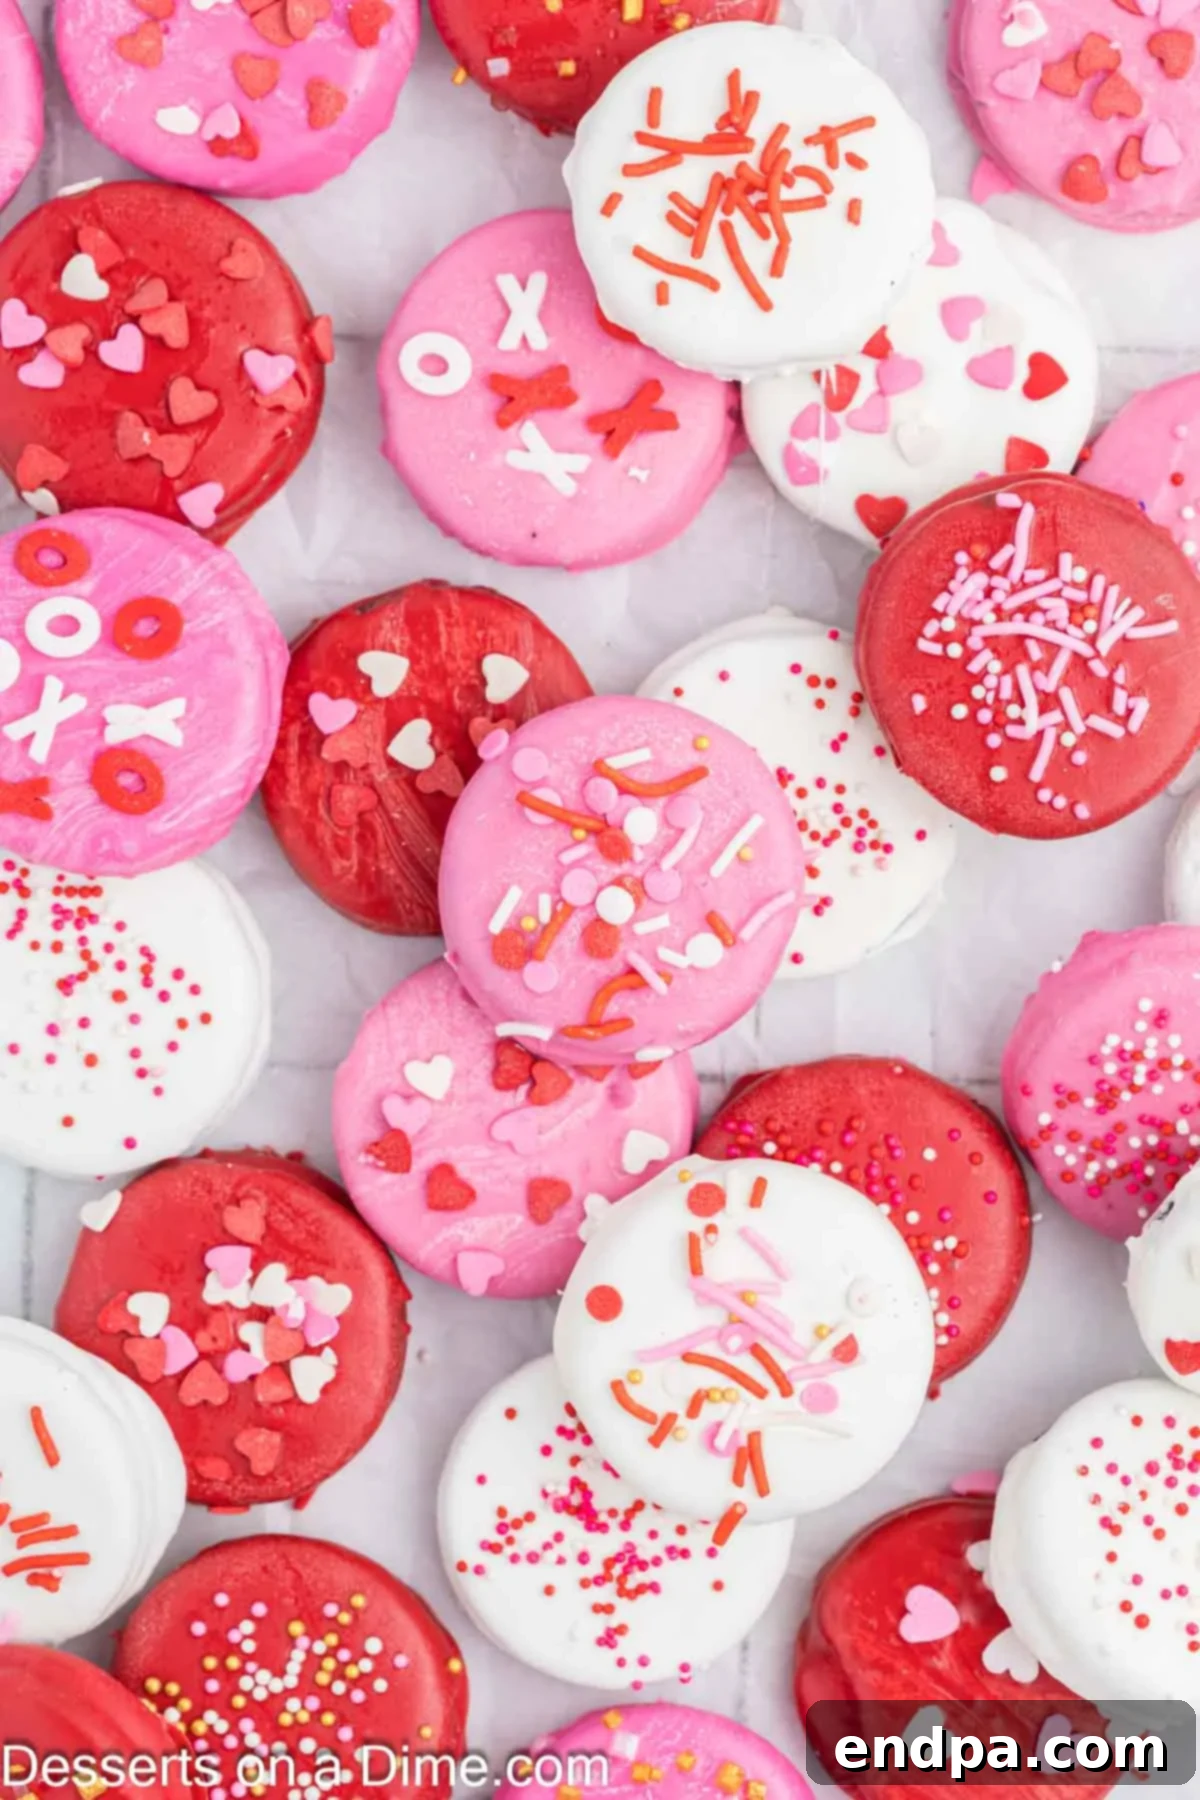
Step 5. Allow to Set: Continue the dipping and sprinkling process until all your Oreos are coated and decorated. Once finished, allow the chocolate-covered Oreos to sit at room temperature for at least 1 hour, or until the candy coating has fully hardened and set. For faster setting, you can place the baking sheet in the refrigerator for about 15-20 minutes, though room temperature setting often yields a smoother finish.
And there you have it! Beautiful, festive, and utterly delicious Valentine’s Day Chocolate Covered Oreos, ready to enjoy or gift.
Expert Tips for Perfect Dipped Oreos
Achieving perfectly coated and decorated Oreos is easy with a few insider tricks. These pro tips will help you avoid common pitfalls and ensure your Valentine’s Day treats look as good as they taste:
- Eliminate Excess Chocolate: Often, when you place the dipped cookies onto the baking sheet, a small pool of chocolate can form around the base. This can make your Oreos look a bit messy. To combat this, use a toothpick to gently go around the base of the cookie shortly after placing it down but before the chocolate sets. Once dry, you won’t have that unsightly extra ring of chocolate, resulting in a much cleaner, more professional finish.
- Parchment Paper is Non-Negotiable: Always, always line your baking sheets with parchment paper or wax paper. This simple step is a game-changer for easy removal of the finished Oreos and makes cleanup an absolute breeze. Without it, you risk your cookies sticking and potentially breaking when you try to lift them.
- Avoid Cooling Racks: Unlike some baked goods, chocolate-covered Oreos should not be placed on a cooling rack to set. The melted chocolate will drip through the rack, creating an uneven bottom layer and making removal difficult. Stick to a flat, parchment-lined surface for best results.
- Act Fast with Sprinkles: The moment you dip an Oreo, apply the sprinkles. Candy melts and chocolate set relatively quickly, and if you wait even a minute too long, the surface will harden, and your beautiful sprinkles won’t stick. Keep your sprinkles bowl close at hand and ready to go!
- Consider a Double Boiler: If you’re wary of melting candy melts in the microwave (or have had issues with burning them in the past), a double boiler is an excellent alternative. It provides a gentle, even heat that melts the candy slowly and smoothly, minimizing the risk of scorching or seizing. Simply place a heat-proof bowl over a saucepan of simmering water, ensuring the bottom of the bowl doesn’t touch the water, and stir until melted.
- Prevent Chocolate Seizing: When melting candy melts or chocolate, ensure no water gets into the mixture. Even a tiny drop of water can cause chocolate to “seize,” turning it thick, lumpy, and unusable. Use dry bowls and utensils, and be careful with steam if using a double boiler.
- Maintain Optimal Temperature: If your candy melts start to thicken as you’re dipping, simply return them to the microwave for another 10-15 seconds (or back over the double boiler) and stir until smooth again. Maintaining a fluid consistency is key for an even coating.
By keeping these expert tips in mind, you’ll be well on your way to creating stunning and delicious Valentine’s Day Chocolate Covered Oreos with ease and confidence.
Frequently Asked Questions
Here are answers to some common questions about making and storing Valentine’s Day Chocolate Covered Oreos:
How to store chocolate-covered Oreos?
To keep your chocolate-covered Oreos fresh and delicious, store them in an airtight container in the refrigerator. They will maintain their quality and festive appearance for up to 2 weeks. For optimal storage and to prevent them from sticking together, we highly recommend placing a sheet of wax paper or parchment paper between layers of cookies. This also makes it incredibly easy to grab just a couple of treats without disturbing the rest.
Can Valentine’s chocolate Oreos be made ahead?
Absolutely! These treats are perfect for making in advance, which is a huge time-saver, especially when preparing for a holiday or special event. You can comfortably make them up to 2 weeks ahead of time. Just ensure they are stored correctly in an airtight container with layers separated by parchment paper, and keep them in the refrigerator until you’re ready to serve.
Can you freeze chocolate Oreos?
While convenient for many desserts, freezing is generally not recommended for chocolate-covered Oreos. The main reason is that when you thaw them, condensation tends to form on the surface of the chocolate coating. This moisture can cause the coating to become sticky, discolored, or develop an unappealing texture, compromising their beautiful appearance and smooth finish. For the best results, stick to refrigeration for storage.
Can I use regular chocolate chips instead of candy melts?
You can use regular chocolate chips, but be aware that they can be trickier to work with than candy melts. Regular chocolate chips often require tempering to achieve a smooth, shiny, and snap-able coating that doesn’t melt easily at room temperature. Without tempering, chocolate chips may result in a dull finish and a softer texture that’s prone to melting on touch. If you do use regular chocolate, adding a tiny bit of coconut oil or shortening (about 1 teaspoon per cup of chocolate) can help thin it out and make it smoother for dipping, but it still won’t have the same setting properties as candy melts.
What if my candy melts seize or become too thick?
Candy melts can seize (become lumpy and thick) if they get too hot, if water gets into them, or if they cool too much. If they become too thick while you’re working, try adding a small amount of vegetable shortening or a specific candy melt thinning agent (like paramount crystals). Start with 1/2 teaspoon and stir well. Never add water, as this will cause them to seize completely. If they’ve completely seized and become lumpy due to overheating or water, it’s often best to discard and start fresh.
More Easy Valentine’s Day Treats
If you loved making these chocolate-covered Oreos, you’re in luck! There are plenty of other simple and festive treats perfect for Valentine’s Day. Here are some more ideas to sweeten your celebrations:
- Valentine’s Day Chocolate Covered Pretzels
- Valentine’s Day Cake Balls Recipe
- Emoji Chocolate Covered Oreos
- Valentine’s Day Chocolate Covered Pretzel Rods
- The Best Valentine’s Day Cake Mix Cookies
- Valentine’s Day Poke Cake Recipe
- Valentine Rice Krispie Treats
- Valentine Cakes
These festive Valentine’s Day Chocolate Covered Oreos are a testament to how easily you can create something special. They taste incredible, look adorable in a gift box, and make a wonderful homemade present. We encourage you to try this fun and simple recipe and share your creations!
Valentine’s Day Chocolate Covered Oreos Recipe Card
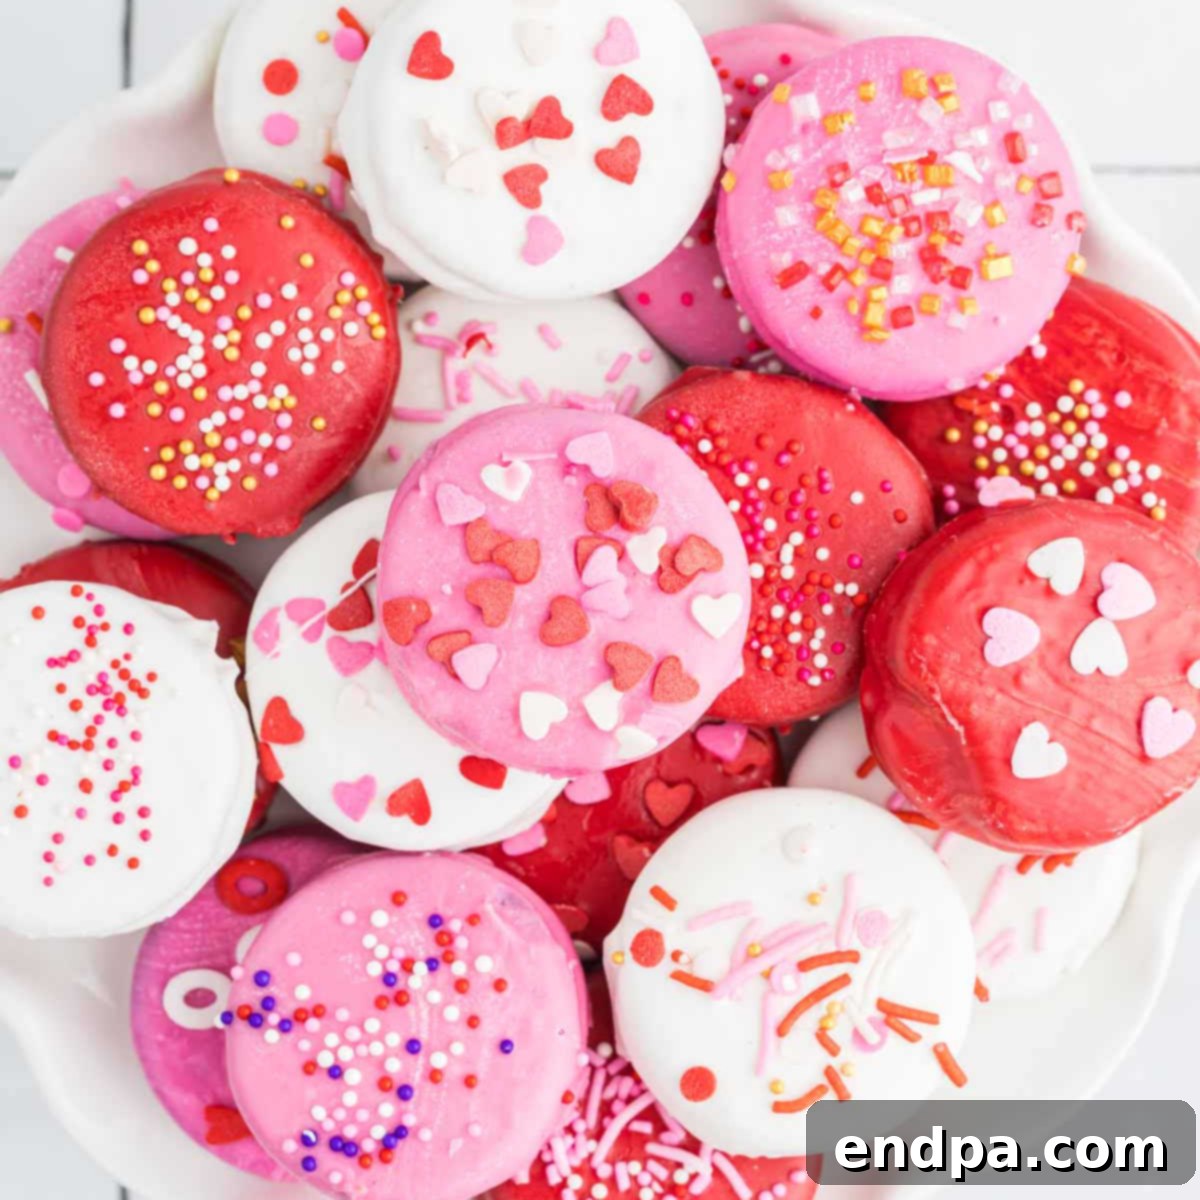
Valentine’s Day Chocolate Covered Oreos
If you are looking for an easy no-bake treat, try making Valentine’s Day Chocolate Covered Oreos. You only need 3 ingredients to make this festive and tasty treat.
Prep Time: 15 minutes
Chill Time: 1 hour (at room temperature to set)
Total Time: 1 hour 15 minutes
Yield: 36 cookies
Cuisine: American
Course: Dessert
Author: Carrie Barnard
Rating: 5 out of 5 stars (based on 3 reviews)
Ingredients
- 1 package Oreos (14 oz.) – regular Oreos work best
- 16 oz. White candy melts (such as Wilton melting wafers)
- Red, Pink, and White Sprinkles (Valentine’s Day themed)
Instructions
- Line a baking sheet with parchment paper or wax paper. This will prevent sticking and make cleanup easier.
- Place the candy melts in a microwave-safe bowl. Heat in 30-second intervals, stirring thoroughly after each interval, until the candy melts are fully melted and smooth. Be careful not to overheat to prevent scorching.
- Carefully place an Oreo cookie into the melted candy, ensuring it is fully submerged. Use a fork to gently remove the Oreo from the melted candy.
- While the Oreo is still on the fork, gently tap the fork against the side of the bowl to remove any excess candy coating. This helps create a smooth and even layer.
- Immediately transfer the dipped Oreo to the prepared baking sheet. While the coating is still wet, liberally apply your chosen Valentine’s Day sprinkles. Ensure the sprinkles adhere before the candy sets.
- Repeat with the remaining Oreos. Once all cookies are dipped and decorated, allow them to sit at room temperature for approximately 1 hour to fully set. Alternatively, you can place them in the refrigerator for about 15-20 minutes for quicker setting. Enjoy your festive treats!
Recipe Notes
Store the chocolate-covered Oreos in an airtight container in the refrigerator for up to 2 weeks. For best results, place wax paper or parchment paper between layers of cookies to prevent sticking.
Nutrition Facts
Per serving (1 cookie): Calories 79kcal, Carbohydrates 11g, Protein 1g, Fat 4g, Saturated Fat 2g, Polyunsaturated Fat 1g, Monounsaturated Fat 1g, Trans Fat 1g, Sodium 56mg, Potassium 24mg, Fiber 1g, Sugar 8g, Vitamin A 1IU, Calcium 2mg, Iron 1mg.
