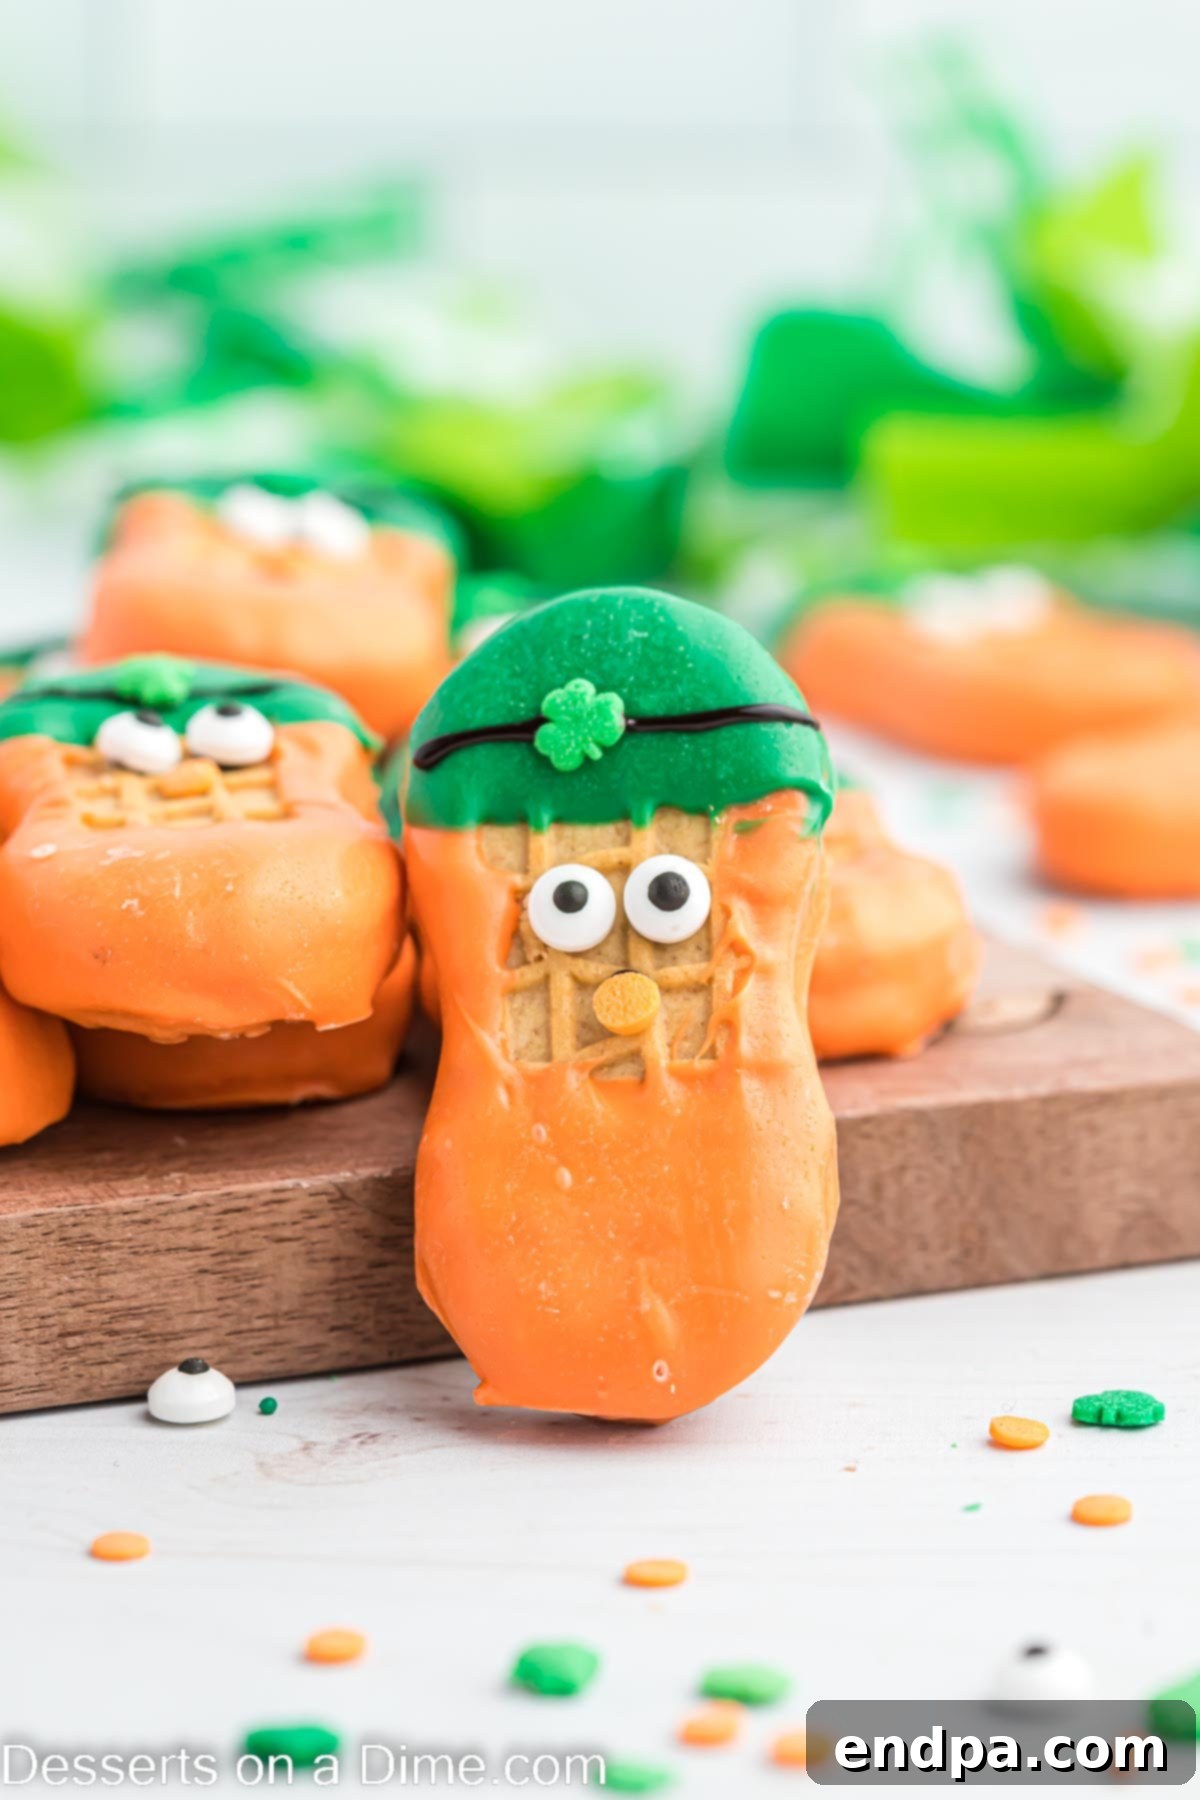
Prepare to enchant your taste buds and delight your guests with these adorable Leprechaun Cookies! Thanks to this incredibly simple no-bake recipe, you can craft a batch of these festive treats in mere minutes. Perfect for St. Patrick’s Day, they promise to bring a cheerful, whimsical touch to any celebration and are sure to be enjoyed by everyone, from the youngest revelers to the seasoned holiday enthusiasts.
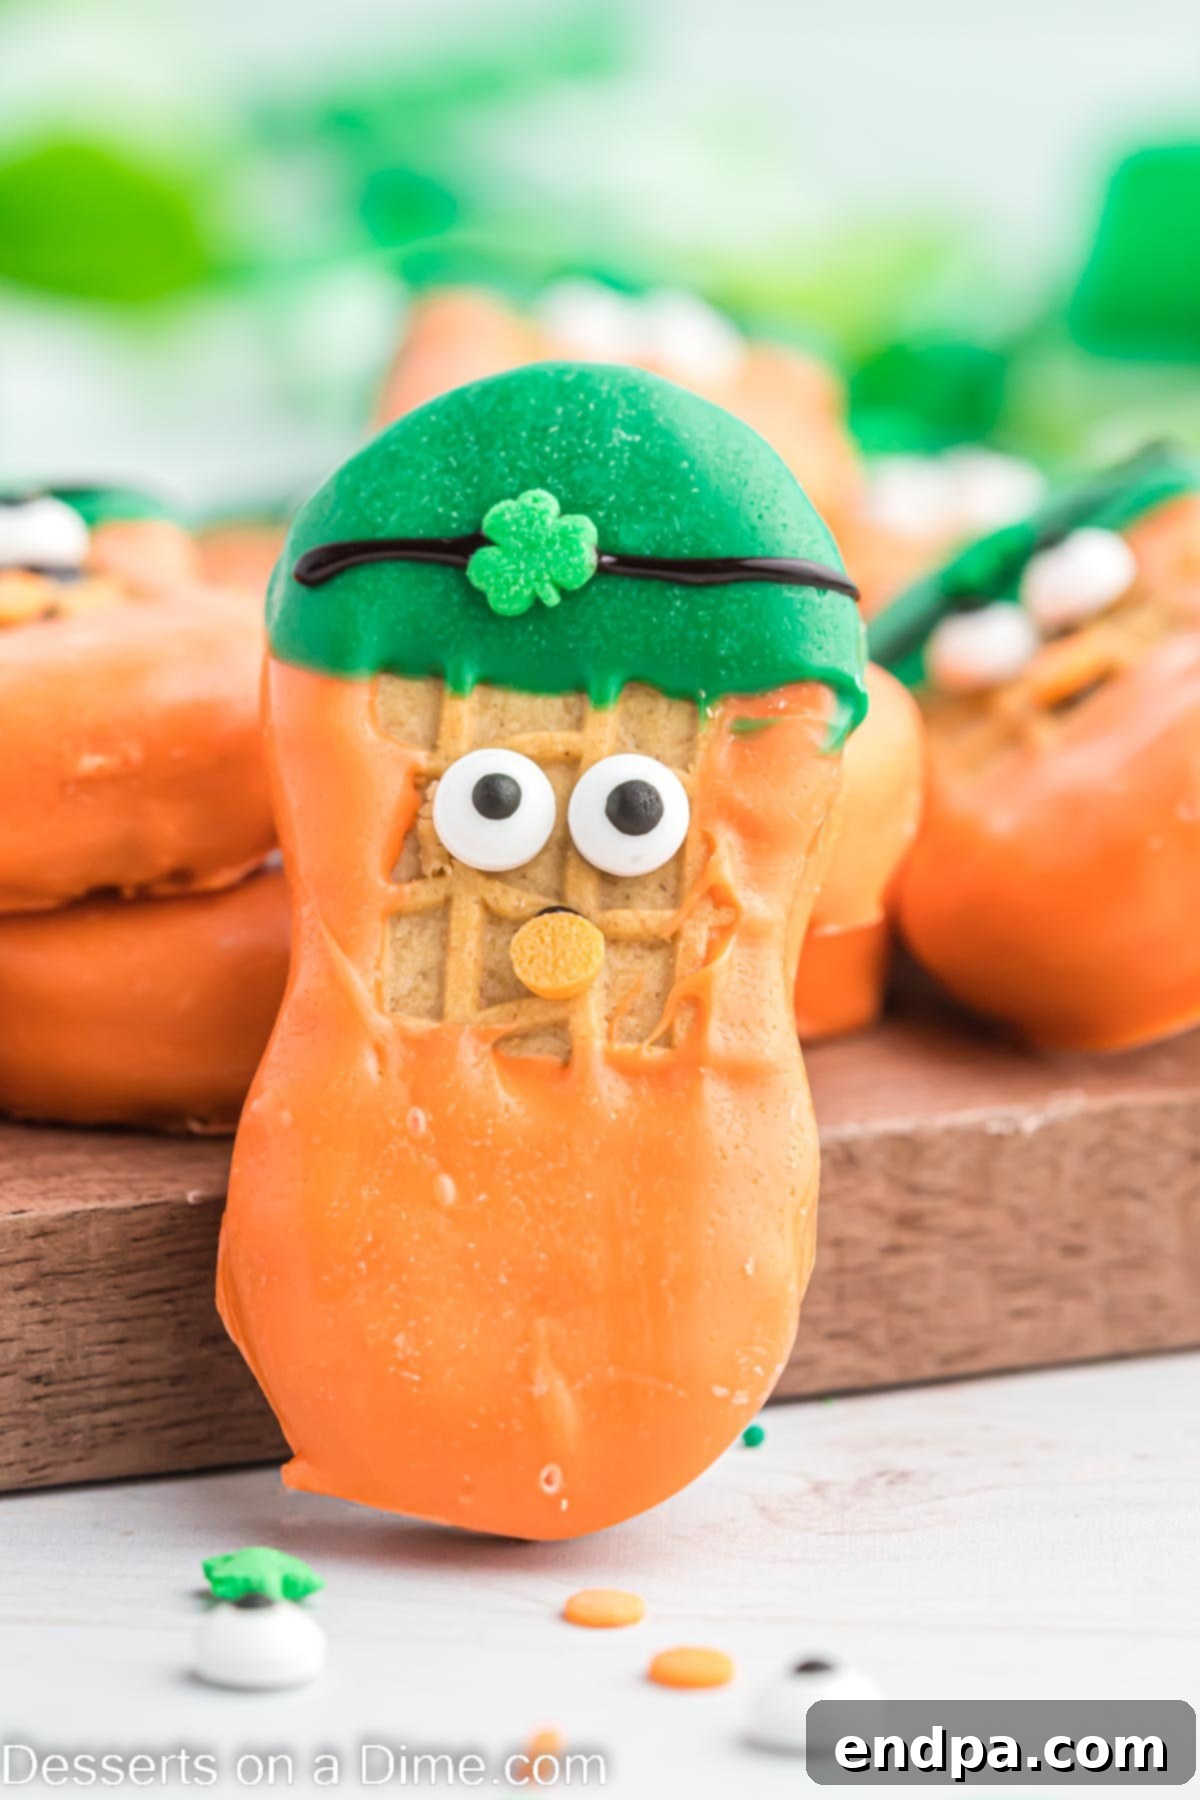
Are you searching for the absolute perfect treat to make when time is short but you still want something wonderfully festive? Look no further! These Leprechaun Cookies are not only remarkably fun to assemble but also incredibly easy, making them an ideal choice for last-minute party preparations or a delightful family activity. Their charm lies in their simplicity, transforming ordinary Nutter Butter cookies into magical leprechaun characters with just a few dips and decorative touches.
For those who love to go all out for St. Patrick’s Day, these leprechaun cookies fit right in with other beloved holiday desserts. We also enjoy crafting Leprechaun Gold Oreos, indulging in rich Guinness Brownies, and baking vibrant St. Patrick’s Day Cupcakes. Each of these recipes offers a unique and delicious way to celebrate the luck of the Irish!
Your Guide to Crafting Amazing Leprechaun Cookies: What’s in this post
- Why You Will Adore This Recipe
- Ingredients for Magical Leprechaun Treats
- Crafting Your Leprechaun Cookies: Step-by-Step
- Expert Decorating Tips for Flawless Cookies
- Proper Storage for Lasting Freshness
- How Long Do Leprechaun Cookies Last?
- Frequently Asked Questions
- More Enchanting St. Patrick’s Day Desserts
- Leprechaun Cookies: The Full Recipe
Why You Will Adore This Recipe: Simple & Festive Fun for Everyone
These Leprechaun Cookies quickly become a beloved part of any St. Patrick’s Day celebration, and for good reason! Their effortless preparation combined with their undeniable festive charm makes them an ideal choice for both seasoned bakers and complete novices. Here are several compelling reasons why this recipe will capture your heart and become a holiday favorite:
- Effortless No-Bake Convenience: The standout feature of this recipe is its no-bake nature. This means no oven preheating, no monitoring baking times, and significantly less cleanup. It’s a perfect solution for busy schedules, allowing you to whip up a batch of homemade treats without the typical baking fuss. This also makes them a safe and easy activity for involving younger children in the kitchen.
- A Fantastic Family Bonding Activity: Transforming simple Nutter Butter cookies into whimsical leprechauns is an activity that truly brings families together. Kids especially love the hands-on process of dipping the cookies into colorful candy melts and adding the expressive candy eyes and festive sprinkles. It’s a wonderful opportunity to create cherished memories and let everyone’s creativity shine, resulting in a unique personality for each leprechaun cookie.
- The Perfect Nutter Butter Foundation: The choice of Nutter Butter cookies as the base is pure genius. Their elongated oval shape is inherently perfect for mimicking a leprechaun’s head and beard, requiring minimal effort to achieve the iconic silhouette. The delicious peanut butter flavor of the cookie pairs wonderfully with the sweet candy melt coating, creating a delightful taste combination that appeals to almost everyone.
- Endless Customization Options: While our recipe guides you to a classic leprechaun look, these cookies are incredibly adaptable. Feel free to unleash your imagination! You can experiment with different shades of green or even add other colors to the hats. Consider incorporating gold coin sprinkles, rainbow nonpareils, or substituting mini chocolate chips for the candy eyes. Edible food markers can also be used to draw tiny smiles or eyebrows, adding even more character and fun.
- A Guaranteed Crowd-Pleaser: Whether you’re preparing them for a classroom party, a festive office gathering, or simply as a special dessert at home, these leprechaun cookies are consistently a massive hit. Their charming, quirky appearance is instantly appealing, and their delightful taste ensures they disappear quickly from any dessert spread. They embody the joyful spirit of St. Patrick’s Day in every bite.
And if you’re looking for even more St. Patrick’s Day inspiration, don’t forget to check out our recipes for Leprechaun Bait and our deliciously unique Pistachio Cookies. They’re excellent complements to these delightful leprechaun treats!
Ingredients for Magical Leprechaun Treats: Gather Your Supplies
The beauty of crafting these enchanting Leprechaun Cookies lies in the simplicity of their ingredients. You won’t need anything exotic or hard to find; just a few standard confectionery items will help you bring these whimsical characters to life. Here’s a detailed list of what you’ll need to create your batch of festive leprechaun treats:
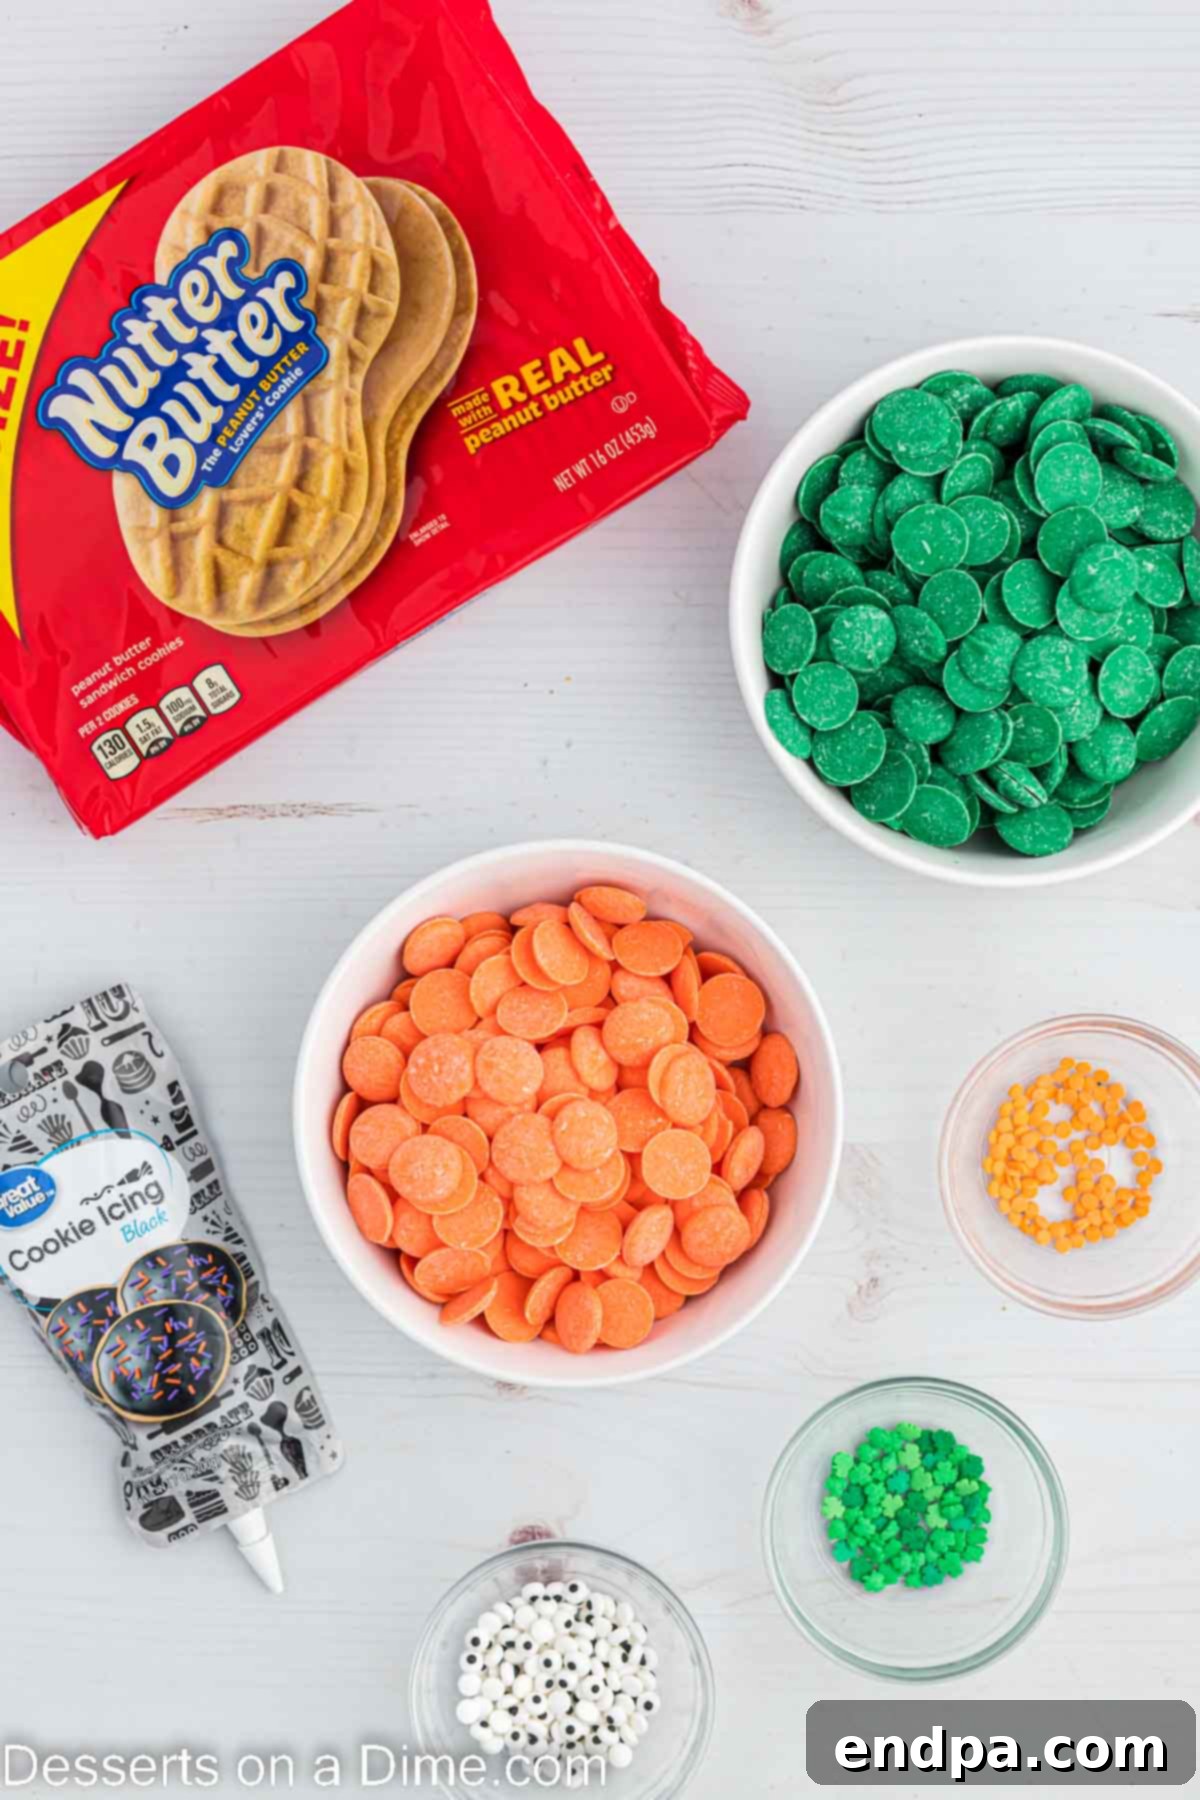
- Nutter Butter Cookies: These beloved peanut butter sandwich cookies are the star of our show. Their distinct oblong shape is absolutely perfect for forming the base of your leprechauns, providing a natural canvas for their faces and beards. The rich, creamy peanut butter filling also adds a wonderful flavor contrast to the sweet candy coatings. Be sure to use standard-sized Nutter Butter cookies for the best results.
- Small Candy Eyes: These are absolutely crucial for giving your leprechauns their charming and often mischievous expressions. Edible candy eyes are widely available in the baking aisles of most major grocery stores, craft stores, or specialty baking supply shops. They instantly transform a simple cookie into a character!
- Candy Melts (Orange and Green): These vibrant confectionery coatings are essential for creating the leprechaun’s iconic orange beard and green hat. Candy melts are specifically designed to melt smoothly and harden quickly, providing a professional-looking, even finish. You’ll need one 12-ounce package of bright orange candy melts and one 12-ounce package of festive green candy melts. If candy melts are hard to find, you can use high-quality white chocolate chips colored with oil-based food coloring (avoid water-based colors, as they will cause chocolate to seize).
- Black Decorating Icing: For drawing the fine details of the leprechaun’s hat rim, a tube of black cookie icing with a fine-tip applicator is incredibly convenient. This pre-packaged option eliminates the need for piping bags and couplers, making the intricate decorating step quick and mess-free. Look for gel or royal icing types in a squeeze tube for optimal control.
- Shamrock Shaped Sprinkles: To complete the leprechaun’s hat with an authentic St. Patrick’s Day touch, shamrock-shaped sprinkles are a must-have. These tiny, symbolic decorations add a delightful festive flair. You can often find these in seasonal baking supplies around March. If unavailable, small green or gold confetti sprinkles would also work well.
- Orange Round Sprinkles: These small, round orange sprinkles are designated for the leprechaun’s nose, adding another endearing detail to their faces. Their bright color stands out beautifully against the orange face, completing the whimsical look. Any small, spherical sprinkle can be used, but orange provides the most classic leprechaun appearance.
For a precise breakdown of quantities and to easily print this recipe, simply scroll down to the bottom of this article where you’ll find our comprehensive recipe card. Happy collecting!
Crafting Your Leprechaun Cookies: A Detailed Step-by-Step Guide
Creating these delightful Leprechaun Cookies is a wonderfully straightforward and enjoyable process. Follow these detailed instructions meticulously to ensure your St. Patrick’s Day characters come out perfectly charming and ready for celebration!
- Step 1: Prepare Your Baking Sheet. Begin by lining a large baking sheet with parchment paper or a silicone baking mat. This crucial step is vital for two main reasons: it prevents your candy-coated cookies from sticking as they dry and significantly simplifies the cleanup process. Having a prepared, non-stick surface ready will ensure your beautifully decorated cookies can be easily lifted without damage once they’ve set. Set this prepared sheet aside in an easily accessible spot.
- Step 2: Carefully Melt the Orange Candy Melts. Pour the entire package of orange candy melts into a microwave-safe bowl. Heat the melts in short, controlled intervals—typically 25 to 30 seconds at a time is ideal. After each heating interval, remove the bowl from the microwave and stir the candy melts thoroughly with a spoon or rubber spatula, even if they don’t appear fully melted. The residual heat will continue to melt the solids. Continue this process, stirring consistently between intervals, until the orange candy melts are completely smooth, fluid, and free of any lumps. It’s important to avoid overheating, as this can cause the candy to seize or become too thick to dip properly. A smooth consistency is paramount for an even coating.
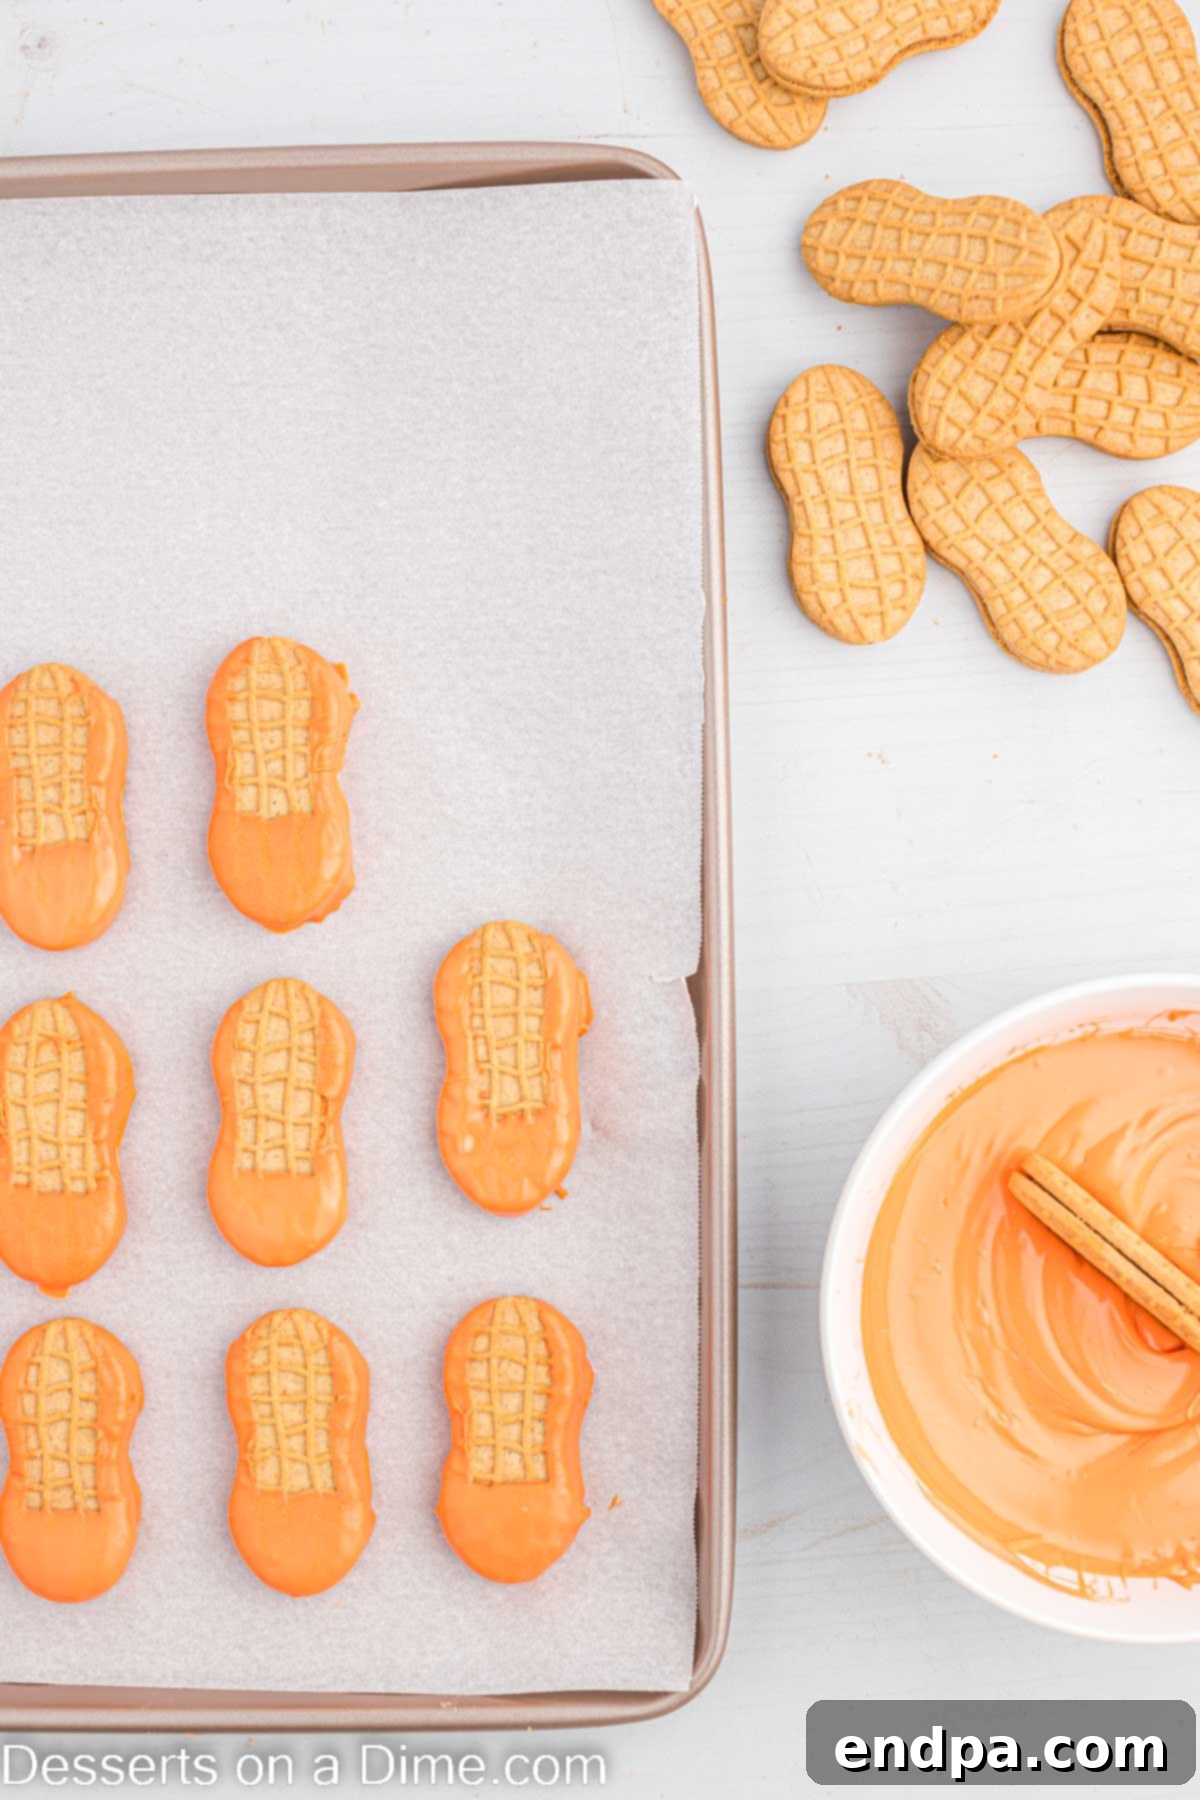
Step 3: Dip the Cookies to Form the Face and Beard. Take one Nutter Butter cookie gently by one end. Dip one of the long sides of the cookie into the smooth orange candy melts, aiming to cover approximately two-thirds of the cookie’s length. This will create the leprechaun’s vibrant orange face. Carefully lift the cookie and lightly shake off any excess candy melts by tapping it gently against the edge of the bowl or your wrist. The goal is a thin, even coating. Next, dip just the very bottom edge of the same cookie into the orange melts, allowing a small amount to drip to form the distinct, pointed leprechaun beard. Again, gently shake off any excess. The orange should predominantly cover the cookie, leaving a small, clean section at the very top (opposite the beard) uncoated, which will later become the hat.
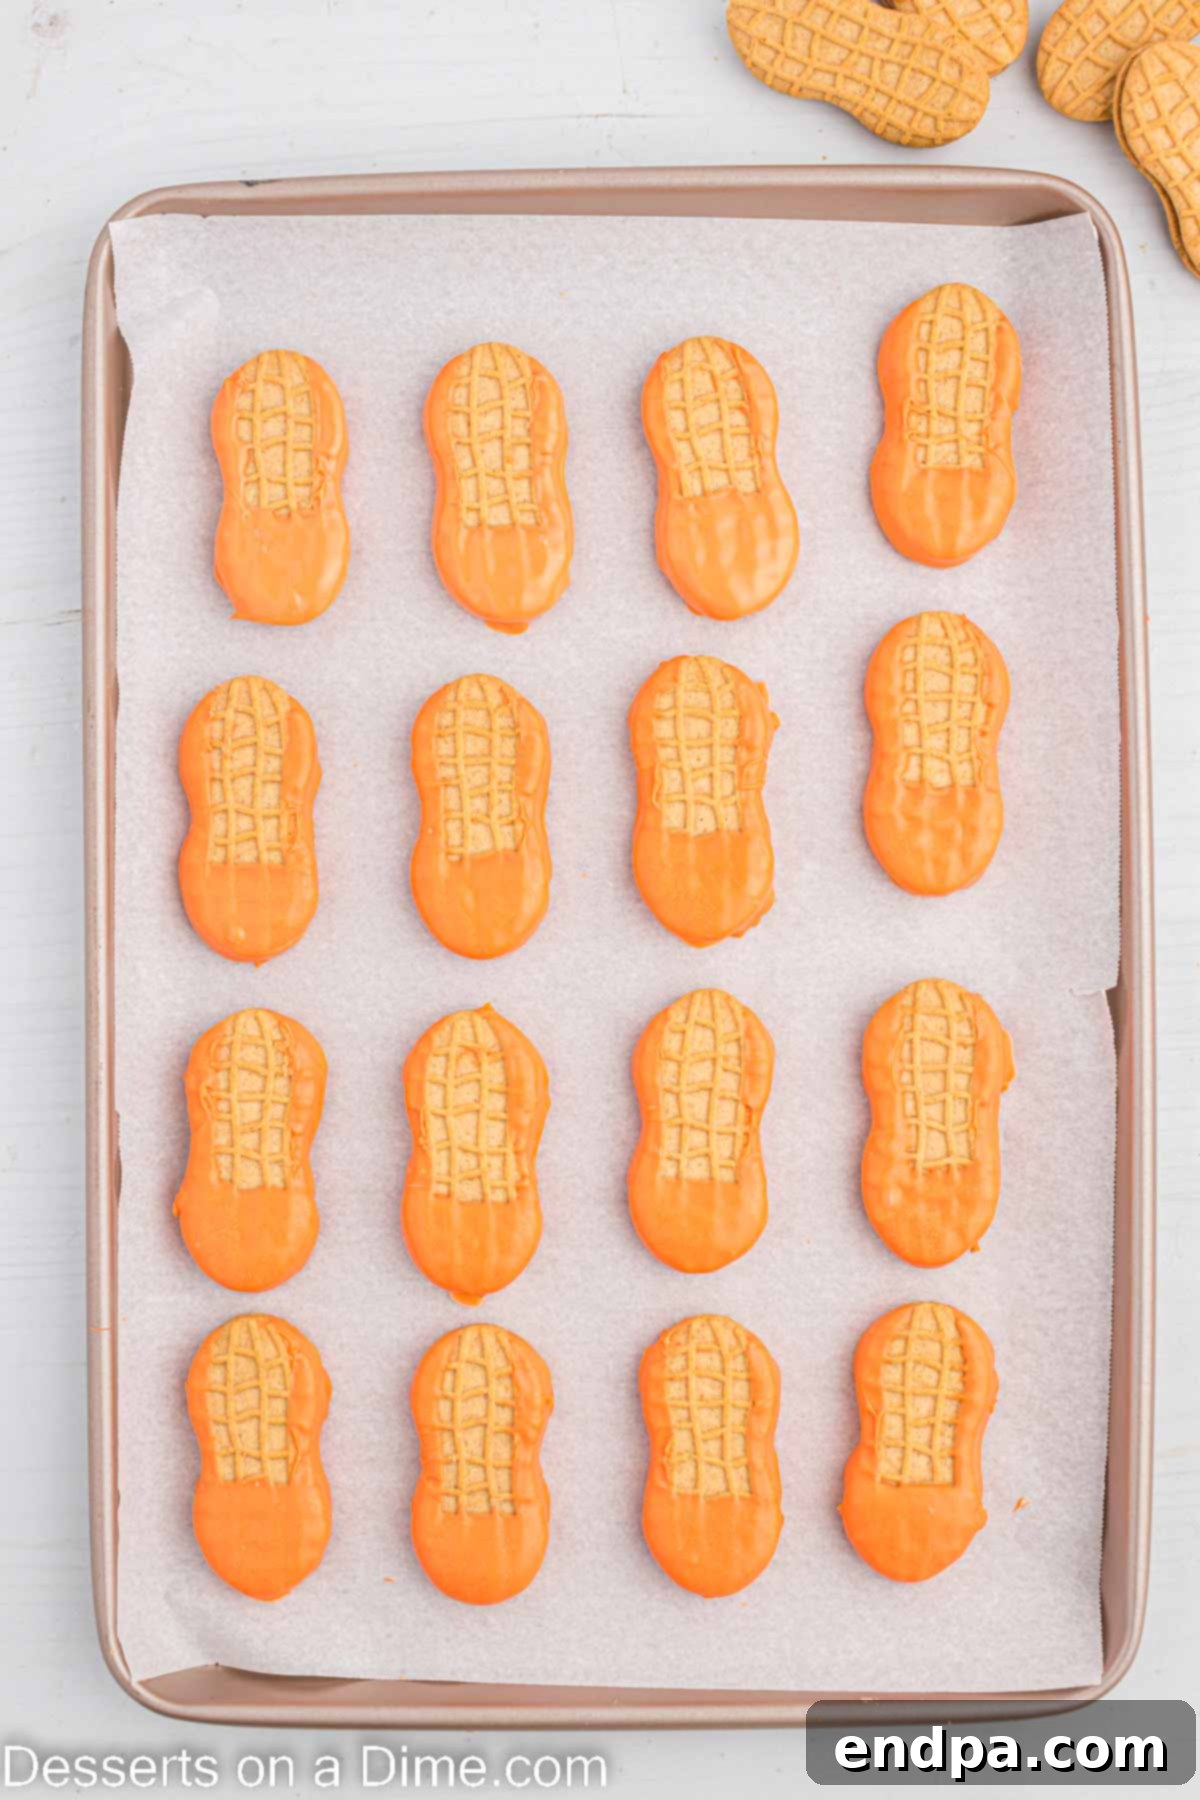
Step 4: Allow the Orange Layer to Fully Cool and Set. As each cookie is dipped and the beard is formed, carefully place it onto your prepared baking sheet. Repeat this entire dipping process for all 24 Nutter Butter cookies (or your desired quantity). It is absolutely critical that the orange candy melts are given ample time to dry and harden completely before you proceed to the next step. This prevents any smudging or color bleeding. This setting process typically takes about 15-20 minutes at room temperature, or you can accelerate it by placing the baking sheet in the refrigerator for 5-10 minutes. Ensure the coating is firm to the touch to guarantee a clean transition to the next layer.
- Step 5: Prepare the Green Candy Melts. In a separate, clean microwave-safe bowl (or after thoroughly cleaning the previous one), place your green candy melts. Just as with the orange melts, heat them in brief 25-30 second intervals, stirring vigorously after each. Continue heating and stirring until the green candy melts are perfectly smooth, liquid, and ready for dipping. Be mindful not to overheat, as this can negatively impact their texture and workability.
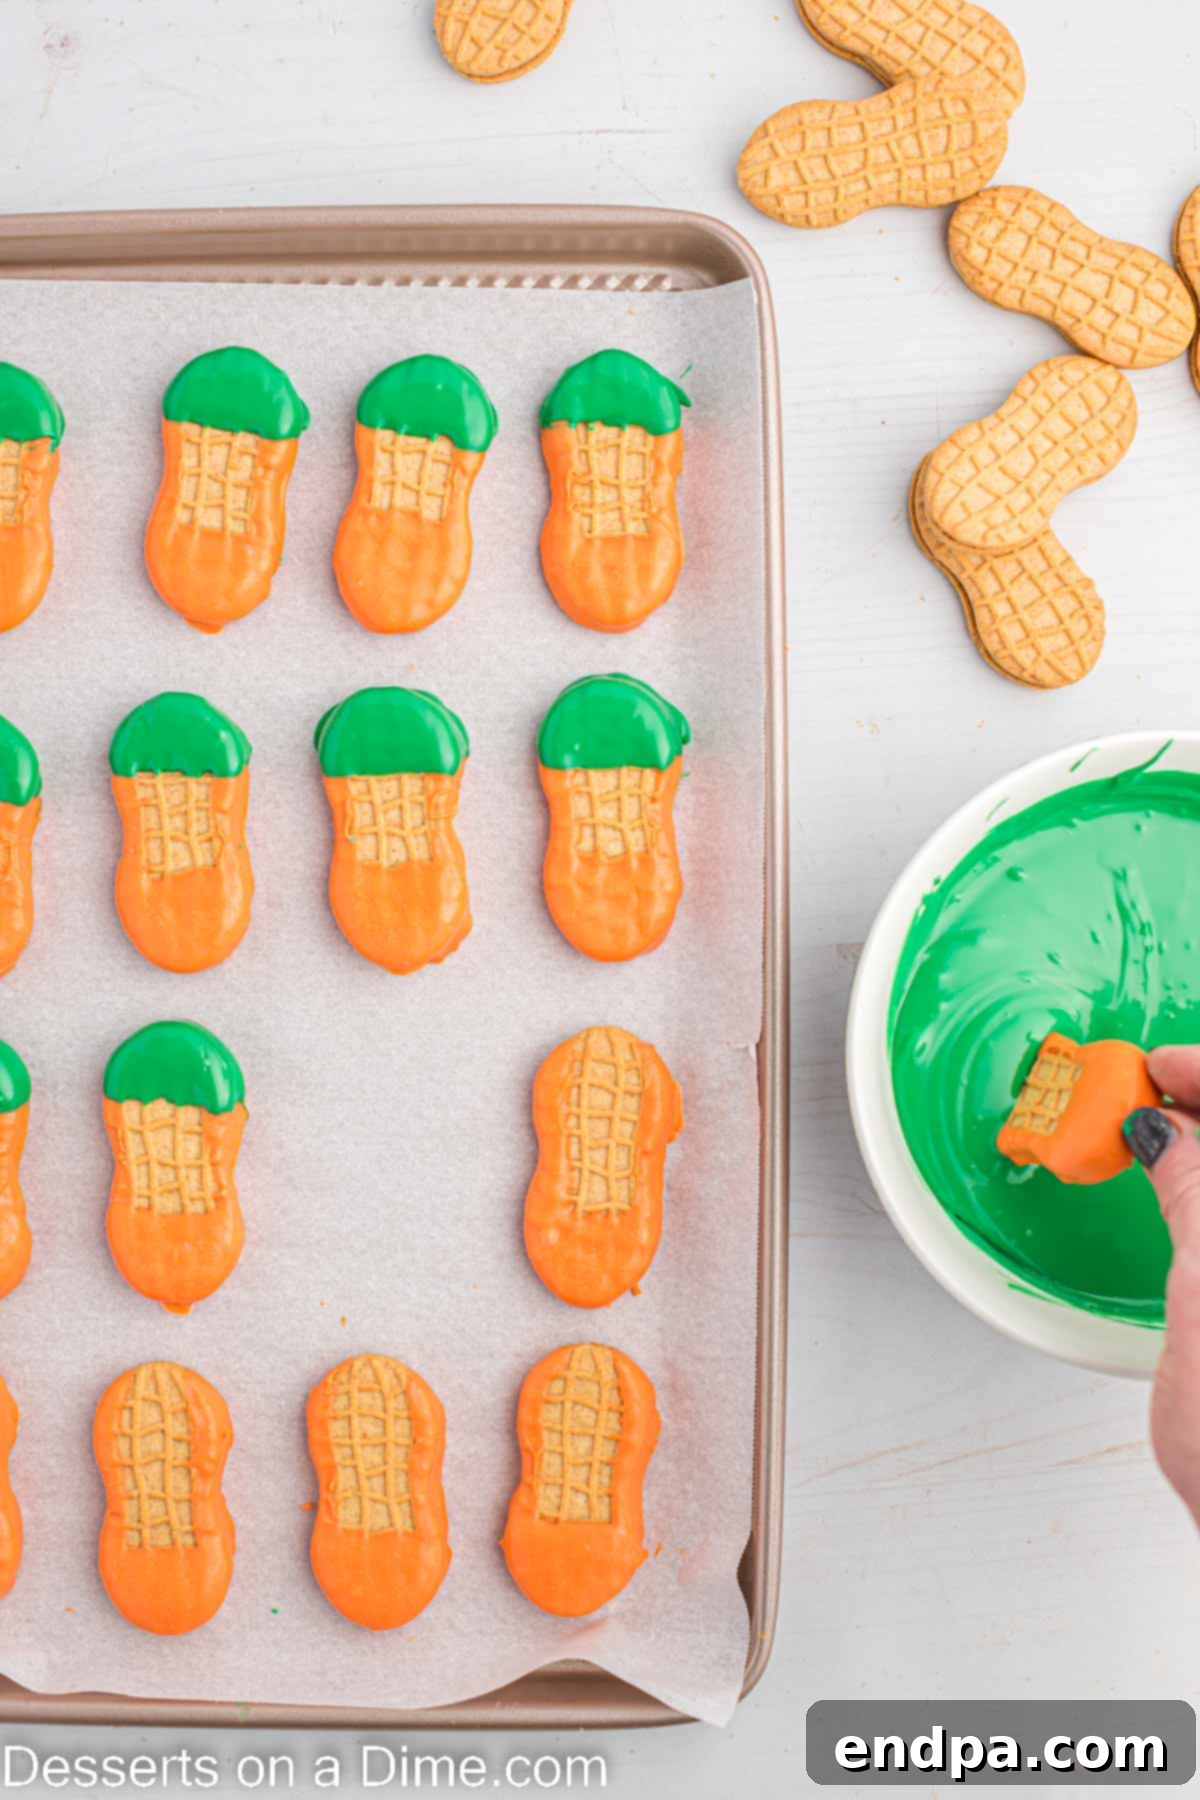
Step 6: Dip to Create the Leprechaun’s Hat. Once the orange layer on your cookies is completely solid, take an orange-coated Nutter Butter. Dip the *opposite* end of the cookie (the small portion you left uncoated at the top) into the melted green candy melts. This will form the leprechaun’s characteristic green hat. Dip just enough to create a distinct hat shape, leaving a clear line between the green hat and the orange face. Gently shake off any excess green candy melts to achieve a clean, sharp brim for the hat. Carefully return the dipped cookie to the parchment-lined baking sheet.
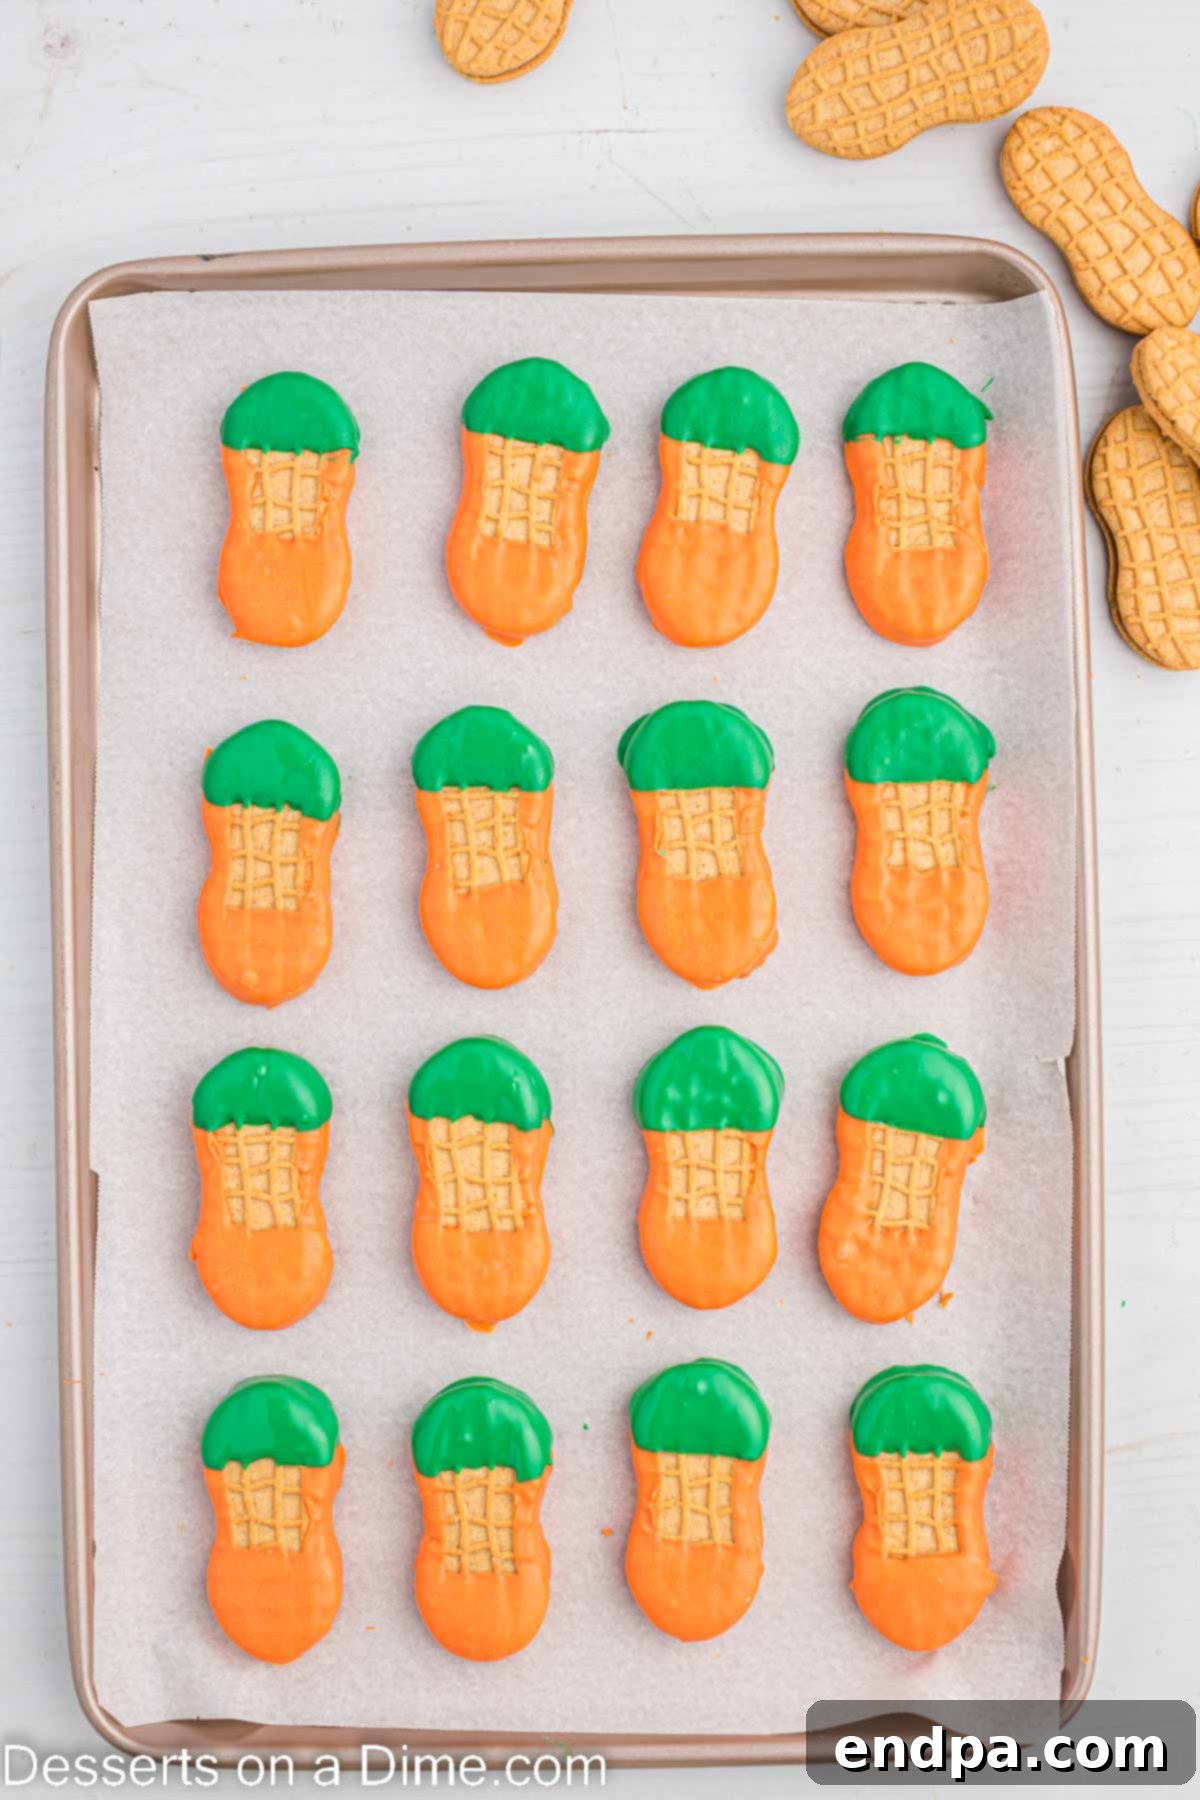
Step 7: Allow the Green Hats to Fully Dry and Set. Continue the hat-dipping process for all your remaining cookies. Just as with the orange layer, it is absolutely essential that the green candy melts are completely dry and hardened before you move on to adding the fine details. Rushing this step can lead to smudged decorations. Allow them to sit at room temperature for about 15-20 minutes, or use the refrigerator for a quicker set of 5-10 minutes. A firm, dry surface is necessary for the next decorative steps.
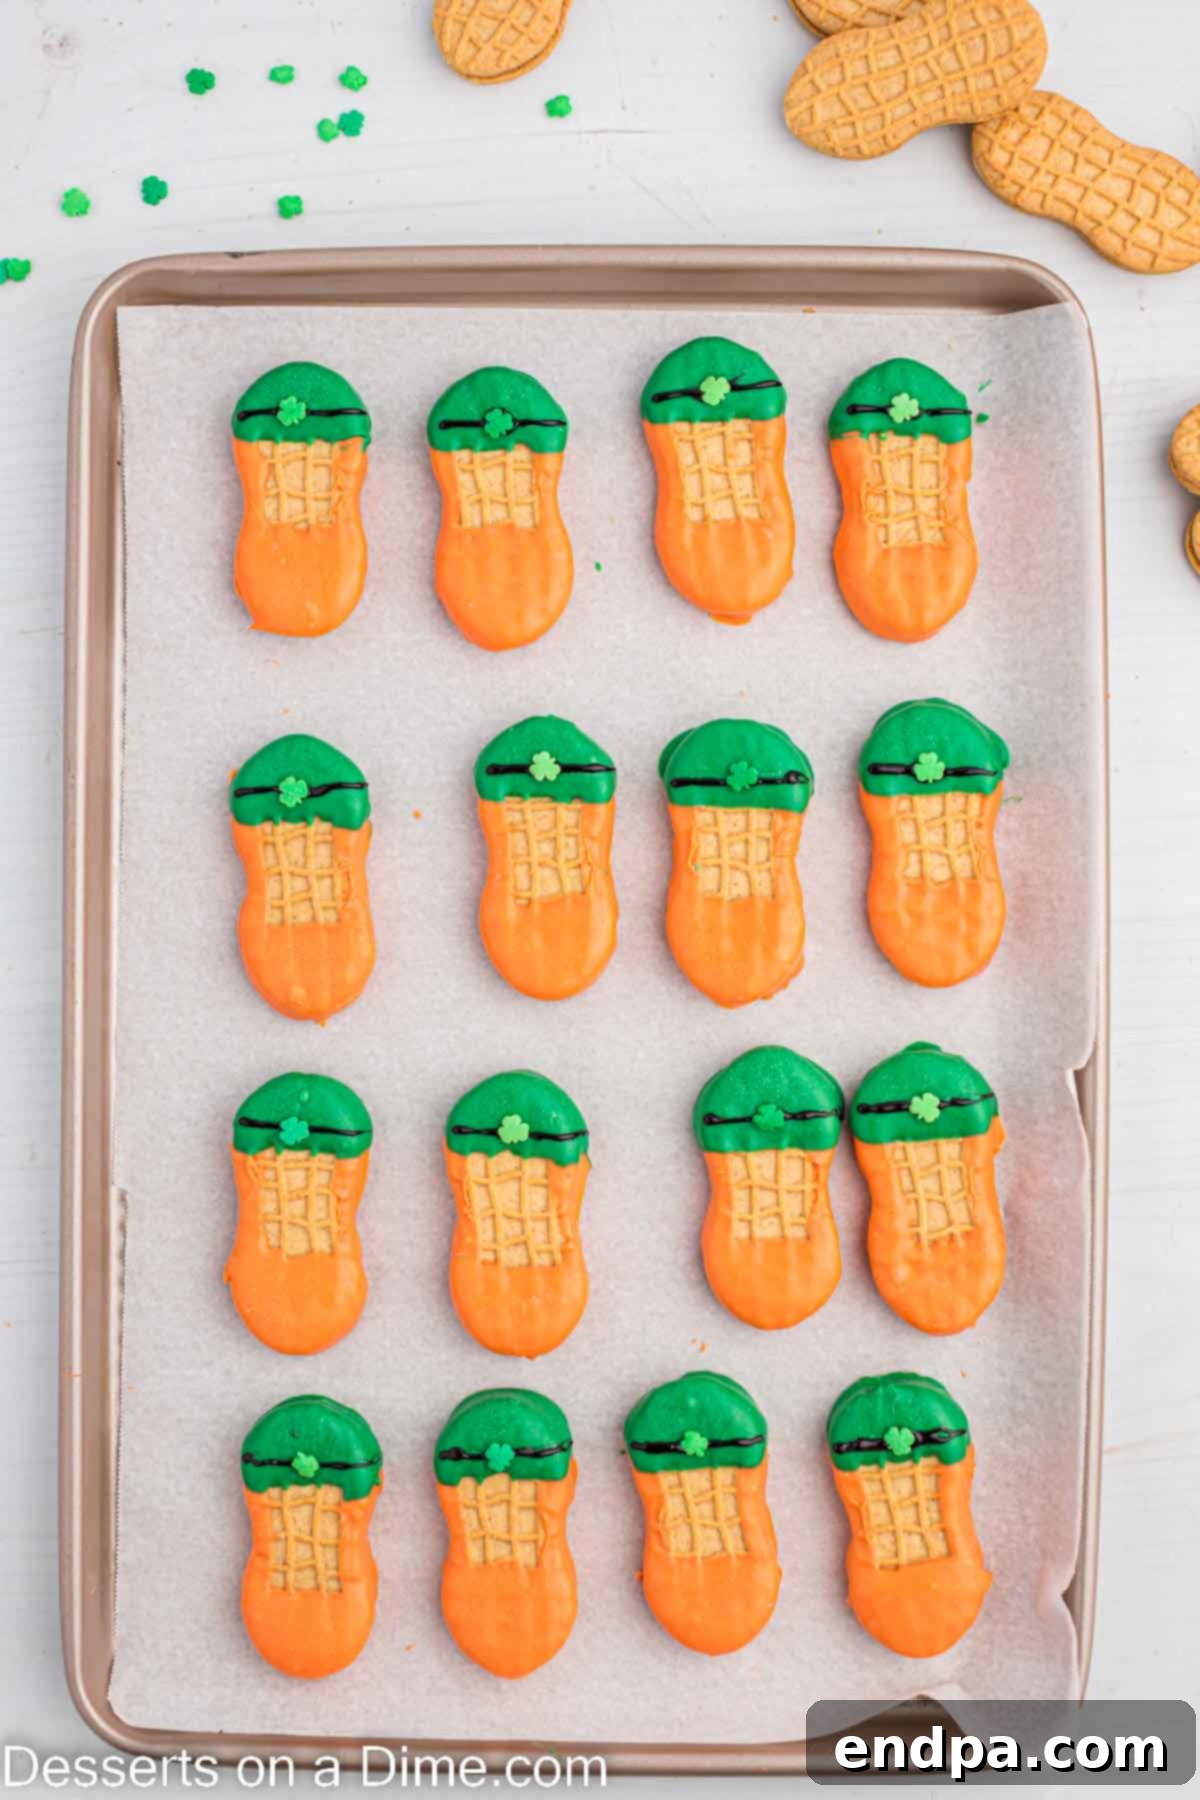
Step 8: Add the Hat’s Details: Rim and Shamrock. Once both the orange face and green hat layers are entirely set and firm, it’s time to add the finishing touches. Take your tube of black decorating icing. Carefully pipe a thin, neat line along the very bottom edge of the green hat, precisely where it meets the orange face. This line serves as the leprechaun’s hat rim, adding definition and character. While the black icing is still slightly wet (acting as an adhesive), gently place a shamrock-shaped sprinkle directly onto the center of this black line. Press it down lightly to ensure it adheres securely to the hat.
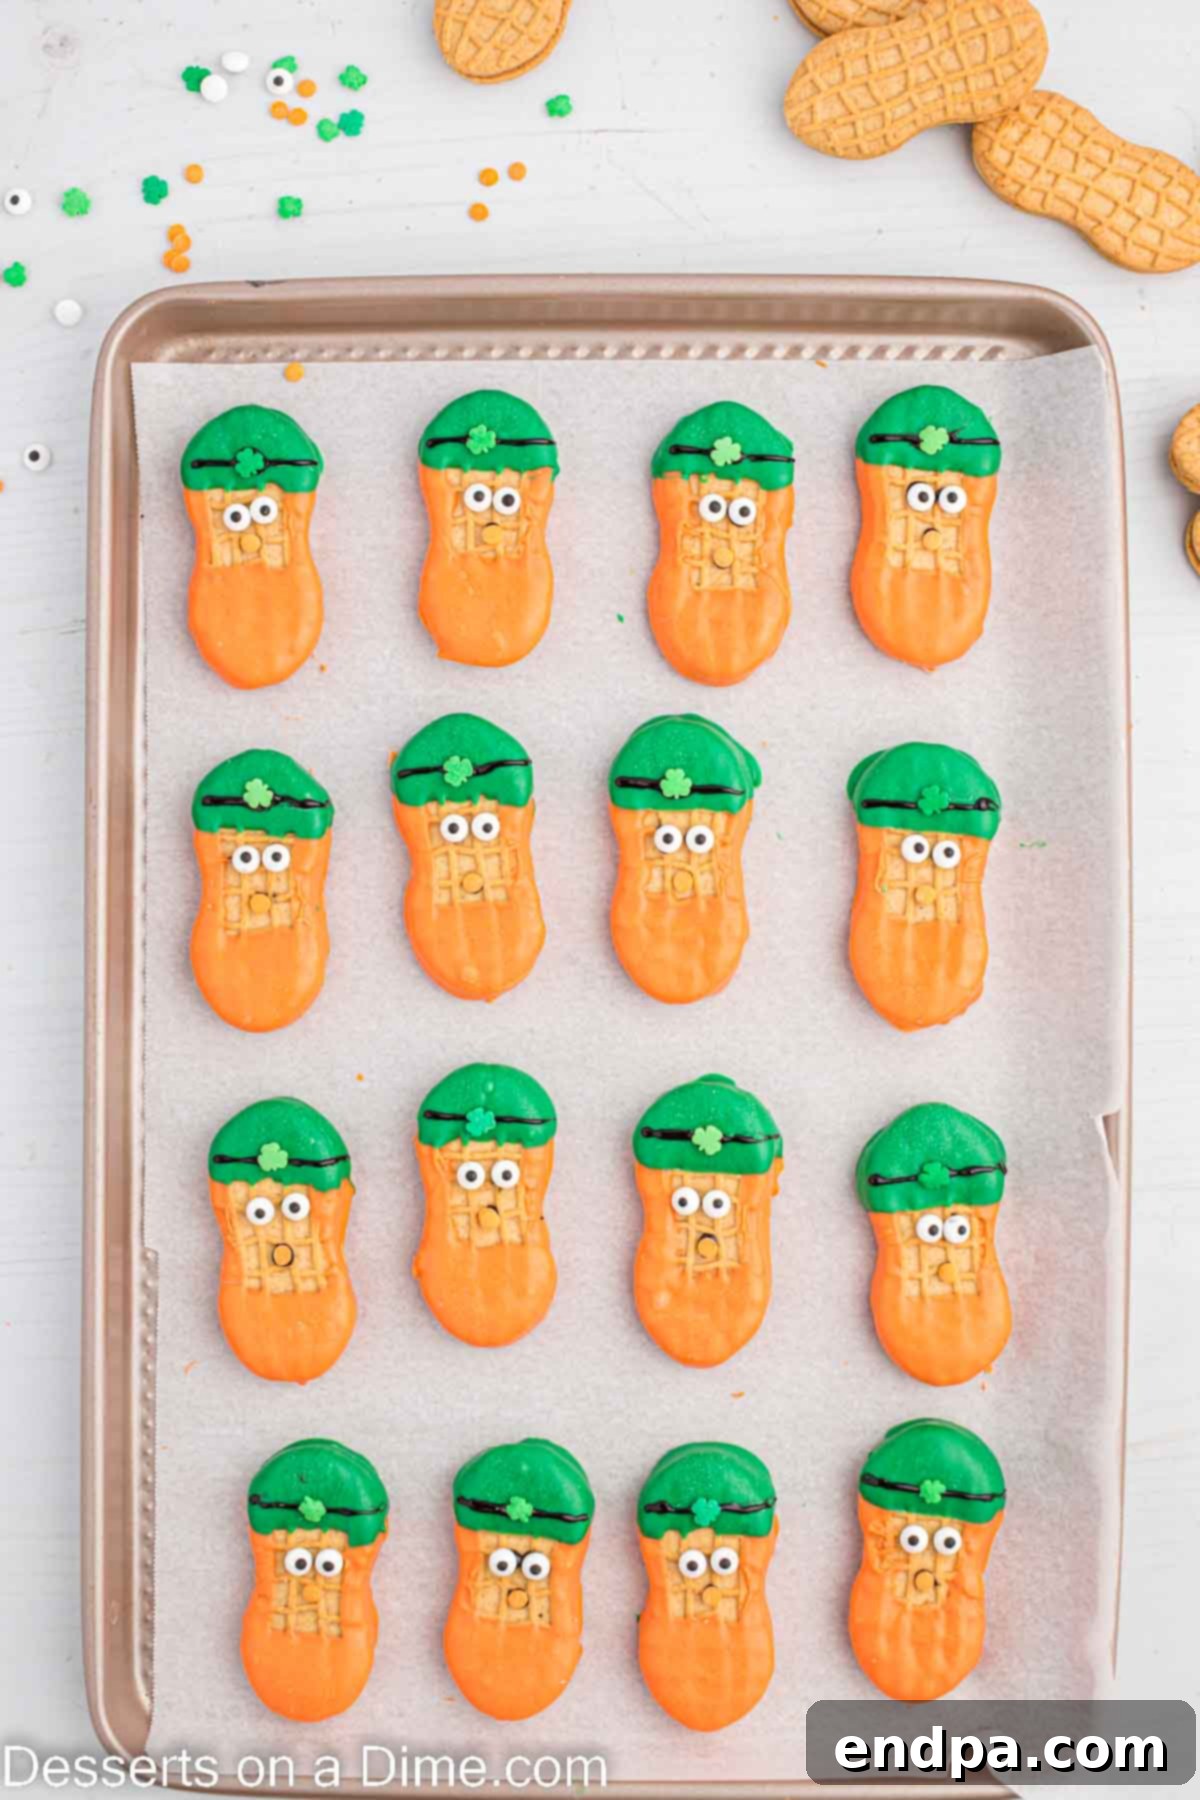
Step 9: Give Your Leprechauns Their Expressive Eyes and Nose. Now for the most personality-defining step! Use a tiny dab of the remaining black decorating icing as “glue.” Carefully place two small candy eyes onto the orange face portion of each cookie, positioning them just above where the beard begins. Arrange them to give your leprechauns either a friendly, mischievous, or surprised look—the choice is yours! Next, for the nose, gently press a single orange round sprinkle into the center of the face, slightly below the eyes. If needed, a minuscule dot of black icing can help secure the nose in place as well.
- Step 10: Final Setting for Perfect Presentation. After all the charming details—the hat rim, shamrock, eyes, and nose—have been meticulously added, gently return your now fully decorated Leprechaun Cookies to the parchment-lined baking sheet. Allow them a final, undisturbed period to ensure all the icing and sprinkles set completely. This final setting guarantees that all the festive adornments are securely in place, preventing any smudges or dislodged pieces when you handle and serve them. Once everything is firm to the touch, your delightful, homemade Leprechaun Cookies are officially ready to be served and thoroughly enjoyed by all!
Expert Decorating Tips for Flawless Leprechaun Cookies
To help you achieve the most charming and delicious Leprechaun Cookies, here are some expert tips and tricks that will make your decorating process smoother and your results even more impressive:
- Achieving the Ideal Candy Melt Consistency: If your candy melts appear too thick or clumpy after heating, don’t despair! You can thin them out by adding a very small amount (start with half a teaspoon) of vegetable shortening (like Crisco) or paramount crystals. Stir thoroughly until you reach a smooth, easily dippable consistency. Remember, never add water or any water-based liquids to candy melts, as this will cause them to seize and become unusable.
- Patience is a Virtue When Cooling: This cannot be emphasized enough: allow each layer of candy melts to cool and fully set before attempting to add the next. Trying to apply green hats to still-wet orange faces will inevitably lead to colors bleeding and a messy finish. For faster setting, simply place your baking sheet with the dipped cookies in the refrigerator for 5-10 minutes between layers.
- Creative Alternatives for Candy Eyes: If you find yourself without small candy eyes, there are several clever substitutions. You can use mini chocolate chips (placed with the flat side down, and the pointed side up to resemble an eye), small dots of white icing with a tiny black dot in the center made with a food marker or toothpick, or even tiny black nonpareils for a minimalist eye effect.
- Always Line Your Baking Sheets: This seemingly minor step is crucial for success. Always line your baking sheets with parchment paper or a silicone mat. This prevents the delicate, freshly coated cookies from sticking to the pan as they cool and makes transferring them a breeze. It also saves you considerable time during cleanup, allowing you to focus on enjoying your festive treats.
- Experiment with Colors and Flavors: While the traditional green and orange hues are perfect for St. Patrick’s Day leprechauns, feel encouraged to get creative. You could experiment with gold or rainbow-colored candy melts for the hats. For an extra festive kick, consider adding a tiny drop of mint extract to your green candy melts (ensure it’s oil-based, not water-based) for a delightful minty twist.
- Utilize a Toothpick for Precision: For minor adjustments to the placement of candy eyes or sprinkles, or to pick up tiny stray pieces, a simple toothpick can be your best friend. It offers a level of precision that fingers often cannot, helping you perfect those intricate details.
- Work in Batches if Needed: If you’re making a very large batch, or if your kitchen is warm, consider working in smaller batches. This ensures your candy melts stay at the right consistency and prevents premature hardening or melting of coatings.
Proper Storage for Lasting Freshness: Keeping Your Leprechauns Happy
Once your charming Leprechaun Cookies are fully decorated and completely set, proper storage is paramount to ensure they maintain their freshness, delightful texture, and festive appearance. Here’s how to best store them so they can be enjoyed for days to come:
For immediate enjoyment or short-term storage, place any leftover cookies in an airtight container or a robust ziplock bag. Store them at room temperature in a cool, dry place, away from direct sunlight or any heat sources, which could cause the candy melts to soften or even melt. To prevent the cookies from sticking together or damaging their delicate decorations, arrange them in a single layer or place a sheet of parchment paper or wax paper between each stack. This simple precaution helps preserve their whimsical look.
If you’re planning ahead or wish to extend their shelf life significantly, these cookies freeze exceptionally well. Arrange the fully set cookies in a single layer on a baking sheet and place them in the freezer until they are solid (this prevents them from sticking together once bagged). Once frozen solid, transfer them to a freezer-safe bag or an airtight container, again using parchment paper between layers to protect their decorations. They can be safely frozen for up to 2 months. When you’re ready to serve them, simply remove them from the freezer and allow them to thaw at room temperature for an hour or two until soft and ready to enjoy.
How Long Do Leprechaun Cookies Last?
When properly stored in an airtight container at room temperature, your delightful Leprechaun Cookies will maintain their optimal quality and freshness for approximately 3 to 5 days. Should you choose to freeze them for longer preservation, they can last in the freezer for up to 2 months. This makes them a fantastic make-ahead option for any St. Patrick’s Day celebration, ensuring you have a festive treat ready whenever the craving strikes!
Frequently Asked Questions About Leprechaun Cookies
Here are answers to some common questions you might have when making these fun and festive Leprechaun Cookies:
- Can I use regular chocolate chips instead of candy melts? While regular chocolate chips can be used, they behave differently than candy melts. They may not melt as smoothly, and they typically won’t harden as quickly or as firmly as candy melts, which are designed for coating. If you choose to use white chocolate chips, remember to use oil-based food coloring (not water-based) to color them green and orange, otherwise, the chocolate will seize.
- How can I make the candy melts thinner for easier dipping? If your melted candy seems too thick for a smooth coating, you can thin it out. Add a very small amount (start with half a teaspoon) of vegetable shortening (like Crisco) or paramount crystals, stirring thoroughly until you achieve your desired, dippable consistency. Never use water or milk, as this will cause the chocolate to seize.
- Can I prepare these cookies in advance for St. Patrick’s Day? Absolutely! These cookies are perfect for making ahead of time. Once they are fully decorated and completely set, store them in an airtight container at room temperature for several days, or freeze them for up to two months. They’ll be ready to enjoy whenever you need a festive treat.
- What should I do if my candy melts seize or become lumpy? Candy melts often seize if they are overheated or if any moisture is introduced into them. If this happens, sometimes adding a small amount of vegetable shortening or paramount crystals and stirring very vigorously can help salvage them, but often, it’s best to start with a fresh batch to ensure the best results.
- Are Nutter Butter cookies suitable for people with peanut allergies? No, Nutter Butter cookies are made with real peanut butter and are not suitable for individuals with peanut allergies. If you need a peanut-free option, look for a similar elongated sandwich cookie that is certified peanut-free, and ensure all other decorative ingredients are also safe for your specific allergy requirements.
More Enchanting St. Patrick’s Day Desserts to Explore
Continue your St. Patrick’s Day culinary adventure with these other delightful and festive dessert ideas, perfect for bringing more green and gold to your celebration:
- St. Patrick’s Day Cake Mix Cookies: Incredibly easy and colorful cookies made with a cake mix base.
- Shamrock Cookies: Classic cut-out cookies shaped and decorated to resemble lucky shamrocks.
- Homemade McDonald’s Shamrock Shake Recipe: Recreate the iconic minty green shake right in your own kitchen.
- St. Patrick’s Day Puppy Chow: A festive, muddy buddy mix with a delightful green twist.
- Leprechaun Gold Oreos: Regular Oreos transformed into shimmering gold coins, perfect for a pot of gold treat.
- Vibrant Rainbow Cake: A show-stopping, colorful cake that symbolizes the treasure at the end of the rainbow.
We truly value your feedback! If you try your hand at crafting these easy and fun Leprechaun Cookies, please take a moment to leave a star review and share your comments below. Your input helps us continue to create and share delicious, inspiring recipes with our community!
Leprechaun Cookies
(Rating based on 5 votes, with an average of 4.80 stars)
Make charming Leprechaun Cookies in minutes thanks to this no-bake recipe. Everyone will enjoy this festive treat for St. Patrick’s Day.
30 mins
30 mins
24
American
Dessert
128
Carrie Barnard
Ingredients
- 1 pkg Nutter Butter Cookies
- 1 pkg Small Candy Eyes
- 1 pkg Orange Candy Melts (12 ounce package)
- 1 pkg Green Candy Melts (12 ounce package)
- 1 tube Black Decorating Icing
- Shamrock Shaped Sprinkles
- Orange Round Sprinkles
Instructions
- Line a baking sheet with parchment paper and set aside.
- Place the orange candy melts in a microwave safe bowl. Heat in 25 second intervals, stirring after each interval, until melted and smooth.
- Dip each side (long side) of the Nutter Butter cookie into the orange candy melts and then carefully shake the cookie to get rid of any excess candy melts. Then dip the bottom of the cookie into the orange candy melts and carefully shake the cookie to get rid of any excess candy melts to form the beard of the leprechaun. Set the cookie on the prepared baking sheet to cool. Continue this process until all cookies are coated with the orange beard. Make sure that the orange candy melts are dried on the cookies before proceeding with the next steps.
- Place the green candy melts in a microwave safe bowl. Heat in 25 second intervals, stirring after each interval, until melted and smooth.
- Dip the opposite end of the Nutter Butter cookies into the green candy melts and carefully shake to get rid of any excess candy melts to form the hat of the leprechaun. Then place the cookie back on the baking sheet to cool. Continue this process with all the cookies. Make sure that the green candy melts are dried on the cookies before proceeding with the next steps.
- Use the black decorating icing to add a line on the bottom of the green part of the cookies to create the hat’s rim. Then carefully add a shamrock sprinkle to the center of the line for decoration on the hat.
- Use the remaining black decorating icing as glue to add on the eyes of the leprechaun and the orange sprinkles as the nose.
- Place the cookies back on the baking sheet to allow the finishing touches to cool. Then they are ready to serve and enjoy!
Nutrition Facts
, Carbohydrates: 17g
, Protein: 1g
, Fat: 6g
, Saturated Fat: 4g
, Polyunsaturated Fat: 1g
, Monounsaturated Fat: 1g
, Sodium: 63mg
, Sugar: 12g
Pin This Now to Remember It Later
Pin Recipe
