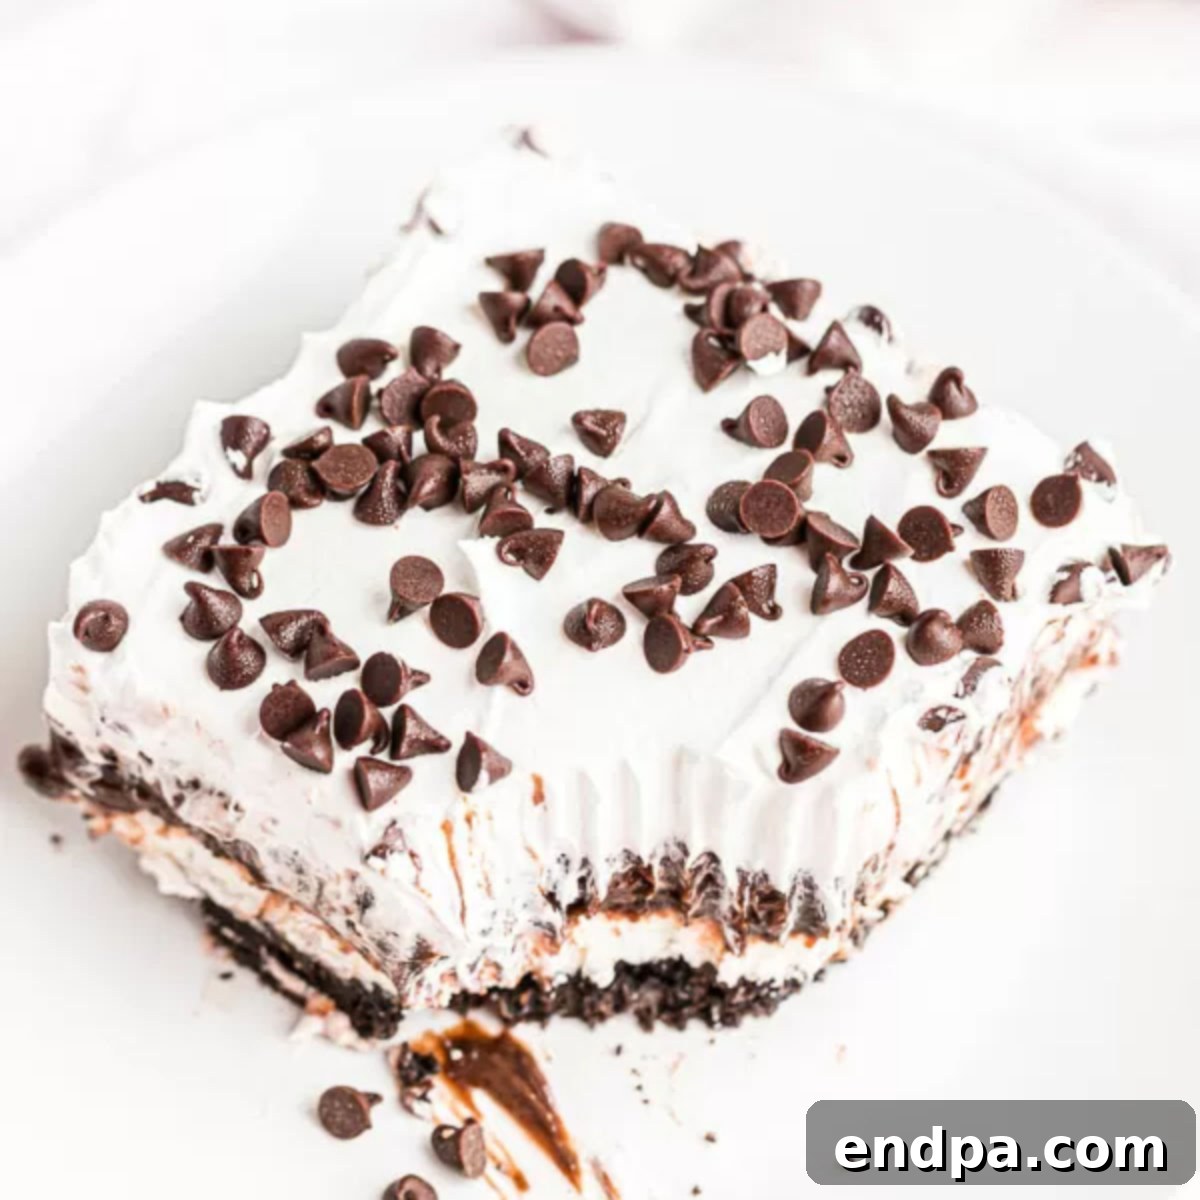
The Ultimate No-Bake Chocolate Lasagna: Your Go-To Decadent Dessert
Prepare to fall in love with the ultimate no-bake dessert: Chocolate Lasagna. This heavenly concoction is a symphony of textures and flavors, featuring luscious layers of crunchy Oreo crust, a smooth and tangy cream cheese filling, rich chocolate pudding, and a light, airy whipped topping. It’s the perfect treat for any occasion, from casual family dinners to festive holiday gatherings, promising a delightful experience with every single bite.
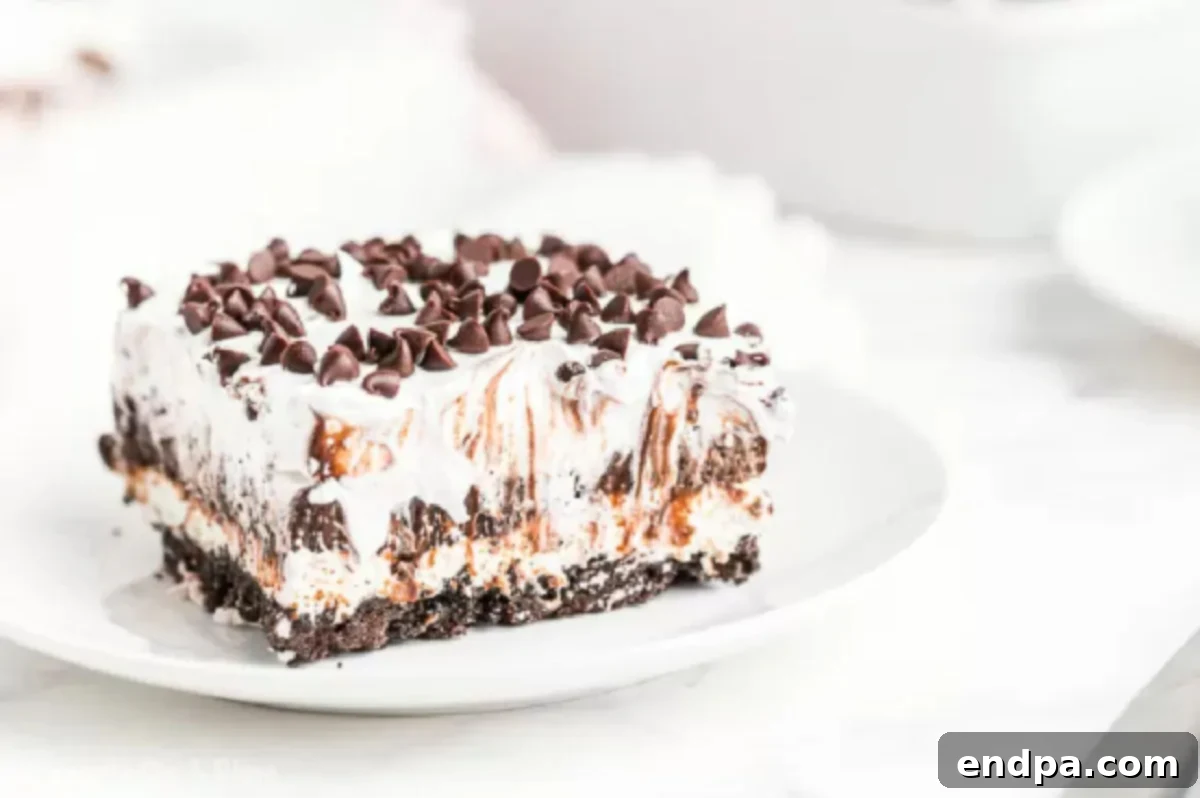
This simple, yet incredibly impressive, dessert comes together quickly without any oven time, making it an absolute lifesaver for warm summer days, busy holiday seasons, or last-minute potlucks. Its make-ahead friendly nature is another huge bonus; in fact, Chocolate Lasagna tastes even better after chilling, allowing all the rich layers to meld and set perfectly for an incredibly smooth and creamy finish. Say goodbye to baking stress and hello to pure dessert bliss!
What is Chocolate Lasagna? A Decadent Layered Delight
Chocolate Lasagna is a creative, no-bake dessert that visually resembles its savory namesake due to its distinct, stacked layers. Unlike traditional lasagna, however, this version is entirely sweet, indulgent, and served chilled. It typically begins with a crushed cookie crust, most commonly made from Oreos, providing a satisfying crunch and deep chocolate flavor. On top of this, a creamy, slightly tangy cheesecake-like layer is spread, offering a perfect contrast to the richness of the chocolate.
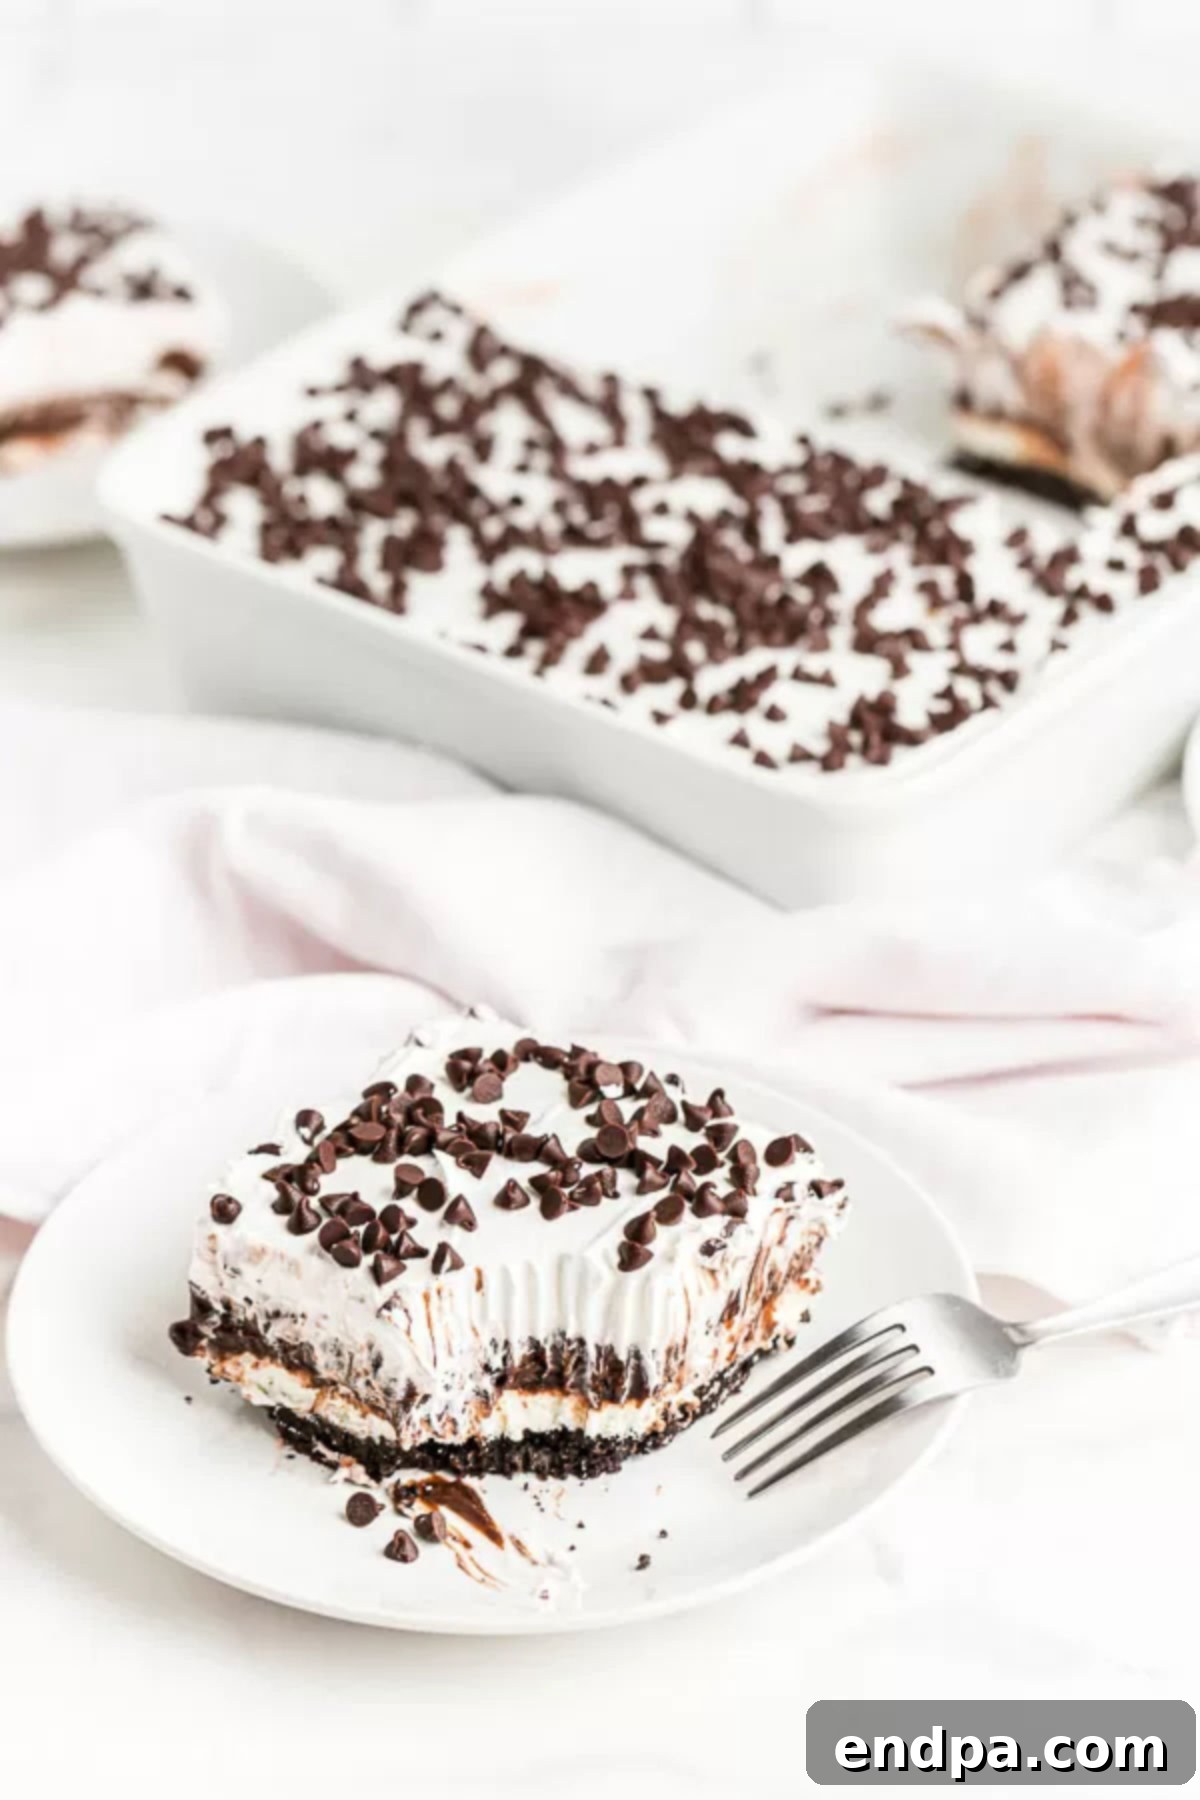
The third layer introduces a generous serving of smooth, velvety chocolate pudding, intensifying the cocoa experience. Finally, the dessert is crowned with a fluffy, light whipped topping, which not only adds an airy texture but also balances the richness of the underlying layers. Often, this top layer is adorned with sprinkles of mini chocolate chips, chocolate shavings, or other delightful garnishes. The magic of Chocolate Lasagna lies in how these individual components, while delicious on their own, combine to create an extraordinary dessert that’s greater than the sum of its parts. It’s a dessert that consistently delivers on both taste and presentation, making it a beloved choice for any celebration.
Why You’ll Love This No-Bake Chocolate Lasagna
There are countless reasons why this Chocolate Lasagna will quickly become a cherished recipe in your repertoire:
- Effortless Preparation: Forget about heating up your kitchen! This recipe requires absolutely no baking, making it a dream come true for hot days, crowded ovens during holidays, or simply when you want a delicious dessert without the fuss. It’s a true no-stress sweet treat.
- Irresistibly Creamy Layers: Each spoonful offers a harmonious blend of textures and flavors. From the satisfying crunch of the Oreo crust to the smooth, tangy cheesecake, the rich, velvety pudding, and the light, fluffy whipped topping, this dessert is a textural masterpiece that delights the palate.
- Beginner-Friendly: Even novice home cooks can master this recipe with ease. It uses simple, readily available ingredients and follows straightforward assembly steps, ensuring a successful and delicious outcome every time. No fancy techniques or complex equipment are required.
- Guaranteed Crowd-Pleaser: This Chocolate Lasagna is a universal favorite that appeals to all ages. Its comforting chocolate flavors and delightful layers make it an instant hit at parties, potlucks, family gatherings, or any event where a delicious dessert is appreciated. Prepare for rave reviews!
- Perfect for Planning Ahead: One of the best qualities of Chocolate Lasagna is that it benefits greatly from being made in advance. Preparing it a day or even several hours before serving allows the layers to fully set and the flavors to meld beautifully, resulting in an even more delicious and easy-to-slice dessert. This frees up your time on the day of your event.
Table of contents
- What is Chocolate Lasagna? A Decadent Layered Delight
- Why You’ll Love This No-Bake Chocolate Lasagna
- Essential Ingredients and Clever Substitutions
- Step-by-Step Guide to Making Chocolate Lasagna
- Pro Tips for a Perfect Chocolate Lasagna
- Storage and Make-Ahead Instructions
- Creative Topping and Serving Ideas
- Frequently Asked Questions About Chocolate Lasagna
- Explore More No-Bake Desserts
Essential Ingredients and Clever Substitutions
To create this magnificent Chocolate Lasagna, you’ll need a handful of readily available ingredients. Here’s a detailed look at what makes each layer special, along with some helpful substitution ideas to customize your dessert:
- Regular Oreo Cookies: The foundational layer of our dessert! Classic Oreos are paramount for creating a sturdy, flavorful, and perfectly crunchy crust. It’s crucial to use the regular variety, not “Double Stuf,” as the extra cream in the latter can lead to a crust that’s too soft or even soggy. For those looking for a different flavor profile, consider using Golden Oreos, Nutter Butter cookies for a peanut butter twist, or even chocolate graham crackers for a slightly less sweet base.
- Unsalted Butter (Melted): This golden liquid gold is essential for binding the crushed cookies together, forming a cohesive and delicious crust that holds its shape when sliced. If you only have salted butter on hand, you can still use it, but be mindful of the overall saltiness and omit any additional salt if the recipe called for it. For a dairy-free alternative, melted coconut oil can work, though it might impart a subtle coconut flavor.
- Full-Fat Cream Cheese: Softened to room temperature, full-fat cream cheese is the cornerstone for achieving that wonderfully smooth, rich, and slightly tangy cheesecake layer. The full-fat version ensures the best texture and depth of flavor. If you’re looking for an alternative, mascarpone cheese offers a similar richness and creaminess, making for an even more decadent layer.
- Granulated Sugar: This provides the necessary sweetness to balance the tang of the cream cheese layer, creating a perfectly harmonious flavor profile. Feel free to adjust the quantity to your personal preference for sweetness. Powdered sugar (confectioners’ sugar) can also be used for an even silkier texture, though you may need to adjust the quantity as it’s typically sweeter by volume than granulated sugar.
- Cold Milk: A critical ingredient for two layers. It’s used in the cream cheese mixture for consistency and, more importantly, it’s vital for properly setting the instant pudding mix. Whole milk generally yields the creamiest results, but 2% milk or even certain non-dairy milks (such as almond or oat milk) can be used. Be aware that non-dairy options might slightly alter the pudding’s setting time or final texture.
- Whipped Topping (Cool Whip or Homemade): This light and fluffy component adds an airy contrast to the denser layers below, providing a delicate finish. Cool Whip is a convenient and stable choice. However, for a truly gourmet touch, consider making your own homemade whipped cream using heavy cream, powdered sugar, and a splash of vanilla extract for unparalleled freshness and flavor.
- Instant Chocolate Pudding Mix: The undeniable star of the rich chocolate layer! It is imperative to use instant pudding mix for this recipe, not the “cook-and-serve” variety, as it needs to thicken and set without any heat. Any brand of instant chocolate pudding will work. Experiment with dark chocolate pudding for a deeper cocoa flavor or white chocolate pudding for a delightful contrast.
- Mini Chocolate Chips: These delightful morsels are sprinkled on top, providing a fantastic textural crunch and an extra burst of intense chocolate flavor with every bite. If mini chips aren’t available, regular chocolate chips, finely chopped chocolate bars, or elegant chocolate shavings can be used to similar effect.
Step-by-Step Guide to Making Chocolate Lasagna
Creating this stunning Chocolate Lasagna is simpler than you might think! Follow these easy steps to assemble your masterpiece, layer by decadent layer:
Step 1: Prepare the Crunchy Oreo Cookie Crust
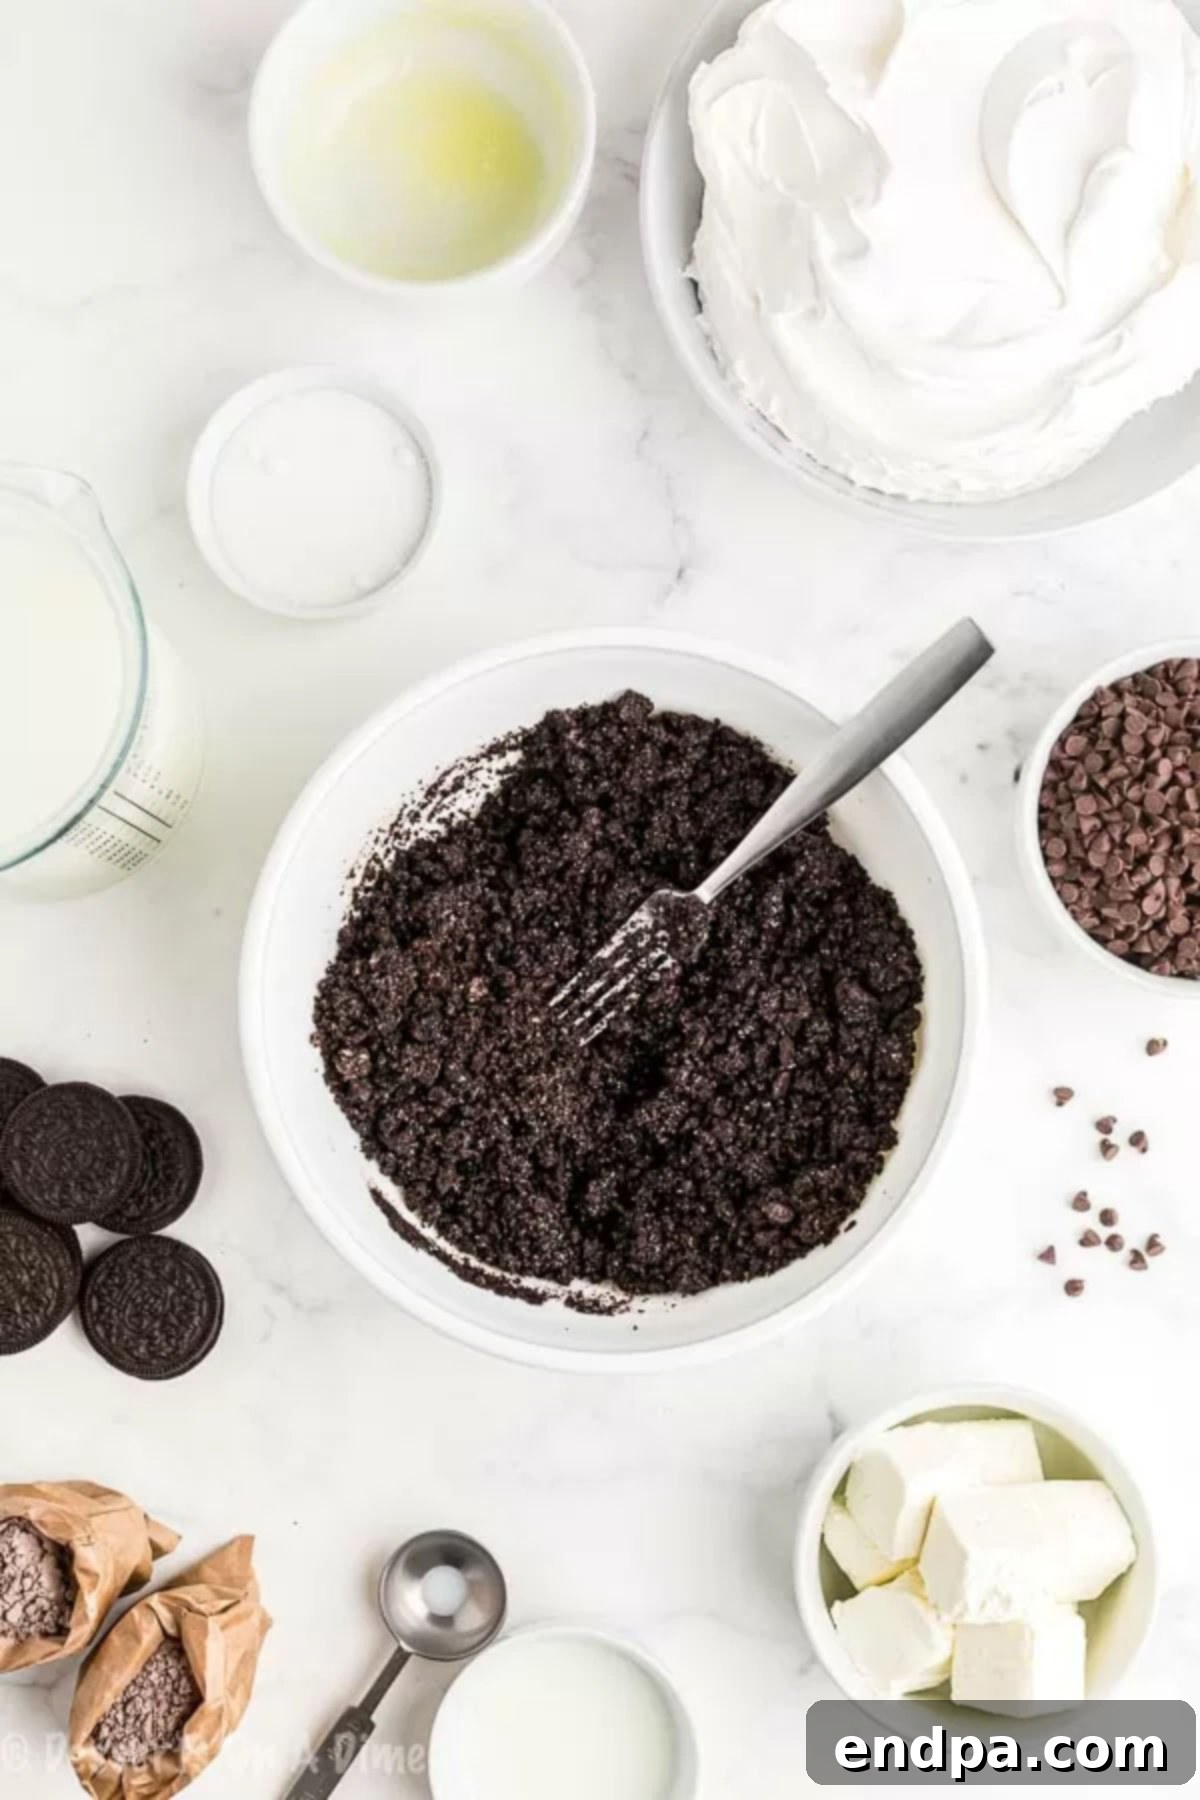
Begin by thoroughly crushing approximately 36 regular Oreo cookies. The most efficient way to achieve fine crumbs is by using a food processor. Simply pulse the cookies until they resemble fine sand with no large chunks remaining. If you don’t have a food processor, place the Oreos in a large, sturdy Ziploc bag and crush them with a rolling pin or the bottom of a heavy glass until uniformly fine. Once crushed, transfer the Oreo crumbs to a large mixing bowl. Pour in the 6 tablespoons of melted unsalted butter and mix thoroughly with a fork. Continue mixing until all the crumbs are evenly moistened and have the texture of wet sand. Transfer this buttered crumb mixture into a 9×13-inch baking dish. Using the back of a spoon or your hands, firmly and evenly press the crumbs into the bottom of the pan to form a compact crust. Place the baking dish in the refrigerator to chill while you prepare the subsequent layers; this crucial step helps the crust set firmly.
Step 2: Craft the Creamy Cheesecake Layer
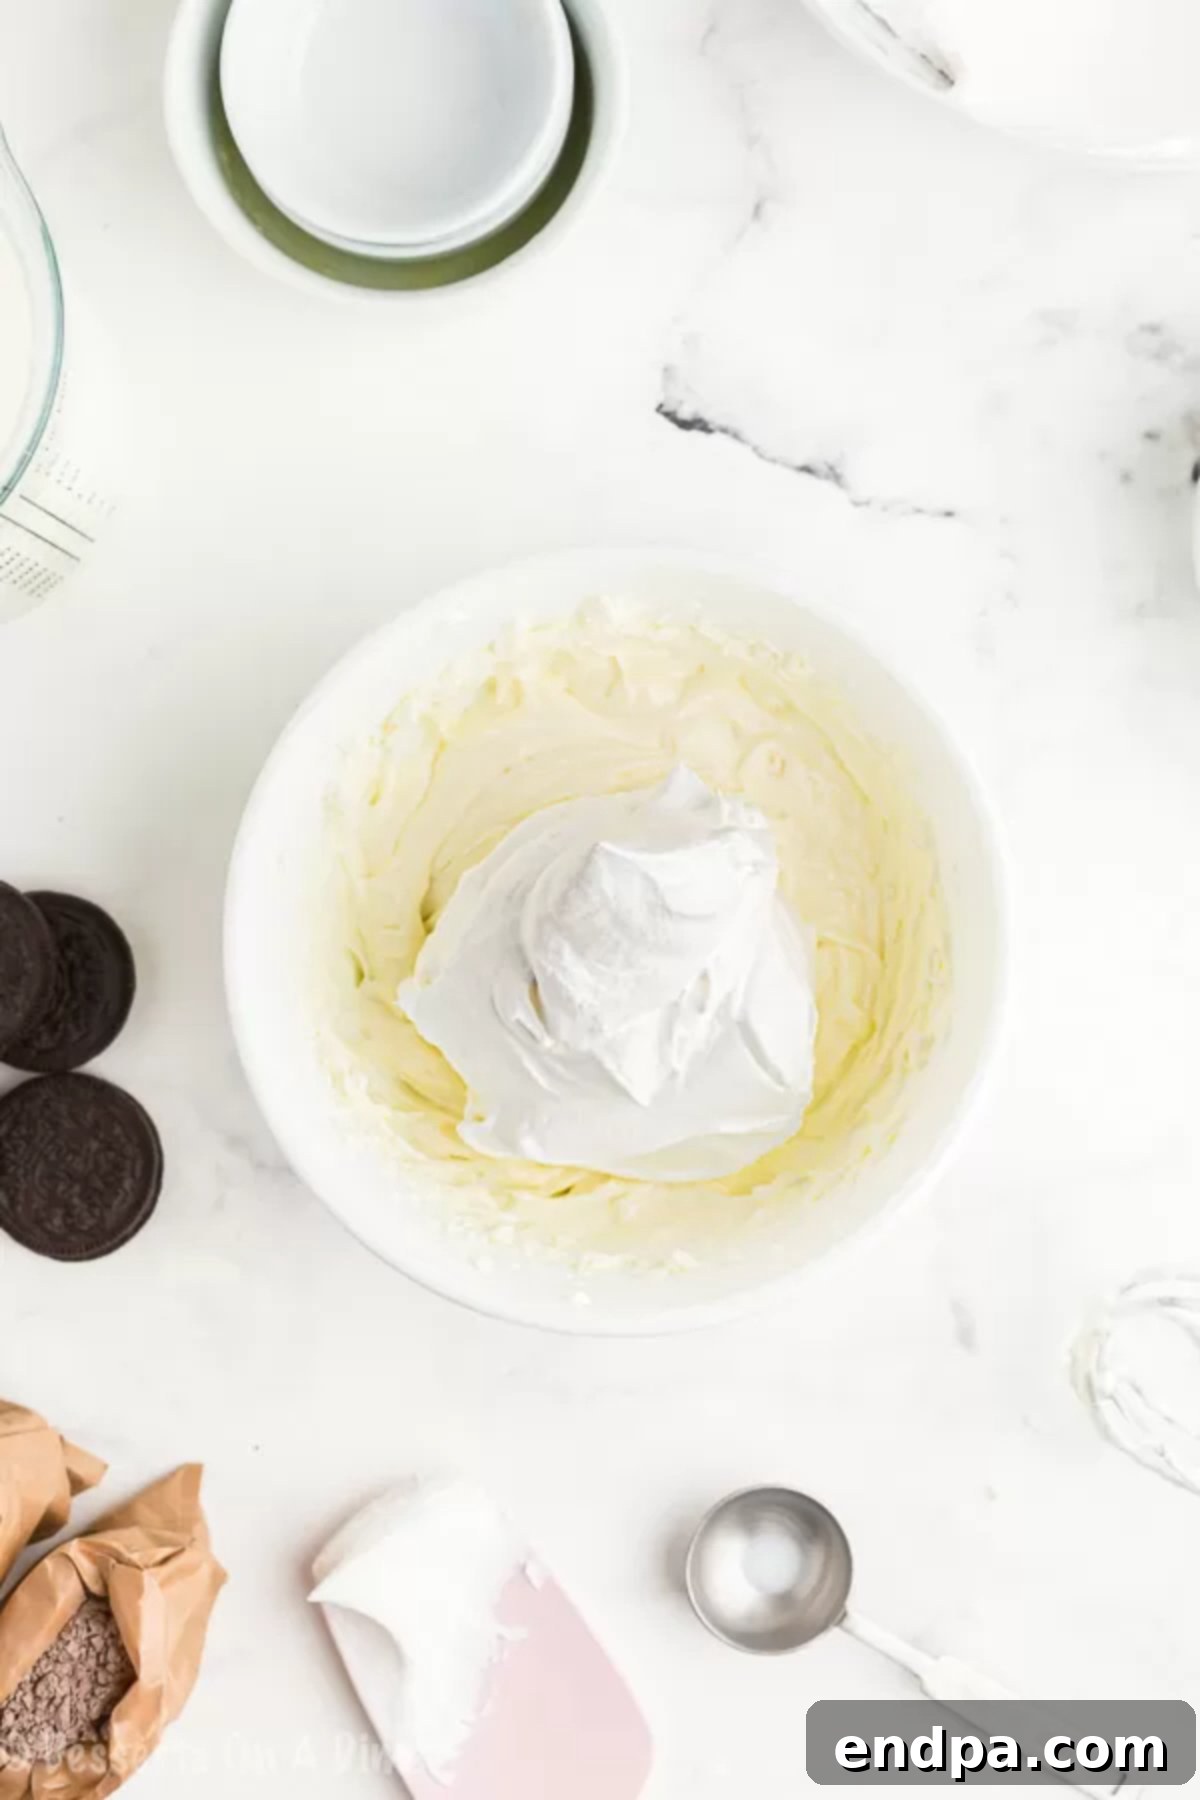
In a separate medium bowl, begin preparing the delightful cheesecake layer. Ensure your 8-ounce package of cream cheese is fully softened to room temperature for the best results. Using an electric hand mixer, beat the softened cream cheese until it becomes wonderfully light, smooth, and fluffy – this should take about 1-2 minutes. Gradually add 2 tablespoons of cold milk and 1/4 cup of granulated sugar to the cream cheese mixture, continuing to mix until all ingredients are fully combined and the mixture is completely lump-free. Finally, with a gentle hand, fold in 1 and 1/4 cups of whipped topping (such as Cool Whip) until it is just incorporated. Overmixing at this stage can deflate the whipped topping, so be gentle. Carefully and evenly spread this creamy cheesecake mixture over your chilled Oreo crust in the baking dish. Return the dish to the refrigerator to allow this layer to start setting.
Step 3: Layer the Rich Chocolate Pudding
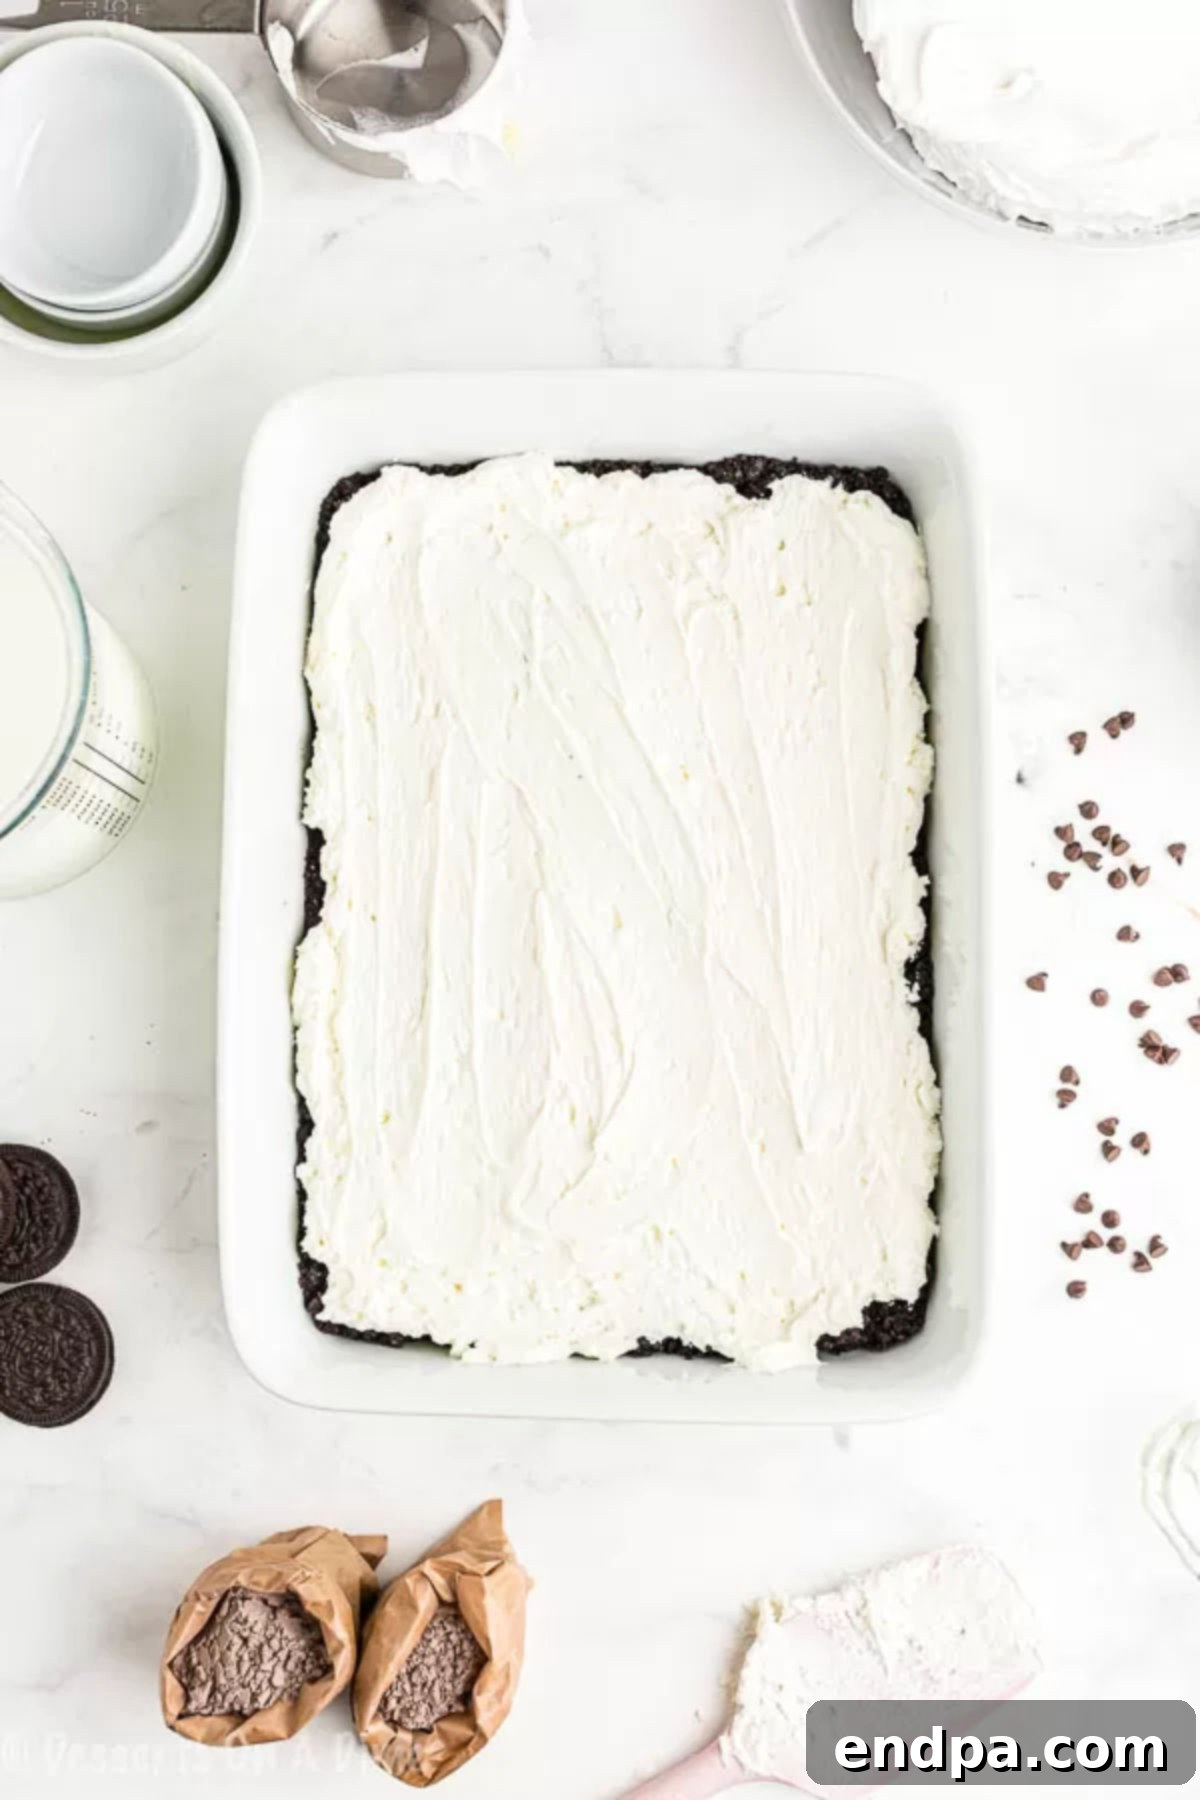
Now it’s time for the decadent chocolate pudding layer. In another bowl, combine the two 3.9 oz packages of instant chocolate pudding mix with 3 and 1/4 cups of very cold milk. Whisk these ingredients vigorously and continuously for at least 2-3 minutes, or until you observe the pudding visibly thickening. It’s important to use cold milk as it helps activate the setting agents in instant pudding more effectively. Once thickened, allow the pudding mixture to rest for an additional 5 minutes to ensure it fully sets into a firm, luscious consistency. After this brief resting period, gently and evenly spread the thick chocolate pudding layer over the cream cheese layer in your baking dish, ensuring a smooth and complete coverage. Place the dish back in the refrigerator to continue chilling.
Step 4: Add the Final Whipped Topping and Chill
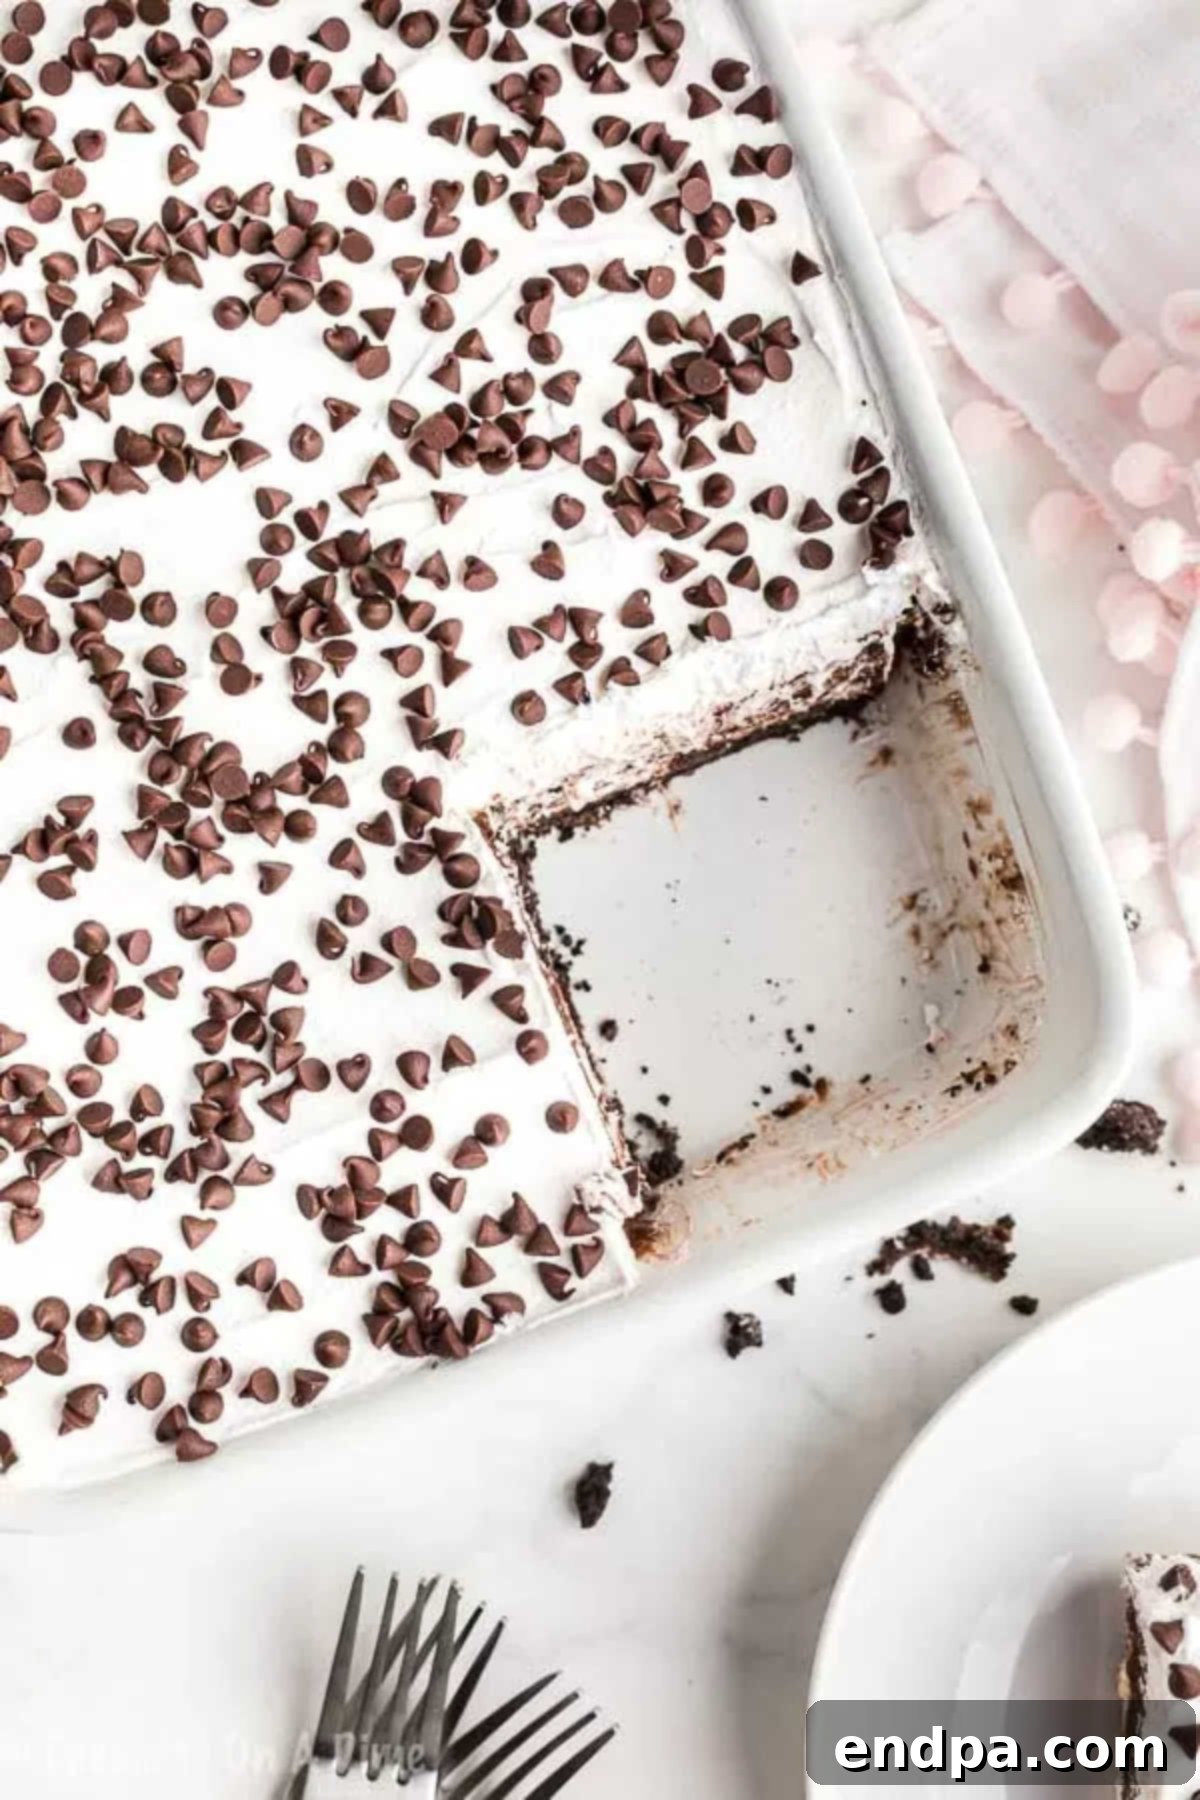
For the grand finale, carefully spread the remaining whipped topping (Cool Whip) over the chocolate pudding layer. Use a spatula to create a smooth and inviting top layer. To add a delightful visual appeal and an extra burst of chocolate flavor, generously sprinkle 1 cup of mini chocolate chips evenly across the entire surface of the dessert. For optimal results and a perfectly set Chocolate Lasagna, place the entire dish in the freezer for at least 1 hour. If you prefer a slightly softer set or have more time, you can refrigerate it for a minimum of 4 hours. This crucial chilling time allows all the layers to firm up, meld together beautifully, and ensures clean, easy slices when you’re ready to serve. The longer it chills, the better it sets and tastes!
Pro Tips for a Perfect Chocolate Lasagna
Mastering this delicious no-bake dessert is easy with a few expert tricks up your sleeve. Follow these professional tips to ensure your Chocolate Lasagna is nothing short of perfection:
- Ensure Even Layer Distribution: For a visually stunning and perfectly balanced dessert, it’s crucial to take your time spreading each layer evenly across the entire baking pan. This attention to detail ensures that every single slice you cut will have a satisfying portion of each delicious component, from the crust to the whipped topping.
- Choose the Right Oreos: When it comes to the crust, stick with regular Oreo cookies. Varieties like “Double Stuf” or those with extra cream filling can introduce too much moisture and make your crust soggy and unable to hold its shape properly. The classic Oreos provide the ideal balance of cookie and cream for a firm, flavorful base. You can leave the cream filling in when crushing them, as it adds to the flavor.
- Optimal Chilling is Key: This is arguably the most critical step for a successful Chocolate Lasagna. Do not rush the chilling process! Adequate chilling time—at least 1 hour in the freezer or a minimum of 4 hours in the refrigerator—is essential. This allows the instant pudding and cream cheese layers to fully set and firm up, which is vital for achieving clean, neat slices and a dessert that holds its structure beautifully. For the best flavor integration and firmest set, overnight chilling in the refrigerator is highly recommended.
- Achieving Clean Slices: To get those enviable, picture-perfect cuts that showcase all the lovely layers, adopt a simple trick: run your sharp knife under warm water and wipe it clean between each slice. A warm, clean knife glides through the layers without dragging or sticking, resulting in crisp, defined edges for every piece.
- Room Temperature Cream Cheese: Always make sure your cream cheese is completely softened to room temperature before you begin mixing. This step is non-negotiable for preventing lumps and ensuring that your cream cheese layer is wonderfully smooth, light, and airy, contributing to the overall luxurious texture of the lasagna.
- Confirm Pudding Thickness: Before spreading your instant chocolate pudding mixture, always verify that it has thickened sufficiently. If it appears too thin or watery after whisking, give it a few more minutes to rest. Using very cold milk also aids in activating the gelling agents in instant pudding more effectively, ensuring it sets to the correct consistency.
- Prevent Freezer Burn: If you plan on freezing your Chocolate Lasagna for longer storage, ensure it’s properly protected from freezer burn. Cover the surface directly with plastic wrap, pressing it down to eliminate any air bubbles, then add an additional layer of aluminum foil. This dual-layer protection helps maintain its freshness, flavor, and texture for up to a month.
Storage and Make-Ahead Instructions
Chocolate Lasagna is a fantastic make-ahead dessert, perfect for busy schedules and entertaining. Here’s everything you need to know about storing it and preparing it in advance:
- Refrigeration: Leftover Chocolate Lasagna or a freshly made batch can be stored in the refrigerator for up to 4 days. Always ensure it is tightly covered with plastic wrap, gently pressed against the surface to minimize air exposure. Keeping it well-chilled until just before serving is key to maintaining its firm texture and fresh, delightful taste.
- Freezing: For longer storage, Chocolate Lasagna freezes beautifully. You can freeze individual slices, which are perfect for portion control, or the entire dessert for up to 1 month. To prevent freezer burn and preserve its quality, wrap it tightly first in plastic wrap, ensuring it adheres directly to the dessert’s surface, and then follow with a layer of heavy-duty aluminum foil.
- Thawing: When you’re ready to enjoy frozen Chocolate Lasagna, simply transfer it from the freezer to the refrigerator and allow it to thaw overnight. While the texture might become slightly softer after the freezing and thawing process, it will still retain its incredible flavor and be wonderfully delicious.
- Room Temperature Advisory: Given its generous dairy content, which includes cream cheese, milk, and whipped topping, Chocolate Lasagna is perishable. It should not be left at room temperature for more than 2 hours to ensure food safety and maintain the integrity of its layered structure. Always keep it chilled!
Creative Topping and Serving Ideas
While inherently delicious on its own, Chocolate Lasagna offers a fantastic canvas for creative toppings and serving presentations. Elevate your dessert with these inspiring ideas to impress your guests and delight your taste buds:
- Classic Mini Chocolate Chips: The go-to choice for a reason, these tiny morsels add a delightful texture and an extra dose of chocolatey goodness that perfectly complements every layer.
- Elegant Chocolate Shavings or Curls: For a sophisticated touch that elevates the visual appeal, generously sprinkle delicate chocolate shavings or curls over the top. This makes the dessert look even more gourmet and enticing.
- Chopped Candy Bar Pieces: Unleash your creativity by crushing your favorite chocolate bars—think Snickers, Kit Kat, Hershey’s, or Heath bars—and sprinkling the pieces over the whipped topping. This adds a fun, varied texture and a burst of familiar candy flavors.
- Reese’s Pieces or Mini Peanut Butter Cups: If you’re a fan of the irresistible chocolate-peanut butter combination, these are an absolute must-try. The nutty, sweet, and salty flavors are a perfect complement to the rich chocolate.
- Rich Chocolate Ganache Drizzle: Take the chocolate factor to an even more decadent level with a glossy, smooth drizzle of homemade chocolate ganache. It adds an intense chocolate flavor and a luxurious sheen.
- Indulgent Caramel or Hot Fudge Drizzle: Swirl a generous amount of warm homemade caramel sauce or hot fudge sauce over the top of your lasagna. These classic dessert sauces add a rich, gooey finish that is truly irresistible.
- Crushed Peppermint or Chocolate Mints: Ideal for a festive holiday twist, crushed peppermint candies or chocolate mints like Andes Mints add a cool, refreshing flavor and a beautiful contrasting color.
- Toasted Coconut Flakes: For a delightful nutty and slightly tropical crunch, sprinkle lightly toasted coconut flakes over the whipped topping. This adds another layer of flavor and texture complexity.
- Finely Chopped Nuts: Pecans, walnuts, or almonds, lightly toasted, can add a wonderful earthy crunch and depth of flavor, contrasting beautifully with the creamy layers.
- Fresh Berries: For a touch of freshness and a vibrant pop of color, adorn your Chocolate Lasagna with fresh strawberries, raspberries, or blueberries. The tartness of the berries provides a lovely balance to the sweetness of the dessert.
- Additional Oreo Crumbs: If you’re an ultimate Oreo enthusiast, sprinkle extra crushed Oreos over the top layer for an even more intense cookie flavor and an additional crunch.
Frequently Asked Questions About Chocolate Lasagna
Got more questions about perfecting your Chocolate Lasagna? We’ve got answers to help you achieve the best possible results!
- Can I make Chocolate Lasagna ahead of time for a party? Absolutely! This dessert is one of the best make-ahead options for any gathering. In fact, preparing it at least 8-12 hours in advance or even chilling it overnight significantly enhances its flavor and allows all the layers to fully set, resulting in a firmer, more cohesive, and even more delicious slice. It’s perfect for reducing stress on the day of your event.
- Why is my Chocolate Lasagna crust soggy? A soggy crust can be a common issue but is easily preventable. It often occurs if you use “Double Stuf” Oreos (which contain too much cream), or if the melted butter wasn’t thoroughly incorporated into the cookie crumbs. Always ensure you’re using regular Oreos and that you press the crust mixture firmly and evenly into the pan before the crucial chilling step. Adequate chilling helps it firm up and prevents sogginess.
- How do I prevent my pudding layer from being runny? The key to a perfectly set pudding layer lies in two main factors: using the correct type of pudding and ensuring the right temperature for your milk. Always use instant pudding mix, not “cook-and-serve” varieties, as instant pudding is formulated to set without heat. Additionally, use very cold milk and whisk it vigorously for the recommended time (typically 2-3 minutes) until you observe it visibly thickening. After whisking, let it sit for at least 5 minutes to fully activate its setting agents before spreading.
- Can I use homemade whipped cream instead of Cool Whip? Yes, you absolutely can, and many prefer it for an extra special touch! Homemade whipped cream (made from heavy cream, powdered sugar, and a splash of vanilla extract) will give your Chocolate Lasagna an even fresher, more luxurious, and richer taste. Just ensure your homemade whipped cream is whipped to stiff peaks so it holds its shape well within the dessert’s layers.
- How long does Chocolate Lasagna need to chill for optimal results? For the best results, you should chill your Chocolate Lasagna for a minimum of 4 hours in the refrigerator. However, for truly optimal setting, ease of slicing, and enhanced flavor integration, chilling it overnight in the refrigerator is highly recommended. If you’re in a hurry, you can place it in the freezer for about 1 hour for a quicker set, but the refrigerator chill yields a slightly creamier texture.
- Is this dessert suitable for large parties and gatherings? Definitely! Chocolate Lasagna is a classic crowd-pleaser and is perfectly suited for large parties, potlucks, holiday celebrations, birthday parties, or any festive gathering. Its rich, appealing layers are universally loved, and its ability to be made ahead of time makes it incredibly convenient for entertaining.
Explore More No-Bake Desserts
If you’ve fallen in love with the ease and deliciousness of this Chocolate Lasagna, you’ll be thrilled to discover other fantastic no-bake treats. These desserts are perfect for warm weather, busy schedules, or simply when you want a delightful treat without turning on the oven:
- No-Bake Salted Caramel Pie: Indulge in rich, buttery caramel flavor perfectly balanced with a hint of sea salt, all resting in a perfectly set, easy-to-make crust. A truly irresistible sweet and salty combination.
- Easy No-Bake Oreo Pie: Another Oreo-lover’s dream, this pie features a creamy, cookie-filled sensation that requires no baking at all. It’s simple, satisfying, and always a hit with kids and adults alike.
- Pumpkin Delight: A seasonal favorite that brings together creamy pumpkin, a spiced base, and a light, airy topping without requiring any oven time. Perfect for fall celebrations or anytime you crave pumpkin flavors.
- The Best Strawberry Lasagna Recipe: A vibrant, fruity, and refreshing alternative to its chocolate cousin. This layered dessert is bursting with fresh strawberry flavor and is absolutely perfect for spring and summer gatherings.
- Hot Chocolate Lasagna: Experience the cozy, comforting flavors of hot chocolate transformed into a chilled, layered dessert format. It’s a unique twist that captures the essence of a beloved beverage.
- Chocolate Peanut Butter Lasagna: For fans of the ultimate chocolate and peanut butter combination, this layered dessert is a dream come true. Rich, creamy, and irresistible, it marries two beloved flavors seamlessly.
- Chocolate Brownie Lasagna: If you crave an even richer, denser, brownie-like texture in your layered dessert, this variation is a must-try. It offers an intensified chocolate experience for true chocoholics.
This no-bake Chocolate Lasagna is more than just a dessert; it’s a testament to how simple ingredients, when thoughtfully combined, can create something truly extraordinary. With its satisfying layers of crunchy cookie crust, tangy cream cheese, rich chocolate pudding, and airy whipped topping, it promises to be a beloved addition to your recipe collection. Give it a try, and prepare to delight your taste buds and impress everyone who takes a bite!
Pin
Chocolate Lasagna Recipe
Ingredients
- 1 pkg regular Oreo cookies Not Double Stuff – about 36 cookies
- 6 Tablespoon butter melted
- 8 ounce package cream cheese softened
- 1/4 cup granulated sugar
- 2 Tablespoons cold milk
- 12 ounce cool whip divided
- (2) 3.9 oz. Chocolate instant pudding
- 3 1/4 cups cold milk
- 1 cups mini chocolate chips you can do more if you want
Instructions
- Begin by crushing 36 Oreo cookies. I used my food processor for this, but you could also place them in a large ziplock bag and crush them with a rolling pin. When the Oreos have turned into fine crumbs, you are done.
- Place the Oreo crumbs to a large bowl. Stir in 6 tablespoons melted butter and use a fork to incorporate the butter into the cookie crumbs. When the butter is distributed, transfer the mixture to a 9×13 inch baking dish. Press the crumbs into the bottom of the pan. Place the pan in the refrigerator while you work on the additional layers.
- Mix the cream cheese with a hand mixer until light and fluffy. Add in 2 Tablespoons of milk, and sugar, and mix well. Stir in 1 and ¼ cups Cool Whip. Spread this mixture over the crust.
- In a bowl, combine chocolate instant pudding with 3 and ¼ cups cold milk. Whisk for several minutes until the pudding starts to thicken. Use a spatula to spread the mixture over the previous cream cheese layer. Allow the dessert to rest for about 5 minutes so that the pudding can firm up further.
- Spread the remaining Cool Whip over the top. Sprinkle mini chocolate chips evenly over the top. Place in the freezer for 1 hour, or the refrigerator for 4 hours before serving.
Nutrition Facts
Pin This Now to Remember It Later
Pin Recipe
