St. Patrick’s Day Chocolate Covered Oreos are the ultimate easy, no-bake treat that brings a touch of Irish cheer to any celebration. With just a few simple ingredients and minimal effort, anyone can whip up these festive delights, making them perfect for parties, lunchbox surprises, or a fun afternoon activity with the kids. Get ready to impress with these vibrant green and white chocolate-dipped cookies, adorned with cheerful sprinkles!

When the festive spirit of St. Patrick’s Day calls for a quick and delightful dessert, these chocolate-covered Oreo cookies are my go-to choice. Requiring only four basic ingredients, this recipe offers a delicious and straightforward way to create a memorable treat. After the huge success of our White Chocolate Covered Oreos, crafting a special St. Patrick’s Day version was an absolute must. These cookies join a beloved lineup of holiday treats, alongside our popular St. Patrick’s Day Cake Pops and St. Patrick’s Day Rice Krispie Treats, proving that holiday baking can be both effortless and incredibly rewarding.
Table of Contents
- Why This Recipe Works
- Essential Ingredients
- Creative Variations
- Step-by-Step Guide to Making Chocolate Covered Oreos
- Proper Storage for Freshness
- Expert Tips for Perfect Oreos
- More St. Patrick’s Day Desserts
Why This Recipe Works So Perfectly
There’s something undeniably magical about Oreo cookies, and when they’re enrobed in a luscious chocolate coating and sprinkled with festive decorations, they transform into an extraordinary treat. These St. Patrick’s Day Chocolate Covered Oreos are not only incredibly delicious but also strikingly beautiful, with their vibrant green and white hues making them a visual feast. This recipe is a true winner for several reasons:
- Effortless Preparation: This is a genuinely no-bake recipe, meaning you won’t need to turn on your oven. The simplicity of melting, dipping, and decorating makes it accessible for cooks of all skill levels, even beginners.
- Kid-Friendly Fun: Involving children in the kitchen is a wonderful way to create lasting memories, and this recipe is perfect for little hands. Kids will love dipping the cookies and adding their favorite sprinkles, turning dessert-making into a delightful St. Patrick’s Day activity.
- Versatile for Any Occasion: Whether you’re hosting a grand St. Patrick’s Day party, packing a special surprise in a lunchbox, or simply looking for a fun after-school snack, these Oreos fit the bill. Their festive appearance makes them ideal for school events, potlucks, or as charming homemade gifts.
- Cost-Effective: Made with readily available and inexpensive ingredients, this recipe is budget-friendly. You can create a large batch of impressive treats without breaking the bank, making it perfect for feeding a crowd.
- Irresistible Flavor Combination: The classic crunch of an Oreo cookie paired with smooth, sweet candy coating is a match made in heaven. The addition of festive sprinkles not only adds visual appeal but also a delightful textural contrast.
Everyone who tries these delightful cookies will be thrilled by their taste and charm. They truly embody the spirit of St. Patrick’s Day in every bite!
Essential Ingredients for Your St. Patrick’s Day Oreos
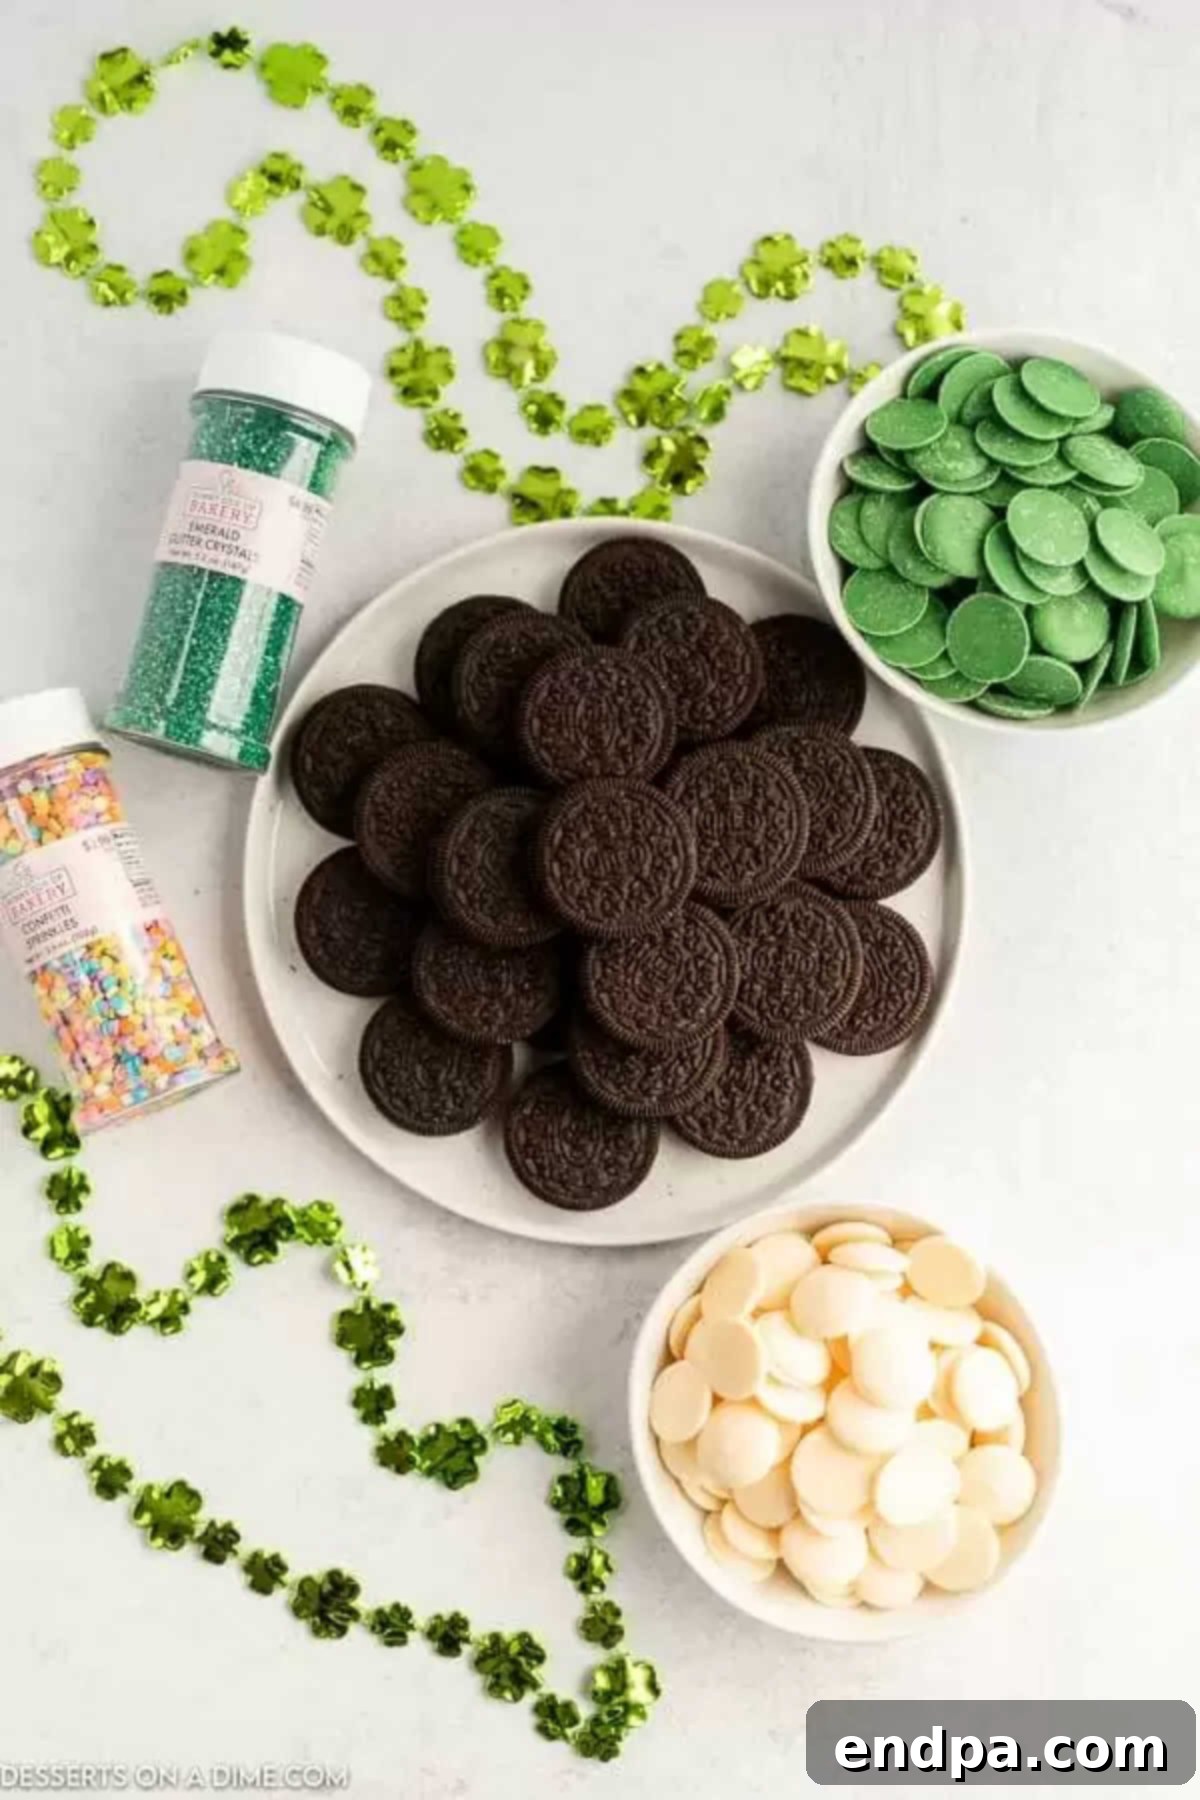
You only need a handful of items to bring these festive cookies to life. Quality ingredients ensure the best results, both in taste and appearance.
- Oreo Cookies: Opt for classic, regular Oreo cookies. While Double Stuffed Oreos might seem tempting, the regular variety holds up better to dipping and coating, preventing them from becoming too heavy or falling apart. A standard 14 oz package should yield plenty of treats.
- White Candy Melts and Green Candy Melts: These are the stars of your colorful coating! Candy melts, such as those made by Wilton, are specially designed for easy melting and provide a smooth, consistent finish without requiring tempering like traditional chocolate. You can typically find them in the baking aisle of most craft stores or large supermarkets. Having both white and green allows for a beautiful contrast and more festive presentation.
- Festive Sprinkles: This is where you can truly unleash your creativity! Choose an assortment of St. Patrick’s Day-themed sprinkles. Green, white, gold, or even rainbow nonpareils or jimmies will add a celebratory touch. Consider using white sprinkles on green-coated Oreos and vice versa for a striking look.
For the complete measurements and detailed instructions, continue scrolling to the bottom of this article where you’ll find the full recipe card.
Creative Variations to Customize Your Treat
While the basic recipe is fantastic on its own, there are countless ways to customize your St. Patrick’s Day Chocolate Covered Oreos to suit your taste or occasion. Don’t be afraid to experiment!
-
Alternative Coatings:
- White Chocolate Chips: If you prefer using actual white chocolate, melt white chocolate chips or high-quality white melting chocolate. For the green hue, add a few drops of oil-based green food coloring (gel food coloring works best) to the melted white chocolate. Water-based food coloring can cause chocolate to seize, so be cautious. Melt in short intervals, stirring frequently, just as you would with candy melts.
- Almond Bark: A popular and easy-to-use alternative, almond bark melts smoothly and sets quickly. It can also be colored with oil-based food coloring.
- Milk or Dark Chocolate: For a deeper, richer flavor, consider dipping some Oreos in melted milk or dark chocolate. You can then drizzle them with green or white candy melts for a festive contrast.
-
Expand the Color Palette:
- While green and white are classic for St. Patrick’s Day, consider drizzling other colors like gold or even a touch of orange candy melts to symbolize a rainbow or pot of gold. This adds another layer of visual interest, especially if you’re preparing these for a St. Patrick’s Day party.
- Remember, the beauty of this recipe is its adaptability. By simply switching the color of your candy melts and sprinkles, you can easily adapt these treats for any holiday, from festive Christmas Oreos to pastel Easter delights or vibrant Fourth of July treats.
-
Flavorful Oreo Alternatives:
- Mint Oreos: Elevate the Irish theme by using Mint Oreos for an extra burst of refreshing flavor. The minty cream pairs wonderfully with the chocolate coating.
- Golden Oreos: For a vanilla-forward flavor, try Golden Oreos. Their golden color offers a lovely base for green or white chocolate and can mimic the look of a pot of gold.
-
Utilize Molds for Perfection:
- While not strictly necessary, silicone cookie molds are a fantastic tool if you want to achieve perfectly uniform, professional-looking chocolate-covered Oreos. Simply pour a small amount of melted candy into the mold, press in an Oreo, and then cover with more candy before letting it set. This method creates a completely enclosed, smooth cookie.
-
Creative Topping Ideas:
- Beyond sprinkles, consider a variety of other toppings. Drizzle contrasting melted candy melts (e.g., white on green, green on white) in intricate patterns.
- Finely chopped nuts (like pistachios for a green touch), crushed peppermint candies, edible glitter, or even a light dusting of cocoa powder can add unique textures and flavors.
- For an extra indulgent treat, top with a miniature chocolate coin to symbolize a leprechaun’s treasure!
Step-by-Step Guide to Making Chocolate Covered Oreos
Creating these festive treats is a breeze! Follow these simple steps for perfectly coated Oreos every time.
- Step 1: Prepare Your Workstation. Start by lining a baking sheet with parchment paper or wax paper. This crucial step prevents your dipped Oreos from sticking and makes cleanup incredibly easy.
- Step 2: Melt the Candy Melts. Place your white candy melts in one microwave-safe bowl and your green candy melts in another separate microwave-safe bowl. Heat each bowl in the microwave in short intervals, starting with 30-second bursts. After each interval, stir the candy melts thoroughly. Continue heating and stirring until the melts are completely smooth and free of lumps. It’s essential to only melt in intervals to prevent the candy from burning or becoming overheated and thick. If the candy melts become too thick, you can add a tiny bit of shortening or a special candy-thinning agent, but avoid adding water or milk, as this will cause it to seize.
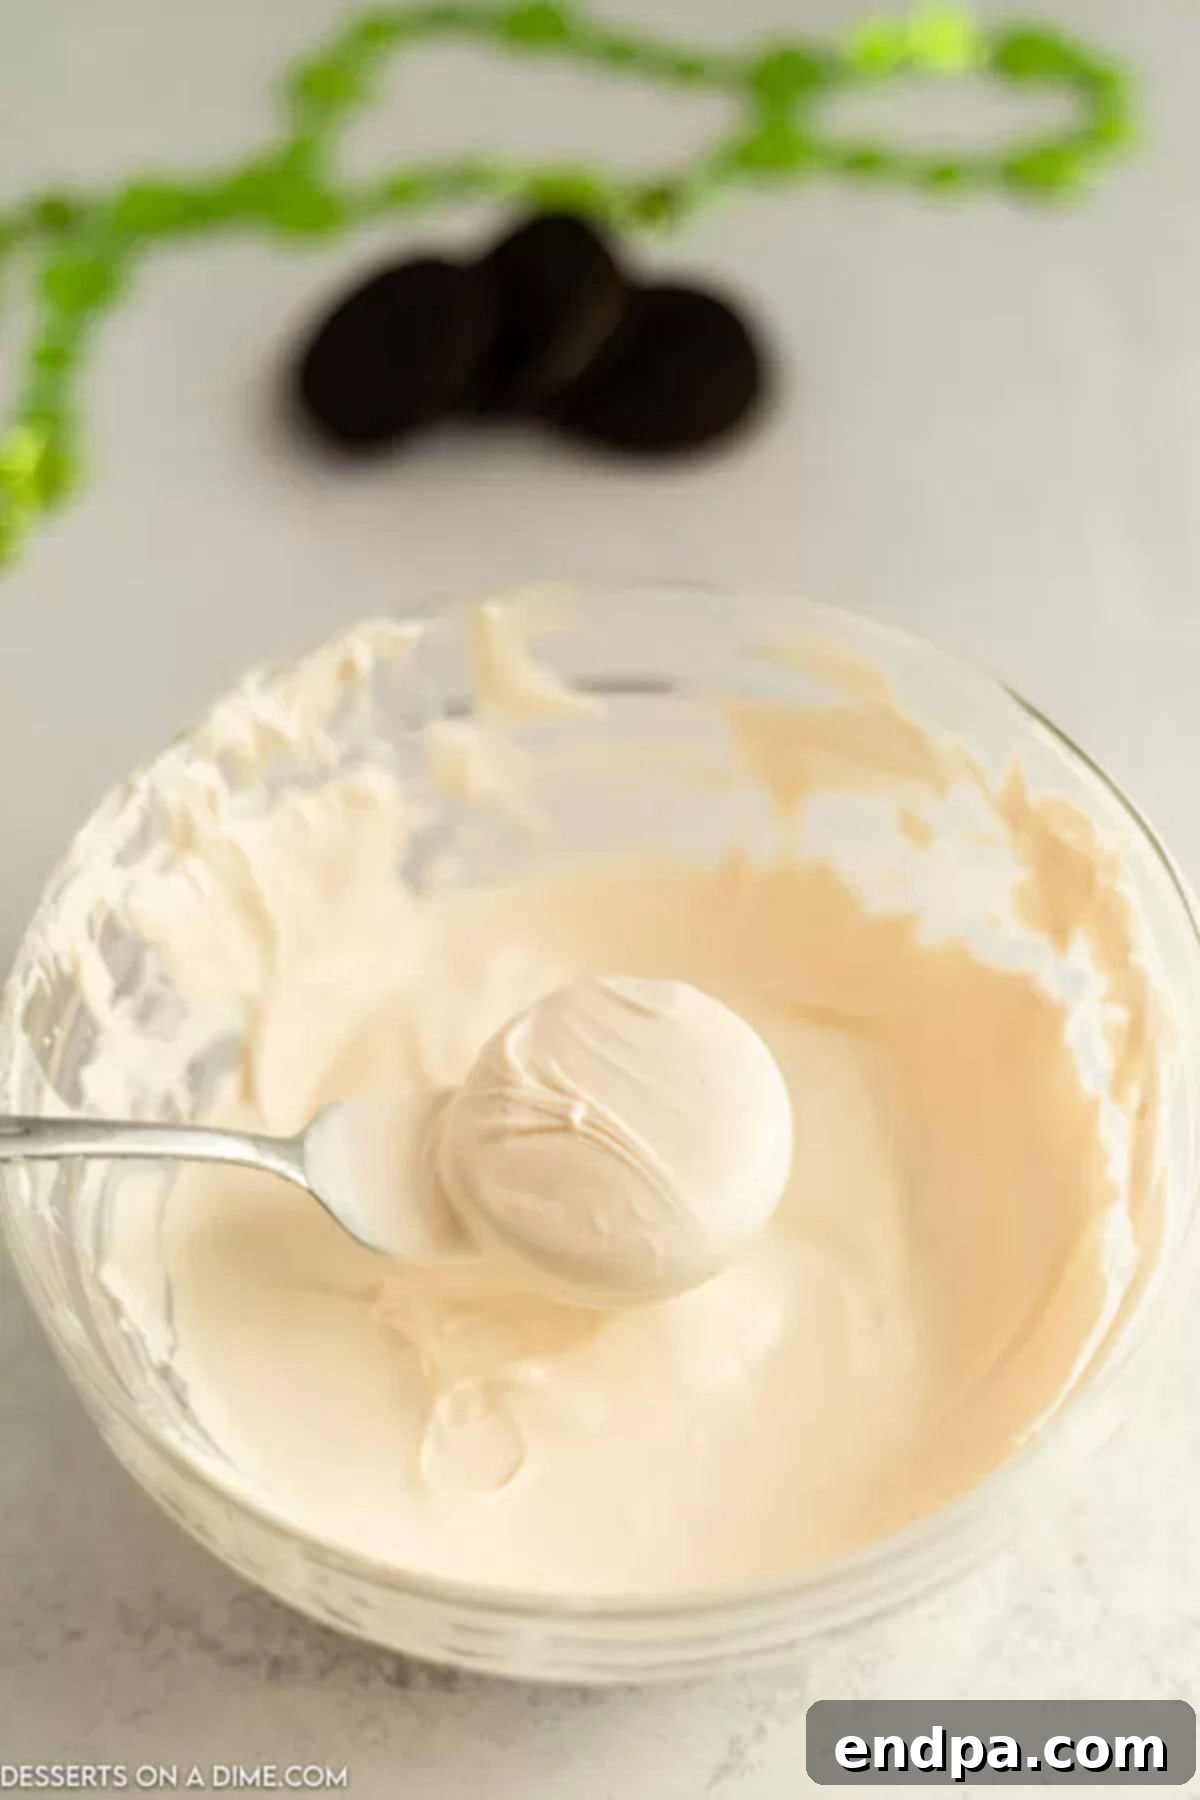
Step 3: Dip the Oreos. Carefully take an Oreo cookie and fully immerse it into the melted candy. You might find it helpful to use a spoon to gently pour melted candy over the entire cookie, ensuring it’s completely coated. Once coated, use a fork (preferably one with thin tines) to carefully lift the Oreo out of the candy. Gently tap the fork against the side of the bowl to allow any excess candy coating to drip off. This helps create a smooth, even finish. For a visually appealing platter, dip some cookies in green candy and others in white.

Step 4: Decorate and Set. Immediately after dipping, carefully transfer the coated Oreo from the fork onto your prepared baking sheet. While the candy coating is still wet, liberally sprinkle your chosen festive sprinkles over the Oreo. Timing is key here – the sprinkles need to adhere before the candy dries. Once decorated, allow the cookies to sit undisturbed at room temperature for approximately 1 hour, or until the candy coating has fully set and hardened. Avoid placing them in the refrigerator unless absolutely necessary, as this can sometimes cause the chocolate to bloom or become dull.
Proper Storage for Long-Lasting Freshness
Once your delicious St. Patrick’s Day Chocolate Covered Oreos have fully set, proper storage is essential to maintain their freshness and taste.
- Airtight is Key: Store the cookies in an airtight container with a tightly fitting lid. A gallon-sized Ziploc bag can also work, just ensure it’s sealed well to prevent air exposure.
- Ensure Cookies Are Set: Before placing them in a container, verify that the candy coating on all cookies is completely set and dry to the touch. Storing them before they are fully set can cause them to stick together or smudge the decoration.
- Layering with Care: If you’ve used a generous amount of sprinkles or plan to stack multiple layers of cookies, it’s a good idea to place a sheet of wax paper or parchment paper between each layer. This prevents the cookies from sticking to each other and protects the delicate decorations.
- Longevity: When stored correctly at room temperature in an airtight container, these chocolate-covered Oreos can remain fresh and delicious for 2 to 3 weeks. This makes them an excellent make-ahead treat, allowing you to prepare them well in advance for your St. Patrick’s Day celebrations, saving you valuable time when you need it most.
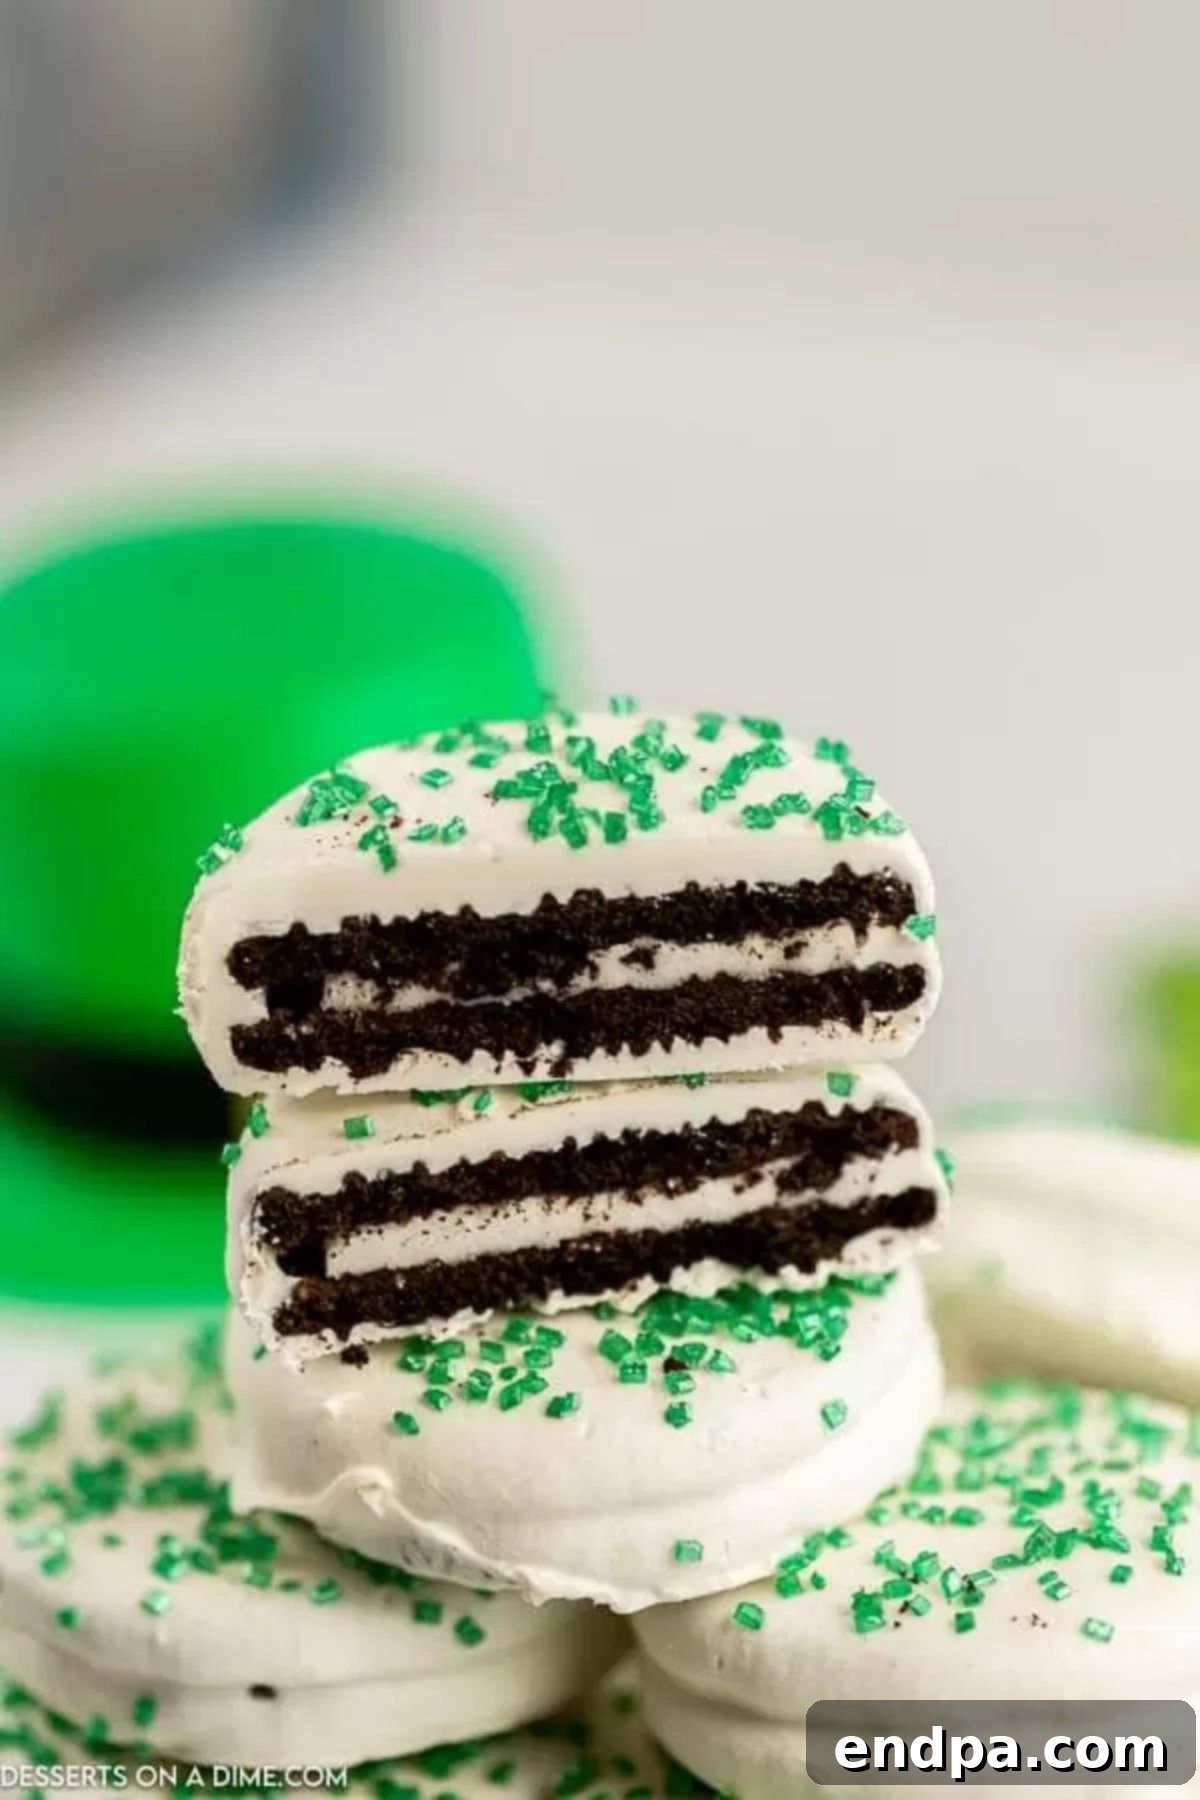
Expert Tips for Perfect St. Patrick’s Day Oreos Every Time
Achieving bakery-quality chocolate-covered Oreos is easier than you think with these professional tips.
- Master the Melting Process: This is perhaps the most crucial step. Always melt your candy melts in short bursts, typically 30-second intervals in the microwave, stirring vigorously after each one. This prevents scorching, ensures an even melt, and maintains the smooth consistency necessary for dipping. If using a double boiler, maintain a gentle simmer and ensure no water comes into contact with the candy melts, as this will cause them to seize.
- Act Fast with Sprinkles: Once an Oreo is dipped, you must add the sprinkles immediately while the candy coating is still wet and tacky. If you wait too long, the coating will begin to set, and the sprinkles won’t adhere properly. To manage this, especially when making a large batch, consider working in small batches or having all your sprinkles ready and open beside your dipping station.
- Patience is a Virtue: Allow the coated Oreos to set completely for at least one hour at room temperature. Rushing this step can result in soft coatings, smudged designs, or cookies sticking together when stored. A fully set coating will be firm and dry to the touch, ensuring beautiful, stable treats.
- Simplify Cleanup with Parchment: Lining your baking sheet with parchment paper or wax paper is non-negotiable. It creates a non-stick surface, making it incredibly easy to remove the set cookies without damage and simplifies the cleanup process dramatically.
- Choose the Right Equipment: Ensure all bowls used for melting candy are genuinely microwave-safe. For dipping, a sturdy fork with thin tines works best for lifting cookies gently. A small, deep bowl for melting also helps ensure the cookie is fully submerged.
- Control Coating Thickness: After dipping, gently tap the fork a couple of times against the edge of the bowl to remove excess chocolate. This prevents a thick, clumpy coating and ensures a more refined finish.
- Store at Room Temperature: While it might be tempting to put them in the fridge to speed up setting, room temperature setting often results in a shinier, smoother finish for candy melts. Refrigeration can sometimes lead to condensation, which can dull the chocolate.
More Festive St. Patrick’s Day Desserts to Explore
If you’re looking for even more delightful ways to celebrate St. Patrick’s Day with sweet treats, be sure to check out these other fantastic recipes:
- St. Patrick’s Day Cake Mix Cookies: Incredibly easy and colorful cookies using a simple cake mix base.
- Easy Rainbow Cookies: Bright and cheerful cookies perfect for a pot of gold theme.
- St. Patrick’s Day Puppy Chow: A fun, snackable, and addictive treat with a festive green twist.
- Edible Gold Oreos: Add a touch of luxury and leprechaun magic with these shimmering golden cookies.
- Green Velvet Cake Recipe: A moist and flavorful cake that’s perfect as a show-stopping St. Patrick’s Day dessert.
Give this effortless and enchanting recipe for St. Patrick’s Day Chocolate Covered Oreos a try. You’ll love how simple it is to make and how much everyone enjoys these festive cookies! Don’t forget to leave a comment and a star rating if you try the recipe – we love hearing your feedback!

St. Patrick’s Day Chocolate Covered Oreos
St. Patrick’s Day Chocolate Covered Oreos make a fun and easy no-bake treat. With only 4 ingredients and very little time, anyone can make this recipe.
15 mins
1 hr
1 hr 15 mins
36 cookies
American
Dessert
72 kcal
Carrie Barnard
Ingredients
- 1 package Oreo Cookies (14 oz)
- 1 package White Candy Melts (6 oz)
- 1 package Green Candy Melts (6 oz)
- Assorted St. Patrick’s Day Sprinkles
Instructions
- Line a baking sheet with parchment paper or wax paper.
- Place the white candy melts in one microwave-safe bowl and the green candy melts in another. Heat each bowl in 30-second intervals, stirring thoroughly after each interval until fully melted and smooth. Be careful not to overheat to avoid burning.
- Carefully place an Oreo cookie into the melted candy, ensuring it is fully coated. Use a spoon if necessary to cover the entire cookie.
- Using a fork, gently lift the coated Oreo from the bowl. Lightly tap the fork against the side of the bowl to remove any excess candy coating, ensuring a smooth finish.
- Immediately place the dipped Oreo onto the prepared baking sheet. While the candy is still wet, top generously with your chosen sprinkles. You can use green sprinkles on white-coated Oreos and rainbow sprinkles on green-coated Oreos for a vibrant contrast. Ensure sprinkles are applied before the candy sets.
- Allow the decorated Oreos to sit at room temperature for approximately 1 hour, or until the candy coating has completely set and hardened. Once set, they are ready to serve and enjoy!
Nutrition Facts
Calories: 72 kcal,
Carbohydrates: 10g,
Protein: 1g,
Fat: 3g,
Saturated Fat: 2g,
Polyunsaturated Fat: 1g,
Monounsaturated Fat: 1g,
Trans Fat: 1g,
Sodium: 55mg,
Potassium: 24mg,
Fiber: 1g,
Sugar: 7g,
Vitamin A: 1IU,
Calcium: 2mg,
Iron: 1mg
