Frozen S’mores Recipe: Your Ultimate No-Bake Chilled Dessert
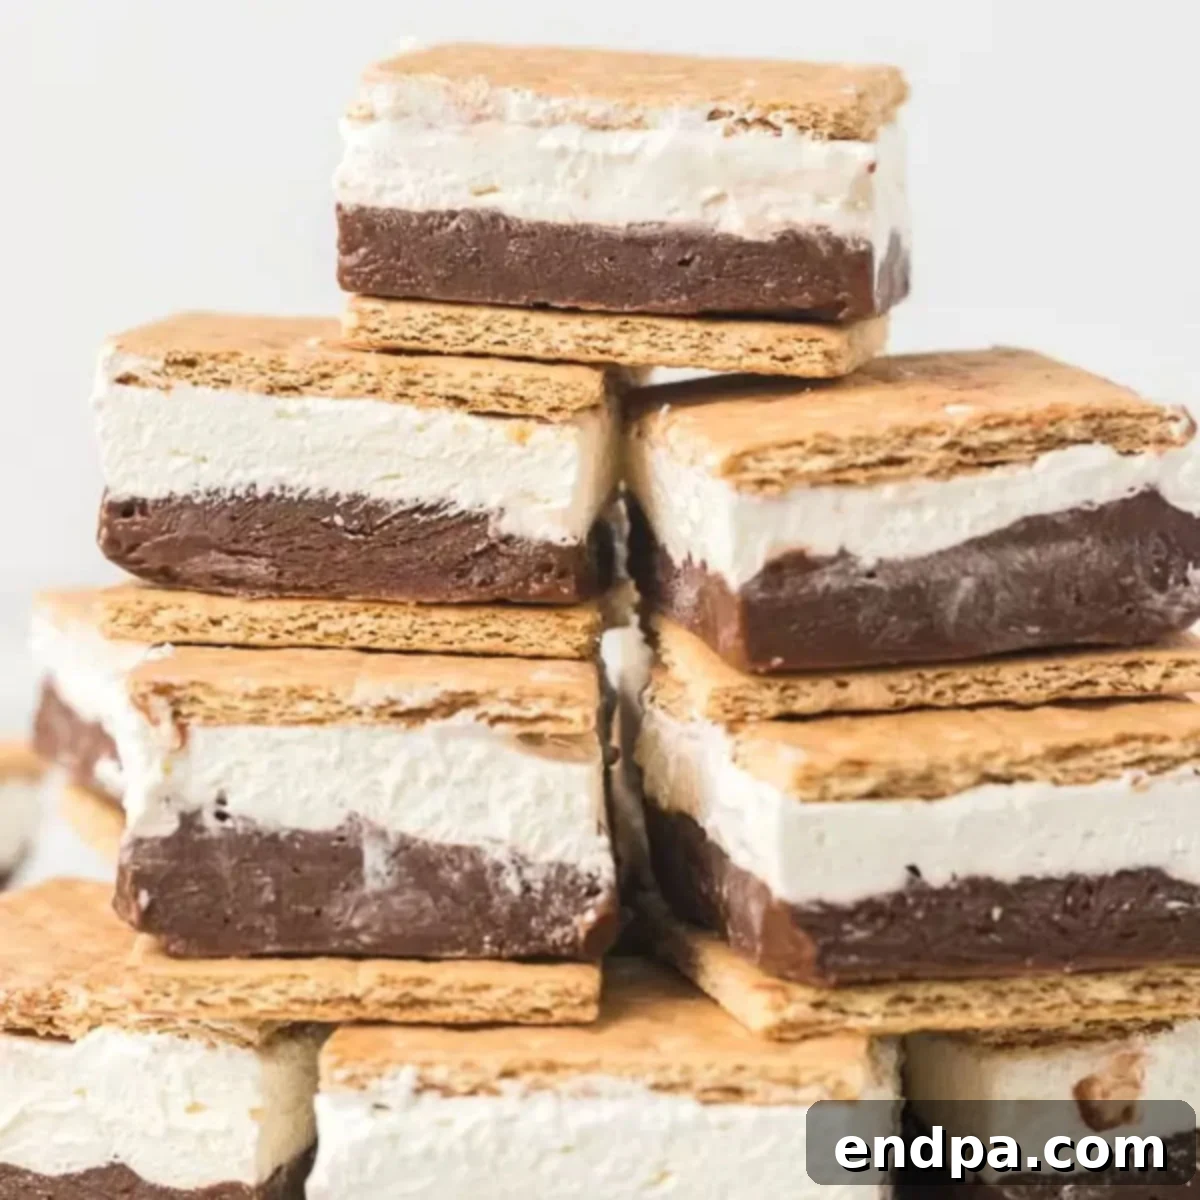
Prepare to fall in love with a refreshing twist on a beloved classic! Our **Frozen S’mores** recipe takes everything you adore about the iconic campfire treat – the rich chocolate, the gooey marshmallow, and the crunchy graham crackers – and transforms it into an exquisite, chilled dessert. This no-bake masterpiece features luscious layers of chocolate pudding and a dreamy marshmallow-cream cheese mixture, all nestled between crisp graham crackers. It’s a truly impressive yet incredibly easy dessert that promises to delight your taste buds and earn rave reviews.
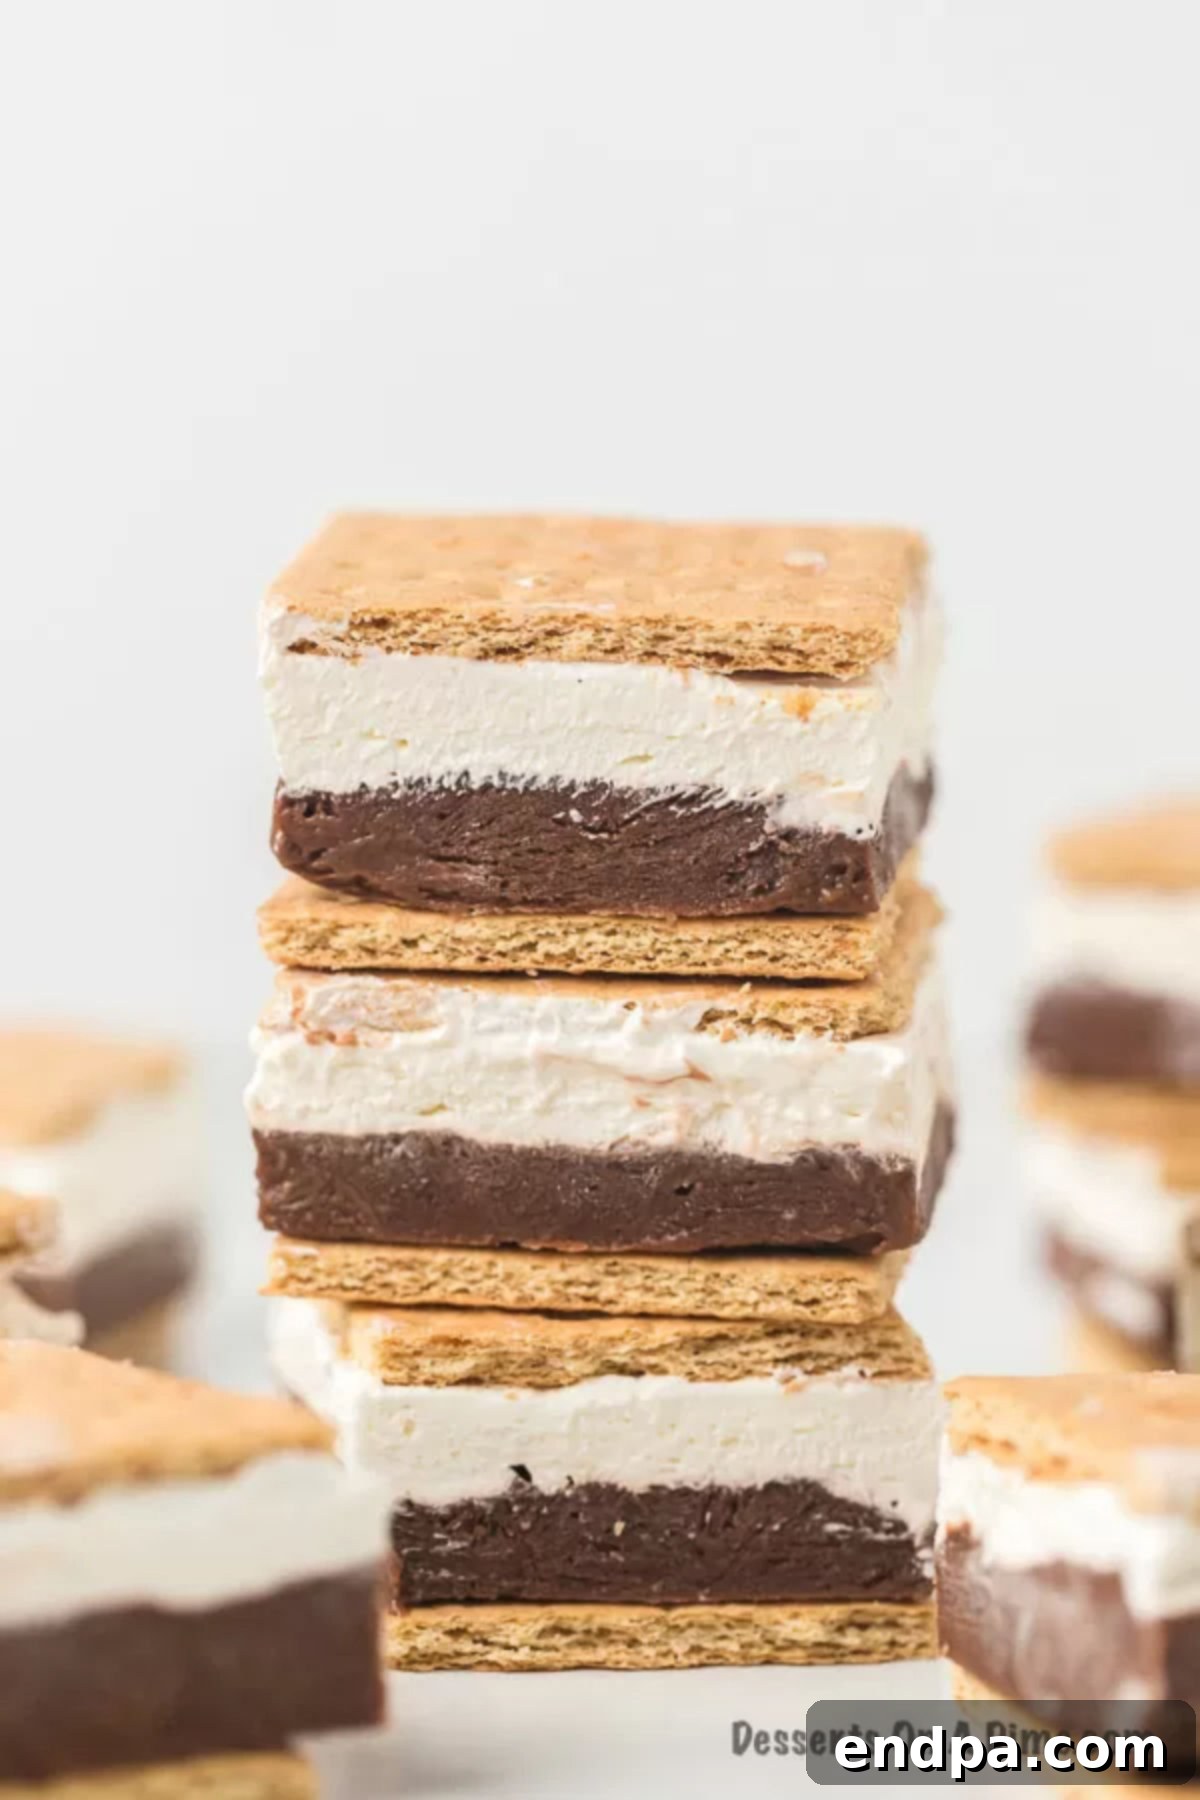
The timeless allure of s’mores is undeniable. Who doesn’t cherish memories of roasting marshmallows over an open flame, sandwiching them with chocolate and graham crackers? While the traditional version holds a special place in our hearts, our family is always on the lookout for exciting new ways to enjoy this favorite flavor profile. From Easy S’mores Cake and S’mores Cupcakes to Oven Baked Smores and S’mores Cones, we’ve explored many delicious variations. When the idea of a *frozen* s’mores recipe surfaced, the enthusiasm for this no-bake dessert was immediate and overwhelming. It’s perfect for those moments when you crave that classic s’mores taste without the heat of a campfire, or simply desire a cool, refreshing treat.
If you’re a fan of effortless frozen delights, be sure to also check out our Mint Chocolate Chip Milkshake Recipe and an incredible Ice Cream Cake that are equally simple and satisfying. This Frozen S’mores recipe is a fantastic addition to your collection of easy-to-make, crowd-pleasing desserts.
What’s in this post: Frozen S’mores
- Why We Love This Frozen S’mores Recipe
- Essential Ingredients for Frozen S’mores
- Creative Variations & Topping Ideas
- Step-by-Step Guide: How to Make Frozen S’mores
- Expert Tips for the Best Frozen S’mores
- Frequently Asked Questions (FAQ)
- More S’mores-Inspired Recipes to Try
- Frozen S’mores Recipe Card
Why You’ll Love This Frozen S’mores Recipe
This chilled dessert isn’t just a treat; it’s an experience. Here are a few compelling reasons why our Frozen S’mores will quickly become a household favorite:
- Decadent Layers of Chocolate: Each bite delivers a rich, smooth chocolate experience thanks to the instant chocolate pudding base. It’s wonderfully luxurious, perfectly balancing the sweetness of the marshmallow layer and providing a delightful depth of flavor. This makes the dessert feel truly indulgent without being overly heavy.
- Effortlessly Easy (No-Bake!): Say goodbye to hot ovens and complicated steps. This is a true no-bake marvel, meaning minimal effort for maximum deliciousness. It’s the perfect recipe for beginners or seasoned bakers looking for a quick and impressive dessert that comes together with simple mixing and chilling. Your kitchen stays cool, and your stress levels stay low!
- Perfect for Any Occasion: While it shines as a refreshing summer dessert, these Frozen S’mores are truly a year-round delight. They’re fantastic for backyard BBQs, holiday gatherings, birthday parties, or simply as a special treat on a weeknight. Its unique presentation and familiar flavors make it a guaranteed crowd-pleaser, regardless of the season.
- Kid-Friendly and Fun: The familiar flavors of s’mores appeal to all ages, making this a fantastic dessert for families. Kids will love the playful combination of chocolate and marshmallow, and it’s simple enough that older children can even help with the layering process. It’s a fun and interactive dessert that brings smiles to everyone’s faces.
Essential Ingredients for Frozen S’mores
Crafting these delectable Frozen S’mores requires a few simple, readily available ingredients. The beauty of this recipe lies in its simplicity and the way these humble components come together to create something truly magical. Make sure your ingredients are fresh for the best results!
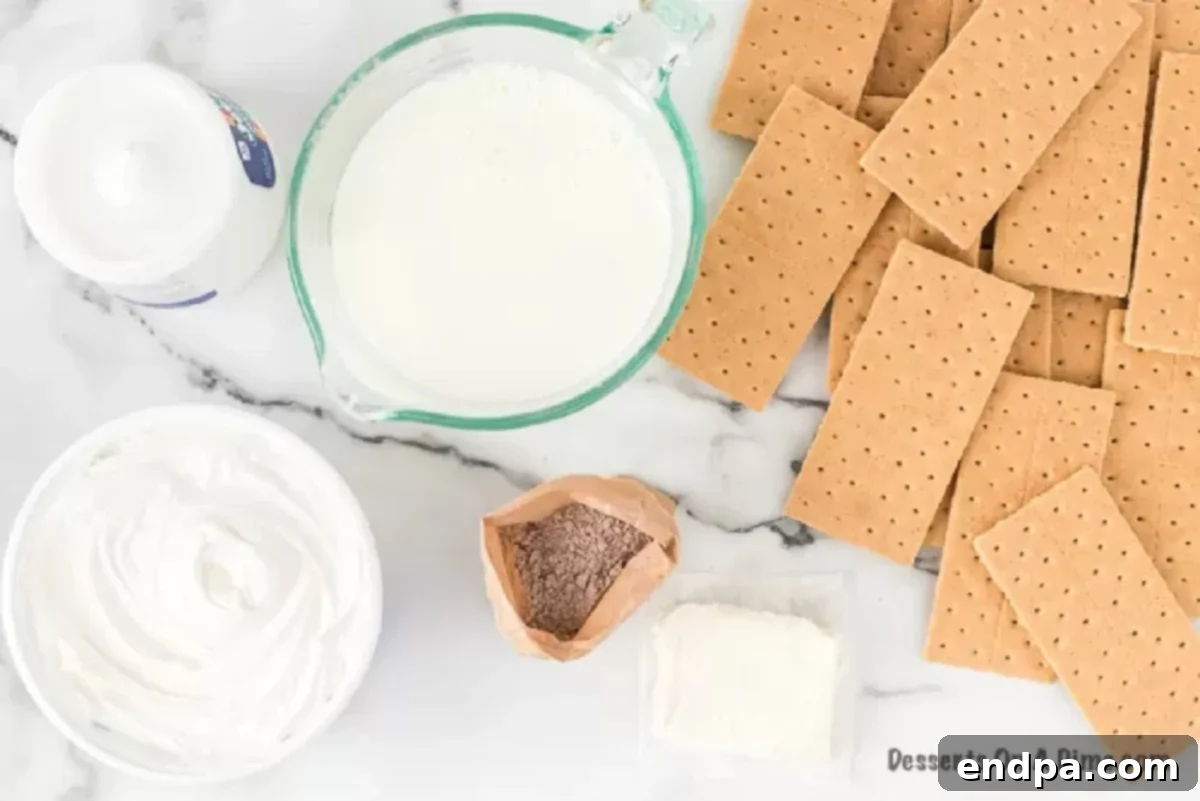
- Instant Chocolate Pudding Mix: This forms the foundational layer, providing a quick and easy way to infuse rich chocolate flavor. We recommend using a high-quality instant mix for the best taste and texture. Any brand will work, but opt for your favorite for maximum chocolatey goodness.
- Milk: Whole milk is highly recommended for whisking with the pudding mix. Its higher fat content contributes to a richer, creamier, and more luxurious chocolate layer, enhancing the overall indulgence of the dessert. If you prefer, 2% milk can also be used.
- Graham Crackers: These crunchy squares are essential for that classic s’mores experience. They provide a delightful texture contrast and act as the perfect ‘sandwich’ for our frozen layers. Standard honey graham crackers are traditional, but feel free to experiment!
- Cream Cheese: Softened at room temperature, cream cheese is key to achieving a smooth and tangy marshmallow layer. It adds a pleasant richness and helps stabilize the mixture, ensuring it freezes beautifully without becoming too hard. Make sure it’s properly softened to avoid lumps.
- Marshmallow Creme (or Marshmallow Fluff): This sweet, sticky, and incredibly fluffy ingredient is what gives the top layer its signature marshmallow flavor and airy texture. It’s crucial for achieving the classic s’mores taste.
- Cool Whip (thawed): Folded into the marshmallow cream cheese mixture, thawed Cool Whip adds lightness and volume, creating an irresistibly smooth and airy topping. It helps to keep the top layer soft and scoopable, even when frozen, providing a delightful contrast to the firmer chocolate base.
You’ll find the complete, precise ingredient list with measurements in the detailed recipe card at the bottom of this page. This ensures you have everything you need for flawless preparation!
Creative Variations & Topping Ideas
While the classic Frozen S’mores recipe is perfect as is, there’s always room to get creative! Here are some fun variations and topping ideas to customize your chilled treat:
- Enhanced Toppings: Elevate your Frozen S’mores with additional toppings. A drizzle of chocolate syrup or caramel sauce can add extra richness, while a sprinkle of mini chocolate chips or chopped toasted nuts (like pecans or walnuts) provides more texture. For a festive touch, try adding sprinkles or toasted coconut flakes. Fresh berries, like raspberries or sliced strawberries, can also offer a lovely fruity counterpoint.
- Chocolate Graham Crackers: For all the devoted chocolate lovers out there, consider swapping out traditional graham crackers for chocolate graham crackers. This simple change intensifies the chocolate flavor and adds an extra layer of decadence to each bite, making the dessert even more irresistible.
- Alternate Pudding Flavors: Don’t limit yourself to chocolate! Vanilla pudding can create a lighter, more classic flavor profile, while butterscotch pudding offers a unique, rich caramel note. White chocolate pudding could also be a delightful alternative for a sweeter, creamier base.
- Crust Variations: Instead of graham crackers, you could experiment with a crushed Oreo cookie crust or a shortbread cookie crust for a different flavor and texture. Simply crush your chosen cookies, mix with a little melted butter, press into the bottom of the pan as an initial layer, and chill before adding the pudding.
- Add a Fruity Layer: For a refreshing twist, consider a thin layer of fruit preserves or a finely diced fruit mixture (like berries or bananas) between the chocolate and marshmallow layers, or simply as a topping. Ensure any fruit layer is thin and won’t make the dessert too watery when frozen.
Step-by-Step Guide: How to Make Frozen S’mores
Creating these delightful Frozen S’mores is a straightforward process, requiring no baking and just a few simple steps. Follow this guide for a perfect layered dessert every time.
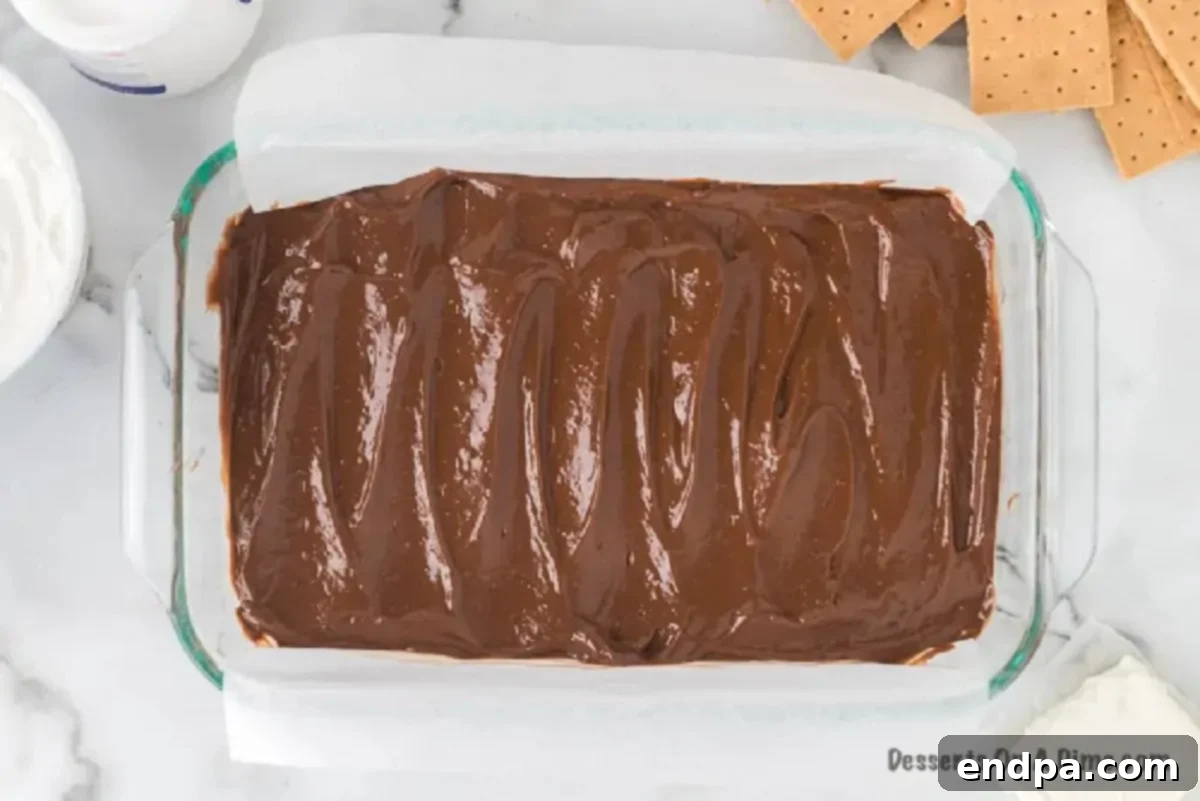
Step 1: Prepare Your Pan for Success
First, line a 9×13 inch baking pan with aluminum foil or parchment paper. Make sure to leave a 1-inch overhang on the sides. This crucial step will act as a sling, making it incredibly easy to lift the entire frozen dessert out of the pan later, which is key for clean cutting and serving. Without this lining, you might struggle to remove the firm dessert without damaging it.
Step 2: Craft the Rich Chocolate Base
In a large mixing bowl, combine the instant chocolate pudding mix and the specified amount of milk. Whisk these two ingredients together thoroughly until the pudding is smooth, well combined, and just starting to thicken. This usually takes about 2-3 minutes. Once mixed, spread this chocolate pudding layer evenly across the bottom of your prepared baking dish. Place the pan in the freezer to chill while you prepare the next layer; this helps it set slightly and prevents the layers from mixing.
Step 3: Create the Fluffy Marshmallow Layer
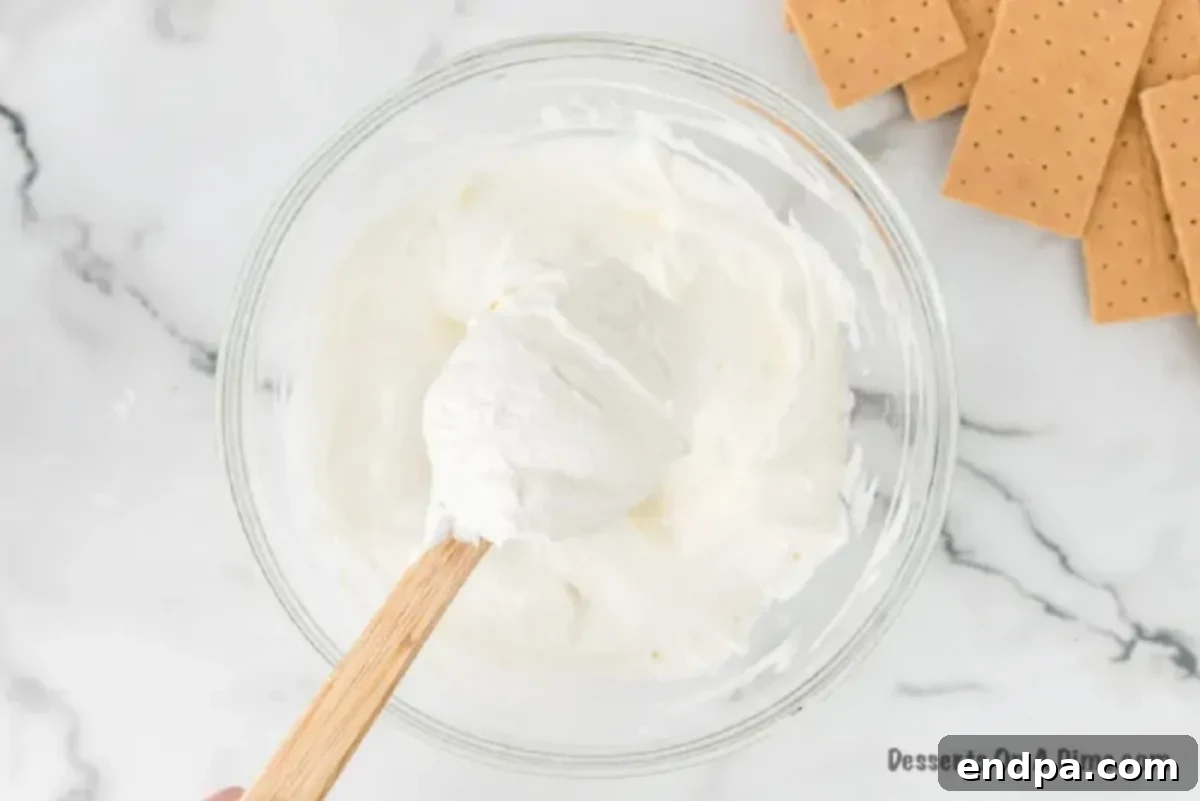
In a separate medium bowl, use a hand-held mixer or stand mixer to beat together the softened cream cheese and marshmallow creme. Continue mixing until the marshmallow mixture is completely smooth and all ingredients are well combined, with no lumps of cream cheese visible. Then, gently fold in the thawed Cool Whip by hand using a spatula. This hand-mixing step ensures the Cool Whip retains its light and airy texture, which is crucial for the delightful mouthfeel of the marshmallow layer.
Step 4: Layer and Freeze to Perfection
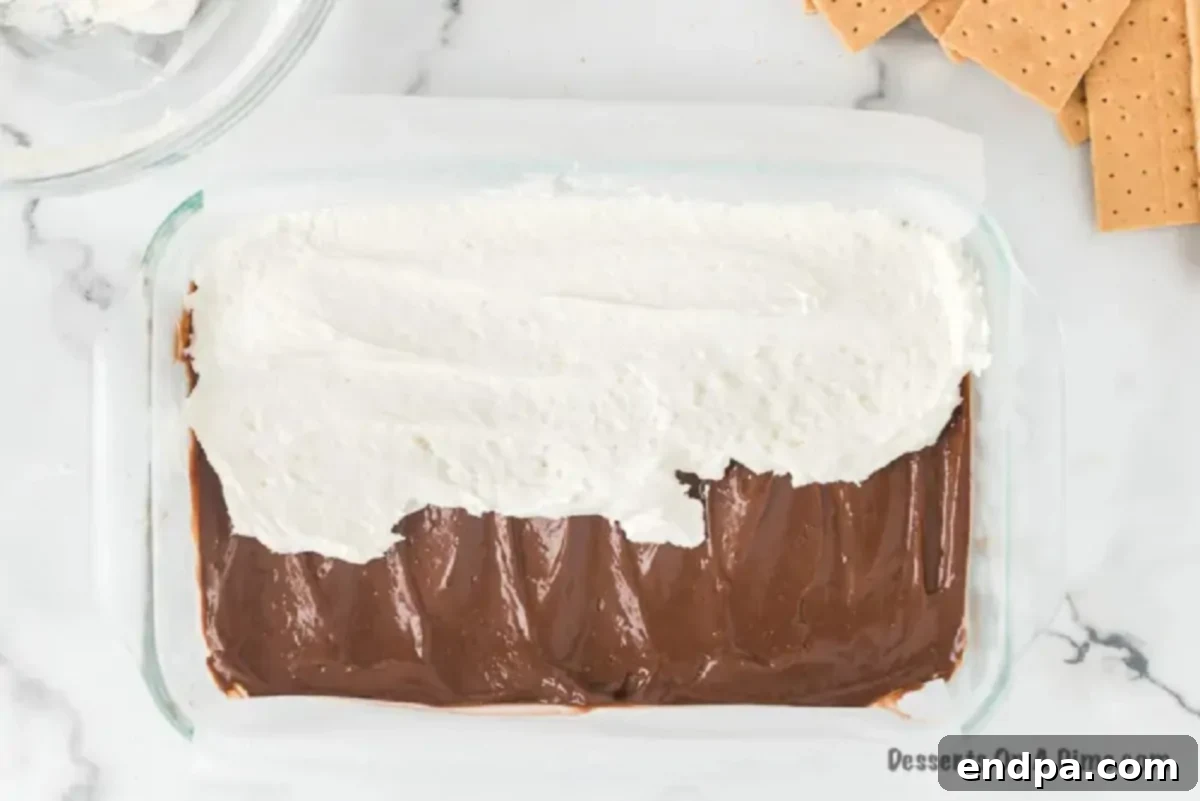
Once your marshmallow mixture is ready and your chocolate layer is slightly chilled, carefully spread the marshmallow layer over the chocolate pudding base in the 9×13 inch pan. Aim for an even layer across the entire surface. After spreading, cover the pan tightly with foil and then with plastic wrap to prevent freezer burn. Place the covered pan back into the freezer and allow it to chill for at least 4-6 hours, or until both layers are completely firm. Adequate freezing time is essential for the dessert to hold its shape.
Step 5: Add the Classic Graham Cracker Crunch
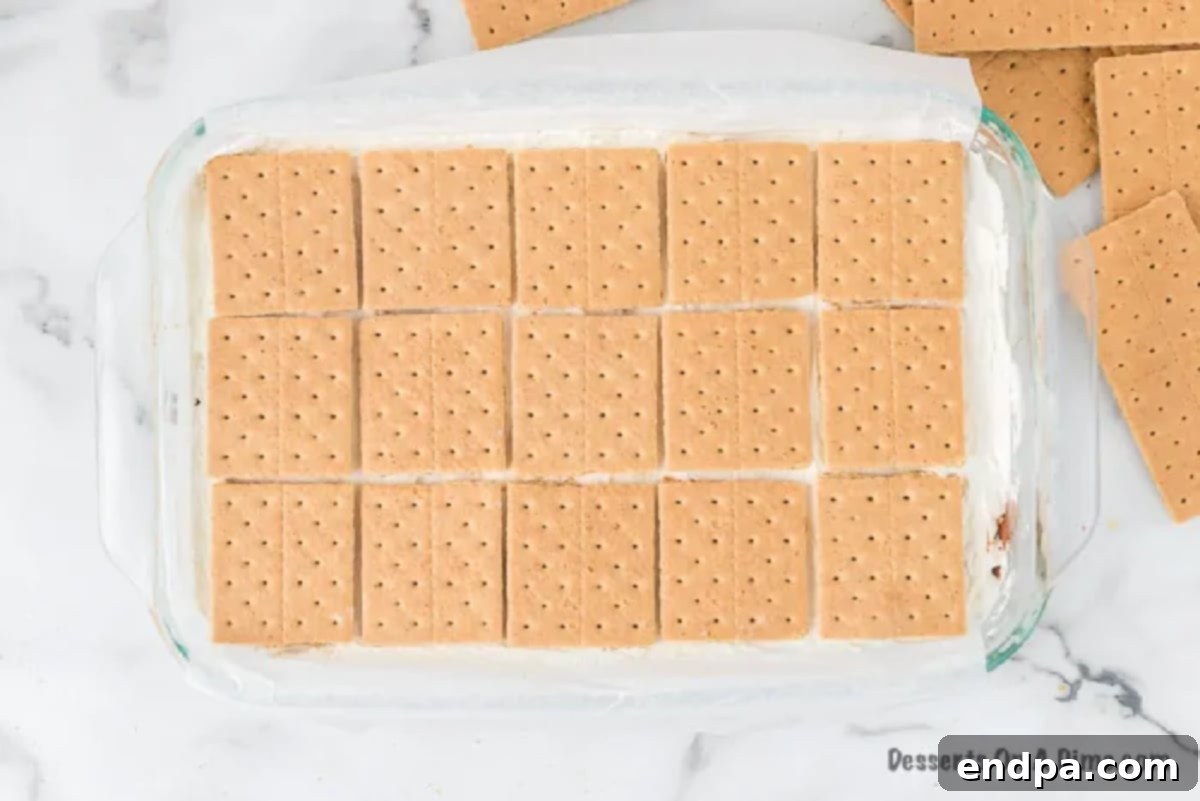
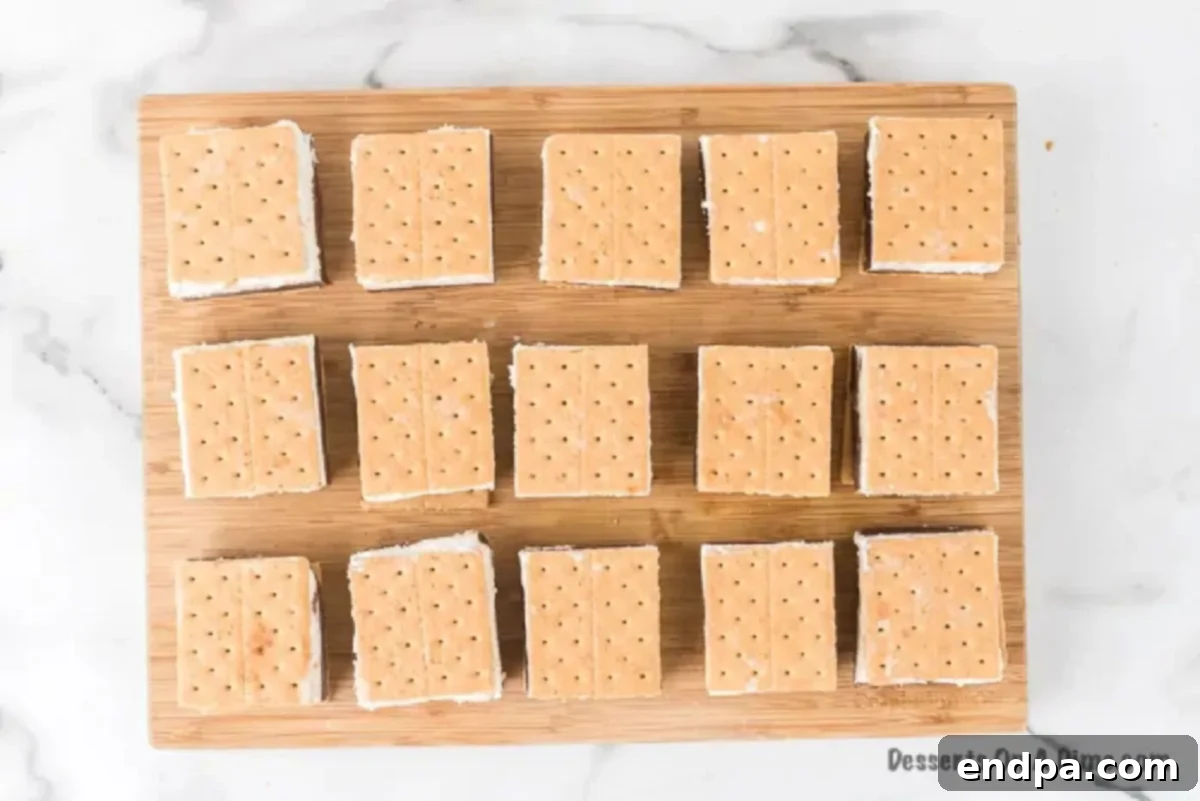
Remove the pan from the freezer. Take your graham crackers and break each one in half to create square-shaped pieces. Carefully arrange these graham cracker squares on top of the firm frozen marshmallow layer, placing them as close together as possible. For a standard 9×13 inch pan, you should be able to create about 3 rows of 5 crackers each, forming a neat grid. These will serve as the top ‘bread’ of your frozen s’mores sandwiches.
Step 6: Effortless Removal for Cutting
Once the graham crackers are in place, gently lift the entire frozen slab out of the baking pan using the foil or parchment paper overhangs as handles. Transfer the whole block onto a sturdy cutting board. This step is made effortless by the initial pan lining and allows for easier, cleaner cuts.
Step 7: Cut and Serve Your Chilled Masterpiece
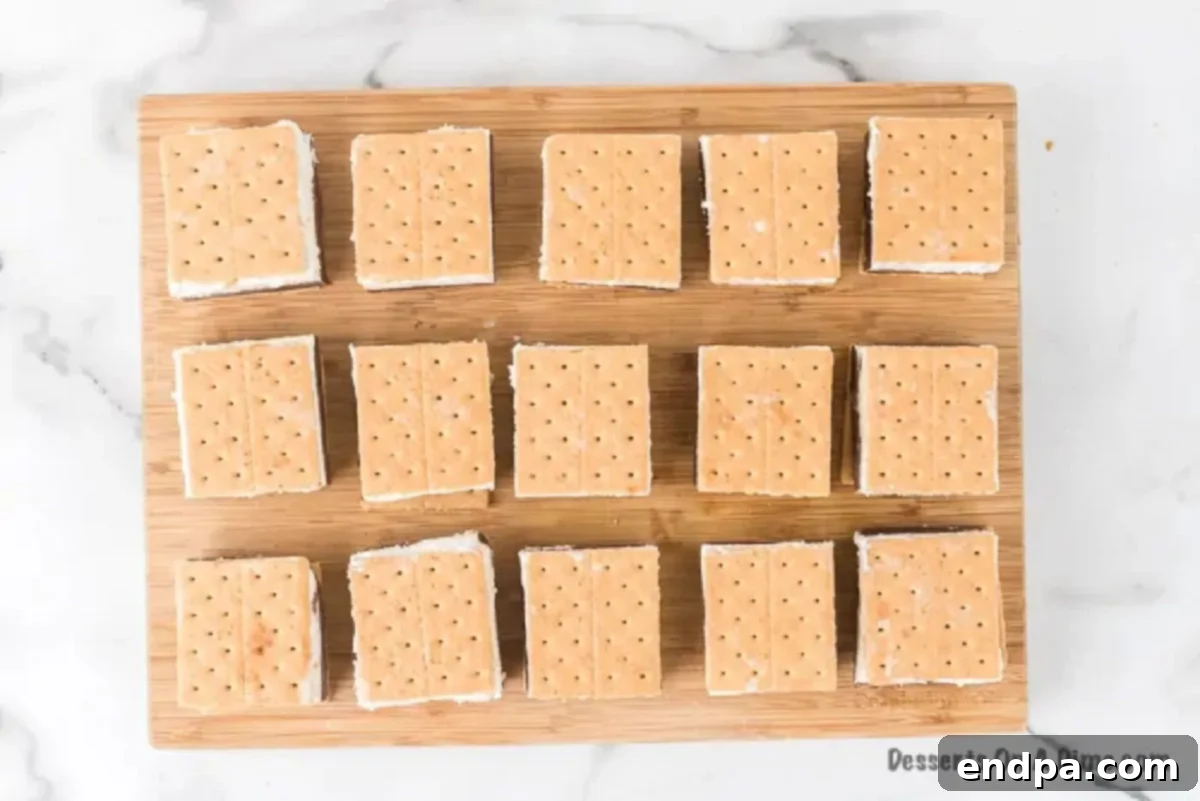
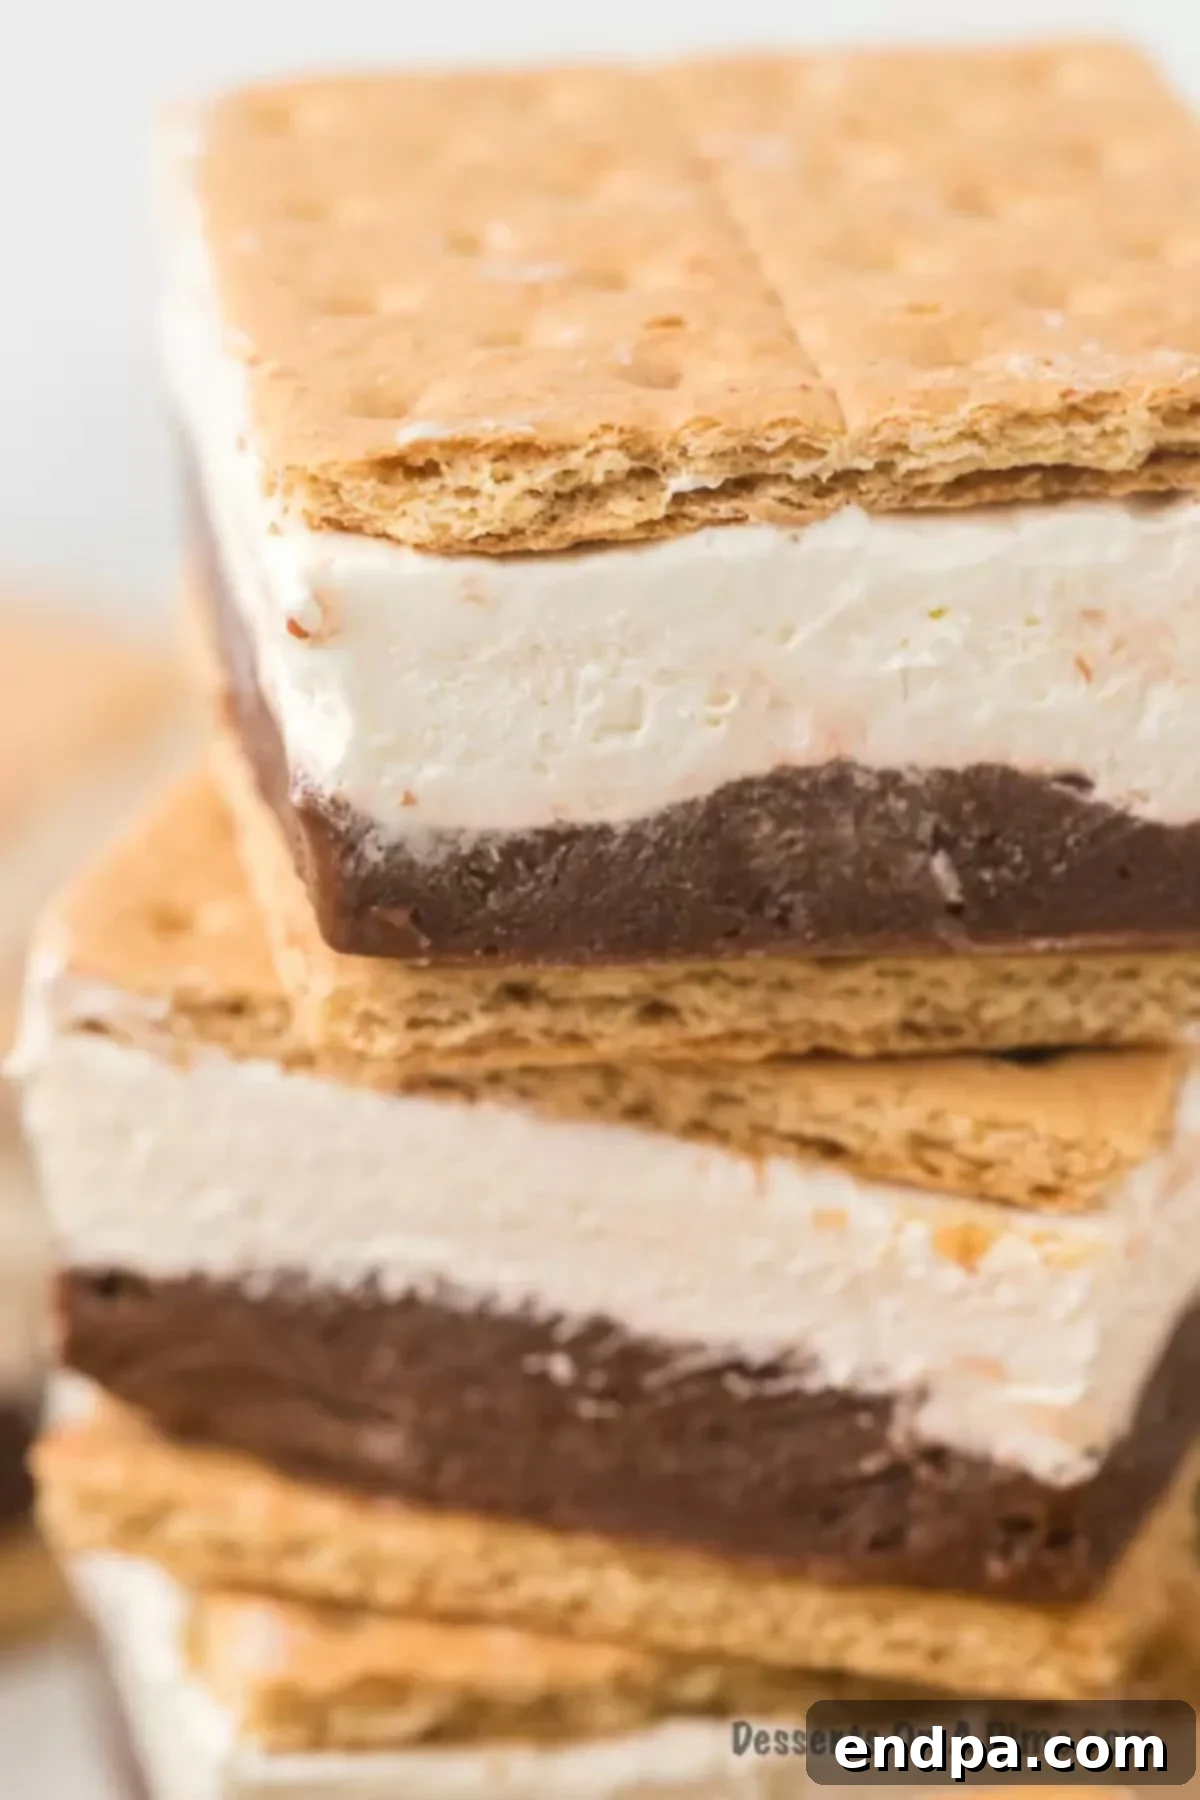
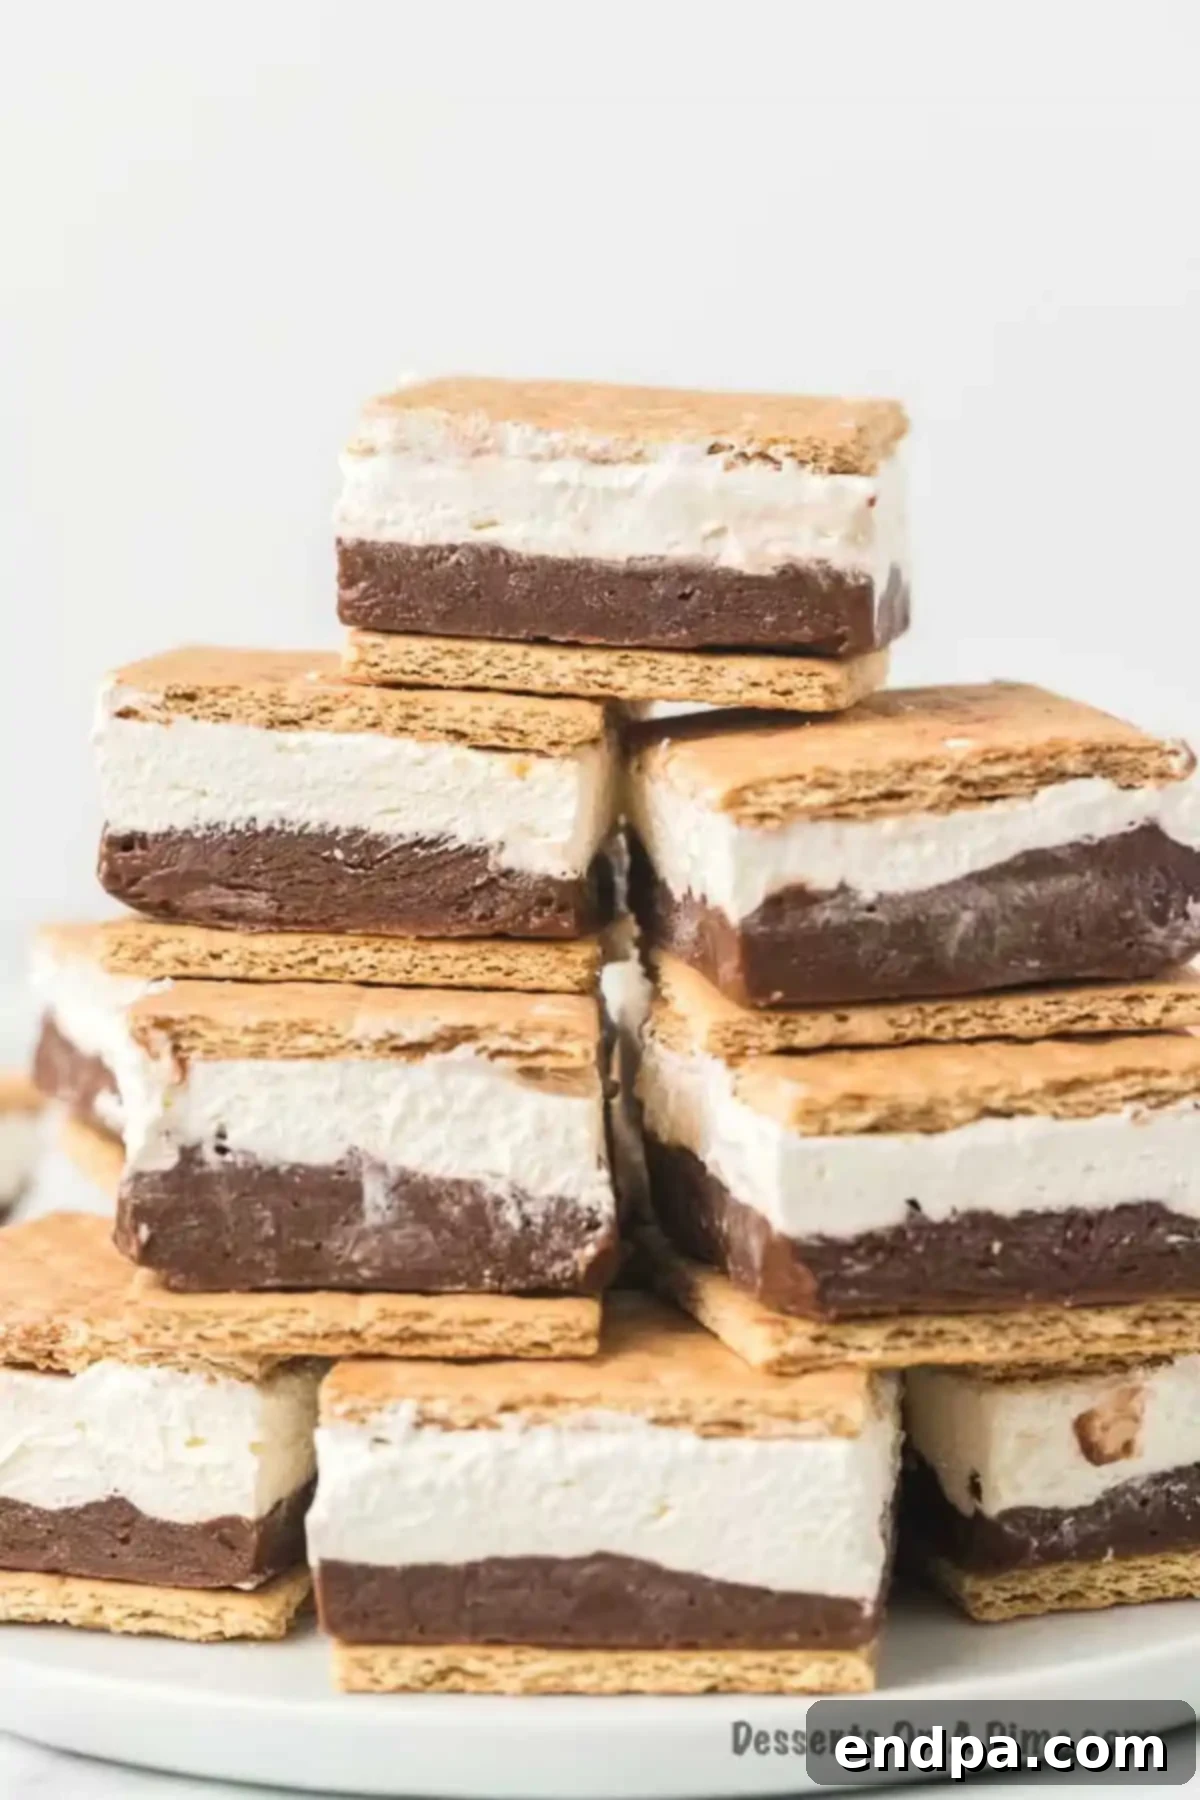
Using a sharp knife, carefully cut the pudding mixture into individual squares, slicing in between each graham cracker to create neat portions. For the cleanest cuts, you might want to run your knife under hot water and wipe it dry between slices. Once cut, flip each square over so the chocolate layer is now on top and place another graham cracker on the bottom to complete your ice cream sandwich treat. Serve immediately with a spatula for easy handling, or prepare for storage. These individual frozen s’mores are now ready to be enjoyed!
Expert Tips for the Best Frozen S’mores
Achieving the perfect Frozen S’mores is easy, but a few expert tips can elevate your dessert from great to absolutely unforgettable. Keep these pointers in mind for a consistently delicious outcome:
- Layer the Ingredients with Care: Pay attention to spreading each layer evenly. This not only ensures a balanced flavor in every bite but also creates a beautiful visual presentation with distinct chocolate, marshmallow, and graham cracker sections. Even layers contribute to the structural integrity of the bars.
- Prepare Your Pan Properly: Always line your 9×13 inch pan with parchment paper or foil, leaving a generous overhang. This seemingly small step is incredibly important for easy removal of the frozen dessert. Trying to pry it out without lining can lead to a messy situation and broken bars.
- Soften That Cream Cheese: For a smooth, lump-free marshmallow layer, it is absolutely essential that your cream cheese is softened to room temperature. Cold cream cheese will result in a clumpy mixture that is difficult to spread and won’t blend seamlessly with the marshmallow creme.
- Choose Quality Ingredients: While this recipe uses simple ingredients, their quality can make a difference. Opt for a chocolate pudding mix you enjoy the flavor of, and use full-fat milk for the richest chocolate layer. Good quality graham crackers will provide the best crunch.
- Don’t Rush the Chill Time: Patience is a virtue, especially with frozen desserts! Allow the Frozen S’mores to freeze for the full recommended time (4-6 hours) or even overnight. This ensures all layers are completely firm and set, making them much easier to cut and serve without melting or falling apart.
- Master the Clean Cut: For perfectly neat squares, use a large, sharp knife. For even cleaner cuts, dip your knife in hot water and wipe it dry between each slice. This warms the blade slightly, allowing it to glide through the frozen layers more easily without dragging or crumbling.
Frequently Asked Questions (FAQ)
Got questions about making or serving your Frozen S’mores? We’ve got answers to some of the most common inquiries:
While you can serve them directly from the freezer, we find that Frozen S’mores are often easier and more enjoyable to eat if they’ve had a few minutes (around 5-10) to sit at room temperature first. This allows the layers to soften slightly, making them less rigid and enhancing the creamy texture. However, on a scorching hot summer day, serving them straight from the freezer can be incredibly refreshing!
To preserve their freshness and prevent freezer burn, wrap each individual Frozen S’mores square tightly in plastic wrap, then place the wrapped pieces into a large freezer-safe bag or an airtight container. This method helps maintain their texture and flavor. Store them in the freezer until you’re ready to enjoy them again.
When stored properly in an airtight container or individually wrapped in the freezer, your Frozen S’mores will last for up to 3 months. This makes them a fantastic make-ahead dessert for parties or a convenient treat to have on hand for unexpected cravings.
Yes, you can absolutely use homemade marshmallow fluff! Just be aware that the consistency of homemade fluff can vary slightly from store-bought marshmallow creme, which might affect the final texture of your marshmallow layer. Ensure your homemade fluff is thick enough to hold its shape when mixed with the cream cheese. If it’s too soft, the layer might be less firm when frozen. Adjust chilling time as needed.
You’ll need a 9×13 inch baking pan, aluminum foil or parchment paper, a large mixing bowl for the pudding, a separate medium mixing bowl for the marshmallow mixture, a whisk, a hand-held or stand mixer, a spatula for spreading, a sharp knife for cutting, and an airtight container or freezer bags for storage. Basic kitchen essentials are all you need!
More S’mores-Inspired Recipes to Try
If your family loves the flavors of s’mores as much as ours does, you’ll be thrilled to explore these other fantastic s’mores-themed recipes. Each offers a unique way to enjoy that beloved combination of chocolate, marshmallow, and graham cracker goodness:
- Smores Puppy Chow Recipe
- Easy Smores Cookie Cups
- Smores Cookies Recipe
- S’mores Bars
- S’mores Cheesecake
It’s your turn to make this fabulous recipe for Frozen S’mores dessert! We are confident it will become a new family favorite. Once you’ve whipped up a batch, please come back and let us know what you think by leaving a star recipe rating. Your feedback helps other dessert lovers discover this amazing treat!
Pin
Frozen S’mores
Ingredients
- 1 box Instant Chocolate Pudding
- 2 ½ cup Milk
- 15 Graham Crackers
- 7 oz Marshmallow Creme
- 4 oz Cream Cheese, softened at room temperature
- 8 oz Cool Whip, thawed
Instructions
- Line a 9×13 inch baking pan with foil or parchment paper, ensuring a 1-inch overhang on all sides for easy removal later.
- In a large mixing bowl, whisk together the instant chocolate pudding mix and milk until well combined and smooth, about 2-3 minutes. Spread this mixture evenly in the bottom of the prepared pan and place it in the freezer to chill while you prepare the next layer.
- In a separate bowl, use a hand-held mixer or stand mixer to beat the softened cream cheese and marshmallow creme until completely smooth and free of lumps. Gently fold in the thawed Cool Whip by hand with a spatula until just combined, preserving its airy texture.
- Carefully spread the marshmallow mixture over the chilled chocolate pudding layer in the 9×13 inch pan. Cover the pan tightly with aluminum foil and then with plastic wrap. Freeze for at least 4-6 hours, or until the entire dessert is firm and set.
- Once firm, use the foil or parchment paper overhang to lift the entire frozen dessert slab out of the baking pan and transfer it onto a cutting board.
- Break the graham crackers in half to create individual squares. Arrange half of these graham cracker squares neatly on top of the frozen pudding layer on the cutting board. You should be able to create approximately 3 rows of 5 crackers.
- Using a sharp knife, carefully cut the pudding mixture into individual squares, slicing precisely between each graham cracker. For cleaner cuts, you can dip the knife in hot water and wipe it dry between slices. Once cut, flip each square over and place another graham cracker on the bottom to complete your Frozen S’mores sandwich.
- You can enjoy them right away for a firm, icy treat, or wrap them individually in plastic wrap and store them in an airtight container or freezer bag in the freezer.
- If stored in the freezer, let them stand at room temperature for about 5-10 minutes before eating to allow them to soften slightly for the best texture.
Recipe Notes
Nutrition Facts
Carbohydrates 28g,
Protein 3g,
Fat 6g,
Saturated Fat 3g,
Cholesterol 15mg,
Sodium 146mg,
Potassium 105mg,
Fiber 1g,
Sugar 16g,
Vitamin A 194IU,
Calcium 81mg,
Iron 1mg
Pin This Now to Remember It Later
Pin Recipe
