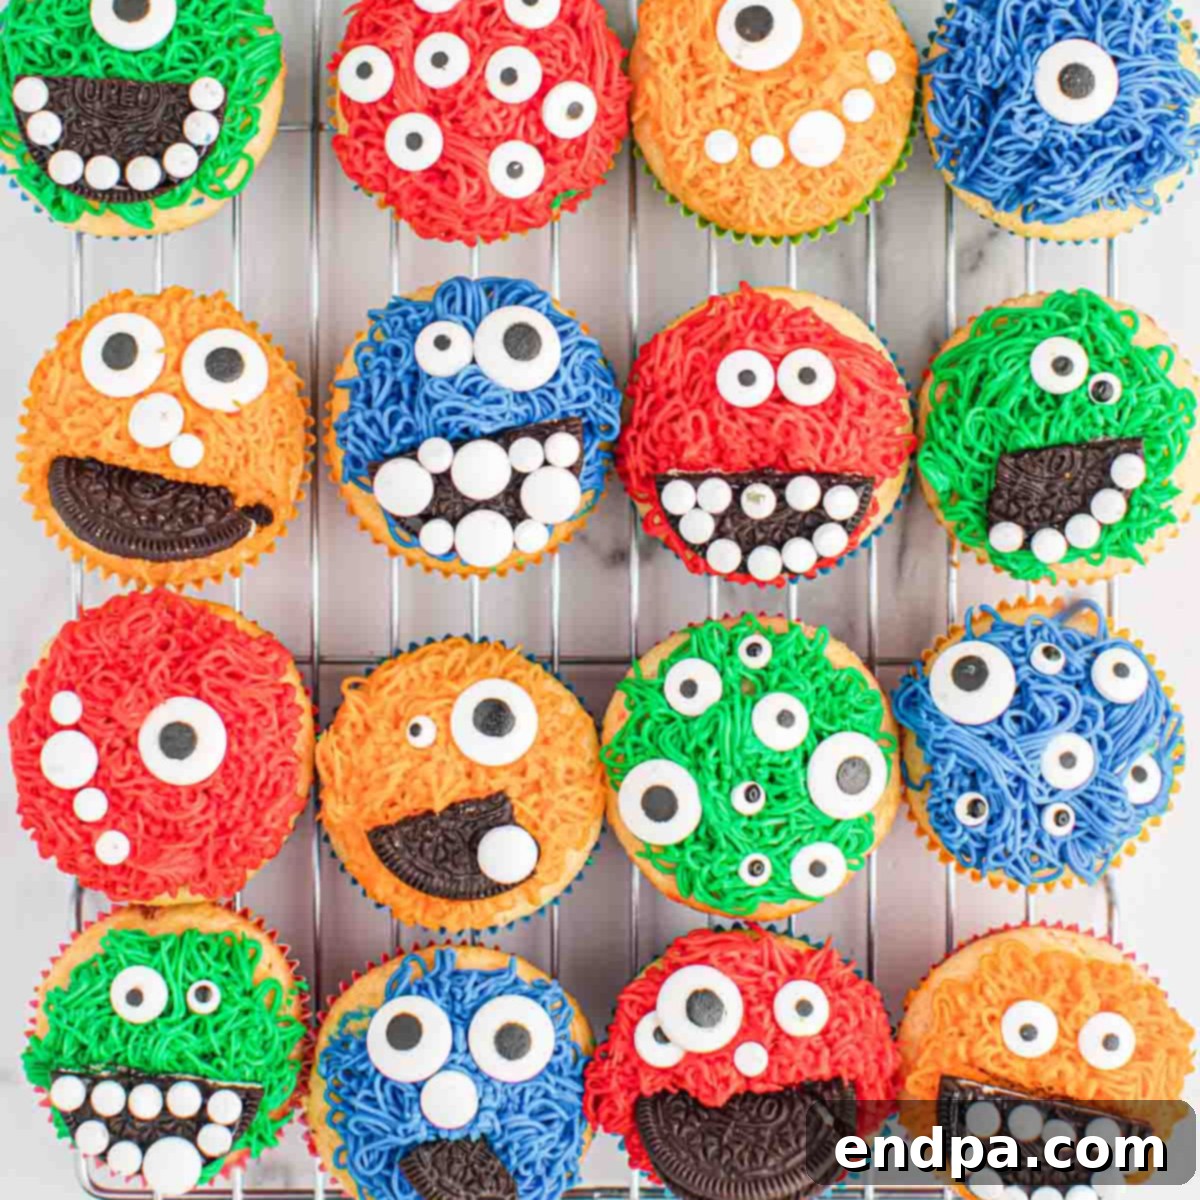
Unleash your inner baker and prepare for a frightfully fun treat with these adorable and easy-to-make Monster Cupcakes! Perfect for a Halloween party, a spooky movie night, or just a delightful autumn afternoon activity with the kids, these vibrant cupcakes are guaranteed to bring smiles and a touch of delicious mischief. We’ll guide you through creating an assortment of colorful, furry monsters, each adorned with whimsical candy eyes, making them the ultimate festive dessert.
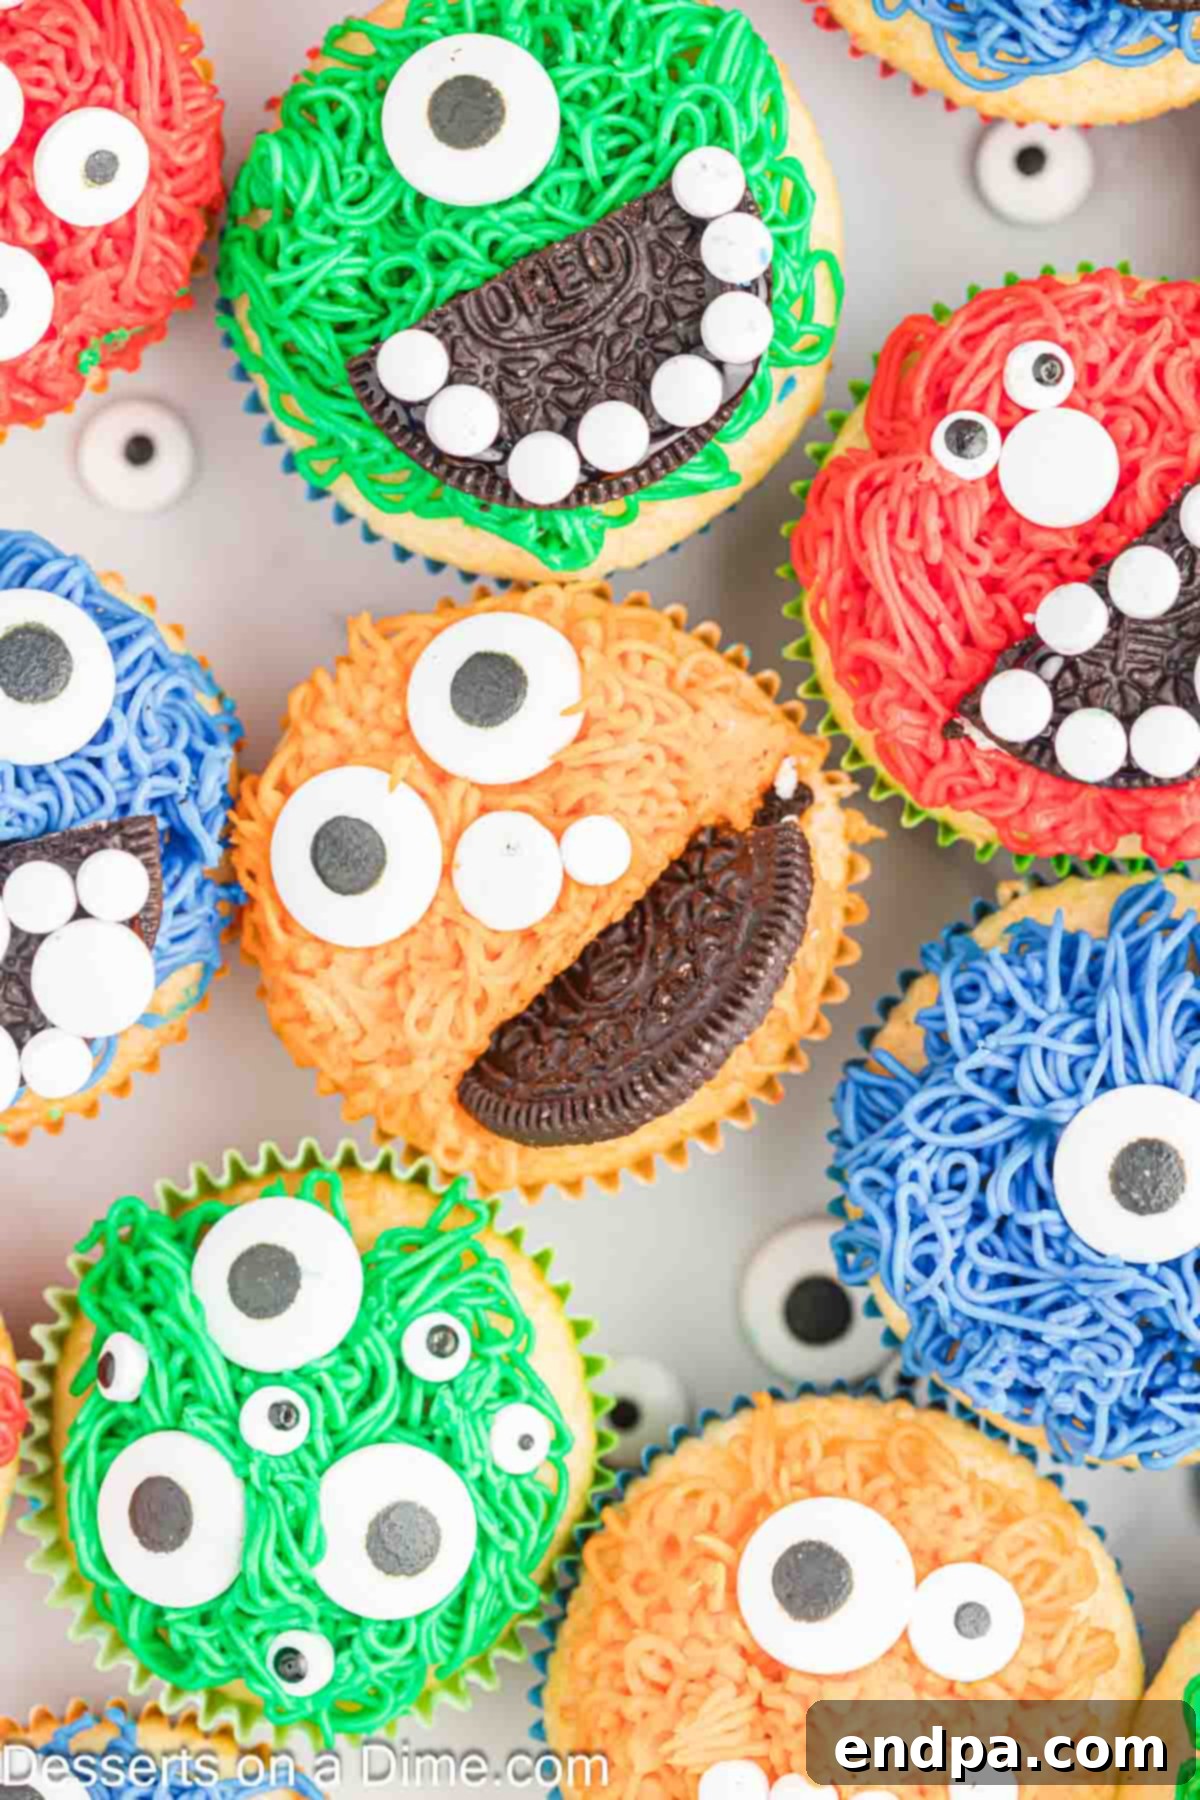
Baking cupcakes has been a cherished tradition in my kitchen for years, especially with little ones eager to help. This recipe, despite its impressive and intricate appearance, is surprisingly simple to execute, proving that you don’t need to be a professional pastry chef to create something truly adorable. It’s an ideal choice for Halloween, offering an effortless yet spectacular way to celebrate the season.
Our Monster Cupcakes don’t just look incredible; they taste absolutely heavenly. Each soft, fluffy cupcake is crowned with a generous swirl of rich, creamy buttercream frosting, providing the perfect canvas for our colorful monster creations. We love to make them in a dazzling array of shades—think bold blues, fiery reds, bright greens, and cheerful oranges—to ensure a truly eye-catching spread.
If you’re planning an epic Halloween celebration and searching for more themed treats, be sure to explore our other fantastic recipes. Complement your monster cupcakes with our eerie Halloween Monster Eyeballs, the classic and comforting Candy Corn Cookies, or our equally playful Monster Donuts for a complete spooky dessert table!
What’s in this post: The Best Monster Cupcakes Recipe
- Why You’ll Adore These Monster Cupcakes
- Essential Ingredients for Spooky Sweet Treats
- Creative Variations and Decorating Ideas
- Step-by-Step Guide: How to Make Monster Cupcakes
- Expert Tips for Flawless Monster Cupcakes
- Storage and Make-Ahead Suggestions
- Serving Suggestions for Your Halloween Party
- More Fun and Festive Cupcake Recipes
- Monster Cupcakes Recipe Card
Why You’ll Adore These Monster Cupcakes
These monster cupcakes are more than just a treat; they’re an experience waiting to happen! Here’s why this recipe will quickly become a cherished favorite for your family and friends:
- Effortless Baking with Box Cake Mix: We understand that life can be busy, especially during the festive season. That’s why this recipe ingeniously utilizes a vanilla box cake mix, transforming the baking process into a quick, convenient, and stress-free affair. You get homemade taste with minimal fuss, leaving more time for the fun part: decorating!
- Limitless Customization for Unique Monsters: The beauty of these cupcakes lies in their adaptability. You’re not limited to a single color or monster style. Feel free to unleash your creativity by mixing and matching vibrant gel food colors for the frosting. Whether you prefer a playful pastel monster or a bold, neon creature, this recipe empowers you to create an entire cast of unique characters. It’s a fantastic way to personalize your treats and make each monster special.
- Festive, Fun, and Incredibly Engaging: Halloween is all about embracing the whimsical and the spooky, and these monster cupcakes perfectly capture that spirit. Their whimsical appearances are an instant mood booster and a delightful centerpiece for any gathering. They are especially wonderful for getting children involved in the kitchen, turning baking into a fun, interactive activity where imagination takes center stage. Watching their faces light up as they create their own monster masterpieces is truly priceless.
- Impressive Results with Minimal Skill: Don’t let their elaborate look intimidate you. With a simple piping technique (even a beginner can master!) and readily available candy decorations, you can achieve professional-looking results without needing advanced baking skills. These cupcakes are designed to be forgiving and fun, ensuring that every batch turns out wonderfully charming.
Essential Ingredients for Spooky Sweet Treats
Creating these delightful Monster Cupcakes requires a few simple ingredients, most of which you likely already have in your pantry. The key to their vibrant appearance and delicious taste lies in selecting quality components.
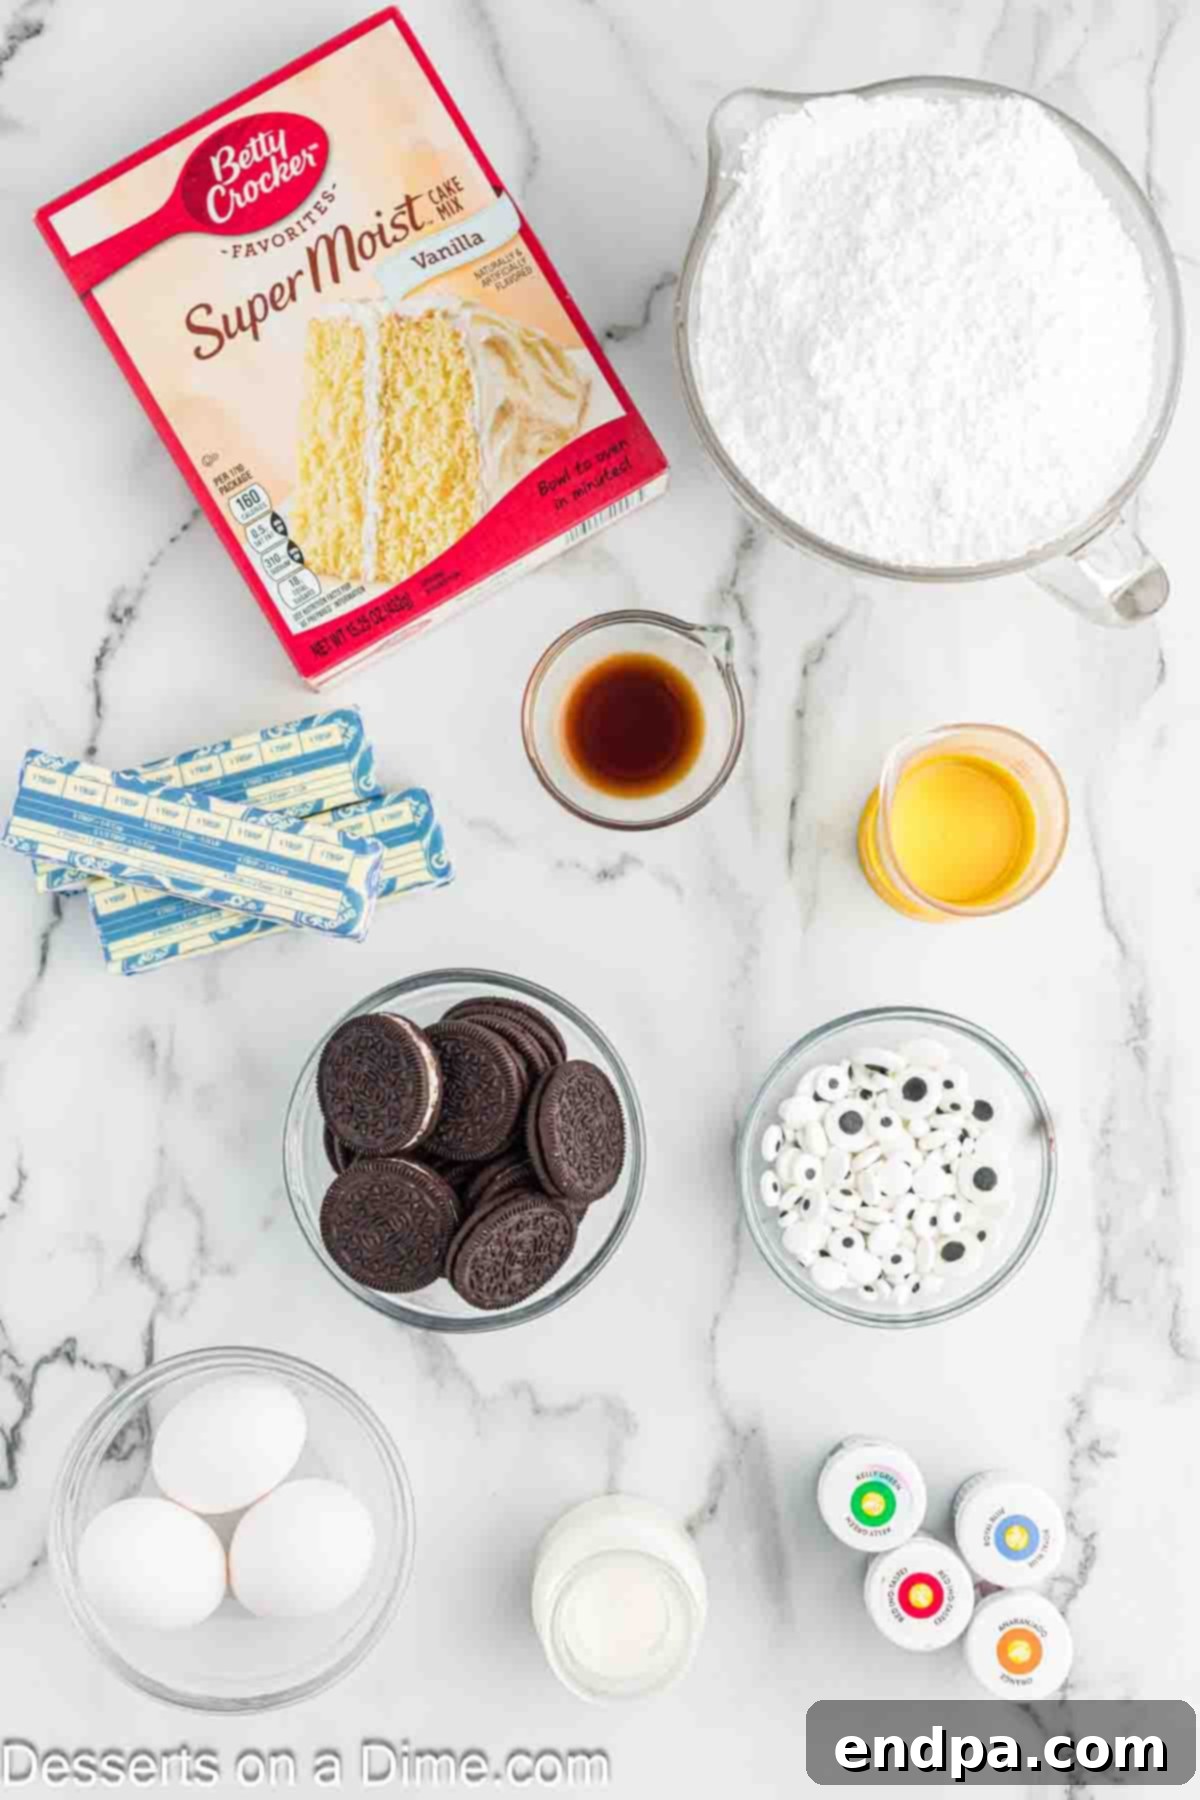
For the Cupcakes
- Vanilla Cake Mix: This is our secret weapon for speed and simplicity! Any standard 16-ounce box of your favorite vanilla cake mix will work perfectly. You’ll also need the additional ingredients listed on the cake mix box, which typically include water, vegetable oil, and large eggs.
For the Rich Buttercream Frosting
- Unsalted Butter (Room Temperature): Using unsalted butter allows you to control the saltiness of your frosting. It’s crucial for the butter to be at room temperature (softened but not melted) for the smoothest, creamiest, and most easily combined frosting texture. This will prevent lumps and ensure a light, fluffy result.
- Powdered Sugar (Confectioners’ Sugar): This fine sugar is what gives buttercream its characteristic smooth and melt-in-your-mouth texture. I highly recommend sifting your powdered sugar before adding it to the butter to prevent any lumps, ensuring a silky-smooth frosting that pipes beautifully.
- Heavy Cream: A splash of heavy cream elevates the frosting, adding an incredible richness and a luxurious consistency that makes it incredibly easy to pipe and delightful to eat. It also helps to achieve that perfect fluffy texture.
- Vanilla Extract: A good quality vanilla extract enhances the overall flavor of your buttercream, adding a classic sweetness that complements the cake perfectly.
For the Spooky & Fun Decorations
- Bright Gel Food Coloring (Blue, Red, Green, Orange): While liquid food coloring works, gel food coloring is a game-changer! Its concentrated pigment delivers incredibly vibrant, deep colors without adding excess moisture to your frosting. This is essential for those eye-popping monster shades. Feel free to choose your favorite monster-inspired hues.
- Candy Eyeballs: These are the stars of our monster cupcakes! Look for various sizes to give your monsters personality and character. A mix of large and small eyeballs adds an extra layer of fun and makes each monster truly unique. You can find these at most craft stores or in the baking aisle of larger supermarkets during the Halloween season.
- Oreo Cookies (Regular, Not Double-Stuffed): Classic Oreo cookies provide the perfect dark contrast for monster mouths. Their simple design allows for easy cutting or placement. Regular Oreos are preferred as they are easier to manipulate than the thicker double-stuffed variety.
You can find the complete list of ingredients with precise measurements in the comprehensive recipe card located at the bottom of this post.
Creative Variations and Decorating Ideas
The true magic of Monster Cupcakes lies in their limitless possibilities for customization. Don’t be afraid to experiment and let your imagination run wild! Here are some fun ideas to make each batch uniquely yours:
- Vary the “Fur” Texture: Get creative with your piping! Decorate some cupcakes with the classic long “grass” tip for shaggy monsters, and others with a star tip for shorter, fluffier fur. The variety in textures will make your monster display even more dynamic and exciting.
- Play with Eyeball Sizes and Placement: Using an assortment of candy eyeball sizes (small, medium, large) adds incredible character. Place them differently too – one large eye for a cyclops, two mismatched eyes, or even three or four eyes for an alien monster! Turn them upside down for a sleepier look, or slightly askew for a goofy expression.
- Alternative Monster Mouths: While Oreos make fantastic mouths, you can also get creative with other options. Simply turn candy eyeballs upside down to form whimsical, rounded mouths. Alternatively, use mini chocolate chips, sprinkles, or even small pieces of black licorice for different mouth shapes and sizes.
- Experiment with Cake Mix Flavors: We love vanilla for its versatility, but feel free to switch things up! Imagine chocolate monsters, strawberry fiends, or lemon-flavored ghouls. White cake mix is also a great canvas if you want to dye the cake batter itself for an extra burst of color inside! Funfetti cake mix adds a surprise sparkle.
- Different Cookie “Mouths” or Toppings: Instead of Oreos, consider other cookies for mouths or additional texture. Chocolate chip cookies, vanilla wafers, or even shortbread cookies can offer different visual and flavor profiles. You could also crumble cookies or sprinkle colorful candy bits over the frosting for added crunch and flair.
- Add Edible Accents: Take your monster decorations up a notch with edible glitter, edible markers for drawing pupils or stitches on the eyeballs, or small pieces of gummy candy (like sour strips for tongues or gummy worms for tentacles). You could even use pretzels for horns or fangs!
- Dietary Adaptations: For those with dietary restrictions, consider using a gluten-free or dairy-free cake mix and making a frosting with plant-based butter and cream alternatives. Always double-check ingredient labels on candy eyeballs and cookies to ensure they meet specific dietary needs.
Step-by-Step Guide: How to Make Monster Cupcakes
Get ready to bring your adorable monsters to life! Follow these detailed instructions for a fun and easy baking experience.
- Step 1: Prepare Your Baking Station. Begin by preheating your oven to 350 degrees Fahrenheit (175°C). Line two standard 12-cup muffin pans with festive cupcake liners. This ensures easy removal and makes cleanup a breeze.
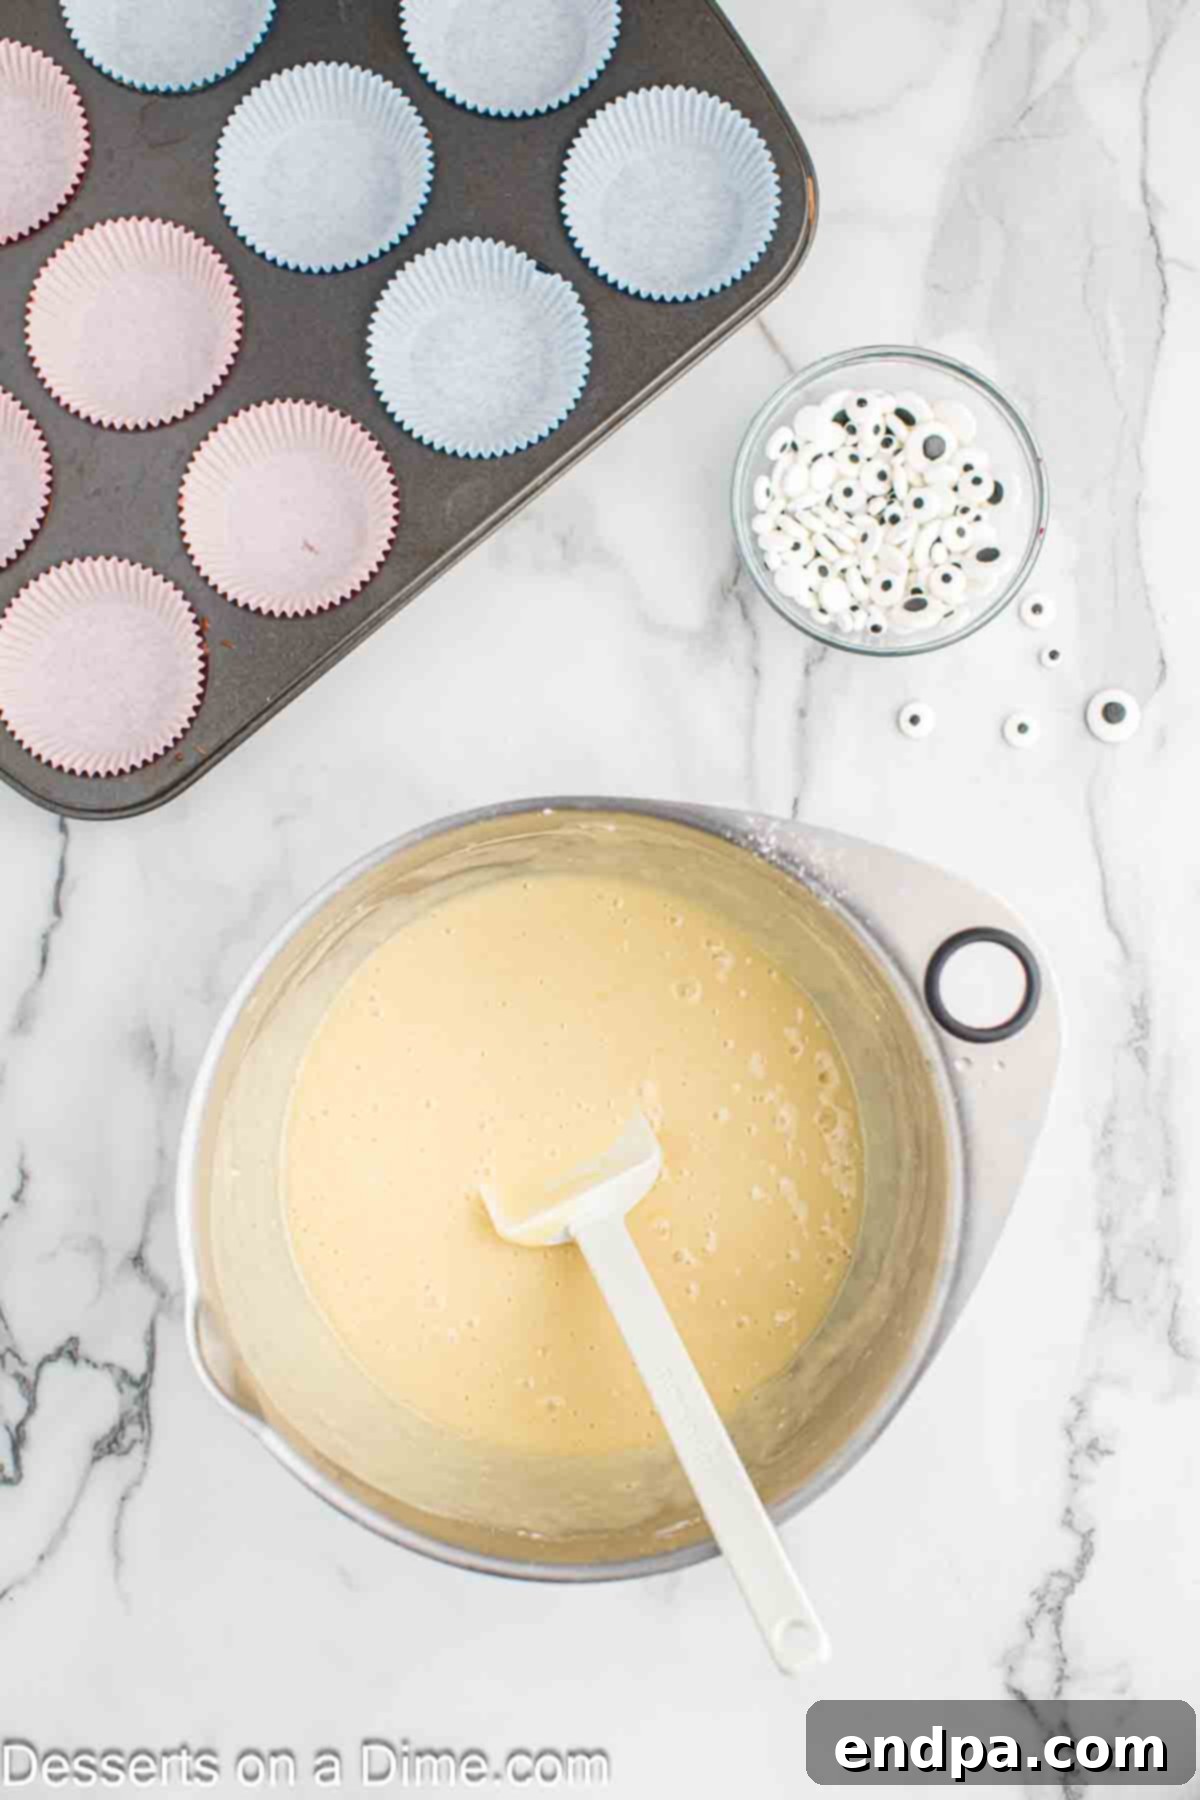
Step 2: Mix the Cupcake Batter. In a large mixing bowl, combine the vanilla cake mix with the water, vegetable oil, and large eggs according to the package instructions. Stir until just combined, being careful not to overmix, as this can lead to tough cupcakes. The batter should be smooth with no dry pockets.
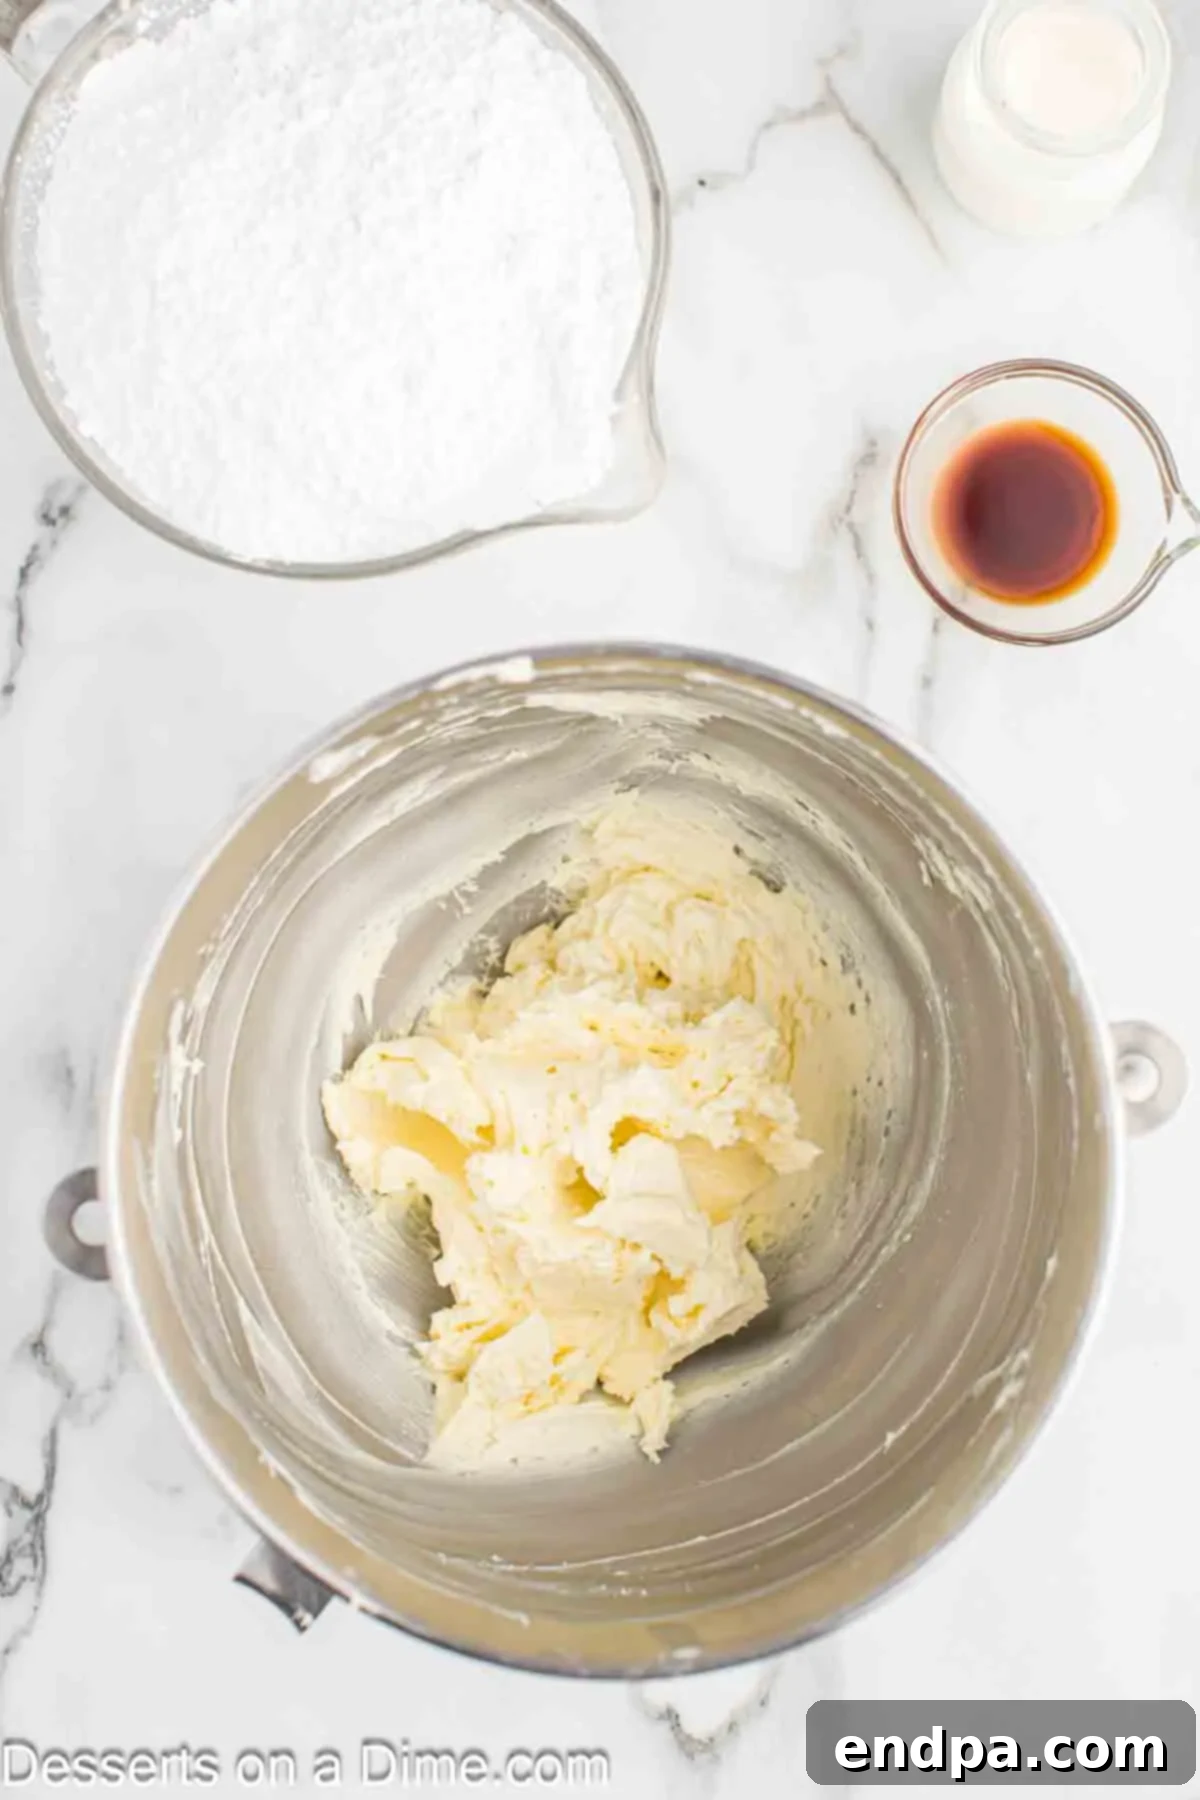
Step 3: Bake the Cupcakes. Carefully pour the batter into the prepared cupcake liners, filling each approximately three-quarters full. Bake for 18-21 minutes, or until a toothpick inserted into the center of a cupcake comes out clean. While the cupcakes cool on a wire rack, begin preparing your buttercream frosting. In a large mixing bowl, beat the softened unsalted butter until it is light, creamy, and fluffy. A stand mixer with a paddle attachment works wonderfully for this, ensuring consistent results.
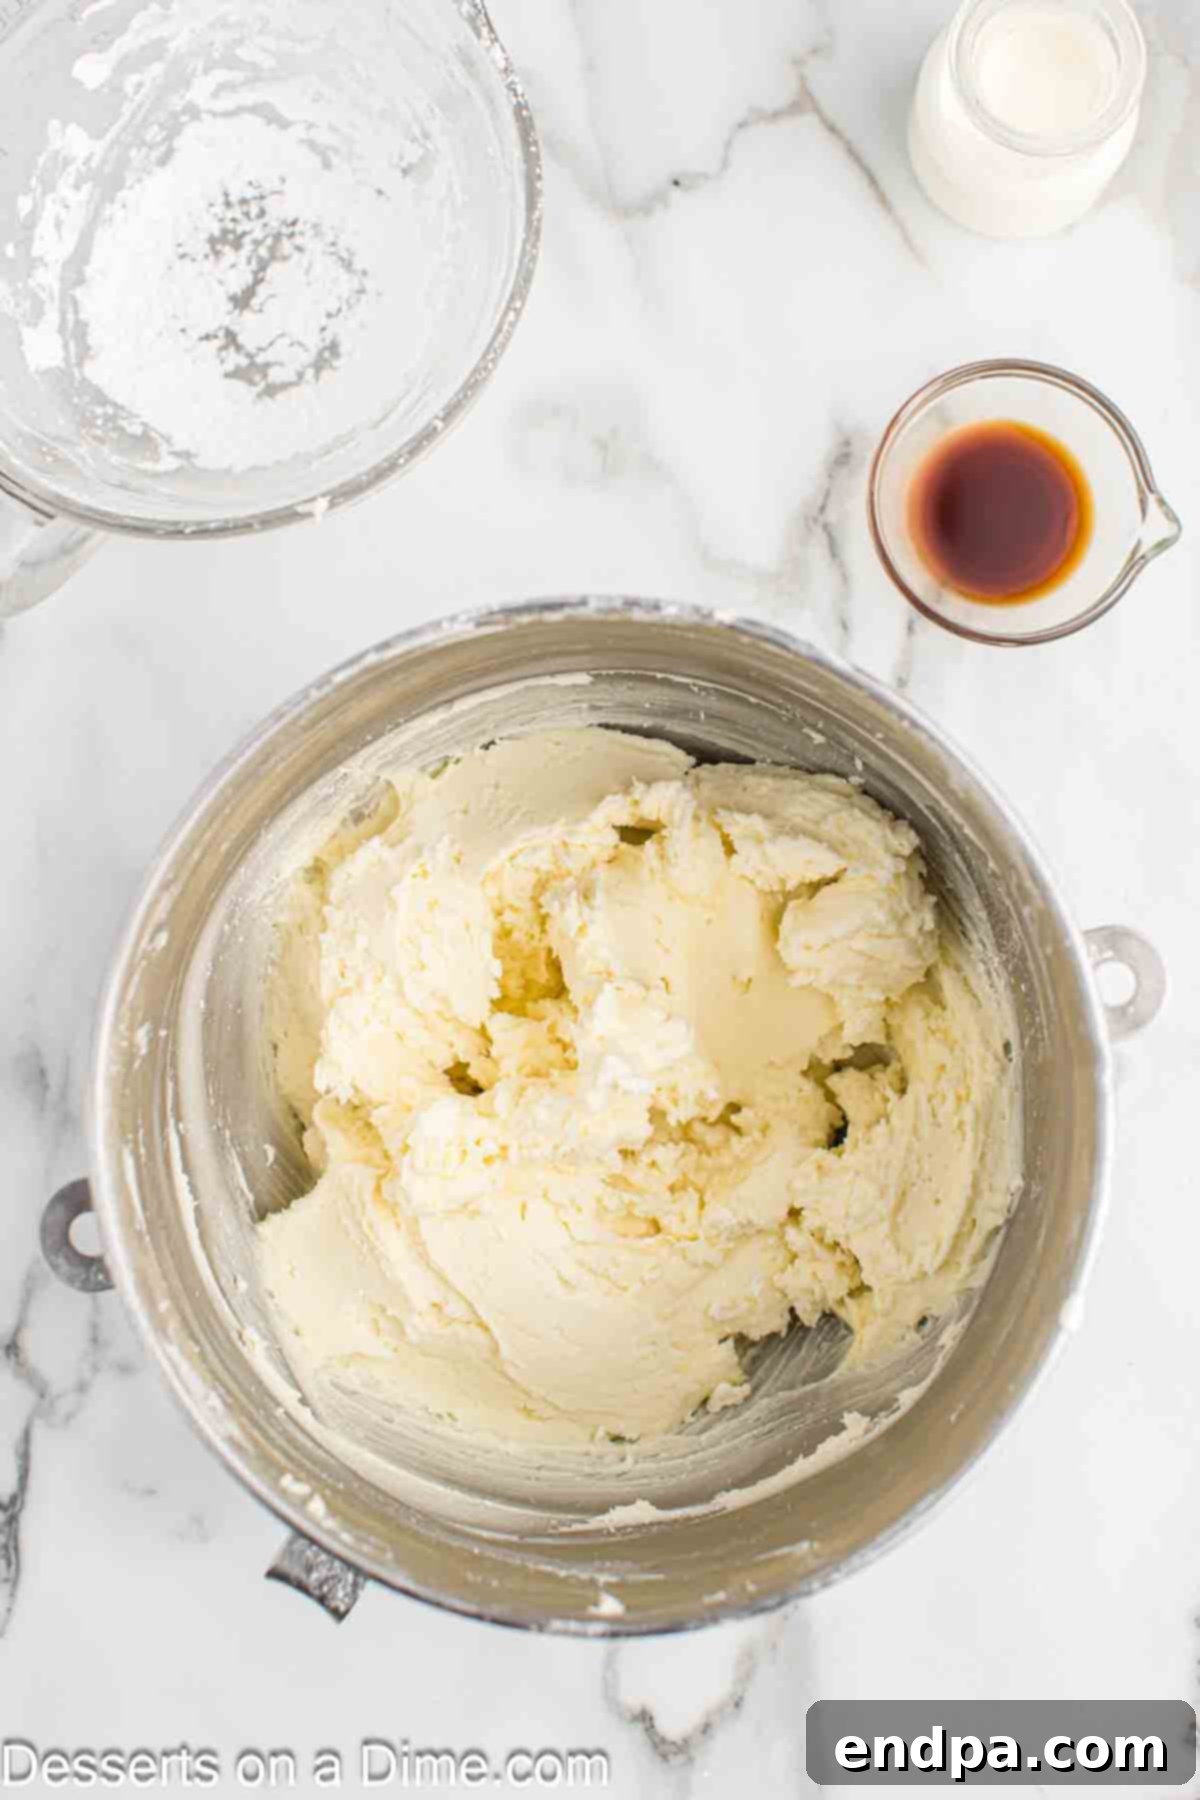
Step 4: Gradually Add Powdered Sugar. With the mixer on low speed, slowly add the sifted powdered sugar to the beaten butter, about half a cup at a time. It’s important to incorporate each addition completely before adding more to prevent a sugary mess and ensure a smooth frosting. Scrape down the sides of the bowl as needed.
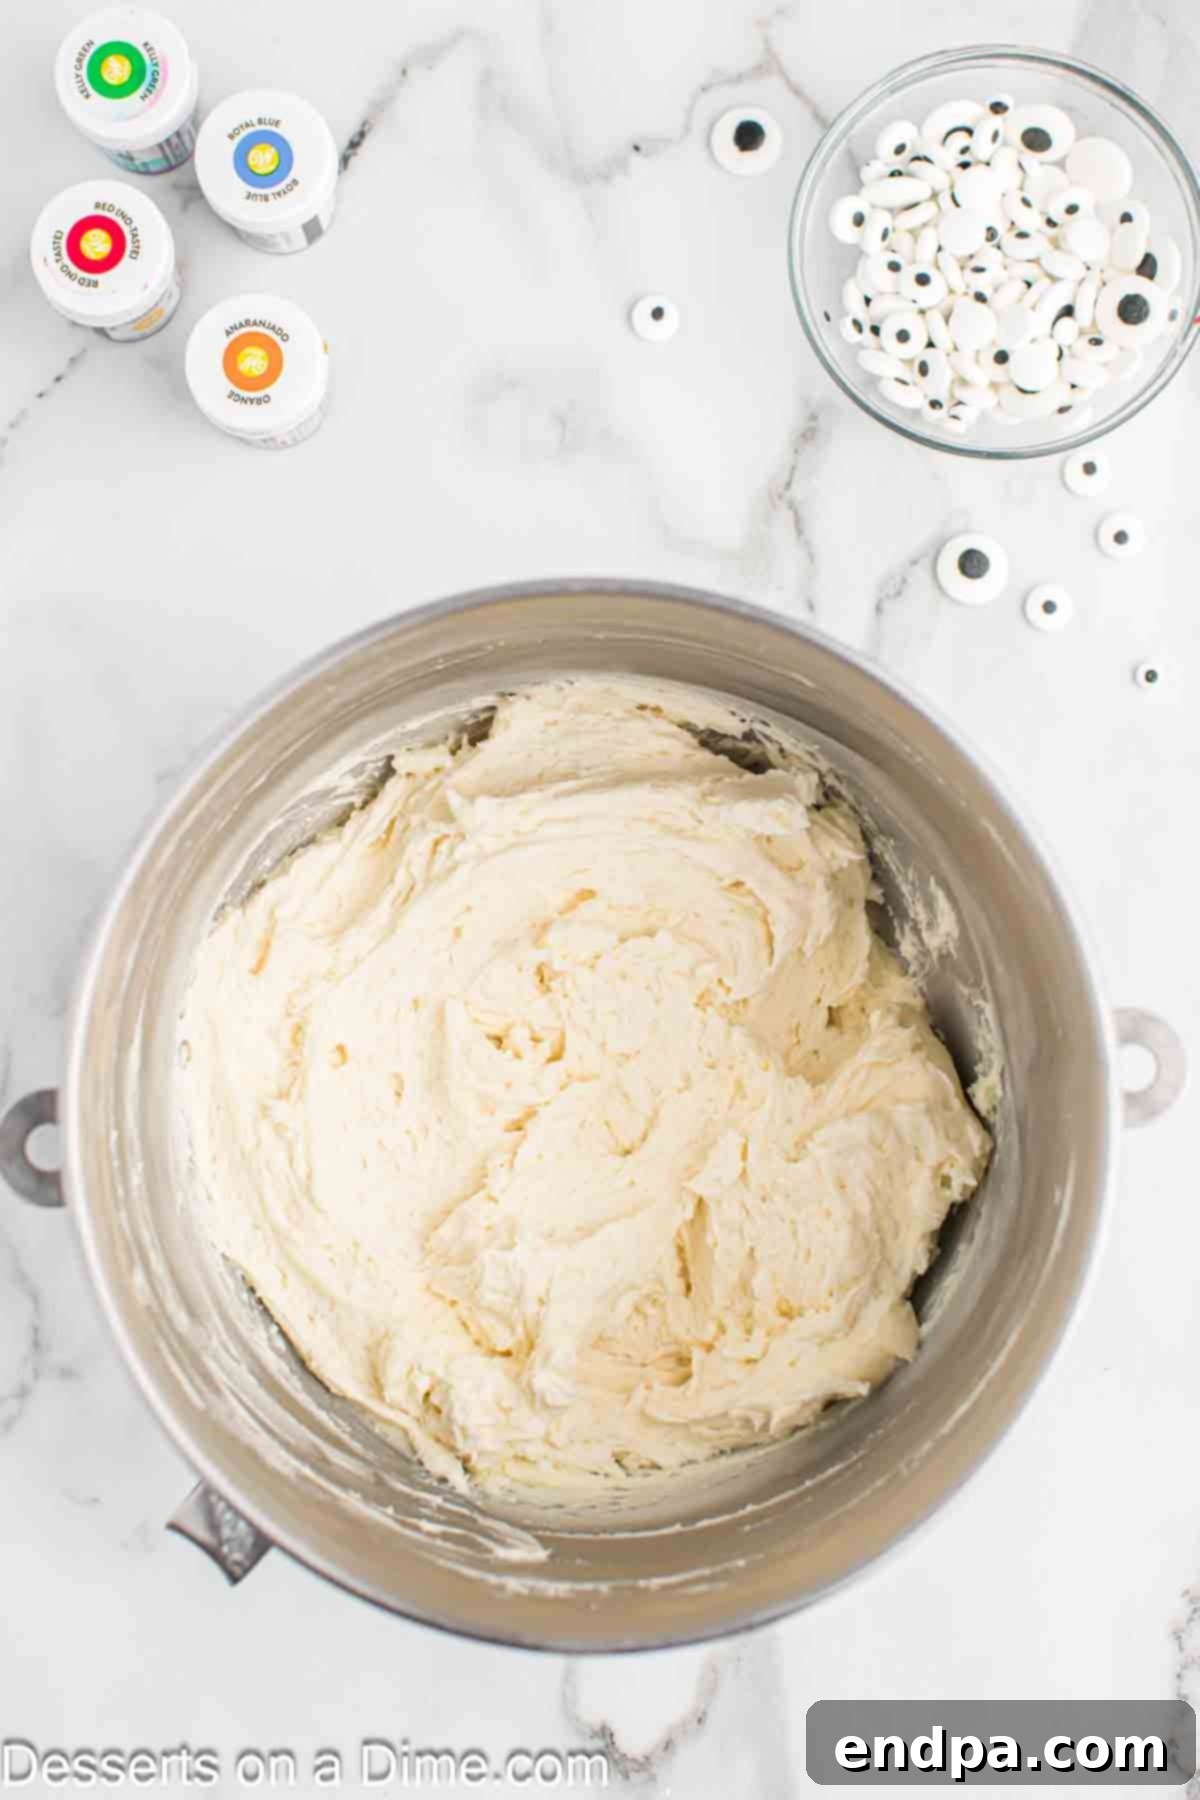
Step 5: Achieve the Perfect Frosting Consistency. Once all the powdered sugar is incorporated, add the heavy cream and vanilla extract. Beat on low speed for about 30 seconds to a minute, then increase the speed to medium-high and beat until the frosting is light, fluffy, and reaches a good, spreadable consistency that holds its shape. If it’s too thick, add a tiny bit more cream; if too thin, add a tablespoon more sifted powdered sugar.
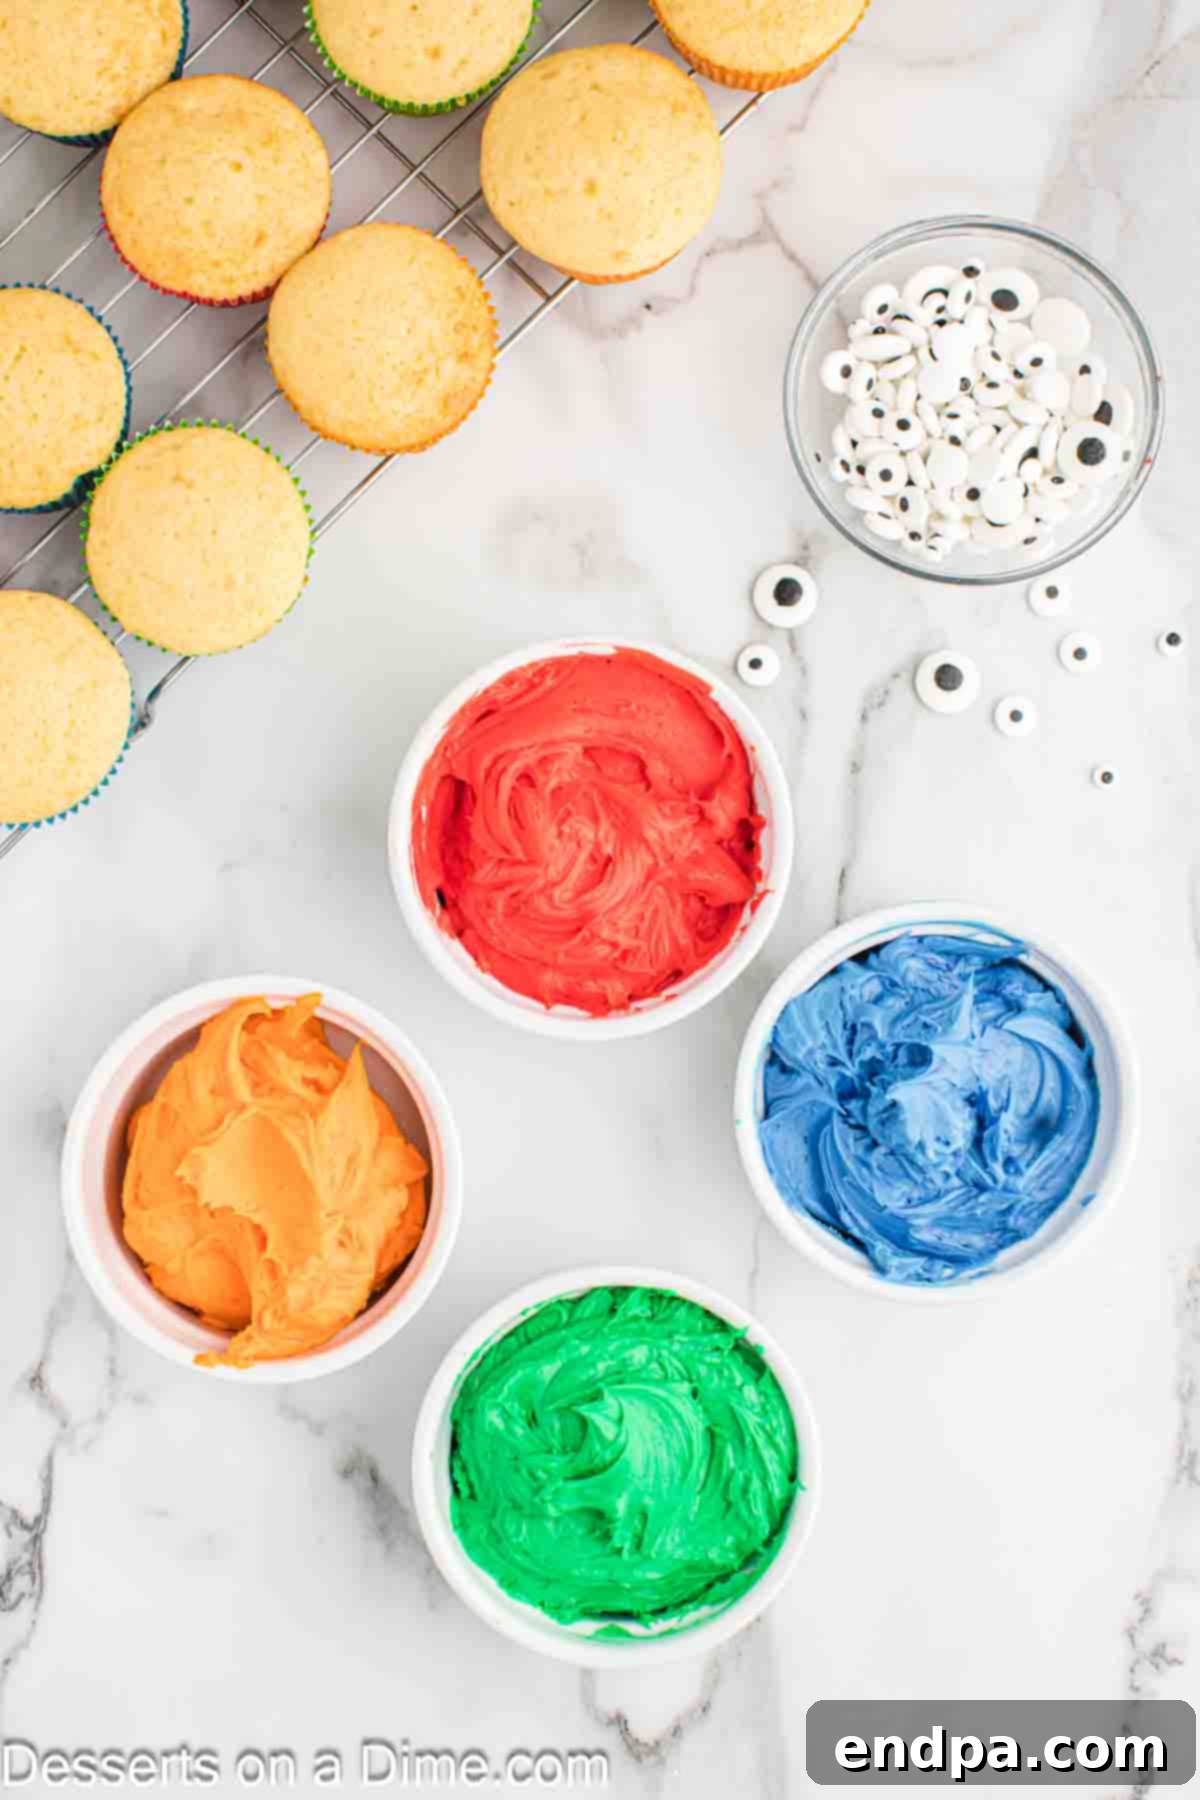
Step 6: Color Your Monster Frosting. Divide the prepared buttercream frosting evenly into four separate bowls. Using gel food coloring, dye each bowl a different vibrant monster color – typically blue, red, green, and orange. Mix well until the color is uniform and bright. Gel food coloring is recommended for the most intense hues.
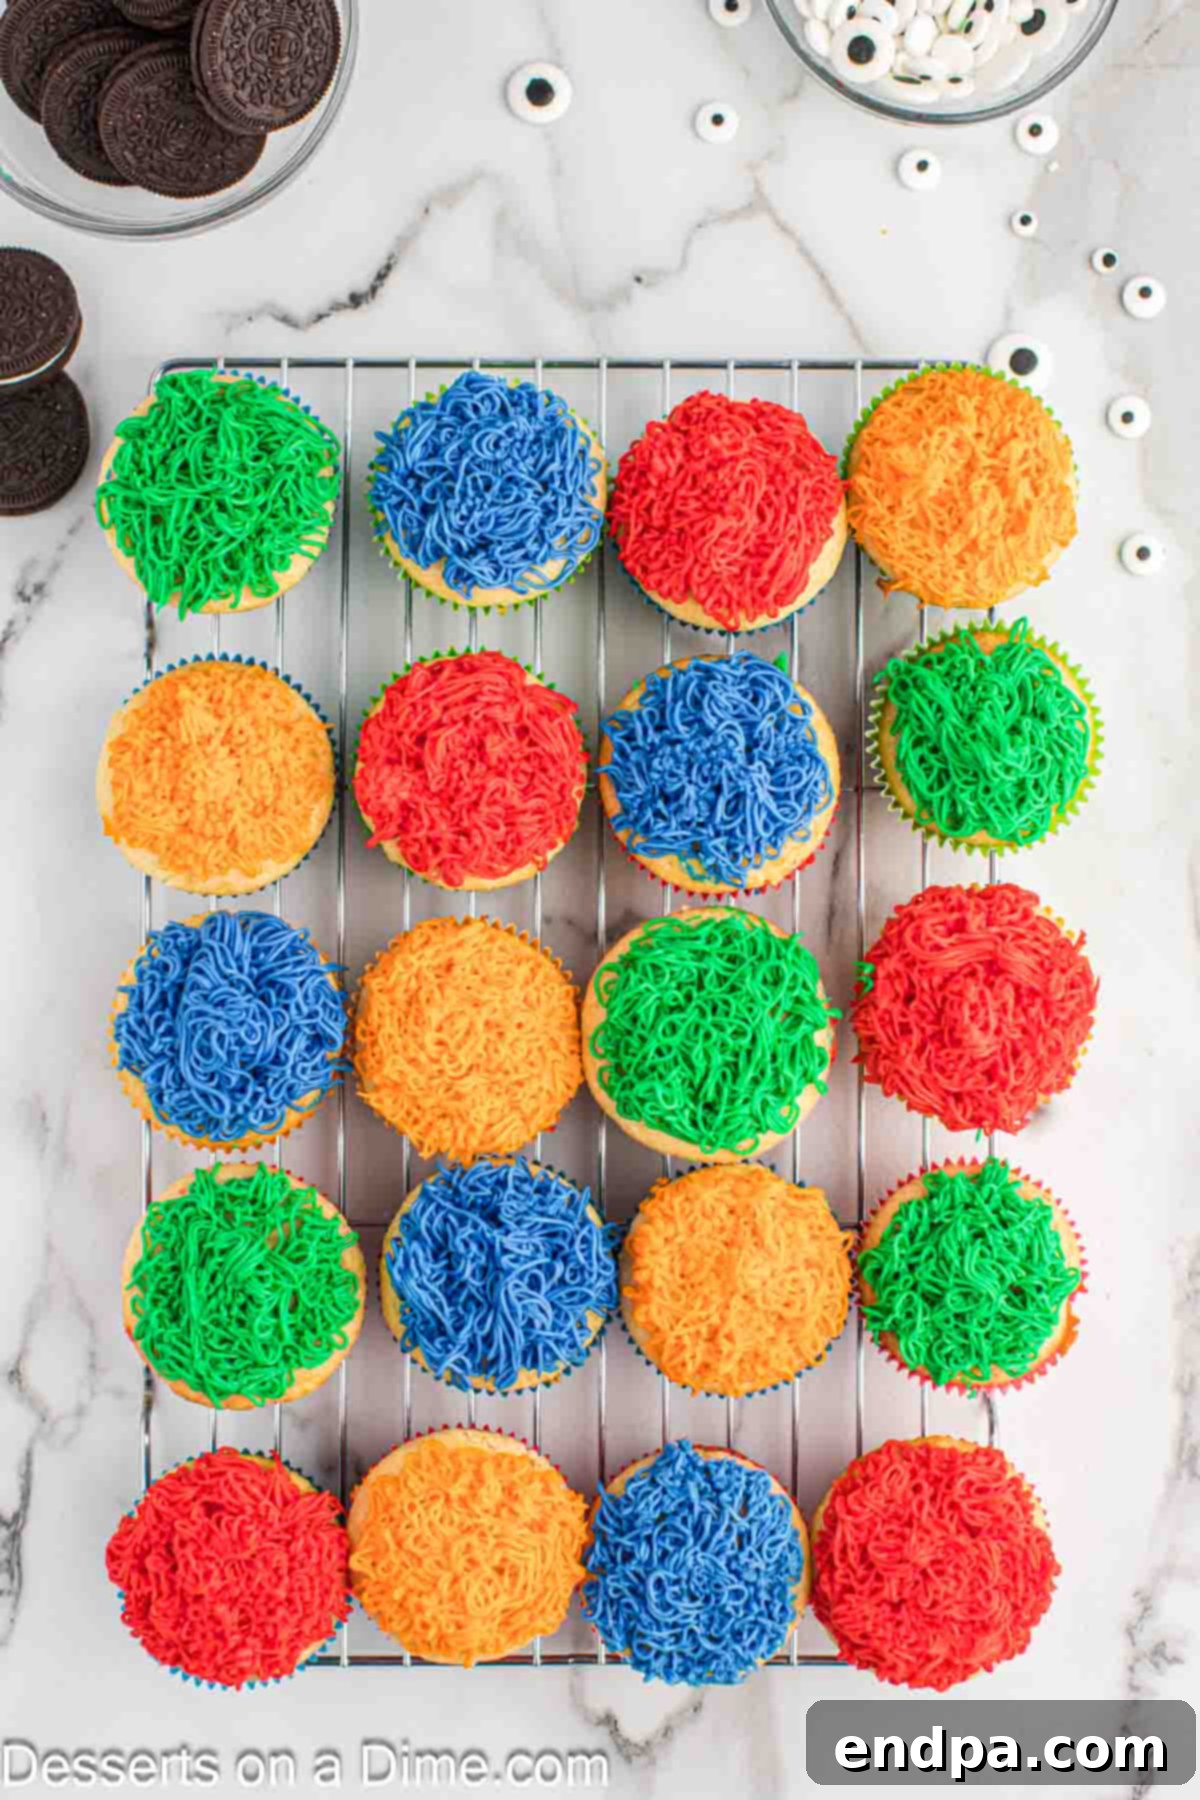
Step 7: Pipe the Monster Fur. Fit a piping bag with a grass piping tip (also known as Wilton #233 or a multi-opening tip). Fill the bag with one color of frosting. Hold the piping bag perpendicular to the cupcake and gently squeeze, lifting slowly as the “fur” emerges. Start piping from the outer edge of the cupcake and work your way inward, covering the entire top. Repeat this process for all the cooled cupcakes, creating an assortment of blue, red, green, and orange monsters.
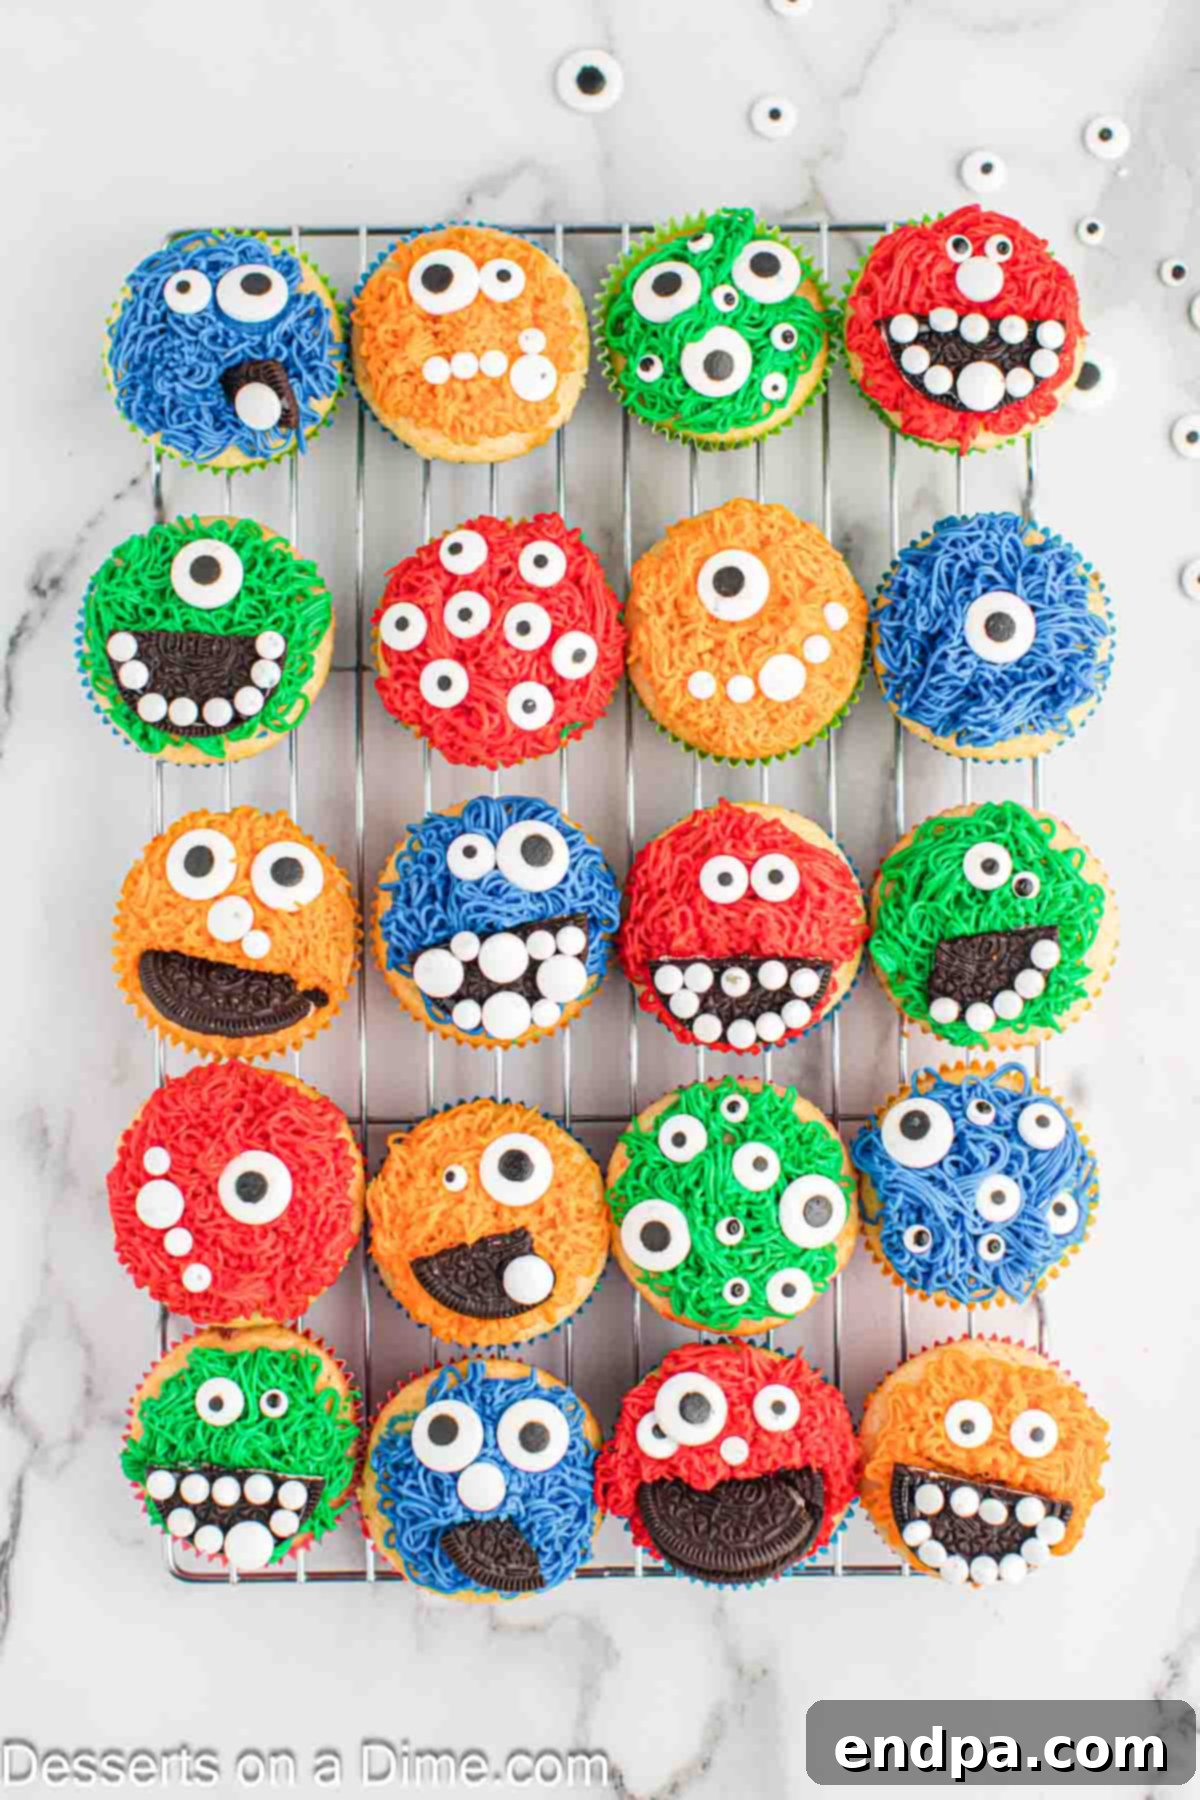
Step 8: Add Eyes and Mouths. This is where the monsters truly come to life! Carefully place candy eyeballs onto the frosted cupcakes. Use various sizes and numbers of eyeballs to give each monster a unique personality – one big eye, two classic eyes, or even three for a quirky creature! For the mouths, use whole Oreo cookies or gently twist and break them in half to create different mouth shapes. Press them gently into the frosting. Get creative with expressions!
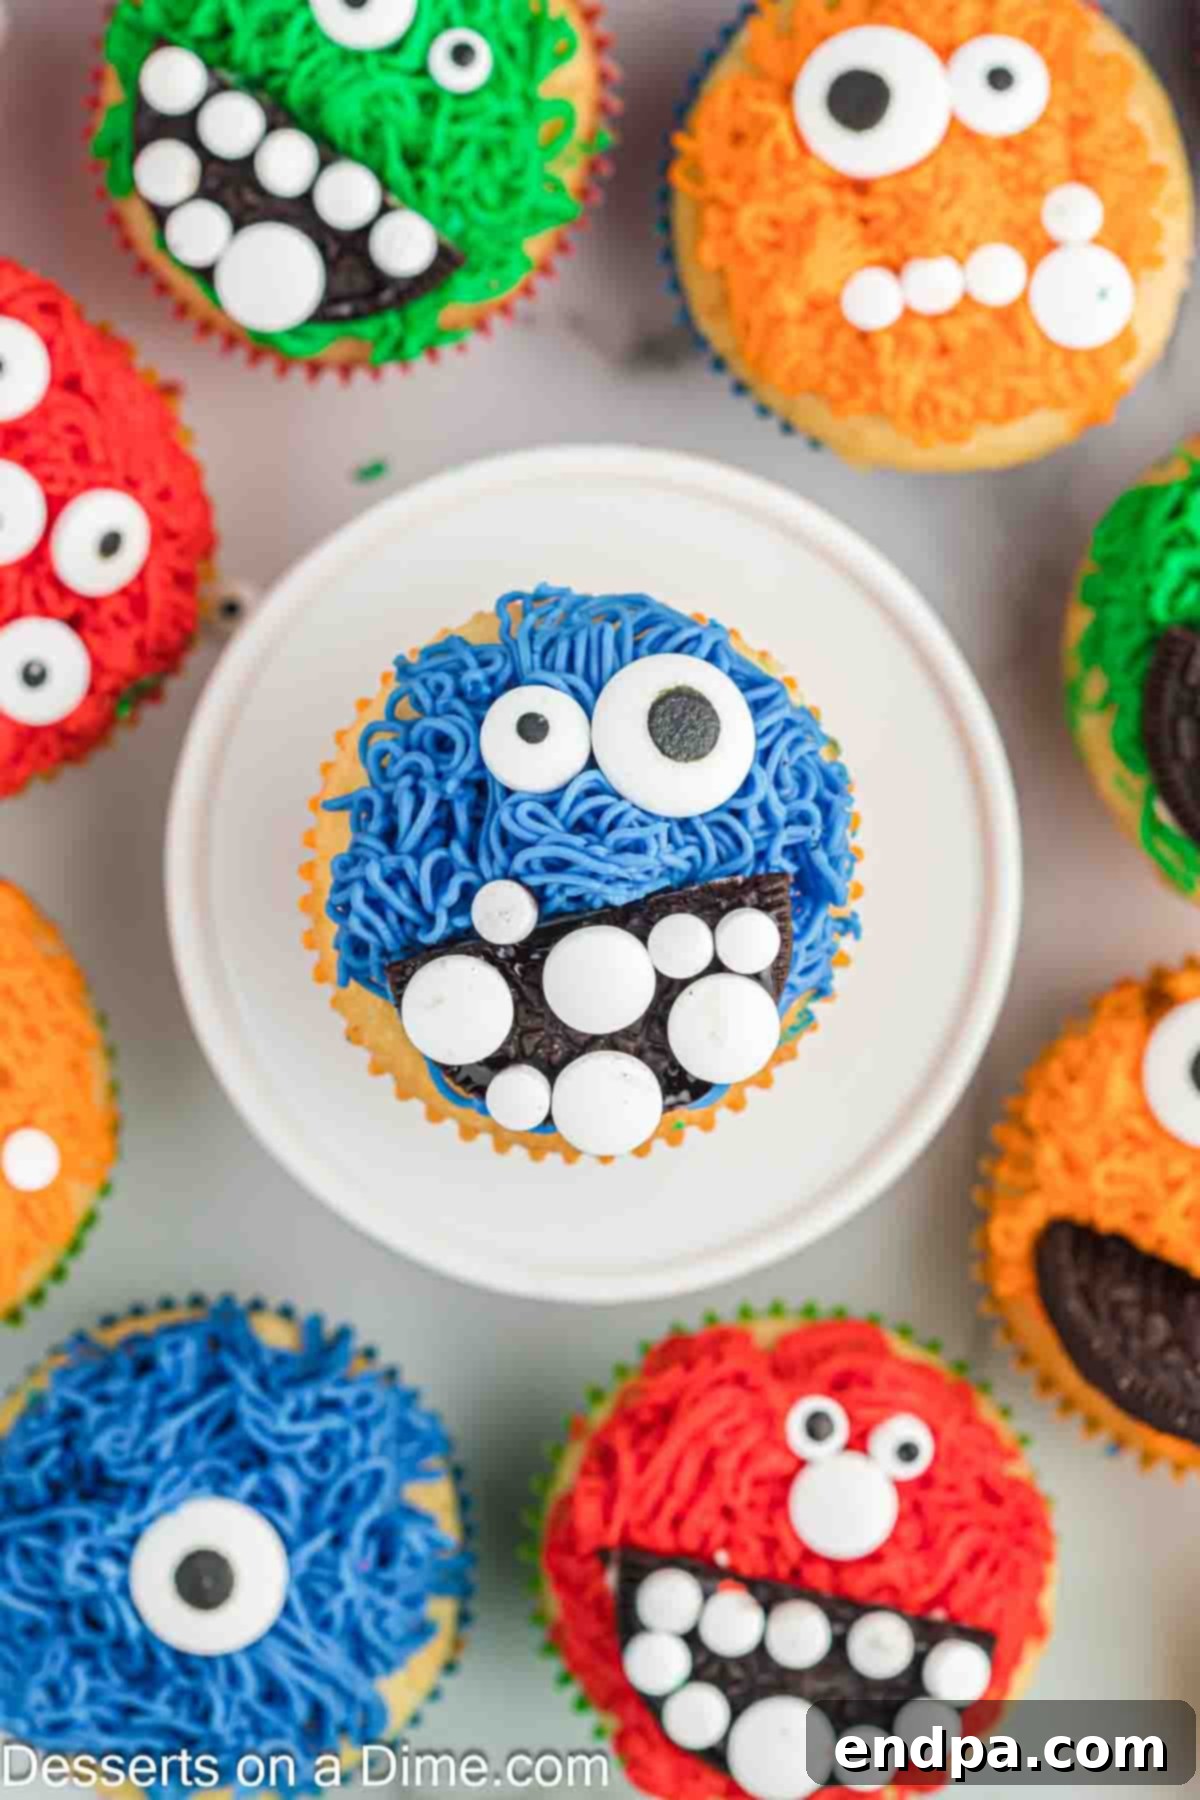
Step 9: Serve and Enjoy! Once all your monsters are decorated, they are ready to be admired and devoured. Arrange them on a platter or cake stand for a show-stopping display. Don’t forget to snap a picture before they disappear!
Expert Tips for Flawless Monster Cupcakes
Even though this recipe is designed to be simple, a few professional tips can elevate your monster cupcakes from great to absolutely spectacular:
- Chill Soft Frosting if Needed: If you find your buttercream frosting becoming too soft or runny while you’re piping, don’t panic! Simply pop the piping bag (or the bowl of frosting) into the refrigerator for 10-15 minutes. This will help it firm up to the desired consistency for easier piping and better-defined “fur.”
- Always Keep Your Piping Bag Twisted: To prevent frosting from oozing out of the top of your piping bag and creating a sticky mess, make sure to keep the top tightly twisted. This also helps maintain pressure for consistent piping. Refill the bag as needed to avoid overfilling, which can make it harder to handle.
- Embrace Imperfection for Monster Charm: Remember, these are monsters! They are not meant to be perfectly symmetrical or uniform. In fact, slight imperfections in the icing design or the placement of eyes often add to their unique charm and character. Don’t stress if a strand of “fur” goes astray – it just makes your monster more endearing and gives it personality!
- Ensure Cupcakes are Completely Cooled: This tip is paramount! Attempting to frost warm cupcakes is a recipe for disaster. The heat will melt your beautifully piped buttercream, causing your adorable monster faces to slide off and lose all shape. Allow your cupcakes to cool completely on a wire rack, preferably for at least an hour, before you even think about decorating.
- Use Gel Food Coloring for Best Results: As mentioned in the ingredients, gel food coloring provides much more vibrant and concentrated colors compared to liquid drops. A little goes a long way, and it won’t thin out your frosting, which is crucial for maintaining the right piping consistency.
- Practice Your Piping: If you’re new to piping, try practicing on a piece of parchment paper or a plate first. You can scrape the frosting back into the bag and reuse it. This helps build confidence and refine your technique before you start on the actual cupcakes.
- Involve the Kids Safely: These cupcakes are a fantastic activity for kids! Let them help with mixing the cake batter (with supervision), choosing colors, and especially placing the candy eyeballs and Oreo mouths. It’s a wonderful way to foster creativity and create lasting memories.
Storage and Make-Ahead Suggestions
Proper storage is key to keeping your Monster Cupcakes fresh and delicious. Planning ahead can also save you valuable time, especially when preparing for a party!
Store any leftover decorated cupcakes in an airtight container at room temperature for up to 3-4 days. To maintain their freshness and prevent them from drying out, ensure the container is tightly sealed. If you need to keep them longer, you can refrigerate the cupcakes for up to one week. Be aware that refrigerating can sometimes alter the texture of the cupcake, making it slightly drier over time. It’s best to bring refrigerated cupcakes back to room temperature for about 15-30 minutes before serving for optimal flavor and texture.
If you’re making these for a Halloween party or a special event, you can easily prepare them the day before. Bake the cupcakes, prepare and color the frosting, and decorate them as desired. Then, store them at room temperature in an airtight container. They will still look fantastic and taste amazing, giving you one less thing to worry about on party day!
Serving Suggestions for Your Halloween Party
Presenting your Monster Cupcakes creatively can make them an even bigger hit at any Halloween gathering. Here are some ideas to make your spooky treats shine:
- Themed Dessert Platter: Arrange your colorful monster cupcakes on a large platter alongside other Halloween treats like ghost brownies, spiderweb cookies, or candy corn. The vibrant colors will create an impressive focal point.
- “Monster Lab” Display: Create a fun “monster lab” theme by placing cupcakes on different height stands. Add a few creepy-crawly plastic spiders, dry ice (for adult supervision), or bubbling cauldrons around them for a theatrical effect.
- Individual Treat Boxes: If you’re hosting a party, consider placing each monster cupcake in a clear, individual treat box. This makes them easy for guests to take home as party favors and protects your beautiful decorations.
- Pair with Spooky Drinks: Serve your monster cupcakes alongside some fun Halloween-themed beverages, like “witch’s brew” punch (green juice with gummy worms) or “bloody” cranberry spritzers.
- Interactive Decorating Station: For younger guests, you could bake and frost the plain cupcakes beforehand, then set up a “Decorate Your Own Monster” station with separate bowls of candy eyeballs, crushed Oreos, and various small candies. Let them unleash their own creativity!
More Fun and Festive Cupcake Recipes
Love baking and decorating cupcakes? Explore more of our exciting recipes perfect for any occasion:
- Cookie Monster Cupcakes
- Pinata Cupcakes
- Ice Cream Cone Cupcakes
- Classic Halloween Cupcakes
- Spider Web Cupcakes
I genuinely can’t wait for you to try these fantastic Monster Cupcakes for your next Halloween celebration or just as a fun baking project. They are sure to be a hit with everyone! Please take a moment to leave a comment and a star recipe rating once you’ve made them – your feedback is always appreciated!
Pin
Monster Cupcakes
Ingredients
For the Cupcakes:
- 1 pkg Vanilla Cake Mix (16 ounces)
- 1 1/4 cup Water
- 1/3 cup Vegetable Oil
- 3 Large Eggs
For the Frosting:
- 1 1/2 cup Unsalted Butter (room temperature)
- 4 1/2 cups Powdered Sugar
- 1 tablespoon vanilla extract
- 3 Tablespoons Heavy Cream
For the Decorations:
- Bright Blue, Red, Green and Orange Food Coloring (gel recommended for vibrant color)
- Candy Eyeballs (various sizes)
- Oreo Cookies
Instructions
For the Cupcakes:
- Preheat your oven to 350 degrees Fahrenheit (175°C) and line 2 standard cupcake pans with paper liners. This ensures the cupcakes won’t stick and makes for easy serving.
- In a large mixing bowl, combine the vanilla cake mix, water, vegetable oil, and eggs. Stir gently until all ingredients are just incorporated and the batter is smooth. Avoid overmixing, as this can lead to a dense cupcake texture.
- Carefully pour the prepared batter into each cupcake liner, filling them approximately ¾ full. This leaves room for the cupcakes to rise without overflowing.
- Bake the cupcakes for 18-21 minutes, or until a wooden toothpick inserted into the center of a cupcake comes out clean. This indicates they are fully cooked through.
- Once baked, remove the cupcakes from the oven and transfer them to wire racks. Allow them to cool completely before attempting to frost them. This is a crucial step to prevent the frosting from melting.
For the Frosting:
- In a large mixing bowl (preferably using a stand mixer with a paddle attachment), beat the room temperature unsalted butter until it’s wonderfully creamy, light, and fluffy. This can take 2-3 minutes.
- Slowly, and in gradual additions of about ½ cup at a time, mix the sifted powdered sugar into the butter mixture. Ensure that each addition of powdered sugar is completely incorporated before adding more, scraping down the sides of the bowl as needed. This prevents lumps and ensures a smooth frosting.
- Reduce the mixer speed to low and add in the heavy cream and vanilla extract. Beat for approximately 30 seconds to 1 minute, then increase the speed to medium-high and beat until the frosting reaches a smooth, fluffy consistency that holds its shape well.
- Divide the finished buttercream frosting evenly into 4 separate bowls. Use gel food coloring to dye each bowl a different vibrant color – for example, bright blue, red, green, and orange. Mix thoroughly until the colors are rich and consistent.
For the Decorations:
- Fit a piping bag with a grass icing tip (such as Wilton #233) and fill it with one color of frosting. Pipe the “fur” onto each of the completely cooled cupcakes. To do this, hold the piping bag perpendicular to the cupcake, gently squeeze, and lift up as the frosting emerges, creating a shaggy texture. Start from the outside edge and work your way inward to cover the entire top of the cupcake.
- Continue decorating an assortment of monsters. For a batch of 24, aim for roughly 6 blue monsters, 6 red monsters, 6 green monsters, and 6 orange monsters to create a diverse and colorful display.
- Now for the fun part! Decorate your monsters with candy eyeballs. Use various sizes and numbers of eyes to give each monster a unique personality. For the mouths, use whole Oreo cookies or gently twist and break them in half to create different shapes and expressions. Press them gently into the frosting.
- Once all your adorable monsters are fully decorated, your cupcakes are ready to serve and enjoy!
Recipe Notes
Nutrition Facts
Pin This Now to Remember It Later
Pin Recipe
