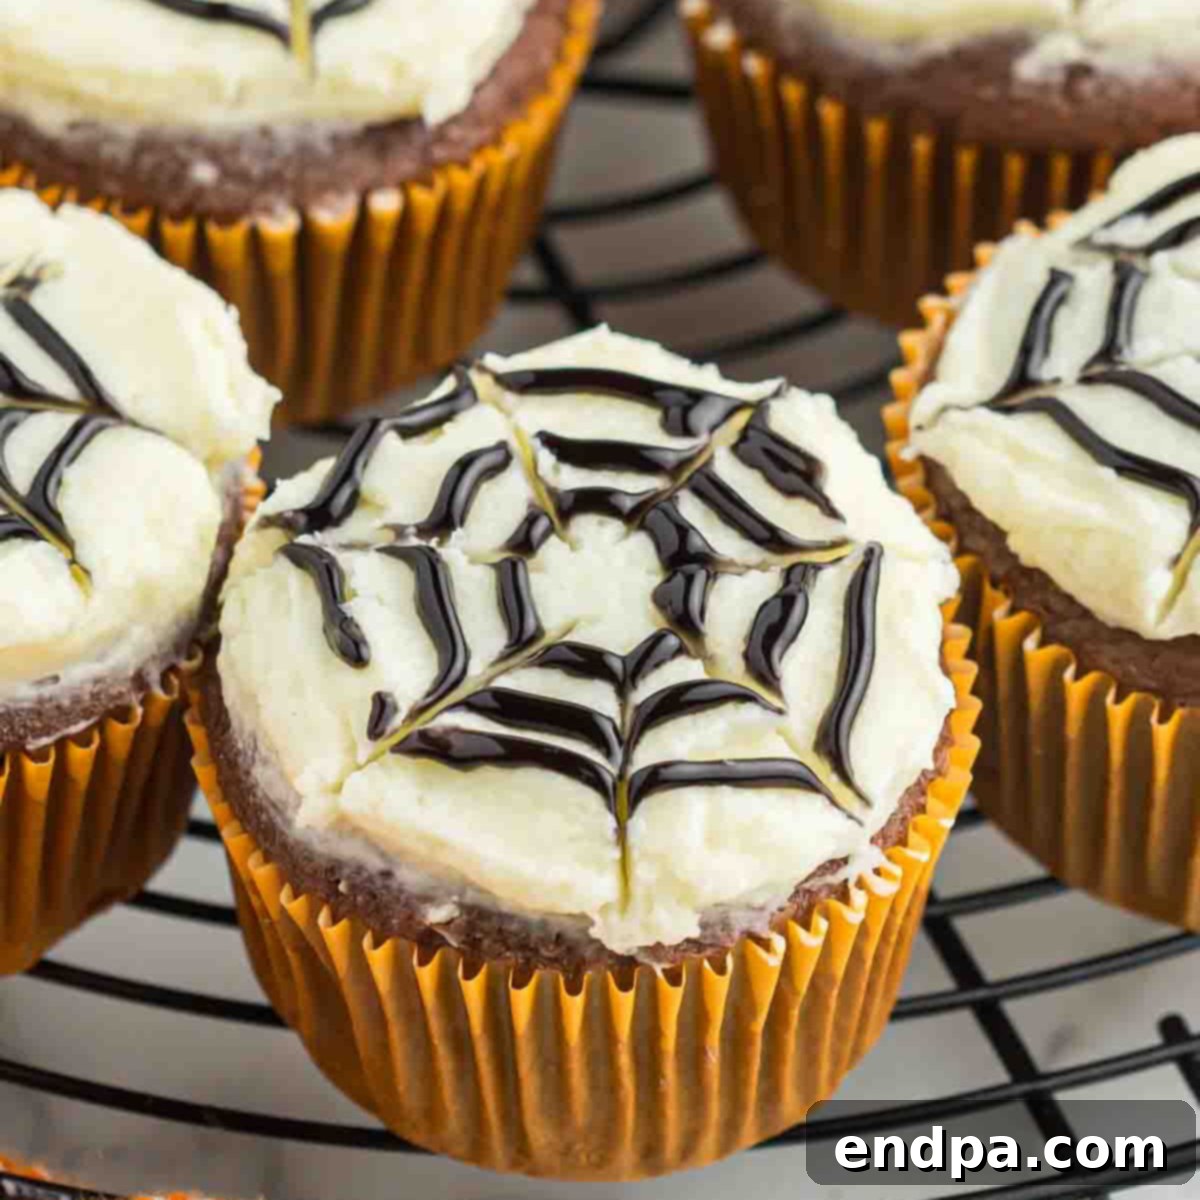
Prepare to cast a delicious spell this Halloween with our enchanting Spider Web Cupcakes! These treats are not just visually striking, but also incredibly simple to create, making them the ideal addition to any spooky celebration. Whether you’re hosting a grand Halloween party, a cozy family gathering, or just want to whip up something fun for the kids, this recipe promises to deliver both delight and ease. Forget complicated baking – our straightforward method ensures perfect, festive cupcakes every time, adorned with a classic spider web design that truly captures the spirit of the season.
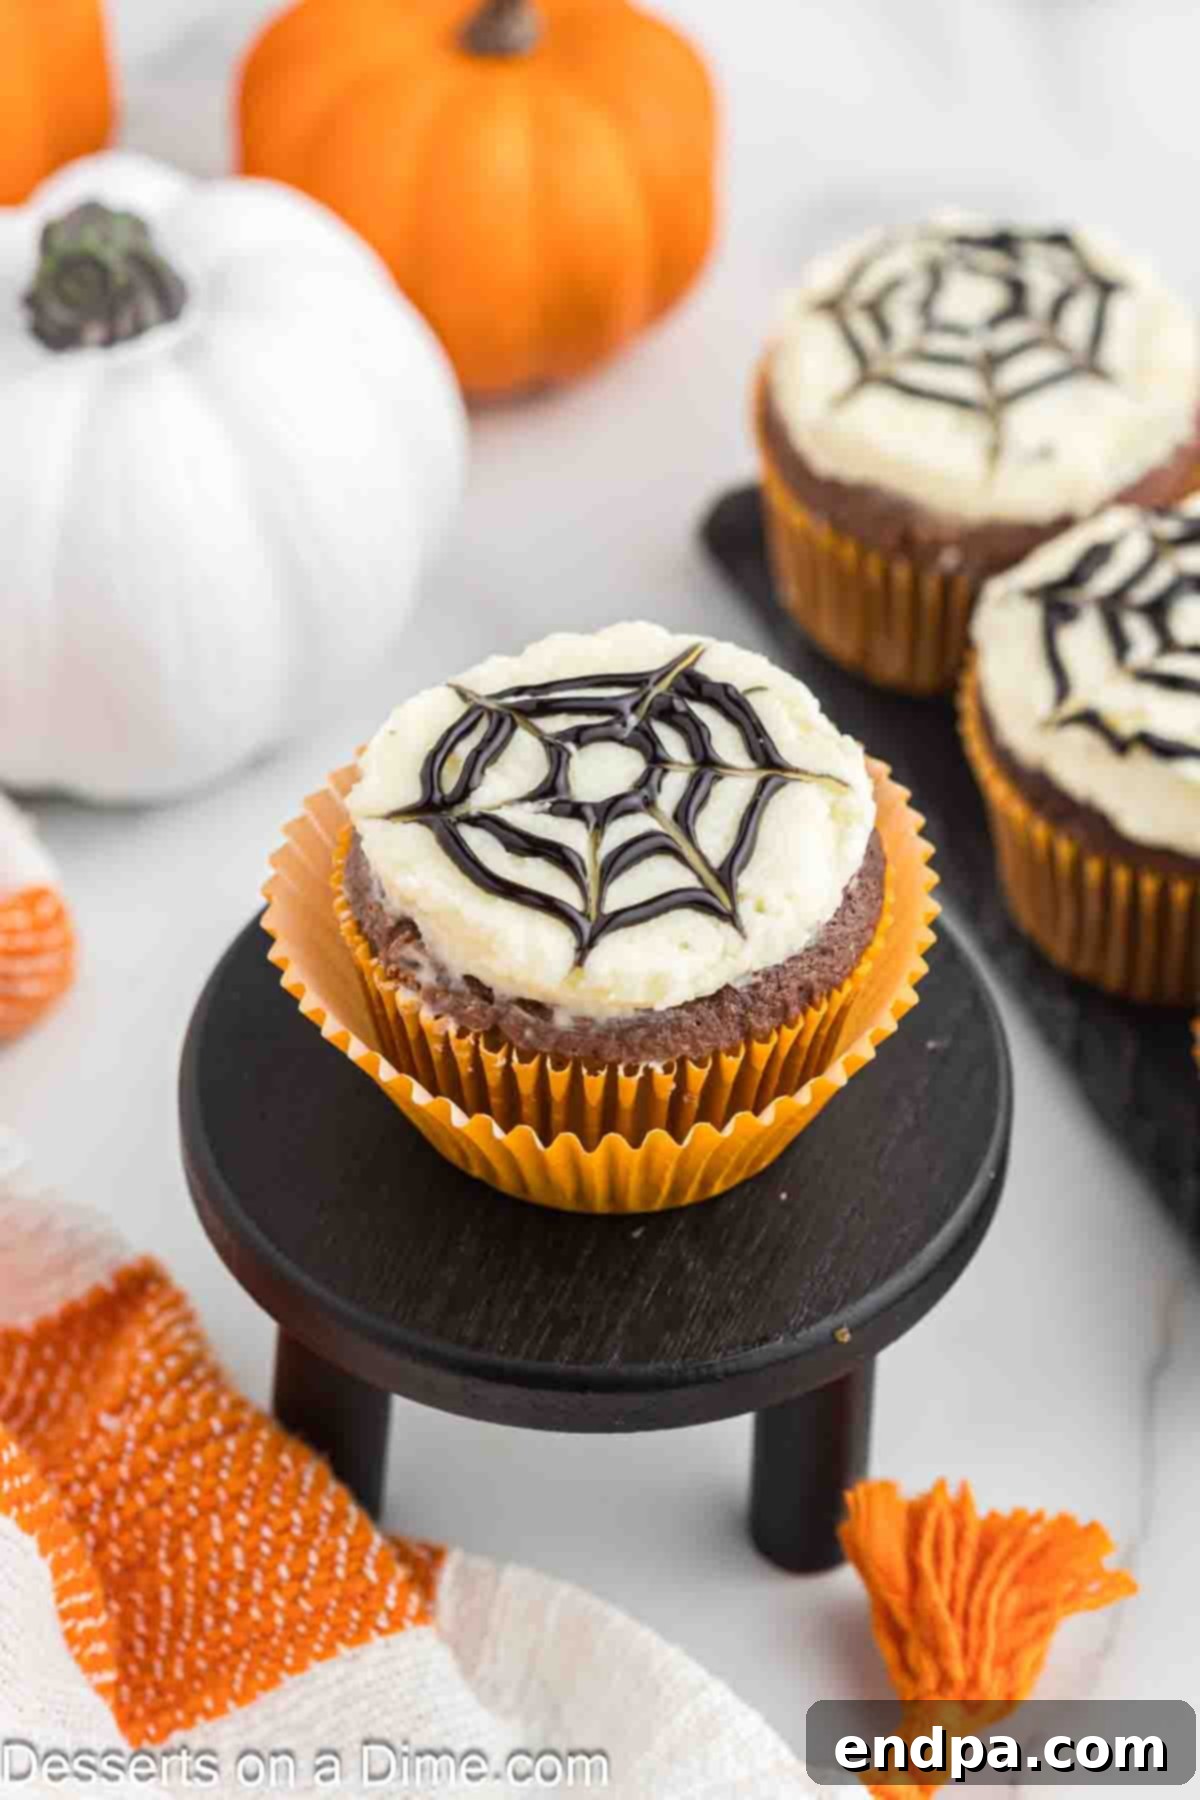
What makes these easy Halloween desserts truly shine is their perfect blend of simplicity and homemade charm. Starting with a convenient cake mix significantly streamlines the baking process, allowing even novice bakers to achieve professional-looking results without the stress. The real magic happens with the rich, creamy homemade frosting, which not only tastes divine but also provides the perfect canvas for the iconic spider web design. This unique combination elevates a simple cupcake into a show-stopping Halloween party treat that is sure to impress all your ghoulish guests.
If you have a penchant for all things creepy-crawly and delicious, be sure to explore more of our spider-themed desserts. Delight in the fudgy goodness of Spider Brownies or the whimsical charm of Halloween Spider Cookies. For those seeking a wider array of festive delights, our collection of Halloween Cupcakes offers endless inspiration for fun and delicious spooky treats. The possibilities are truly boundless when it comes to celebrating Halloween with creative and delectable desserts.
Table of Contents
- Why These Spider Web Cupcakes Are a Must-Make
- Essential Ingredients for Your Spooky Creation
- Creative Variations and Substitutions
- Step-by-Step Guide: How to Make Spider Web Cupcakes
- Mastering the Fluffy Frosting
- How to Decorate the Perfect Spider Web
- Storage and Make-Ahead Tips
- Expert Baking and Decorating Advice
- Frequently Asked Questions
- More Easy Halloween Cupcake Recipes
- Tasty Halloween Dessert Recipes
Why These Spider Web Cupcakes Are a Must-Make
When it comes to Halloween treats, these Spider Web Cupcakes truly stand out as a crowd-pleaser and an essential addition to any festive occasion. Their charm lies not only in their spooky visual appeal but also in the sheer ease of preparation, making them a favorite for both experienced bakers and those new to the kitchen. Imagine the smiles and gasps of delight when your guests discover these perfectly themed treats on your dessert table! They’re ideal for a bustling Halloween party, a school bake sale, or simply as a fun and engaging activity to enjoy with children on a crisp autumn afternoon.
The beauty of this recipe starts with its foundation: a simple cake mix. This shortcut eliminates the need for numerous ingredients and extensive measuring, significantly cutting down on prep time and ensuring consistent, delicious results every single time. It’s the secret to stress-free Halloween baking! But the ease doesn’t stop there. While the cupcakes bake, you can whip up the luscious homemade frosting. This rich, velvety topping is what truly elevates these treats, providing a decadent flavor that complements the chocolate cake perfectly. And of course, the grand finale is the captivating spider web design. This artistic touch is surprisingly simple to achieve, yet it transforms ordinary cupcakes into edible works of Halloween art. It’s a delightful combination of convenience, flavor, and festive creativity that makes these spider web cupcakes an undeniable favorite.
Essential Ingredients for Your Spooky Creation
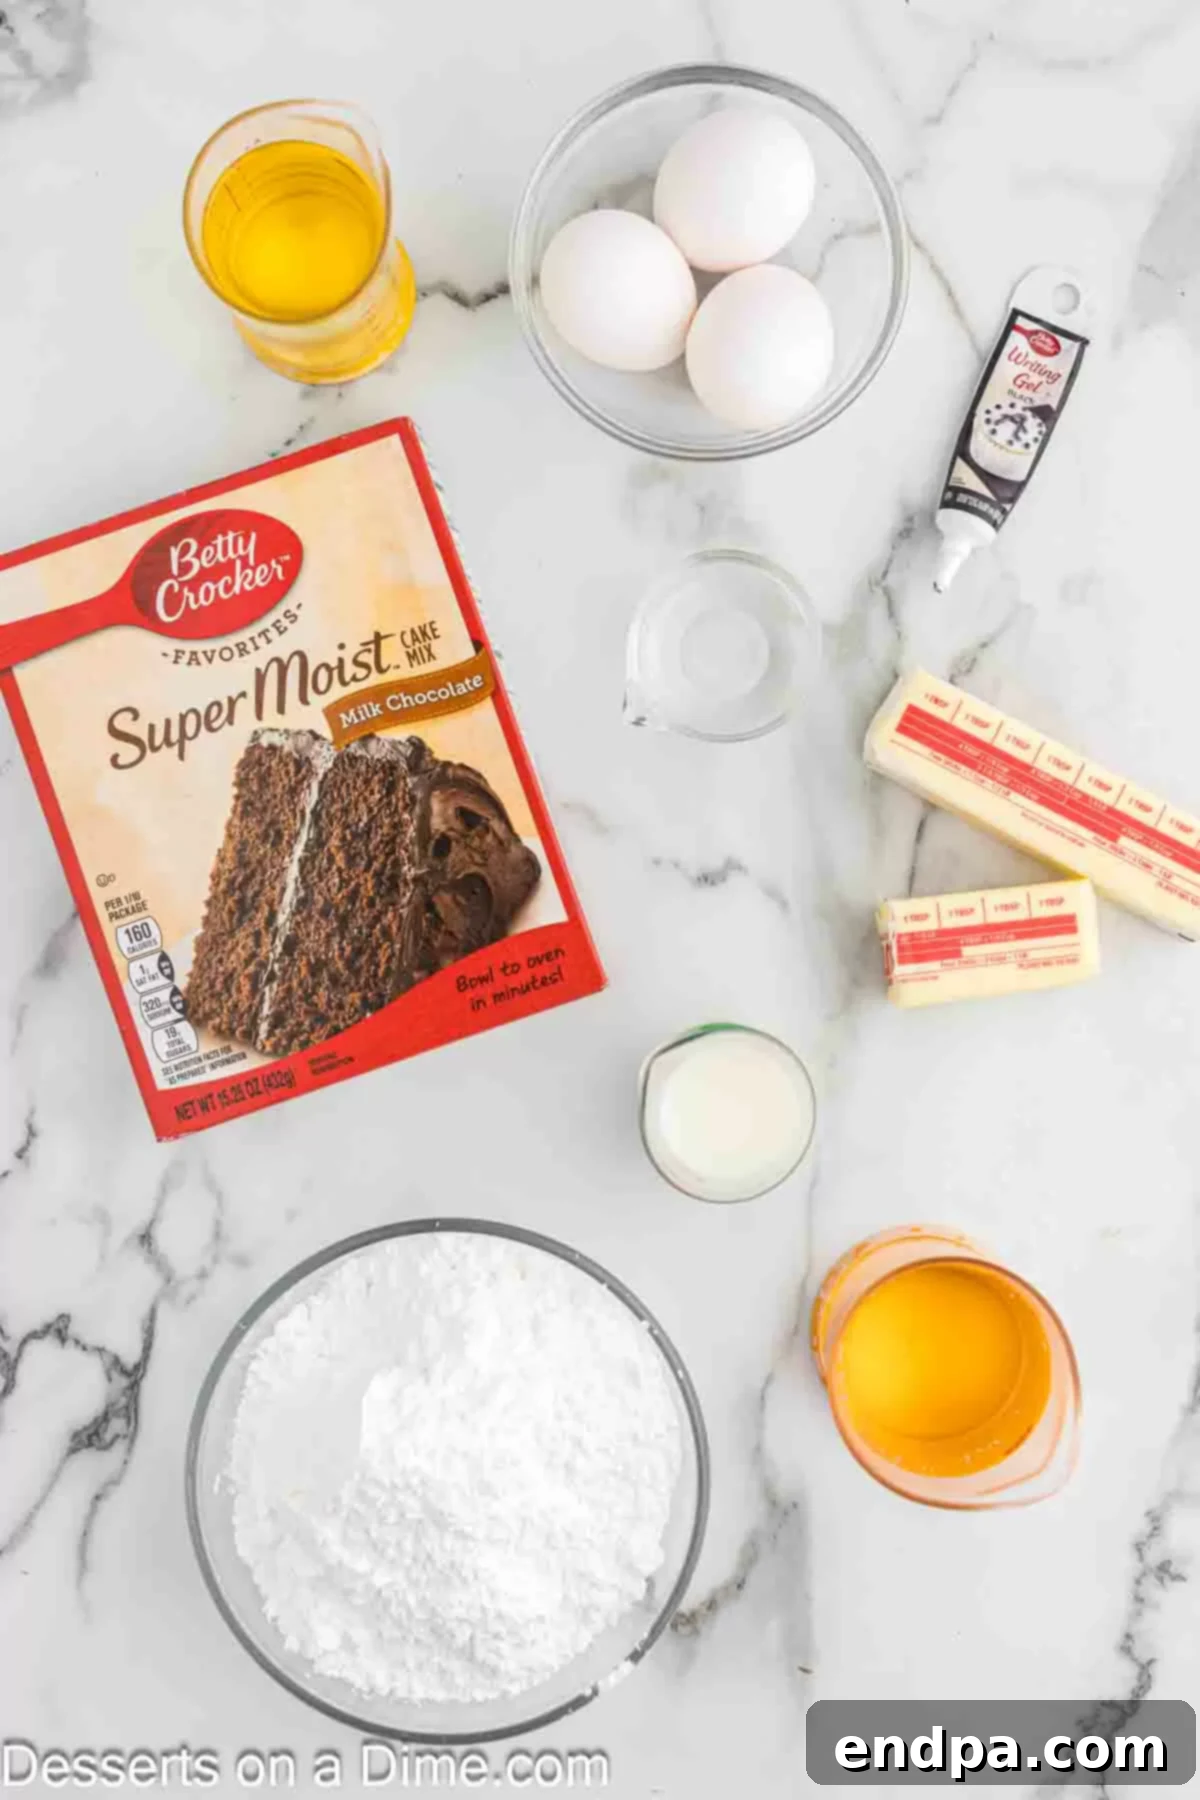
Crafting these delectable Spider Web Cupcakes requires a few simple ingredients, easily found at any grocery store. We’ve streamlined the process by starting with a cake mix, but we encourage you to use fresh, high-quality ingredients for the homemade frosting and decorations to ensure the best flavor and appearance.
For the Moist Chocolate Cupcakes:
- Chocolate Cake Mix: A standard 16-ounce box is all you need for a quick and easy base. Any brand will work beautifully, providing a rich chocolate flavor.
- Vegetable Oil: Essential for keeping your cupcakes incredibly moist and tender.
- Large Eggs: Act as a binder and help create a light, airy texture.
- Water: To achieve the perfect batter consistency as specified by your cake mix instructions.
For the Creamy Homemade Frosting:
- Unsalted Butter, softened: The foundation of our rich buttercream. Ensure it’s at room temperature for smooth, lump-free frosting.
- Powdered Sugar (Confectioners’ Sugar): Provides sweetness and structure to the frosting, yielding a smooth, pipeable consistency.
- Clear Vanilla Extract: For a clean, classic vanilla flavor without adding color to your frosting, which is especially helpful if you plan to dye it.
- Milk: A splash of milk helps achieve the perfect light and fluffy texture for your buttercream. You can use any type of milk you prefer.
For the Iconic Spider Web Design:
- Semi-Sweet Chocolate Chips: These will melt down to create the dark lines of your spider web. Good quality chips melt more smoothly.
- Shortening: A small amount of shortening is key to making the melted chocolate smooth and easy to pipe, preventing it from hardening too quickly.
Creative Variations and Substitutions
One of the joys of baking is the ability to customize recipes to suit your taste, dietary needs, or party theme. These Spider Web Cupcakes are incredibly versatile, offering numerous ways to add your personal touch and make them truly unique for your Halloween festivities.
- Dark Chocolate Elegance: Instead of the traditional white frosting with dark chocolate webs, switch things up for a sophisticated look. Decorate your cupcakes with rich chocolate icing and then create the spider web design using melted white chocolate. The striking contrast is not only visually stunning but also offers a different flavor profile, making for another fun and delicious design to try.
- From Scratch Goodness: While a cake mix offers unparalleled convenience, feel free to substitute with your favorite homemade chocolate cupcake recipe if you prefer baking from scratch. Ensure the cupcakes are completely cooled before frosting and decorating.
- Spooky Critter Toppers: For an extra dose of Halloween spirit, adorn your finished spider web cupcakes with fun toppers. Small plastic spiders, playful spider rings, or even edible chocolate spiders (you can make these with melted chocolate in a mold!) will instantly amplify the festive decoration and delight your guests, especially children.
- Reverse Web Magic: Get creative with your spider web design! Instead of dark chocolate on light frosting, try melting white chocolate and dyeing it with black food coloring for a distinct contrast. This can offer a striking visual effect, especially on lighter-colored frostings.
- Vibrant Frosting Colors: Unleash your inner artist by experimenting with different frosting colors. Purple icing can be particularly enchanting and festive for Halloween, providing a vibrant backdrop for white or black spiderwebs. After piping the webs, sprinkle with fun, Halloween-themed sprinkles for an added touch of sparkle and whimsy.
- Miniature Marvels: Transform this recipe into adorable mini cupcakes for bite-sized delights. Adjust baking time accordingly (typically 10-15 minutes). Keep in mind that you’ll have less surface area for the intricate spider web design, but they will still be charming and delicious. They’re perfect for larger gatherings or when you want to offer a variety of treats.
- Different Cake Flavors: Don’t limit yourself to chocolate! A classic vanilla or even a spooky red velvet cake mix could serve as a fantastic base. Just ensure the frosting color complements your web design.
- Cream Cheese Frosting Alternative: For a tangy twist, consider using a delicious cream cheese frosting instead of buttercream. Just ensure it’s firm enough to hold the chocolate web design.
Step-by-Step Guide: How to Make Spider Web Cupcakes
Creating these festive Spider Web Cupcakes is a straightforward process, designed to be enjoyable for bakers of all skill levels. Follow these simple steps for perfectly baked, delicious cupcakes.
Making the Cupcakes:
- Step 1: Prepare Your Baking Station. Begin by preheating your oven to 350 degrees Fahrenheit (175°C). This ensures your oven is at the correct temperature for even baking. Next, line two standard 12-cup muffin pans with cupcake liners. You can choose festive colors like yellow, orange, or classic black liners to enhance the Halloween theme.
- Step 2: Combine the Wet and Dry Ingredients. In a large mixing bowl, combine the chocolate cake mix with the specified amounts of water, vegetable oil, and large eggs. Using an electric mixer (either a hand mixer or stand mixer) on medium speed, beat the ingredients until they are just combined and smooth. Be careful not to overmix, as this can lead to tough cupcakes. Scrape down the sides of the bowl to ensure all ingredients are thoroughly incorporated.
- Step 3: Fill the Cupcake Liners. Evenly distribute the cupcake batter among the prepared liners. A good rule of thumb is to fill each liner approximately ¾ full. This allows the cupcakes to rise without overflowing, creating a beautifully domed top. A large cookie scoop or ice cream scoop can be very helpful for consistent filling.
- Step 4: Bake to Perfection. Carefully place the muffin pans into the preheated oven. Bake for 18-21 minutes, or until a wooden toothpick inserted into the center of a cupcake comes out clean. Baking times can vary slightly depending on your oven, so keep an eye on them.
- Step 5: Cool Completely. Once baked, remove the cupcakes from the oven. Let them cool in the muffin pans for a few minutes before transferring them to a wire rack to cool completely. This is a crucial step! Attempting to frost warm cupcakes will cause your frosting to melt and slide off, ruining your beautiful design. Patience is key here.
Mastering the Fluffy Frosting
A delicious cupcake isn’t complete without a perfectly fluffy and creamy frosting. Our homemade buttercream is simple to make and provides the ideal base for your spider web design.
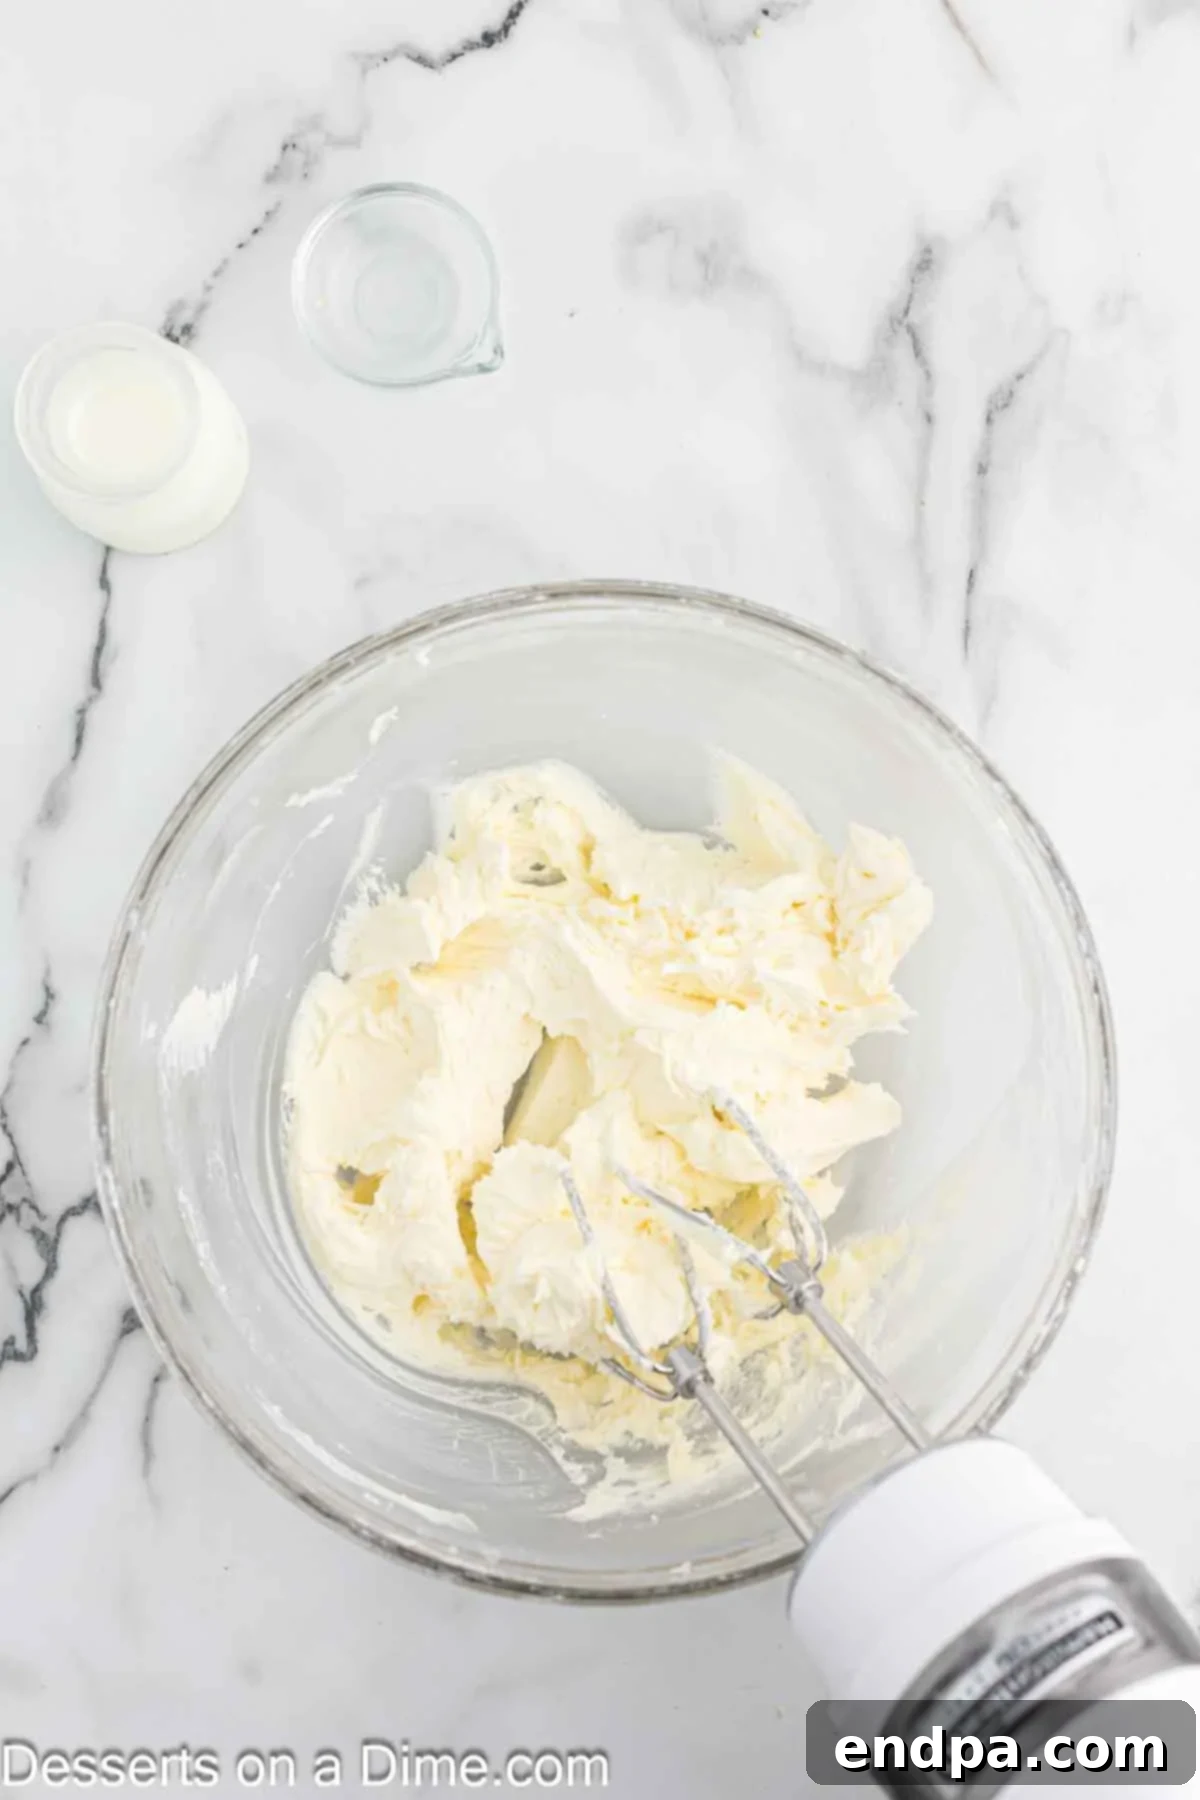
Step 1: Cream Butter and Sugar. In a large mixing bowl, using an electric mixer, cream together the softened unsalted butter and powdered sugar. Start on low speed to avoid a cloud of sugar, then gradually increase to medium-high speed. Beat until the mixture is light, fluffy, and smooth, with no lumps of butter remaining. This creaming process incorporates air, making the frosting wonderfully light.
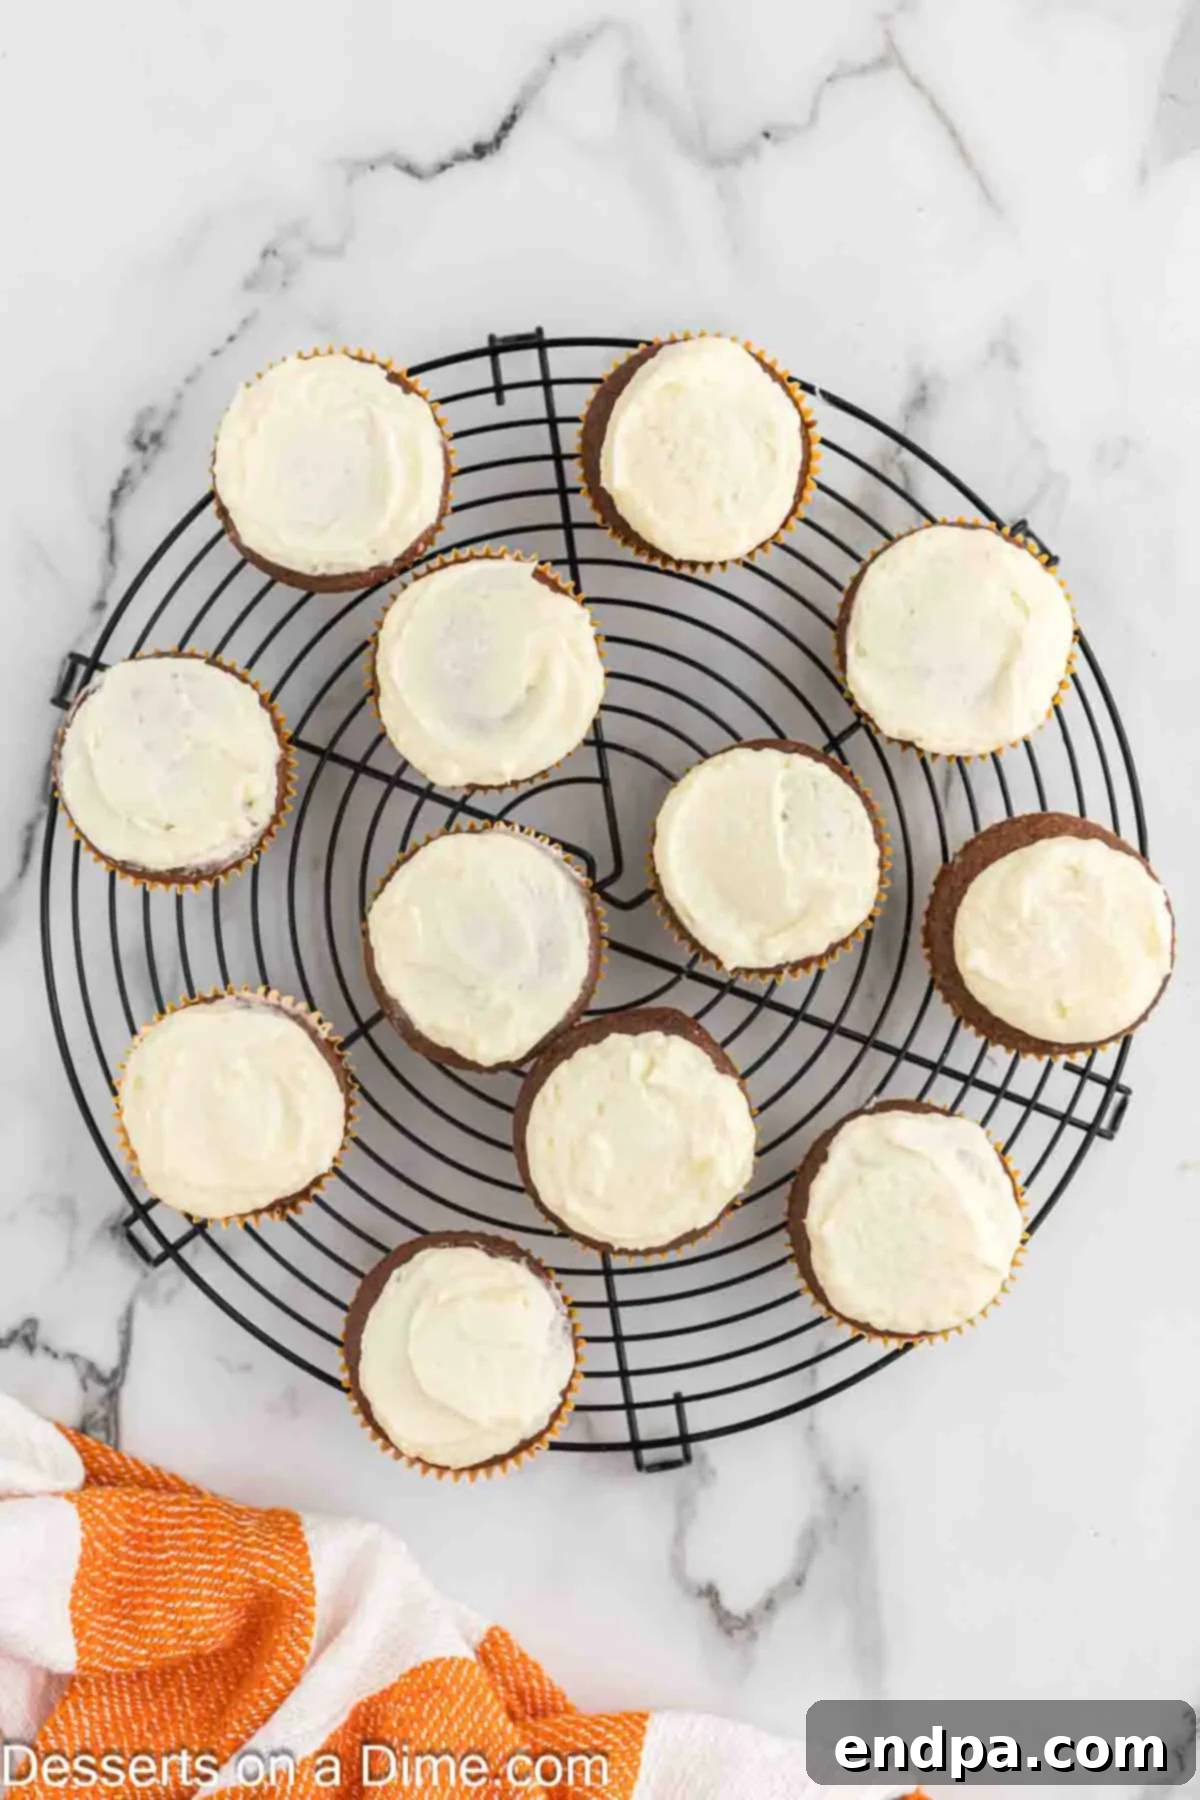
Step 2: Add Liquid and Flavor. Pour in the milk and clear vanilla extract. Continue mixing on medium-high speed for another 1-2 minutes. The frosting should transform into a beautifully light, airy, and fluffy consistency. If it’s too thick, add a tiny bit more milk, one teaspoon at a time, until you reach your desired consistency. If it’s too thin, add a tablespoon more powdered sugar. This homemade frosting is the perfect sweet complement to the chocolate cupcakes.
Step 3: Frost the Cupcakes. Once your frosting is ready and your cupcakes are completely cool, it’s time to apply the frosting. You can use an offset spatula for a rustic swirl, or a piping bag with your favorite tip (a round or star tip works well) for a more professional look. Apply a generous layer of frosting to the top of each cupcake, creating a smooth or swirled surface that will serve as the canvas for your spider web.
How to Decorate the Perfect Spider Web
The spider web design is the signature element of these Halloween cupcakes. It’s surprisingly simple to create, even for those new to decorating, and yields a fantastic spooky effect!
- Step 1: Prepare the Melted Chocolate. Place your semi-sweet chocolate chips and shortening in a microwave-safe bowl. Heat the mixture in 30-second intervals in the microwave, stirring thoroughly after each interval. Continue this process until the chocolate is completely melted and smooth. The shortening helps ensure the chocolate is fluid enough for piping and doesn’t harden too quickly, giving you more time to work.
- Step 2: Transfer to a Piping Bag. Carefully transfer the melted chocolate mixture into a piping bag. If you don’t have a piping bag, a sturdy Ziploc bag will work perfectly. Simply snip off a tiny corner from one end of the bag using scissors. Start with a very small snip; you can always make it larger if needed, but you can’t make it smaller!
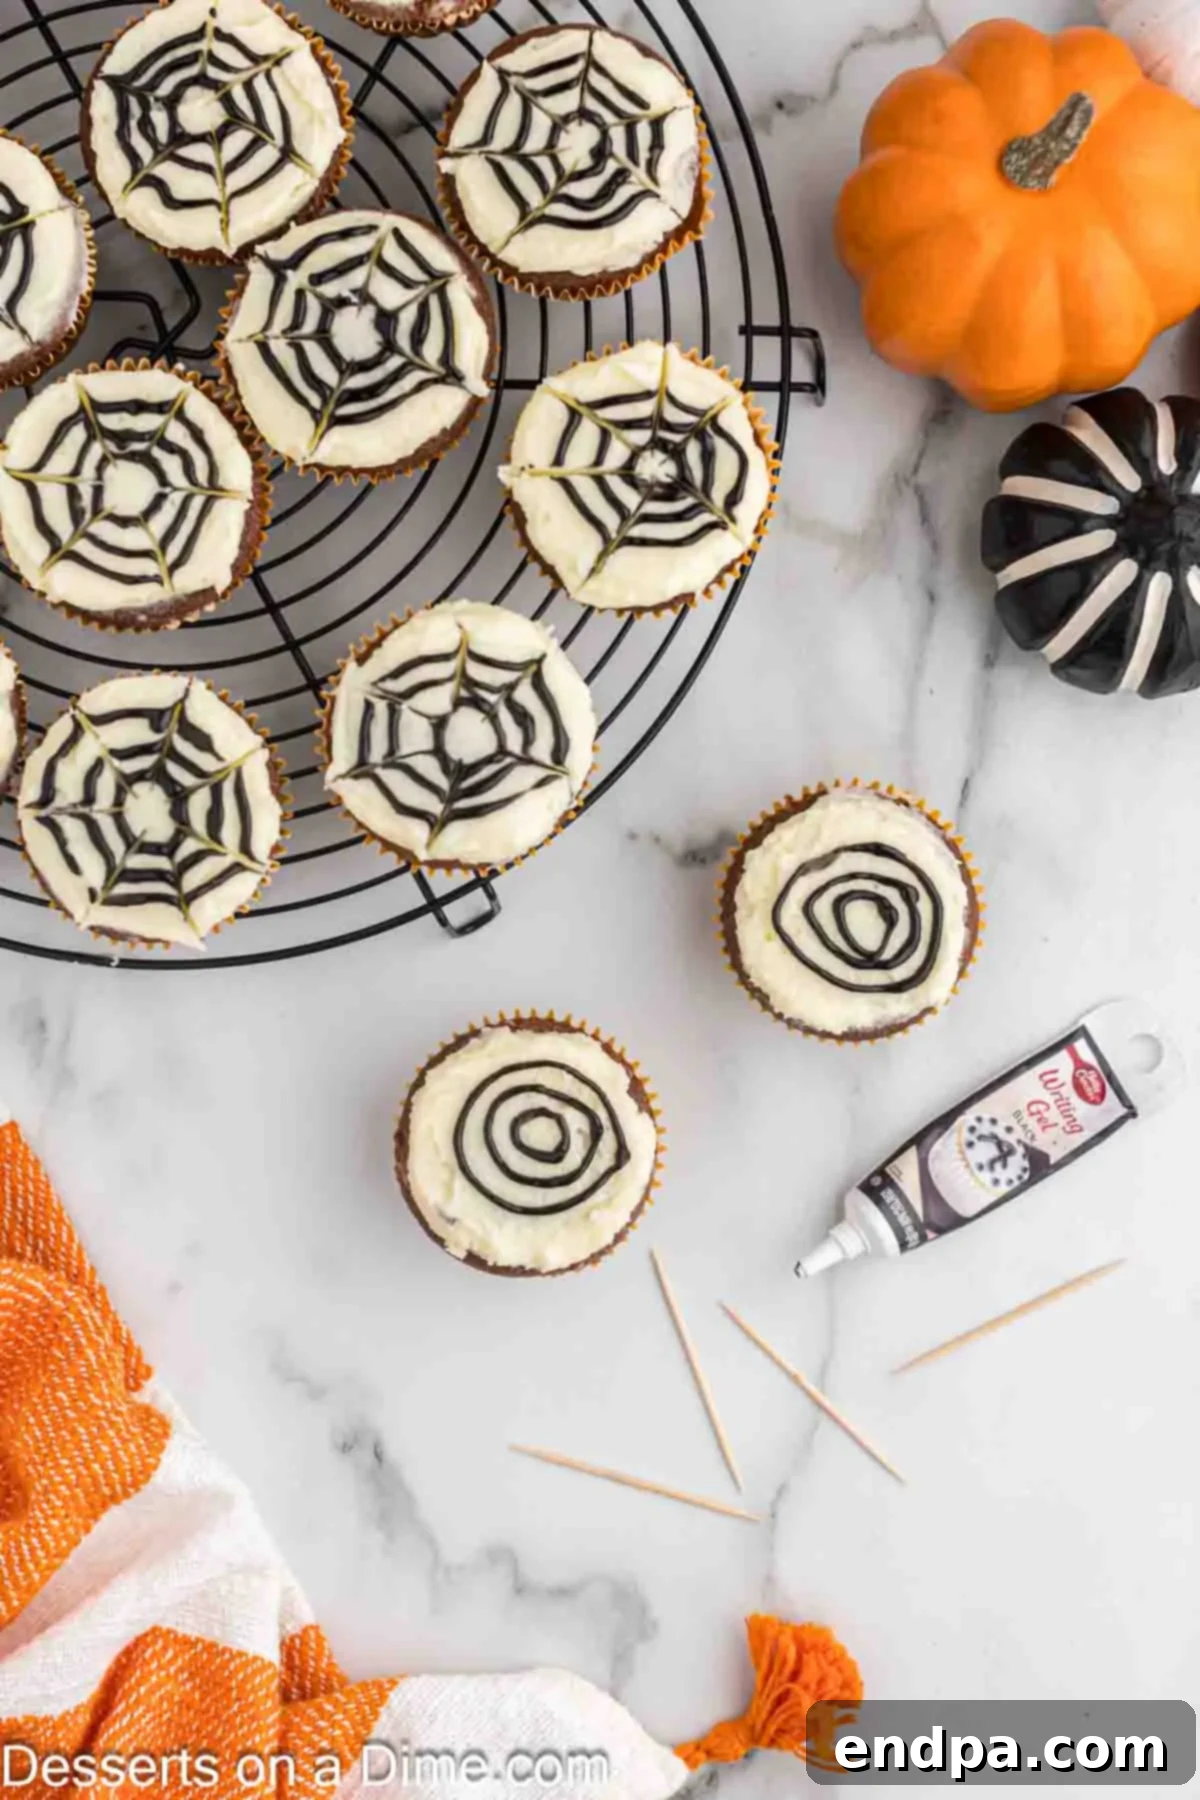
Step 3: Pipe Concentric Circles. Holding the piping bag steady, carefully pipe three concentric circles of the melted chocolate onto the frosted surface of each cupcake. Start with a small circle in the very center, then pipe a slightly larger circle around it, and finally, an even larger one near the outer edge of the cupcake. Aim for evenly spaced circles to create the best web effect.
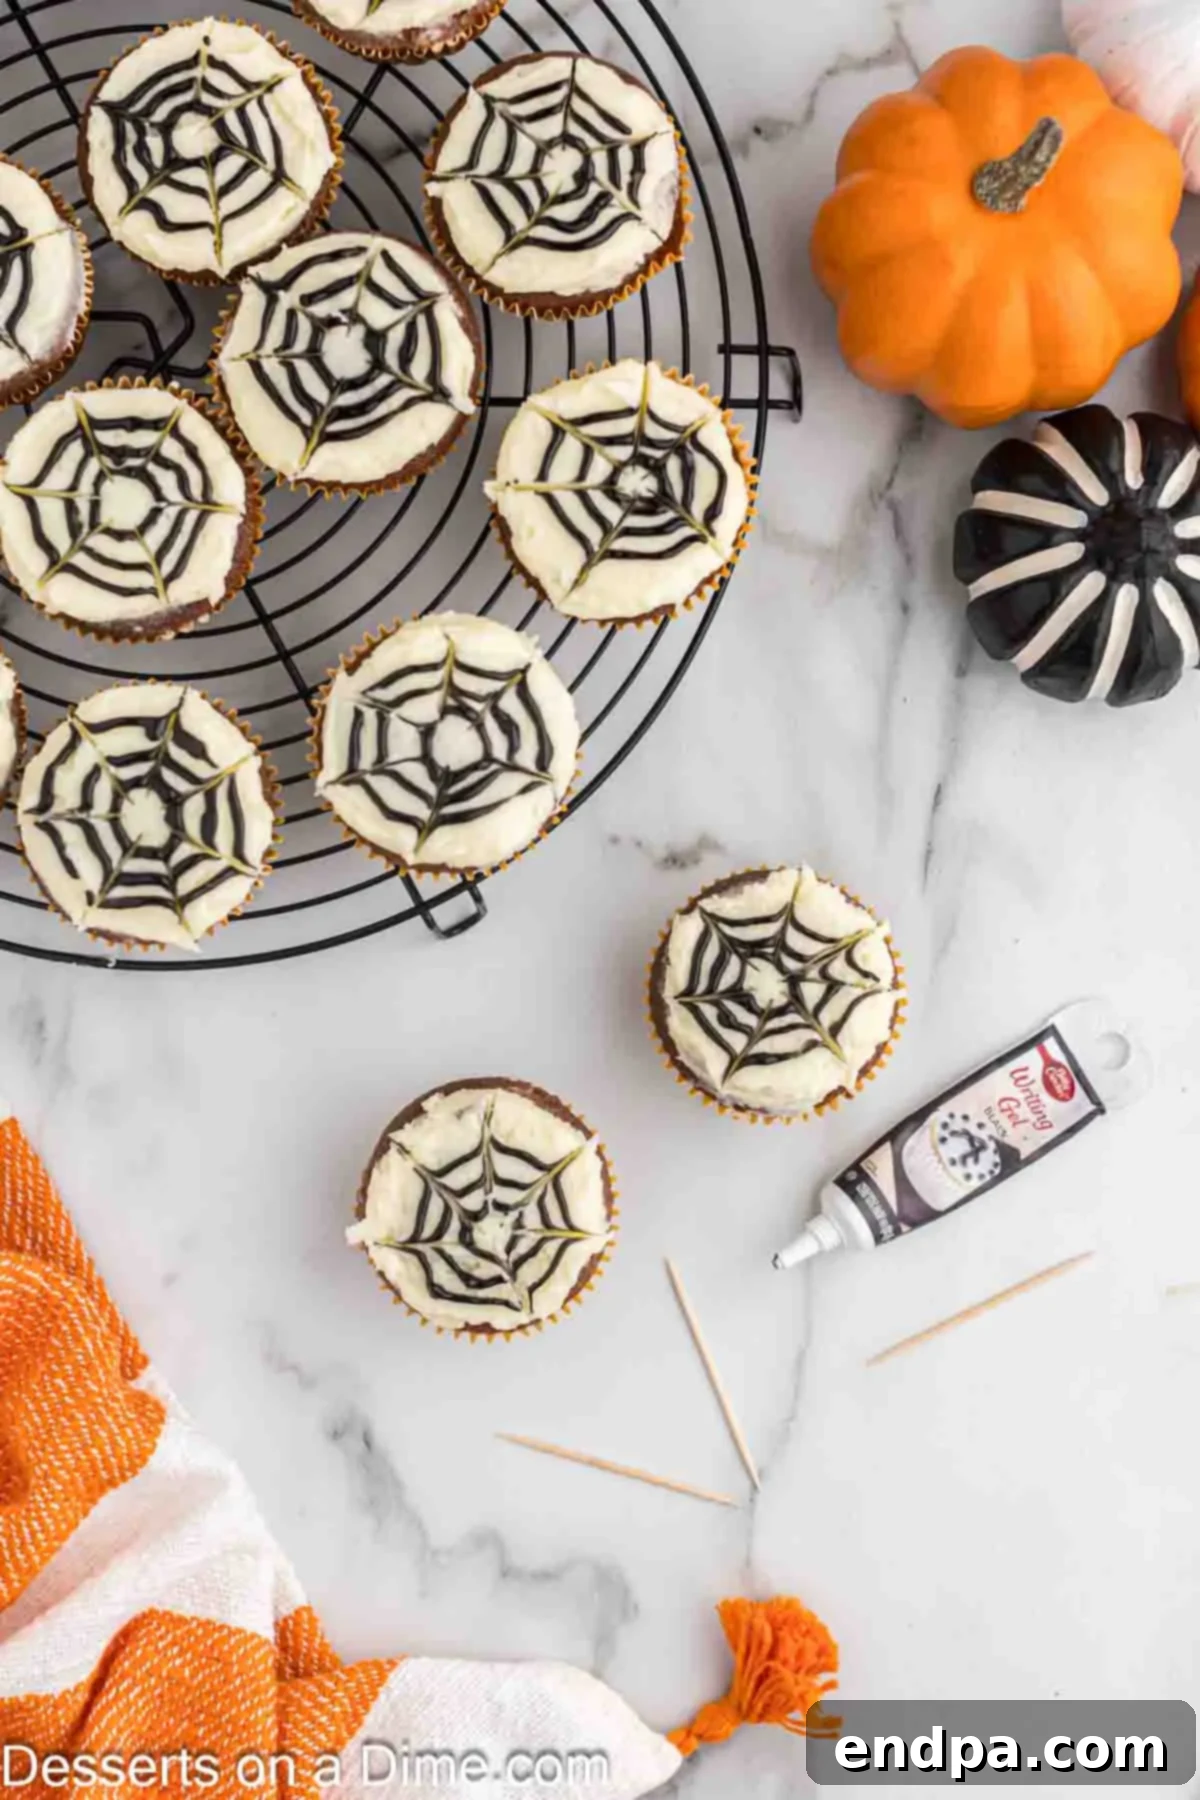
Step 4: Create the Web Effect. Immediately after piping the circles (before the chocolate sets!), grab a clean toothpick. Starting from the very center of the cupcake, gently drag the toothpick outwards through all three chocolate circles towards the outside edge of the cupcake. Repeat this motion 5-6 times around the cupcake, spacing your drag lines evenly. This action will pull the chocolate into fine lines, forming the intricate and spooky spider web design. Wipe your toothpick clean between each cupcake for the sharpest lines.
- Step 5: Decorate All Cupcakes. Continue this piping and dragging process until all of your frosted cupcakes are adorned with their captivating spider webs. Take your time to ensure each one looks spooktacular!
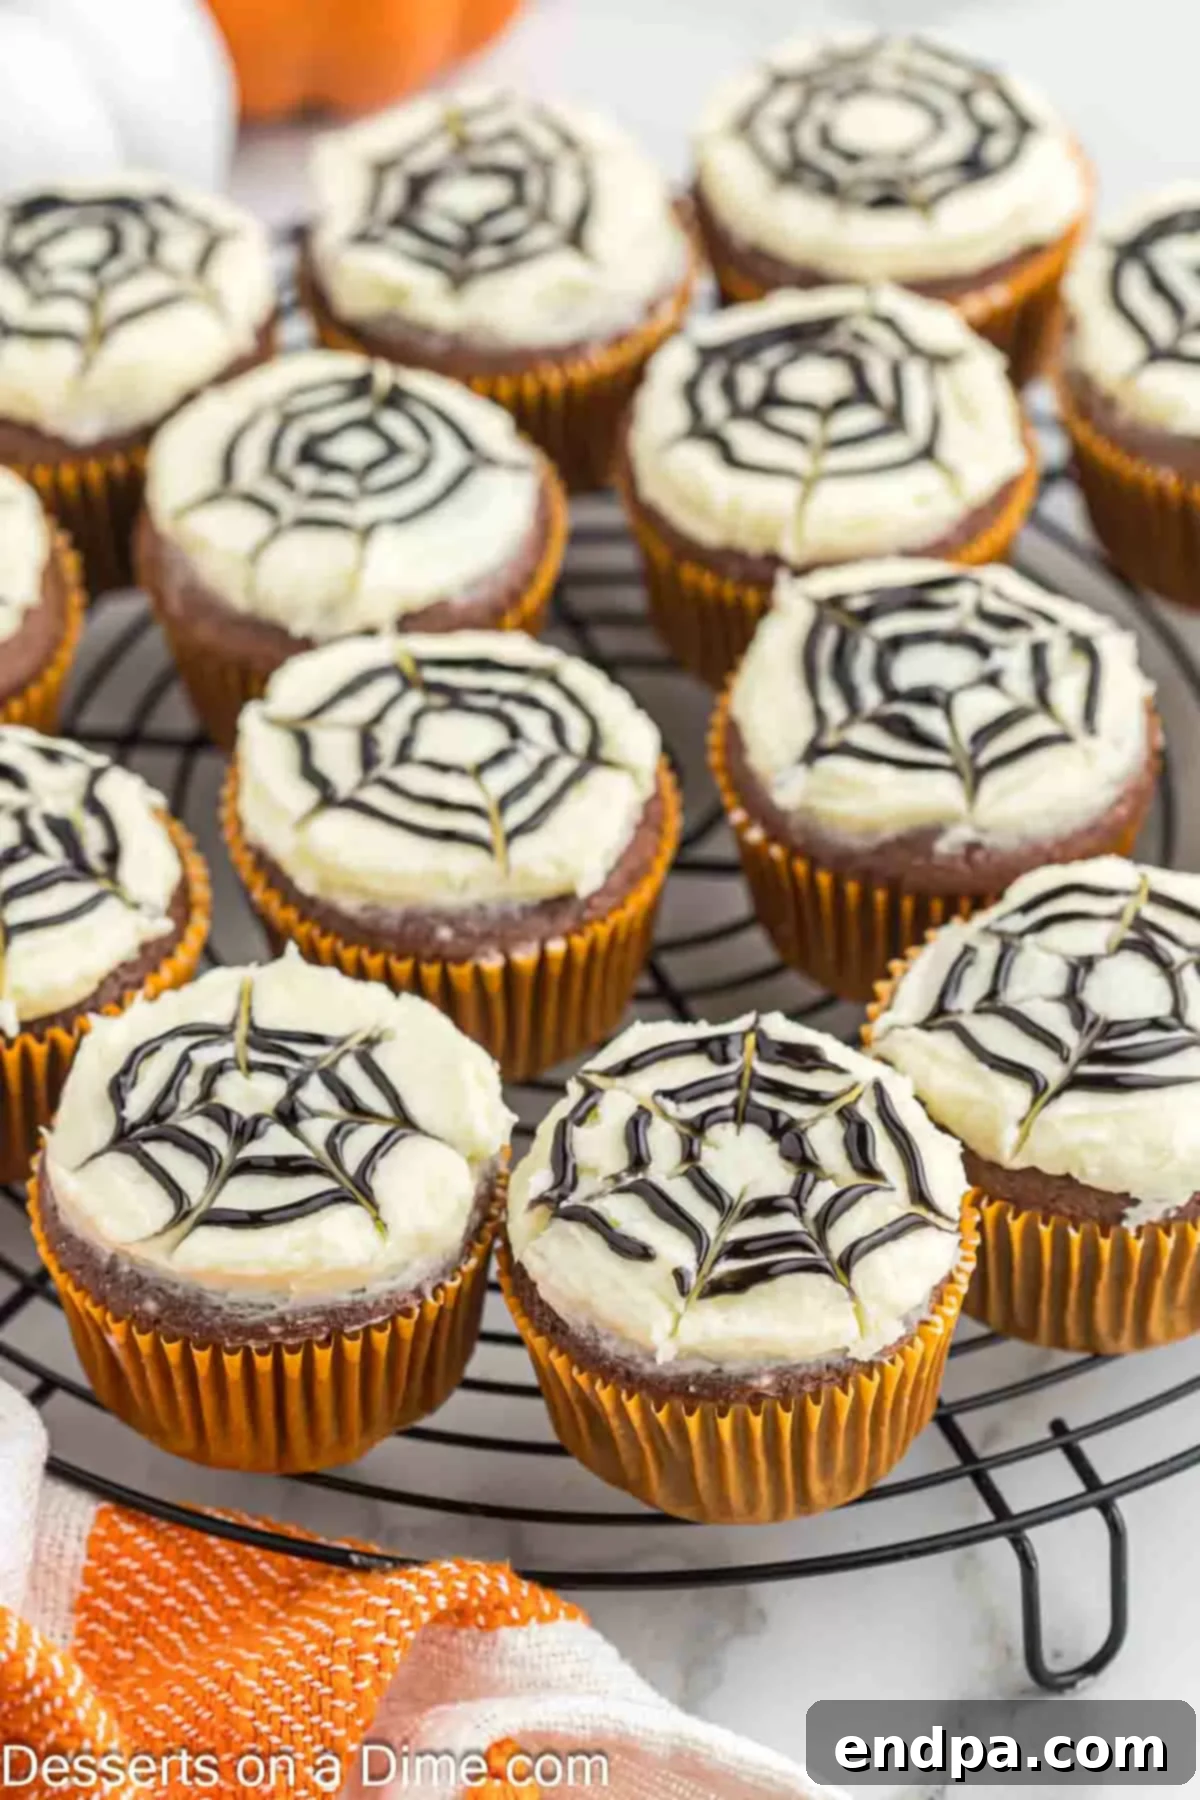
- Step 6: Allow to Set. Once all cupcakes are decorated, let them sit undisturbed at room temperature for the chocolate webs to re-harden. This will ensure the design stays intact when you handle and serve them. Once the chocolate is firm, your delicious and spooky Spider Web Cupcakes are ready to be served and enjoyed by all!
Storage and Make-Ahead Tips
Proper storage is key to keeping your Spider Web Cupcakes fresh and delicious, especially when planning for a party. Follow these guidelines to ensure your treats stay perfect.
Refrigerate any leftover decorated cupcakes in an airtight container for up to 3-4 days. Placing them in a single layer or using cupcake carriers will help protect the delicate spider web design. While they are safe to eat for a bit longer, the texture of the cupcake and freshness of the frosting will begin to diminish after this period, so it’s best to enjoy them within the recommended timeframe.
Expert Baking and Decorating Advice
Achieving bakery-quality results with your Spider Web Cupcakes is easier than you think with these expert tips:
- Cooling is Crucial: This cannot be stressed enough – your cupcakes *must* be completely cool before you even think about frosting them. Even a slight warmth can cause your beautifully piped frosting to melt, slide, and create a messy appearance. Allow ample time for them to cool on wire racks, or even place them in the refrigerator for a short period to speed up the process if you’re in a hurry.
- Let the Web Harden: Just as important as cooling the cupcakes is allowing the chocolate spider web design to fully set. The topping needs time to re-harden at room temperature before you stack, store, or transport them. This ensures the intricate design remains crisp and beautiful, preventing smudges and ensuring your spooky creation looks its best.
- Uniform Cupcake Size: For even baking and a professional presentation, aim for uniform cupcake sizes. Using a large cookie scoop or an ice cream scoop (with a trigger release) is an excellent way to ensure each cupcake liner is filled with approximately the same amount of batter. This not only helps them cook evenly but also results in a consistent, appealing look for all your treats.
- Room Temperature Butter for Frosting: For the silkiest, fluffiest buttercream, your unsalted butter must be properly softened to room temperature. It should be pliable enough to indent with your finger without melting. Cold butter will result in lumpy frosting, while melted butter will make it greasy and runny. Plan ahead by taking butter out of the fridge at least an hour before you begin.
- Microwave Chocolate with Care: When melting chocolate for the webs, use short bursts (30 seconds) and stir well in between. Chocolate can burn easily, especially with shortening added. Stirring helps distribute heat and prevents scorching, ensuring a smooth, workable consistency.
- Practice Your Piping: If you’re new to piping, don’t be afraid to practice on a piece of parchment paper or a plate before moving to the actual cupcakes. This allows you to get a feel for the pressure needed and the flow of the chocolate, helping you create more confident and even circles.
- Clean Toothpick, Crisp Webs: For the sharpest, most defined spider web lines, wipe your toothpick clean with a paper towel after each drag through the chocolate. Chocolate residue on the toothpick can smudge the next web, making it less distinct.
Frequently Asked Questions
Can I make these cupcakes in advance?
Absolutely! Preparing these cupcakes in advance is a fantastic way to save time, especially when planning for a busy party or event. You can bake the plain chocolate cupcakes up to 3 months ahead of time and freeze them. Once baked, allow them to cool completely before placing them in a freezer-safe storage container or freezer bags, ensuring they are tightly sealed to prevent freezer burn. When you’re ready to use them, simply transfer the frozen cupcakes to the refrigerator to thaw overnight. Once thawed, they can be decorated as normal. We do, however, suggest waiting to apply the frosting and the spider web design until closer to the time of serving for the freshest taste and best appearance.
This make-ahead strategy is a true lifesaver, allowing you to focus on other party preparations without feeling rushed in the kitchen. Having the baked cupcakes ready to go means you only need to tackle the fun decorating part on the day of your event!
More Easy Halloween Cupcake Recipes
Looking for more enchanting cupcake ideas for your Halloween bash? Explore these delightful and simple recipes:
- Jack-O-Lantern Cupcakes
- Monster Cupcakes
- Ghost Cupcakes
Tasty Halloween Dessert Recipes
Beyond cupcakes, we have a treasure trove of quick and easy Halloween desserts that are sure to be a hit:
- Halloween Donuts
- Easy Halloween Sugar Cookies
- Quick and Easy Halloween Treats
- Monster Donuts
We hope you have a spooktacular time making and sharing these fun spider web cupcakes for Halloween. Please do come back and leave a comment to tell us how they turned out!
Spider Web Cupcakes
Make these tasty Spider Web Cupcakes for your next Halloween party. It’s such an easy Halloween recipe to make and looks festive for the season.
15
20
35
24
American
Dessert
260
Carrie Barnard
Ingredients
For the Cupcakes:
- 1 pkg Chocolate Cake Mix (16 ounces)
- 1 1/4 cup Water
- 1/3 cup Vegetable Oil
- 3 Large Eggs
For the Frosting:
- 3/4 cup Unsalted Butter, softened
- 2 1/4 cup Powdered Sugar
- 3 Tbsp Milk
- 1 tsp Clear Vanilla Extract
For the Spider Web Design:
- 1 cup Semi-Sweet Chocolate Chips
- 1 Tablespoon Shortening
Instructions
For the Cupcakes:
- Preheat the oven to 350 degrees Fahrenheit and line 2 cupcake pans with liners.
- In a large mix bowl, stir together the cake mix, water, vegetable oil and eggs.
- Pour the batter into the cupcake liners, filling them approximately ¾ full.
- Bake for 18-21 minutes until a toothpick inserted into the cupcakes comes out clean.
- Cool completely on wire racks.
For the Frosting:
- Cream together the butter and powdered sugar until combined and smooth.
- Add in the milk and vanilla extract and mix for 1-2 minutes until the frosting is light and fluffy.
- Frost each of the cooled cupcakes.
For the Decorations:
- Place the chocolate chips and shortening in a microwave safe bowl. Heat in 30-second intervals, stirring after each interval, until fully melted.
- Move the mixture into a piping bag or a Ziploc bag with a corner cut off one end of the bag.
- Pipe 3 concentric circles of the melted chocolate onto each frosted cupcake. Then, start at the center with a toothpick and draw 5-6 times through the circles to the outside edge of the cupcakes to make a spider web design.
- Continue this process until all the cupcakes are prepared and decorated.
- Let sit until the chocolate re-hardens. Then the cupcakes are ready to serve and enjoy!
Recipe Notes
Refrigerate leftover cupcakes in an airtight container for up to 3-4 days.
Nutrition Facts
Calories
260
kcal
,
Carbohydrates
29
g
,
Protein
2
g
,
Fat
16
g
,
Saturated Fat
7
g
,
Polyunsaturated Fat
3
g
,
Monounsaturated Fat
5
g
,
Trans Fat
0.3
g
,
Cholesterol
36
mg
,
Sodium
167
mg
,
Potassium
117
mg
,
Fiber
1
g
,
Sugar
21
g
,
Vitamin A
214
IU
,
Calcium
41
mg
,
Iron
1
mg
