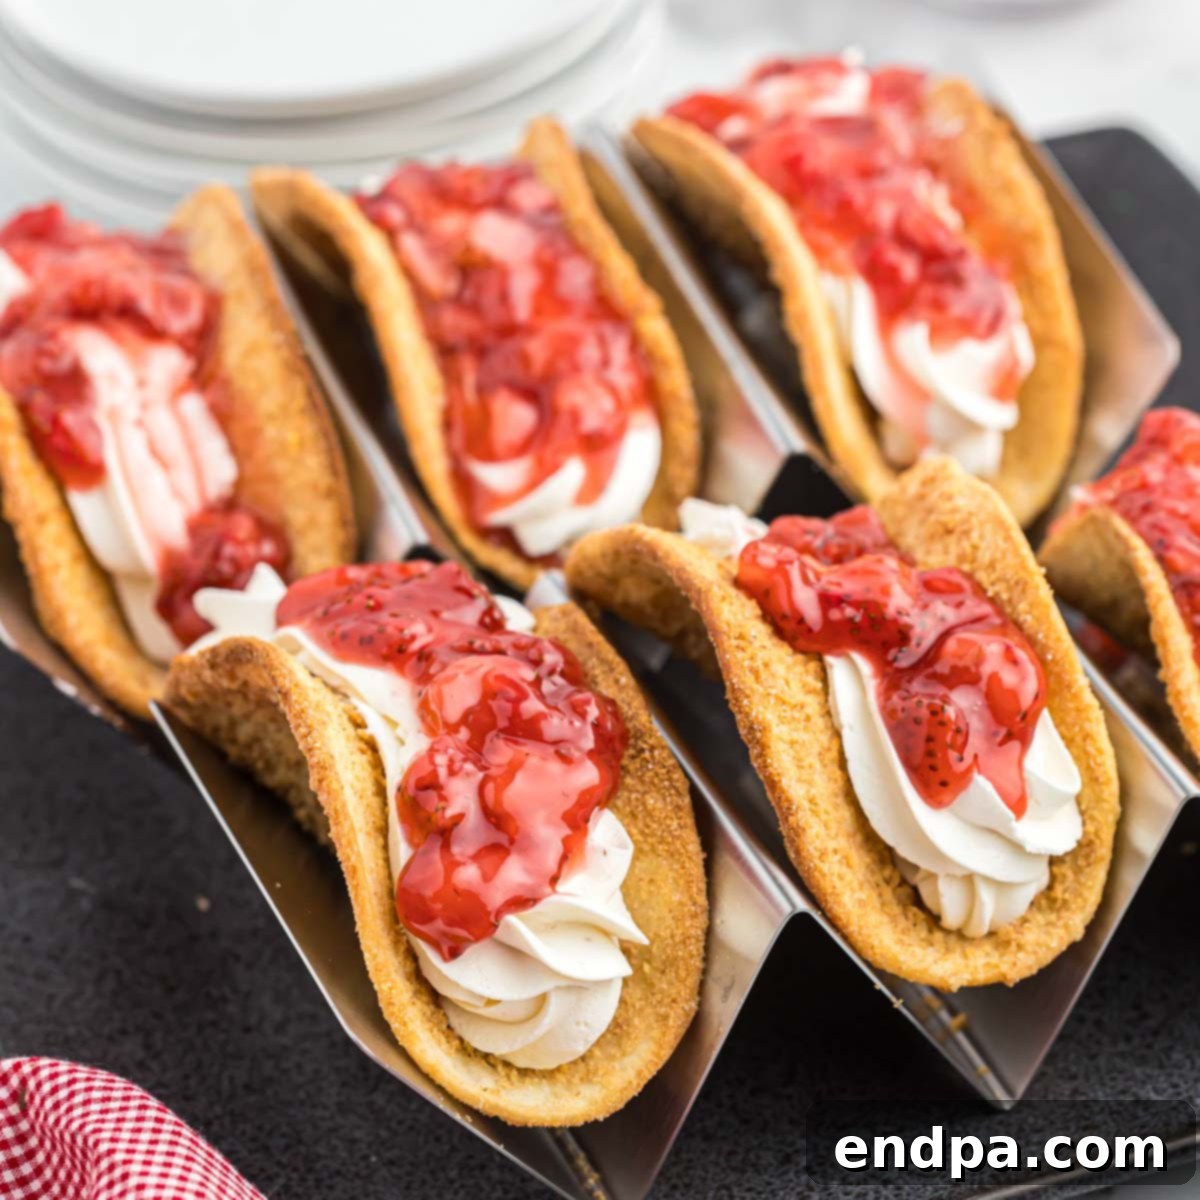
Strawberry Cheesecake Tacos offer a delightful fusion of a classic dessert with a fun, portable format. Each taco is generously filled with a rich, creamy cheesecake mixture, all nestled within a perfectly crispy, sugar-coated shell. Topped with a vibrant, homemade strawberry sauce, these tacos deliver a truly luscious dessert experience in minutes, making them an instant favorite for any occasion.
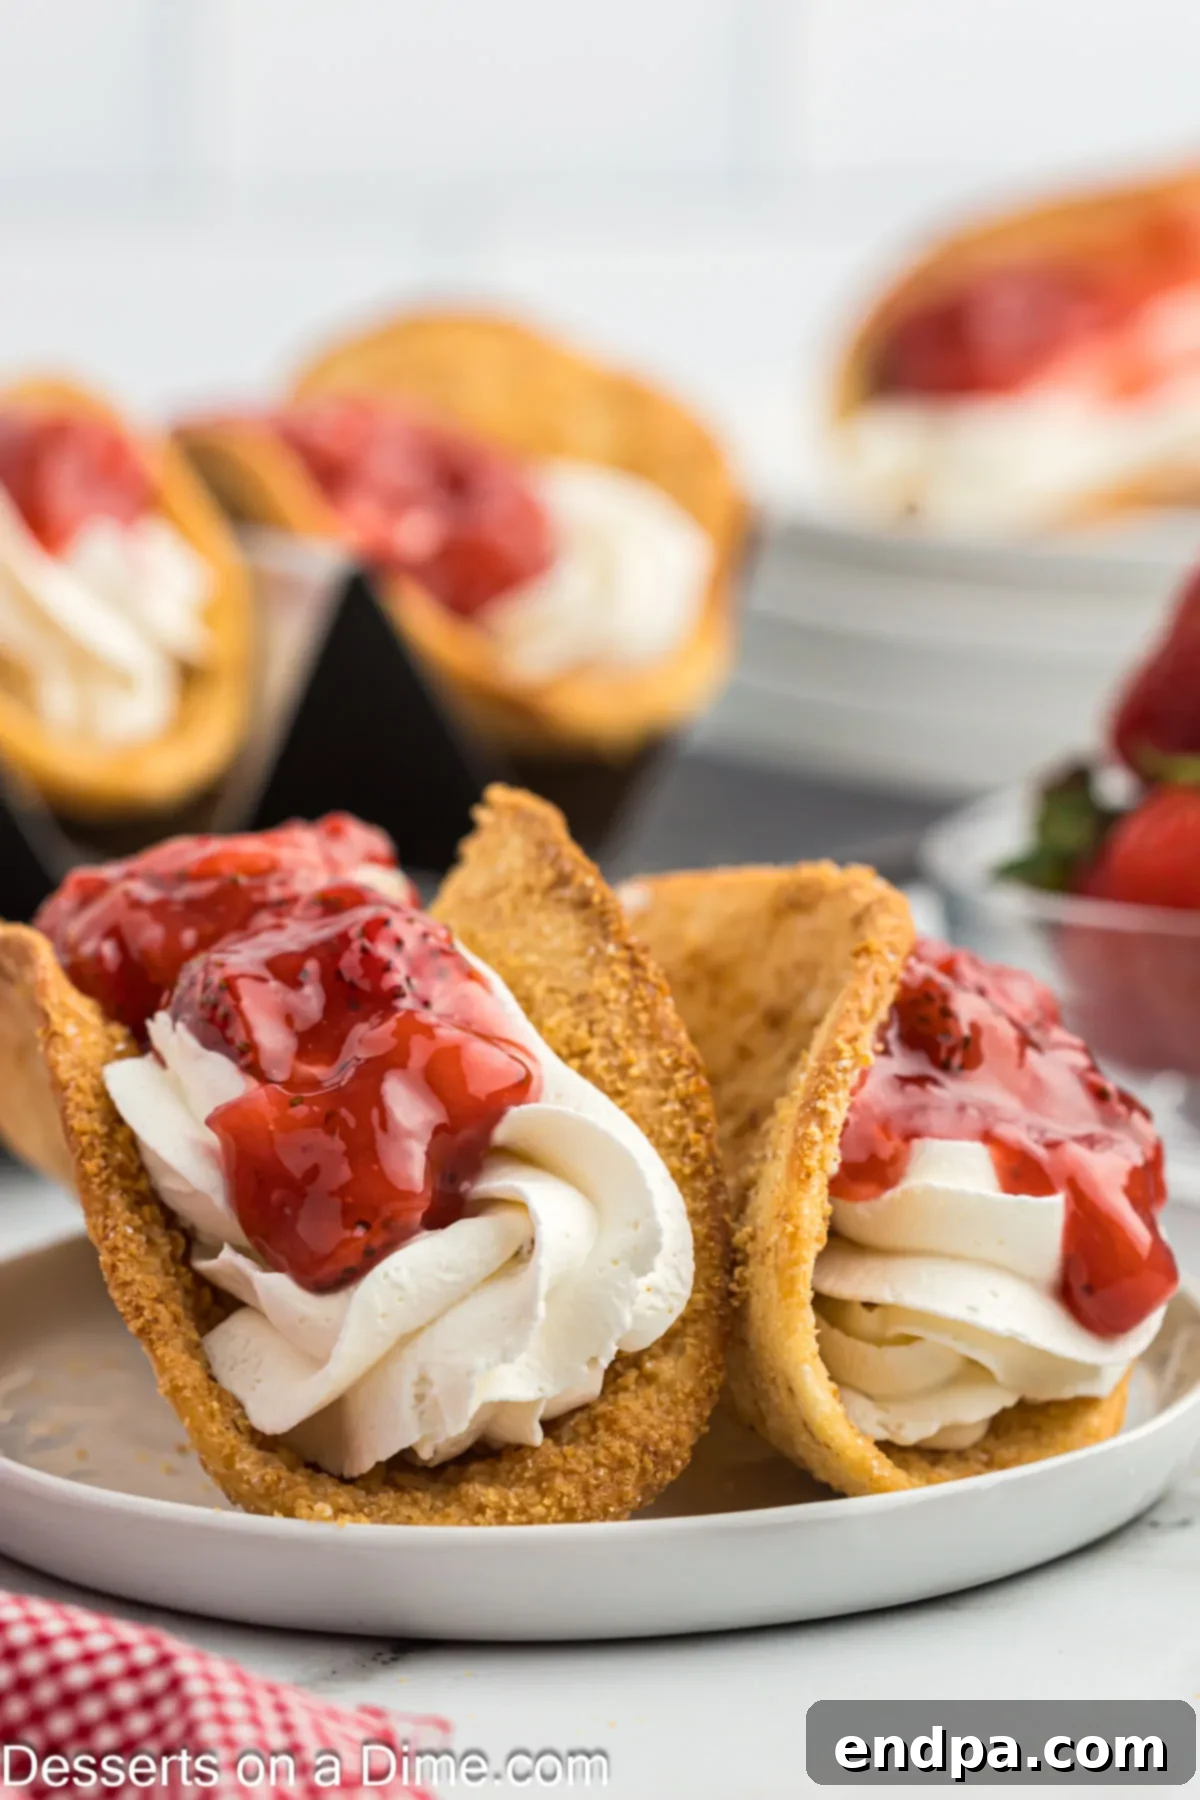
These dessert tacos are not only incredibly appealing visually but are also surprisingly simple to prepare. Ordinary flour tortillas undergo a magical transformation into delightful, sugar-coated, crispy shells that provide the perfect textural contrast to the smooth, velvety cheesecake filling. This exquisite combination of textures and flavors makes Strawberry Cheesecake Tacos a truly standout dessert that’s sure to impress.
The versatility of dessert tacos means the creative possibilities are endless! Beyond this strawberry sensation, you might also enjoy exploring other delightful variations such as Cherry Cheesecake Tacos, Pumpkin Pie Tacos, and Apple Pie Tacos. For those who adore strawberry flavor, consider trying our popular Strawberry Crunch Bars Recipe, or a festive option like Red White and Blue Strawberries for a seasonal treat.
What You’ll Find in This Post: Strawberry Cheesecake Tacos
- Why You’ll Adore This Recipe
- Essential Ingredients
- Kitchen Equipment You’ll Need
- Creative Variations & Customization
- Detailed Step-by-Step Instructions
- Expert Tips for Success
- Frequently Asked Questions
- Serving Suggestions
- Make-Ahead Tips
- Storage and Reheating
- More Irresistible Cheesecake Desserts
- Strawberry Cheesecake Tacos Recipe Card
Why You’ll Adore This Recipe
These dessert tacos are consistently a huge success, disappearing quickly whenever I prepare them. Their appeal lies in their combination of ease and irresistible flavor. They’re among the simplest baked desserts to master, primarily involving a quick bake for the shells.
The delightful contrast between the crunchy, sweet shell and the smooth, cool, and tangy cheesecake filling makes every single bite truly amazing. This recipe is perfectly suited for entertaining guests at parties, yet it’s straightforward enough to whip up for a delightful treat any day of the week. They offer all the beloved flavors of a traditional strawberry cheesecake but in an exciting, handheld form that’s both fun to eat and surprisingly elegant.
Essential Ingredients
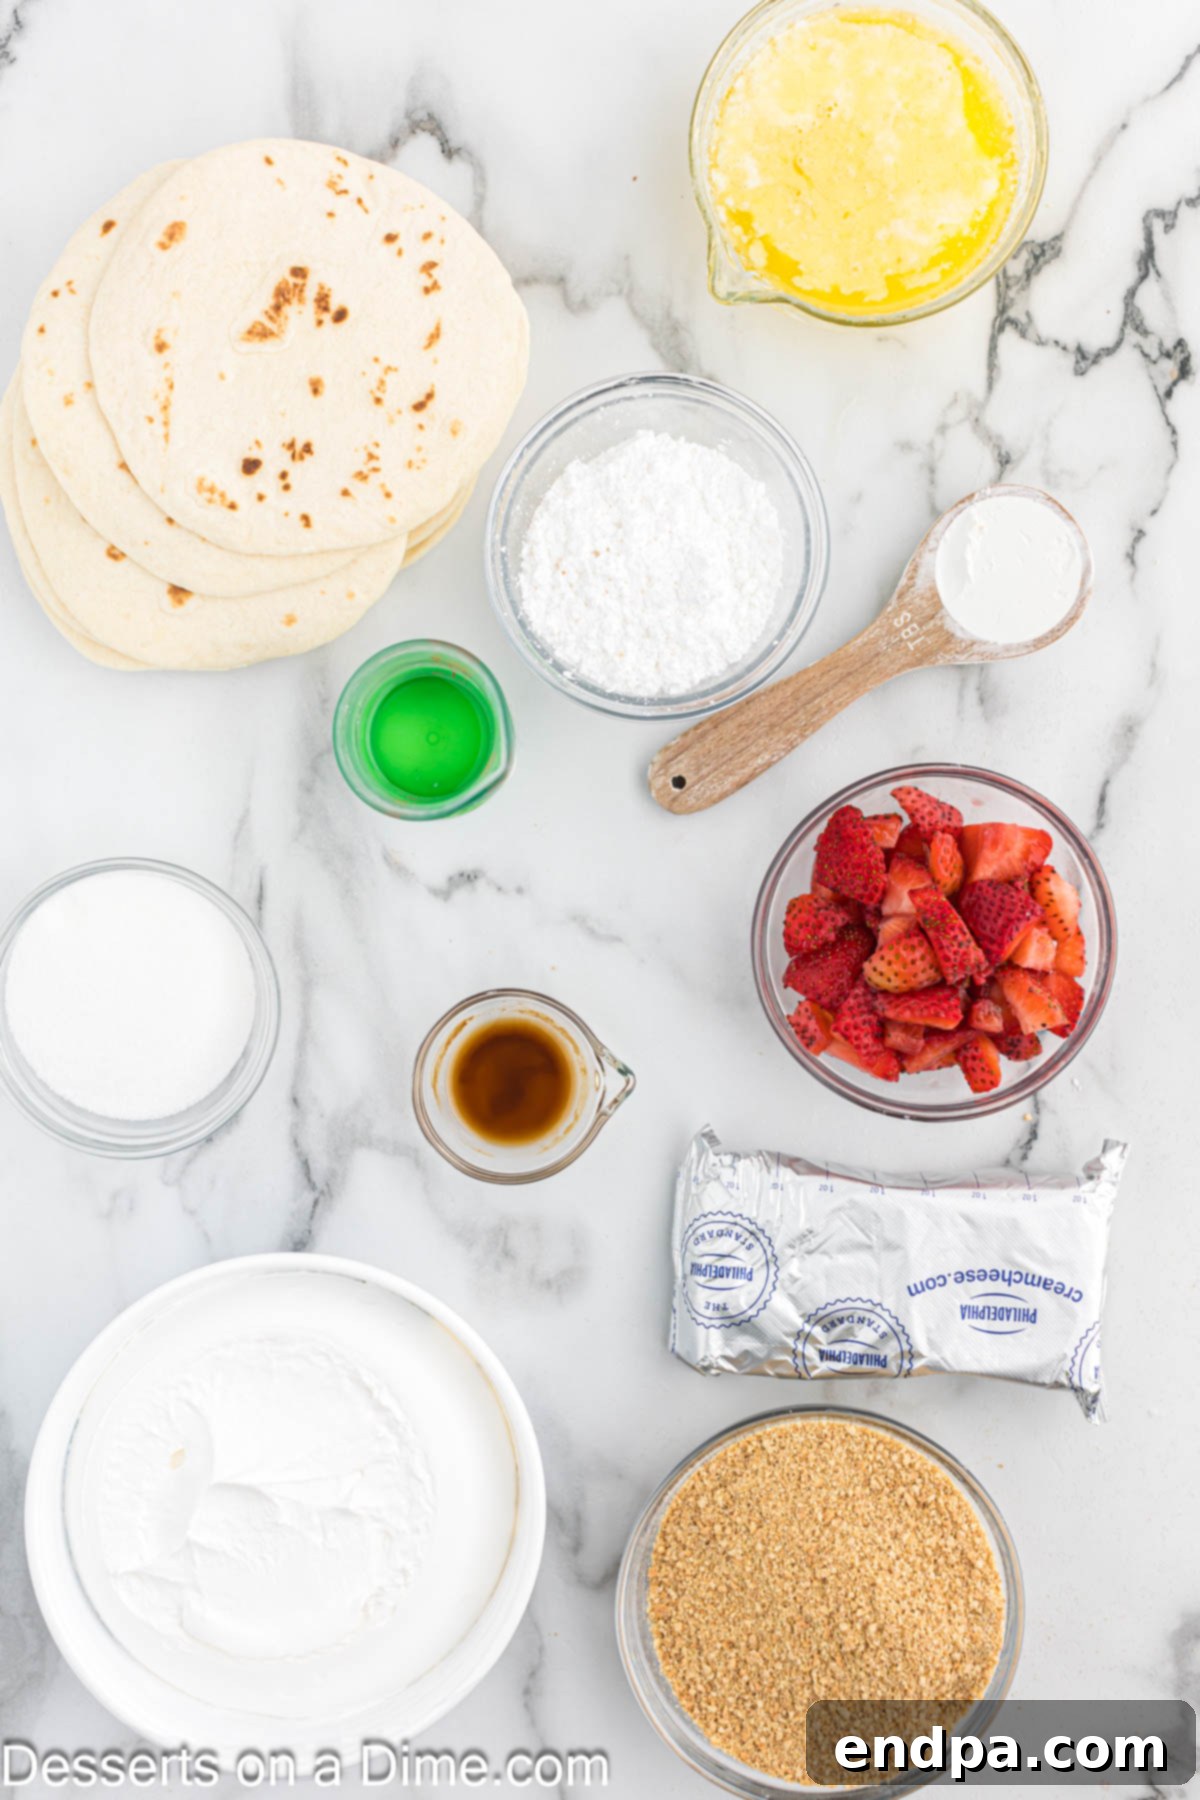
For the Crispy Taco Shells
- Flour Tortillas: Opt for street taco-sized tortillas, which are typically smaller and perfect for individual dessert portions. Regular-sized tortillas can be cut down if street taco size isn’t available.
- Graham Cracker Crumbs: These provide a sweet, buttery crunch. You can easily make your own by crushing graham crackers in a food processor, or save time by purchasing pre-made crumbs.
- Granulated Sugar: A touch of sugar mixes with the graham cracker crumbs to create a deliciously sweet coating for the shells.
- Melted Butter: Essential for helping the graham cracker mixture adhere to the tortillas and achieve that desirable golden crispness when baked.
For the Creamy Cheesecake Filling
- Cream Cheese: For the best texture and flavor, use full-fat cream cheese. Ensure it’s softened to room temperature before mixing to achieve a lump-free, smooth consistency.
- Powdered Sugar: Also known as confectioners’ sugar, this sweetens the filling and helps create its silky smooth texture. Sifting it beforehand will prevent any lumps.
- Pure Vanilla Extract: A crucial ingredient that enhances the overall flavor profile of the cheesecake filling, adding a warm, aromatic note.
- Whipped Topping: Thawed whipped topping (like Cool Whip) adds lightness and airiness to the filling. For a richer flavor, you can also use Homemade Whipped Cream.
For the Luscious Strawberry Topping
- Fresh Strawberries: Chopped into small pieces, these are the star of the topping, providing natural sweetness and a beautiful color. You can use fresh or frozen (thawed) strawberries.
- Granulated Sugar: Sweetens the strawberry sauce, balancing the tartness of the fruit.
- Water: Used to help create the sauce consistency and dissolve the cornstarch.
- Cornstarch: A small amount of cornstarch mixed with water (a slurry) is vital for thickening the strawberry topping, giving it a glossy, pourable consistency.
You can find the complete list of ingredients with precise measurements in the detailed recipe card at the bottom of this page.
Kitchen Equipment You’ll Need
Gathering your tools before you begin ensures a smooth and efficient cooking process. For these Strawberry Cheesecake Tacos, you’ll need a few basic kitchen items:
- Small Mixing Bowls: For combining the graham cracker coating and preparing the cornstarch slurry.
- Large Mixing Bowl: Essential for preparing the creamy cheesecake filling.
- Handheld Electric Mixer or Stand Mixer: To ensure your cream cheese filling is perfectly smooth and fluffy.
- Basting Brush: For evenly coating the tortillas with melted butter.
- Cupcake or Muffin Pan: Flipping this upside down is a clever hack to shape your taco shells during baking. Alternatively, a dedicated taco shell holder works just as well.
- Small Saucepan: For simmering and thickening your homemade strawberry topping.
- Piping Bag or Ziploc Bag: Highly recommended for neatly piping the cheesecake filling into the taco shells.
- Fork: To gently prick the tortillas, preventing air bubbles from forming.
Creative Variations & Customization
One of the best aspects of these dessert tacos is how easily they can be customized to suit different tastes or seasons. Don’t hesitate to experiment with these delicious variations:
- Different Filling Flavors: While strawberry cheesecake is divine, the creamy filling can be easily substituted. Consider using other fruit pie fillings like apple, blueberry, peach, or cherry pie filling. For chocolate lovers, a chocolate mousse or a rich chocolate ganache would be incredible.
- Decadent Toppings: Elevate your tacos with additional toppings. A drizzle of Homemade Hot Fudge Sauce or Easy Homemade Caramel Sauce tastes absolutely amazing. Crushed nuts, mini chocolate chips, sprinkles, or even a dusting of cocoa powder can add extra flair.
- Fresh Fruit Medley: Instead of or in addition to the strawberry sauce, top each shell with an assortment of fresh berries like blueberries, raspberries, or sliced kiwi for a burst of fresh flavor and vibrant color.
- Cinnamon Sugar Coating: For a slightly different flavor profile, add a teaspoon or two of ground cinnamon to your graham cracker and sugar mixture for coating the shells. This adds a warm, inviting aroma and taste.
- No-Bake Filling Options: While the shells are baked, you can opt for a truly no-bake filling by combining cream cheese, powdered sugar, and whipped topping, then chilling until firm.
Detailed Step-by-Step Instructions
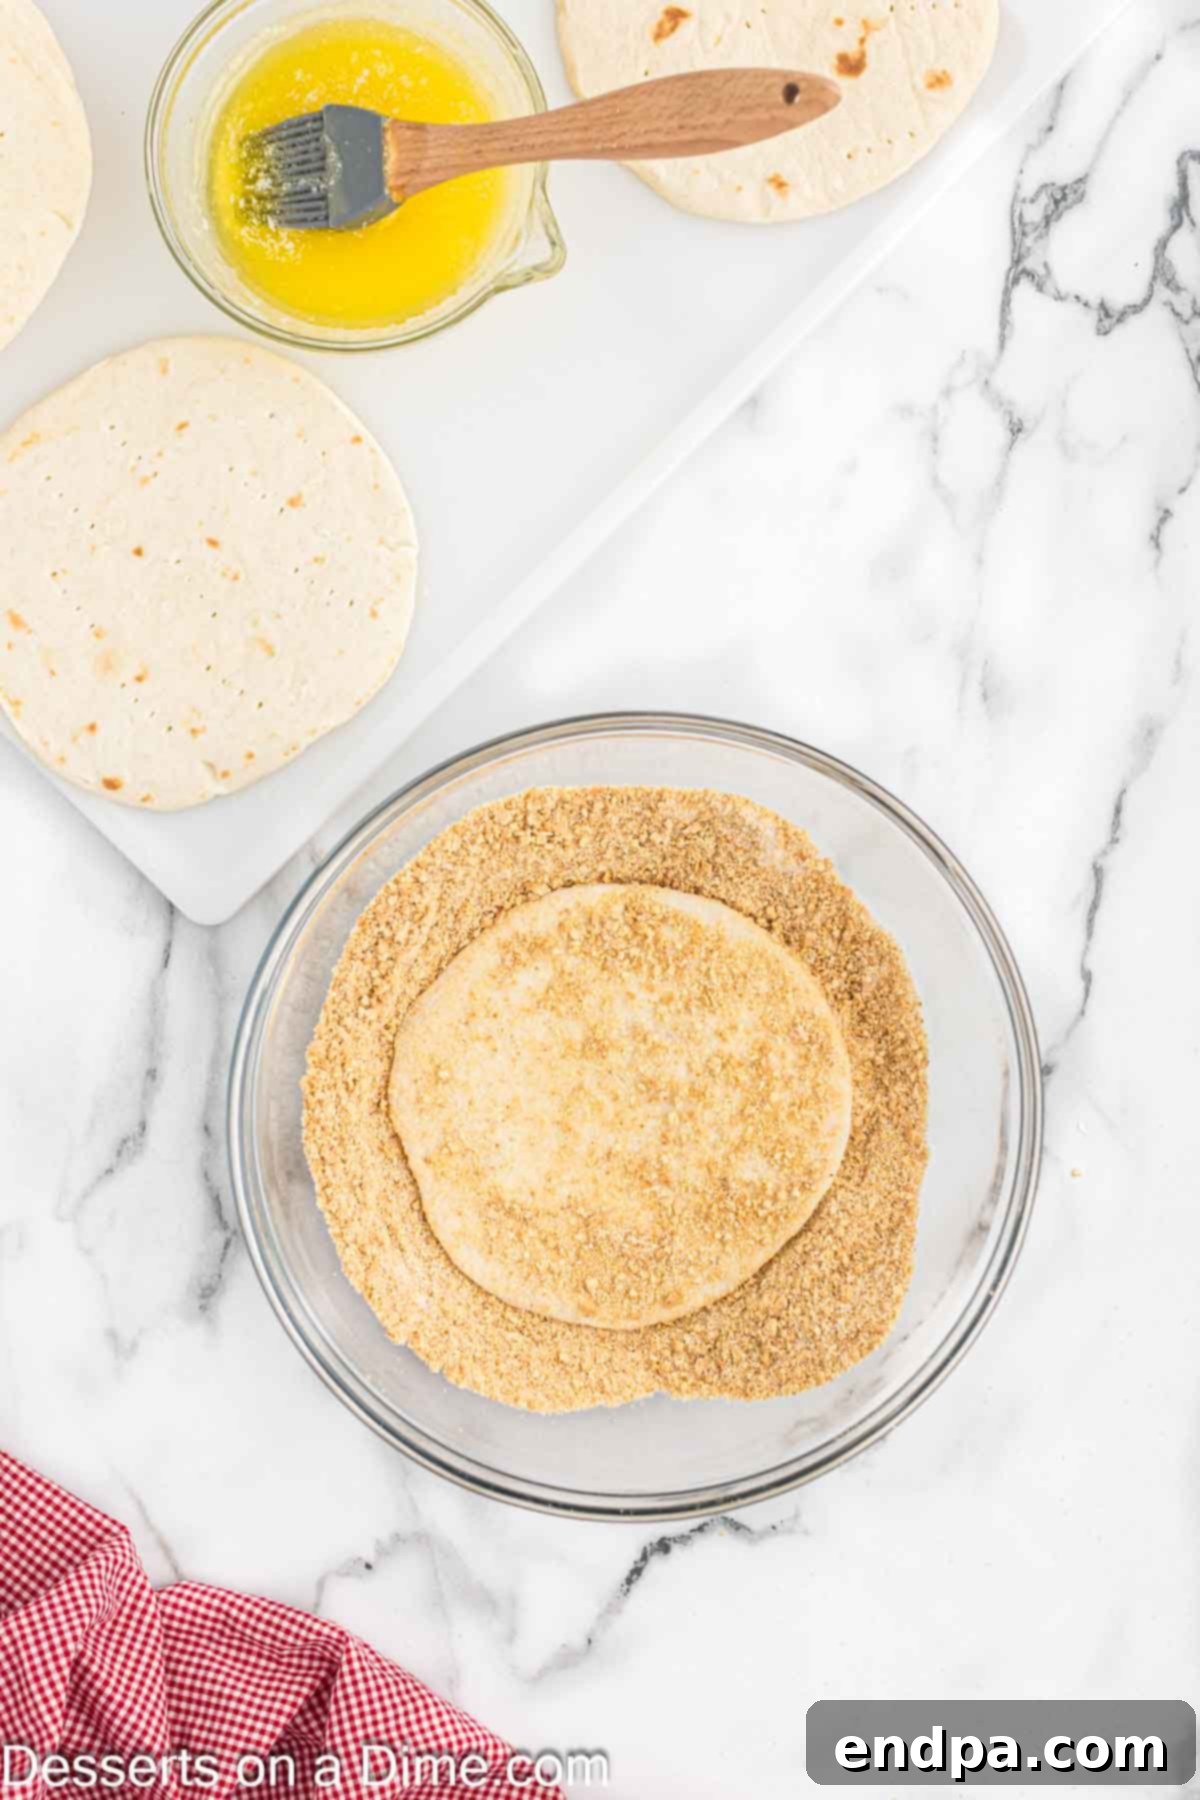
Step 1: Prepare the Tortilla Shells. Begin by preheating your oven to 400 degrees Fahrenheit (200°C). In a shallow bowl, combine the graham cracker crumbs and granulated sugar. Take a flour tortilla and gently stab it 6-7 times with a fork across its surface; this small step is crucial for preventing air bubbles from forming and ensuring your shells bake evenly. Using a basting brush, lightly coat both sides of the tortilla with melted butter. Then, carefully press both sides of the buttered tortilla into the graham cracker mixture, ensuring it’s fully coated.
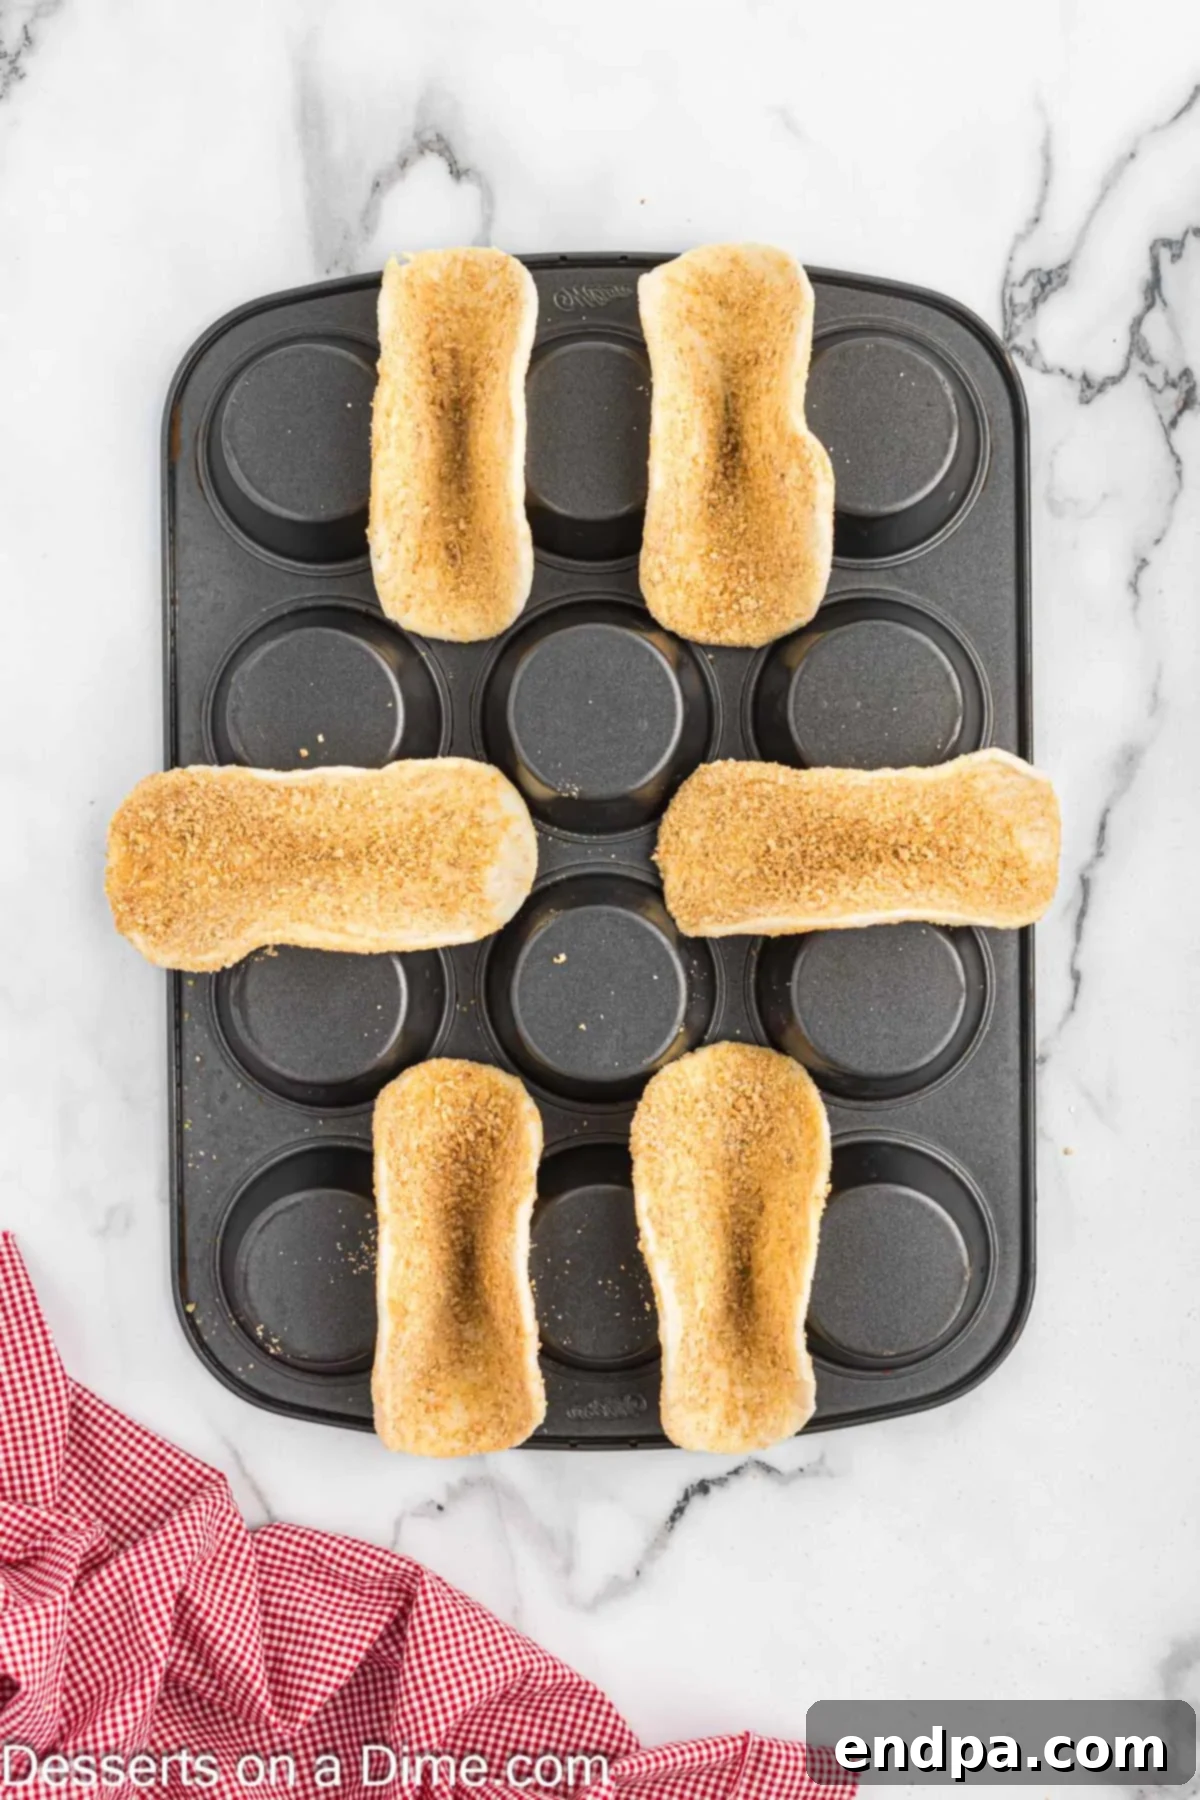
Step 2: Shape and Bake the Shells. For shaping, flip a standard cupcake or muffin pan upside down. Fold each coated tortilla in half and carefully drape it between the cups of the inverted pan. This simple technique allows the tortillas to maintain their taco shape as they bake. If you have a dedicated taco shell holder, that will also work perfectly.
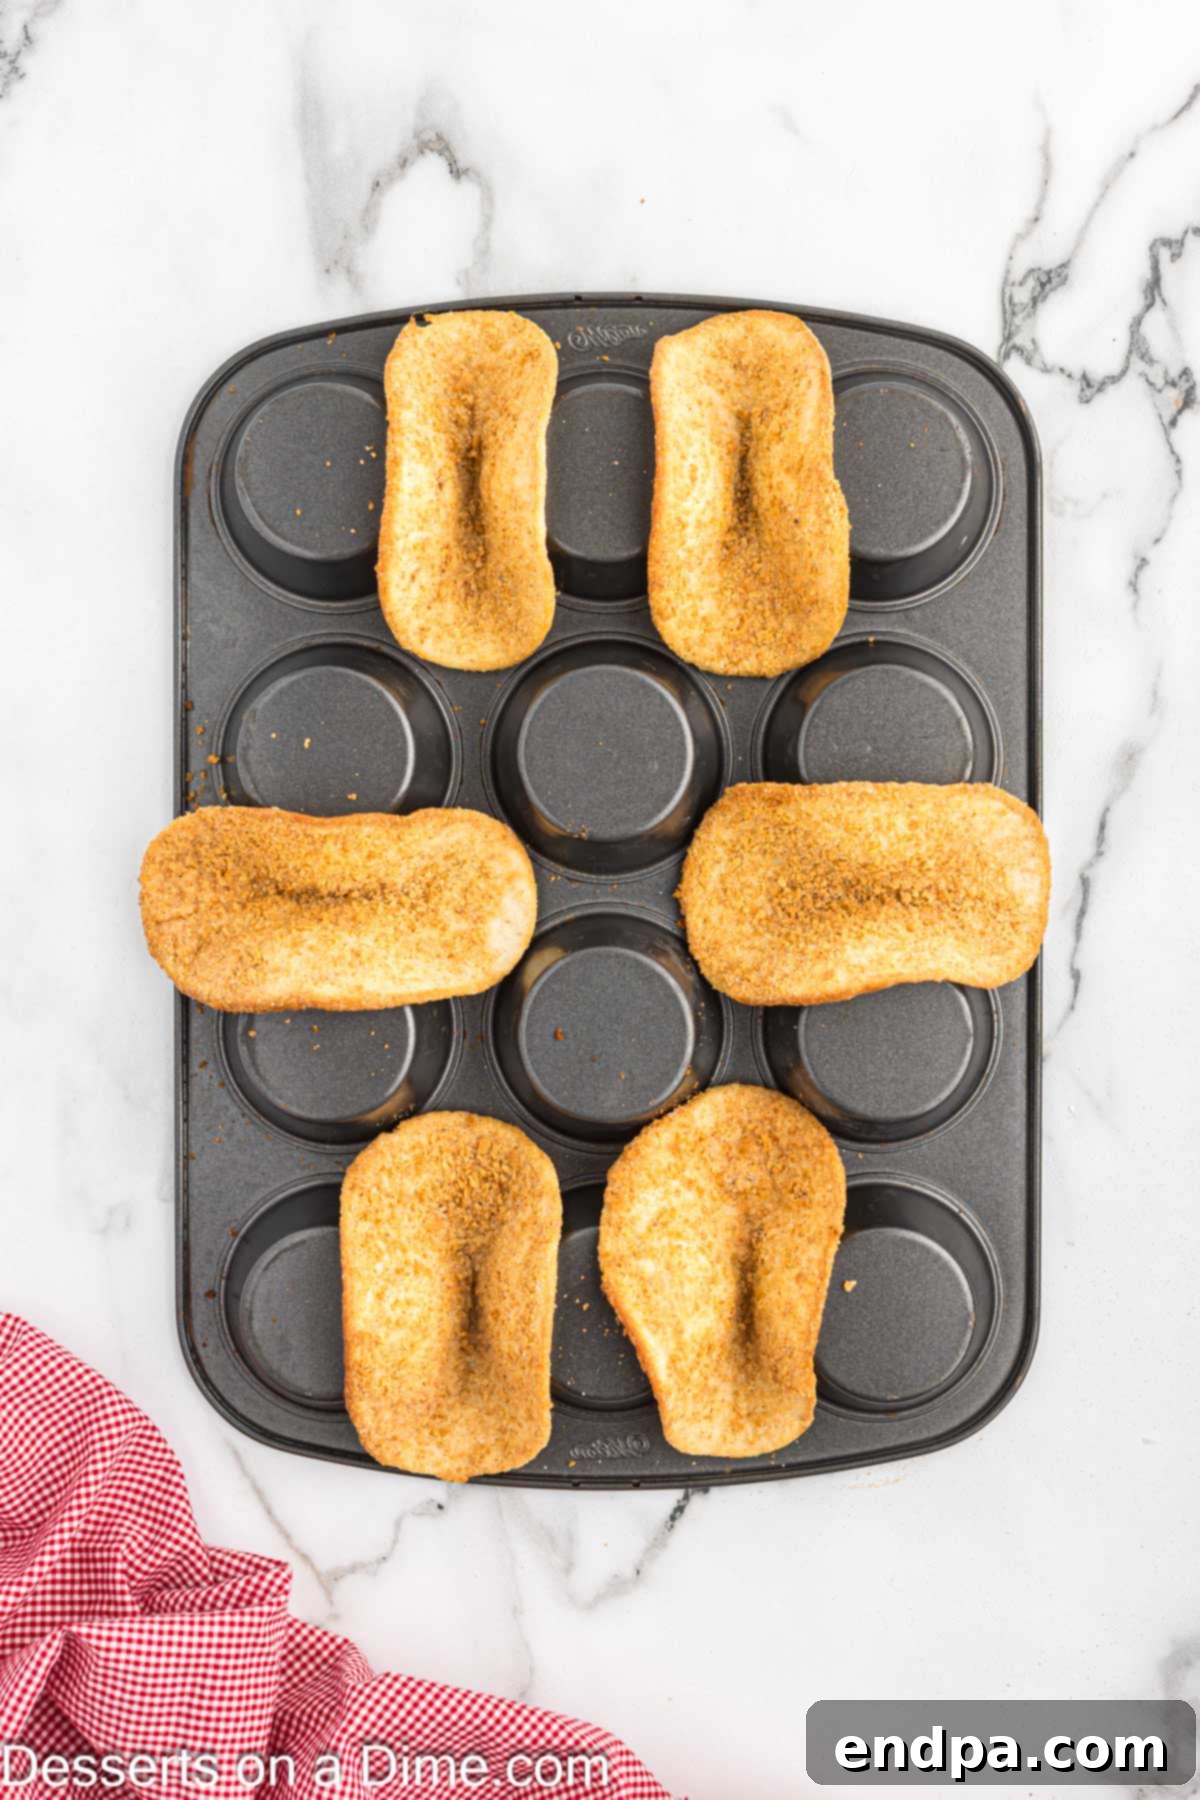
Step 3: Cool the Shells. Bake the shaped tortillas in the preheated oven for approximately 10-11 minutes, or until they turn beautifully golden brown and become delightfully crispy. Once baked, carefully remove the pan from the oven and allow the taco shells to cool completely on the pan before you even think about adding the filling. This is essential to prevent the filling from melting or making the shells soggy.
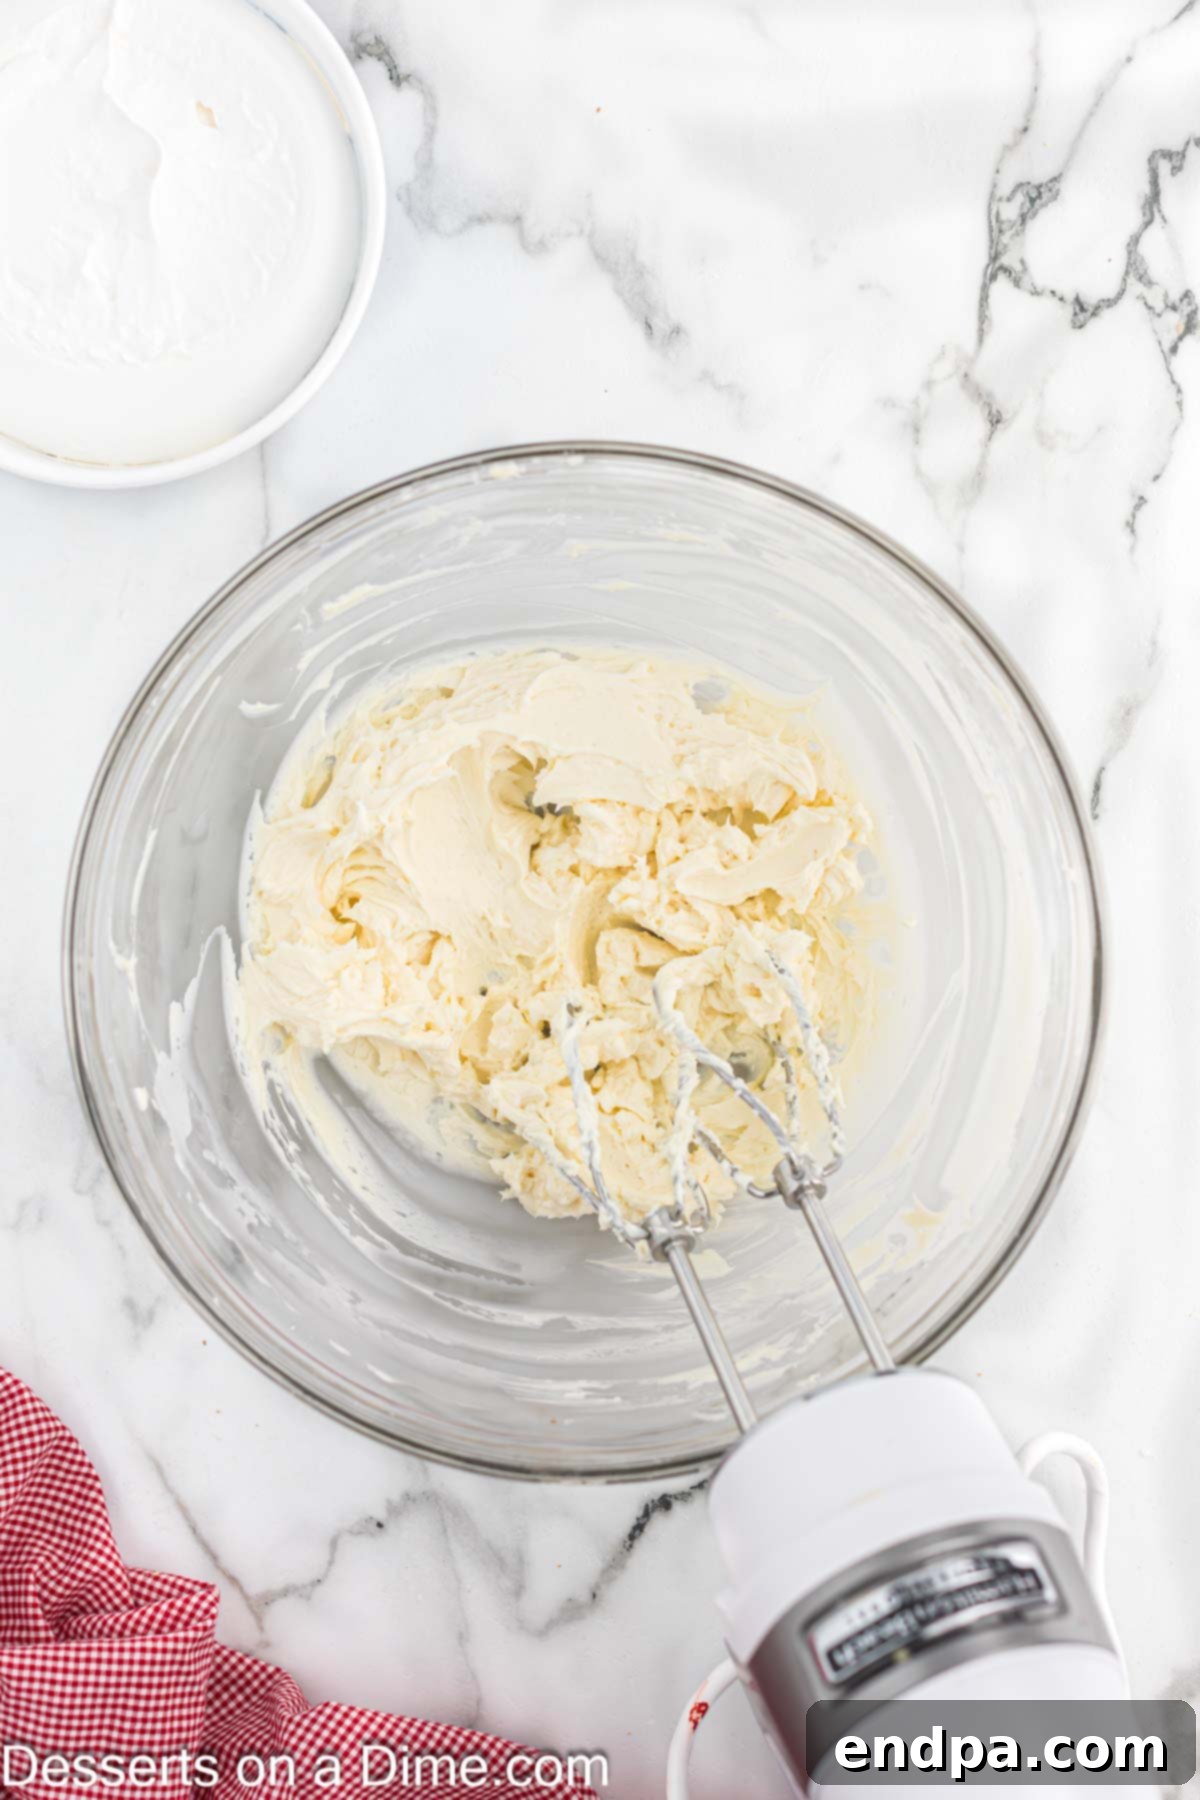
Step 4: Prepare the Cheesecake Filling. While your taco shells are cooling, begin preparing the decadent cheesecake filling. In a large mixing bowl, combine the softened cream cheese, powdered sugar, and pure vanilla extract. Beat these ingredients together using an electric mixer (either a handheld or stand mixer works well) on medium speed until the mixture is thoroughly combined, smooth, and free of any lumps.
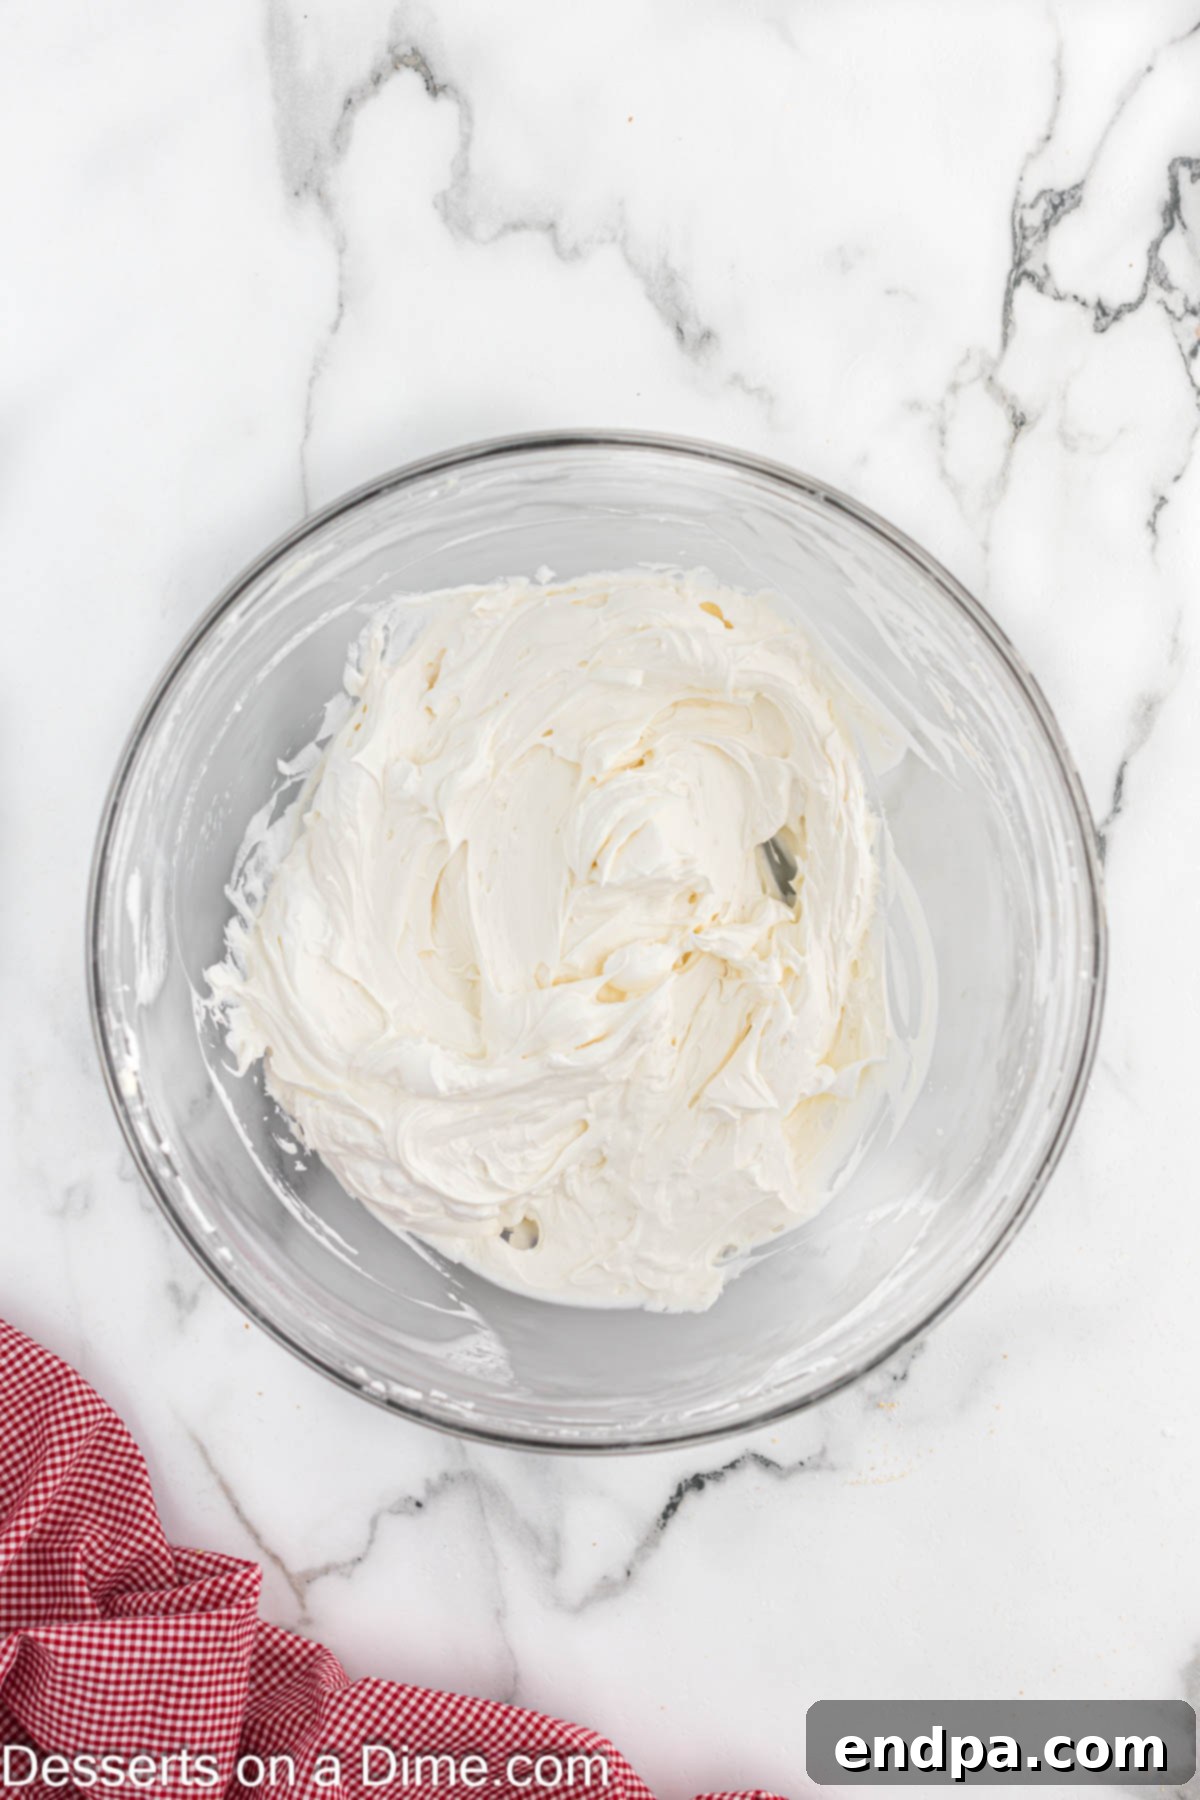
Step 5: Finish the Filling & Chill. Gently fold in the thawed whipped topping into your cream cheese mixture. Continue beating on low speed until the entire mixture is smooth, light, and wonderfully fluffy. Once achieved, transfer the cheesecake filling to the refrigerator and allow it to chill for at least 30 minutes. This chilling time is vital as it helps the filling firm up, making it much easier to pipe into the shells and preventing it from becoming too soft.
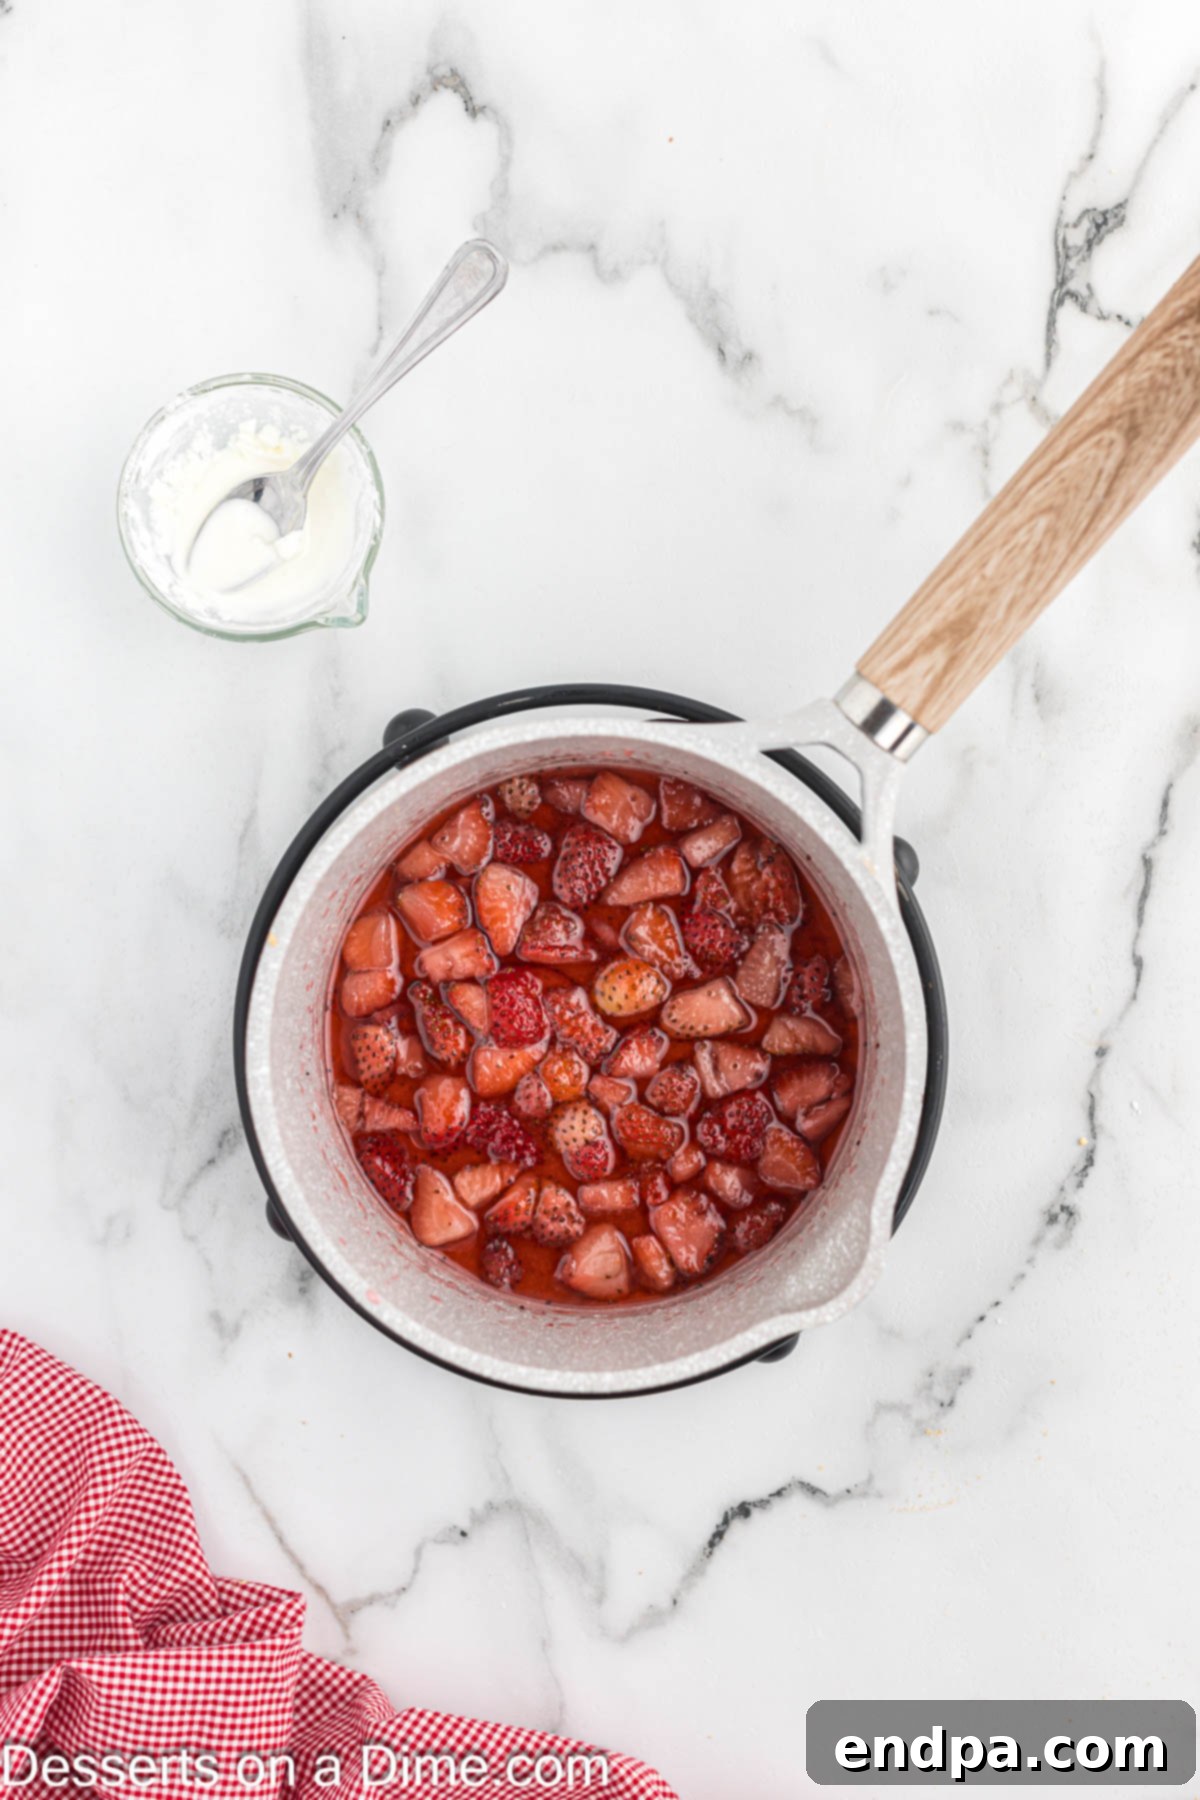
Step 6: Craft the Strawberry Topping. In a small saucepan, combine the chopped strawberries, granulated sugar, and water. Bring the mixture to a gentle boil, then reduce the heat to a simmer. Allow it to simmer for several minutes, stirring occasionally, until the strawberries have softened and released their juices. In a separate tiny bowl, dissolve the cornstarch in a small amount of cold water to create a smooth slurry. Add this cornstarch slurry to the simmering strawberry mixture in the saucepan and stir constantly. Continue stirring until the sauce thickens slightly and achieves a glossy, chunky consistency. Remove from heat and let it cool completely before using.
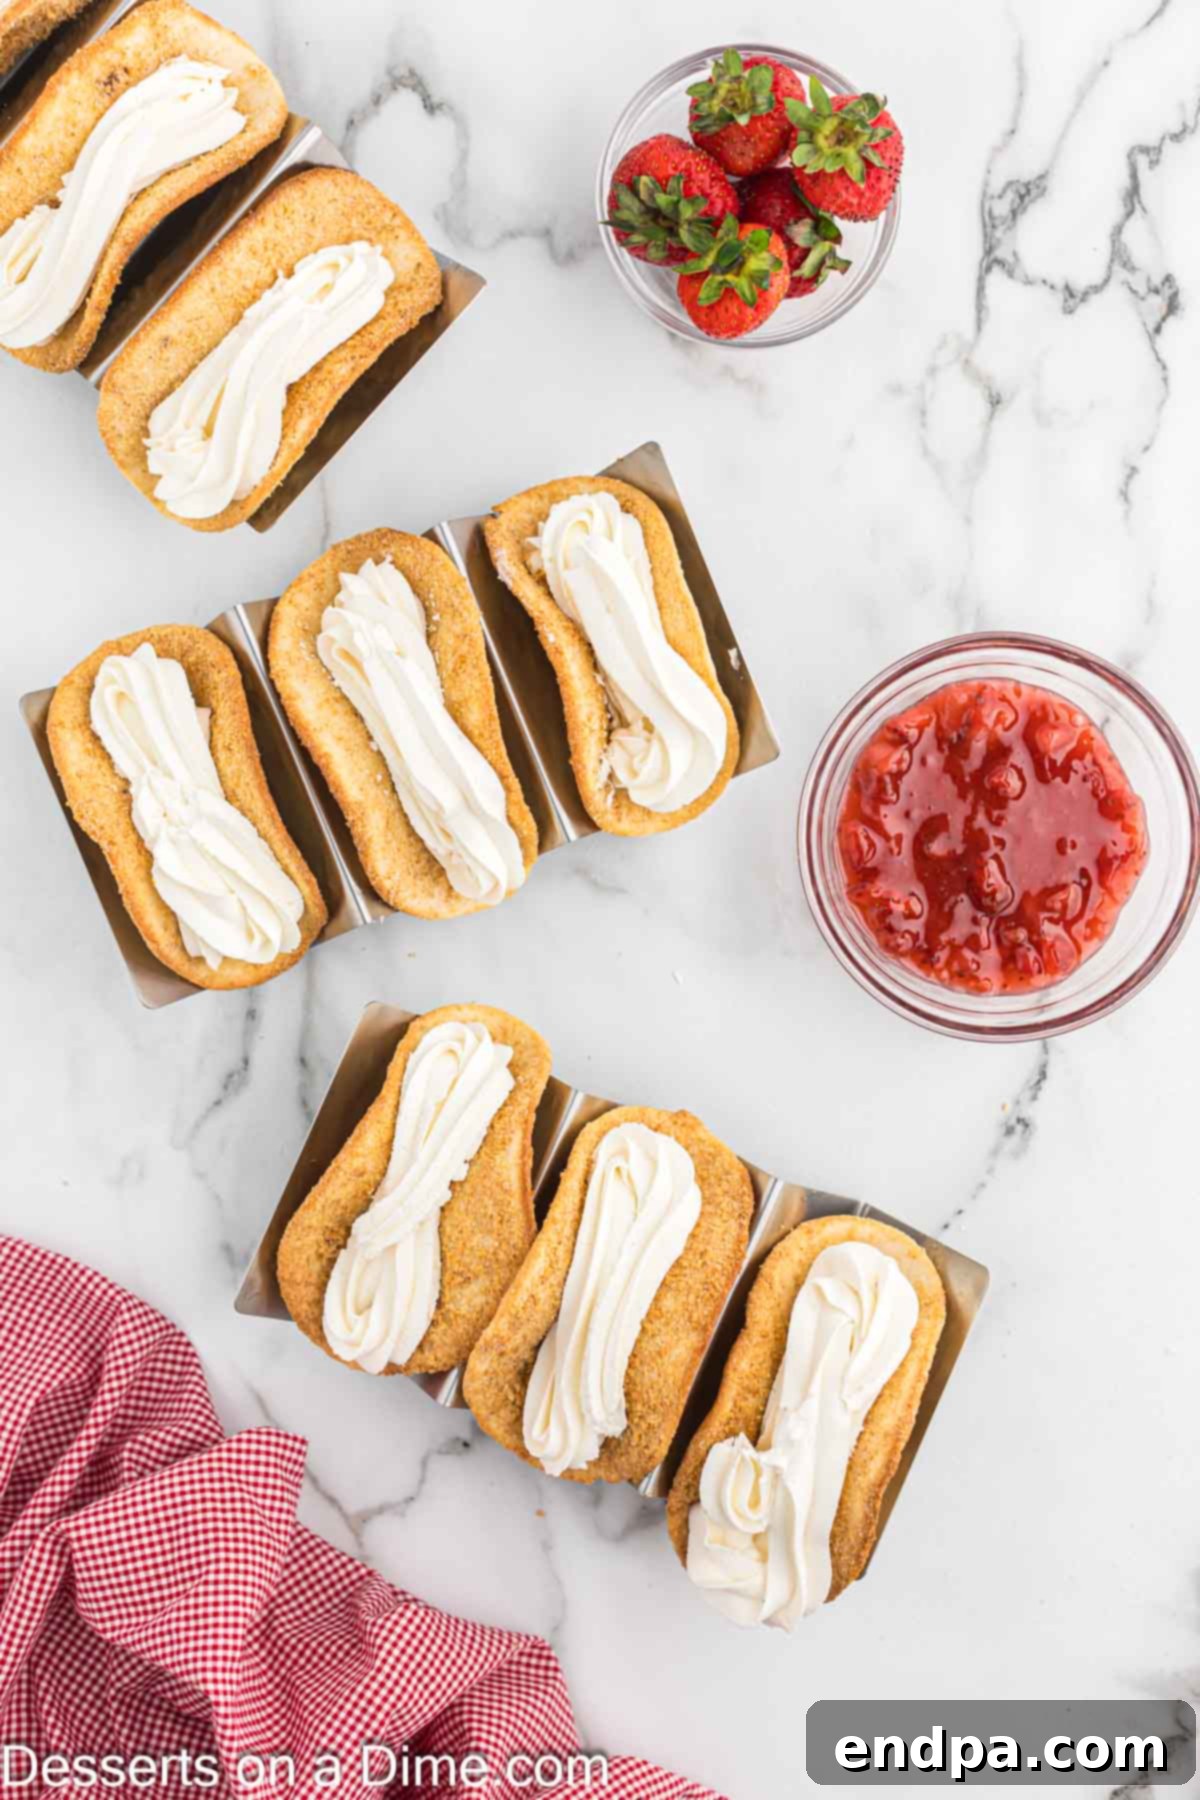
Step 7: Fill the Taco Shells. Once both the taco shells and the cheesecake filling are fully cooled, it’s time for assembly. Transfer the chilled cheesecake filling into a piping bag fitted with a star tip, or simply use a large ziploc bag with one corner snipped off. Carefully pipe the creamy cheesecake mixture into each crispy taco shell. Be mindful not to overfill, as this can make the tacos difficult to handle and might cause the shells to break.
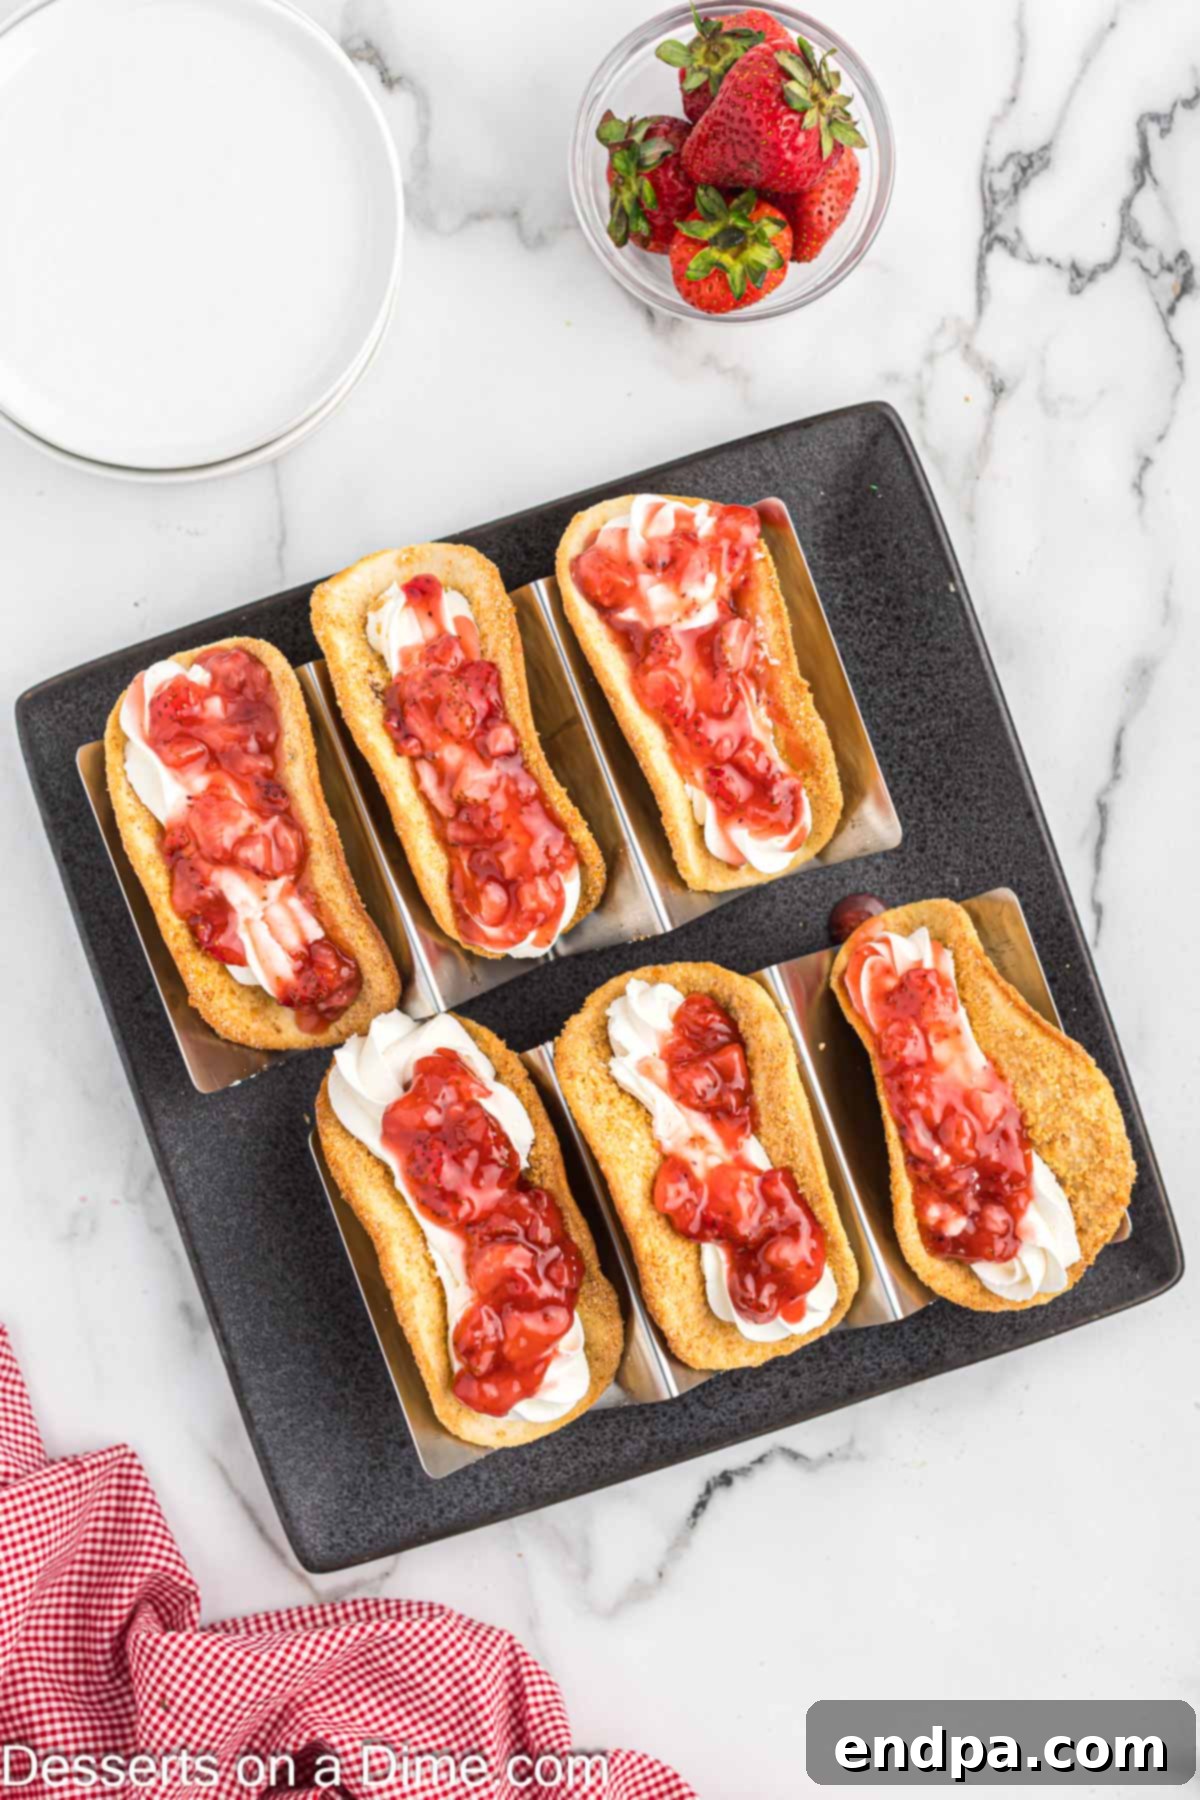
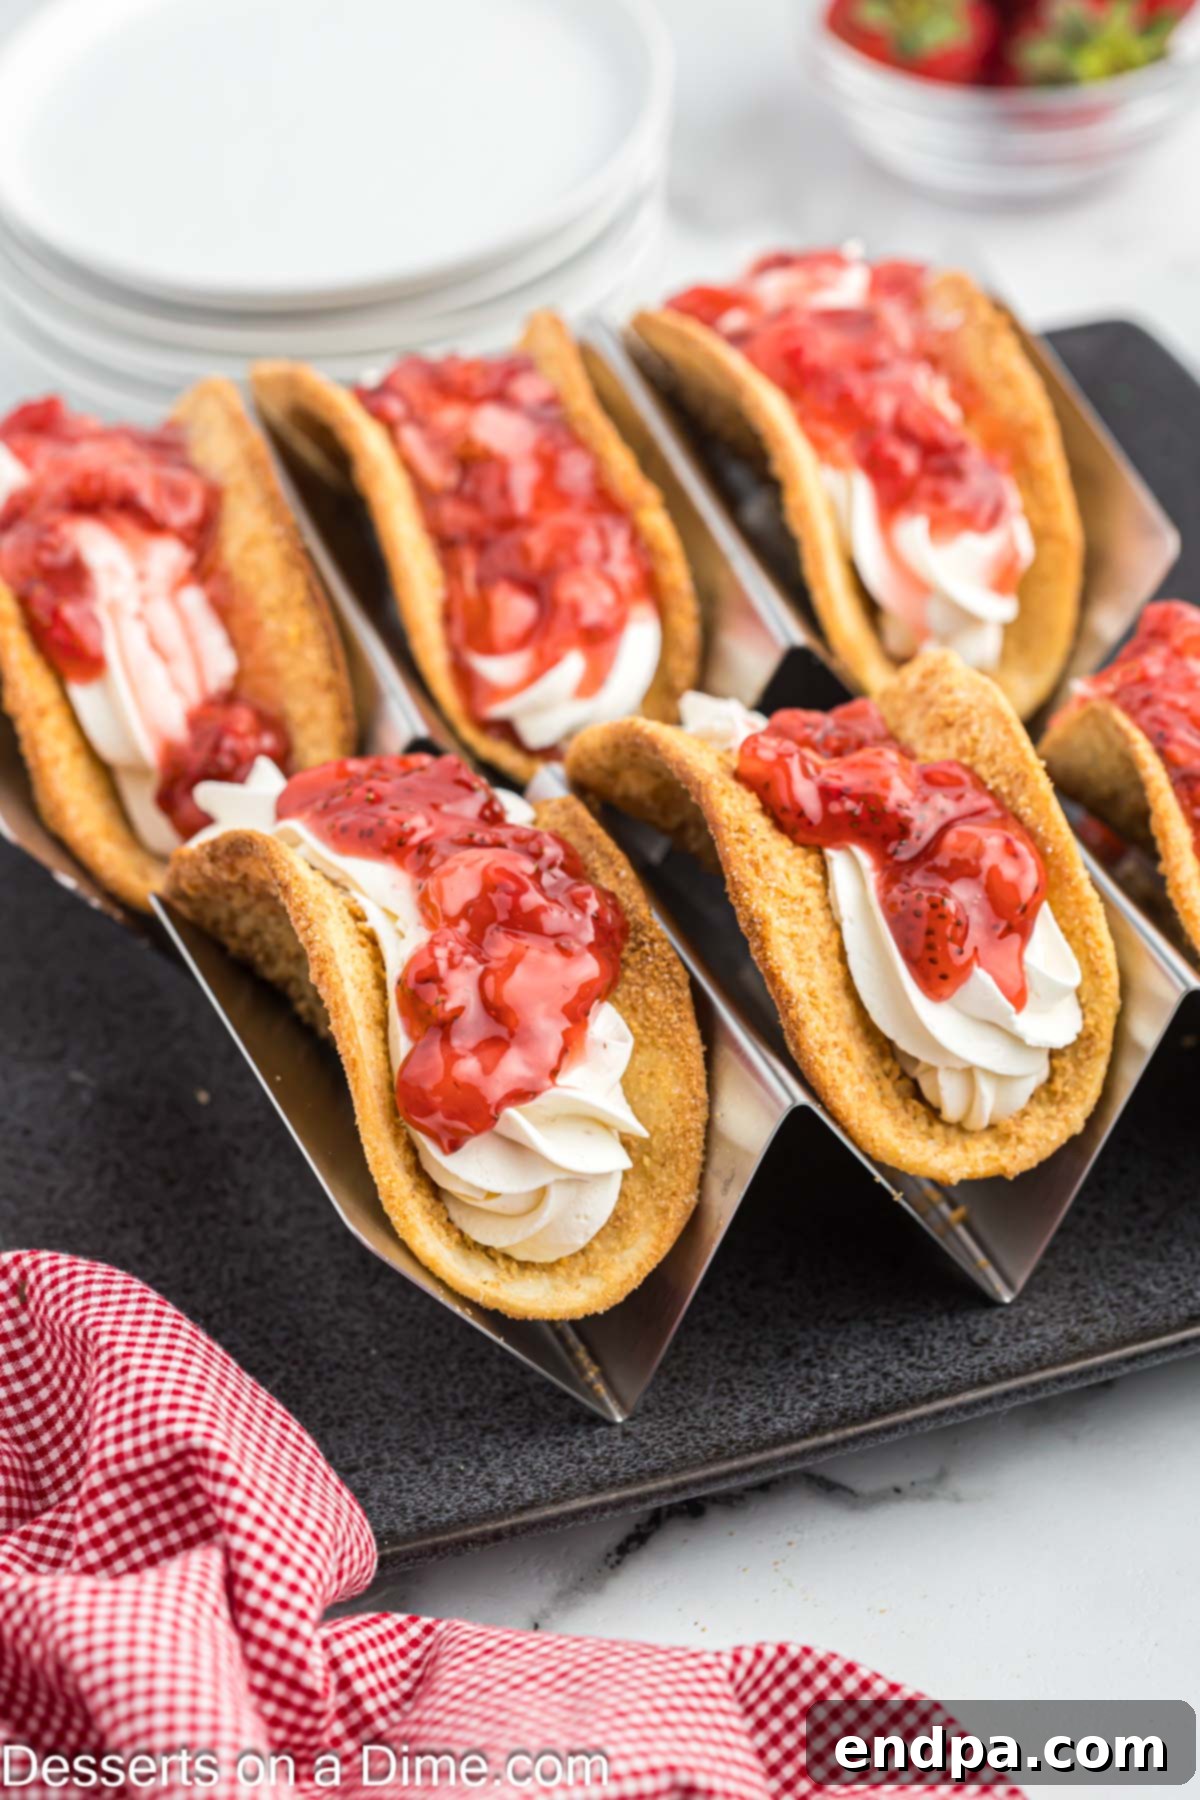
Step 8: Top and Serve. Spoon a generous amount of the cooled, homemade strawberry topping over the cheesecake filling in each taco. For an extra touch of elegance, you can garnish with a fresh strawberry slice or a sprig of mint. Serve these delightful Strawberry Cheesecake Tacos immediately to enjoy their optimal crispy shell and creamy filling texture. Enjoy your homemade dessert masterpiece!
Expert Tips for Success
Achieving perfect Strawberry Cheesecake Tacos is simple with a few helpful tips:
- Prevent Air Bubbles: Don’t skip the step of pricking the tortillas with a fork before baking. This small action releases any trapped air, preventing large bubbles from forming and ensuring your shells bake flat and evenly crispy.
- Alternative Taco Shell Holders: While an inverted muffin tin is an excellent hack, dedicated taco shell holders are readily available and can provide even more consistent shapes for your dessert tacos.
- Tortilla Size Matters: Street taco-sized tortillas are ideal for these individual dessert portions. If you can only find larger regular-sized flour tortillas, simply use a round cookie cutter or a sharp knife to cut them down to a smaller, more manageable size.
- Room Temperature Ingredients are Key: Always ensure your cream cheese is completely softened to room temperature before you begin mixing the filling. This is paramount for achieving a perfectly smooth, lump-free, and creamy consistency. Cold cream cheese will result in a lumpy filling that won’t blend properly.
- Avoid Overfilling: Resist the temptation to stuff your tacos to the brim. Overfilling can cause the shells to crack or fall apart when handled, making them messy to eat. A moderate amount of filling ensures structural integrity and a balanced bite.
- Chill the Filling Properly: Allowing the cheesecake filling to chill in the refrigerator for at least 30 minutes, or even longer, is crucial. This step helps the filling firm up, making it much easier to pipe neatly into the cooled taco shells and preventing it from being too soft or runny.
- Cool Shells Completely: Never add the creamy filling to warm taco shells. The heat will cause the filling to melt and potentially make your crispy shells soggy. Patience is a virtue here!
- Fresh vs. Frozen Strawberries for Sauce: While fresh strawberries are ideal for the topping, thawed frozen strawberries can also be used. If using frozen, you might need to simmer the sauce slightly longer to reduce any excess liquid.
Frequently Asked Questions
These dessert tacos are truly best enjoyed immediately after assembly when their shells are at their crispiest. However, if you have leftovers, you can refrigerate them in an airtight container for 1-2 days. Be aware that the shells may gradually soften over time due to moisture from the filling.
You can certainly freeze the prepared cheesecake filling separately in a freezer-safe container for up to a month. Thaw it in the refrigerator before using. However, I do not recommend freezing the baked taco shells, as they will lose their crisp texture upon thawing and become soggy.
Small flour tortillas, specifically “street taco size,” work best for these dessert tacos. Their smaller size makes them perfect for individual servings and easier to handle. You can also use regular-sized flour tortillas and cut them into smaller rounds if needed.
Yes, to make these gluten-free, simply substitute regular flour tortillas with your favorite gluten-free flour tortillas. Ensure your graham cracker crumbs are also gluten-free. The rest of the ingredients are naturally gluten-free.
The best way to prevent soggy shells is to ensure they are completely cooled before adding the filling. Also, serve the tacos immediately after assembly. If preparing in advance, keep the shells, filling, and topping separate, and assemble just before serving.
Serving Suggestions
These Strawberry Cheesecake Tacos are a dessert showstopper on their own, but a few simple additions can make them even more special:
- A Dollop of Whipped Cream: A fresh swirl of homemade whipped cream or extra whipped topping makes for a beautiful and delicious garnish.
- Fresh Mint Leaves: A sprig of fresh mint adds a pop of vibrant green and a refreshing aroma that complements the strawberries perfectly.
- Chocolate Shavings: A dusting of finely grated dark chocolate adds a touch of elegance and a subtle richness.
- Dessert Platter: Arrange them neatly on a platter for a party, perhaps alongside other mini desserts for a variety.
- Coffee or Tea: Serve with a fresh cup of coffee or your favorite herbal tea for a sophisticated dessert experience.
Make-Ahead Tips
To reduce stress and save time, especially when entertaining, you can prepare components of the Strawberry Cheesecake Tacos in advance:
- Taco Shells: Bake and cool the crispy taco shells up to 2-3 days ahead of time. Store them in an airtight container at room temperature to maintain their crispness.
- Cheesecake Filling: Prepare the cheesecake filling up to 2 days in advance. Store it in an airtight container in the refrigerator. Before piping, give it a quick whisk to ensure it’s smooth and fluffy.
- Strawberry Topping: Make the strawberry sauce up to 3-4 days ahead. Store it in an airtight container in the refrigerator. Allow it to come to room temperature or gently warm it slightly before serving if preferred, though it’s delicious cold too.
- Assemble Just Before Serving: For the best texture, especially the crispy shells, always assemble the tacos no more than a few hours before serving, ideally right before.
Storage and Reheating
While these tacos are best fresh, proper storage ensures any leftovers remain enjoyable:
- Refrigeration: As mentioned, assembled tacos can be stored in an airtight container in the refrigerator for 1-2 days. The shells will gradually soften, but the flavors will still be delicious.
- Freezing: The cheesecake filling freezes well for up to a month. Store it in a freezer-safe container. Thaw in the refrigerator overnight before use. The strawberry topping can also be frozen for similar duration; thaw and stir before serving.
- Reheating (Not Recommended for Assembled Tacos): Reheating assembled tacos is generally not recommended as the shells will become even softer and the filling may separate. It’s best to enjoy them cold from the fridge if they’ve been stored. If you have leftover shells that have softened slightly, you can try briefly re-crisping them in a dry skillet or toaster oven for a minute or two, but this is a delicate process and results may vary.
More Irresistible Cheesecake Desserts
If you’ve fallen in love with the rich, creamy goodness of cheesecake in these tacos, you’ll definitely want to explore more cheesecake-inspired treats. Here are some other delightful recipes to satisfy your cravings:
- Cheesecake Bites
- Caramel Cheesecake Bars Recipe
- Deep Fried Cheesecake
- Pecan Pie Cheesecake Bars
- Nutella Cheesecake
This Strawberry Cheesecake Tacos recipe is incredibly easy to make and guaranteed to be a hit. Give it a try, and don’t forget to come back and leave a comment to share your experience!
Strawberry Cheesecake Tacos Recipe
Summary: Strawberry Cheesecake Tacos are packed with a rich filling tucked into a crispy shell. Each taco is topped with homemade strawberry sauce for a luscious dessert in minutes.
Recipe Details:
- Prep Time: 20 minutes
- Cook Time: 11 minutes
- Total Time: 31 minutes
- Servings: 18 tacos
- Cuisine: American
- Course: Dessert
- Calories: 247 kcal per serving
- Author: Carrie Barnard
Ingredients
For the Taco Shells:
- 18 Street Taco Size Flour Tortillas (Find them here)
- 1 cup Graham Cracker Crumbs (Buy graham cracker crumbs)
- 2 Tablespoons Granulated Sugar (Shop for sugar)
- ⅓ cup Melted Butter (High-quality butter)
For the Cheesecake Filling:
- 8 ounces Cream Cheese, softened (Get cream cheese)
- ⅓ cup Powdered Sugar (Powdered sugar options)
- 2 teaspoons Vanilla Extract (Pure vanilla extract)
- 8 ounces Whipped Topping (thawed – Cool Whip or similar) (Whipped topping brands)
For the Strawberry Topping:
- 1 cup chopped strawberries (Fresh strawberries)
- 2 tablespoons cornstarch (Buy cornstarch)
- ¼ cup water
- ½ cup Granulated Sugar (Granulated sugar)
Instructions
For the Shells:
- Preheat the oven to 400 degrees Fahrenheit (200°C).
- In a shallow bowl, stir together the graham cracker crumbs and granulated sugar. Gently stab the tortillas with a fork 6-7 times to help prevent air bubbles from forming during baking.
- Coat both sides of the tortillas with the melted butter using a basting brush. Then, gently press the tortillas down into the graham cracker mixture to coat the shells evenly. Flip and repeat until both sides are well coated.
- Flip a cupcake pan upside down. Fold the tortillas in half and place them in between the cups of the inverted pan so that they keep their taco shape while baking.
- Bake for 10-11 minutes until the shells are golden brown and crispy. Let the shells cool completely in the pan before handling or adding any filling.
For the Filling:
- In a large mixing bowl, beat together the softened cream cheese, powdered sugar, and vanilla extract until thoroughly combined and smooth, using a handheld or stand mixer.
- Gently fold in the thawed whipped topping and continue to beat until the mixture is smooth, light, and fluffy.
- Chill the mixture in the refrigerator for at least 30 minutes while you prepare the strawberry topping. This helps the filling firm up.
- For the Strawberry Topping: In a small pot, combine the water with sugar and the chopped strawberries. Bring to a gentle boil, then reduce to a simmer to soften the strawberries.
- Dissolve cornstarch in a small amount of cold water to create a slurry. Add this slurry into the pot with the strawberries. Stir constantly until the mixture thickens slightly and becomes a slightly chunky sauce.
- Remove the strawberry topping from the heat and let it cool completely.
To Assemble:
- Transfer the chilled cheesecake filling mixture to a piping bag (with a star tip, if desired) or a ziploc bag with one of the corners snipped off.
- Carefully pipe the creamy cheesecake mixture into each of the cooled taco shells. Be careful not to overfill.
- Spoon a generous amount of the cooled strawberry topping on top of the cheesecake filling.
- Serve immediately and enjoy your delicious Strawberry Cheesecake Tacos!
Recipe Notes
These Strawberry Cheesecake Tacos are best served immediately after they are assembled to ensure the shells remain wonderfully crispy. Over time, the moisture from the filling will cause the shells to soften.
However, you can refrigerate any leftovers for 1-2 days in an airtight container. Keep in mind that the shells may lose some of their crispness.
Nutrition Facts (per serving)
- Calories: 247 kcal
- Carbohydrates: 33g
- Protein: 4g
- Fat: 11g
- Saturated Fat: 6g
- Polyunsaturated Fat: 1g
- Monounsaturated Fat: 3g
- Trans Fat: 0.1g
- Cholesterol: 24mg
- Sodium: 328mg
- Potassium: 90mg
- Fiber: 1g
- Sugar: 14g
- Vitamin A: 297IU
- Vitamin C: 5mg
- Calcium: 76mg
- Iron: 1mg
Pin This Now to Remember It Later
Pin Recipe
