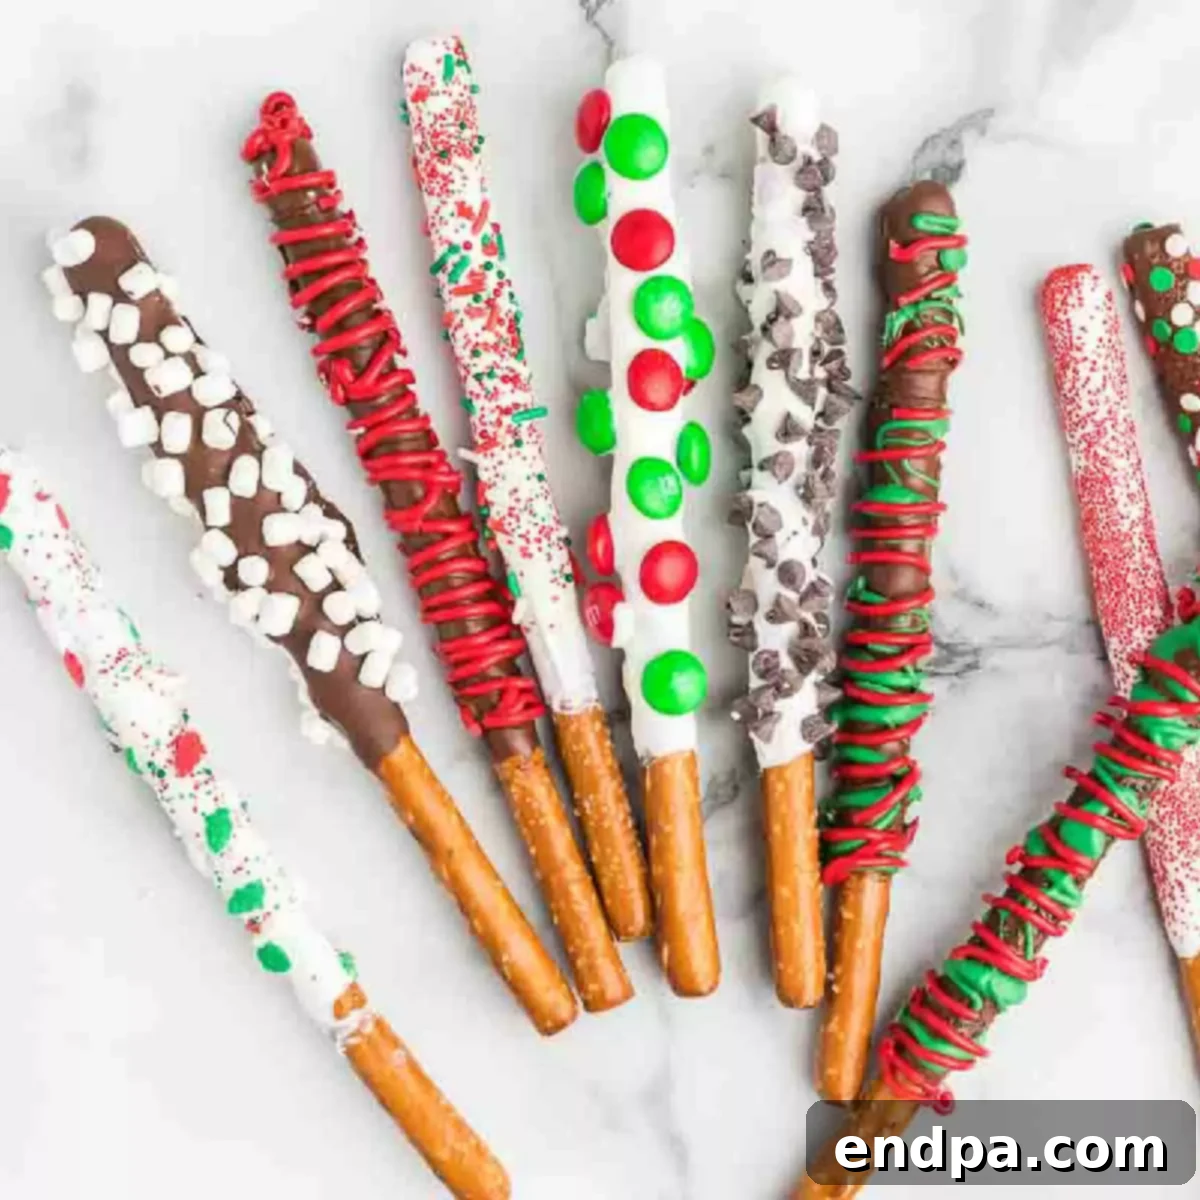
If you’re searching for a delightful yet budget-friendly holiday treat that’s both festive and incredibly easy to make, look no further than these **Christmas Chocolate Covered Pretzel Rods**. These irresistible snacks blend the perfect balance of sweet and salty, creating a crowd-pleasing dessert that’s as fun to decorate as it is to eat. Whether you’re preparing for a holiday party, crafting homemade gifts, or simply enjoying a cozy baking session with family, this recipe is a must-try.
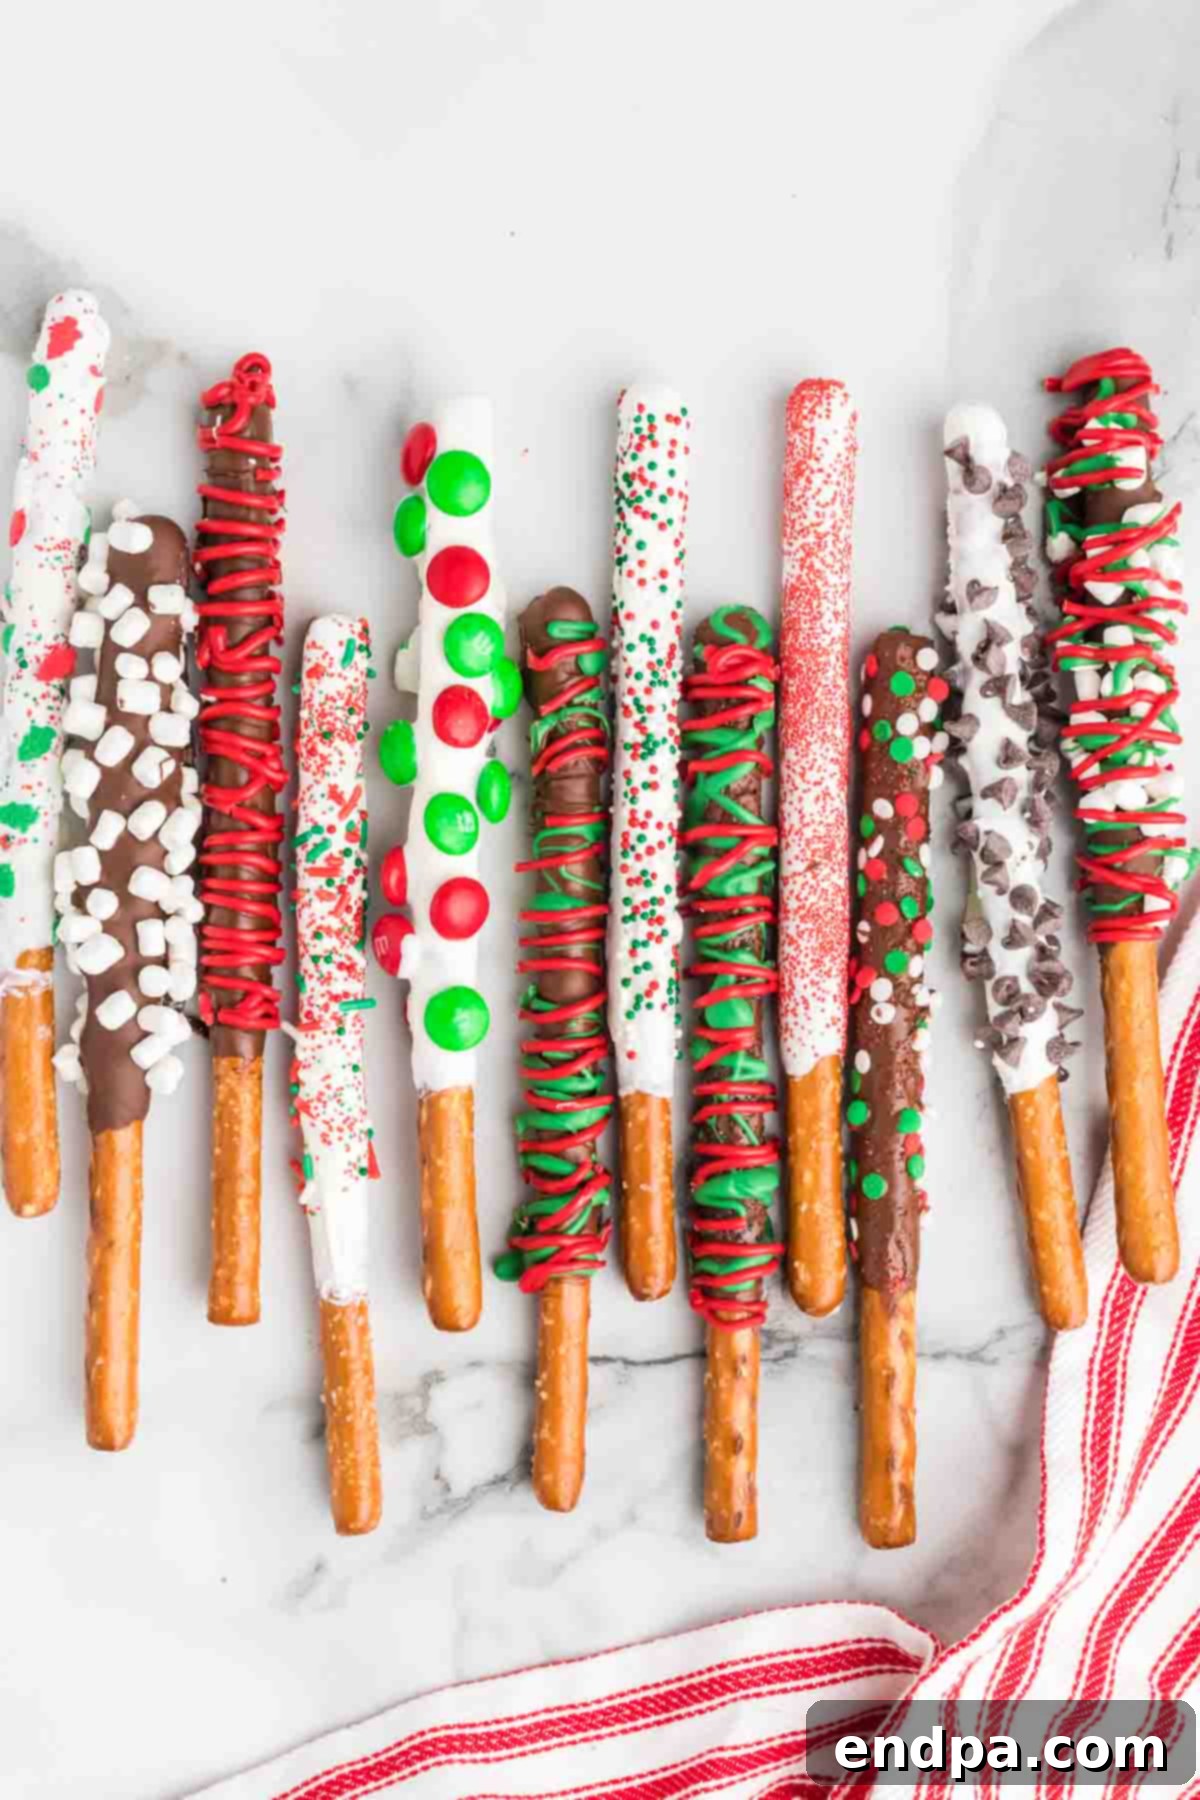
The holiday season is synonymous with joy, traditions, and, of course, delicious treats. For years, our family has cherished the tradition of making these Christmas pretzel rods, and they consistently rank among our favorites. Kids especially love getting involved in the decorating process, transforming simple pretzel rods into edible works of art with an array of vibrant toppings. The combination of crunchy pretzels and smooth, sweet chocolate is simply divine, making them an instant hit with everyone who tries them. Beyond Christmas, we also enjoy chocolate covered pretzel rods year-round, adapting them for various occasions, and even creating fun Reindeer Pretzel Rods for a whimsical touch during the holidays.
From classic festive sprinkles to crushed candy canes, M&M’s, chopped nuts, or even shredded coconut, the possibilities for jazzing up these treats are endless. This guide will walk you through everything you need to know to create stunning and scrumptious Christmas chocolate covered pretzel rods, complete with step-by-step instructions, creative variations, and helpful tips for storage and gifting.
Table of Contents
- The Allure of Sweet and Salty
- Why These Pretzel Rods are a Holiday Favorite
- Essential Ingredients for Festive Fun
- Unleash Your Creativity: Variations and Substitutions
- Step-by-Step Guide to Perfect Pretzel Rods
- Serving Suggestions & Gifting Inspiration
- Tips for Flawless Pretzel Rod Decorating
- Frequently Asked Questions
- More Easy Christmas Desserts
- Recipe Card: Christmas Chocolate Covered Pretzel Rods
The Allure of Sweet and Salty
The magical combination of sweet and salty flavors has captivated taste buds for generations, and these Christmas chocolate covered pretzel rods are a testament to this timeless pairing. The crisp, savory crunch of the pretzel rod provides the perfect counterpoint to the rich, smooth sweetness of the chocolate coating. This delightful contrast isn’t just pleasing to the palate; it creates an addictive quality that makes these treats impossible to resist. The saltiness of the pretzel enhances the chocolate’s sweetness, creating a more complex and satisfying flavor profile that keeps you coming back for more. It’s this beautiful culinary harmony that makes them a beloved snack, especially during the festive holiday season.
Why These Pretzel Rods are a Holiday Favorite
There are countless reasons why Christmas chocolate covered pretzel rods have become a beloved holiday tradition for so many families, including ours. Their ease of preparation, versatility, and sheer deliciousness make them a standout treat during the festive season.
- **Effortlessly Easy & Fun:** This recipe is incredibly simple, making it perfect for bakers of all skill levels, even beginners. It’s a fantastic activity to involve children, allowing them to express their creativity with toppings and fostering cherished holiday memories in the kitchen.
- **A Delicious Crowd-Pleaser:** The combination of crunchy pretzels and smooth chocolate, enhanced by various toppings, ensures these treats are a universal favorite. They appeal to both kids and adults, making them ideal for holiday gatherings, school parties, or simply enjoying at home.
- **Budget-Friendly Brilliance:** Crafting homemade gifts doesn’t have to break the bank. Pretzel rods, candy melts, and sprinkles are all affordable ingredients, allowing you to create a large batch of impressive treats without a hefty price tag. This makes them perfect for showing appreciation to teachers, neighbors, friends, and colleagues.
- **Perfect for Gifting:** Thoughtful, homemade gifts always leave a lasting impression. These chocolate covered pretzel rods can be beautifully packaged in cellophane bags, festive boxes, or tied with ribbons, making them charming presents that spread holiday cheer. They are sturdy enough to travel and delight recipients.
- **Endless Customization:** While we focus on traditional Christmas colors here, the recipe is a blank canvas for your imagination. You can adapt the colors and toppings for any holiday or special occasion throughout the year, ensuring these treats are never out of season.

Essential Ingredients for Festive Fun
Creating these delightful Christmas chocolate covered pretzel rods requires only a few basic ingredients, most of which you likely already have in your pantry or can easily find at any grocery store. The beauty of this recipe lies in its simplicity and the ability to customize with various toppings.
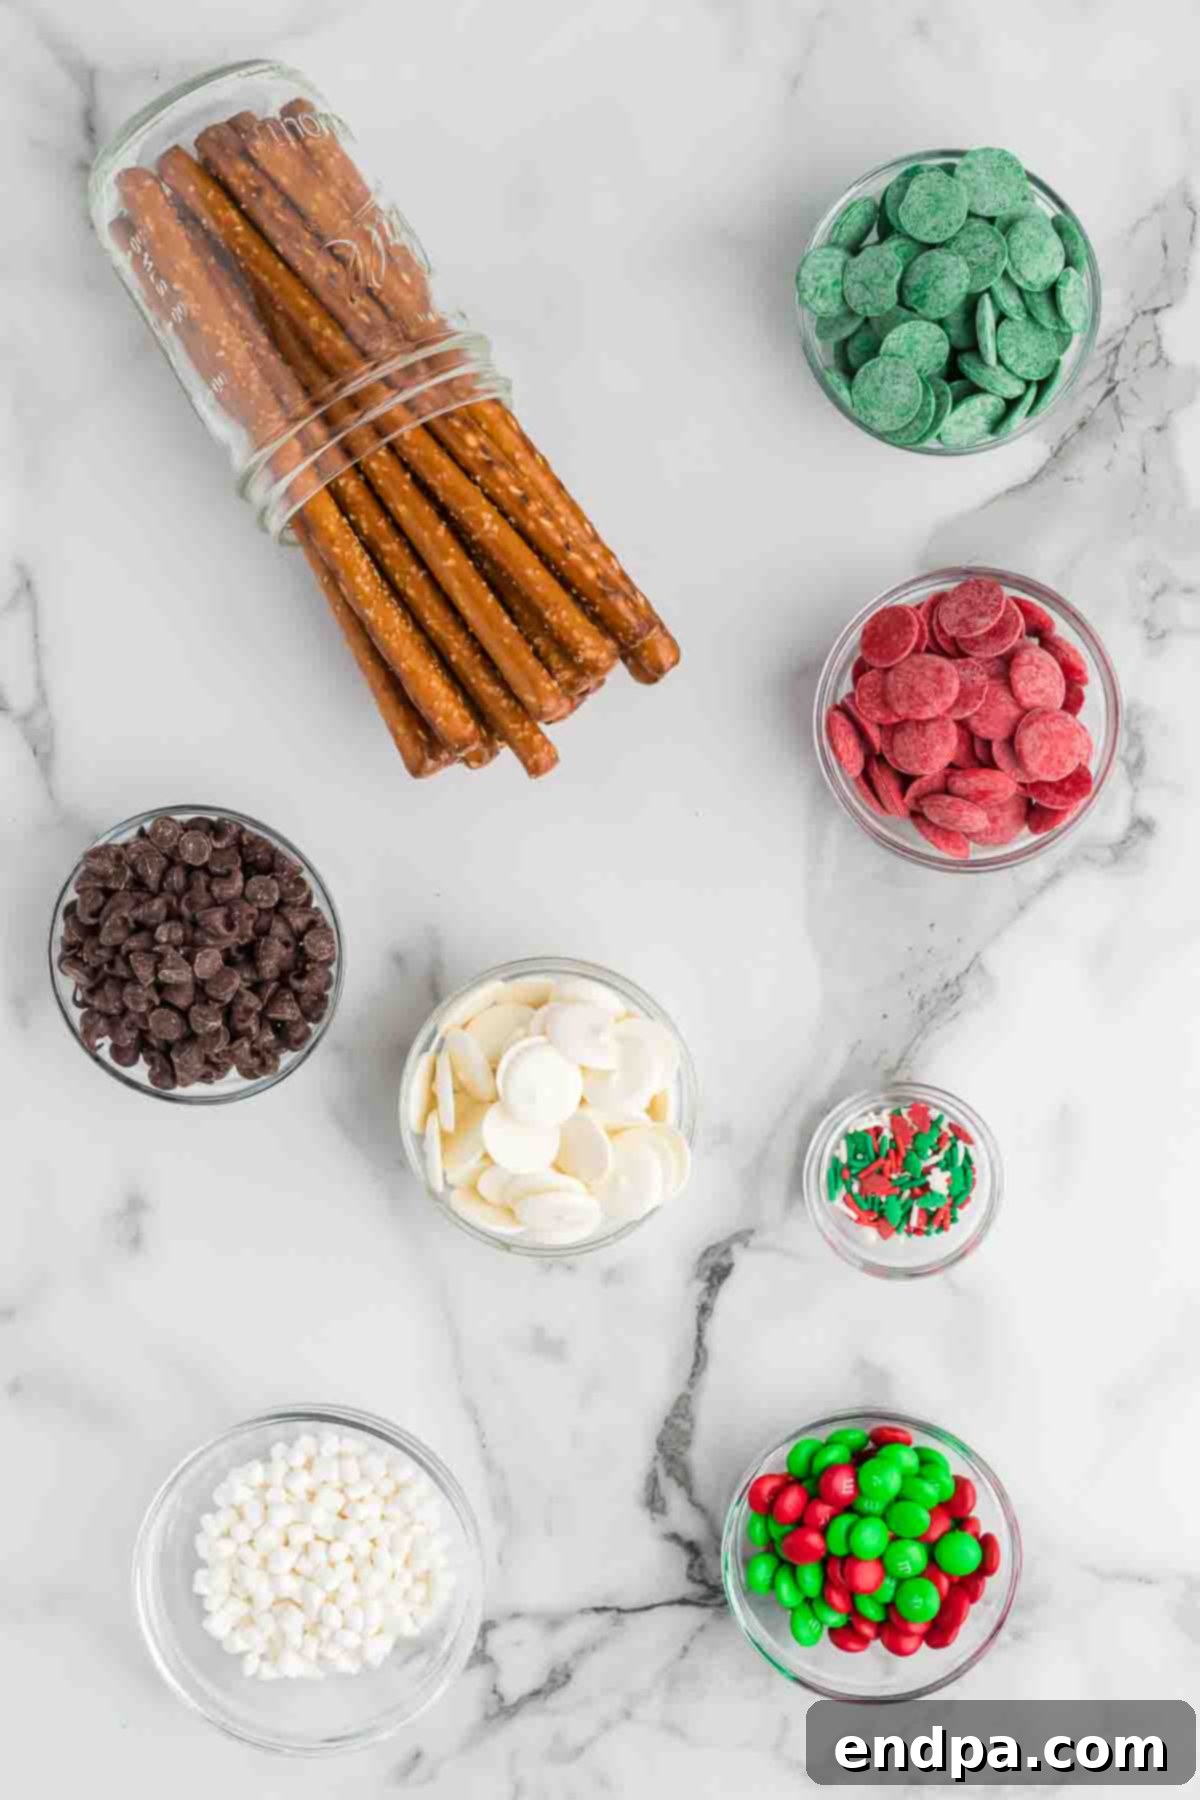
- Pretzel Rods: The star of our show! Their long, sturdy shape makes them ideal for dipping and decorating. Any brand will work, so choose your favorite. Make sure they are whole and unbroken for the best presentation.
- Candy Melts: These vibrant confectionary wafers are perfect for coating as they melt smoothly and set quickly, creating a beautiful, glossy finish. We recommend using traditional Christmas colors like red candy melts, green candy melts, and white candy melts to capture that festive spirit. They are easier to work with than tempered chocolate for beginners.
- Semi-sweet Chocolate Chips: While candy melts provide the color, semi-sweet chocolate chips offer a classic chocolate flavor that complements the pretzels beautifully. I prefer semi-sweet as it’s not overly sweet, creating a nice balance with the candy melts and toppings. However, milk chocolate chips can also be used if you prefer a sweeter profile. You can also use almond bark for a similar easy-melting experience.
-
Toppings: This is where the magic happens! Get creative with an array of festive additions:
- **Christmas Sprinkles:** Stars, trees, nonpareils, jimmies – the more variety, the better!
- **Christmas M&M’s:** Mini or regular, they add a pop of color and chocolatey crunch.
- **Chopped Nuts:** Almonds, pecans, walnuts, or peanuts add a lovely texture and nutty flavor.
- **Crushed Candy Canes:** For a classic peppermint kick and a beautiful red-and-white swirl.
- **Other Peppermint Candy:** Finely crushed peppermint patties or starlight mints.
- **Caramel Drizzle:** A decadent addition, especially when paired with a sprinkle of sea salt.
- **Shredded Coconut:** For a “snowy” effect, especially on white chocolate.
- **Mini Chocolate Chips:** A simple yet effective topping.
Remember, the complete ingredient list with precise measurements can be found in the recipe card at the bottom of this post.
Unleash Your Creativity: Variations and Substitutions
One of the best aspects of making chocolate covered pretzel rods is their incredible versatility. This recipe is merely a starting point; feel free to experiment with these variations and substitutions to personalize your treats for any occasion, not just Christmas!
- Drizzled Elegance: Instead of fully dipping the pretzels, try a partial dip or simply drizzle them with contrasting colors of melted chocolate or candy melts. This creates a more delicate look and can be just as appealing. Kids particularly enjoy this less messy decorating method!
- Beyond Rods: While pretzel rods are excellent for dipping, don’t limit yourself! Use mini pretzel twists, waffle pretzels, or even pretzel crisps for different textures and shapes. These smaller pretzels are great for bite-sized treats.
-
A Rainbow of Colors: This recipe is a fantastic year-round option. Simply swap out the Christmas-themed candy melts and sprinkles for colors appropriate to other holidays:
- **Valentine’s Day:** Pink, red, and white melts with heart sprinkles.
- **Easter:** Pastel shades like yellow, blue, and lavender with bunny or egg sprinkles.
- **Halloween:** Orange, black, and purple melts with spooky sprinkles.
- **Birthday Parties:** Use the birthday person’s favorite colors!
- **Game Day:** Team colors for a fun sports-themed snack.
-
Chocolate Choices: Experiment with different types of chocolate for dipping.
- White Chocolate: A creamy, sweet base for colorful drizzles and bright sprinkles.
- Milk Chocolate: A classic, sweeter option that’s always a hit.
- Dark Chocolate: For a more sophisticated, less sweet treat.
- Peanut Butter Chips: Melted peanut butter chips can create a delicious twist for peanut butter lovers.
- Flavor Boosts: Add a few drops of food-grade extract to your melted chocolate or candy melts for an extra flavor dimension. Peppermint extract is fantastic for Christmas, almond extract adds a subtle nuttiness, or orange extract for a citrusy hint.
- Nutty Alternatives: If you’re a fan of nuts, consider finely crushing different varieties like pistachios or hazelnuts for a gourmet touch. Ensure no one has nut allergies if serving these to a group.
Step-by-Step Guide to Perfect Pretzel Rods
Making Christmas chocolate covered pretzel rods is a straightforward process, but following these steps carefully will ensure beautiful and delicious results every time.
-
Step 1: Prepare Your Workstation & Melt the Coatings. First, line a large baking sheet with parchment paper, wax paper, or a silicone mat. This will prevent your pretzels from sticking as they set. Next, prepare your candy melts and chocolate chips. Place the white candy melts and semi-sweet chocolate chips into two separate, microwave-safe tall glasses or narrow bowls. The height of the vessel is key, as it allows for easier, more even dipping of the long pretzel rods.
Melt each in the microwave in 30-second intervals, stirring thoroughly after each interval. Continue this process until the melts are completely smooth and free of lumps. Be careful not to overheat, as this can cause the chocolate or candy melts to seize or burn. - Step 2: Melt Remaining Colors. In separate microwave-safe bowls (or clean tall glasses), melt the green candy melts and red candy melts using the same 30-second increment method, stirring until perfectly smooth. Having all your melted coatings ready before you start dipping will make the process much smoother.
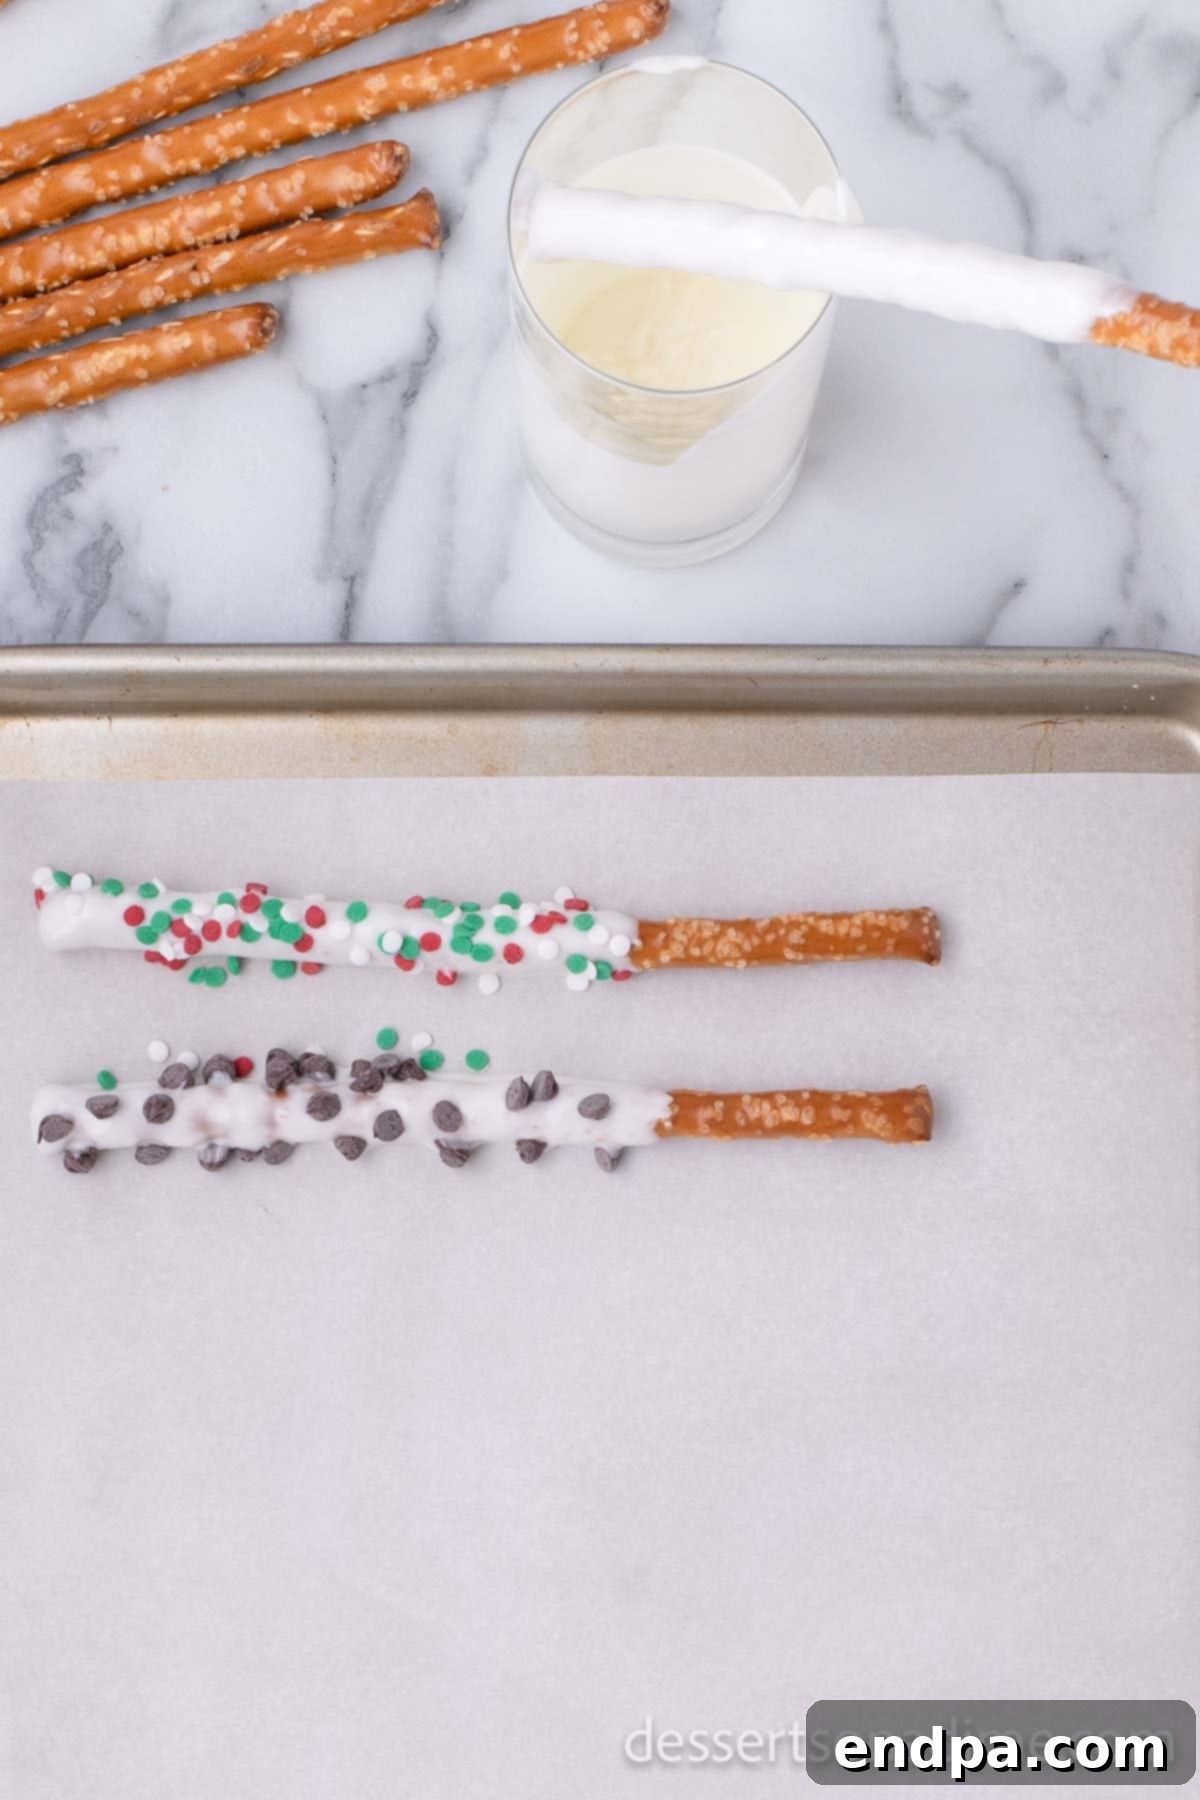
Step 3: Dip the Pretzel Rods. Hold a pretzel rod by the dry end and carefully dip about two-thirds of it into one of your melted coatings (white candy melt or semi-sweet chocolate). Gently twirl and tap the pretzel rod against the edge of the bowl to allow any excess coating to drip off. This helps create a smooth, even layer and prevents puddles at the base.
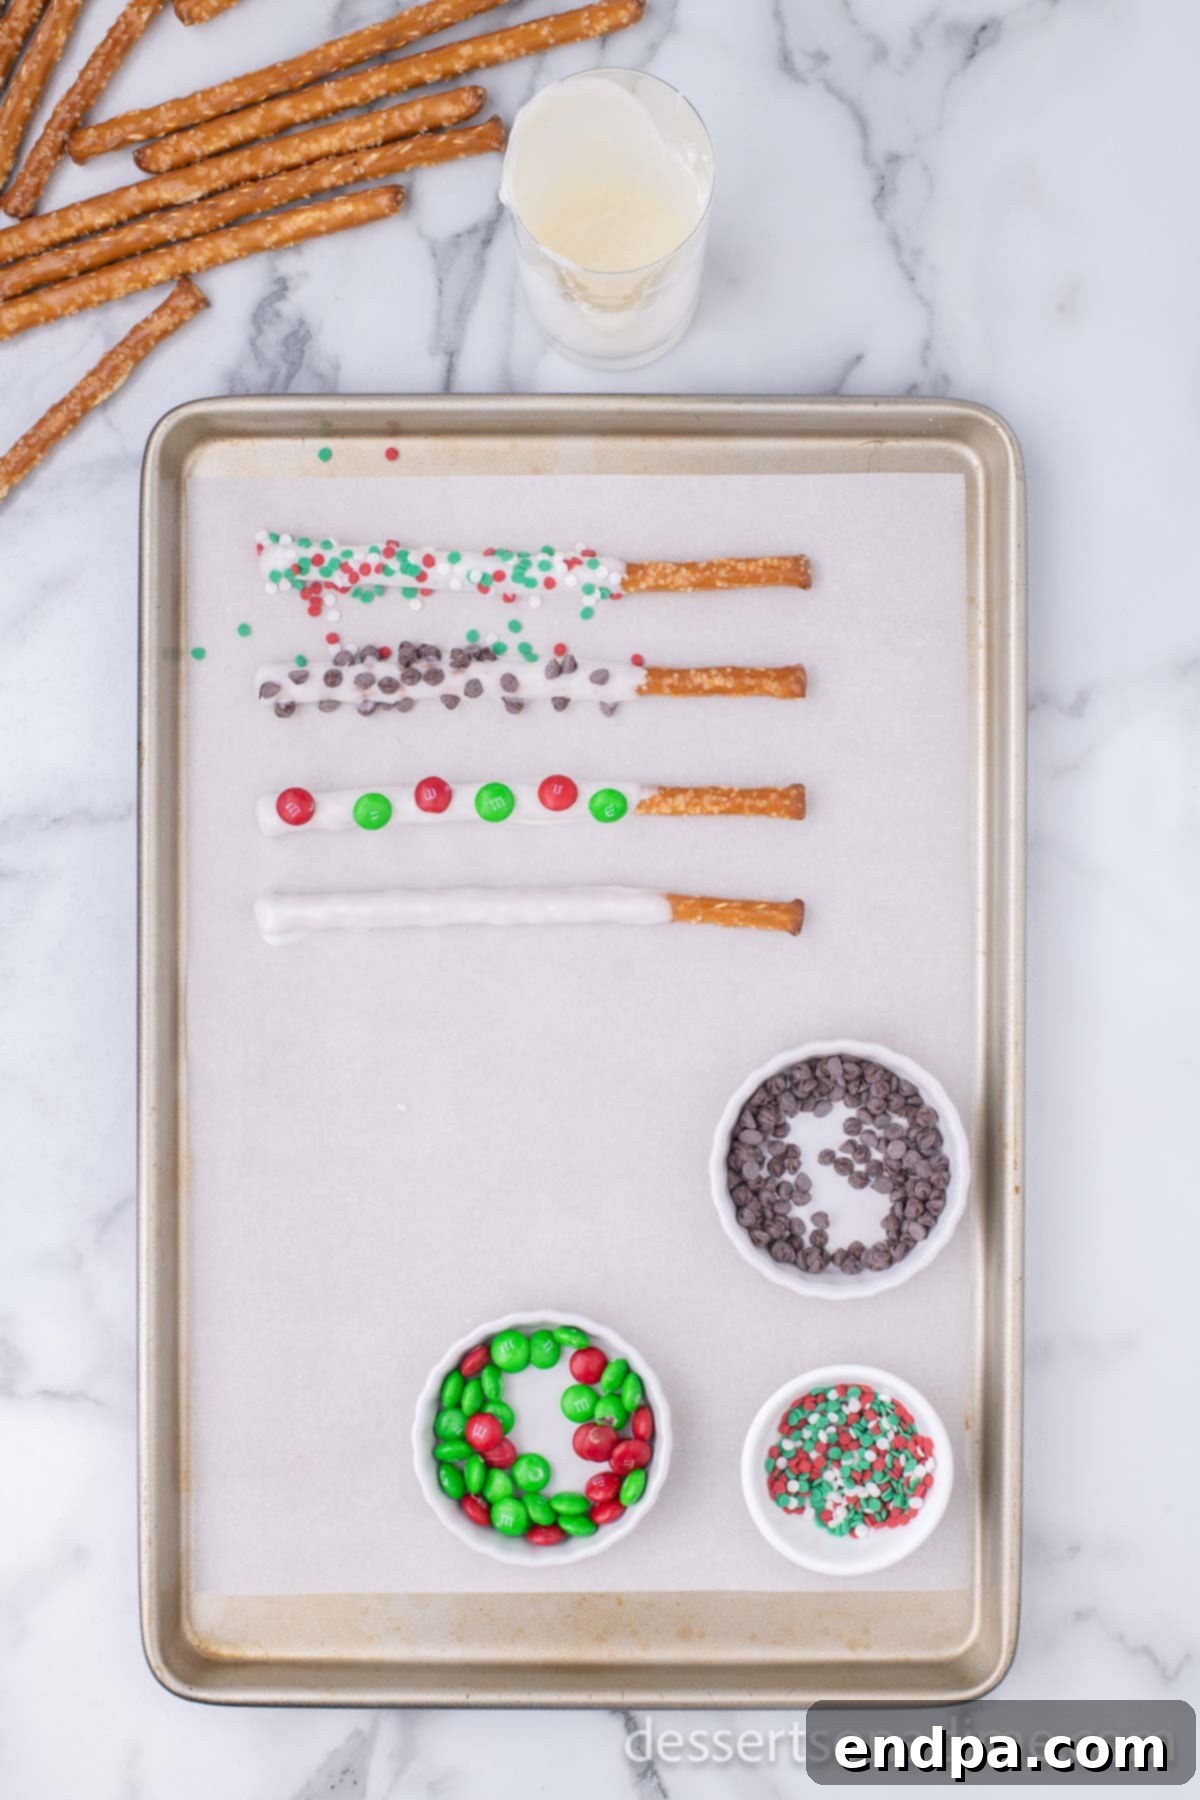
Step 4: Arrange on Baking Sheet. Carefully place the dipped pretzel rods onto your prepared baking sheet. Ensure they are spaced apart so they don’t touch each other, which could disrupt the setting process or ruin the decorations.
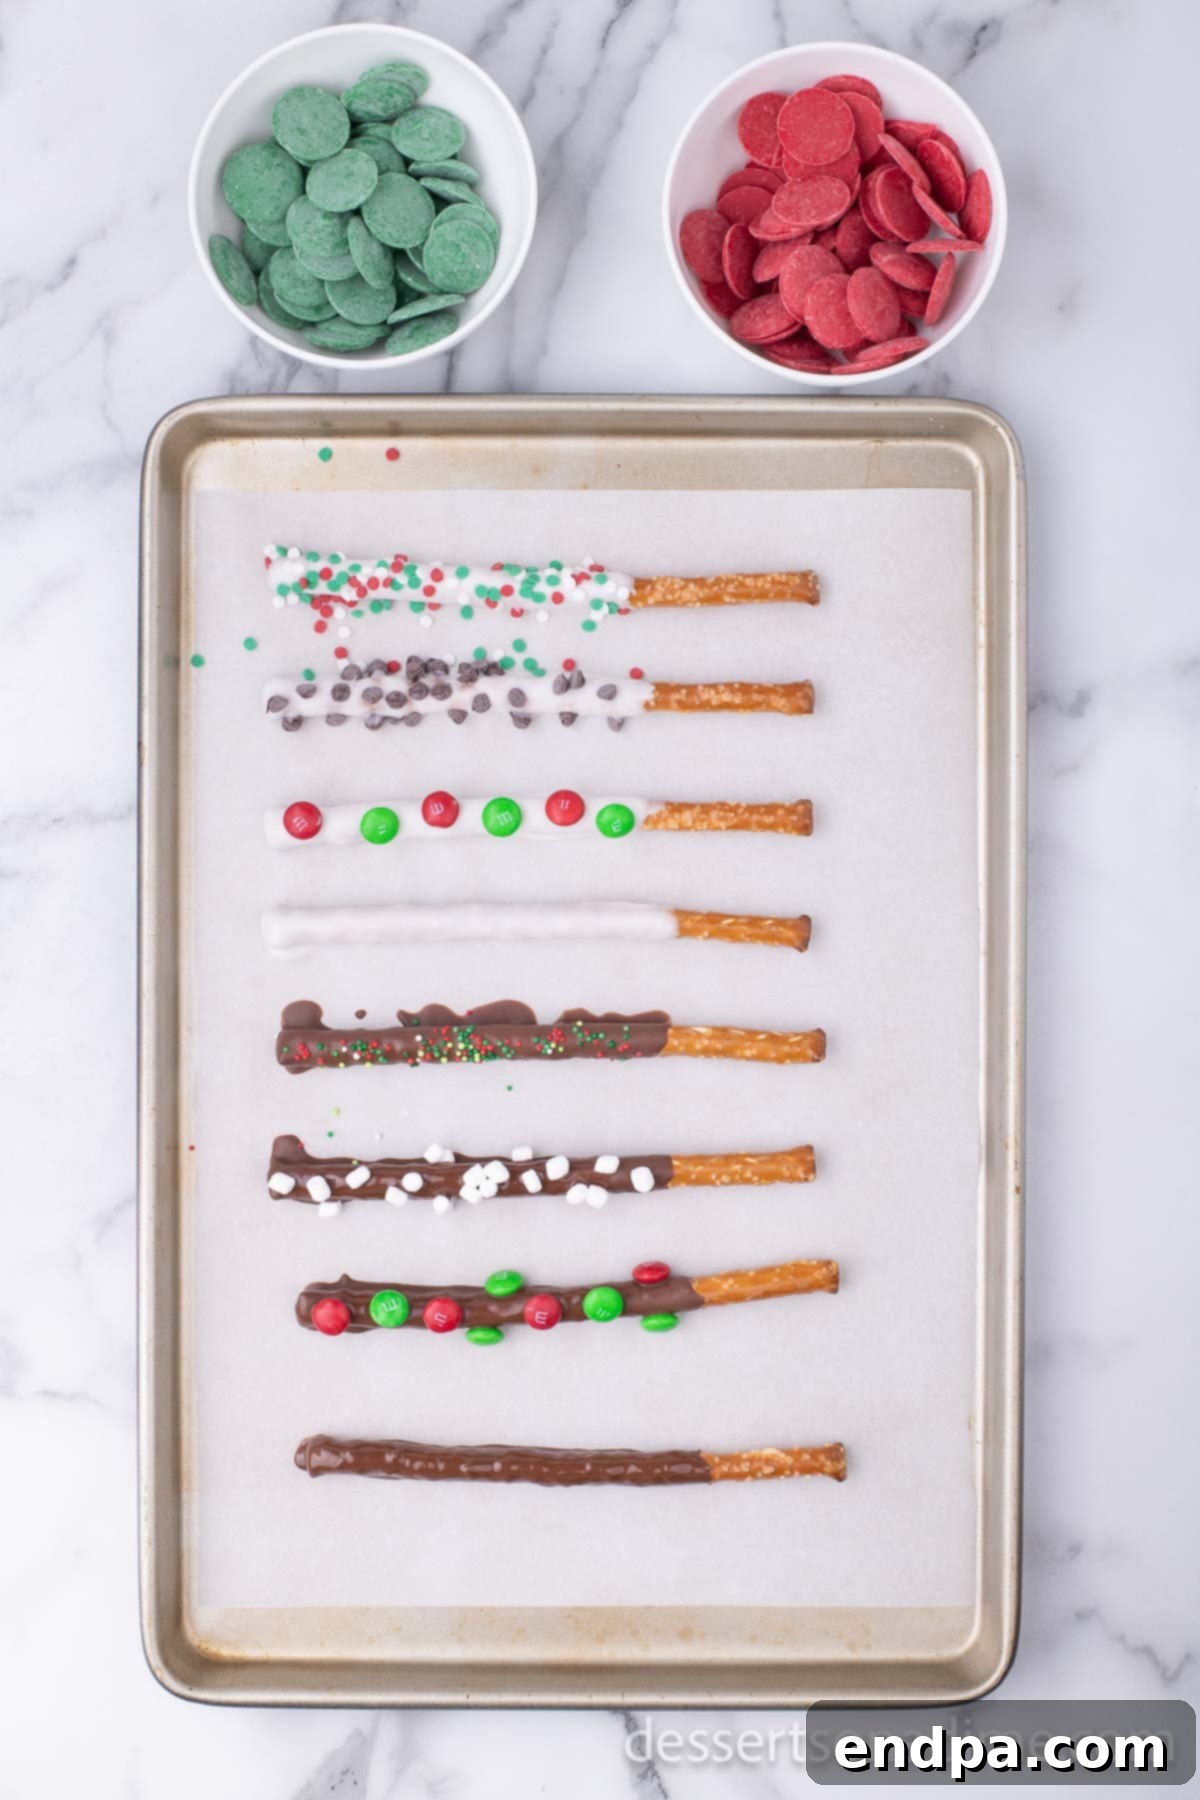
Step 5: Decorate While Wet. This is the most fun part! While the chocolate or candy melt on the pretzel rods is still wet and pliable, immediately begin decorating. Use a fork to drizzle contrasting colors of melted candy melts over the dipped pretzels. Then, liberally sprinkle your chosen toppings – festive sprinkles, M&M’s, chopped nuts, or crushed candy canes – onto the still-wet coating. Press larger toppings gently to ensure they adhere.
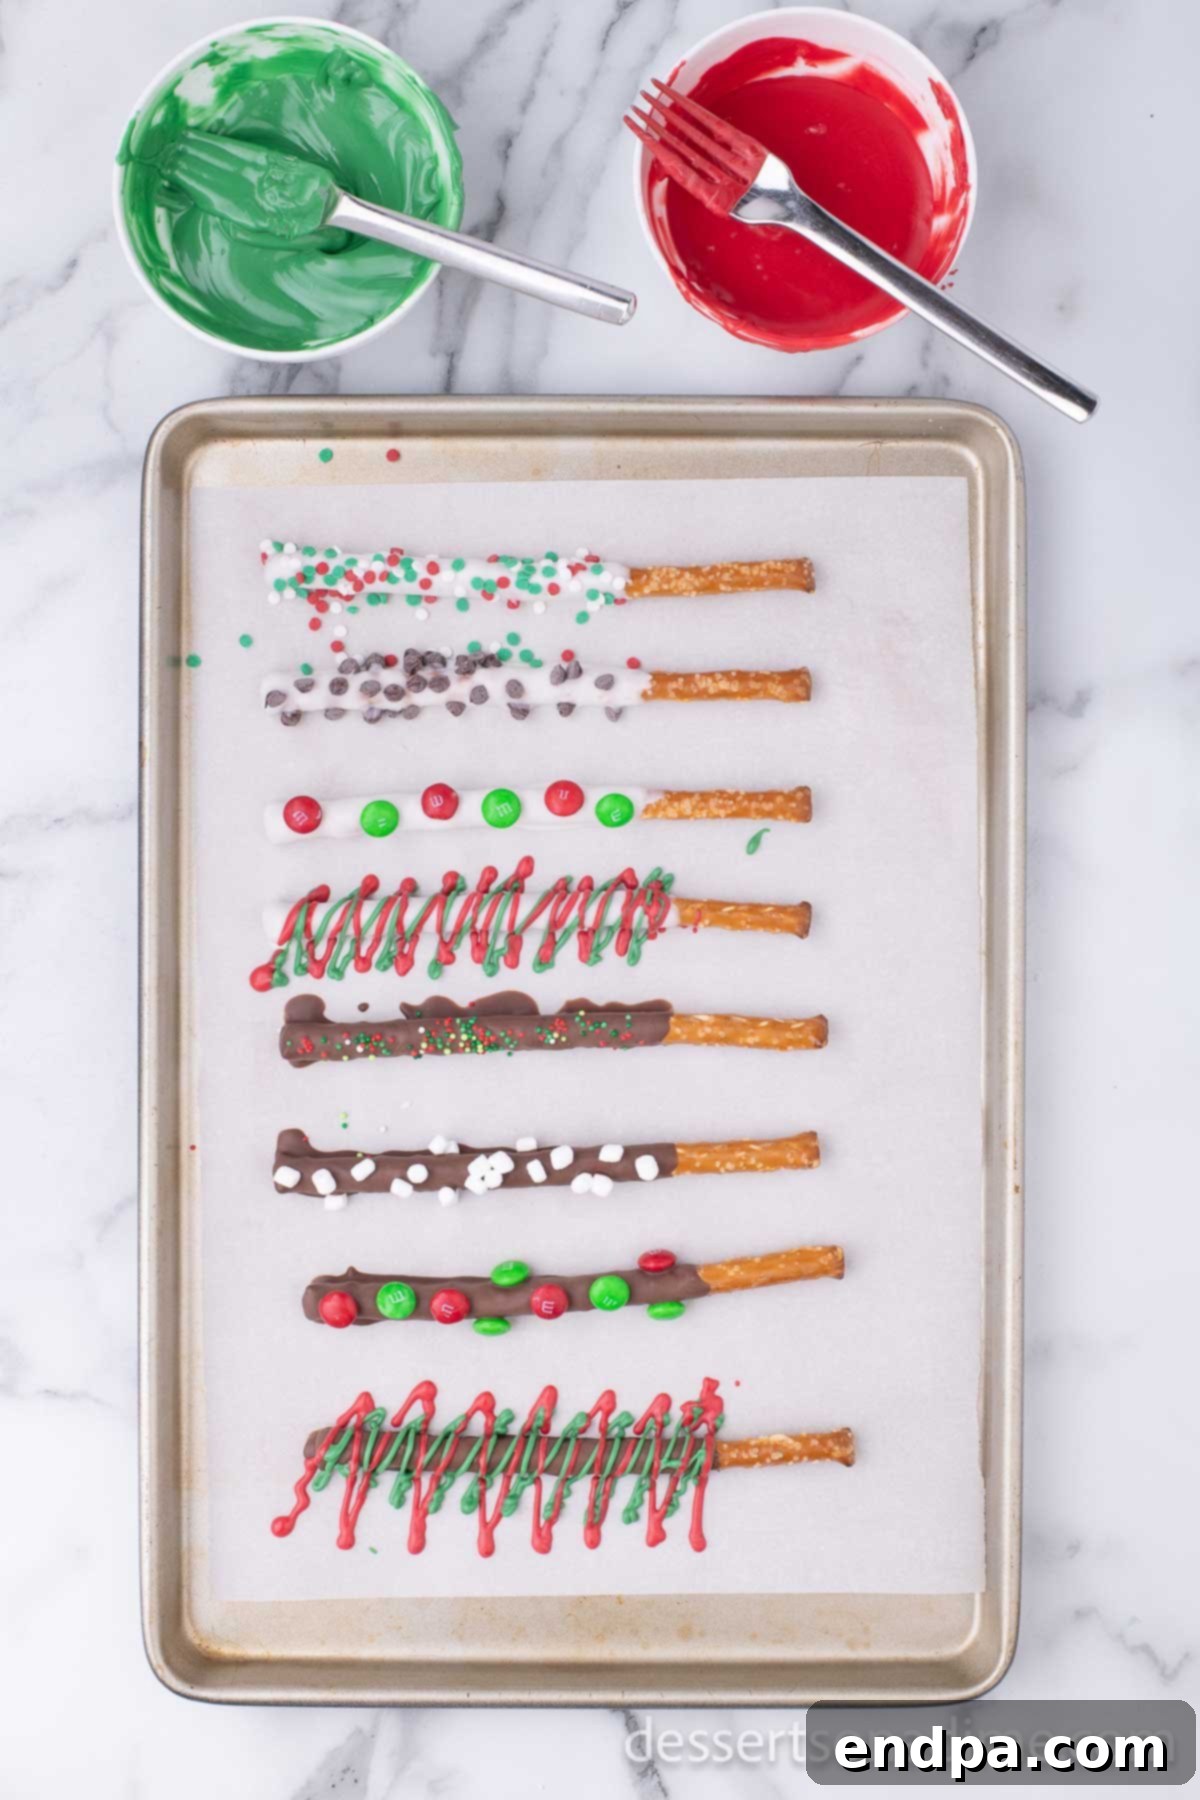
Step 6: Allow to Set. Once decorated, allow the pretzel rods to set completely. This can take about 1 hour at room temperature, or you can speed up the process by placing the baking sheet in the refrigerator for about 30 minutes. The coating should be firm and dry to the touch before handling. Once set, they are ready to enjoy or package!
Serving Suggestions & Gifting Inspiration
These Christmas chocolate covered pretzel rods are not just a delicious treat; they’re also incredibly versatile for serving and gifting. Their festive appearance makes them a wonderful addition to any holiday celebration or a thoughtful token of appreciation.
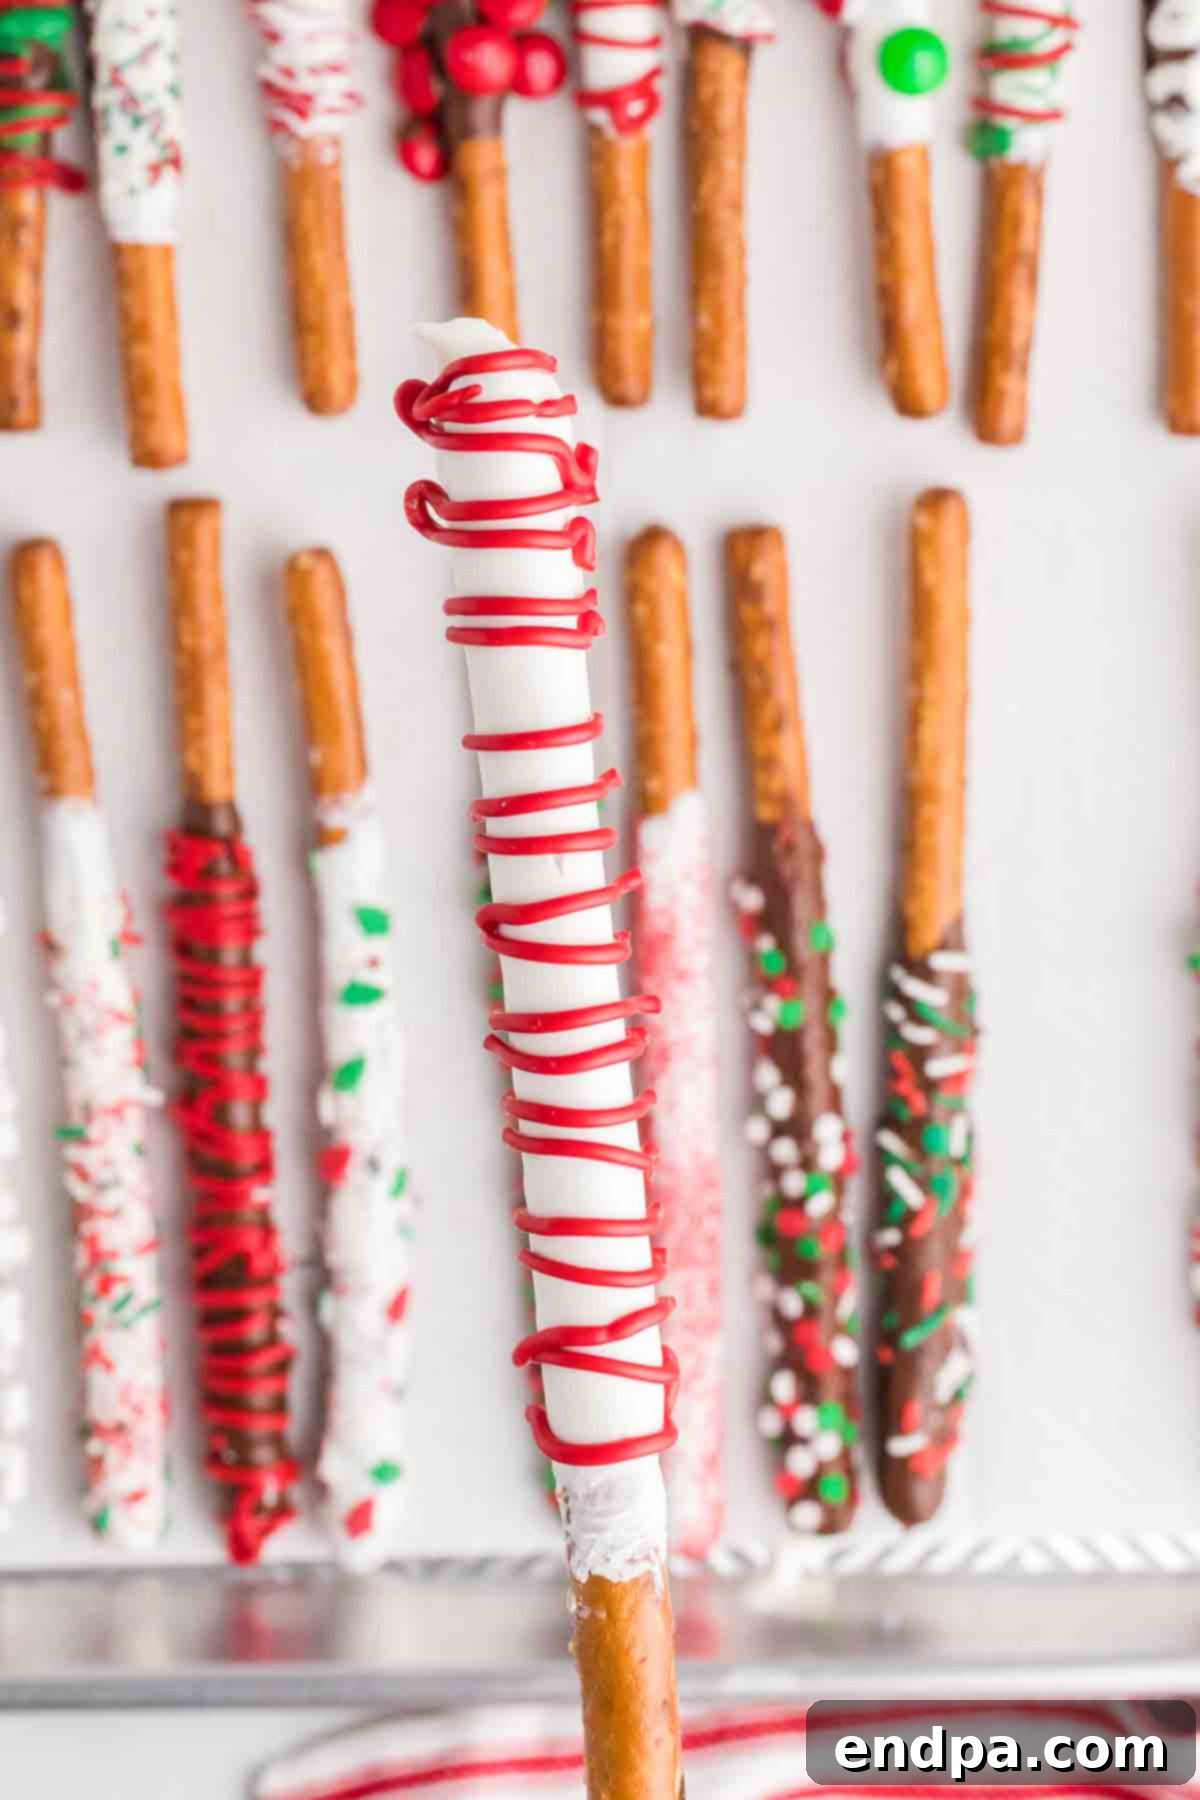
- Elegant Centerpiece in a Jar: For a stunning holiday party display, arrange your decorated pretzel rods upright in a decorative glass jar or tall vase. Choose jars with a wide opening to make it easy for guests to grab a treat. This creates an eye-catching edible centerpiece that doubles as dessert!
- Festive Platter Perfection: Create a beautiful holiday dessert platter or add them to a festive charcuterie board. Arrange them alongside other holiday favorites like cookies, mini cupcakes, or seasonal fruits. Their varying colors and textures will add visual interest to your spread.
-
Thoughtful Treat Bags & Boxes: Handmade gifts are always appreciated. Package 2-3 pretzel rods in clear cellophane treat bags, tie them with a festive ribbon, and perhaps add a small gift tag. You can also arrange an assortment in small decorative boxes. These make perfect gifts for:
- Teachers and school staff
- Neighbors and friends
- Co-workers or clients
- Holiday party hosts
- As stocking stuffers
Make sure the chocolate coating is completely set before packaging to prevent sticking.
- Holiday Activity Station: Turn making these pretzel rods into a fun holiday activity! Set up a “pretzel decorating bar” at a party or family gathering. Provide plain dipped pretzels and a variety of toppings in small bowls. Guests, especially children, will love customizing their own unique creations.
Tips for Flawless Pretzel Rod Decorating
To ensure your Christmas chocolate covered pretzel rods turn out perfectly every time, here are some expert tips to keep in mind:
- Use a Tall, Narrow Container: When melting your candy melts or chocolate, opt for a tall glass or a deep, narrow mug. This allows you to dip the pretzel rods deep enough to get a good coating without using an excessive amount of melting chocolate.
- Avoid Overheating: Melt your chocolate in short bursts (30 seconds at a time in the microwave) and stir frequently. Chocolate and candy melts can seize or burn if overheated, becoming clumpy and unusable. Patience is key!
- Tap Off Excess: After dipping, gently tap the pretzel rod against the side of your container to remove any excess chocolate. This prevents thick, uneven coatings and ensures a smoother finish.
- Work Quickly with Toppings: The melted chocolate or candy melts will start to set relatively fast. Have all your sprinkles and toppings ready and apply them immediately after dipping and drizzling.
- Parchment Paper is Your Friend: Always use parchment paper, wax paper, or a silicone mat on your baking sheet. This ensures the pretzels don’t stick and makes cleanup a breeze once they’ve set.
- Chill, Don’t Freeze: If you’re in a hurry for the pretzels to set, place the baking sheet in the refrigerator for about 15-30 minutes. Avoid the freezer, as extreme temperature changes can cause the chocolate to bloom (develop white streaks) or the pretzels to become soggy.
- Get Creative with Drizzles: For neat drizzles, use a fork or a piping bag with a very small hole. You can also put melted chocolate in a Ziploc bag, snip a tiny corner, and pipe designs.
Frequently Asked Questions
When stored properly in an airtight container at room temperature, these festive treats will stay fresh and delicious for up to 2 weeks. Ensure they are kept away from direct sunlight or heat sources, which could melt the chocolate.
For vibrant colors and ease of use, colorful candy melts are often recommended, especially for beginners. They melt smoothly and set quickly without needing tempering. However, you can also use high-quality chocolate chips (semi-sweet, milk, or dark) or almond bark. If using real chocolate, be aware that tempering might be necessary for a truly professional, shiny finish and to prevent blooming, although for a simple home treat, melting carefully usually suffices.
Absolutely! These chocolate covered pretzel rods are a perfect make-ahead holiday treat. You can prepare them up to 2 weeks in advance of your event or gifting. Just be sure to store them in an airtight container at room temperature to maintain their freshness and crispness. This makes holiday entertaining much less stressful!
No, it is generally not necessary to refrigerate chocolate covered pretzel rods. Storing them in an airtight container at room temperature is ideal. Refrigeration can sometimes cause the chocolate to “bloom” (develop a whitish film due to sugar or fat crystallization) and may make the pretzels slightly less crisp. However, if your home is particularly warm, or if you prefer a firmer texture, a short stint in the refrigerator (as mentioned in the setting step) is fine, but for long-term storage, room temperature is best.
To keep your candy coated pretzel rods fresh, store them in a single layer or separated by parchment paper in an airtight container at room temperature. If stacking, use parchment or wax paper between layers to prevent sticking. If you’re displaying them on a cookie tray, cover the tray tightly with plastic wrap to protect them from air and moisture, which can make the pretzels stale. This recipe is also fantastic for using up leftover holiday candy – simply crush and sprinkle on top!
Yes, with simple substitutions! Many brands now offer delicious gluten-free pretzel rods. For dairy-free options, choose dairy-free chocolate chips or allergy-friendly candy melts (check labels carefully) and ensure your sprinkles/toppings are also dairy-free. Always double-check ingredient labels for specific dietary needs.
Chocolate seizing (becoming thick and clumpy) usually happens when it’s overheated or comes into contact with even a tiny amount of water. To fix it, try stirring in a teaspoon of vegetable oil or shortening at a time until it smooths out. To prevent it, melt chocolate slowly in short bursts, stirring frequently, and ensure all your utensils and bowls are completely dry.
More Easy Christmas Desserts
Looking for more festive inspiration? Explore these other delightful and easy Christmas dessert recipes to complete your holiday menu:
- Festive Christmas Pinwheel Cookies Recipe
- Simple 3-Ingredient Rolo Pretzel Turtles Recipe
- Classic Christmas Chocolate Covered Oreos
- Fun & Themed Grinch Puppy Chow
We hope you enjoy making and sharing these wonderful Christmas chocolate covered pretzel rods with your loved ones. Their delightful crunch, sweet coating, and festive decorations are sure to bring smiles and holiday cheer to any occasion.
Please come back and share your experience, leave a comment, and rate the recipe once you’ve tried it!
Recipe Card: Christmas Chocolate Covered Pretzel Rods
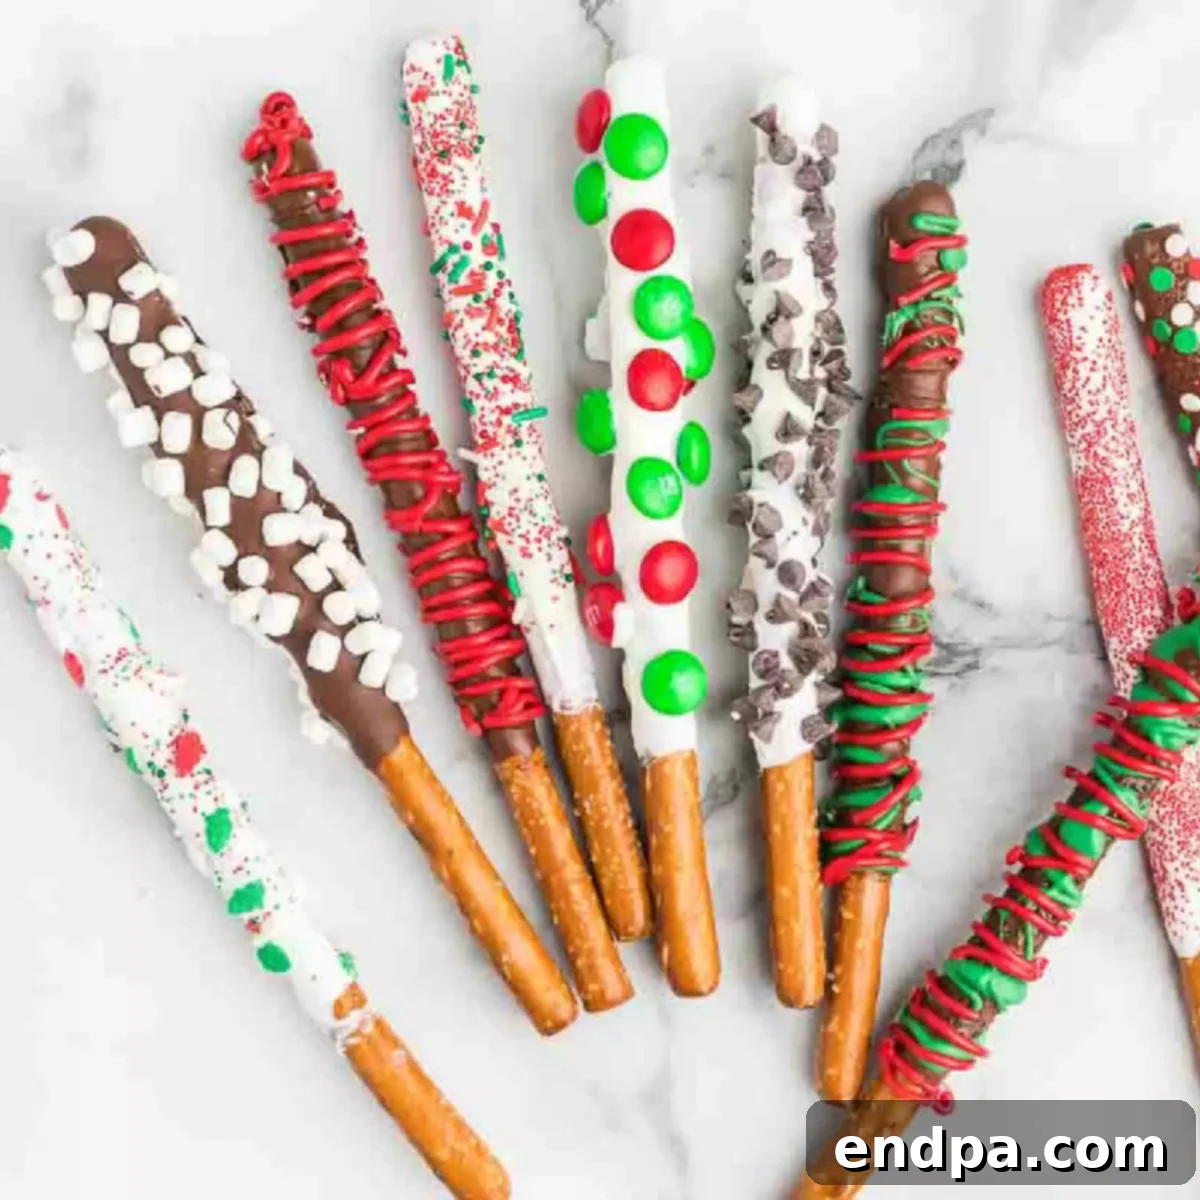
These Christmas Chocolate Covered Pretzel Rods are a delightful, easy-to-make, and festive treat. They’re perfect for holiday parties, gifting, or a fun family activity.
Recipe Details
- Prep Time: 10 mins
- Chill Time: 30 mins
- Total Time: 40 mins
- Servings: 24 rods
- Cuisine: American
- Course: Dessert
- Calories: 141 kcal per serving
- Author: Carrie Barnard
Ingredients
- 24 Pretzel Rods
- 4 ounces Red Candy Melts
- 4 ounces Green Candy Melts
- 4 ounces White Candy Melts
- 4 ounces Semi-sweet Chocolate Chips
- Toppings: Christmas Sprinkles, Christmas M&M’s, chopped nuts, crushed candy canes, etc.
Instructions
- Melt the white candy melts and the semi-sweet chocolate chips in 2 separate tall glasses or narrow microwave-safe bowls.
- Melt each in the microwave in 30-second increments, stirring well after each interval, until they are completely smooth and melted.
- Similarly, melt the green and red candy melts in separate bowls (or tall glasses) using the same 30-second increment method.
- Dip about two-thirds of each pretzel rod into the melted white candy melt or semi-sweet chocolate. Gently tap off any excess coating.
- Place the dipped pretzels onto a baking sheet lined with parchment paper, wax paper, foil, or a silicone mat, ensuring they don’t touch.
- While the coating is still wet, use a fork to drizzle contrasting colors of melted candy melts onto the pretzel rods for decoration. Immediately top with your chosen sprinkles, M&M’s, nuts, or other festive additions.
- Allow the decorated pretzel rods to cool and set completely (approximately 1 hour at room temperature or 30 minutes in the refrigerator).
- Enjoy your beautiful and delicious Christmas Chocolate Covered Pretzel Rods!
Recipe Notes
These are incredibly fun to make for a party or family gathering, allowing everyone, especially kids, to personalize and decorate their own! It’s a fantastic way to create lasting holiday memories.
Nutrition Facts (per serving)
- Calories: 141 kcal
- Carbohydrates: 23g
- Protein: 2g
- Fat: 5g
- Saturated Fat: 3g
- Cholesterol: 1mg
- Sodium: 248mg
- Potassium: 52mg
- Fiber: 1g
- Sugar: 7g
- Vitamin A: 2IU
- Calcium: 6mg
- Iron: 1mg
