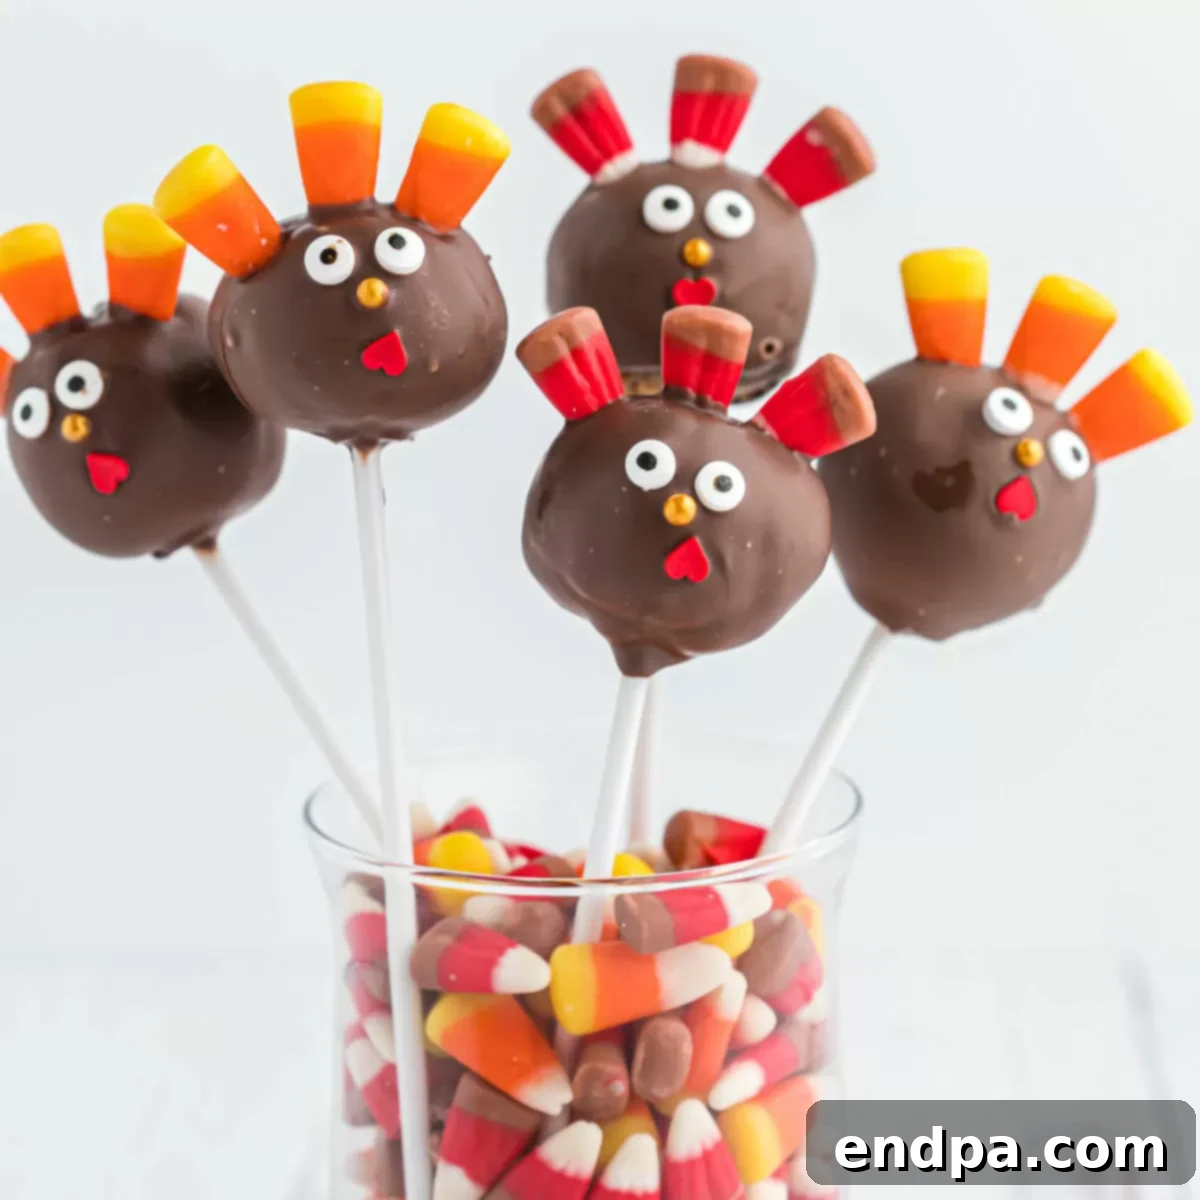
Get ready to delight your taste buds and impress your guests with this utterly charming Thanksgiving Cake Pops Recipe! These adorable turkey-themed treats are not just a dessert; they’re a centerpiece, a conversation starter, and a fantastic activity for the whole family during the holiday season. Imagine the smiles when everyone sees these bite-sized, moist spice cake balls, perfectly coated in chocolate and decorated to resemble cute little turkeys. They’re truly a fun and festive treat that everyone, from the youngest children to the seasoned adults, will enjoy. If you’re looking for Cute Thanksgiving Desserts for Kids, or just a unique twist on classic holiday baking, these cake pops are an absolute must-try. We adore making them every single year, often alongside our beloved Turkey Cake, to complete our festive spread.
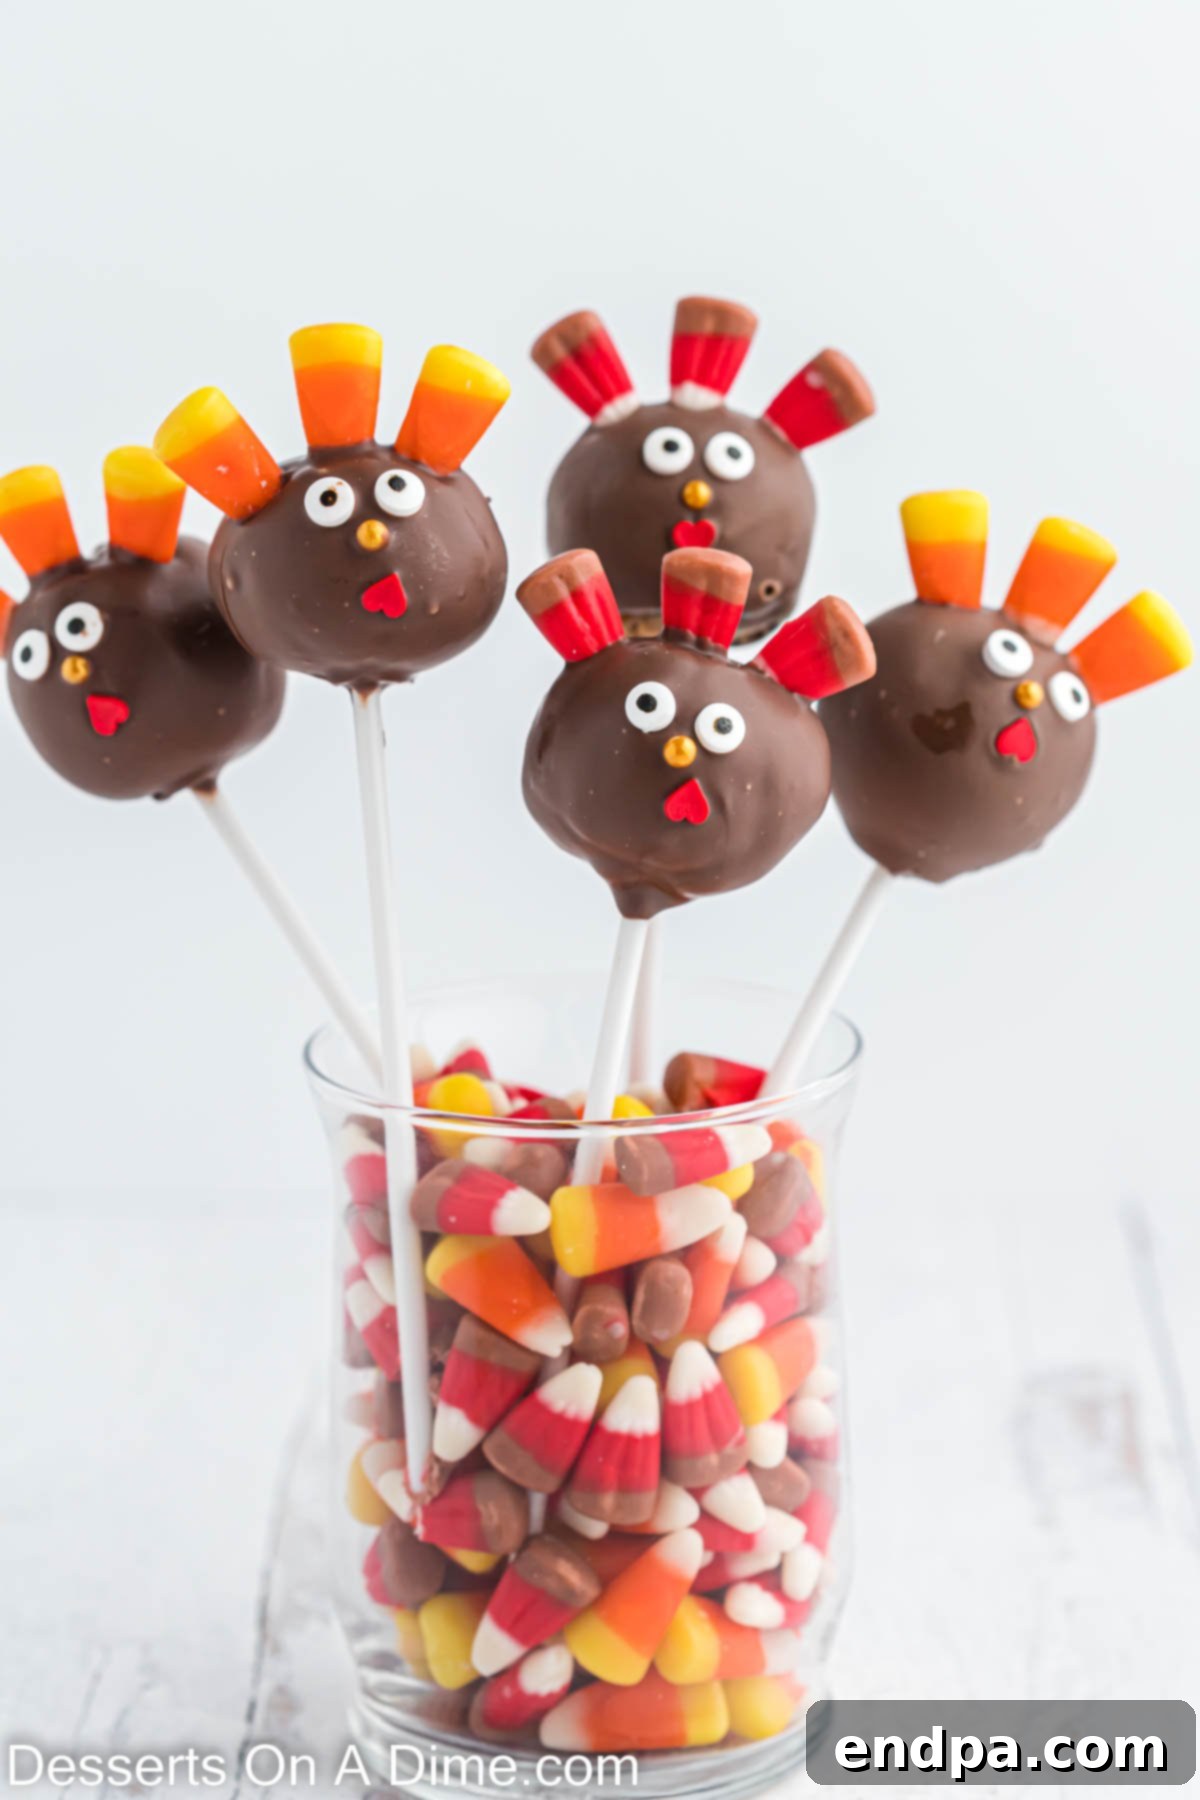
Cake pops hold a special place in the world of celebratory desserts. They are incredibly versatile, allowing for endless flavor combinations and creative decorations. Our Chocolate Covered Turkey Cake Pops recipe certainly lives up to the hype, promising a treat that is both incredibly tasty and surprisingly simple to create. The rich, decadent spice cake base, combined with creamy cream cheese frosting, is transformed into perfectly portioned cake balls. These are then artfully adorned as miniature turkeys, bringing a playful and heartwarming element to your Thanksgiving table. Each pop boasts a smooth, glossy candy coating that provides a satisfying crunch, while the convenient lollipop stick makes them wonderfully easy to eat and handle, especially for little hands.
Beyond their deliciousness, these turkey cake pops are a visual spectacle. Displayed on an elegant cake pop stand, they instantly become the star of any dessert table, outshining even the most elaborate pies or cakes. They offer a charming alternative or addition to traditional holiday sweets. Consider pairing them with other fantastic recipes like various Thanksgiving Cake Recipes or even some of the 89 Thanksgiving Cheesecake Recipes for an unforgettable holiday feast. Their vibrant appearance and delightful taste make them an essential part of our annual Thanksgiving celebrations, and we’re sure they’ll become a cherished tradition in your home too.
Table of Contents
- Why These Cake Pops Are a Must-Make for Thanksgiving
- Essential Ingredients for Your Thanksgiving Cake Pops
- Substitutions and Variations to Customize Your Cake Pops
- How to Make Adorable Thanksgiving Turkey Cake Pops
- Expert Tips for Perfect Cake Pops
- Storage and Make-Ahead Guide
- Frequently Asked Questions About Thanksgiving Cake Pops
- More Delicious Cake Pop Creations
- More Thanksgiving Dessert Inspirations
Why These Cake Pops Are a Must-Make for Thanksgiving
There’s something truly magical about Thanksgiving Cake Pops. The primary reason we adore this recipe is the sheer joy of creating and decorating each one. Dipping the perfectly formed cake balls into luscious chocolate candy melts is a satisfying step, but the real fun begins with the decoration. With simple components like candy corn for vibrant tail feathers, charming candy eyes that bring each turkey to life, and a sprinkle for the beak, every cake pop becomes a miniature work of edible art. Each decorative item is not only easy to use but contributes to the undeniably adorable final product. These aren’t just desserts; they’re edible crafts that spark creativity and bring people together.
Beyond the delightful decoration process, the combination of flavors in these Thanksgiving cake pops is simply irresistible. The rich, autumnal spice cake base, blended with creamy frosting, creates a moist and flavorful interior that perfectly complements the sweet, crisp candy coating. This balance of textures and tastes ensures that every bite is a delightful experience. They’re also wonderfully portion-controlled, making them an ideal dessert for a gathering where guests might want a small, sweet indulgence without committing to a large slice of cake. Their individual nature also makes them easy to serve and hygienic, a thoughtful touch for any hostess. These turkey cake pops truly embody the spirit of Thanksgiving: fun, festive, and utterly delicious.
Essential Ingredients for Your Thanksgiving Cake Pops
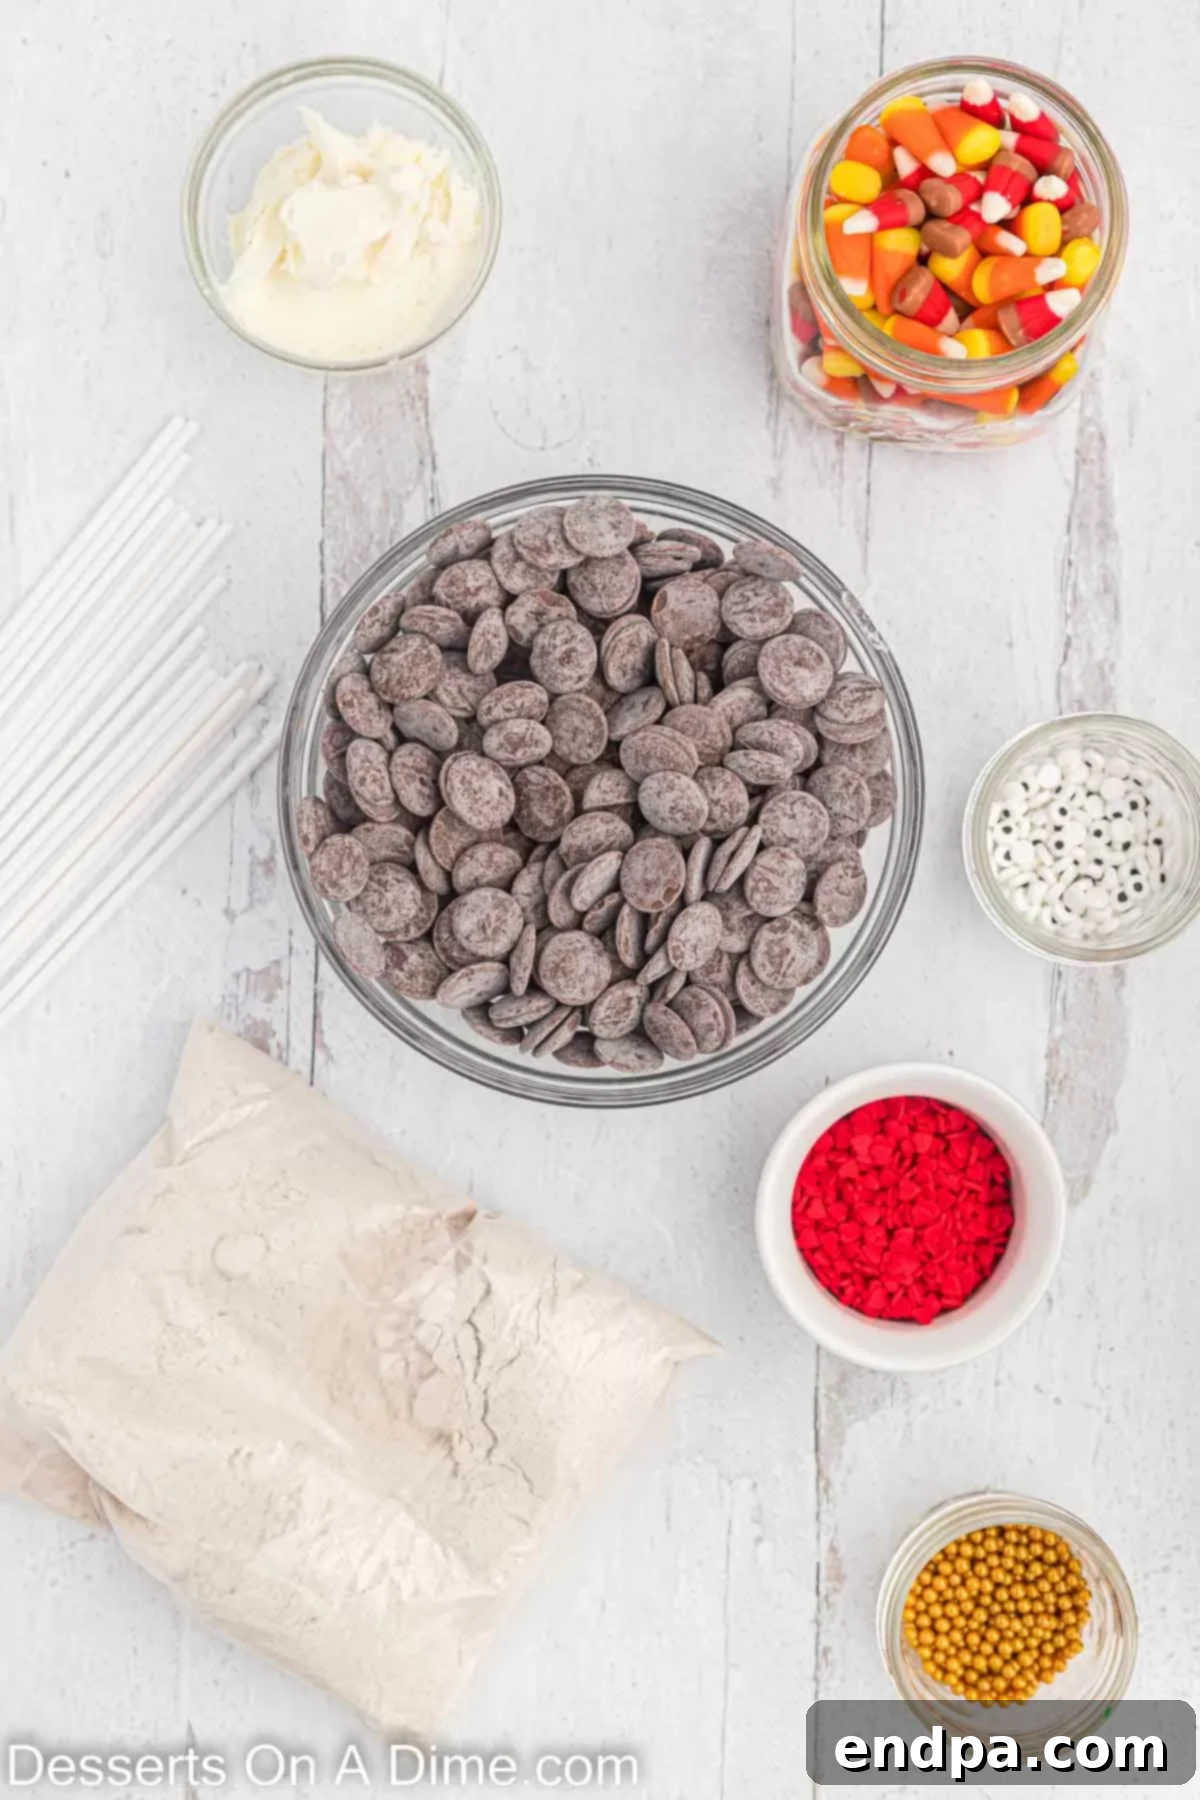
Creating these delightful Thanksgiving Cake Pops starts with a few key ingredients. Here’s a detailed look at what you’ll need:
- Spice Cake Mix: We recommend a 15 oz box of spice cake mix for that quintessential fall flavor. Remember, you’ll also need the additional ingredients listed on the back of the cake mix box (typically eggs, oil, and water) to prepare the cake according to package directions.
- Cream Cheese Frosting: About 1/3 cup of cream cheese frosting is needed to bind the cake crumbs. While a good quality pre-made frosting is a convenient time-saver, you can certainly elevate your cake pops with a Homemade Cream Cheese Frosting Recipe for an even richer flavor.
- Chocolate Candy Melts: A 16 oz bag of chocolate candy melts is crucial for the outer coating. These are specifically designed for easy melting and provide a smooth, consistent finish, which is ideal for cake pops. Their melt consistency is far superior to regular chocolate chips for this application.
- Candy Corn: One bag of candy corn will provide the iconic tail feathers for your turkey pops. The classic orange, yellow, and white colors are perfect for capturing the festive fall spirit.
- Candy Eyes: Approximately 48 candy eyes are needed (two per cake pop). These edible eyeballs can usually be found in the baking aisle of most grocery stores or craft shops, and they instantly bring character to your turkey creations.
- Red Heart Sprinkles: You’ll need about 24 red heart sprinkles for the turkey’s snood (the fleshy appendage hanging over the beak). If you have difficulty locating heart sprinkles, any small red candy or sprinkle will work as a substitute to add that pop of color.
- Round Sprinkles: Approximately 24 round sprinkles, any color will do, are used for the turkey’s beak. Yellow or orange would be ideal to match the candy corn theme, but feel free to get creative!
- Cake Pop Sticks: Ensure you have 24 sturdy cake pop sticks. These are essential for holding the cake balls securely and presenting them beautifully. Look for ones that are strong enough to support the weight of the finished cake pop.
A full list of ingredients with precise measurements is available in the recipe card at the bottom of the page, making it easy for you to gather everything before you begin baking.
Substitutions and Variations to Customize Your Cake Pops
One of the joys of making cake pops is their adaptability. You can easily tailor this Thanksgiving Cake Pops recipe to suit your preferences or what you have on hand:
- Cake Flavor: While spice cake offers a wonderful autumnal touch, feel free to experiment with other cake flavors. Delicious alternatives include classic chocolate, vanilla, yellow cake, vibrant funfetti, or even a rich red velvet. The base cake flavor can significantly alter the overall taste profile, so choose your favorite!
- Frosting Choice: Cream cheese frosting provides a rich and tangy balance, but almost any frosting can be used to bind the cake crumbs. Consider Cinnamon Buttercream for an extra warm spice note, or a simple vanilla buttercream for a universally loved flavor. Ensure your chosen frosting has a thick consistency to properly hold the cake balls together.
- Candy Decorations: Get creative with your turkey’s “feathers” and “beak”! Instead of traditional candy corn, try using Reese’s Pieces for a peanut butter chocolate twist, or even small chocolate candies. While traditional candy corn works great, the “autumn mix” variety, which often includes more brown and yellow colors, can also add a unique touch to your turkey tail. For the snood and beak, small jelly beans or other tiny candies can also be used.
- Chocolate Coating: If you don’t have candy melts, you can substitute them with good quality chocolate chips. However, be aware that chocolate chips may require a bit more finesse to melt smoothly and can sometimes be thicker in consistency. Adding a small amount of coconut oil or vegetable shortening (as detailed in our pro tips) can help achieve a desirable dipping consistency.
- Omit the Lollipop Stick: For a simpler, easier-to-store option, you can simply form these into cake balls without inserting the sticks. These “turkey truffles” are just as delicious and equally festive, perfect for a platter where guests can easily pick them up.
These variations allow you to customize your Thanksgiving cake pops, ensuring they are perfect for your family and guests while maintaining that festive turkey charm.
How to Make Adorable Thanksgiving Turkey Cake Pops
Creating these charming Thanksgiving turkey cake pops is a rewarding process. Follow these step-by-step instructions for a batch of perfect holiday treats:
- Step 1: Prepare the Cake. Begin by preparing your spice cake mix according to the package instructions. Bake the cake in a 9×13 inch pan until a toothpick inserted into the center comes out clean. Once baked, allow the entire cake to cool completely to room temperature. This is a crucial step; attempting to crumble a warm cake will result in a sticky mess.
- Step 2: Crumble the Cake. Once the cake is fully cooled, remove it from the baking pan. Discard the slightly crusty outside layer of the cake, as it can make the cake pops less smooth. Crumble the remaining moist cake into fine crumbs into a large mixing bowl. Ensure there are no large lumps for a consistent texture.
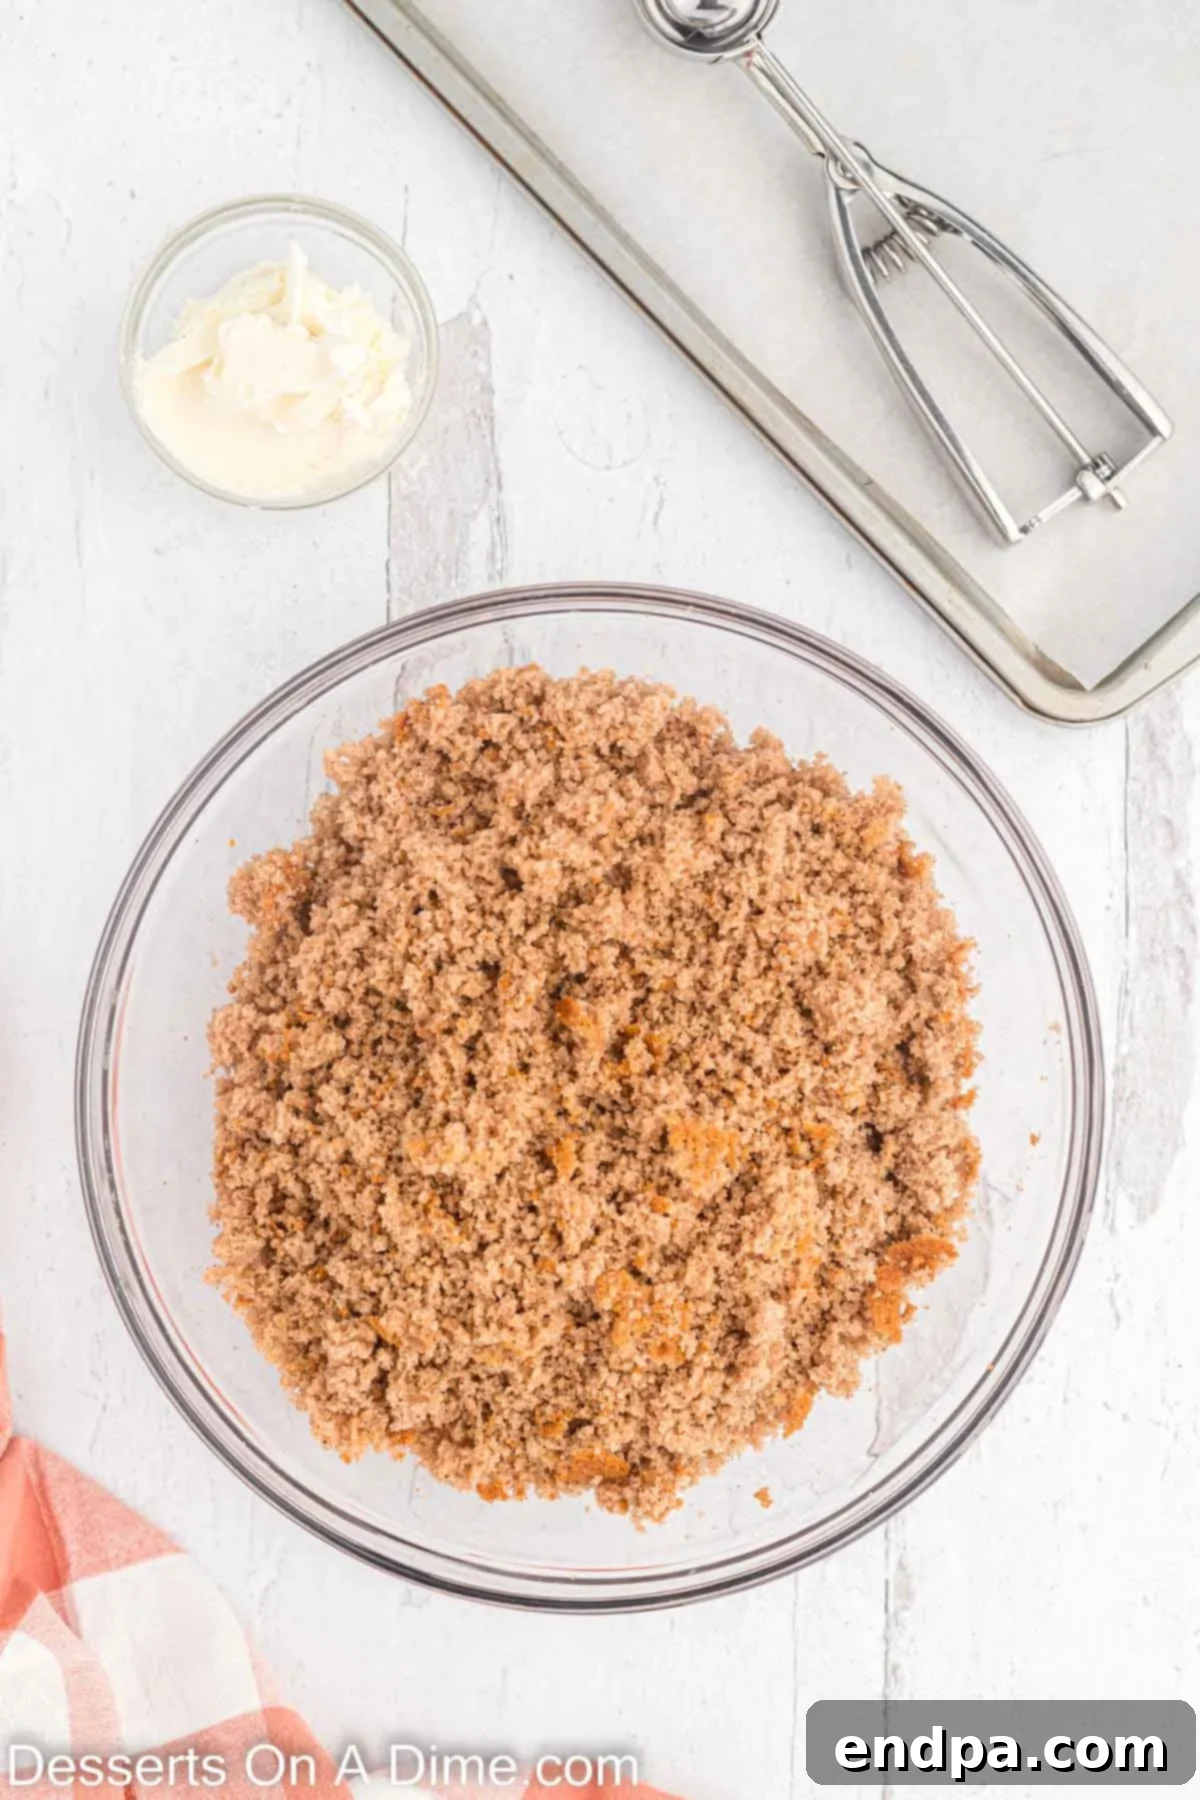
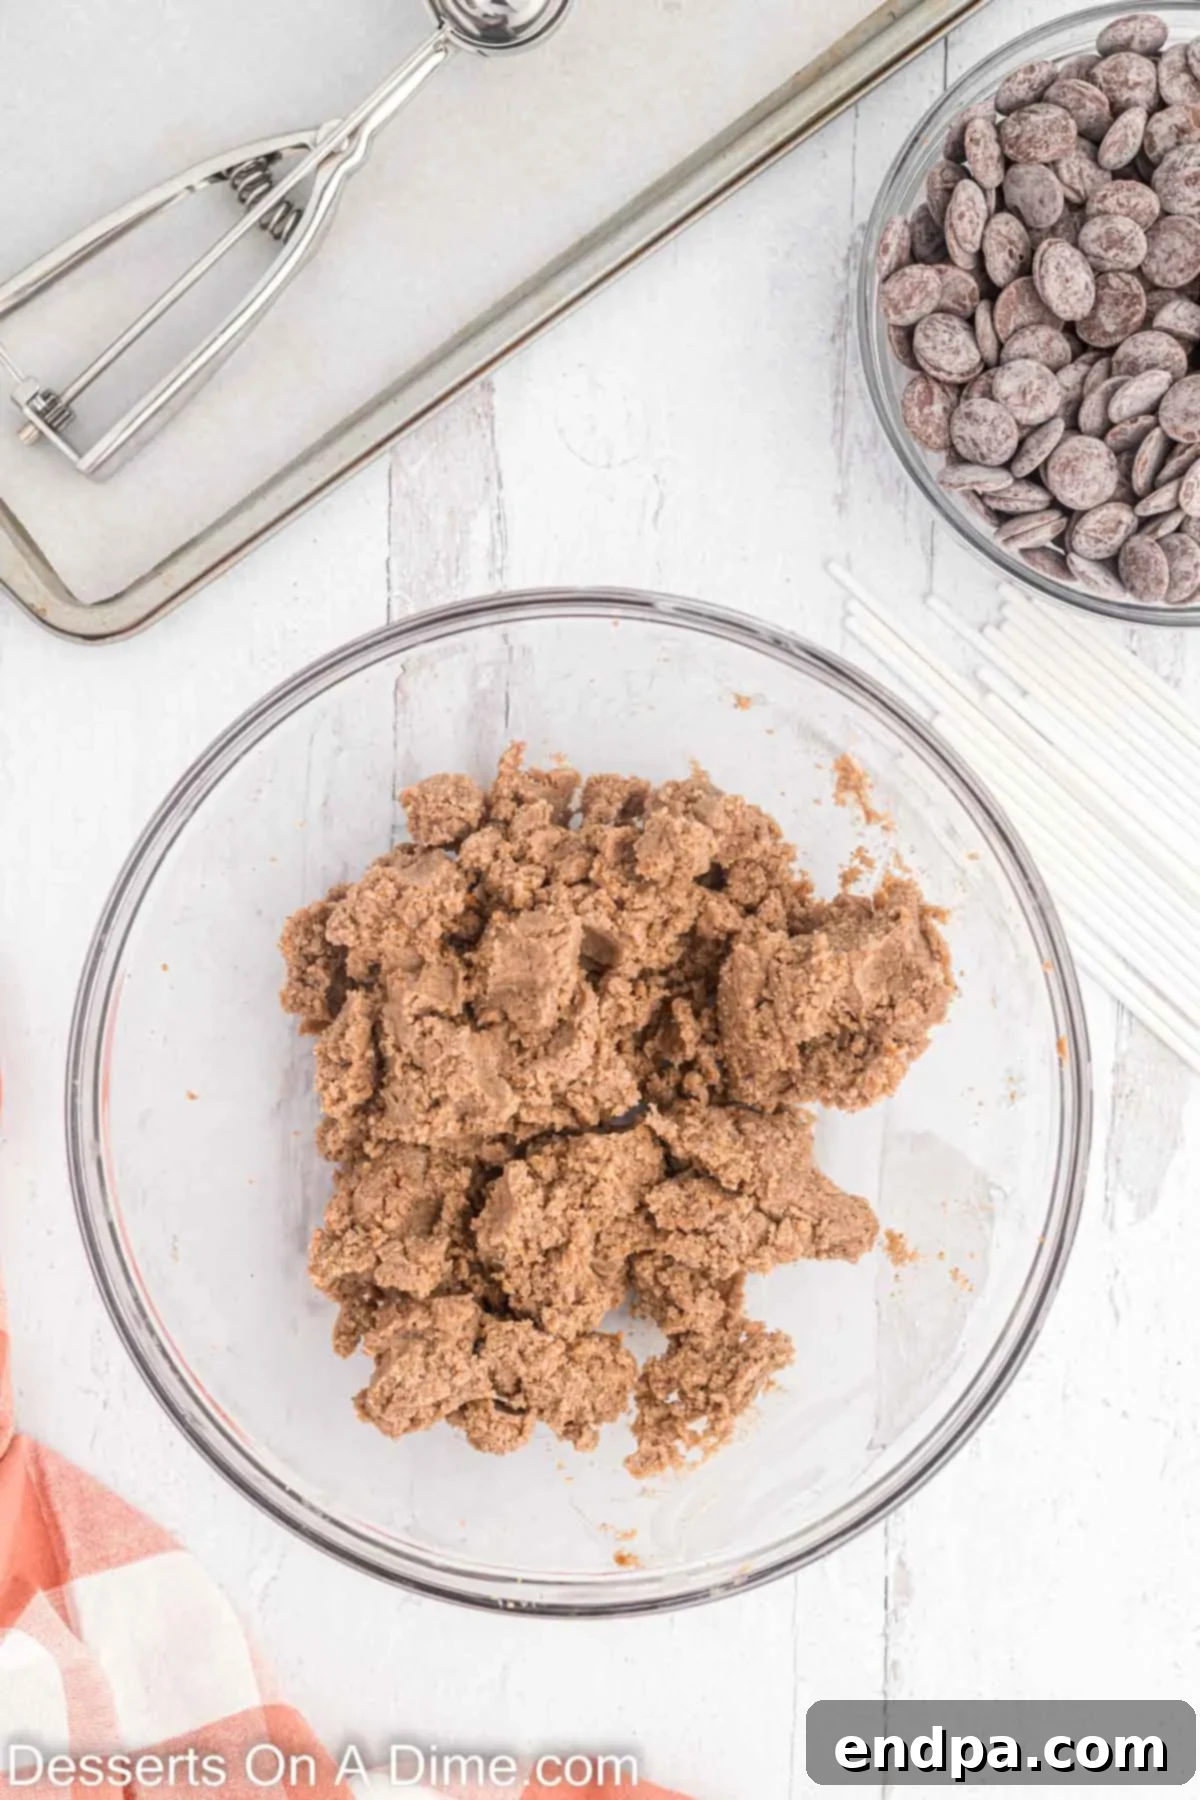
- Step 3: Combine with Frosting. Add the cream cheese frosting to the crumbled cake in the bowl. Using your hands (wearing gloves is recommended for cleanliness and less mess) or a sturdy spoon, mix everything together thoroughly until the cake crumbs are well combined with the frosting. The mixture should be moist enough to hold its shape when pressed, but not overly sticky or wet.
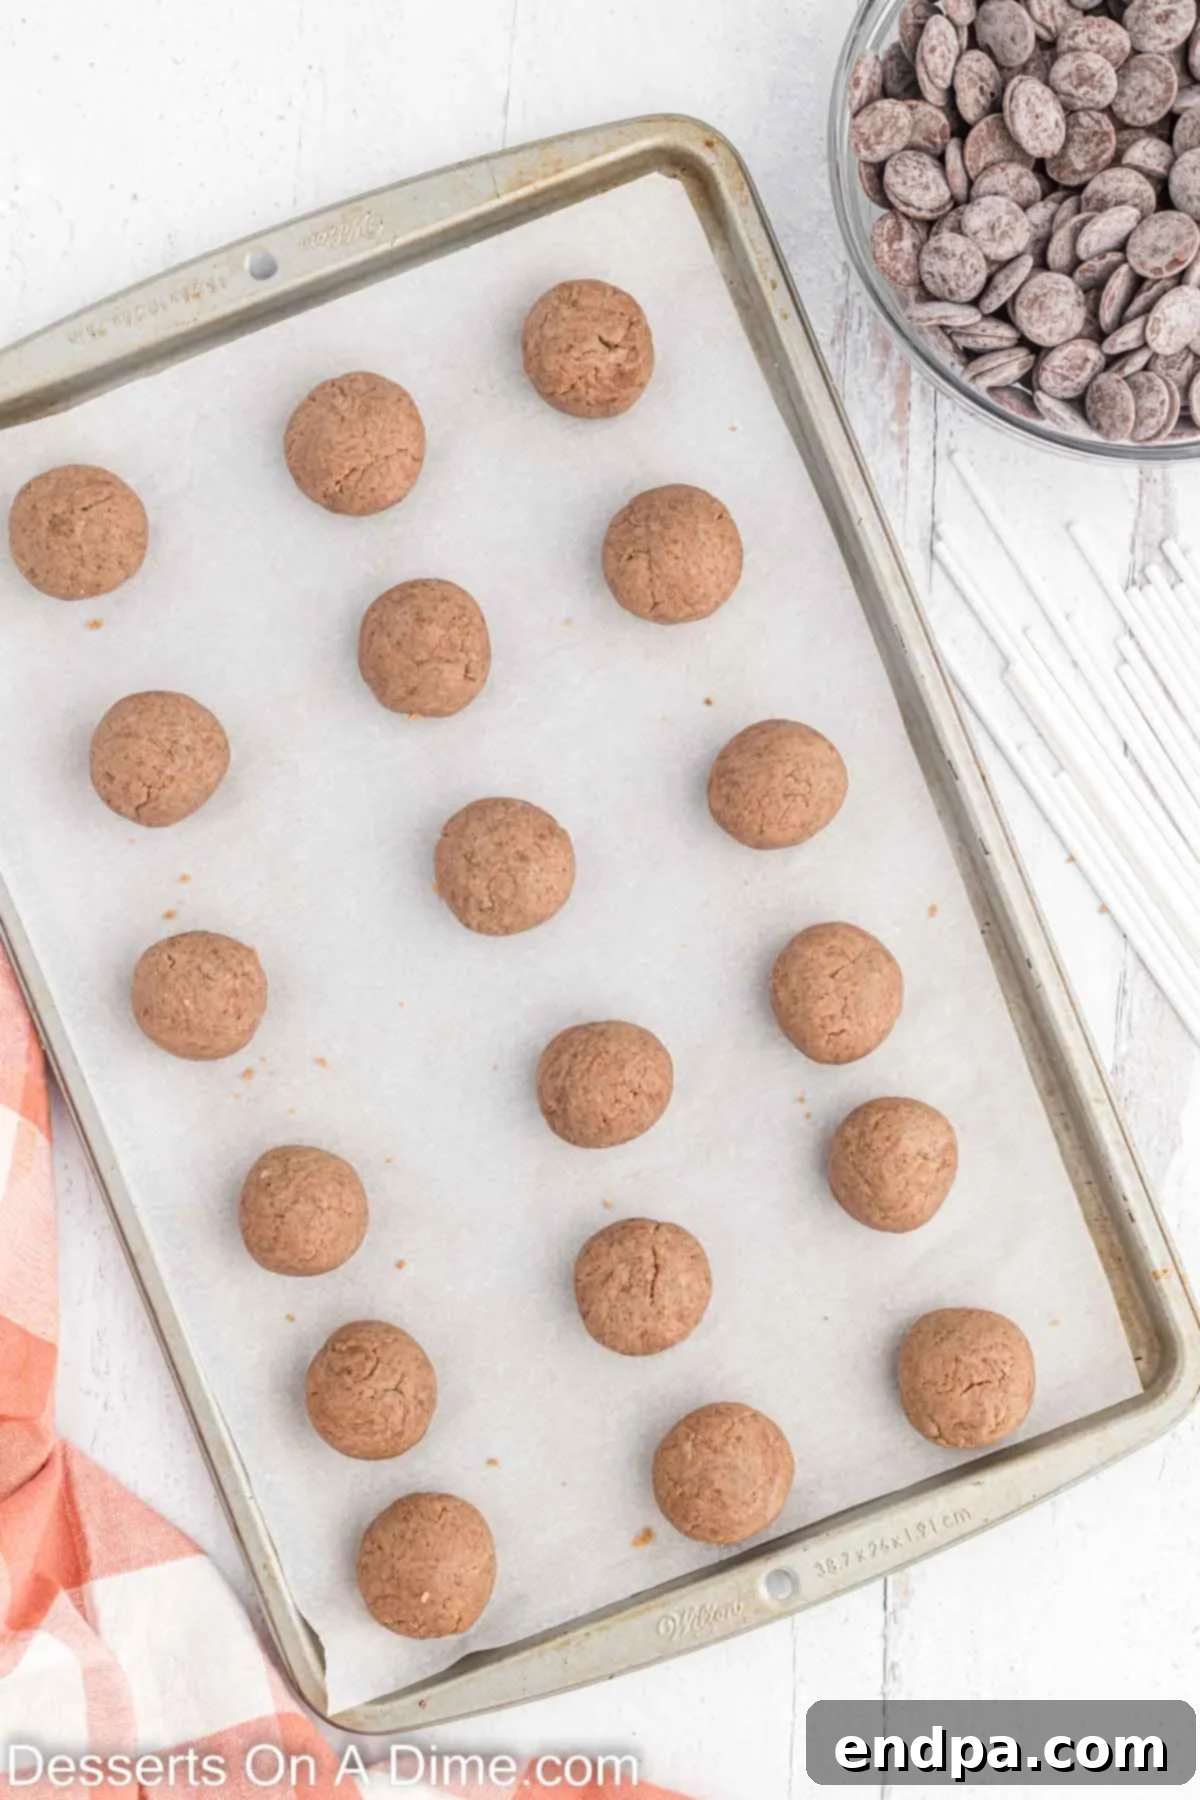
- Step 4: Form the Cake Balls. Now it’s time to shape your cake pops. We find that using a cookie scoop (about 1-inch in diameter) helps create uniformly sized cake balls. Scoop out portions of the mixture and roll them between your palms to form smooth, round balls. Place these shaped cake balls onto a baking sheet lined with wax paper or parchment paper. This preparation typically yields between 24 and 36 cake balls, depending on the exact size.
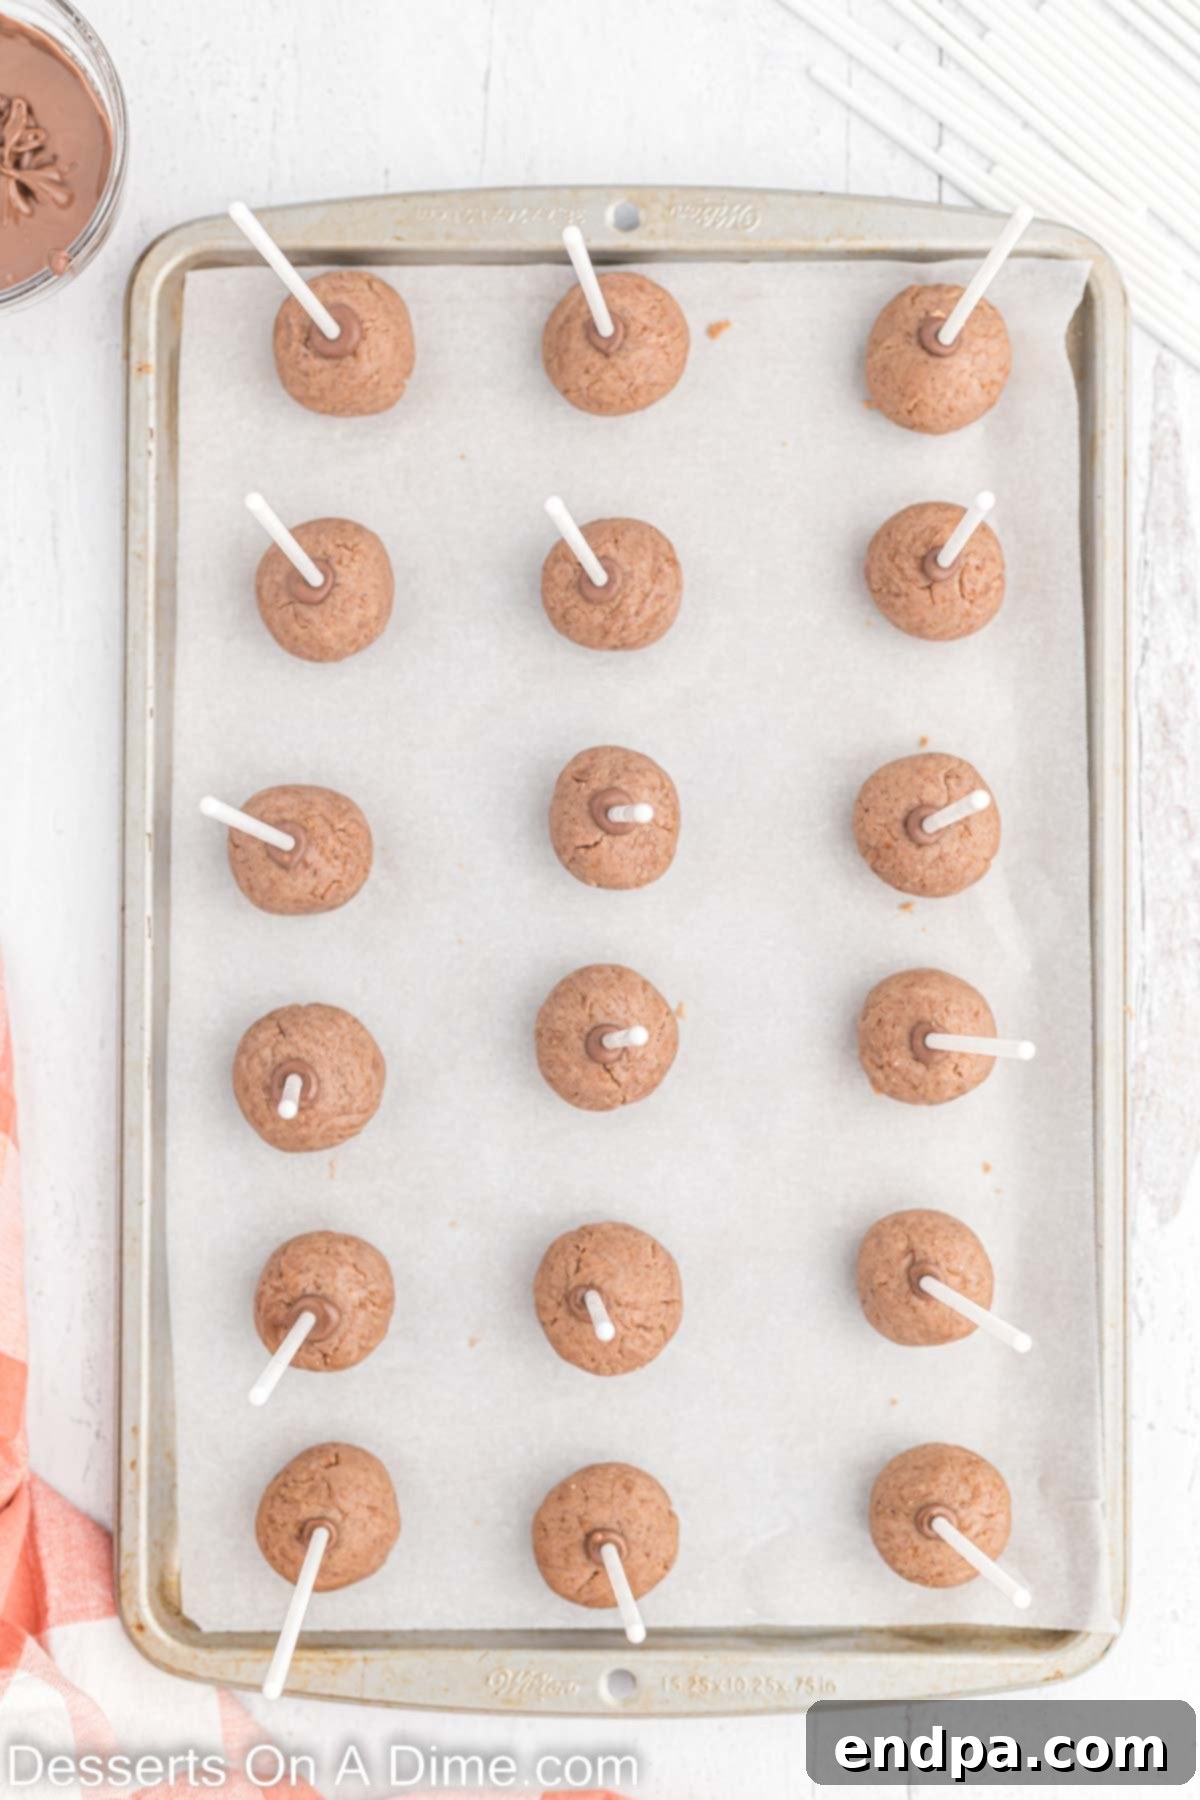
- Step 5: Prepare and Insert Sticks. Place your chocolate candy melts in a small microwave-safe bowl or cup. Microwave for 30 seconds, then stir thoroughly. Continue to heat in 30-second intervals, stirring vigorously between each interval, until the candy melts are completely smooth and melted. Dip the tip of each cake pop stick into the melted candy, then insert the candy-coated end of the stick about halfway into each cake ball. The melted candy acts as a “glue” to secure the stick. Once all sticks are inserted, place the baking sheet with the cake pops into the freezer for 10-15 minutes. This chilling period is crucial for firming up the cake balls, making them easier to dip, but be careful not to over-freeze them, as this can lead to cracking in the coating.
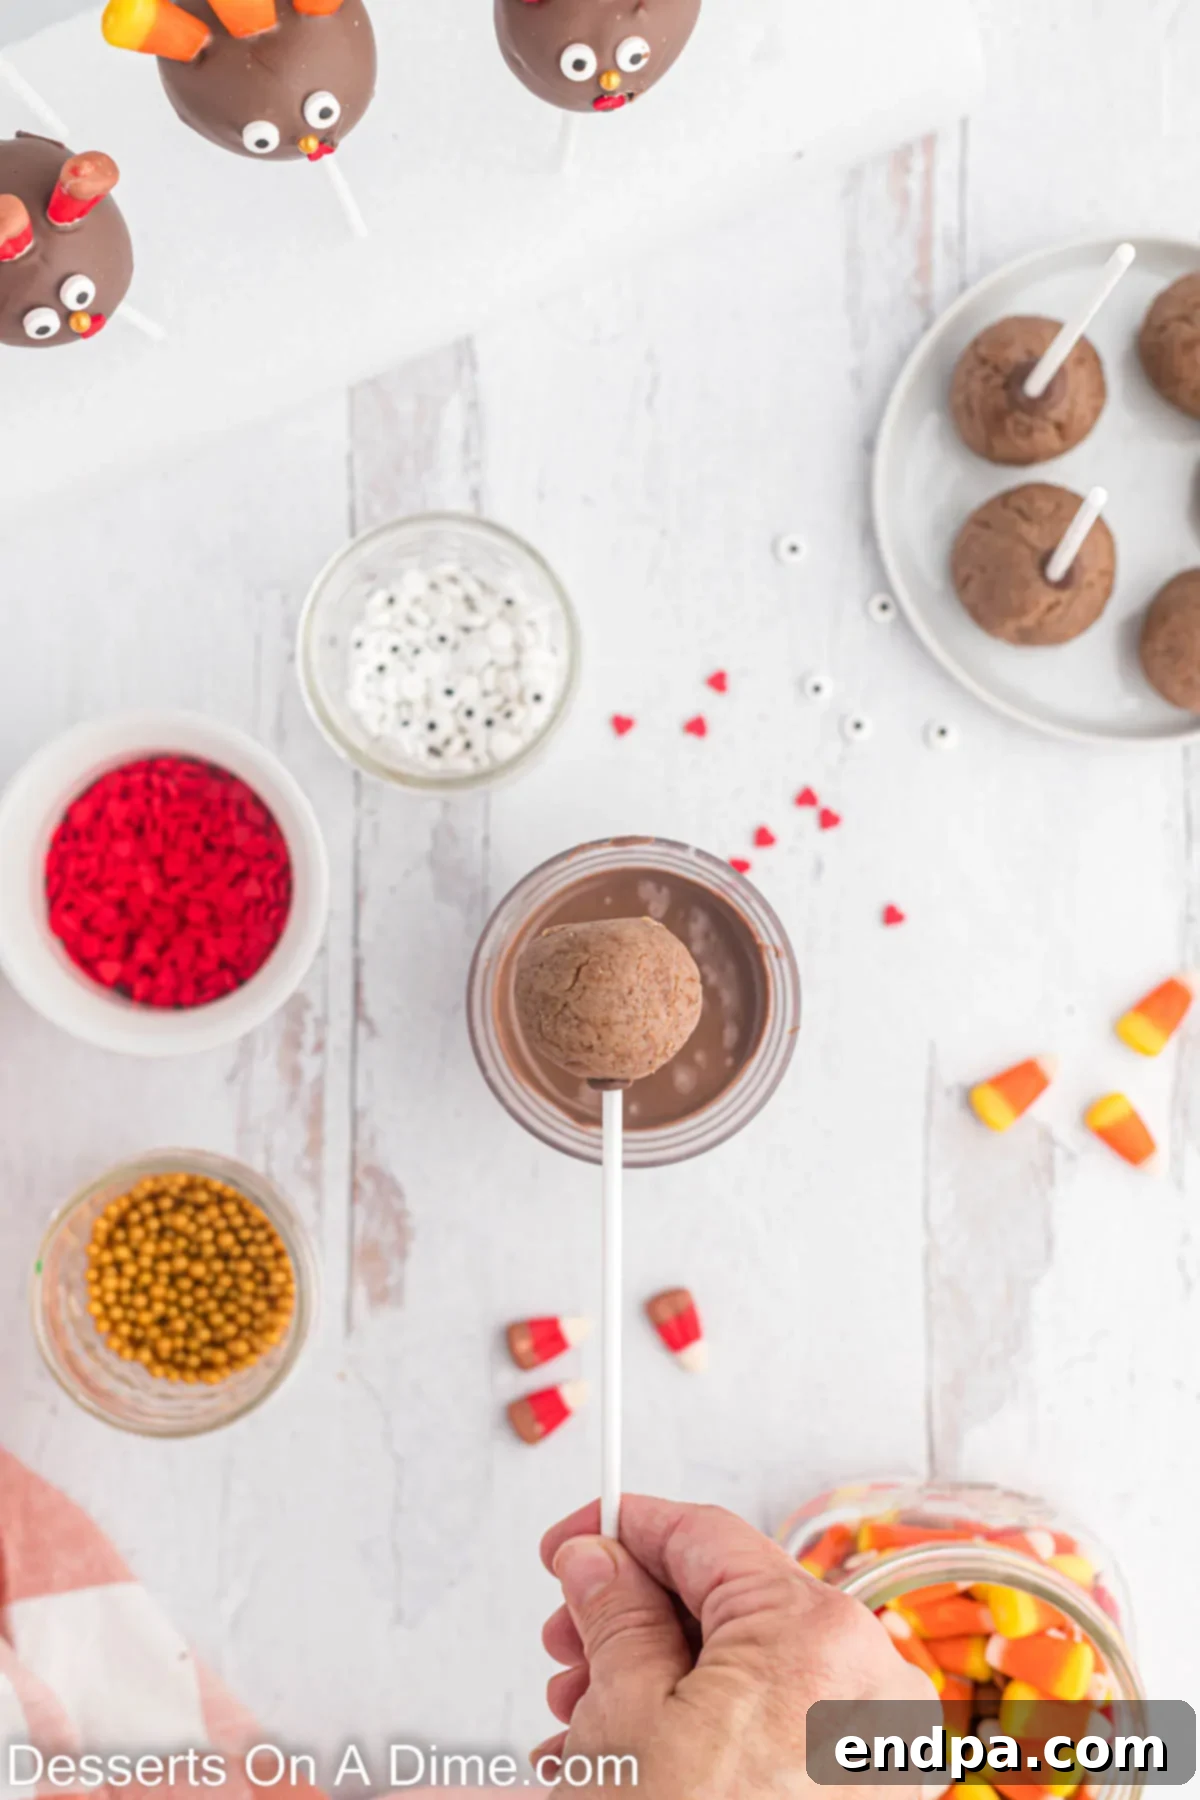

- Step 6: Dip and Decorate. After the cake pops have been sufficiently chilled (but not frozen solid), it’s time for the final coating. Re-melt your candy melts if they have started to solidify. Dip each cake pop into the melted candy melts, ensuring the entire cake ball is covered smoothly. Gently tap the stick against the side of the bowl to remove any excess melted candy. Immediately, while the coating is still wet, place the stick of the cake pop into a block of Styrofoam or a dedicated cake pop holder.
- Step 7: Bring Your Turkeys to Life! Before the candy coating sets (work quickly!), it’s time to decorate your turkey pops. Place three pieces of candy corn on the back of the cake pop to form the tail feathers. Position two candy eyes on the front. Add a small round sprinkle for the beak and a red heart sprinkle for the snood, just below the beak. Hold each piece of candy in place for a few seconds until it adheres to the coating. Continue this process until all your cake pops are covered in chocolate and beautifully decorated.
- Step 8: Allow to Set. Let all the decorated cake pops set completely at room temperature. This can take anywhere from 30 minutes to an hour, depending on the humidity and temperature of your kitchen. Once set, they are ready to serve and enjoy!
Expert Tips for Perfect Cake Pops
Achieving bakery-quality cake pops at home is easier than you think with these expert tips:
- Thin the Chocolate if Necessary: If your melted candy melts appear too thick for smooth dipping, don’t fret! You can easily thin them out by adding a small amount of vegetable shortening or coconut oil. Add just a teaspoon at a time, slowly stirring it into the melted chocolate until you reach the desired consistency. This ensures a beautifully smooth and even coating without unsightly drips or lumps.
- Form Uniform Cake Balls: Consistency is key for professional-looking cake pops. To prevent the cake mixture from sticking to your hands while forming the balls, spray your palms lightly with nonstick cooking spray. This trick makes rolling much easier and helps create perfectly round, uniform cake balls. Using a cookie scoop is also highly recommended for portion control.
- Melt Candy Melts in Intervals: Patience is a virtue when melting candy melts. Always microwave them in short 30-second intervals, stirring thoroughly after each one. This prevents the chocolate from overheating, burning, or seizing, ensuring a smooth and workable consistency every time.
- Secure the Candy Decorations: To ensure your turkey’s features stay put, gently hold the tips of each candy corn tail feather, candy eye, beak, and snood in place for a few seconds after attaching them to the wet chocolate coating. This gives the chocolate time to begin setting around the candy, creating a strong bond.
- Line Your Baking Sheet: For easy cleanup and to prevent sticking, always line your baking sheet with parchment paper or wax paper before placing your cake balls on it. This is particularly helpful when chilling the cake pops in the freezer.
- Use Tweezers for Precision: The decorative candy pieces, especially the sprinkles for the beak and snood, can be quite small. Using a pair of clean kitchen tweezers can be incredibly helpful for precise placement, ensuring your turkeys look perfectly charming.
- Remove Excess Chocolate: After dipping each cake pop, gently tap the stick against the edge of the bowl. This allows any excess melted chocolate to drip off, preventing puddles at the base of the cake pop and ensuring a clean, polished finish. A fork can also be used to carefully scrape off any drips before the chocolate sets.
- Consider a Double Boiler: If you prefer not to use a microwave for melting chocolate, a double boiler method is an excellent alternative. Simply place your candy melts in a heat-safe bowl set over a saucepan of simmering water, ensuring the bowl does not touch the water. Stir gently until completely melted and smooth.
Storage and Make-Ahead Guide
Proper storage is essential to keep your Thanksgiving Cake Pops fresh and delicious. Store any leftover cake pops in an airtight container at room temperature. They will remain fresh and delightful for up to one week. For longer storage, you can refrigerate them for up to two weeks, or even freeze them for up to a month. If freezing, arrange them in a single layer in an airtight container or freezer bag, separating layers with parchment paper to prevent sticking. Thaw them in the refrigerator before serving.
These cake pops are also an excellent make-ahead dessert, which is a huge advantage during the busy Thanksgiving season. You can easily prepare them the day before you plan to serve them, saving you valuable time on the big holiday. Simply follow all the steps, from baking and decorating, then store them appropriately overnight. This makes them perfect for parties and Thanksgiving Day celebrations, allowing you to focus on other aspects of your meal without rushing to get dessert ready at the last minute. The flavors and textures hold up beautifully, ensuring your guests enjoy a fresh and festive treat.
Frequently Asked Questions About Thanksgiving Cake Pops
When stored properly in an airtight container at room temperature, these delightful cake pops will last for up to 1 week. If you need them to last longer, they can be refrigerated for up to 2 weeks or frozen for up to a month.
Absolutely, making these cake pops in advance is highly recommended, especially for holiday gatherings. You can easily prepare the entire batch the day before you need them. This strategy is fantastic for saving time and reducing stress on Thanksgiving Day or when hosting a party. Simply complete all the steps, including decorating, and store them at room temperature overnight, or refrigerate if your kitchen is particularly warm. They’ll be ready to impress your guests when it’s time for dessert!
Cracked coating on cake pops is usually a result of a significant temperature difference between the chilled cake ball and the warm melted chocolate. The most common culprit is freezing the cake balls for too long. When the extremely cold cake ball hits the warm chocolate, the rapid expansion and contraction can cause the coating to crack as it sets. To prevent this, only chill the cake balls in the freezer for the recommended 10-15 minutes. It’s a good practice to set a timer to ensure you don’t accidentally leave them in for too long.
If your cake pop mixture is too sticky to roll into balls, it likely has too much frosting. You can try adding a few more finely crumbled plain cake crumbs to absorb some of the moisture, or place the mixture in the refrigerator for about 15-30 minutes to firm it up slightly. Slightly chilled mixture is often easier to handle.
As mentioned in our pro tips, if your candy melts are too thick, you can thin them out. Add a small amount (start with 1 teaspoon) of vegetable shortening or coconut oil to the melted candy melts and stir well. Continue adding small amounts until you achieve a smooth, pourable consistency perfect for dipping. Do not add water, as this will cause the chocolate to seize.
More Delicious Cake Pop Creations
If you’ve fallen in love with making cake pops, there’s a whole world of flavors and themes to explore! Here are some other fantastic cake pop recipes to try:
- Pumpkin Cake Pops: Perfect for fall, these capture the essence of pumpkin pie in a fun bite-sized treat.
- Cookie Dough Cake Pop Recipe: Indulge in edible cookie dough coated in chocolate – a true crowd-pleaser.
- Brownie Cake Pops: For the ultimate chocolate lover, rich brownie goodness dipped in chocolate.
- Red Velvet Cake Pops: Elegant and delicious, with the classic tang of red velvet cake and cream cheese frosting.
More Thanksgiving Dessert Inspirations
Thanksgiving is the ultimate dessert holiday! If you’re looking to expand your holiday menu beyond these delightful turkey cake pops, here are more festive and delicious Thanksgiving dessert ideas:
- Turkey Cupcake Recipe: Another adorable turkey-themed treat that’s easy to make with kids.
- Pumpkin Rice Krispie Treats: A quick, no-bake option bursting with pumpkin spice.
- Turkey Cookies: Simple and fun cookies decorated to look like turkeys, great for school parties.
- Pilgrim Cookies: Classic and charming, these pilgrim hat cookies are easy to assemble.
- Chocolate Acorns: Tiny, sweet, and adorable chocolate-covered acorns made with Nutter Butter cookies.
- Pumpkin Pie Rice Krispie Treats: A creative twist on a classic, resembling mini pumpkin pies.
Gather your loved ones, especially the kids, and make these little turkeys together. It’s an activity that’s not only fun and festive but also creates lasting memories. We absolutely love making these every year for a fantastic, crowd-pleasing dessert. We hope you enjoy making and sharing them as much as we do!
Thanksgiving Cake Pops Recipe
Rated 5 out of 5 stars from 5 votes.
You will love this adorable Thanksgiving Cake Pops Recipe for a fun and festive treat. The entire family will enjoy these turkey pops.
15 mins
30 mins
15 mins
1 hr
24 cake pops
American
Dessert
245 kcal
Carrie Barnard
Ingredients
- 1 box Spice Cake Mix (15 oz)
- *Plus ingredients to prepare the cake as directed on the back of the box
- 1/3 cup Cream Cheese Frosting (pre-made or homemade)
- 16 oz. Chocolate Candy Melts
- 1 bag Candy Corn
- 48 Candy Eyes
- 24 Red Heart Sprinkles
- 24 Round Sprinkles (any color will work)
- 24 Cake Pop Sticks
Instructions
- Prepare the spice cake mix and bake according to the box instructions in a 9×13 inch pan. Allow the cake to cool completely to room temperature.
- Once cooled, remove the cake from the pan. Discard the outer crusty layer of the cake, then crumble the remaining cake into a large bowl until it forms fine crumbs.
- Add the cream cheese frosting to the crumbled cake. Mix everything together thoroughly until the cake crumbs and frosting are well combined and the mixture is moist enough to hold its shape.
- Shape the mixture into approximately 24-36 uniform cake balls (about 1-inch in size). Place these on a baking sheet lined with wax paper or parchment paper. Using a cookie scoop helps ensure consistent sizes.
- Melt the chocolate candy melts in a small microwave-safe bowl. Microwave in 30-second intervals, stirring well after each, until fully melted and creamy.
- Dip the tip of each cake pop stick into the melted candy, then insert the stick about halfway into each cake ball. This “glues” the stick in place. Place the baking sheet with the cake pops into the freezer for 10-15 minutes to firm them up (do not freeze for longer than 15 minutes to prevent cracking).
- Once the cake pops are chilled, re-melt the candy melts if needed. Dip each cake pop completely into the melted candy, allowing any excess to drip off by gently tapping the stick against the bowl’s edge.
- Immediately place the dipped cake pop stick into a block of Styrofoam or a cake pop holder. While the coating is still wet, decorate each pop: add 3 pieces of candy corn on the back for the tail feathers, 2 candy eyes on the front, a round sprinkle for the beak, and a red candy heart for the snood.
- Continue decorating until all cake pops are covered and adorned.
- Allow all the decorated cake pops to set completely at room temperature. Once firm, they are ready to serve and enjoy!
Recipe Notes
Store leftover cake pops in an airtight container at room temperature for up to 1 week. They can also be refrigerated for up to 2 weeks or frozen for up to a month.
*If the melted candy melt is too thick, thin it out with a small amount (start with 1 teaspoon) of vegetable shortening or coconut oil. Add it slowly and stir into the melted chocolate until you achieve the desired dipping consistency.
Nutrition Facts
Calories: 245 kcal, Carbohydrates: 41g, Protein: 1g, Fat: 8g, Saturated Fat: 3g, Polyunsaturated Fat: 1g, Monounsaturated Fat: 3g, Trans Fat: 0.01g, Sodium: 209mg, Potassium: 75mg, Fiber: 0.4g, Sugar: 34g, Vitamin A: 1IU, Vitamin C: 0.04mg, Calcium: 20mg, Iron: 1mg
Pin This Now to Remember It Later
Pin Recipe
Print Recipe
