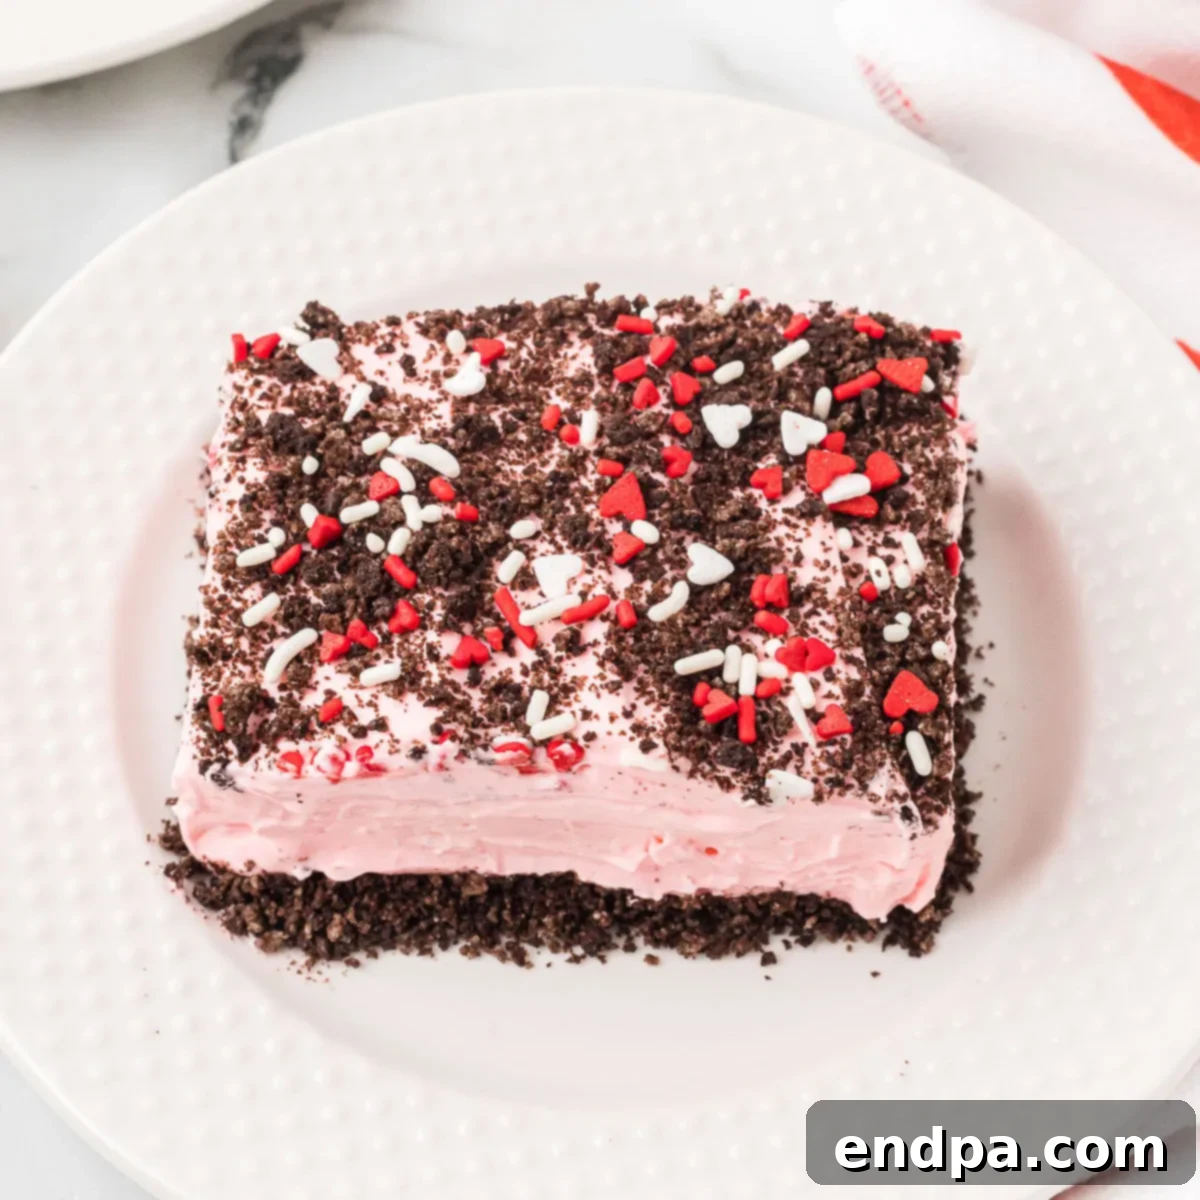
Valentine’s Day Dirt Cake is a universally adored, no-bake dessert that flawlessly captures the spirit of romance and sweetness. Imagine layers of rich, creamy pudding and delightful Oreo cookies, transformed into a festive, pink-hued masterpiece. This recipe isn’t just a dessert; it’s a delightful experience, perfect for adding a touch of homemade charm to your Valentine’s celebrations, parties, or simply a cozy evening with loved ones. Its enchanting appearance, complete with whimsical sprinkles, makes it an irresistible treat for all ages.
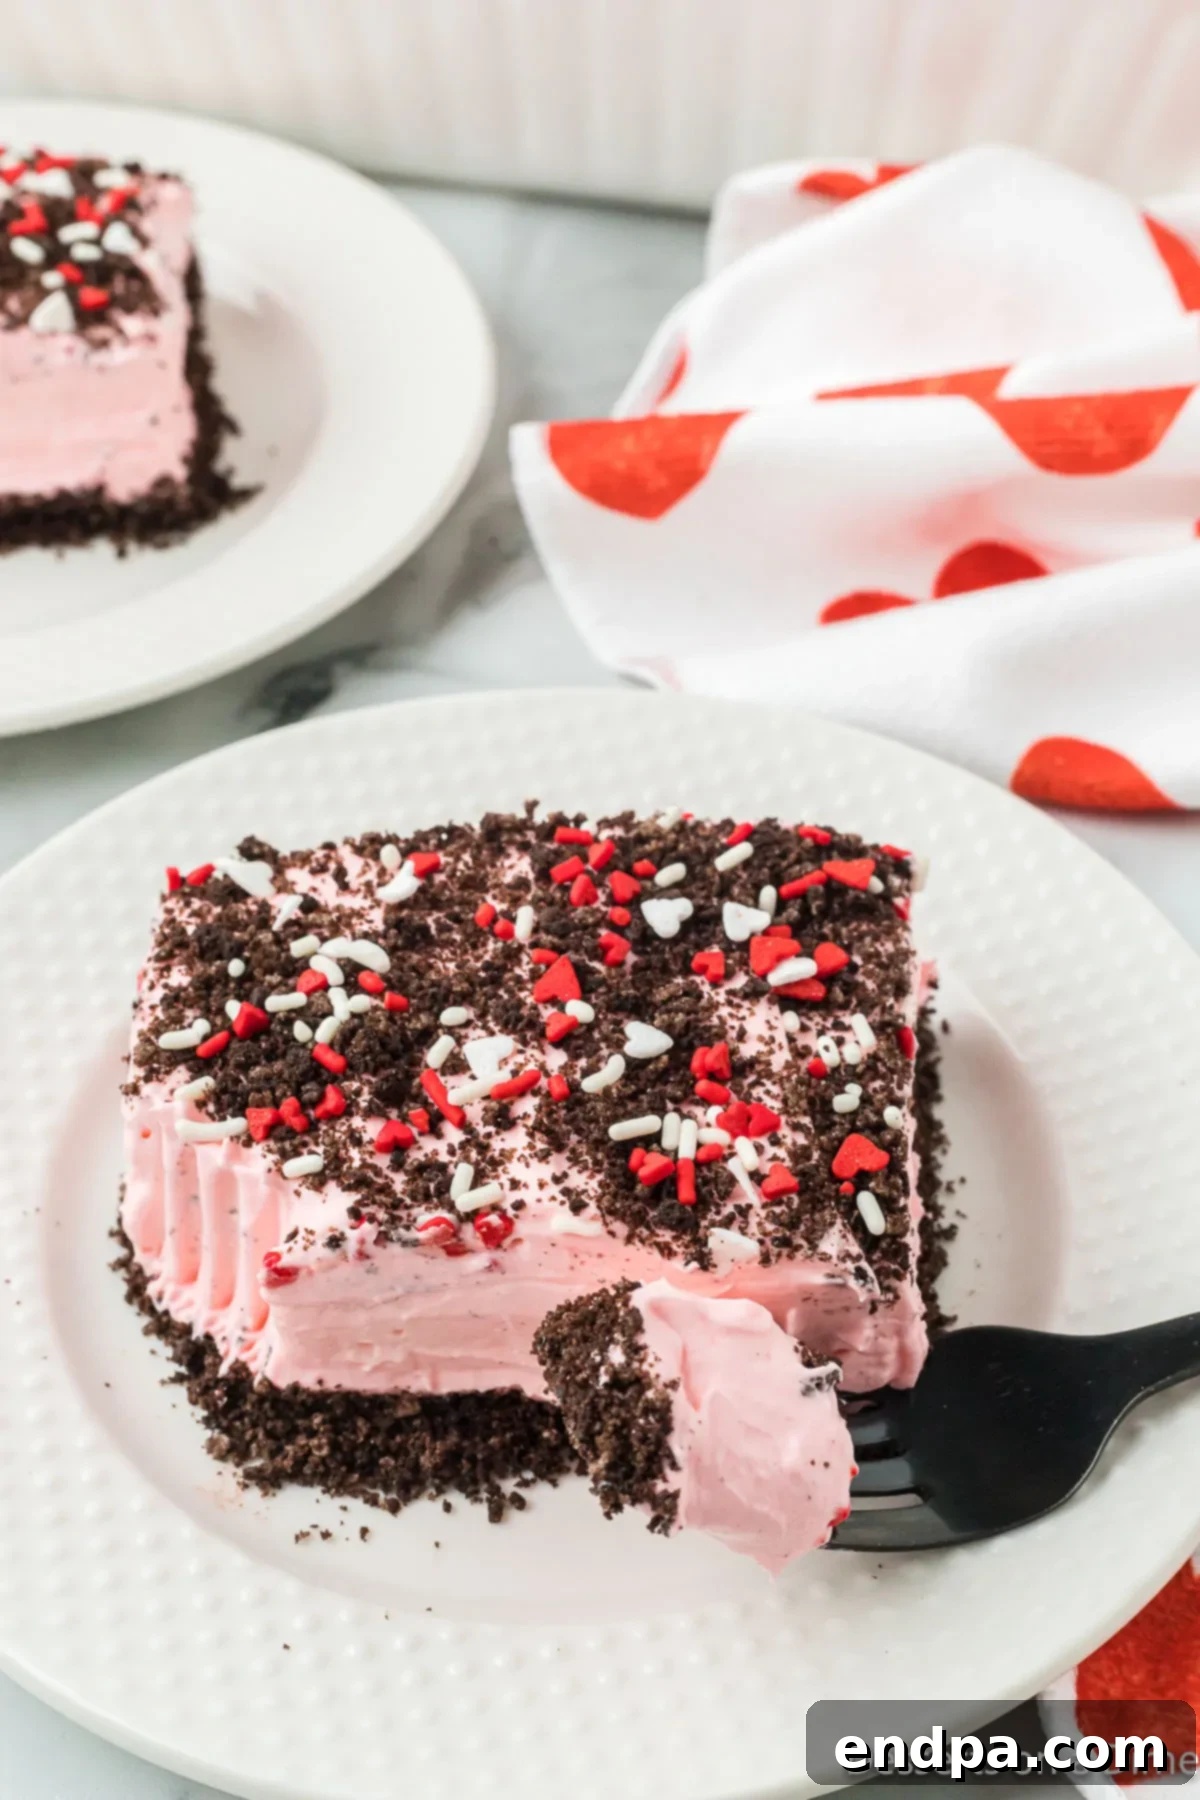
Why settle for generic store-bought sweets when you can effortlessly whip up this enchanting, Valentine’s Day-inspired dirt cake? It’s not only incredibly luscious but also remarkably simple to assemble, mirroring the ease of a traditional Oreo Dirt Cake Recipe. However, instead of the classic gummy worms or a shovel-in-a-flower-pot presentation, our festive rendition for Valentine’s Day sparkles with charming heart-shaped sprinkles and a vibrant pink filling, evoking true holiday cheer. This dessert stands out as a unique and memorable way to show affection through delicious baking.
The harmonious blend of creamy cheese, smooth pudding, and crunchy Oreo cookies creates a flavor profile that is simply divine. This is proudly one of our absolute favorite no-bake dessert recipes, promising minimal effort with maximum flavor. Beyond this delightful dirt cake, our kitchen often buzzes with other seasonal favorites such as Valentine’s Day Rocky Road Candy, adorable Heart Shaped Brownies, and perfectly sweet Valentine Chocolate Covered Pretzels. These tried-and-true recipes have been cherished staples for years, bringing joy to countless celebrations.
Looking ahead, you might also want to bookmark our Easter Dirt Cake recipe for a springtime twist, or explore our versatile Dirt Cake Recipe without Cream Cheese, which is perfect for birthday parties, potlucks, or any occasion where you need a crowd-pleasing dessert with a slightly different texture. The adaptability of dirt cake makes it a fantastic canvas for seasonal themes and dietary preferences, ensuring there’s always a version to love.
Table of contents
- Why We Love This Recipe
- The Magic Behind Dirt Cake: A Brief History
- Ingredients for Your Valentine Masterpiece
- Step-by-Step: How to Make Valentine’s Day Dirt Cake
- Creative Variations and Serving Ideas
- Frequently Asked Questions About Valentine’s Day Dirt Cake
- Expert Tips and Tricks for the Perfect Dirt Cake
- More Irresistible Valentine’s Day Recipes
Why We Love This Recipe
This Valentine’s Day Dirt Cake offers an incredibly simple yet profoundly satisfying twist on a classic dessert, making it an absolute favorite for romantic celebrations and family gatherings alike. Its charm lies not only in its ease of preparation but also in its captivating presentation. The vibrant pink filling, infused with a hint of romance, combined with a showering of festive sprinkles, elevates this humble dirt cake into a truly luscious and visually stunning treat. Both children and adults are utterly captivated by its delightful taste and whimsical appearance, making it a guaranteed crowd-pleaser for your Valentine’s Day festivities. It’s the kind of dessert that brings smiles, creates memories, and encourages everyone to reach for a second helping.
The beauty of this recipe extends beyond its deliciousness; it’s an effortless creation that leaves you ample time to prepare other delightful holiday treats. Imagine having time to craft beautiful Valentine’s Day Chocolate Covered Pretzel Rods or even a savory main course, all while this glorious dirt cake chills to perfection in the refrigerator. Its no-bake nature means no oven preheating, no complex baking techniques, and minimal cleanup, allowing you to focus on enjoying the holiday spirit rather than being confined to the kitchen.
The Magic Behind Dirt Cake: A Brief History
Dirt cake, often affectionately called “dirt pudding,” has been a beloved American dessert for decades, especially popular at potlucks, children’s parties, and holiday gatherings. Its appeal stems from its playful appearance, mimicking garden soil, typically adorned with gummy worms. The basic concept involves layers of crushed chocolate cookies (usually Oreos) and a rich, creamy pudding or cream cheese mixture. While its exact origin is somewhat debated, it gained significant popularity in the late 20th century as a fun, no-fuss dessert.
The genius of dirt cake lies in its simplicity and adaptability. It requires no baking, making it accessible to even novice cooks, and its components are readily available. Over the years, countless variations have emerged, transforming the classic into seasonal delights like our Valentine’s Day version, Easter dirt cake with marshmallow bunnies, or Halloween dirt cake with candy corn and spooky decorations. This Valentine’s Day Dirt Cake pays homage to that beloved tradition while infusing it with a romantic, festive twist, proving that a timeless classic can always be reimagined for new occasions.
Ingredients for Your Valentine Masterpiece
Crafting this delightful Valentine’s Day Dirt Cake requires a handful of simple, readily available ingredients that come together to create an extraordinary dessert. Each component plays a crucial role in achieving the perfect balance of texture, sweetness, and that signature festive pink hue.
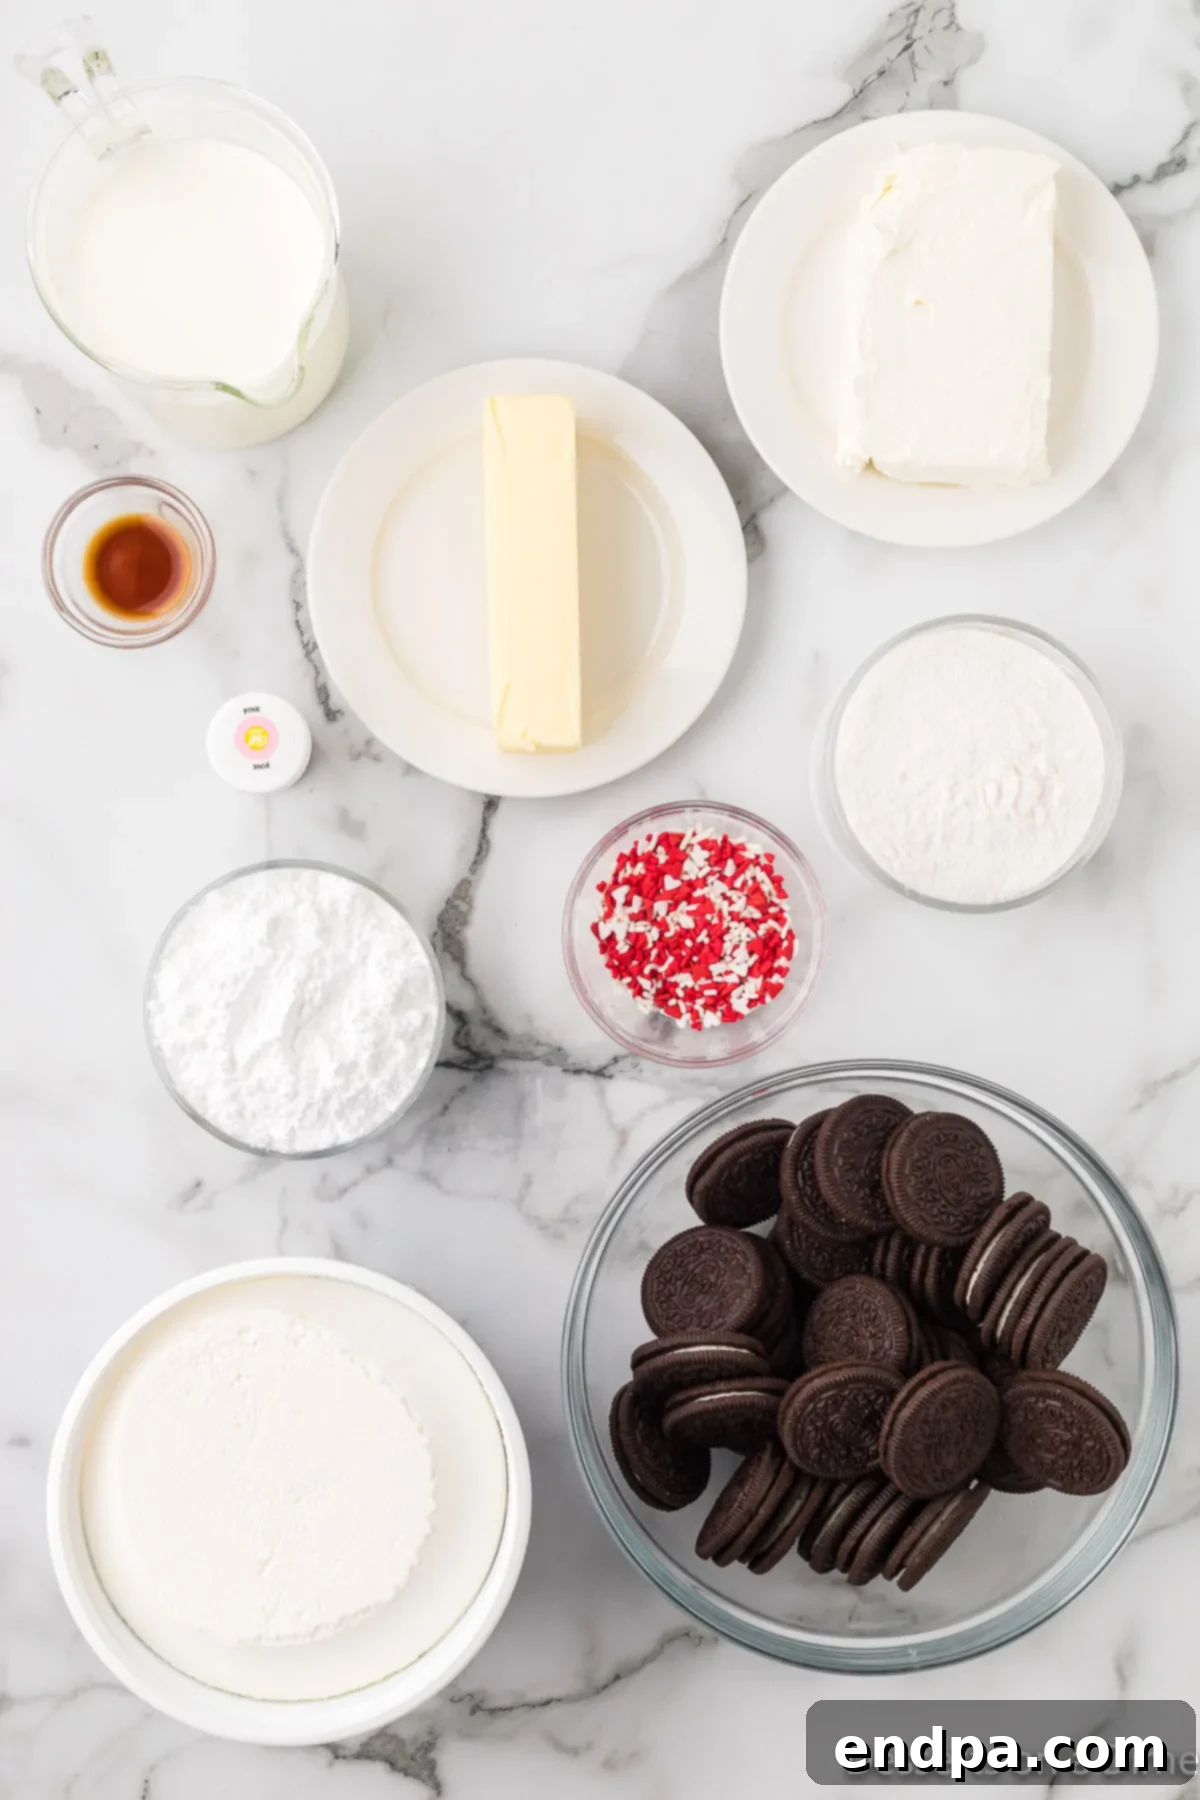
- Package of Oreos (14.3 oz): The star of our “dirt.” These iconic chocolate sandwich cookies provide the perfect crumbly texture and rich chocolate flavor for the base and topping. While generic chocolate sandwich cookies can be used, authentic Oreo cookies offer that unmistakable taste and crunch.
- Cream Cheese (8 oz): Softened at room temperature. This is essential for achieving a smooth, velvety texture in your creamy filling. Cold cream cheese will result in lumps, so plan ahead and let it sit out for about 30-60 minutes before you begin.
- Butter (1/2 cup): Softened at room temperature. Like cream cheese, softened butter blends seamlessly, contributing to the rich, smooth consistency of the pudding mixture. Unsalted butter is generally preferred in desserts to control the overall saltiness.
- Powdered Sugar (1 cup): Also known as confectioners’ sugar. Its fine texture dissolves easily into the cream cheese and butter mixture, ensuring a silken, lump-free filling that’s perfectly sweet without being grainy.
- Cool Whip (16 oz): A staple for many no-bake desserts. Cool Whip provides a light, airy, and stable base for the creamy layers. For a more homemade touch and a richer flavor, you can certainly substitute with an equal amount of freshly Homemade Whipped Cream.
- Instant Vanilla Pudding Mix (2 boxes, 3.3 oz each): The key to the cake’s delightful pudding layers. It’s crucial to use *instant* pudding mix, not the cook-and-serve variety, as instant pudding sets quickly and firmly without heat, forming the stable, luscious filling that holds the cake together.
- Milk (3 cups): The liquid component for activating the instant pudding mix. Whole milk will yield a richer, creamier pudding, but 2% milk works just as well. Ensure it’s cold for optimal pudding setting.
- Vanilla Extract (1 tsp): A touch of pure vanilla extract enhances all the sweet flavors in the cake, adding depth and warmth to the creamy layers.
- Pink Food Coloring: This is what gives our Valentine’s Day Dirt Cake its signature romantic hue. You can use gel or liquid food coloring; adjust the amount to achieve your desired shade of festive pink, from a subtle blush to a vibrant fuchsia.
- Valentine’s Day Sprinkles: The crowning glory! Heart-shaped sprinkles, red and pink nonpareils, or any festive mix you love will add a cheerful, celebratory finish to your dessert.
Make sure all your cold ingredients (cream cheese, butter) are at room temperature for smooth mixing, and gather your tools before you start. The complete ingredient list, along with precise measurements, is available in the recipe card below.
Step-by-Step: How to Make Valentine’s Day Dirt Cake
Creating this festive Valentine’s Day Dirt Cake is a straightforward process, designed for ease and enjoyment. Follow these simple steps to assemble your stunning no-bake masterpiece.
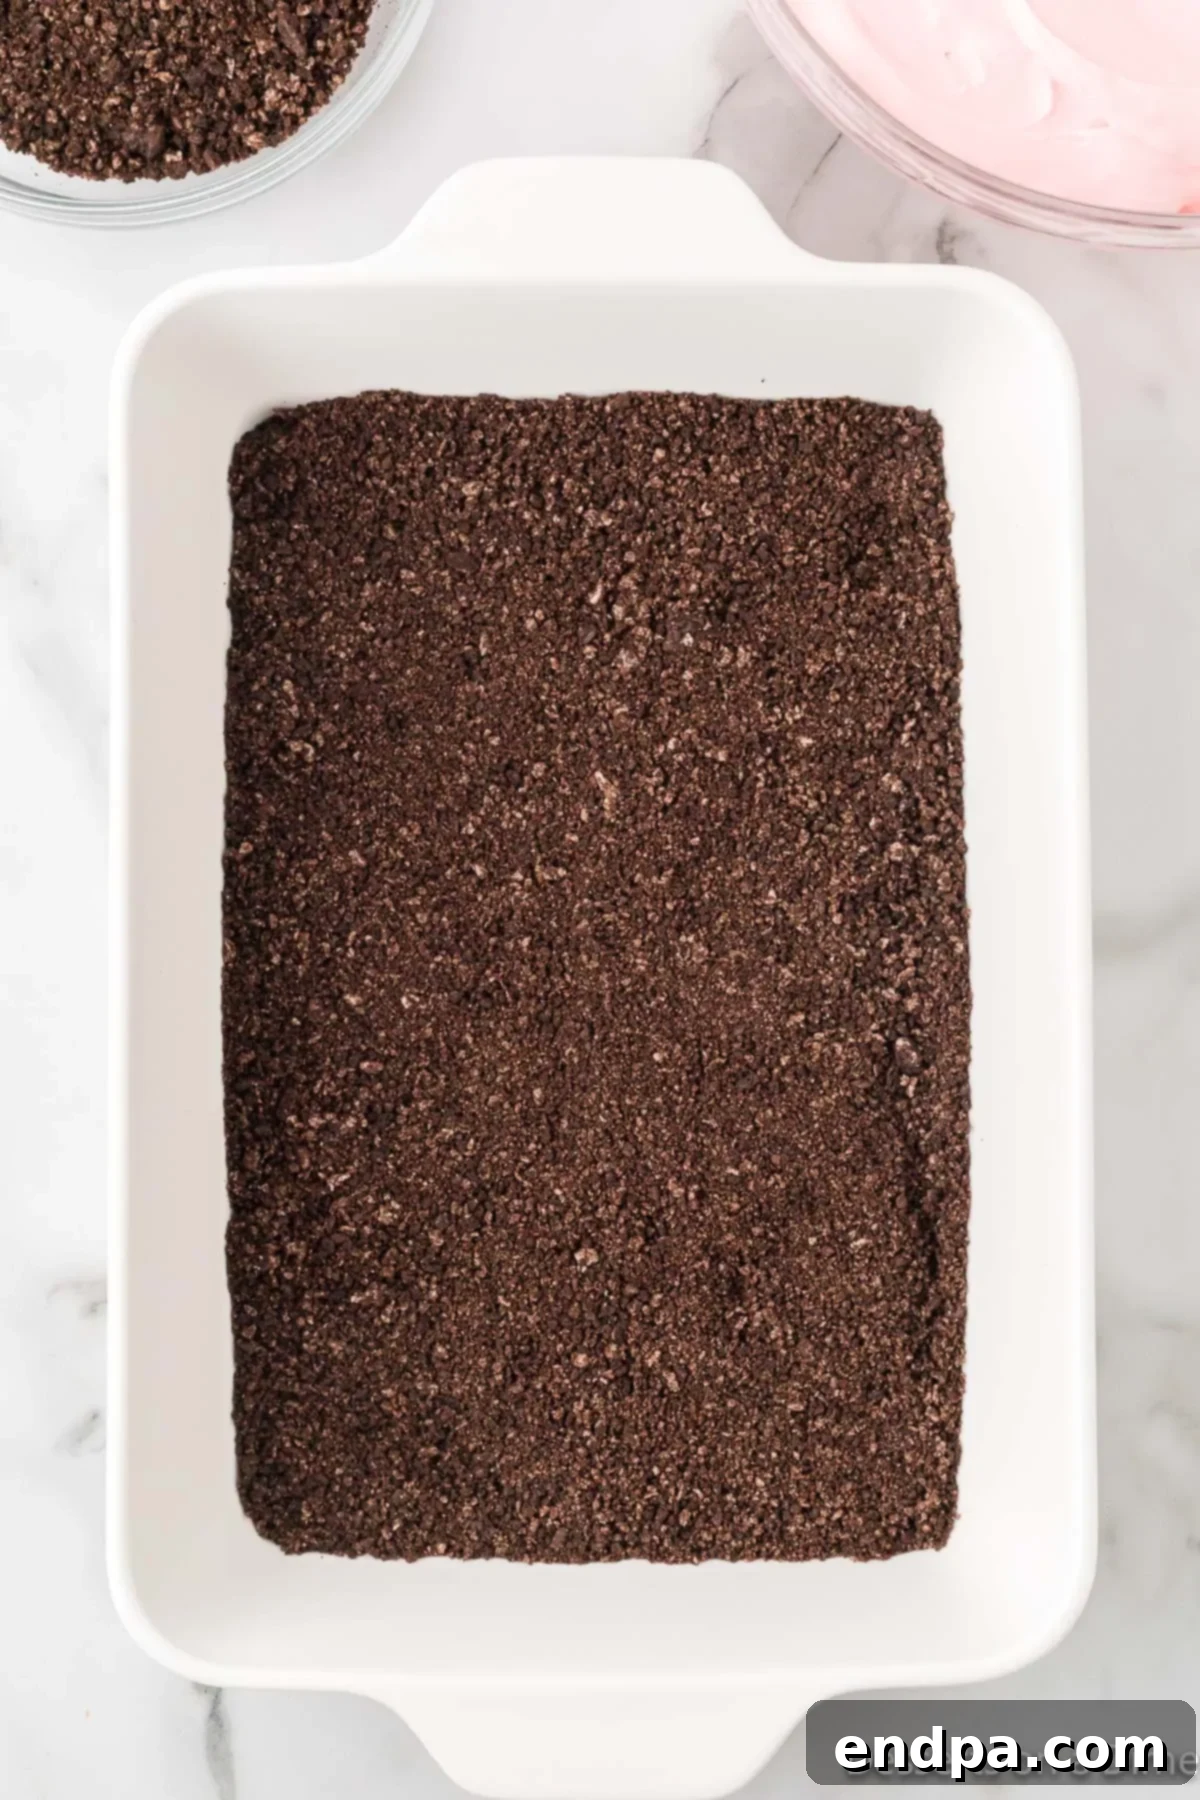
Step 1: Prepare the Oreo Base. Begin by crushing approximately two-thirds of your package of Oreo cookies. You can do this efficiently using a food processor for fine crumbs, or by placing them in a Ziploc bag and crushing them with a rolling pin or the back of a wooden spoon. Spread these crushed Oreos evenly across the bottom of a 9×13-inch baking pan. This layer will form the delightful “dirt” base of your cake. Set the pan aside as you prepare the creamy filling.
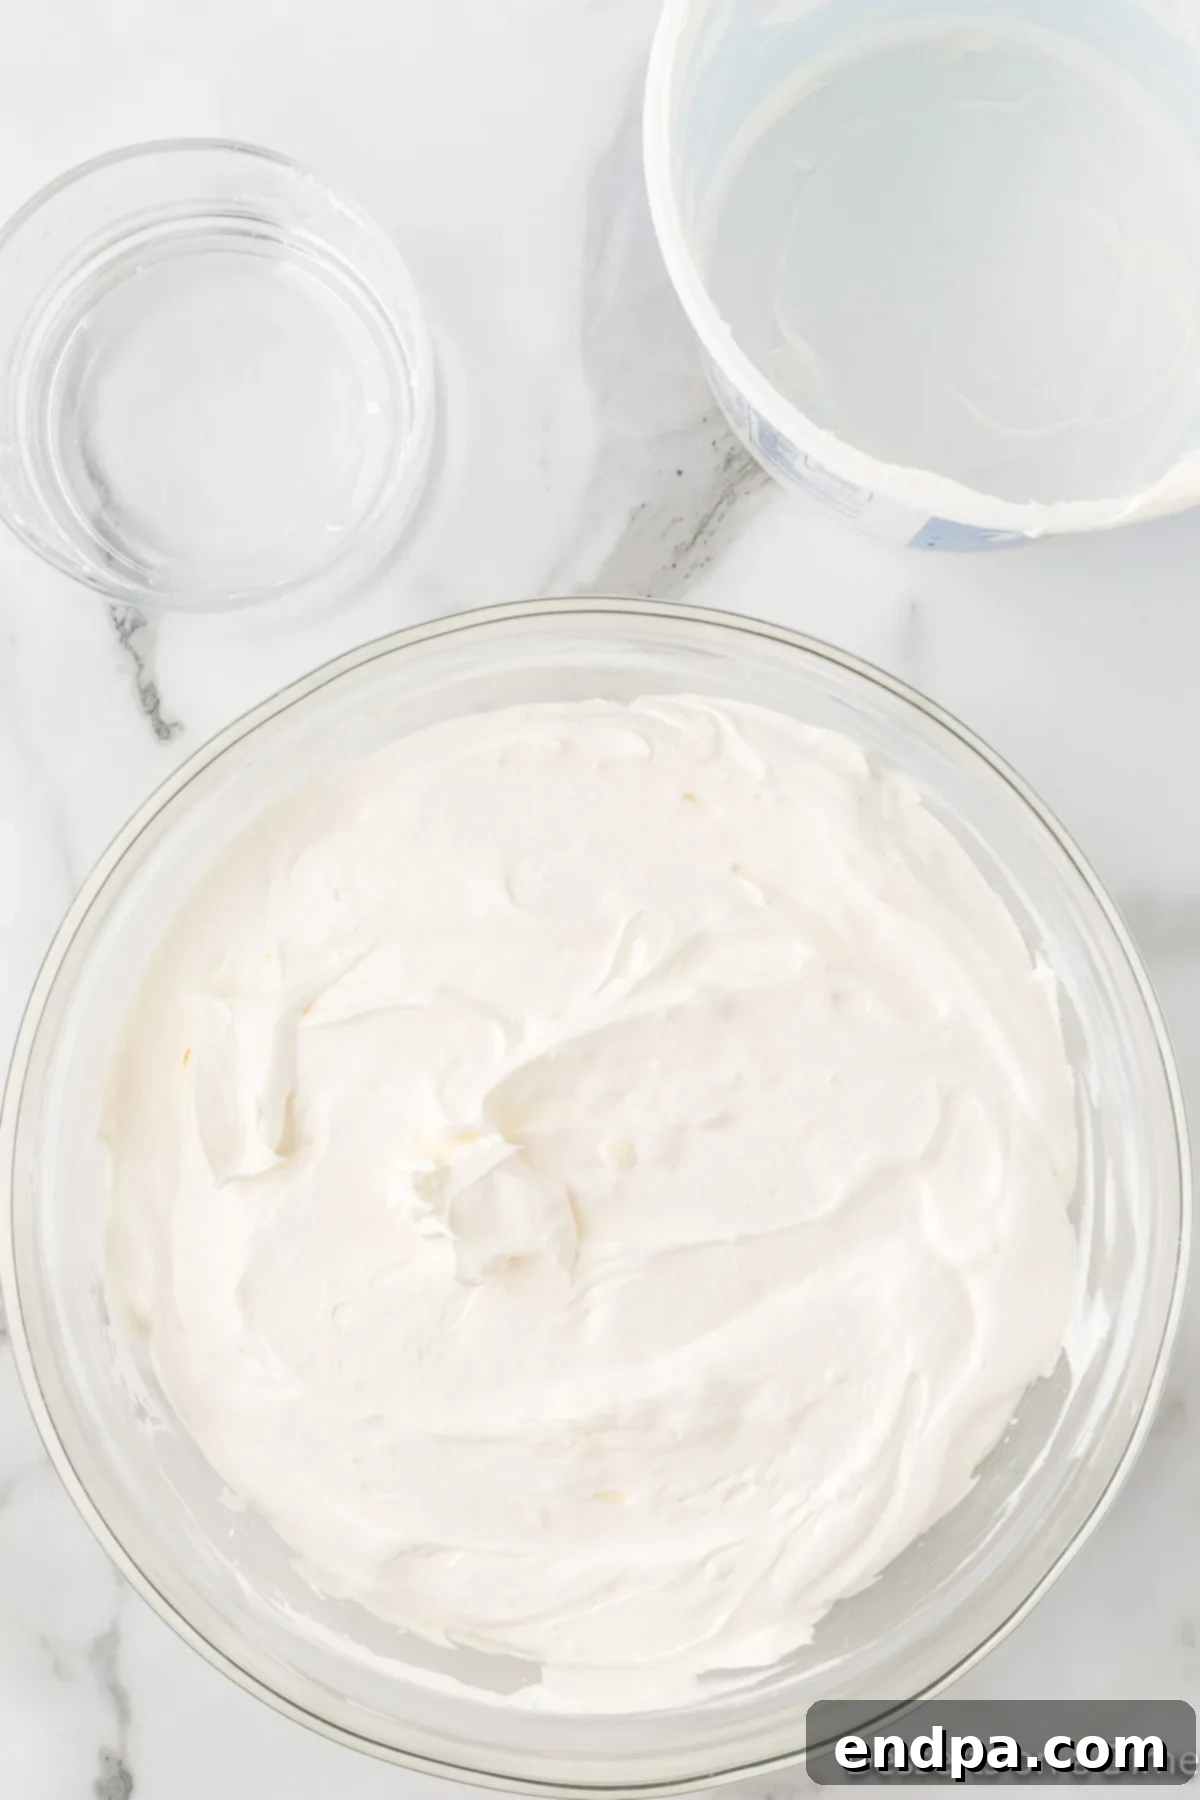
Step 2: Create the Cream Cheese Mixture. In a large mixing bowl, combine the softened cream cheese and softened butter. Using a hand mixer or a stand mixer fitted with a paddle attachment, beat these ingredients together until the mixture is completely smooth and free of any lumps. This step is crucial for a silky, consistent filling. Once combined, gradually add the powdered sugar, beating until fully incorporated. Finally, gently fold in the thawed whipped topping (Cool Whip) until just combined. Avoid overmixing to keep the mixture light and airy. Set this creamy concoction aside for a moment.
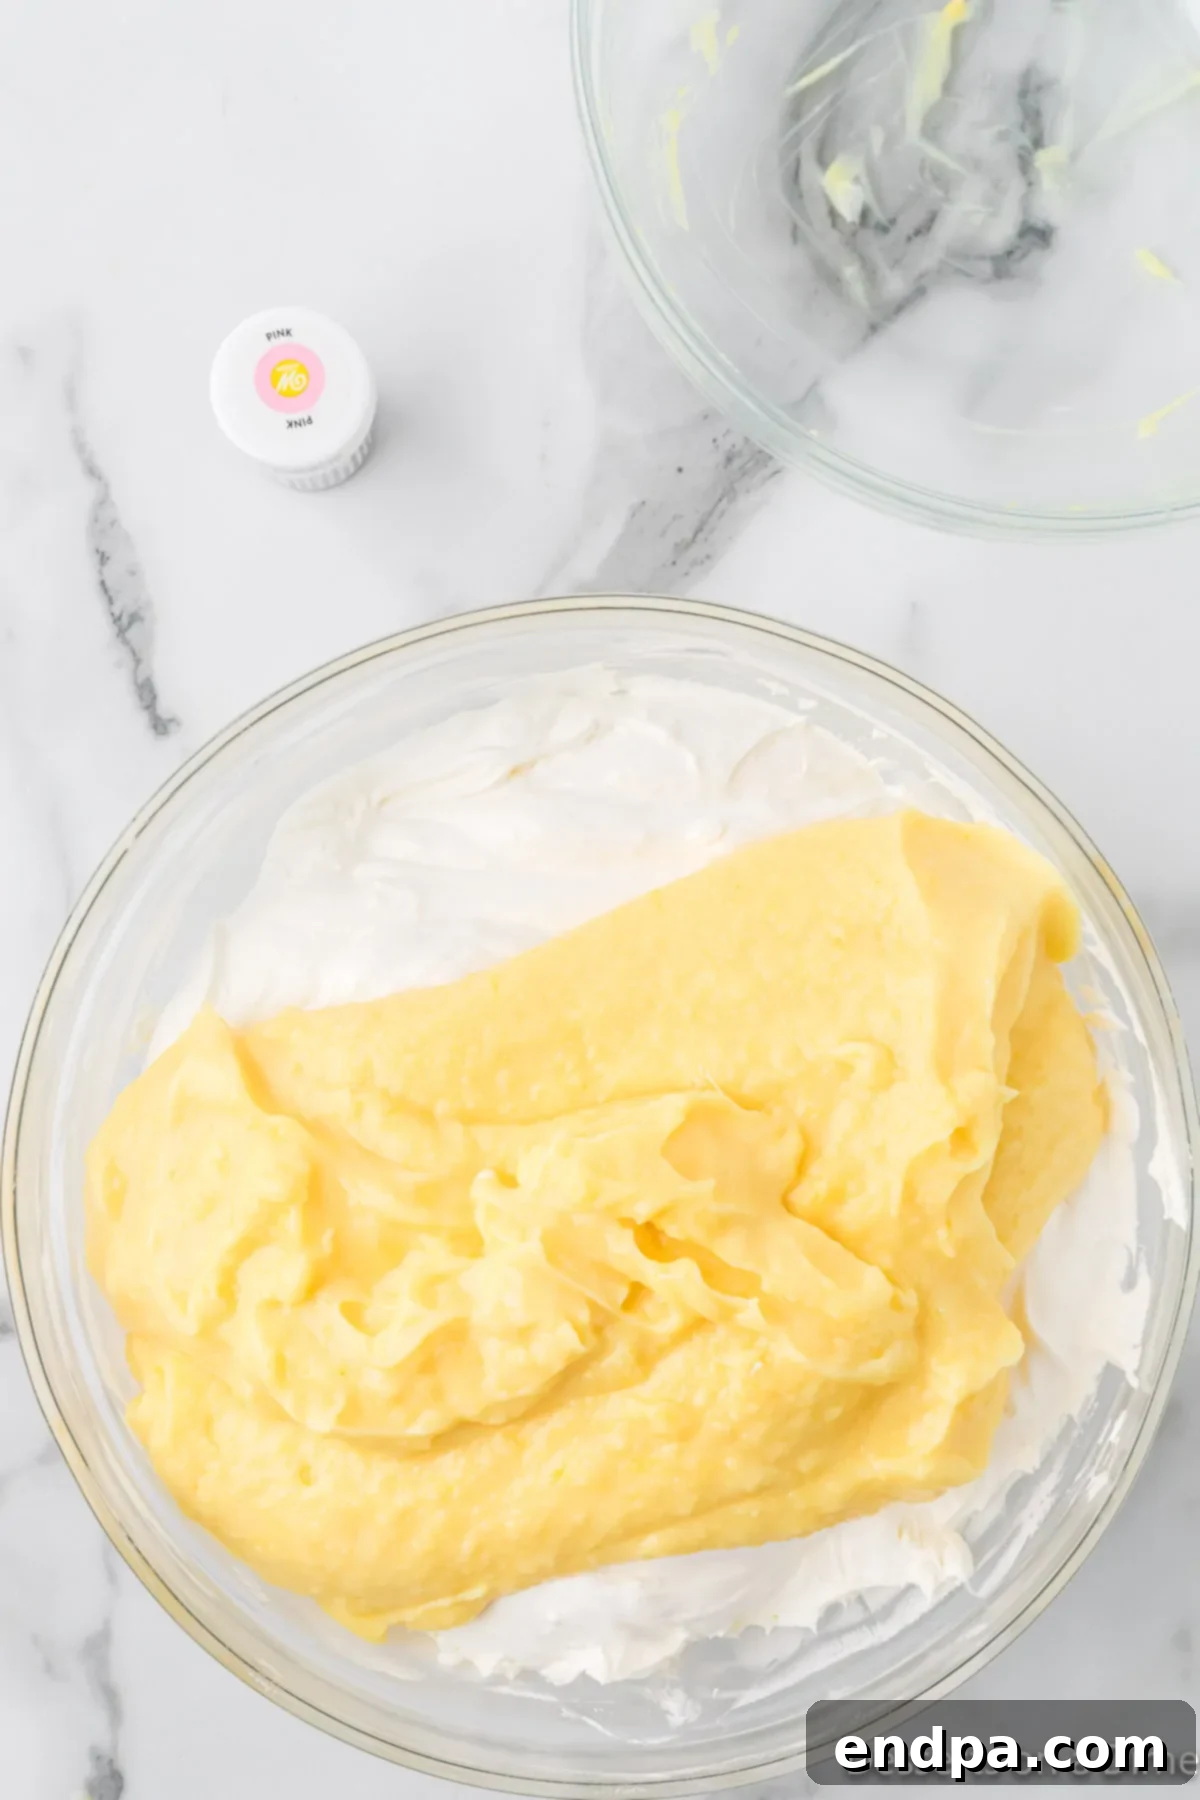
Step 3: Whisk the Pudding. In a separate, medium-sized bowl, whisk together the cold milk, both boxes of instant vanilla pudding mix, and the vanilla extract. Continue whisking vigorously for about 2-3 minutes, or until the pudding begins to thicken considerably. This ensures the pudding sets properly. Once the pudding mixture has thickened, gently fold it into the cream cheese mixture you prepared in Step 2. Use a spatula to combine everything until just blended, maintaining the light texture.
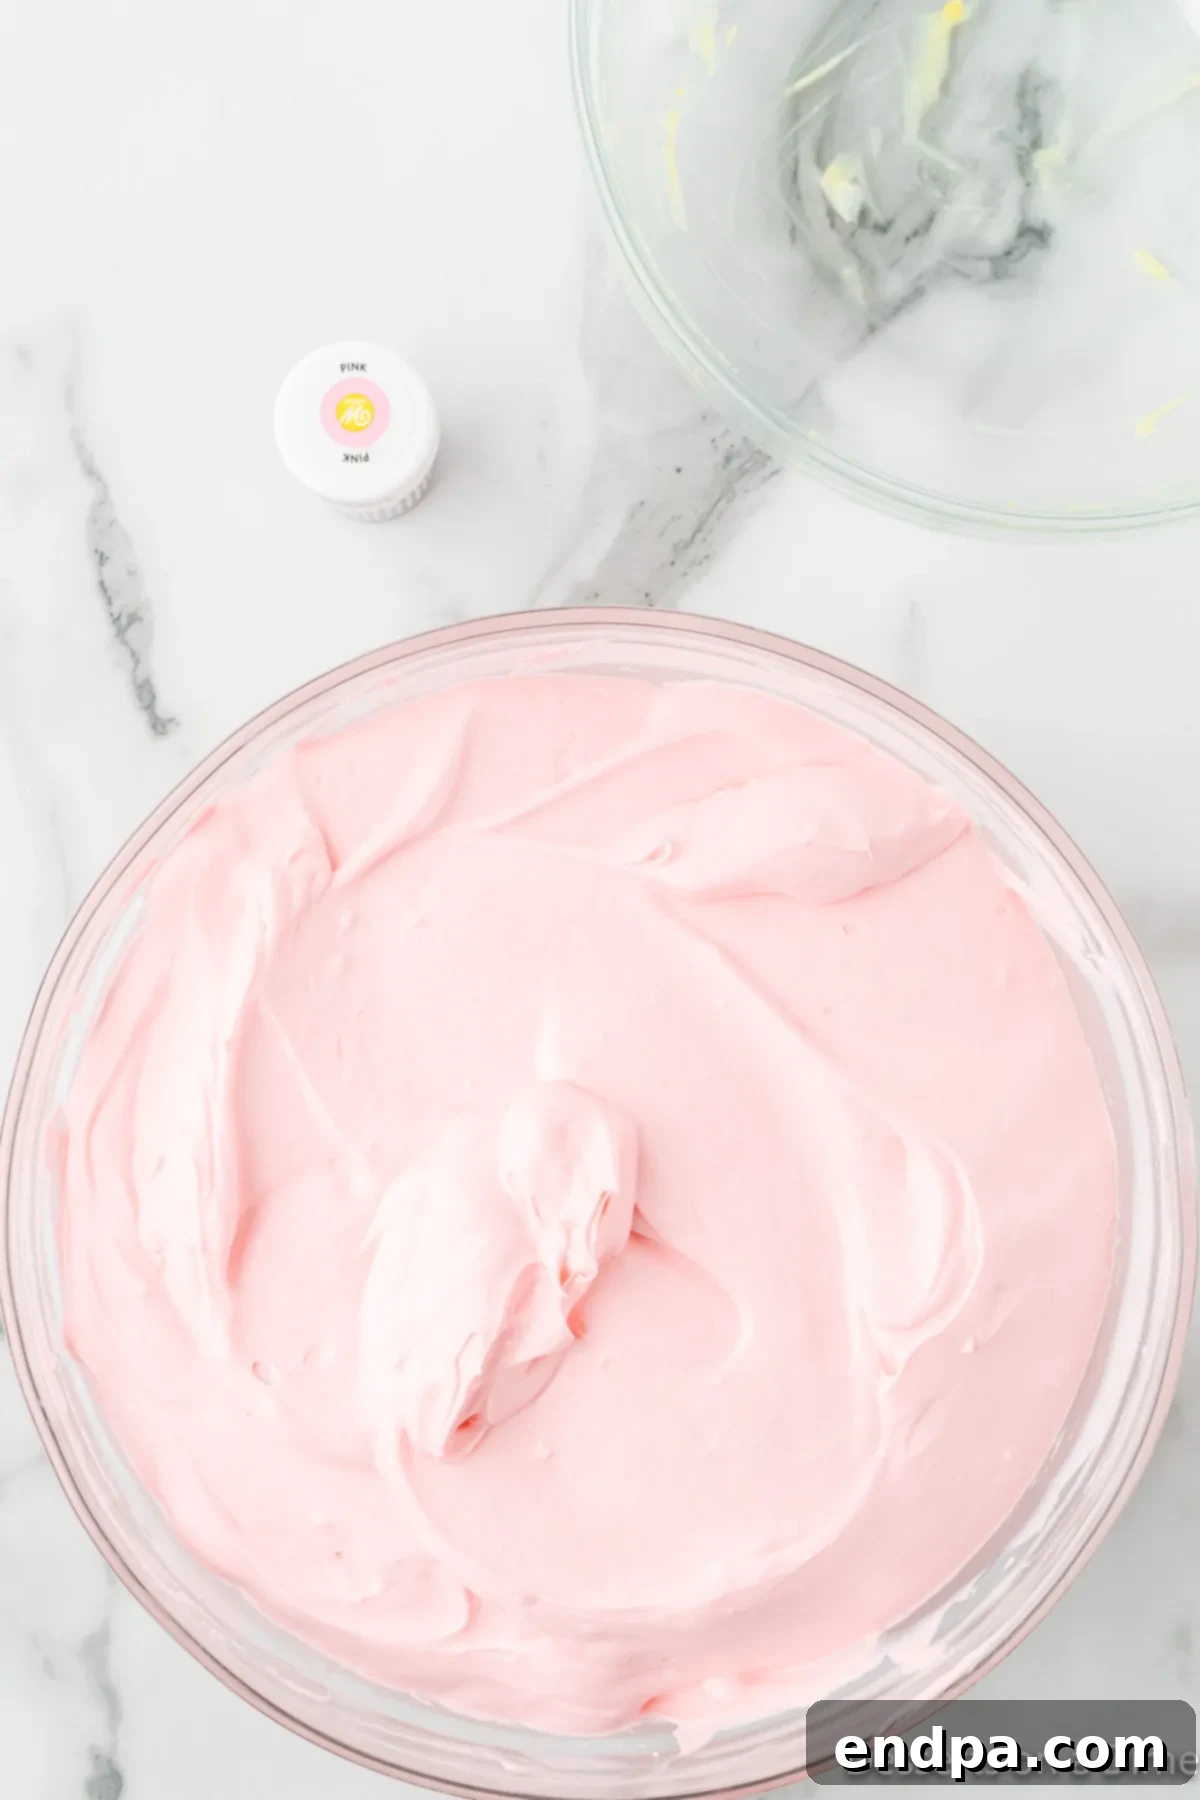
Step 4: Add the Festive Pink Hue. Now comes the fun part: transforming your pudding mixture into a beautiful Valentine’s pink! Add 5 to 7 drops of pink food coloring to the pudding and cream cheese mixture. Stir gently but thoroughly until the color is evenly distributed and you achieve your desired shade of festive pink. You can add more or less food coloring depending on how vibrant you want the color to be. This visual element is key to the cake’s Valentine’s Day appeal.
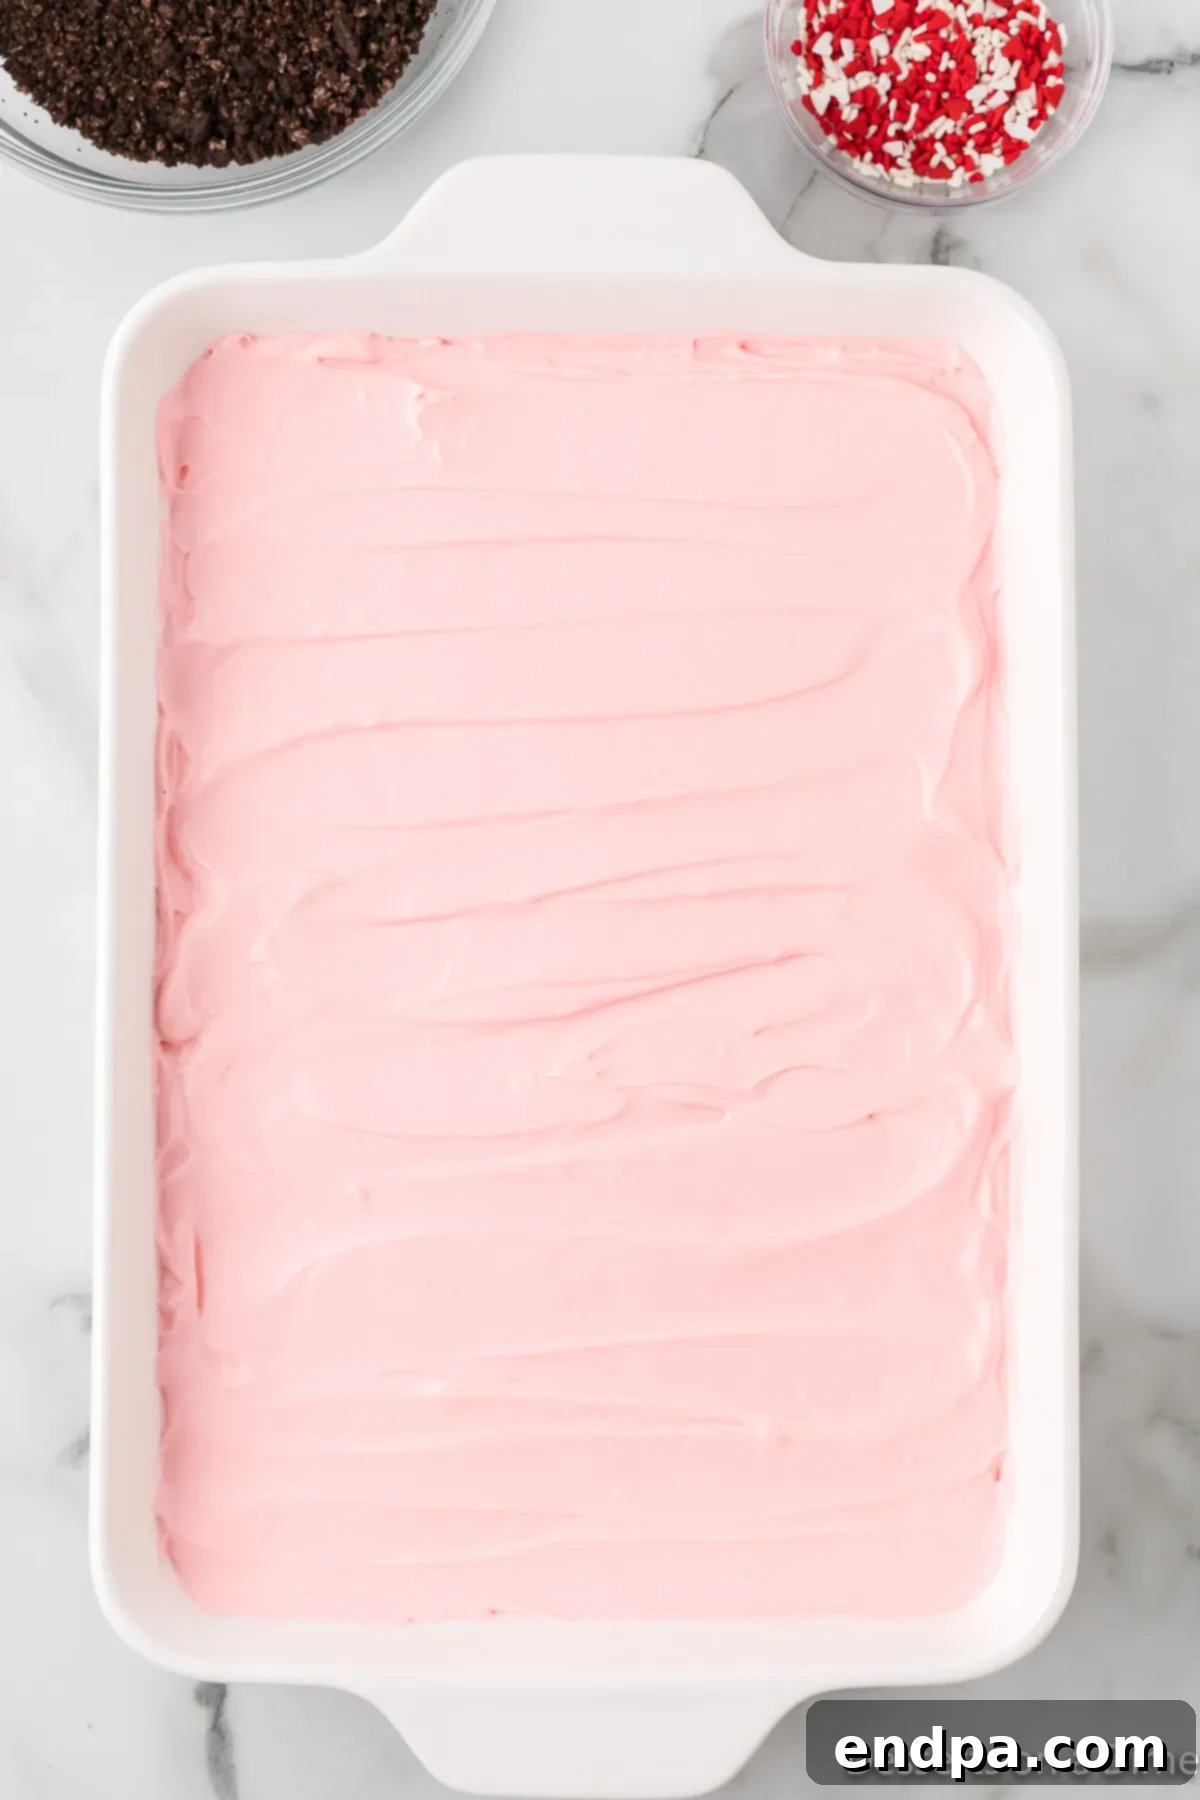
Step 5: Layer and Chill. Carefully pour the beautifully pink pudding mixture over the crushed Oreo crumbs in your 9×13-inch baking dish. Use a spatula to gently spread the mixture evenly, ensuring it covers the entire cookie layer. Once smoothed, place the dish in the refrigerator. Allow the dirt cake to chill for at least 1 to 2 hours, or until the pudding mixture is completely set and firm. This chilling time is essential for the layers to meld and for the cake to achieve its ideal texture.
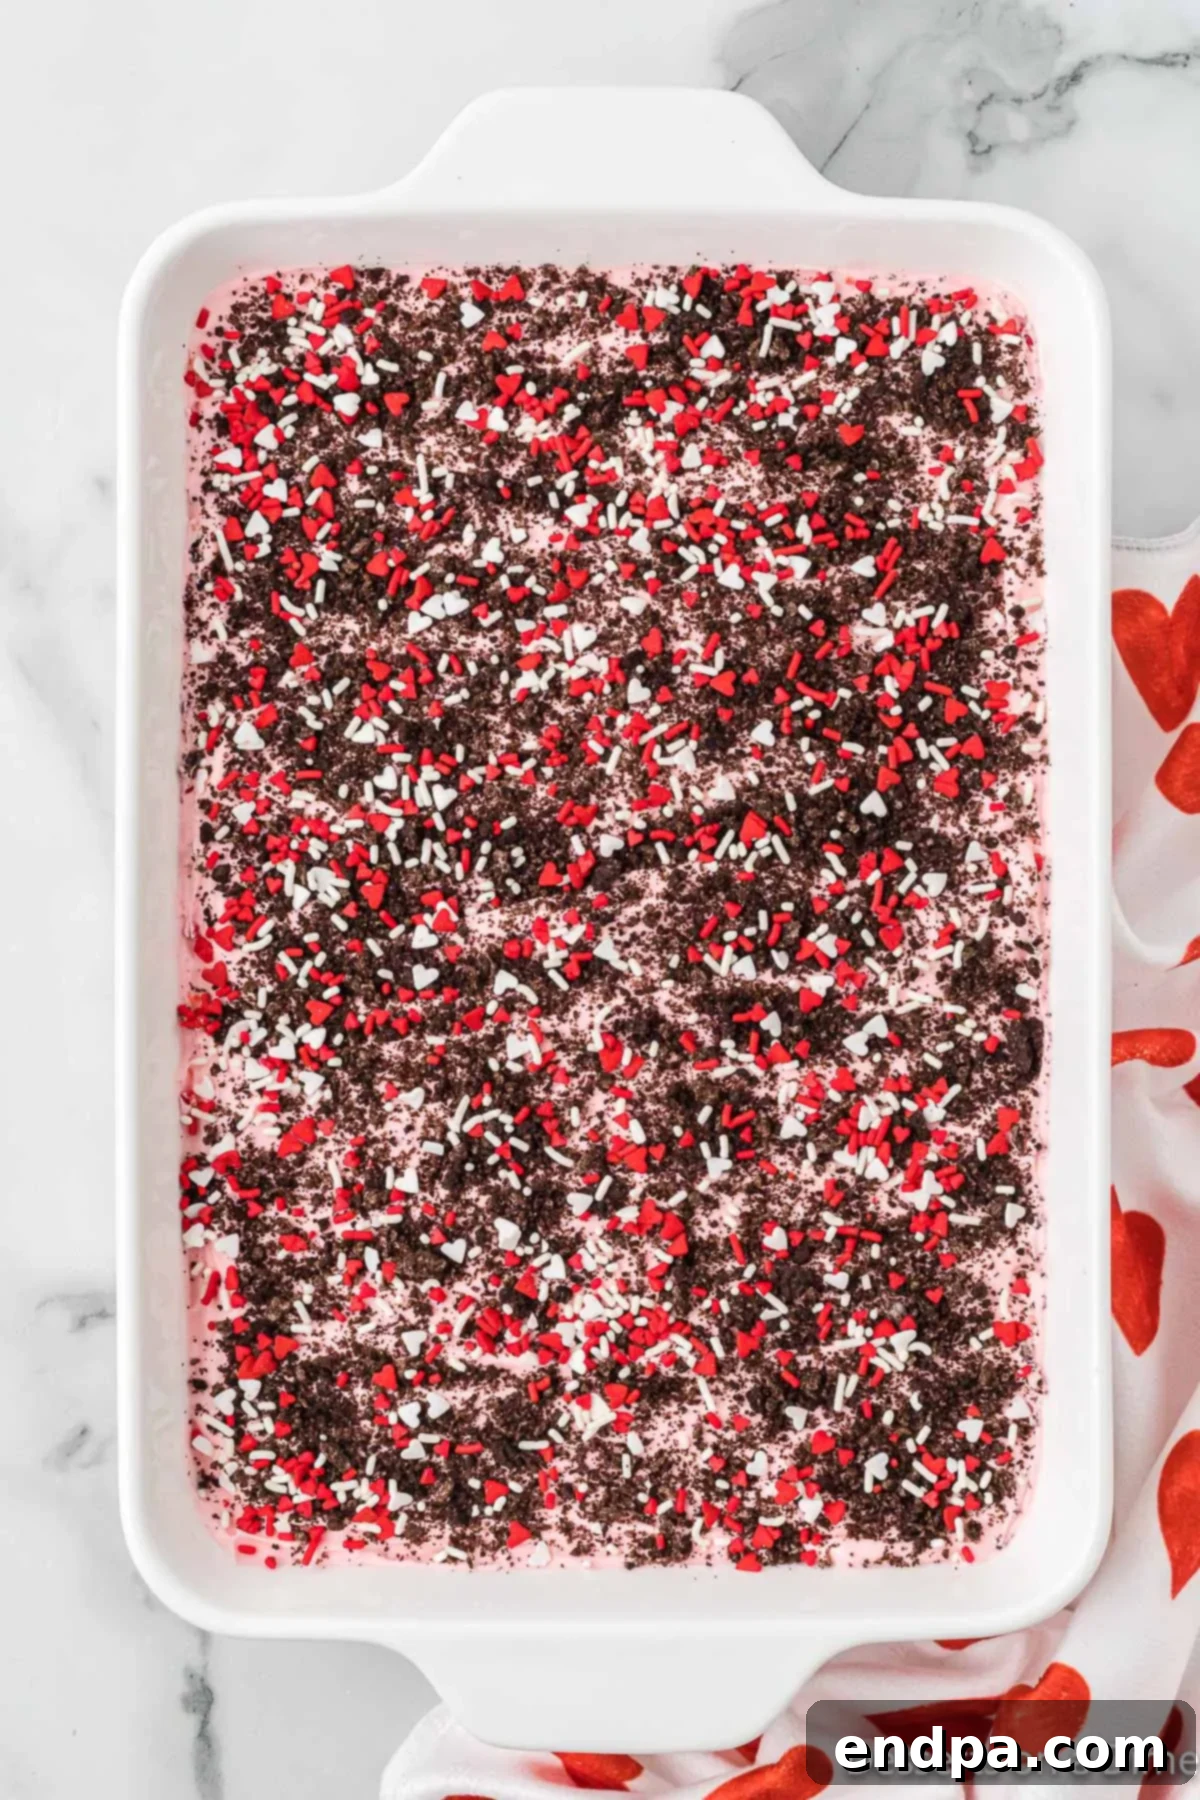
Step 6: Decorate and Serve. Once the dirt cake is thoroughly chilled and set, it’s time for the final touches. Take the remaining crushed Oreo cookies and generously sprinkle them over the top of the pink pudding layer. This creates the classic “dirt” appearance. Then, scatter your festive Valentine’s Day sprinkles, like tiny hearts or red and pink nonpareils, across the top for that extra touch of holiday magic. Slice and serve your magnificent Valentine’s Day Dirt Cake chilled, and be prepared for compliments!
Creative Variations and Serving Ideas
One of the best aspects of Valentine’s Day Dirt Cake is its versatility. While the classic pink vanilla version is undeniably charming, don’t hesitate to get creative with flavors and presentations to make it uniquely yours.
Flavor Variations:
- Different Oreo Flavors: The base recipe uses classic Oreos, but consider experimenting with other varieties. Golden Oreos would create a lighter contrast with the pink filling, while Red Velvet Oreos would amplify the Valentine’s theme even further. Mint Oreos could offer a refreshing twist, and seasonal flavors like Strawberry Shortcake Oreos (if available) would be absolutely delightful.
- Pudding Power: While vanilla pudding is a versatile canvas for pink food coloring, other instant pudding flavors can dramatically change the dessert. White chocolate pudding would offer a similar light base, while cheesecake-flavored pudding would add a tangy richness. For a bolder flavor, consider strawberry or even cherry instant pudding to enhance the pink color and fruit notes.
- Chocolate Lover’s Dream: If you’re a true chocolate aficionado, try using chocolate instant pudding. While the pink food coloring won’t be as prominent, the rich chocolate flavor combined with the Oreo crumbs would be heavenly. You could still add a pink cream cheese layer or pink sprinkles for the visual appeal.
- Fruity Freshness: Incorporate fresh fruit for an added layer of flavor and texture. Sliced strawberries or raspberries can be layered within the pudding, or arranged beautifully on top before serving. A thin layer of strawberry pie filling could also be added for an extra pop of fruitiness.
Serving Suggestions:
- Individual Portions: For elegant serving, assemble the dirt cake in clear individual cups, mason jars, or small parfait glasses. Layer the crushed Oreos and pink pudding mixture, finishing with sprinkles. This not only looks sophisticated but also makes serving a breeze, especially for parties.
- Trifle Bowl Presentation: If you have a large glass trifle bowl, use it to create a stunning layered presentation. The clear sides will showcase the beautiful pink and brown layers, making it a spectacular centerpiece for your Valentine’s table.
- Chocolate Accents: Beyond sprinkles, add other chocolate elements like chocolate shavings, mini chocolate chips, or even chocolate-covered coffee beans for a sophisticated touch.
- Whipped Cream Swirls: Before adding sprinkles, pipe dollops or swirls of extra whipped cream on top of the cake. This adds height and another layer of creamy goodness.
- Candy Toppings: Supplement your sprinkles with small candy hearts, red hot candies, or other Valentine’s Day-themed confectionery for extra sweetness and visual appeal.
No matter how you choose to customize and serve your Valentine’s Day Dirt Cake, it’s sure to be a hit. Its playful nature combined with its delicious flavors makes it an unforgettable dessert that everyone will adore.
Frequently Asked Questions About Valentine’s Day Dirt Cake
Dirt cake is best enjoyed chilled, which also aids in its preservation. To store any delicious leftovers, simply place the baking dish back into the refrigerator. If your baking dish comes with a lid, this is the ideal way to keep it fresh. Otherwise, cover the dish tightly with plastic wrap or aluminum foil, ensuring no air can get in. Proper covering prevents the cake from drying out and absorbing other odors from the fridge.
When properly covered and refrigerated, your Valentine’s Day Dirt Cake will maintain its optimal freshness and delicious taste for up to 3 days. Beyond this period, while still safe to eat, the cookie layers might start to become a bit softer, and the overall texture may change slightly. For the best experience, aim to enjoy it within the first two days.
Absolutely! Dirt cake is a fantastic make-ahead dessert, perfect for busy hosts. You can prepare and assemble the entire cake up to 24 hours in advance of serving. This allows ample time for the layers to set and the flavors to meld beautifully. However, we generally advise against making it any longer than 24 hours ahead, as extending the time can cause the Oreo cookie layers to become excessively soggy, compromising the delightful textural contrast.
You certainly can use instant chocolate pudding if you prefer the flavor. However, be aware that if you use chocolate pudding, the pink food coloring will not be visible. The deep brown color of the chocolate pudding will mask the pink, meaning your dessert will lose its festive pink and romantic appearance that makes it so special for Valentine’s Day. If the pink aesthetic is important to you, stick with vanilla or white chocolate instant pudding.
Expert Tips and Tricks for the Perfect Dirt Cake
Achieving a perfect Valentine’s Day Dirt Cake is incredibly simple, but a few expert tips can elevate your dessert from good to absolutely phenomenal.
- Crushing Oreos Made Easy: If you’re fortunate enough to own a food processor, it is by far the quickest and easiest method to achieve uniform, fine Oreo crumbs. Simply pulse the cookies until they reach your desired consistency. No food processor? No problem! Place your Oreo cookies into a large, sturdy Ziploc freezer bag. Seal it tightly, removing as much air as possible, then use a rolling pin, the back of a heavy spoon, or even a sturdy bottle to crush the cookies until they are finely ground. Ensure they are crushed thoroughly for the best “dirt” texture.
- Avoid Double Stuffed Oreos: While tempting for their extra cream, we strongly advise against using Double Stuffed Oreos for this recipe. The increased amount of cream filling in these cookies can alter the consistency of your crumb mixture, potentially making it too moist or sticky, and preventing it from forming the ideal “dirt” layer. Stick to classic Oreos for the best results.
- Experiment with Oreo Flavors: Don’t be afraid to get creative with your Oreo choices! While classic Oreos are fantastic, trying different varieties can introduce exciting new flavor profiles. Consider using Golden Oreos for a vanilla-themed dirt cake, or Red Velvet Oreos for an intensified Valentine’s Day twist. Even seasonal flavors can make a fun appearance. Just ensure they are not “double stuffed” for the reasons mentioned above.
- Pudding Flavor Adventures: The recipe calls for vanilla pudding, which serves as an excellent neutral base for the pink food coloring. However, feel free to experiment with other instant pudding flavors to suit your taste. White chocolate pudding would also work wonderfully and maintain the light color. For a richer, tangier note, cheesecake-flavored instant pudding is a fantastic option. You could even try a strawberry instant pudding for an extra layer of pink and fruity flavor.
- Instant Pudding is Key: This cannot be stressed enough: make absolutely certain you purchase *instant* pudding mix. “Cook and serve” pudding varieties have a different chemical composition and will not set properly without being heated on the stove, leading to a runny, unappetizing dirt cake. Always double-check the label to ensure it explicitly states “instant.”
- Room Temperature Ingredients: For the smoothest possible cream cheese and butter mixture, ensure both are truly at room temperature. This means they should be soft enough to easily indent with a finger. If they are too cold, your mixture will be lumpy, and it will be difficult to achieve that desirable velvety texture.
- Chill Time is Crucial: Resist the temptation to serve the cake before it has adequately chilled. The 1-2 hours of refrigeration are vital for the pudding layers to fully set and for the flavors to meld. A properly chilled dirt cake will slice cleanly and have the perfect firm-but-creamy texture.
- Decorate Just Before Serving: While the cake can be made ahead, adding the top layer of crushed Oreos and sprinkles just before serving will ensure they retain their maximum crunch and vibrant appearance. If added too early, they can absorb moisture from the pudding and become soft.
By keeping these simple tips in mind, you’re well on your way to crafting a Valentine’s Day Dirt Cake that is not only visually stunning but also incredibly delicious and perfectly textured.
More Irresistible Valentine’s Day Recipes
If you’re looking to spread more love through delicious treats this Valentine’s Day, we have an array of easy and delightful recipes that are sure to charm. From classic chocolates to fun baked goods, there’s something for every sweet tooth.
- Valentine’s Day Chocolate Covered Oreos: Simple, elegant, and utterly delicious. These chocolate-dipped Oreos are customizable with festive sprinkles and make perfect homemade gifts or party favors.
- Valentine’s Day Poke Cake Recipe: A moist and flavorful cake infused with a sweet, colorful filling, topped with whipped cream and sprinkles. It’s a true showstopper that’s surprisingly easy to make.
- The Best Valentine’s Day Cake Mix Cookies: For those who love quick and easy baking, these cookies start with a cake mix and end with soft, chewy, festive treats that are perfect for sharing.
- Valentine’s Day Sugar Cookies Recipe: Classic sugar cookies cut into adorable shapes and decorated with royal icing or simple glaze. A fun activity for the whole family and a beautiful addition to any dessert spread.
- 35 Valentine’s Day Cupcakes: An extensive collection of creative and delicious cupcake ideas, ranging from simple to elaborately decorated, offering inspiration for every skill level.
- Valentine’s Day Cupcakes: A staple for any celebration, these cupcakes are tender, moist, and adorned with romantic frosting and sprinkles, making them an ideal individual treat.
We encourage you to explore these fantastic recipes and make your Valentine’s Day even sweeter. Each one is designed to be easy, delicious, and perfect for celebrating love.
Now, go ahead and indulge in the joy of creating this easy Oreo dirt pudding. We’re confident that you and your loved ones will adore this simple yet spectacular dirt cake recipe. Don’t forget to come back and leave a star rating and comment to share your experience – we love hearing from you! Your feedback helps us continue to provide amazing recipes.
Valentine’s Day Dirt Cake
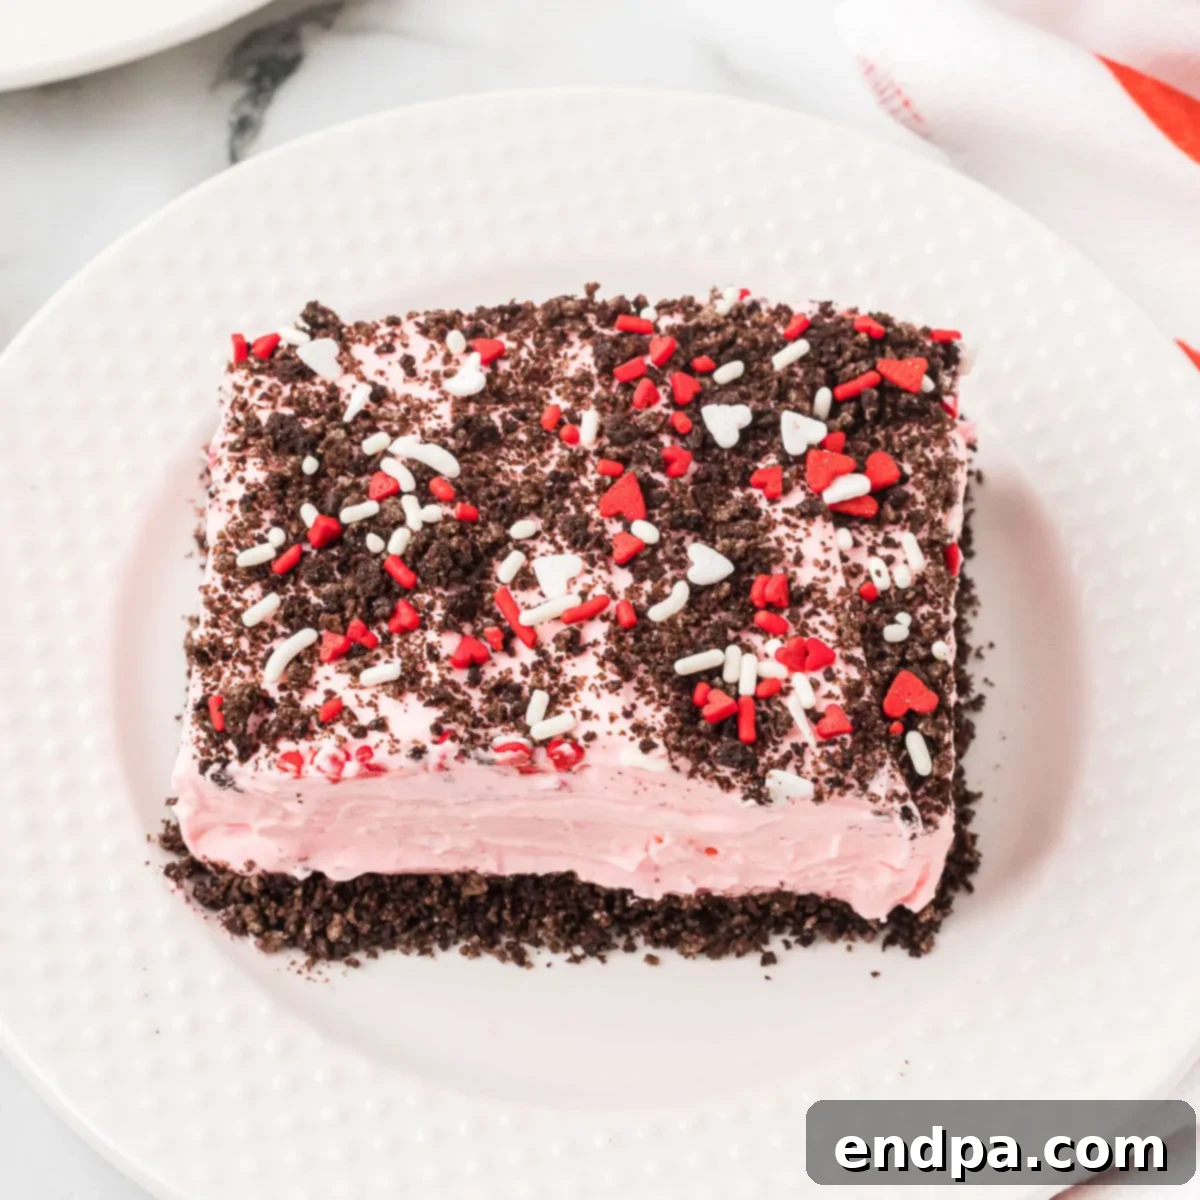
Valentine’s Day Dirt Cake is the perfect dessert to make for parties and more. The delicious pudding mixture and Oreo cookies combine for a great treat. This recipe is so festive with the pink filling and sprinkles on top.
Ingredients
- 1 pkg Oreos (14.3 oz package)
- 8 oz Cream Cheese (softened at room temperature)
- 1/2 cup Butter (softened at room temperature)
- 1 cup Powdered Sugar
- 16 oz Cool Whip
- 2 boxes Instant Vanilla Pudding (3.3 oz boxes each)
- 3 cups Milk
- 1 tsp Vanilla Extract
- Pink Food Coloring
- Valentine’s Day Sprinkles
Instructions
- Crush ⅔ package of Oreos and place in the bottom of a 9×13 pan. Set aside.
- In a large bowl, mix cream cheese and butter until smooth with a hand held mixer. Mix in powdered sugar and cool whip. Set aside.
- In a separate bowl, combine the milk, vanilla pudding mixes, and vanilla extract. Whisk until thickened, then fold this mixture in with the cream cheese mixture.
- Add 5-7 drops of food coloring into the pudding mix and stir until the mixture is the pink color that you prefer.
- Pour the pink pudding mixture over the Oreo crumbs in the bottom of the 9×13 pan. Refrigerate for 1-2 hours until the pudding mixture is set.
- Crush the remaining Oreos and then sprinkle those on top of the cake.
- Top with the Valentine’s Day sprinkles.
- Serve cold and refrigerate when not serving.
- Enjoy!
Recipe Notes
I used regular Oreos for this recipe. I do not recommend using double stuffed Oreos as there is too much cream filling in the Oreo crumb mixture, which can alter the desired texture. However, you can use any flavor of Oreos to change up the flavor of this cake based on your preference, provided they are not double stuffed.
Nutrition Facts
Calories 645kcal, Carbohydrates 83g, Protein 8g, Fat 33g, Saturated Fat 17g, Polyunsaturated Fat 3g, Monounsaturated Fat 10g, Trans Fat 1g, Cholesterol 71mg, Sodium 585mg, Potassium 300mg, Fiber 2g, Sugar 62g, Vitamin A 874IU, Calcium 185mg, Iron 4mg
Pin This Now to Remember It Later
Pin Recipe
