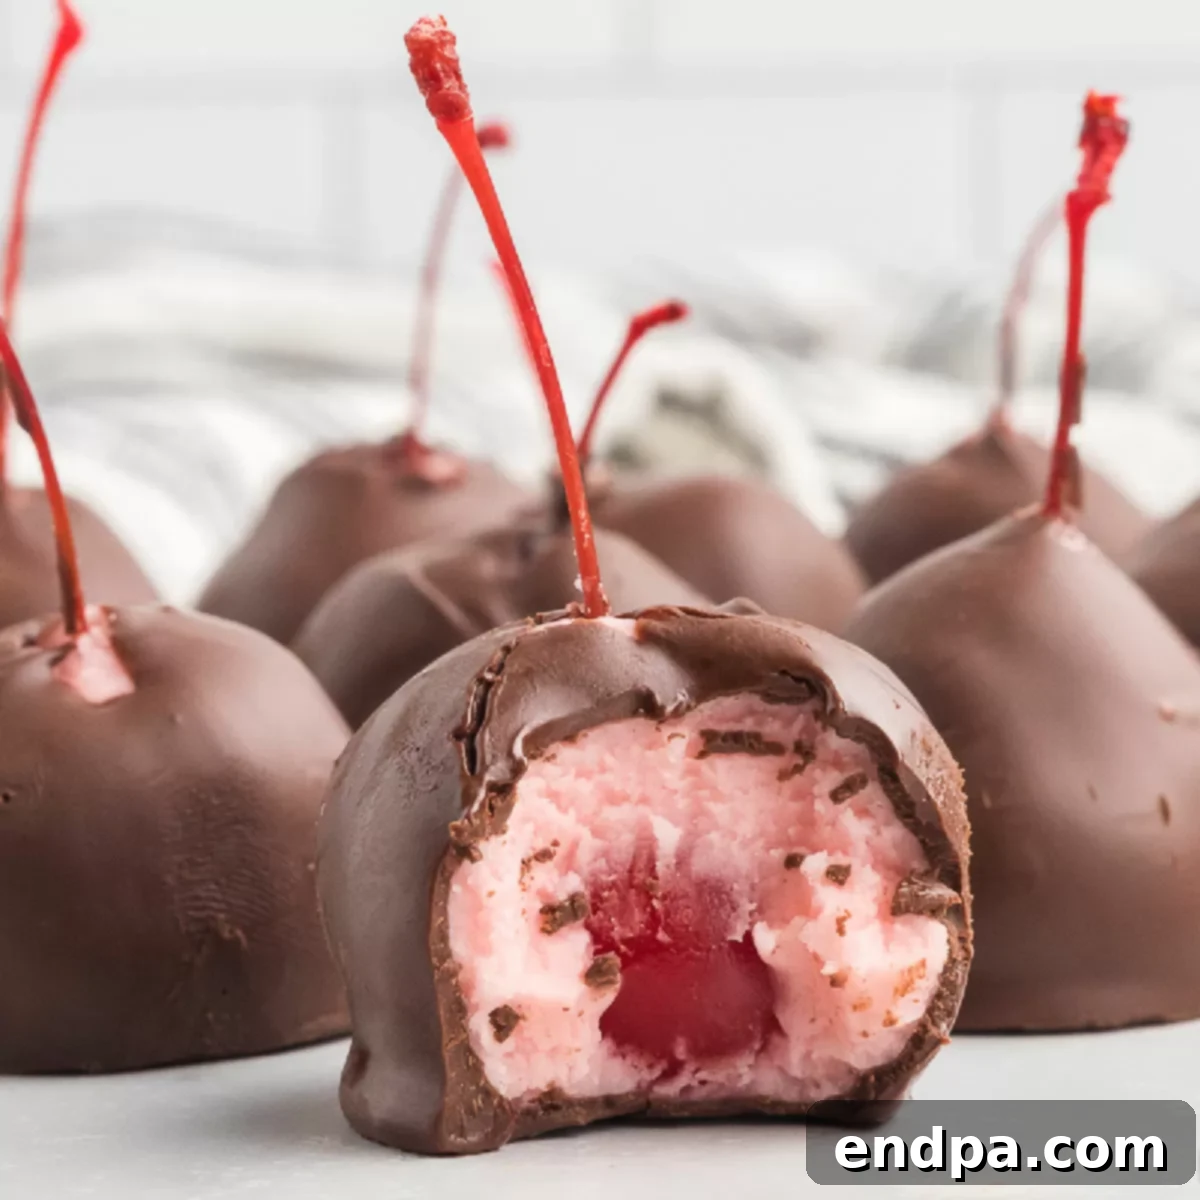
Delight your senses with the ultimate homemade treat: Chocolate Covered Cherries. Forget store-bought versions; this easy-to-follow recipe brings you a decadent dessert crafted with love and just a few simple pantry staples. Imagine plump, juicy maraschino cherries enveloped in a rich, creamy, subtly sweet filling, all coated in a luscious layer of smooth milk chocolate. It’s a symphony of textures and flavors that will tantalize your taste buds and impress everyone lucky enough to try them.
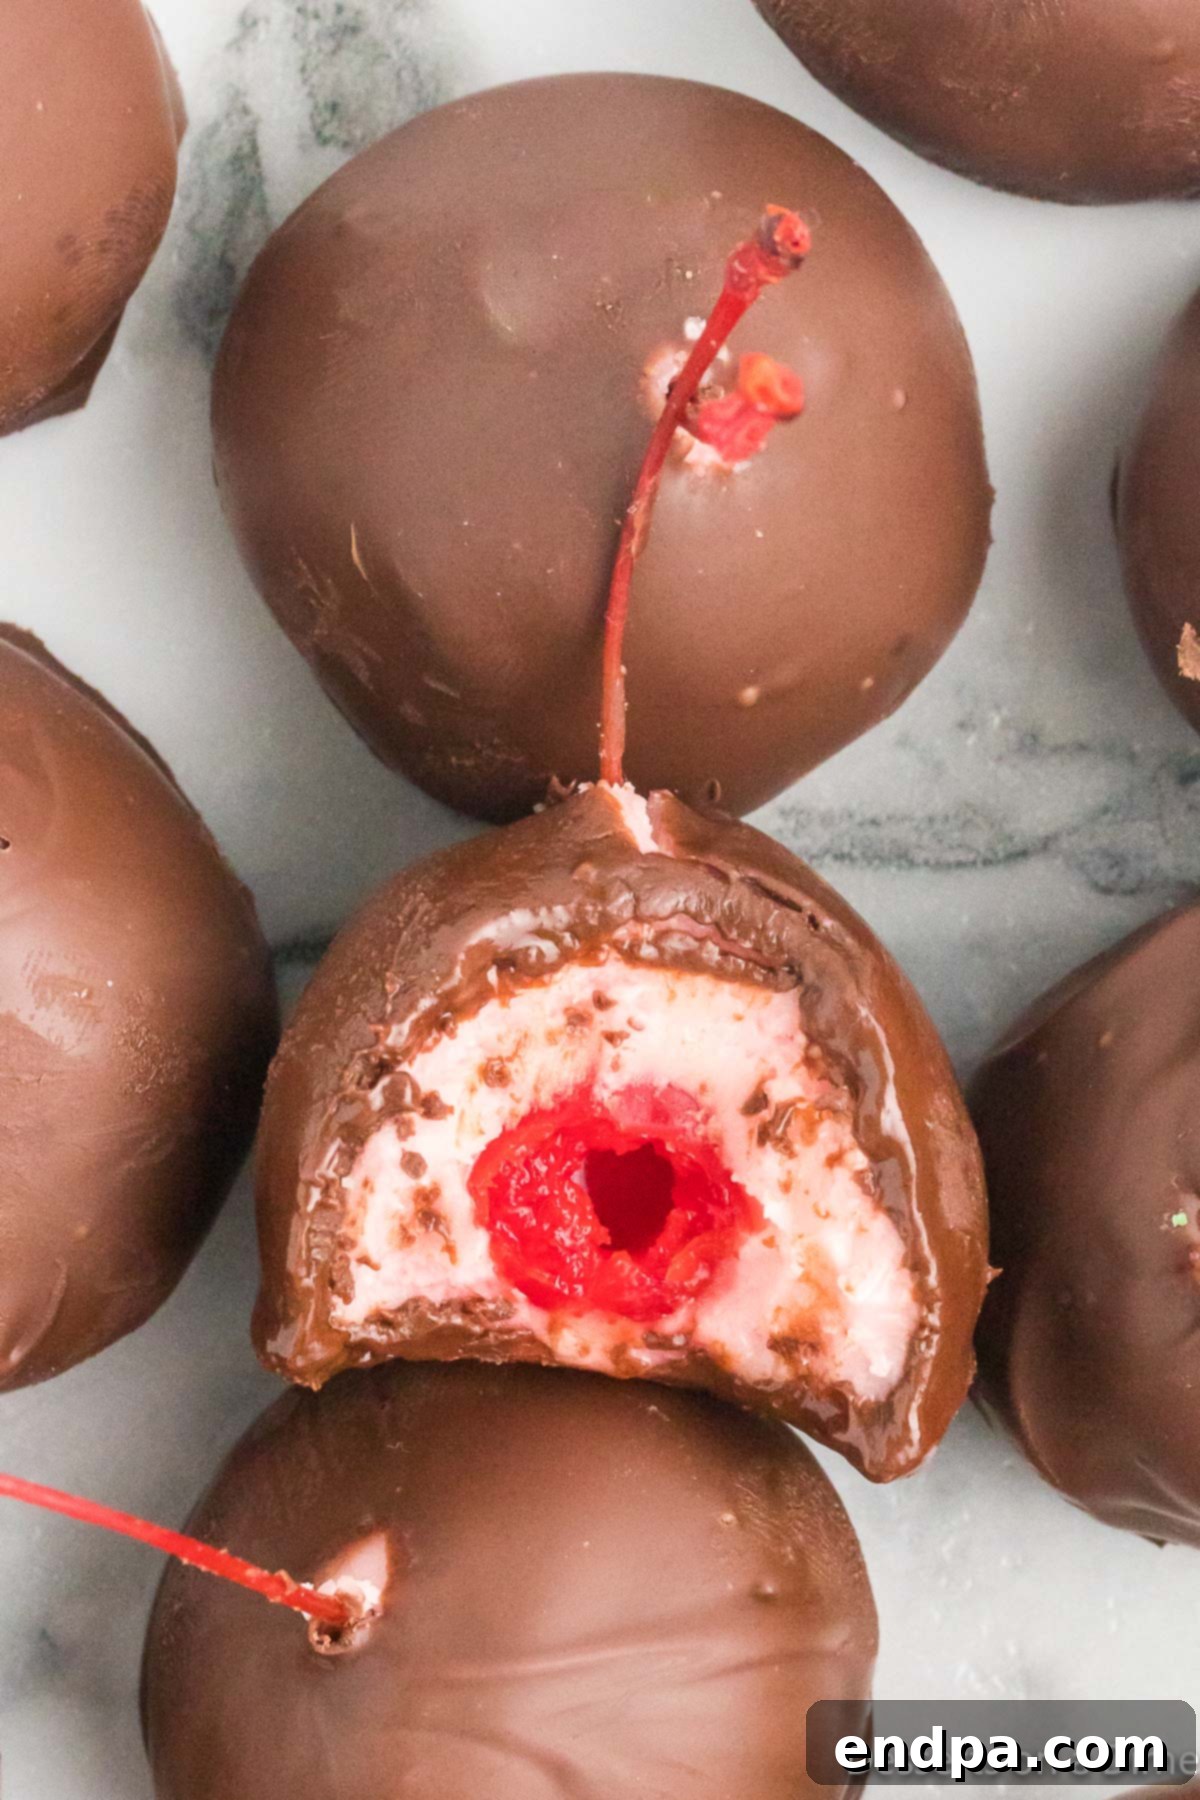
For those who adore cherry desserts, this recipe is an absolute must-try. Unlike traditional cherry cordials, which often feature a liquid center infused with cherry liqueur or syrup, our version focuses on a delightful, gooey, truffle-like cherry mixture that creates an irresistible contrast with the crisp chocolate shell. It’s a classic confectionery experience made approachable for any home baker, offering a sweet escape that’s surprisingly simple to master.
One of the best aspects of this recipe is its sheer simplicity. You won’t need any fancy equipment like a double boiler or specialized candy-making tools. Everything comes together with basic kitchen essentials and straightforward steps, proving that extraordinary flavors don’t require extraordinary effort. Once you experience the superior taste and texture of these homemade chocolate-covered cherries, you’ll find that store-bought varieties simply don’t compare. They are incredibly satisfying to make and even more delightful to eat, making them a perfect addition to any dessert spread, holiday platter, or as a thoughtful homemade gift. The rich, velvety chocolate encasing the sweet, yielding cherry center creates a harmony that store-bought versions often lack, ensuring a truly premium experience.
If you’re a fan of other chocolate-dipped delights, be sure to explore our recipes for Easy Chocolate Covered Strawberries, Dark Chocolate Covered Almonds, and Buckeye Balls. These treats offer similar joy in different flavor profiles, expanding your repertoire of irresistible, homemade confections and ensuring you always have a delightful sweet option on hand.
Table of Contents
- Why This Recipe Works
- Ingredients for Perfect Chocolate Covered Cherries
- Exciting Variations to Try
- How to Make Chocolate Covered Cherries Step-by-Step
- Storage Tips for Freshness
- Expert Tips for Success
- Frequently Asked Questions
- More Decadent Chocolate Covered Desserts
Why This Recipe Works
This recipe for homemade chocolate-covered cherries stands out for several compelling reasons, making it a go-to for anyone craving a truly special treat without the fuss. It’s not just a recipe; it’s an invitation to create joy and indulgence with minimal effort:
- Effortless Elegance: With just 5 basic ingredients, you can create a dessert that looks and tastes incredibly sophisticated. This recipe is proof that you don’t need a long list of obscure items or complex techniques to achieve culinary excellence. The beauty lies in its simplicity, yielding impressive results every time.
- Busy Baker Friendly: Designed with ease in mind, this recipe is perfect for busy individuals, parents, or anyone looking to create something memorable without spending hours in the kitchen. The steps are straightforward, and the active prep time is minimal, allowing for convenient chilling periods while you attend to other tasks. You can break down the process into stages, making it even more manageable.
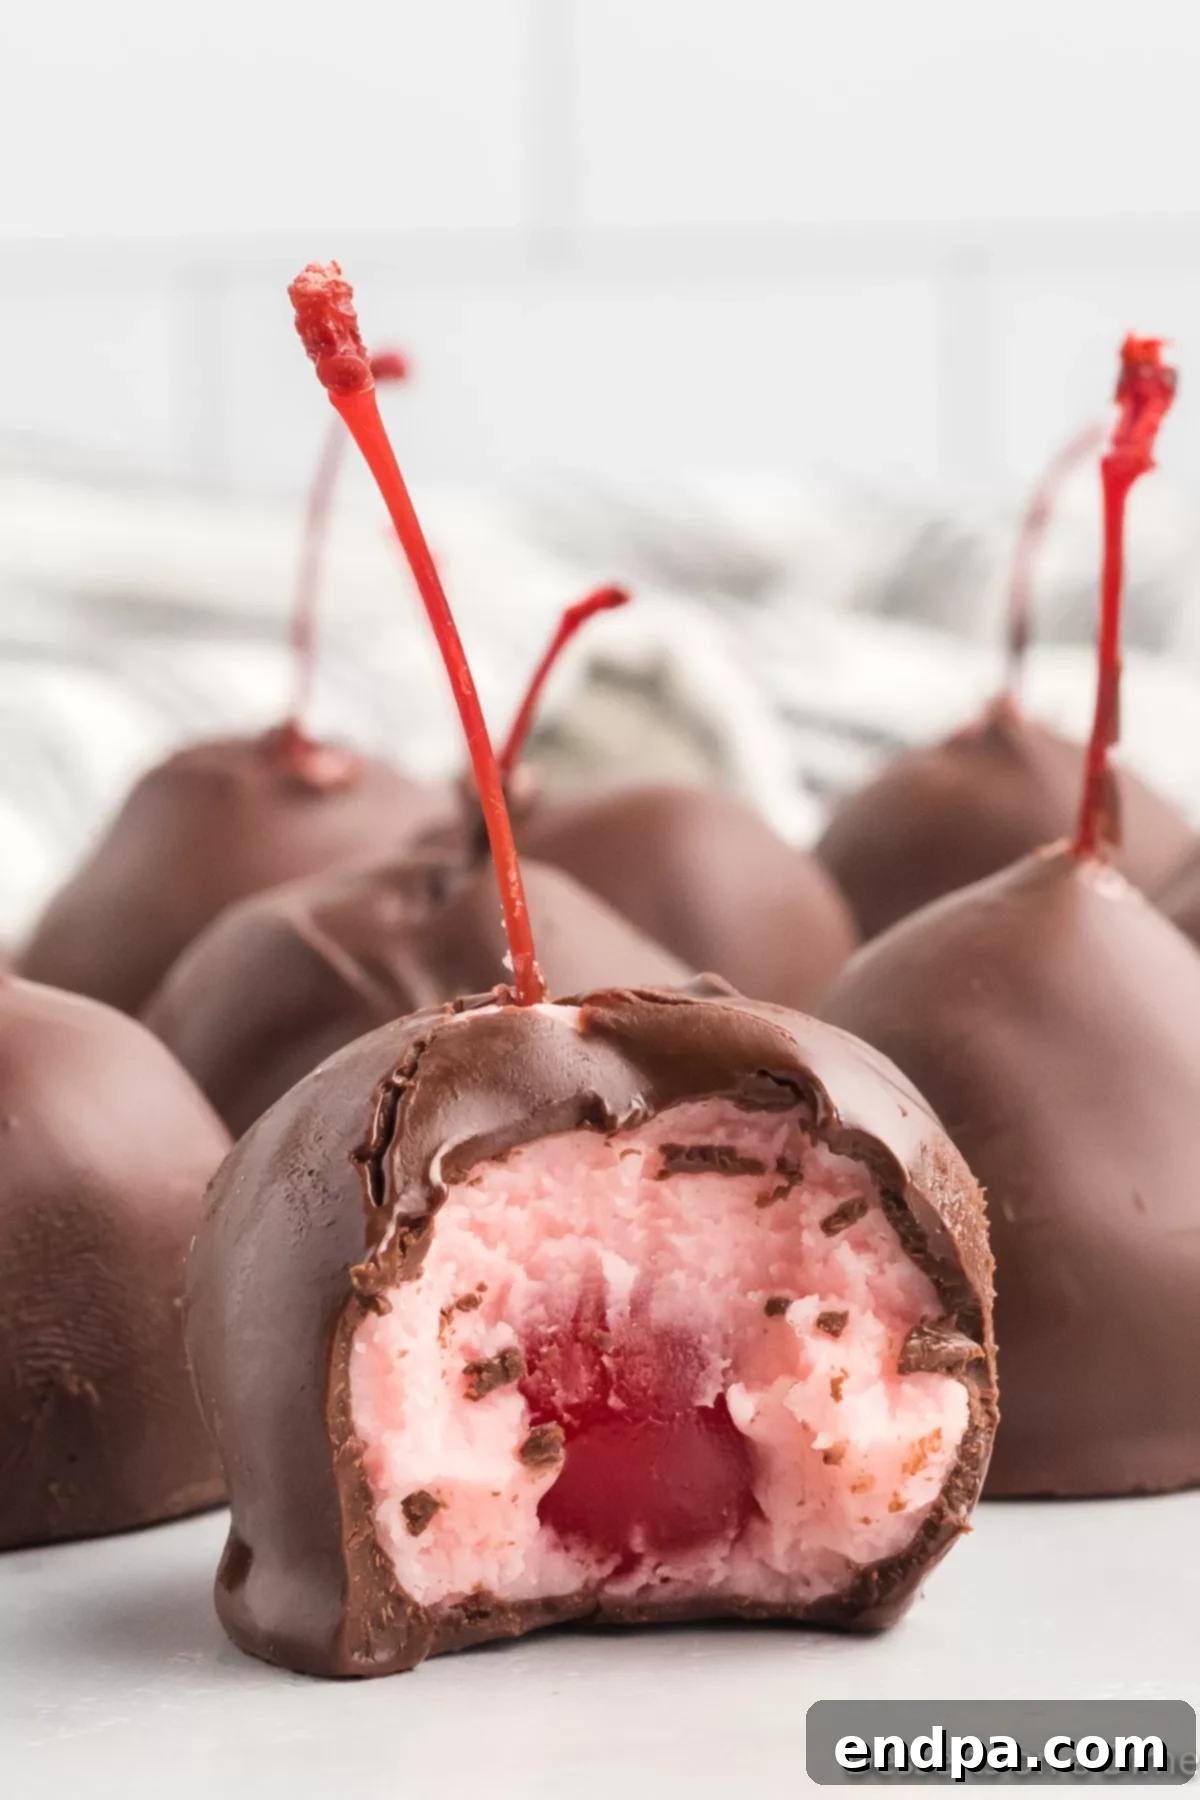
- Irresistibly Decadent Center: The magic truly happens inside each chocolate shell. A luscious, gooey, and subtly sweet cherry mixture encases the maraschino cherry, creating a delightful surprise with every bite. This unique filling is what sets our homemade version apart from many store-bought varieties, offering a depth of flavor and a melt-in-your-mouth experience that is truly unforgettable.
- Superior to Store-Bought: Once you’ve tasted these homemade delights, you’ll understand why they’re so much better than anything you can buy. The freshness of the ingredients, the balanced sweetness, and the rich, smooth chocolate coating elevate this treat to an entirely new level. You control the quality of the chocolate and the freshness of the filling, resulting in a superior product that’s often richer and more satisfying.
- Versatile for Any Occasion: Whether you’re preparing for a holiday gathering, a special celebration, a romantic evening, or simply want to treat yourself, these chocolate-covered cherries are always a hit. Their festive appearance and universally loved flavors make them suitable for any time of year. They make a perfect edible gift, a show-stopping dessert, or a delightful personal indulgence.
Ingredients for Perfect Chocolate Covered Cherries
Crafting these delectable chocolate-covered cherries requires only a handful of readily available ingredients. Each plays a crucial role in achieving the perfect balance of flavor and texture, contributing to the irresistible nature of this classic confectionery.
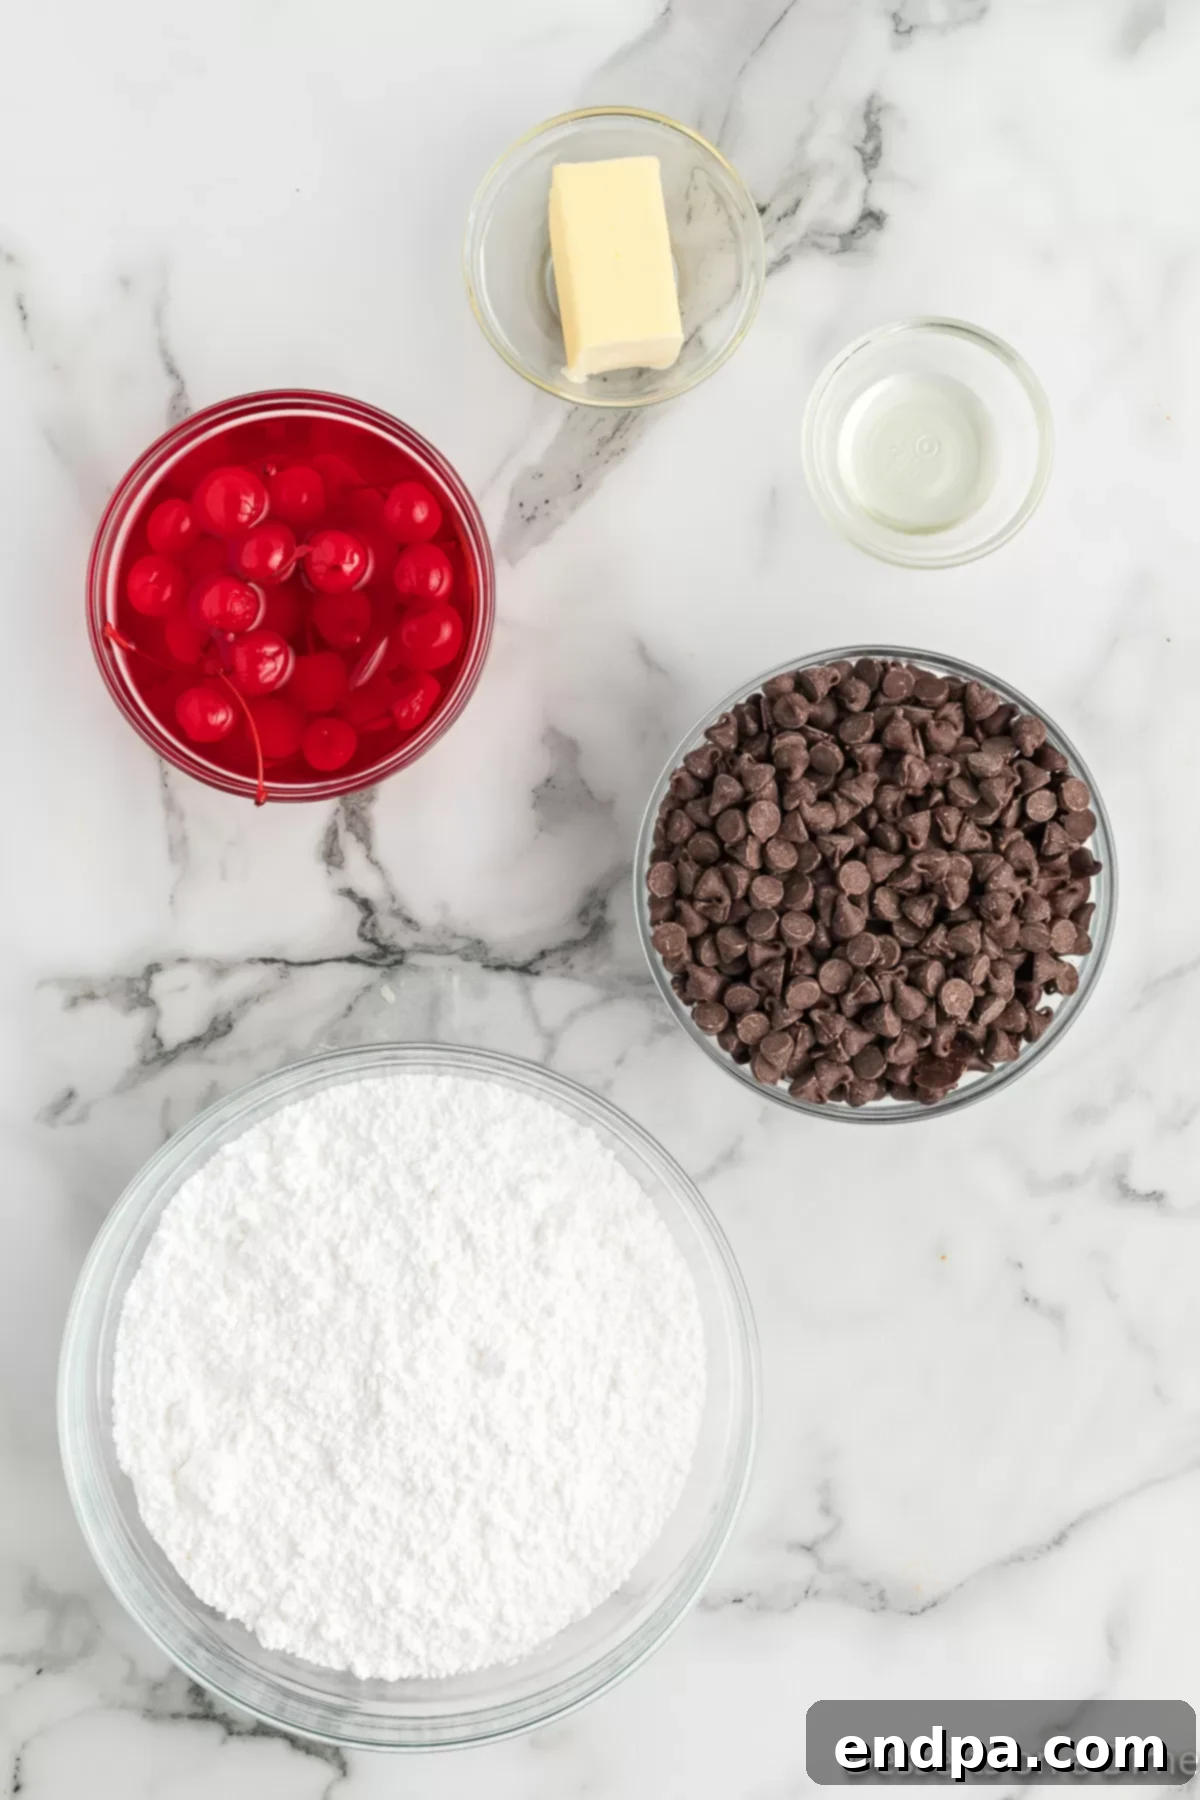
- Maraschino Cherries with Stems (10 ounces): Opting for cherries with stems not only adds an elegant, gourmet touch to your finished product but also makes the dipping process significantly easier. The vibrant red color and distinct sweet-tart flavor of maraschino cherries are quintessential to this classic treat. It’s crucial to ensure they are well-drained and gently patted dry to prevent any excess moisture from affecting your filling or causing your chocolate to seize.
- Powdered Sugar (4 cups): Also widely known as confectioners’ sugar or icing sugar, this finely milled sugar is absolutely essential for creating the smooth, creamy, and slightly gooey internal mixture that defines these cherries. Its powdery consistency ensures a lump-free dough, which is vital for achieving a silky, decadent filling. If your powdered sugar has visible lumps, a quick sift through a fine-mesh sieve before mixing will ensure a perfectly smooth and uniform dough.
- Salted Butter (4 Tablespoons), softened: The inclusion of salted butter is a subtle yet game-changing element in this recipe. The hint of salt expertly balances the sweetness of both the maraschino cherries and the chocolate coating, preventing the dessert from being overwhelmingly sugary. This touch of salt enhances all the other flavors, making the treat more complex and satisfying. Ensure your butter is softened to room temperature for seamless incorporation with the powdered sugar, which is key to creating that ideal pliable dough consistency.
- Semi-Sweet Chocolate Chips (16 ounces): This type of chocolate offers the perfect counterpoint to the inherent sweetness of the cherry filling. Its balanced cocoa flavor provides depth and richness to the outer coating without being too bitter, creating a harmonious blend. Using good quality semi-sweet chocolate chips will ensure a smoother melt, an easier dipping process, and a superior, glossy finish with a satisfying snap when set.
- Vegetable Oil (1 teaspoon): A small amount of neutral-flavored vegetable oil is added to the melted chocolate to achieve a smoother, more fluid consistency. This makes it significantly easier to dip the cherries, allowing for a thin, even coating and a beautiful, glossy sheen. The oil also contributes to a pleasant texture and helps the chocolate set with that desirable slight crispness.
You’ll find the complete, precise measurements for these ingredients, along with detailed nutritional information, in the comprehensive recipe card located at the bottom of this page.
Exciting Variations to Try
While the classic chocolate-covered cherry is undeniably delicious and always a crowd-pleaser, this recipe is also wonderfully versatile, allowing you to get creative and customize your treats to suit different tastes, dietary preferences, or festive occasions. Experiment with these fantastic variations to add your personal touch:
- Explore Different Chocolates for Coating:
- Dark Chocolate: For a more intense cocoa experience and a less sweet profile, substitute the semi-sweet chocolate chips with a high-quality dark chocolate (ideally 60-70% cocoa content). The sophisticated bitterness of dark chocolate beautifully complements the sweet cherry filling, creating a truly gourmet indulgence that appeals to adult palates.
- White Chocolate: To create a visually striking contrast and a creamy, sweet exterior, use white chocolate. You can either coat the entire cherry in white chocolate for a dramatic look or drizzle melted white chocolate over a set milk or dark chocolate coating for an elegant marbled effect. Remember to melt white chocolate very gently as it can scorch easily.
- Ruby Chocolate: For an innovative and naturally pink coating with a unique berry-like flavor, try ruby chocolate. This relatively new chocolate variety offers a stunning visual appeal and a distinct taste that pairs wonderfully with cherries, making your treats truly stand out.
- Compound Coatings/Candy Melts: For ease of melting and a wide array of vibrant colors, candy melts (also known as compound coatings) are an excellent alternative. They come in various flavors and colors, perfect for themed parties or a playful aesthetic.
- Add Festive Sprinkles and Toppings: Before the chocolate fully sets, adorn your cherries with various sprinkles or decorative toppings! This simple addition can instantly transform your dessert for any occasion:
- Holiday Cheer: Use classic red and green sprinkles for a festive Christmas treat, pastel colors for Easter celebrations, or spooky orange and black sprinkles for Halloween parties.
- Celebratory Moments: Gold or silver edible glitter or sprinkles add a touch of glamour for New Year’s Eve, anniversaries, or elegant dinner parties. Rainbow sprinkles are always a hit for birthday parties or joyful gatherings.
- Nutty Crunch: For added texture and flavor, finely chop nuts like almonds, pecans, or walnuts and gently press them onto the still-wet chocolate coating. The combination of creamy filling, crisp chocolate, and crunchy nuts is divine.
- Coconut Flakes: Toasted coconut flakes can add a lovely tropical aroma and chewiness, providing another layer of texture and flavor.
- Utilize Candy Melts for Bold Color and Flavor:
- Vibrant Drizzle: Beyond full coatings, candy melts excel as decorative drizzles. Melt a different colored candy melt and artfully drizzle it over your set chocolate-covered cherries for a vibrant, eye-catching design. This technique allows for beautiful patterns and adds a professional flair.
- Themed Colors: Use candy melts in team colors for game days, school colors for graduations, or specific shades to match a party’s color scheme. The possibilities are endless for customizing your dessert.
How to Make Chocolate Covered Cherries Step-by-Step
Creating these delightful chocolate-covered cherries is a fun and rewarding process that comes together with straightforward steps. Follow these detailed instructions for perfect results every time, ensuring each cherry is a masterpiece of homemade confectionery:
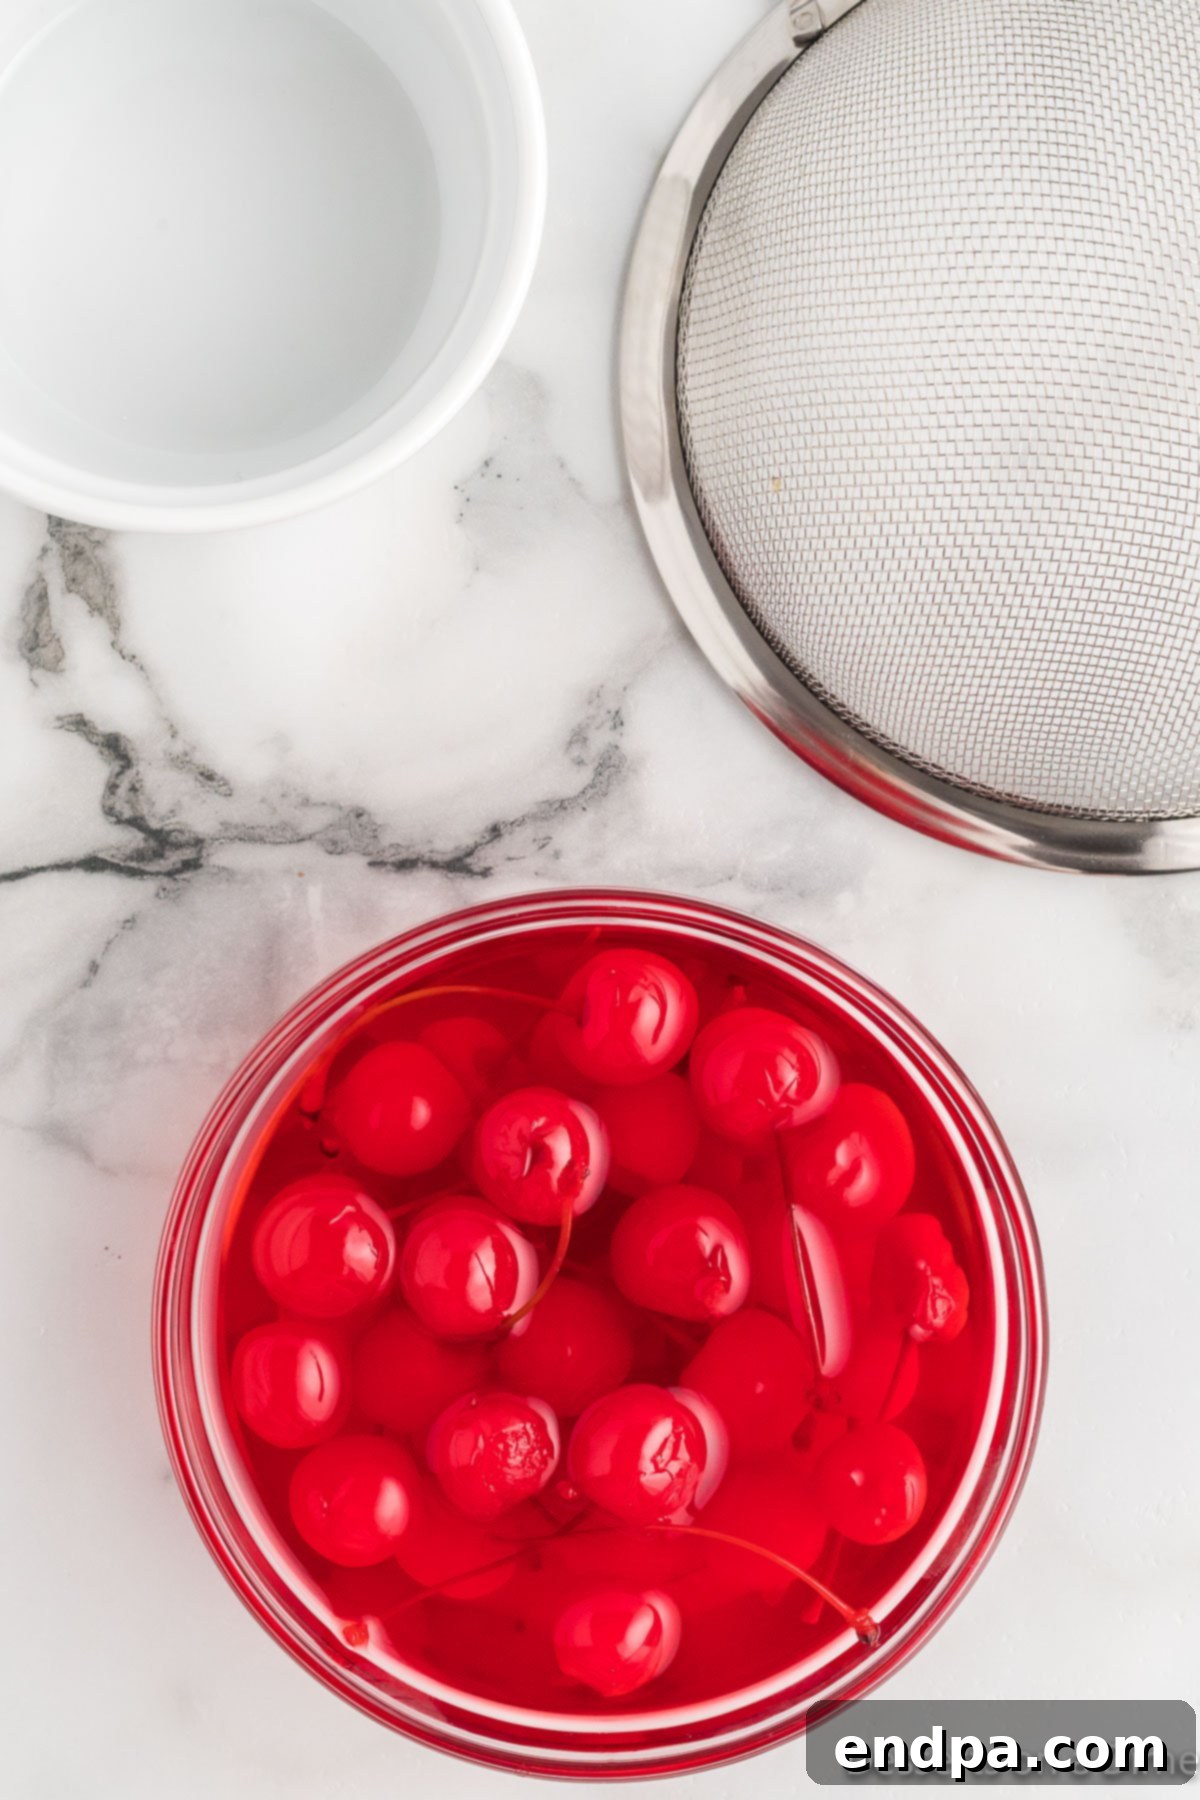
Step 1: Prepare the Cherries. Begin by carefully draining the maraschino cherries from their jar. It’s absolutely crucial to **reserve approximately ¼ cup of the cherry juice**, as a small amount will be indispensable for creating the flavorful filling. Once drained, gently but thoroughly pat each cherry as dry as possible using clean paper towels. This step is vital for ensuring the powdered sugar filling adheres properly and prevents any excess moisture from compromising the texture of your treats or causing the chocolate to seize later. These particular cherries are always pitted, so you don’t need to worry about removing pits.
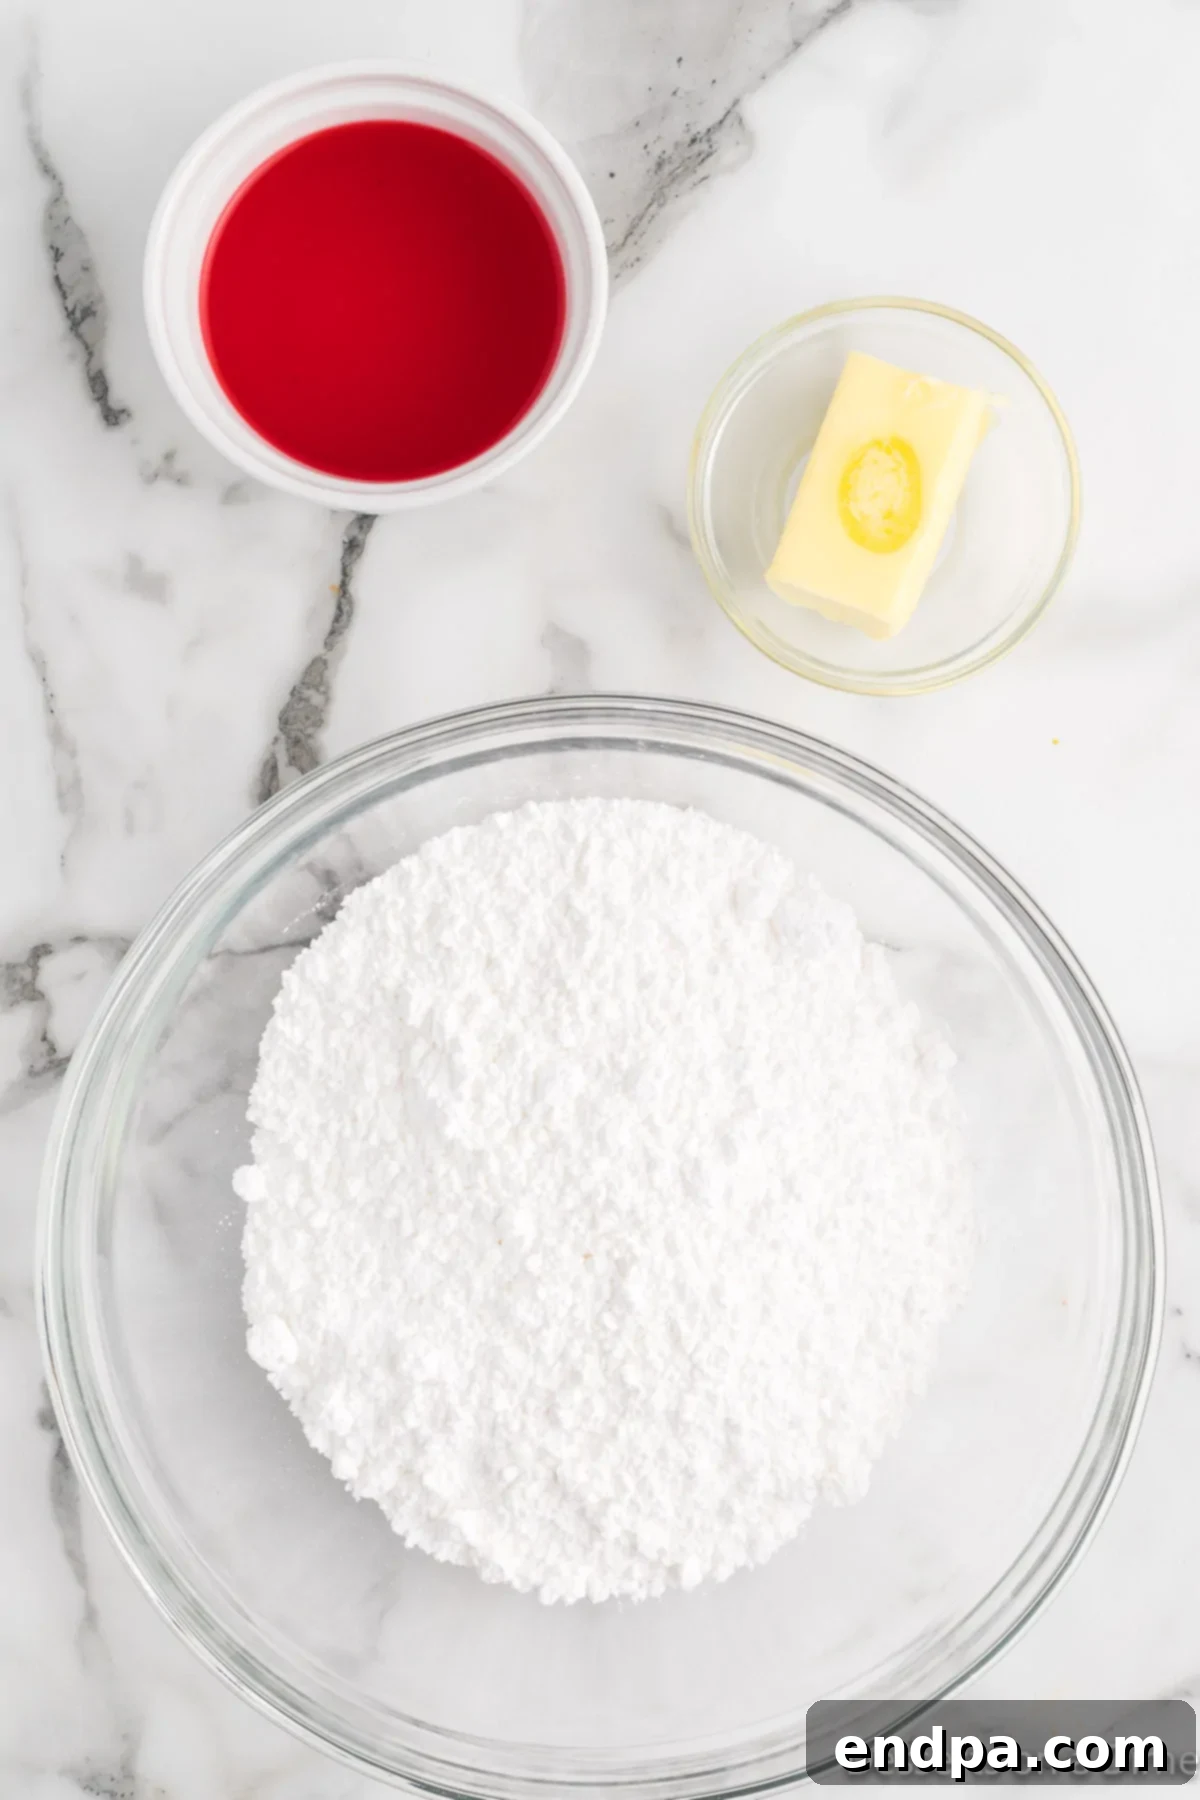
Step 2: Start the Filling Mixture. In a medium-sized mixing bowl, combine 3 cups of powdered sugar, the softened salted butter, and ¼ cup of the reserved cherry juice. Stir these ingredients together until they are well incorporated. You can use a sturdy spoon for hand-mixing, a hand mixer for efficiency, or a stand mixer with the paddle attachment for effortless blending. The mixture will initially form a thick, somewhat paste-like consistency, which is exactly what you want.
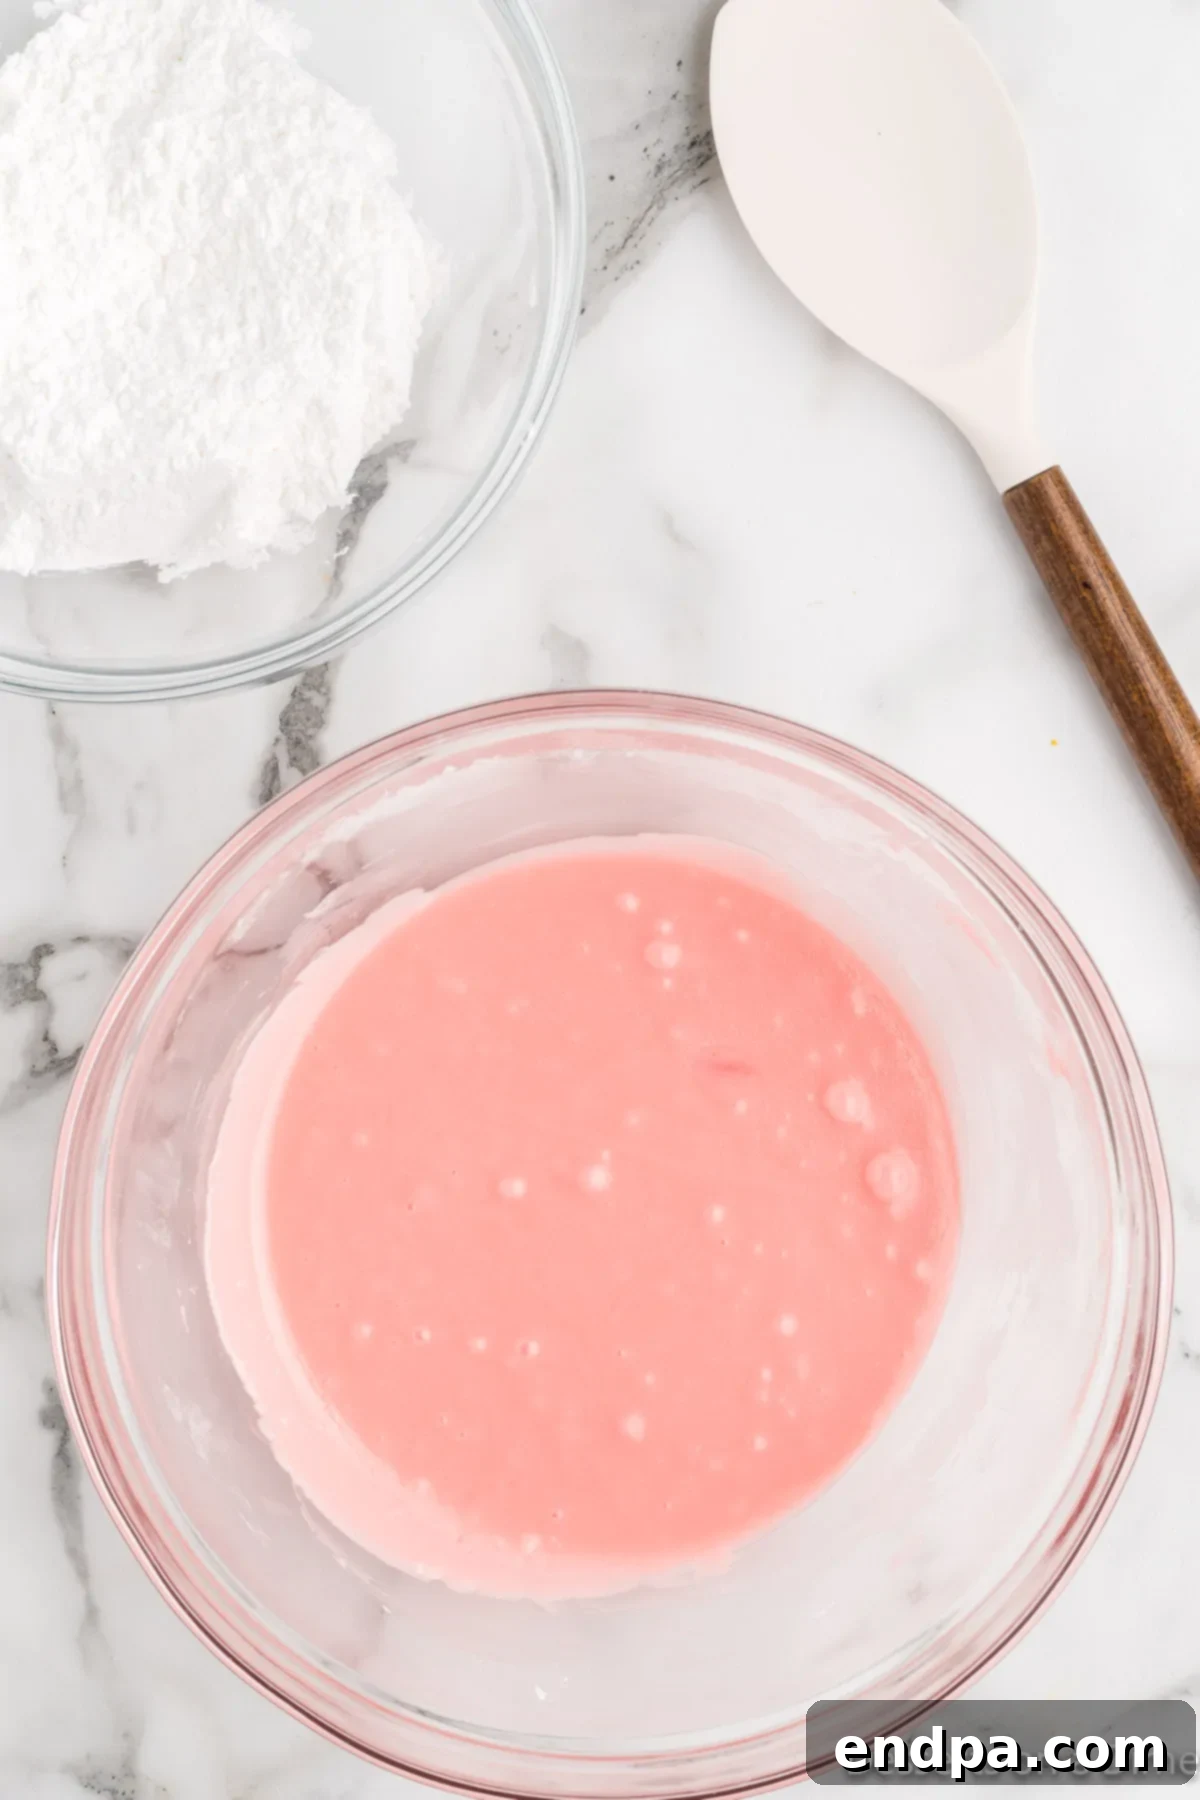
Step 3: Form the Dough. Gradually add the remaining 1 cup of powdered sugar to the mixture, continuing to stir and knead until a cohesive, pliable dough forms. The dough should be firm enough to handle comfortably without being overly sticky. If it feels too wet and difficult to manage, add a tiny bit more powdered sugar, a teaspoon at a time. Conversely, if it seems too dry and crumbly, add a drop or two more cherry juice (very sparingly) until it comes together. The ultimate goal is a smooth, play-dough-like consistency that can be easily rolled and shaped.
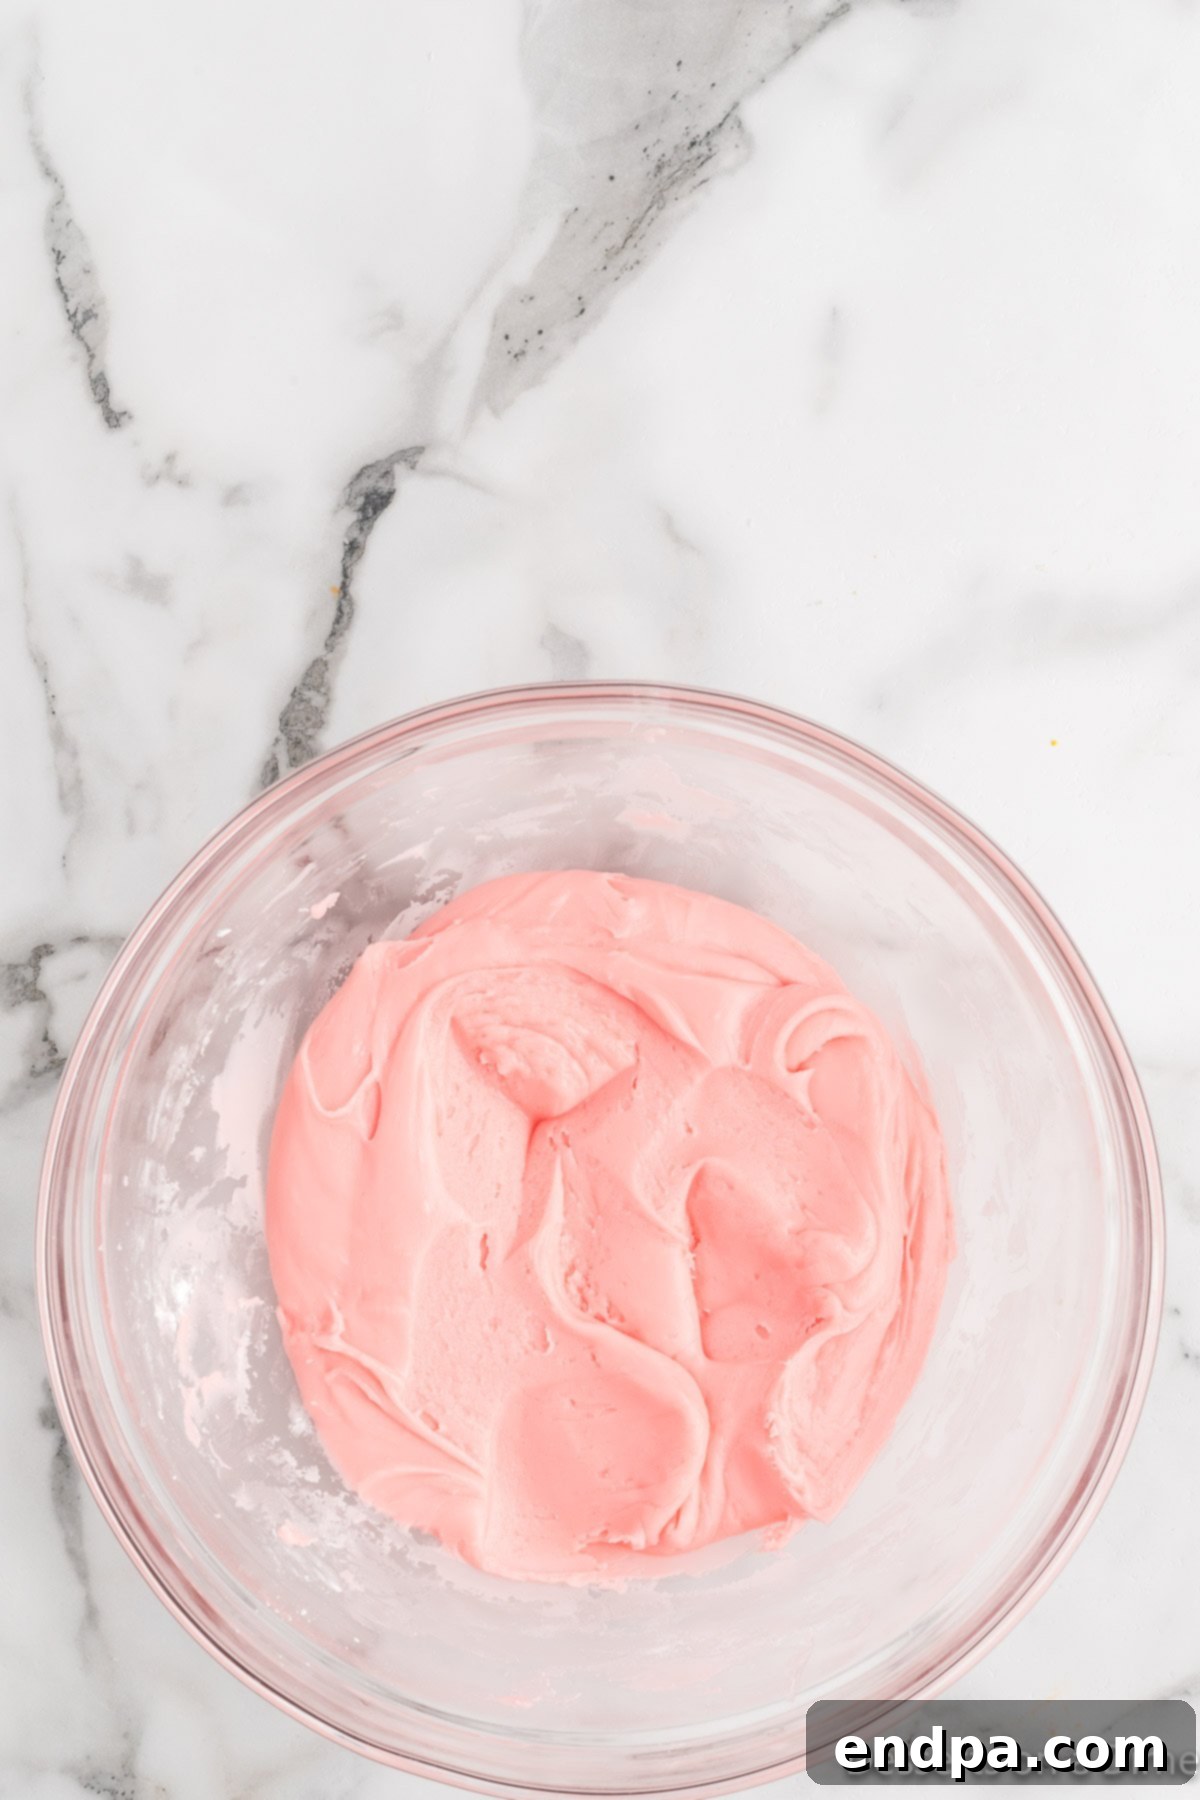
Step 4: Chill the Dough. Once the dough is well combined and has reached the perfect consistency, gather it into a ball, cover the bowl tightly with plastic wrap, or wrap the dough itself in plastic wrap. Place it in the refrigerator for at least 30 minutes. This chilling period is absolutely essential as it firms up the dough significantly, making it much easier to handle, roll, and shape in the subsequent steps without it becoming too soft or sticky in your hands.
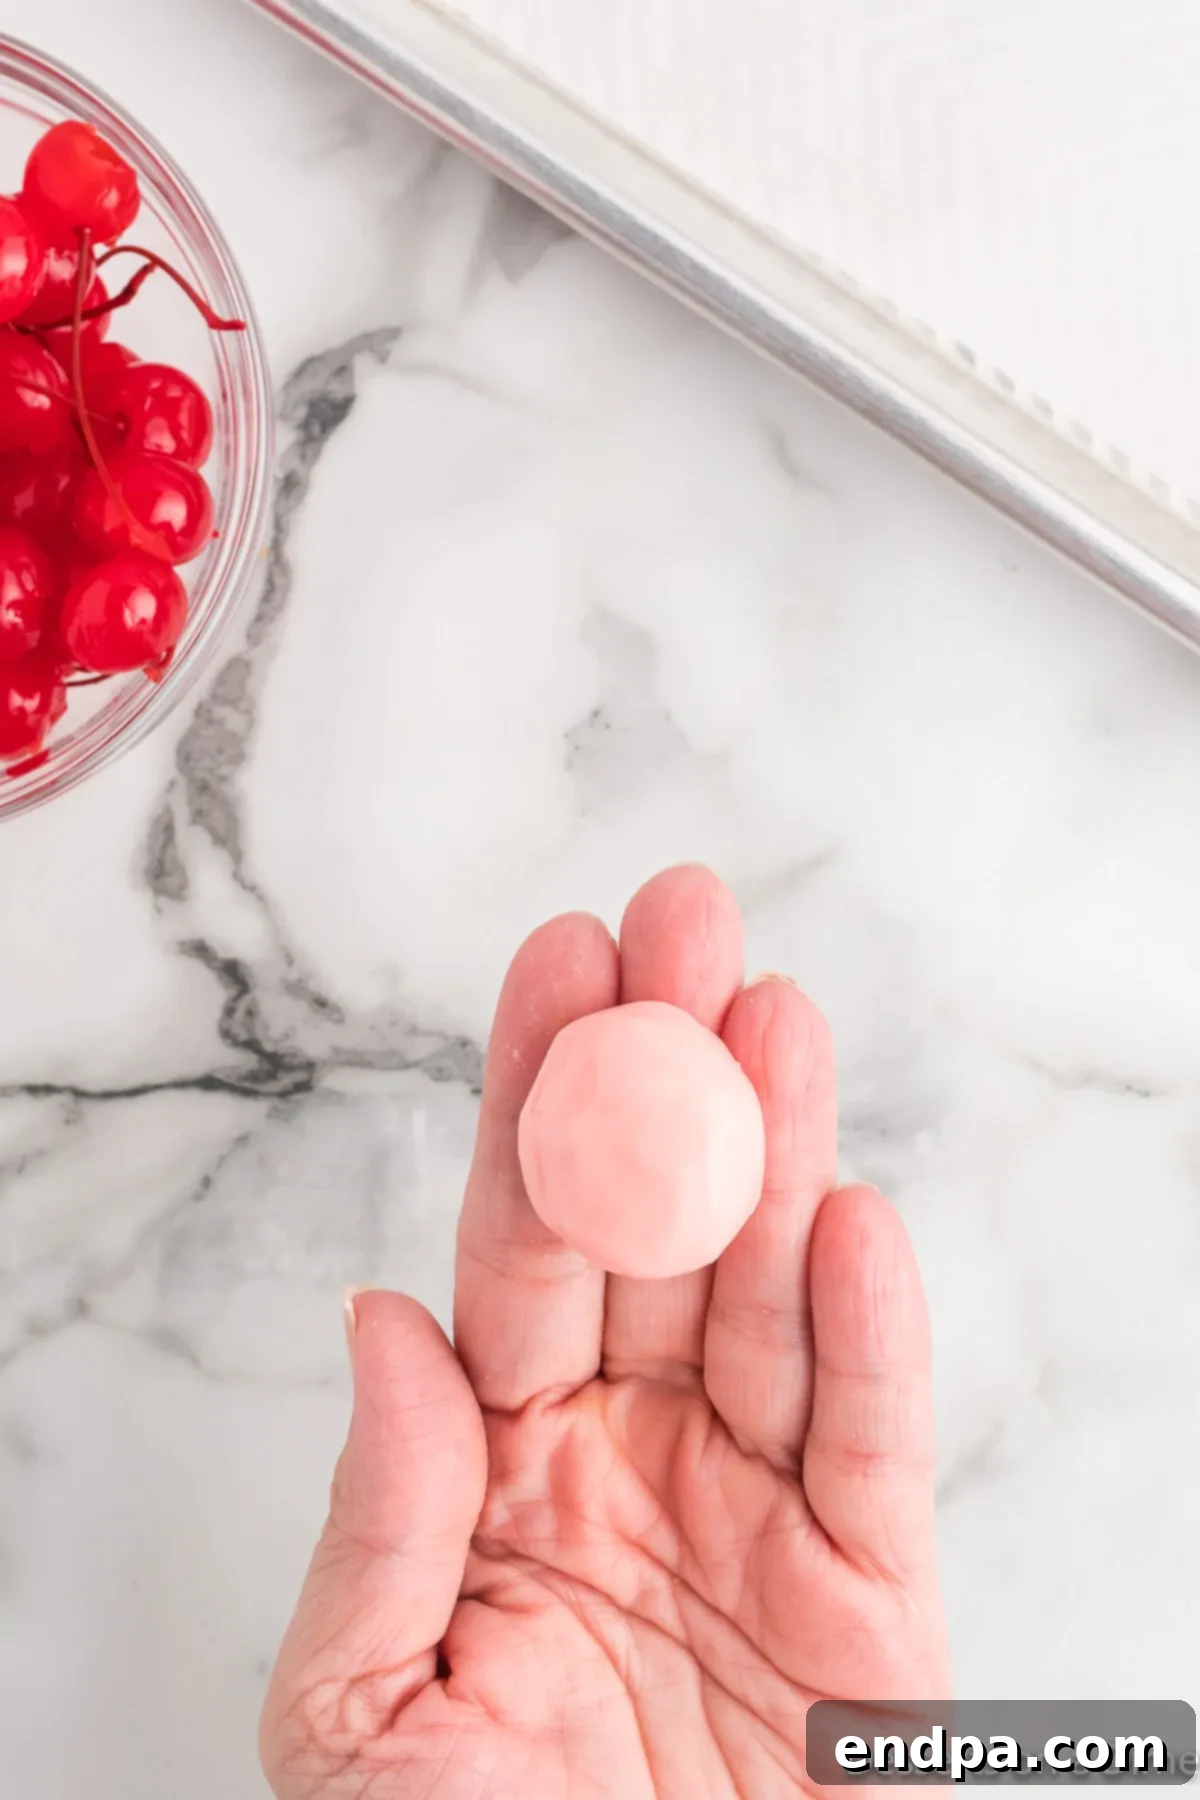
Step 5: Shape the Filling. After chilling, remove the dough from the refrigerator. Pinch off small portions of the dough and roll them into approximately 1-inch sized balls. For consistent sizing, a small cookie scoop (about 1 tablespoon) works perfectly. Once rolled, gently flatten each dough ball into a thin disc. This flattened disc should be wide enough to completely encase a maraschino cherry once folded.
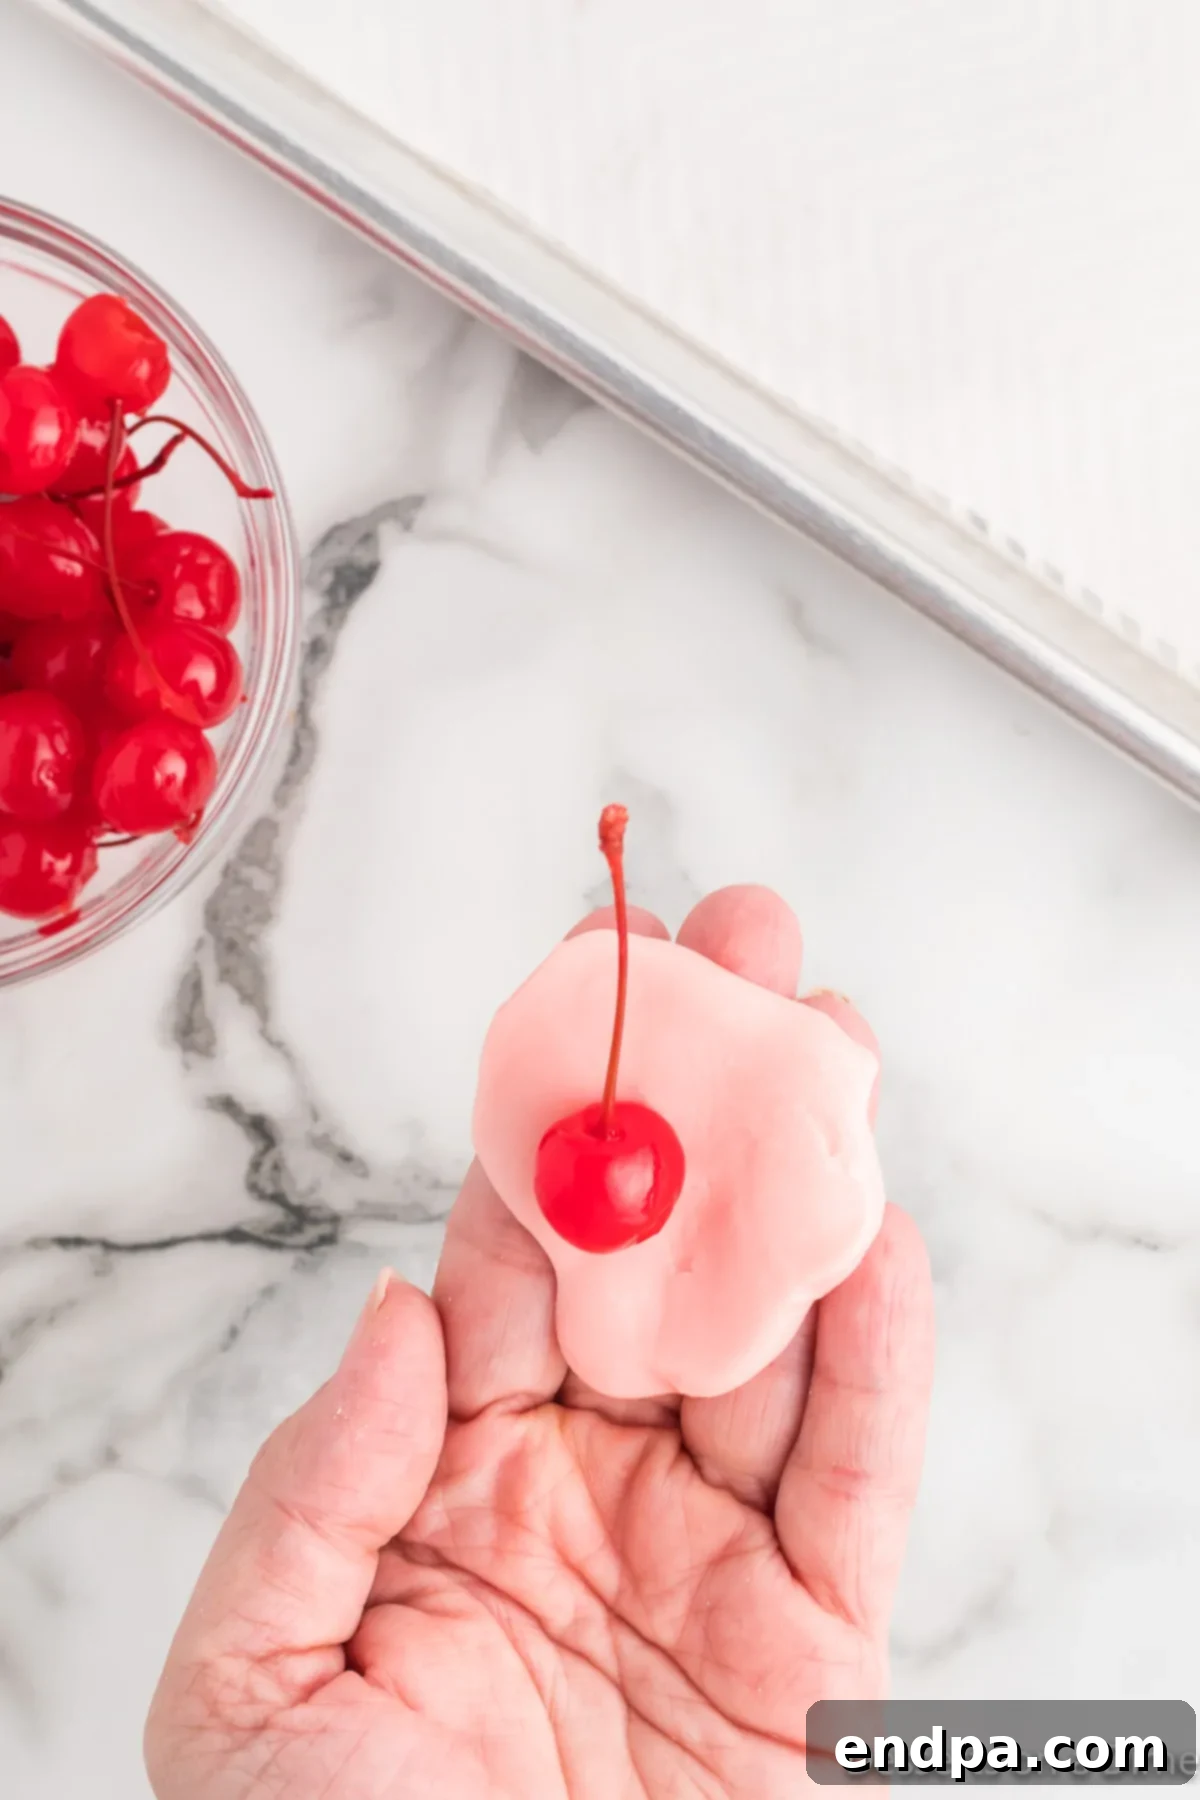
Step 6: Encase the Cherry. Take one flattened dough disc and carefully place a dried maraschino cherry in its center. Gently fold the edges of the dough up and around the cherry, meticulously sealing it completely so that no cherry is exposed. This step requires a delicate touch to avoid tearing the dough and to ensure the cherry is fully enclosed, forming a neat, spherical shape.
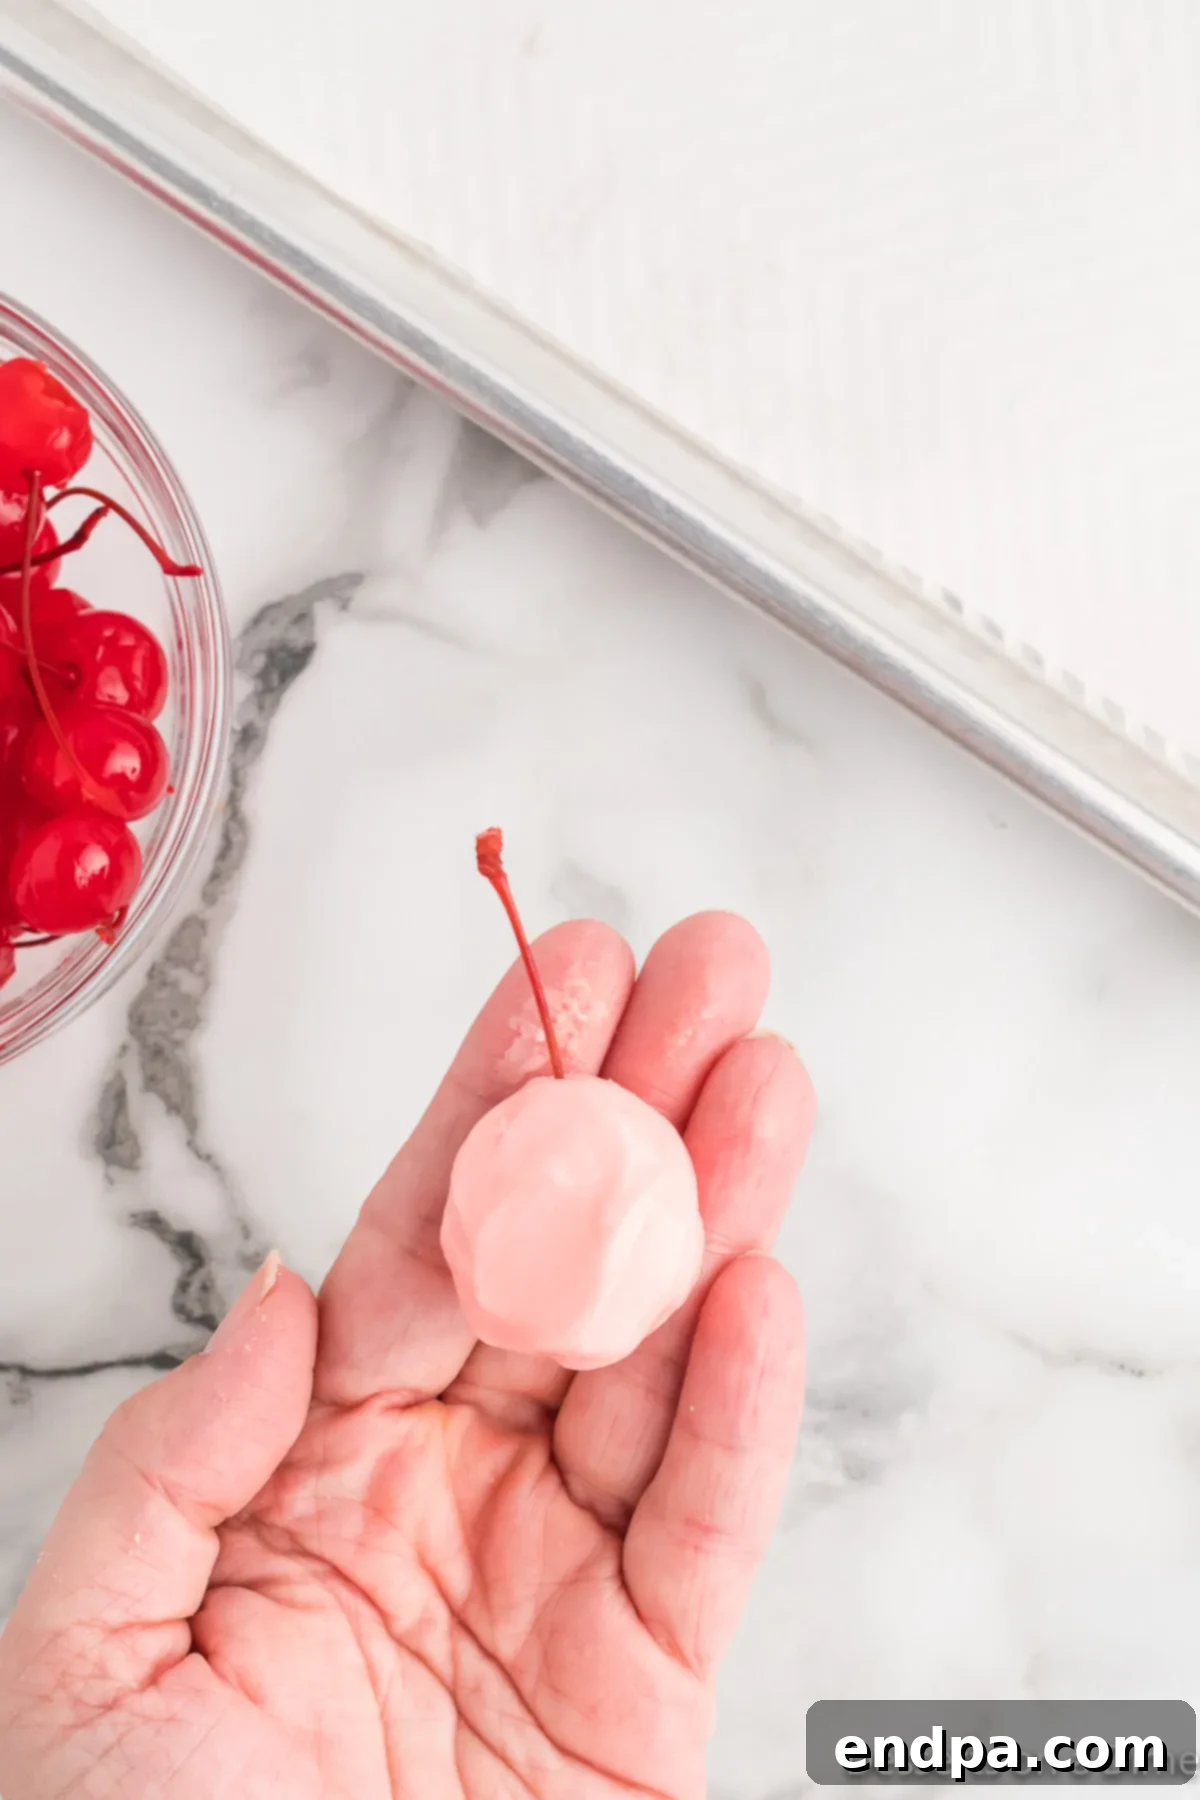
Step 7: Smooth the Spheres. Once the cherry is encased, gently roll the dough ball between your palms to smooth out any seams or imperfections. Aim for a perfectly smooth, round, and uniform shape around the cherry, with the stem (if present) protruding cleanly from the top. Consistency in shape will not only look professional but also ensure an even chocolate coating. If the dough gets too warm and sticky, you can briefly chill it again.
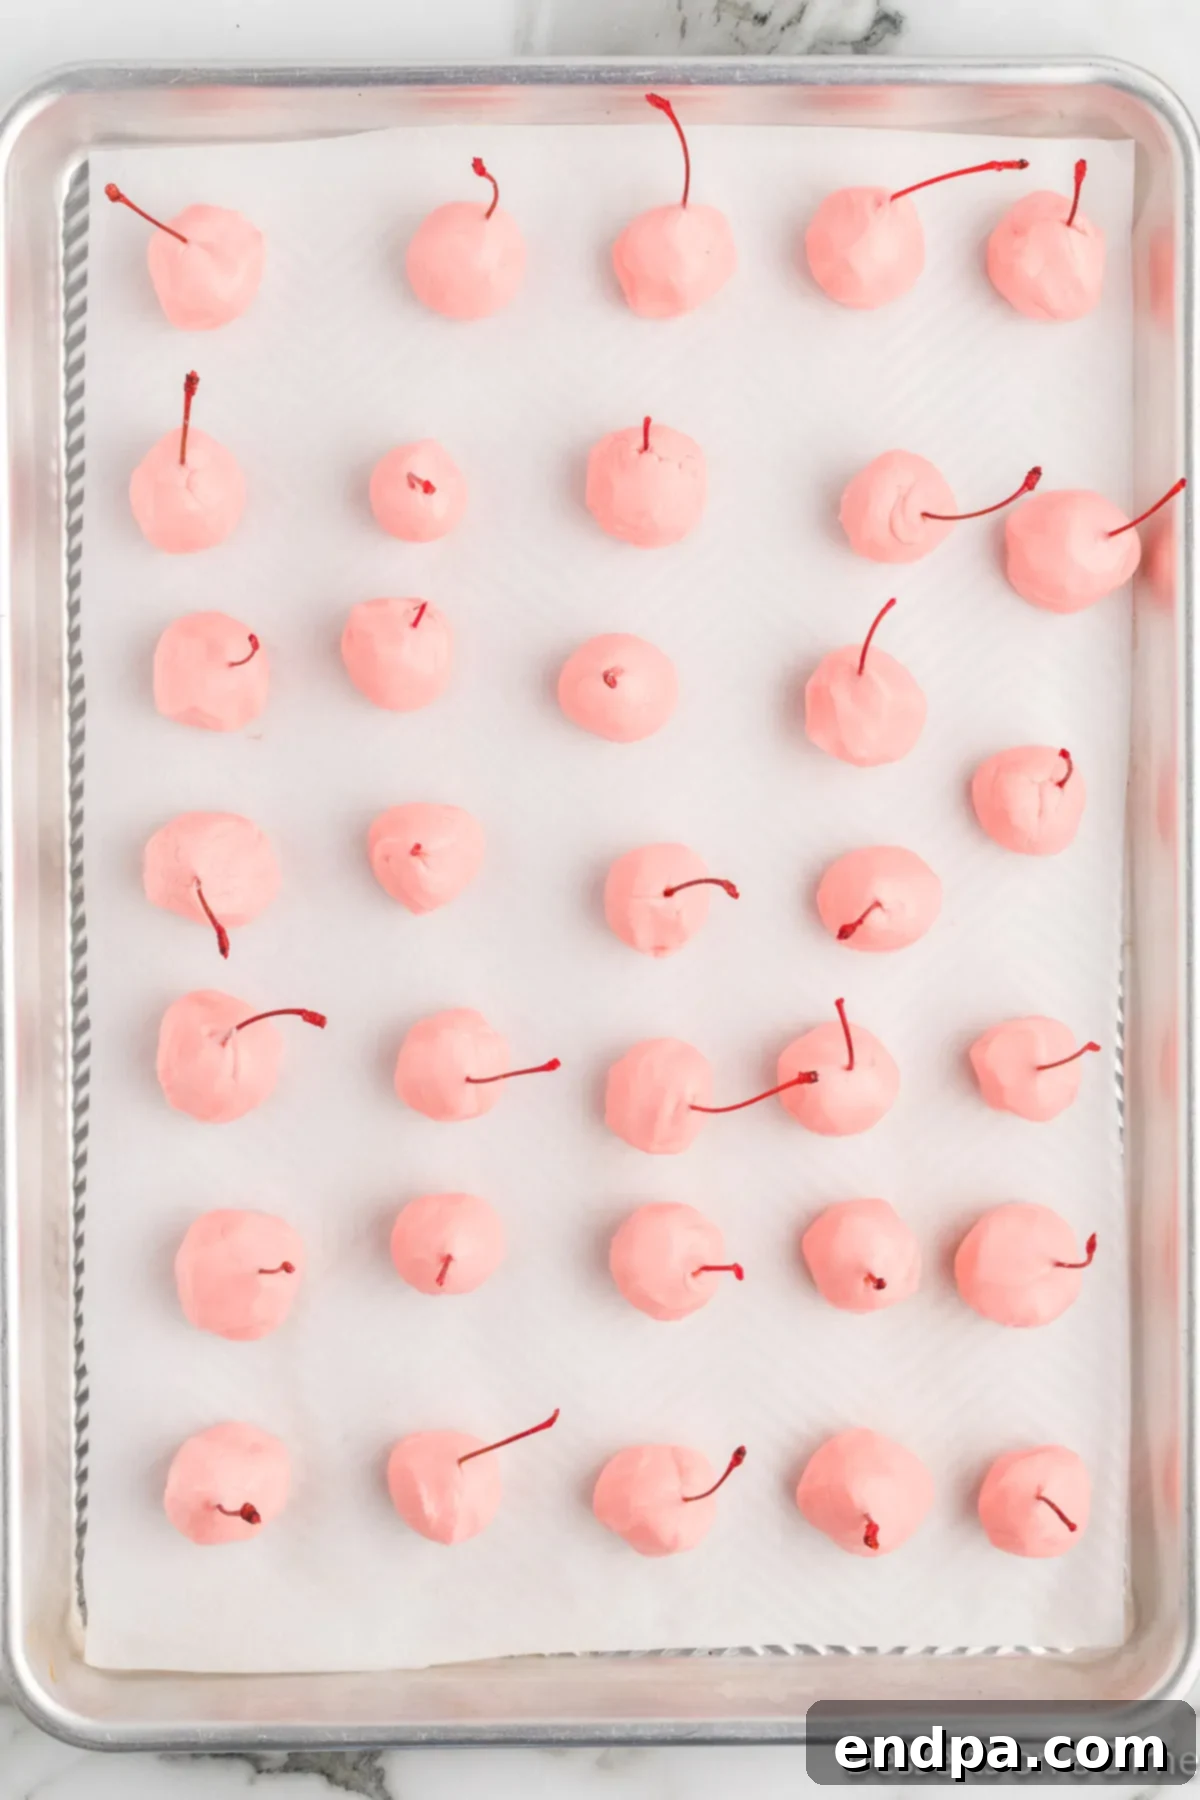
Step 8: Second Chill. Arrange all the cherry-filled dough balls on a baking sheet lined with parchment paper. Return the baking sheet to the refrigerator for another 30 minutes. This second chilling period is absolutely crucial for firming up the cherry-dough balls. This prevents them from softening and losing their shape when dipped into the warm melted chocolate, ensuring a smooth, crisp, and beautifully set outer shell.
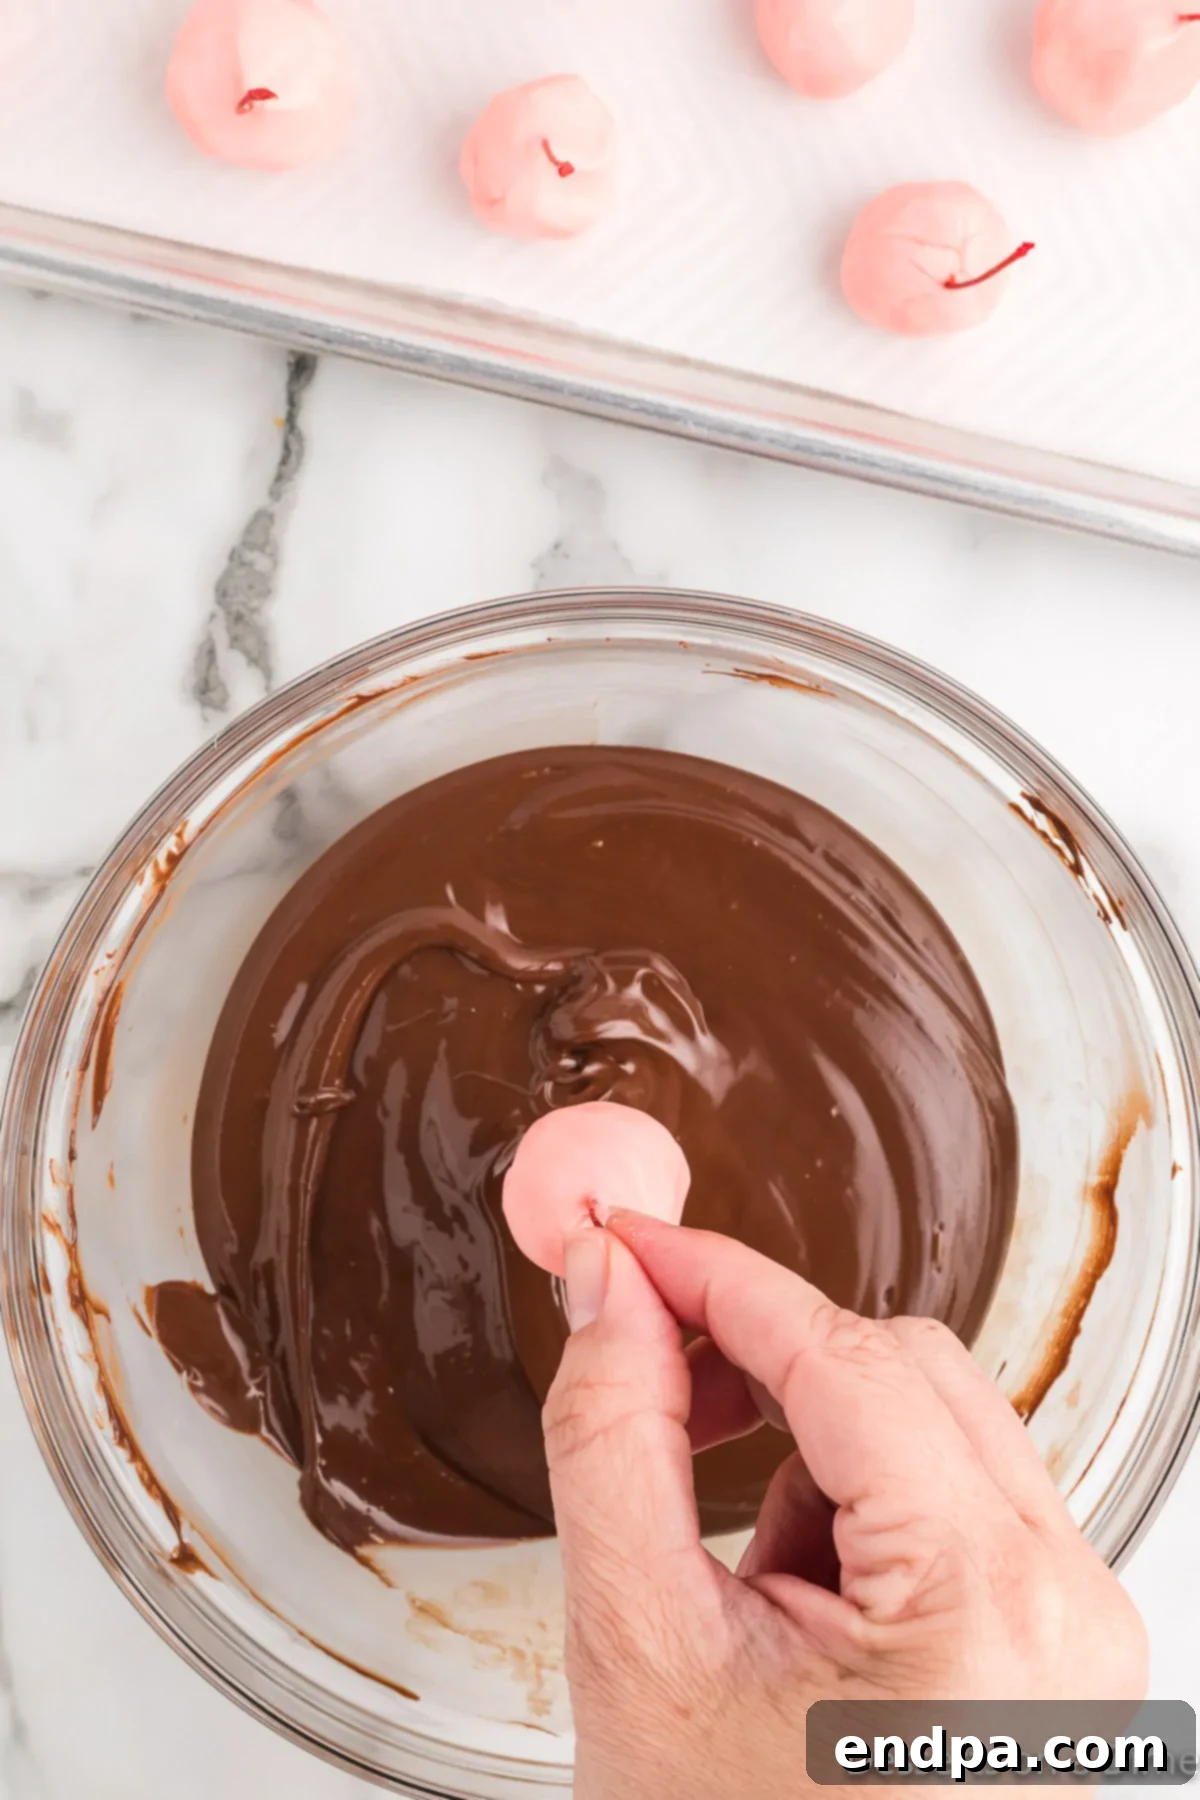
Step 9: Melt the Chocolate. In a microwave-safe bowl, combine the semi-sweet chocolate chips and the vegetable oil. Microwave the mixture in short, controlled 20-second intervals, stirring thoroughly after each interval. Continue this process until the chocolate is completely melted and beautifully smooth, with no lumps remaining. Be extremely careful not to overheat the chocolate, as this can cause it to seize (become thick and grainy) or burn, rendering it unusable for dipping. For more detailed guidance and troubleshooting, you can refer to our comprehensive guide on How to Melt Chocolate Chips.
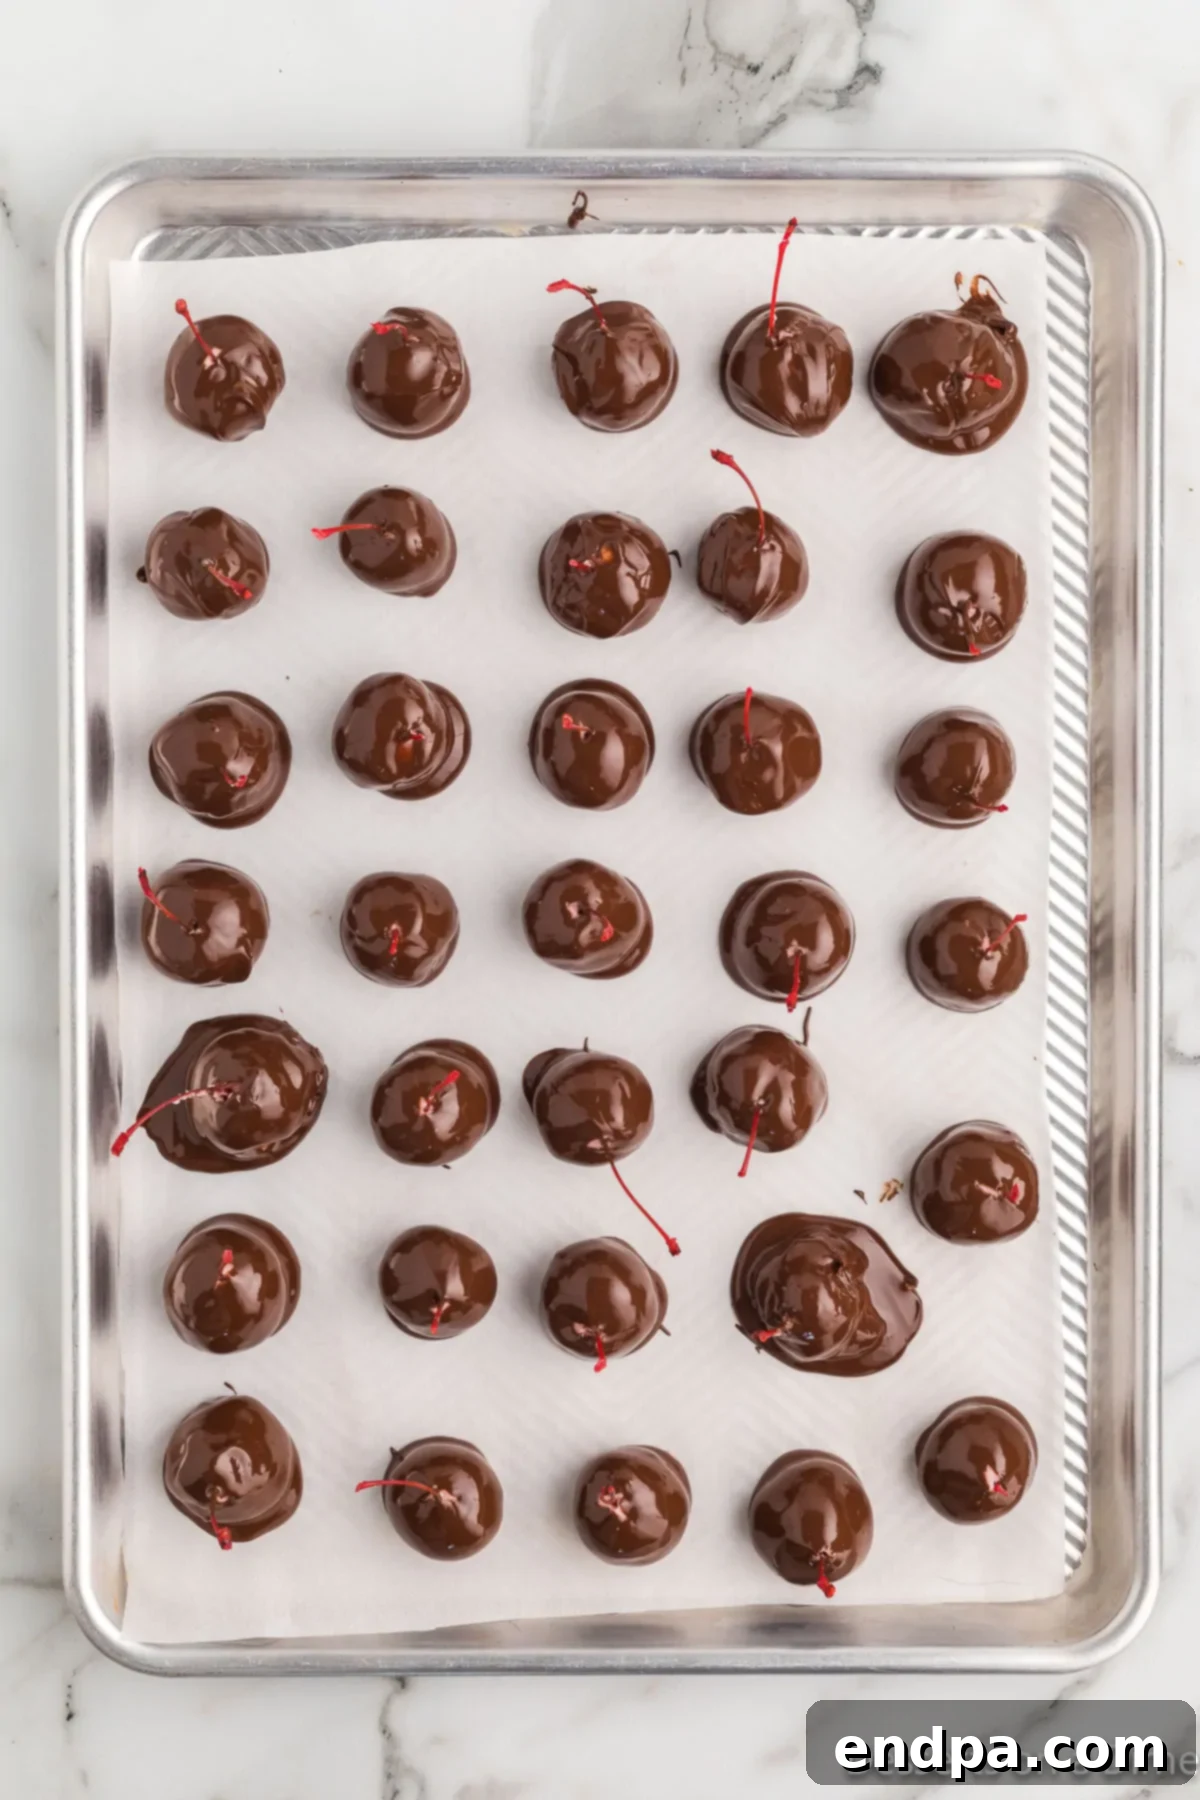
Step 10: Dip and Set. Retrieve the well-chilled cherry balls from the refrigerator. Holding each cherry by its stem (this is where having stems is incredibly helpful!), dip it completely into the melted chocolate. Allow any excess chocolate to drip off back into the bowl for a clean, even, and thin coating. Gently place the dipped cherry onto a baking tray lined with parchment paper. Repeat this process with all remaining cherries, working efficiently. Let the chocolate-covered cherries sit at room temperature until the chocolate has fully set and hardened, which typically takes 30-60 minutes, depending on the ambient temperature and humidity. Your exquisite homemade chocolate-covered cherries are now ready to be served and thoroughly enjoyed!
Storage Tips for Freshness
Proper storage is key to maintaining the delightful taste, appealing texture, and fresh quality of your homemade chocolate-covered cherries. Here’s how to ensure they remain at their best for as long as possible:
- Room Temperature Storage is Ideal: Store any leftover chocolate-covered cherries in an airtight container at room temperature, away from direct sunlight and heat. When stored correctly, they will remain fresh and absolutely delicious for up to 2 weeks. As they sit at room temperature, the unique powdered sugar and butter filling will naturally begin to soften and eventually liquify, transforming into that signature gooey, cordial-like center that is highly sought after in these treats.
- Prevent Sticking with Wax Paper: To prevent the delicate chocolate coatings from sticking together, especially if you’re layering them in your storage container, place a sheet of wax paper or parchment paper between each layer of candy. This simple yet effective trick ensures that each cherry remains perfectly intact and beautifully coated, preventing any damage to their pristine appearance.
- Freezing is Not Recommended: While it might seem like a practical way to extend their shelf life, freezing chocolate-covered cherries is generally not advised for this particular recipe. The creamy filling contains moisture, which will expand significantly when frozen. This expansion can cause the delicate outer chocolate coating to crack, shatter, and bloom (develop white streaks), resulting in an unappealing appearance and potentially compromising the texture and integrity of the filling. For the best possible experience, it’s best to enjoy them fresh or within their recommended room temperature storage period rather than freezing.
Expert Tips for Success
Achieving perfectly irresistible chocolate-covered cherries is easier than you might think, especially with a few insider tricks. Incorporate these expert tips into your process to ensure your homemade treats are nothing short of spectacular, every single time:
- Choose Cherries with Stems: While not strictly necessary for the taste, using maraschino cherries with stems offers two significant advantages. Firstly, the stem provides a convenient and clean handle for dipping the cherries into melted chocolate, making the process much tidier and more efficient. Secondly, the stems add a touch of elegance and authenticity to the finished product, giving them that classic, gourmet, confectionery appearance that is so appealing.
- Embrace Salted Butter for Flavor Balance: Don’t underestimate the profound impact of salted butter in this recipe. Its subtle saltiness acts as a crucial counterbalance to the inherent sweetness of both the maraschino cherries and the chocolate coating. This creates a more complex and well-rounded flavor profile, preventing the dessert from tasting overly sugary or one-dimensional, and instead enhancing the overall decadence and richness.
- Invest in Good Quality Chocolate: The quality of your chocolate directly and significantly impacts the taste, texture, and visual appeal of your final product. Higher-quality chocolate chips or baking bars (such as those from reputable brands like Ghirardelli, Guittard, Callebaut, or Valrhona) contain better cocoa butter and fewer artificial additives. This translates to a smoother melt, a richer, more profound chocolate flavor, and a more pleasing “snap” when the coating sets. You will undoubtedly taste the difference!
- Thoroughly Dry the Cherries – This is Key: This step is absolutely non-negotiable for success. After draining the maraschino cherries from their jar, it is imperative to pat them as dry as humanly possible with paper towels. Any residual moisture, no matter how small, can cause the powdered sugar dough to become excessively sticky and incredibly difficult to work with. More critically, moisture can cause your melted chocolate to “seize,” turning it into a thick, grainy, unusable mess, or even lead to a white “bloom” on the surface of your finished chocolates.
- Don’t Skip the Chilling Periods: The two distinct chilling periods in this recipe (once for the dough mixture, and again for the cherry-filled balls) are critically important. Chilling the dough firms it up, making it much easier to roll, flatten, and shape around the cherries without sticking to your hands. Chilling the cherry-filled balls before dipping ensures they are firm and cold enough to withstand the warmth of the melted chocolate without softening or losing their shape, allowing the chocolate to set quickly and smoothly for a perfect finish.
- Melt Chocolate in Short, Controlled Intervals: When melting chocolate, patience is a virtue, and slow and steady wins the race. Always use a clean, dry, microwave-safe bowl and heat the chocolate in short, controlled 20-second intervals. After each interval, remove the bowl and stir the chocolate thoroughly, even if it doesn’t look fully melted. This gentle, incremental approach prevents the chocolate from burning, scorching, or seizing, ensuring you achieve a perfectly smooth, glossy consistency that is ideal for dipping.
- Work Efficiently but Calmly During Dipping: Once your chocolate is perfectly melted and your cherry balls are thoroughly chilled, work at a steady, efficient pace during the dipping process. The goal is to dip all the cherries before the melted chocolate cools too much and begins to thicken, or before the cherry balls soften too much from being out of the refrigerator. However, avoid rushing, as a calm and steady hand will result in a more even, smooth, and beautiful chocolate coating on each cherry.
Frequently Asked Questions
When stored properly in an airtight container at room temperature, your homemade chocolate-covered cherries will last for up to 2 weeks. It’s fascinating to note that over this time, the internal filling will naturally soften and become more liquid, developing that characteristic gooey, cordial-like texture that is a hallmark of these delightful treats.
We generally do not recommend freezing homemade chocolate-covered cherries for this recipe. The moisture inherent within the creamy cherry filling expands significantly when frozen, and this expansion can unfortunately cause the delicate outer chocolate coating to crack, shatter, and even develop a white “bloom” on its surface. This dramatically affects their appealing appearance and can compromise the pleasant texture. For the best enjoyment, it’s always best to consume them fresh or within the recommended two-week room temperature storage period.
While the terms are often used interchangeably due to their similar appearance, there’s a subtle but important distinction. Traditional cherry cordials typically feature a liquid fondant center, often with a hint of cherry liqueur or brandy, creating a distinct boozy, syrupy burst when bitten. Our chocolate-covered cherries, on the other hand, are made with a richer, initially slightly firmer (though still wonderfully gooey) powdered sugar and butter filling that softens over time. This offers a more truffle-like and family-friendly experience, as our recipe uses vanilla or almond extract for flavor, rather than alcohol.
This particular recipe is specifically designed and optimized for maraschino cherries, primarily due to their consistent moisture content, vibrant color, and preserved sweetness. Using fresh cherries would require significant modifications to the filling recipe and extensive preparation, including pitting, thorough drying, and potentially blanching them, to ensure the filling adheres correctly and to prevent excess moisture from compromising the candy. For simplicity and the best, most consistent results with this recipe, it’s highly recommended to stick to maraschino cherries.
Chocolate seizes (becomes thick, lumpy, grainy, and unusable) when it comes into contact with even a tiny drop of water or if it’s overheated too rapidly. To prevent this, ensure all your bowls and utensils are completely dry before melting any chocolate. If it does happen, you can sometimes rescue seized chocolate by vigorously stirring in a teaspoon of vegetable oil or melted butter, one tiny drop at a time, until it miraculously loosens and becomes smooth again. However, prevention by ensuring no moisture and slow melting is always easier than attempting a cure!
More Decadent Chocolate Covered Desserts
If you’ve enjoyed making these delightful chocolate-covered cherries and have discovered a love for creating exquisite, homemade confections, you’ll be thrilled to explore other treats that perfectly combine sweet centers with rich chocolate coatings. Here are some more irresistible recipes to add to your baking repertoire, perfect for any occasion or just as a special treat:
- Easy Chocolate Peanut Butter Balls: A timeless and universally loved combination of creamy peanut butter and luscious chocolate, these no-bake treats are incredibly easy to make and disappear quickly.
- Chocolate Covered Rice Krispie Treats: Your favorite crispy, chewy, nostalgic treats are elevated to a new level of indulgence with a generous layer of rich, smooth chocolate. A delightful upgrade for a classic snack.
- Chocolate Covered Ritz Crackers: Discover the perfect balance of sweet and salty with these surprisingly addictive treats. The buttery, flaky Ritz cracker paired with a decadent chocolate coating creates an irresistible snack.
- Chocolate Covered Pretzel Rods: A delightful combination of salty crunch and sweet chocolate, these pretzel rods are incredibly versatile for decorating and making for any holiday or party.
- Chocolate Covered Twinkies Recipe: A nostalgic, iconic treat reimagined with a luxurious, crisp chocolate shell. This easy recipe transforms a classic into a sophisticated dessert that’s still fun to eat.
Don’t wait to create these memorable treats! Surprise your family and friends with a batch of homemade chocolate-covered cherries today. The joy of homemade is truly unmatched. We’d absolutely love to hear about your experience – please leave a comment and a star rating once you’ve tried the recipe and shared your delicious creations!
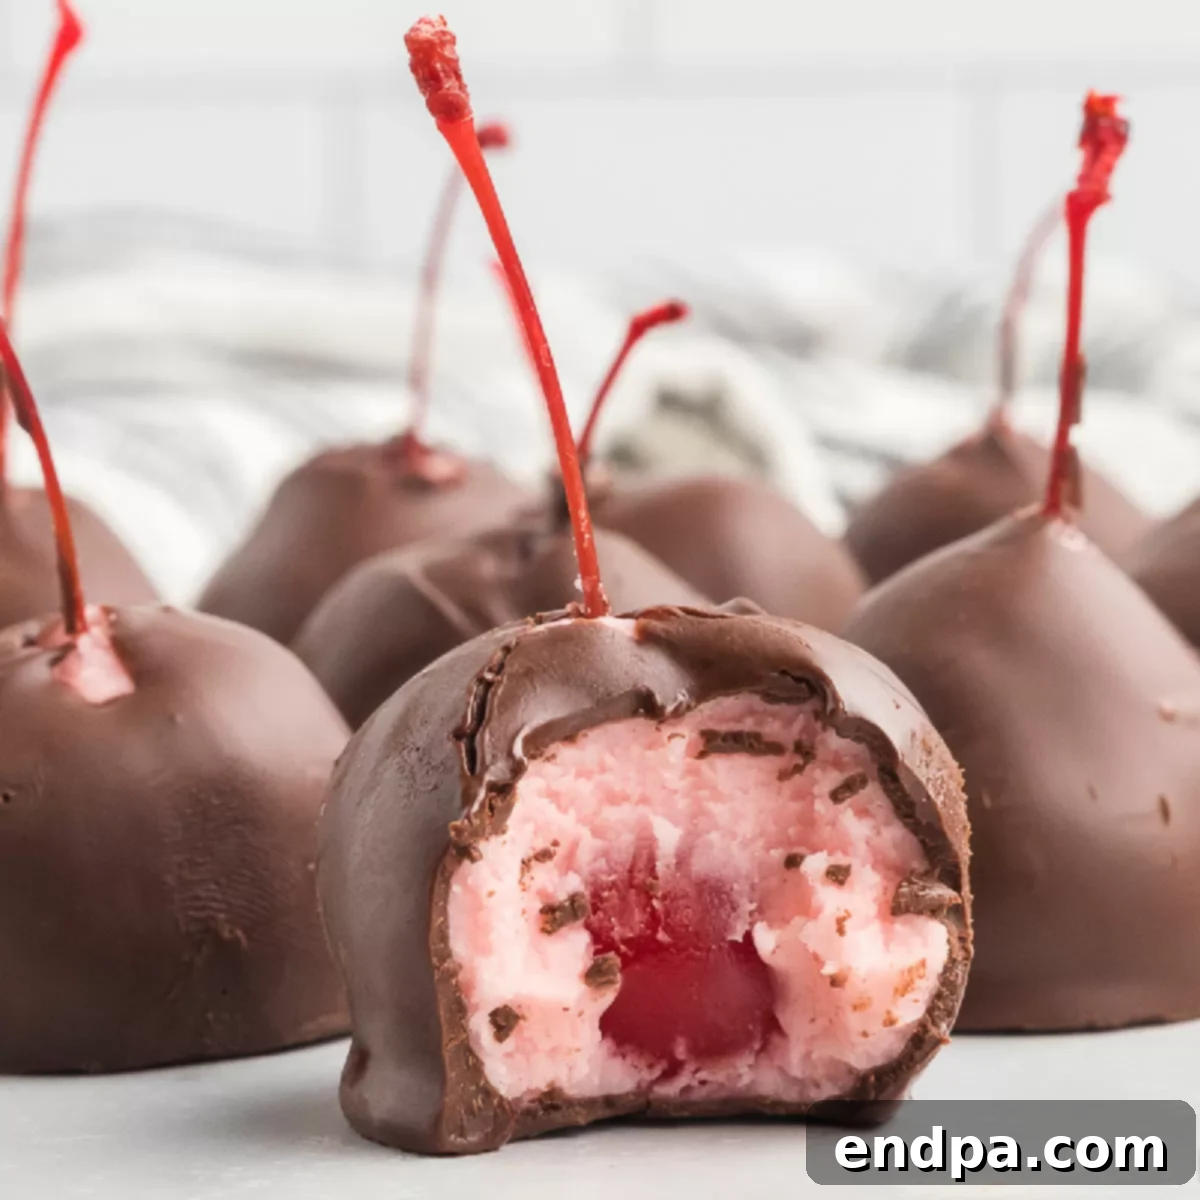
Chocolate Covered Cherries
Easy Chocolate Covered Cherries Recipe is quickly made with a few baking staples. This decadent treat with a tasty cherry mixture is coated in milk chocolate.
Prep Time: 1 hour 15 minutes
Let Sit: 1 hour
Total Time: 2 hours 15 minutes
Servings: 25
Cuisine: American
Course: Dessert
Calories: 216 kcal
Author: Carrie Barnard
Ingredients
- 1 jar Maraschino Cherries with Stems (10 ounces)
- 4 cups Powdered Sugar
- 4 Tablespoons Salted Butter, softened
- 16 ounces Semi-Sweet Chocolate Chips
- 1 teaspoon Vegetable Oil
Instructions
- Drain the cherries from the jar and reserve ¼ cup of the cherry juice.
- Dry the cherries as much as possible using paper towels.
- In a medium-sized mixing bowl, stir together 3 cups of powdered sugar, the softened butter, and ¼ cup of the reserved cherry juice. Gradually add the last cup of powdered sugar until a dough forms.
- Refrigerate the dough for 30 minutes.
- Roll the dough into approximately 1-inch sized balls. Flatten each dough ball into a disc.
- Fold a flattened dough ball around a dried maraschino cherry, completely encasing it.
- Roll the cherry-filled dough between your hands to make it smooth and round.
- Place the cherries on a baking sheet lined with parchment paper and refrigerate for another 30 minutes.
- Place the chocolate chips and vegetable oil in a microwave-safe bowl. Microwave in 20-second intervals, stirring after each interval, until the chocolate is melted and smooth.
- Holding each cherry by its stem, dip it into the melted chocolate. Allow excess chocolate to drip off, then place the cherry on a parchment-lined baking sheet. Repeat until all cherries are coated.
- Let the chocolate-covered cherries sit at room temperature until the chocolate is fully set (approximately 30-60 minutes).
- Serve and enjoy your homemade chocolate-covered cherries!
Recipe Notes
Store the leftovers in an airtight container at room temperature for up to 2 weeks. Place wax paper between layers to prevent sticking.
Nutrition Facts
Calories: 216kcal, Carbohydrates: 33g, Protein: 1g, Fat: 9g, Saturated Fat: 5g, Polyunsaturated Fat: 0.4g, Monounsaturated Fat: 3g, Trans Fat: 0.1g, Cholesterol: 6mg, Sodium: 17mg, Potassium: 106mg, Fiber: 2g, Sugar: 30g, Vitamin A: 70IU, Calcium: 18mg, Iron: 1mg
