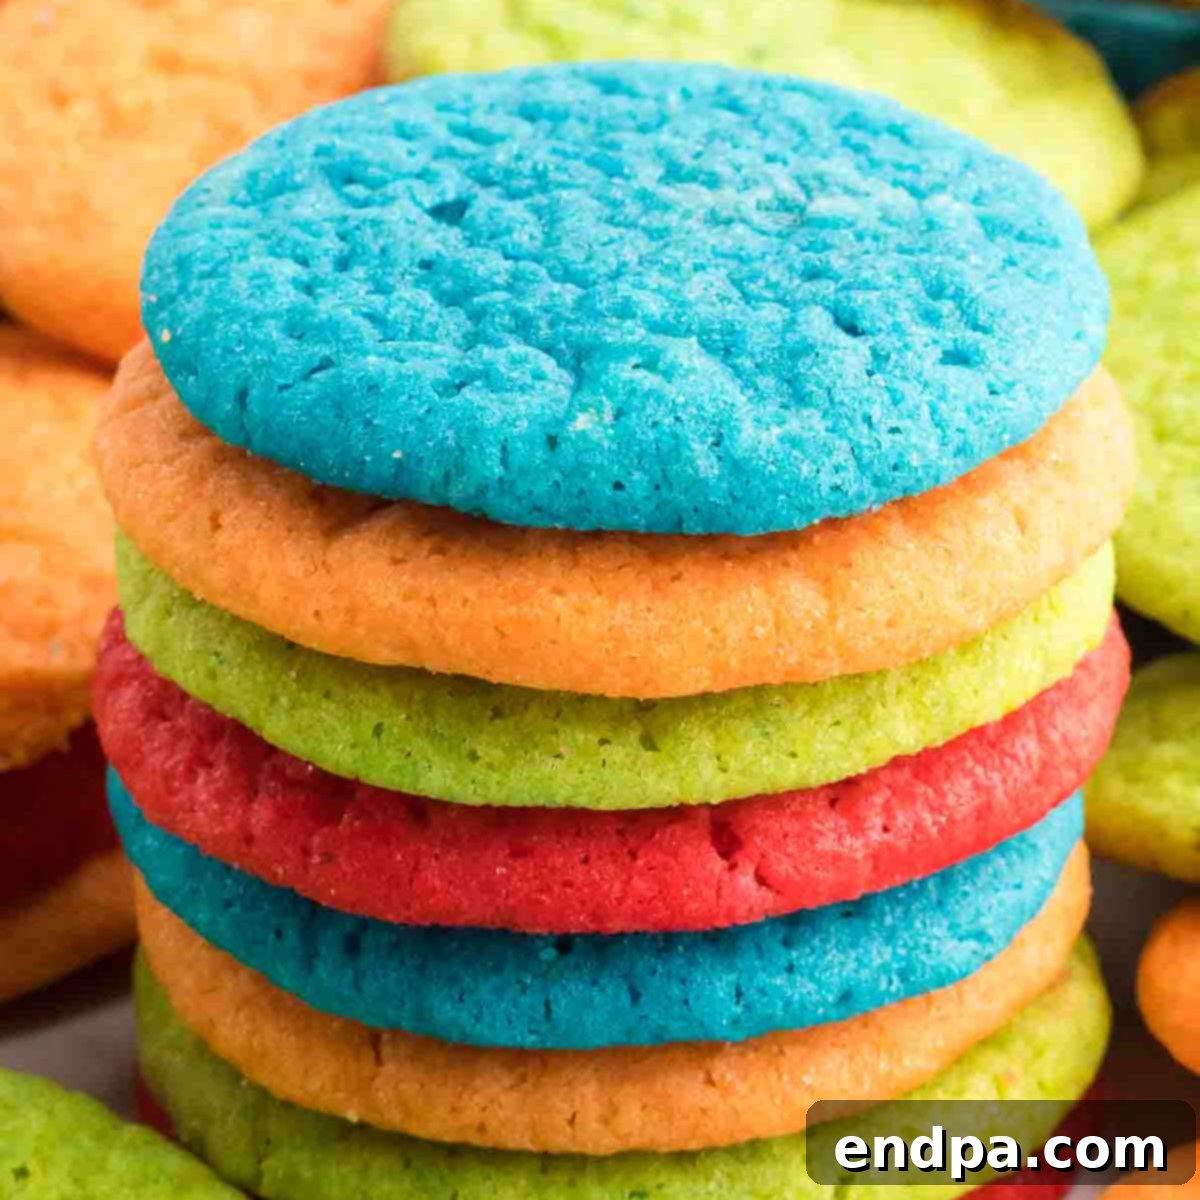
Welcome to the enchanting world of baking where simplicity meets vibrant creativity! Prepare to dazzle your taste buds and impress your friends and family with this incredibly easy and brilliantly colorful Jello Cookies Recipe. These soft, fluffy sugar cookies are not just a treat for the palate but also a feast for the eyes, thanks to one magical ingredient: Jell-O mix. Forget bland, ordinary cookies; these delightful confections burst with incredible flavor and a spectrum of cheerful colors, making them perfect for any occasion, from casual snacks to festive celebrations.
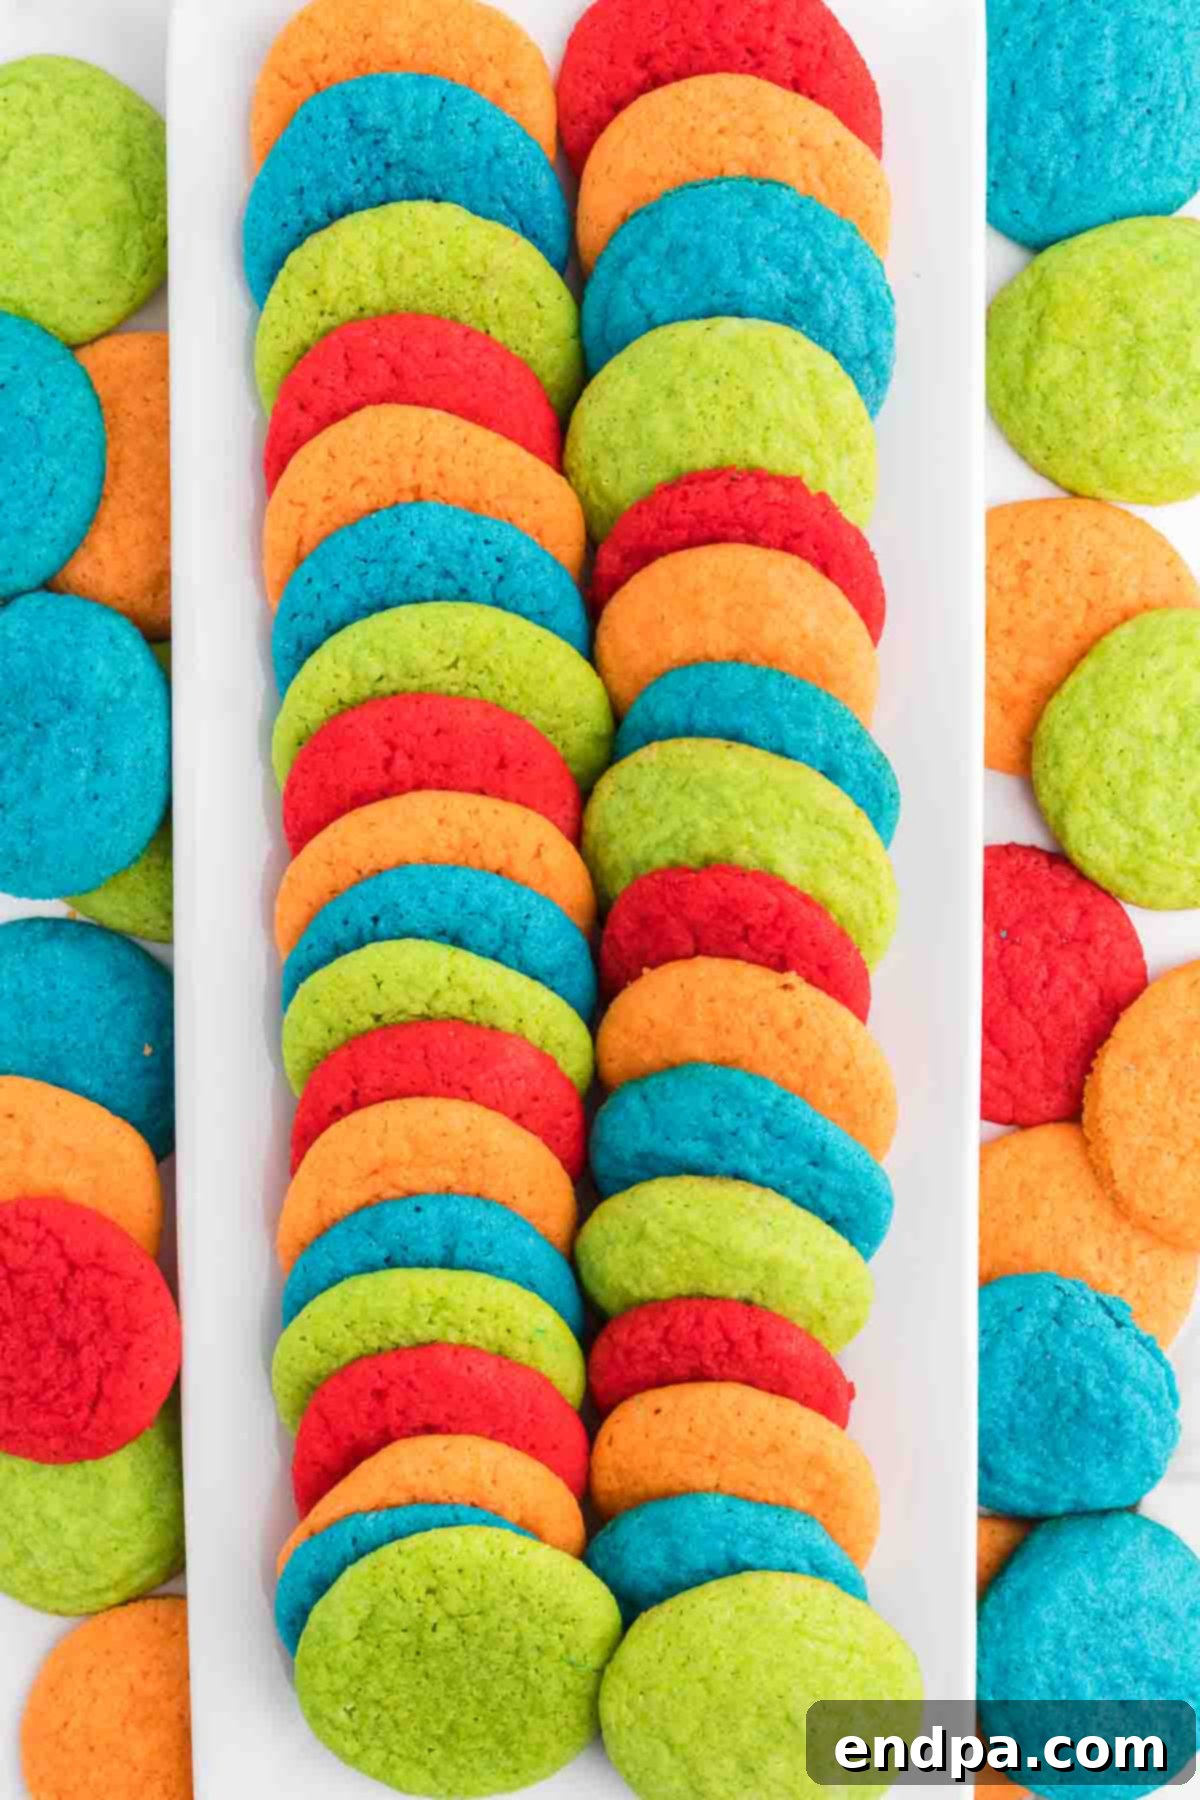
Transforming a classic sugar cookie into a spectacular, eye-catching dessert has never been simpler. Our special technique, incorporating flavored gelatin mix, infuses each bite with a unique fruity essence and a gorgeous hue. Imagine trays filled with ruby red cherry, zesty lime green, sunny lemon yellow, and vibrant blue raspberry cookies – a true rainbow on your dessert table! Whether you’re a seasoned baker or just starting your culinary journey, this recipe promises a fun, fuss-free experience with truly delicious results.
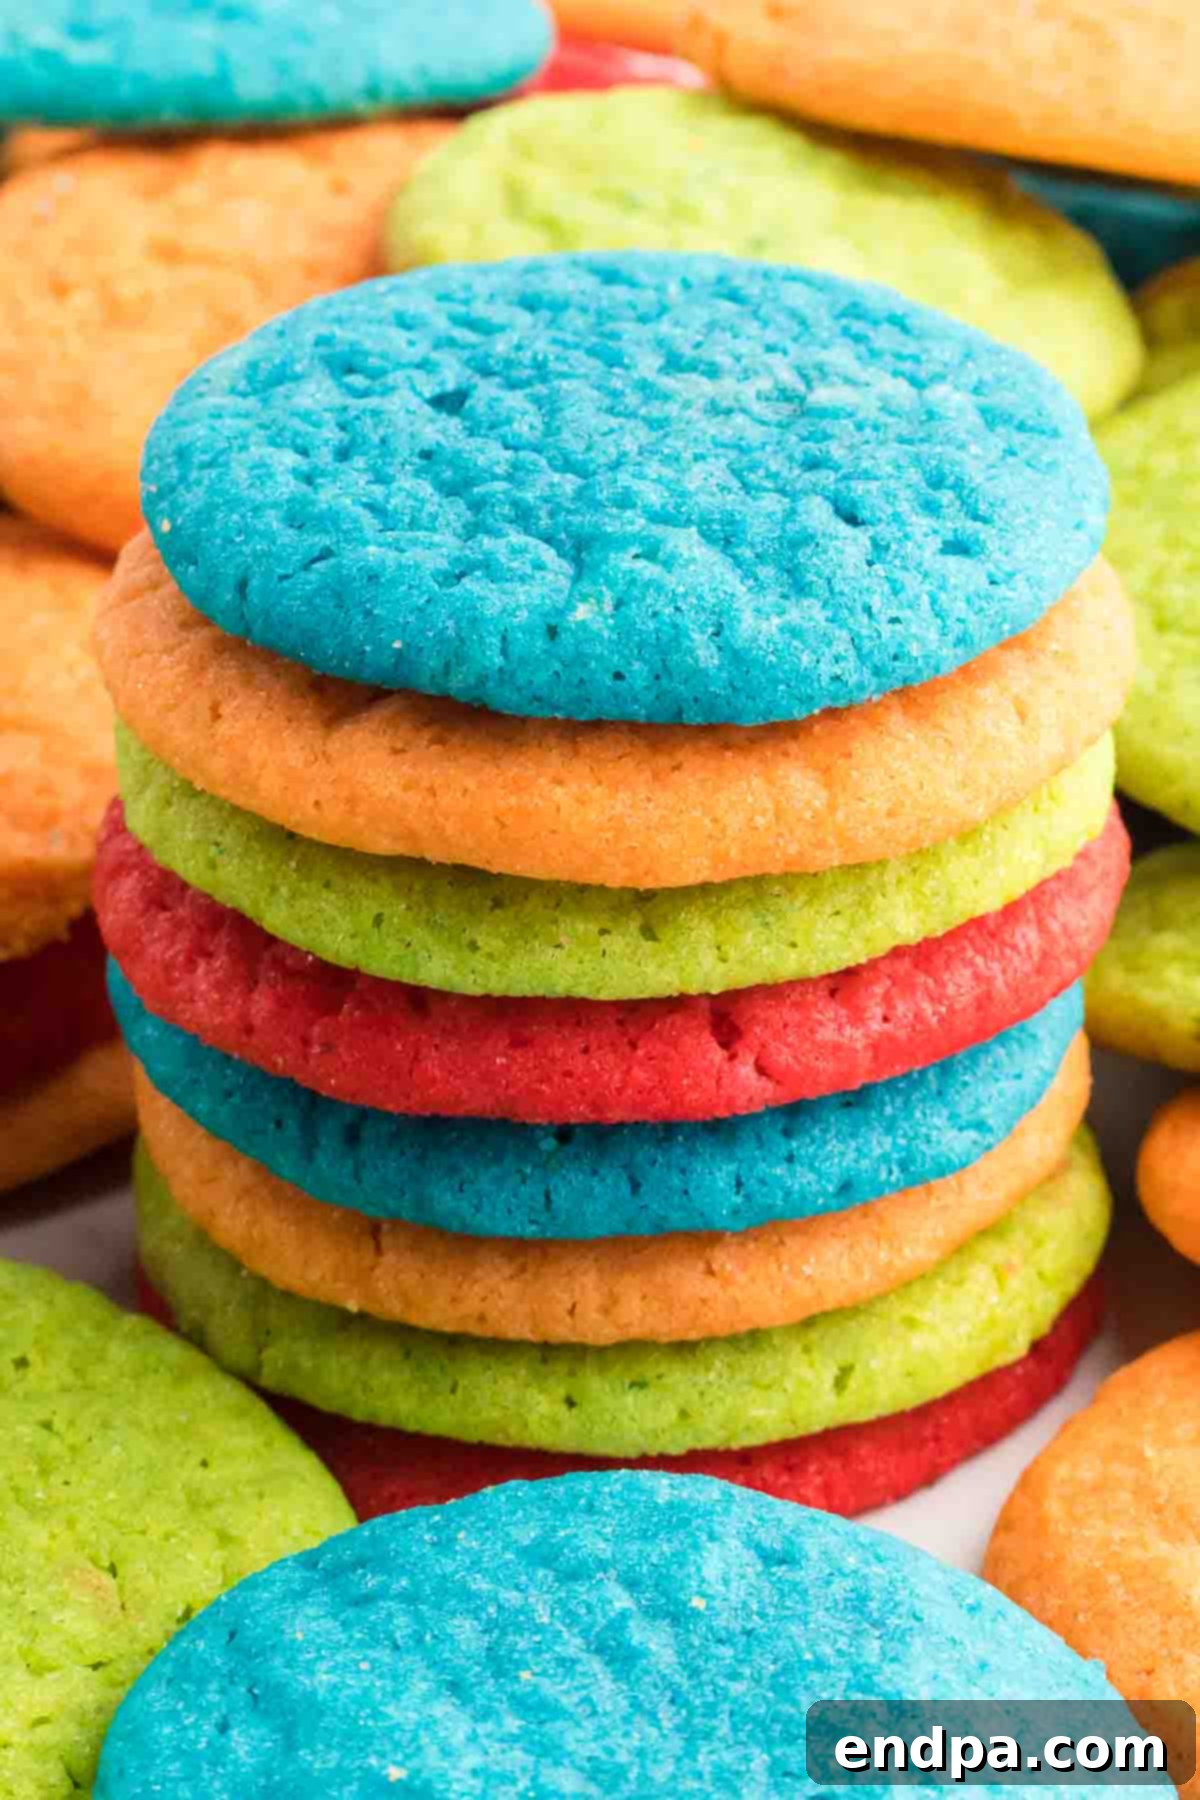
These aren’t just any cookies; they’re a celebration of flavor and fun. The addition of Jell-O mix gives them an unparalleled tenderness and a wonderfully chewy texture, setting them apart from traditional sugar cookies. They are ideal for baking with kids, as the process is straightforward and the results are instantly rewarding. If you find yourself with extra Jell-O, don’t let it go to waste! You can easily whip up complementary treats like Jello Frosting or a whimsical Broken Glass Jello dessert to complete your colorful spread.
Looking for more bright and joyful dessert ideas? You might also love our Jello Popcorn for a fun movie night snack, a collection of delightful Orange Desserts that bring a sunny touch to any meal, or explore more Easy Spring Cookies that are perfect for welcoming warmer weather and vibrant colors. Get ready to embark on a baking adventure that’s as simple as it is satisfying!
Table of Contents
- Why You Will Adore These Jello Cookies
- The Essential Ingredients
- Creative Variations and Serving Suggestions
- Step-By-Step Guide to Jello Cookies
- Perfect Storage for Optimal Freshness
- Freezing Jello Cookies and Dough
- Expert Baking Tips for Jello Cookies
- Frequently Asked Questions About Jello Cookies
- More Irresistible Cookie Recipes
Why You Will Adore These Jello Cookies
There’s so much to love about this Jello Cookies recipe! Beyond their stunning appearance, these cookies offer a unique blend of convenience, customization, and irresistible flavor that makes them a family favorite. Kids especially will have a blast not only eating these vibrant treats but also getting involved in the baking process. Imagine their excitement as they help choose their favorite Jell-O flavors, creating a personalized batch of cookies that truly reflects their creativity.
The beauty of this recipe lies in its versatility. You can select any flavor of Jell-O mix you love, opening up a world of possibilities for different colors and tastes. From classic strawberry and cherry to exotic tropical punch or even an intriguing grape, each flavor brings its own charm. Get creative and make several different flavors for a truly spectacular spread. These cookies are perfect for themed events; you can easily match the cookie colors to birthday party themes, holiday celebrations, or school events. The ideas for incorporating these fun Jello cookies into your festivities are truly endless!
Not only are they fun and customizable, but they also boast a wonderfully soft and tender texture that simply melts in your mouth. The Jell-O powder not only imparts color and flavor but also contributes to the cookies’ incredibly soft crumb. This makes them a delightful change from your everyday cookie and a surefire hit with anyone who tries them. Don’t forget to explore all our Best Jello Recipes for even more ways to enjoy this versatile ingredient, including delicious Jello Frosting which would pair perfectly with these cookies!
The Essential Ingredients
Crafting these sensational Jello Cookies requires a simple lineup of pantry staples, elevated by the star ingredient: Jell-O mix. Each component plays a crucial role in achieving the perfect texture, flavor, and vibrant color that makes these cookies so special. Here’s a closer look at what you’ll need:
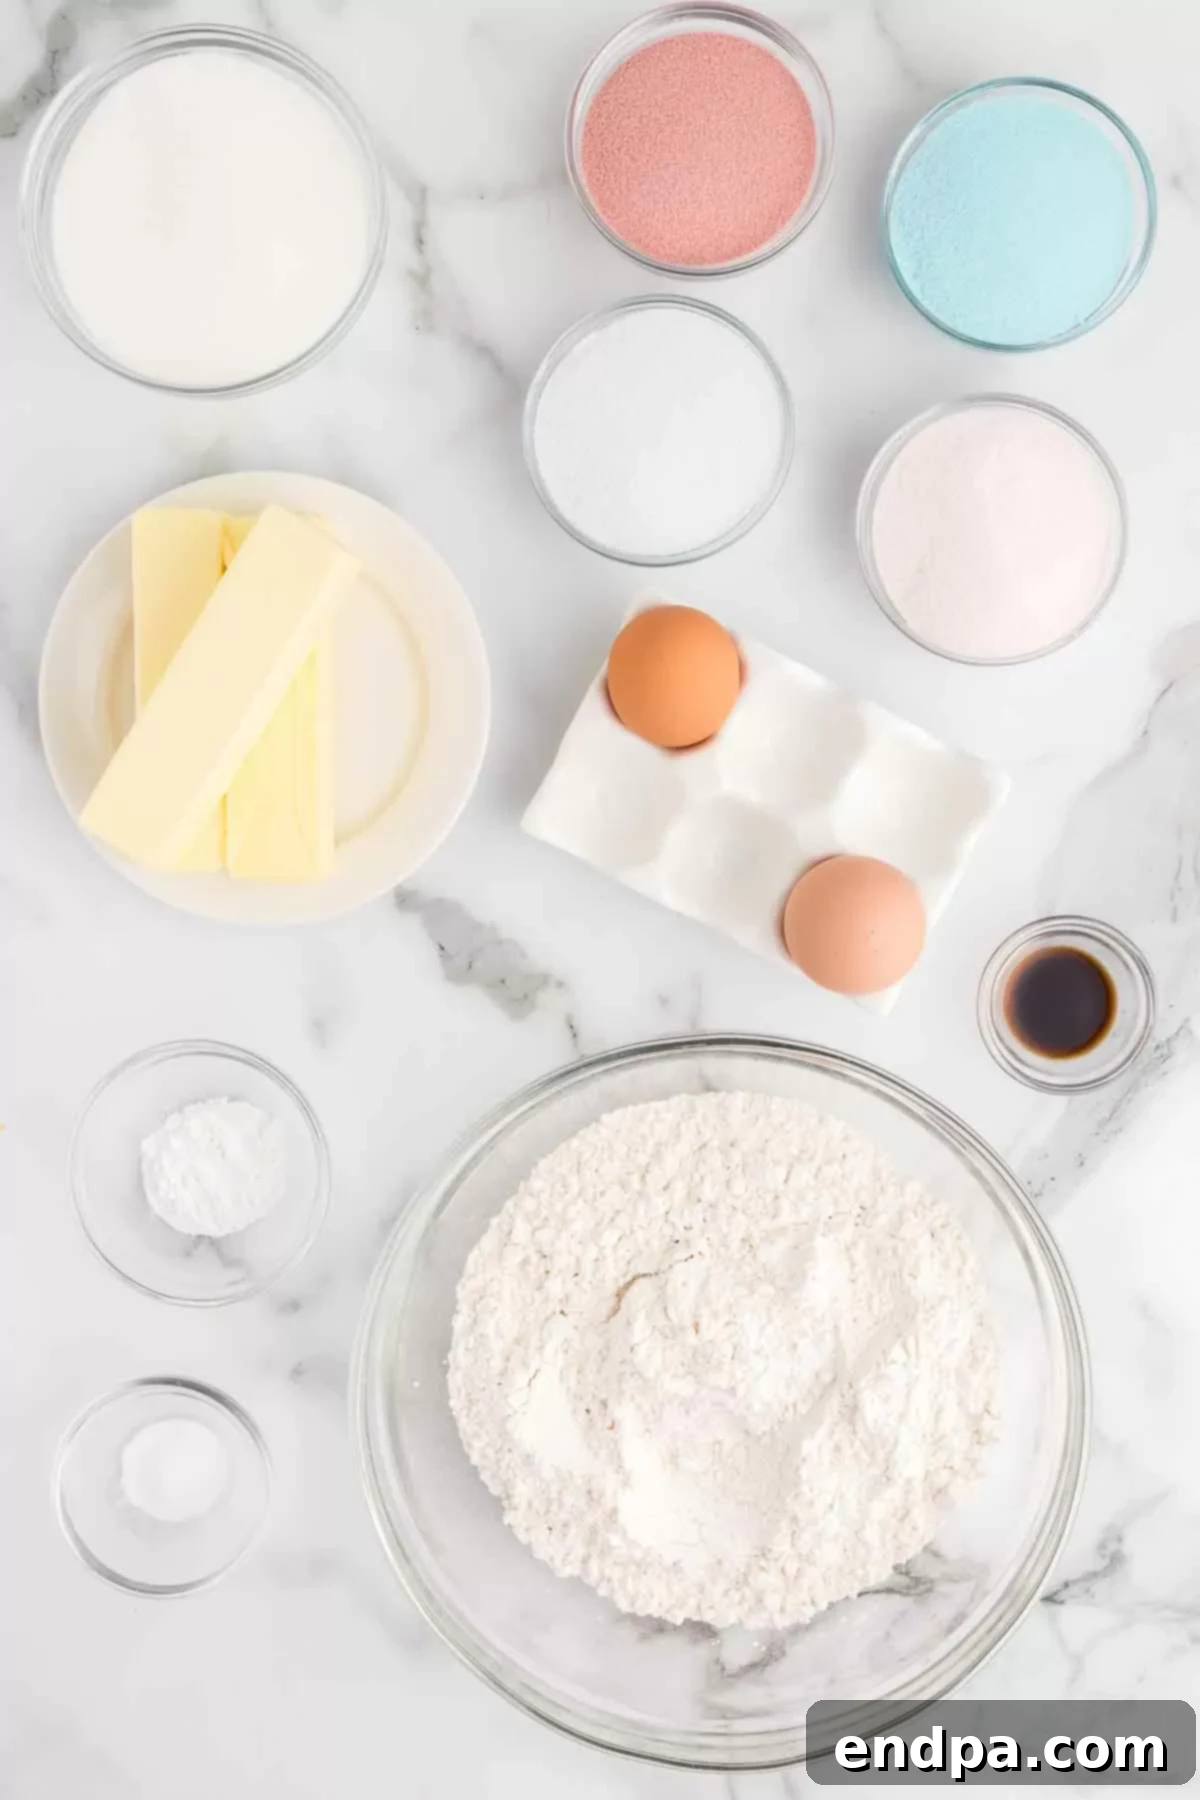
- Unsalted Butter: Ensure your butter is softened to room temperature. This is crucial for creaming it with sugar, creating a light, fluffy base that incorporates air, leading to tender cookies. Using unsalted butter allows you to control the total salt content in the recipe.
- Granulated Sugar: White granulated sugar provides the primary sweetness and helps achieve that classic crispy edge and chewy center in sugar cookies. It also aids in spreading during baking.
- Eggs: Eggs bind the ingredients together, add moisture, and contribute to the cookies’ structure and richness. Using fresh, large eggs is always recommended for best results.
- Vanilla Extract: Pure vanilla extract is a flavor enhancer that adds warmth and depth, complementing the fruity notes of the Jell-O without overpowering them. Don’t skimp on quality here; it makes a noticeable difference.
- All-Purpose Flour: The foundation of our cookie dough. For the most accurate measurement, spoon the flour into your measuring cup and level it off with a straight edge, rather than scooping directly from the bag. This prevents over-measuring, which can lead to dry, dense cookies.
- Baking Powder & Baking Soda: These leavening agents work together to give the cookies their delightful rise and soft, pillowy texture. Baking soda reacts with acidic ingredients (like cream of tartar, though not in this recipe, it often reacts with ingredients in flour or Jell-O itself), while baking powder provides lift without needing an acid.
- Jell-O Mix: This is our secret weapon! You’ll need four 3oz boxes of different Jell-O flavors to create a rainbow of cookies. The powdered gelatin mix provides intense color and a burst of fruity flavor. Feel free to use your absolute favorite flavors or experiment with new combinations.
- Food Coloring (Optional): While the Jell-O mix adds plenty of color, a few drops of food coloring matching your chosen Jell-O flavor can intensify the hue, making your cookies even more visually striking. This is particularly useful if you want truly vibrant, saturated colors.
A complete list of ingredients with precise measurements can be found in the recipe card at the bottom of the page, ensuring you have everything at your fingertips for a seamless baking experience.
Creative Variations and Serving Suggestions
One of the best aspects of this Jello Cookies recipe is its incredible adaptability. While they are fantastic as is, a few simple tweaks can open up a world of new flavors and presentations, making them perfect for any occasion or personal preference.
- Delightful Mix-ins: Our Jello cookies are already bursting with flavor, but if you’re feeling decadent or want to add an extra layer of texture, consider incorporating mix-ins into your dough. White chocolate chips pair wonderfully with many fruit flavors, or you could add a handful of colorful sprinkles for even more visual appeal, especially for birthday parties or holiday themes. Miniature marshmallows or finely chopped nuts could also add an interesting textural contrast.
- Sugar-Free Jello Option: For those managing sugar intake or simply preferring a lighter treat, feel free to substitute regular Jell-O mix with sugar-free varieties. The color and flavor will still be wonderfully pronounced, offering a guilt-free indulgence without compromising on taste.
- Fun Cut-Out Cookies: Instead of forming simple cookie dough balls, roll out the prepared dough (after mixing in the Jell-O and coloring) and use your favorite cookie cutters. This is a fantastic way to engage children in the baking process and customize your cookies for various holidays or special occasions. Imagine heart-shaped cookies for Valentine’s Day, star shapes for patriotic celebrations, or festive holiday shapes. Just remember to flour your work surface and cookie cutters lightly to prevent sticking.
- Drizzle or Glaze: Once cooled, elevate your Jello cookies with a simple glaze. A basic powdered sugar glaze (powdered sugar mixed with a touch of milk or lemon juice) can be drizzled over the top. For extra flair, you can color the glaze to match or contrast with the cookie’s Jell-O flavor.
- Cookie Sandwiches: Take these cookies to the next level by turning them into delightful cookie sandwiches! Spread a layer of cream cheese frosting, buttercream, or even our Jello Frosting between two cooled cookies of the same or complementary flavors.
- Holiday Themes: Jello cookies are perfect for holidays! Use red and green Jell-O for Christmas, pastel colors for Easter, or orange and purple for Halloween. The possibilities are endless!
These variations ensure that your Jello Cookies can be as simple or as elaborate as you desire, making them a truly versatile addition to your baking repertoire.
Step-By-Step Guide to Jello Cookies
Creating these vibrant and delicious Jello Cookies is a straightforward process that yields impressive results. Follow these detailed steps to bake a batch of perfectly soft, colorful, and flavorful cookies every time.
- Step 1: Preheat Your Oven and Prepare Baking Sheets. Begin by preheating your oven to 350 degrees F (175 degrees C). Line your baking sheets with parchment paper or silicone baking mats. This crucial step prevents sticking and makes cleanup a breeze, ensuring your cookies bake evenly and release easily.
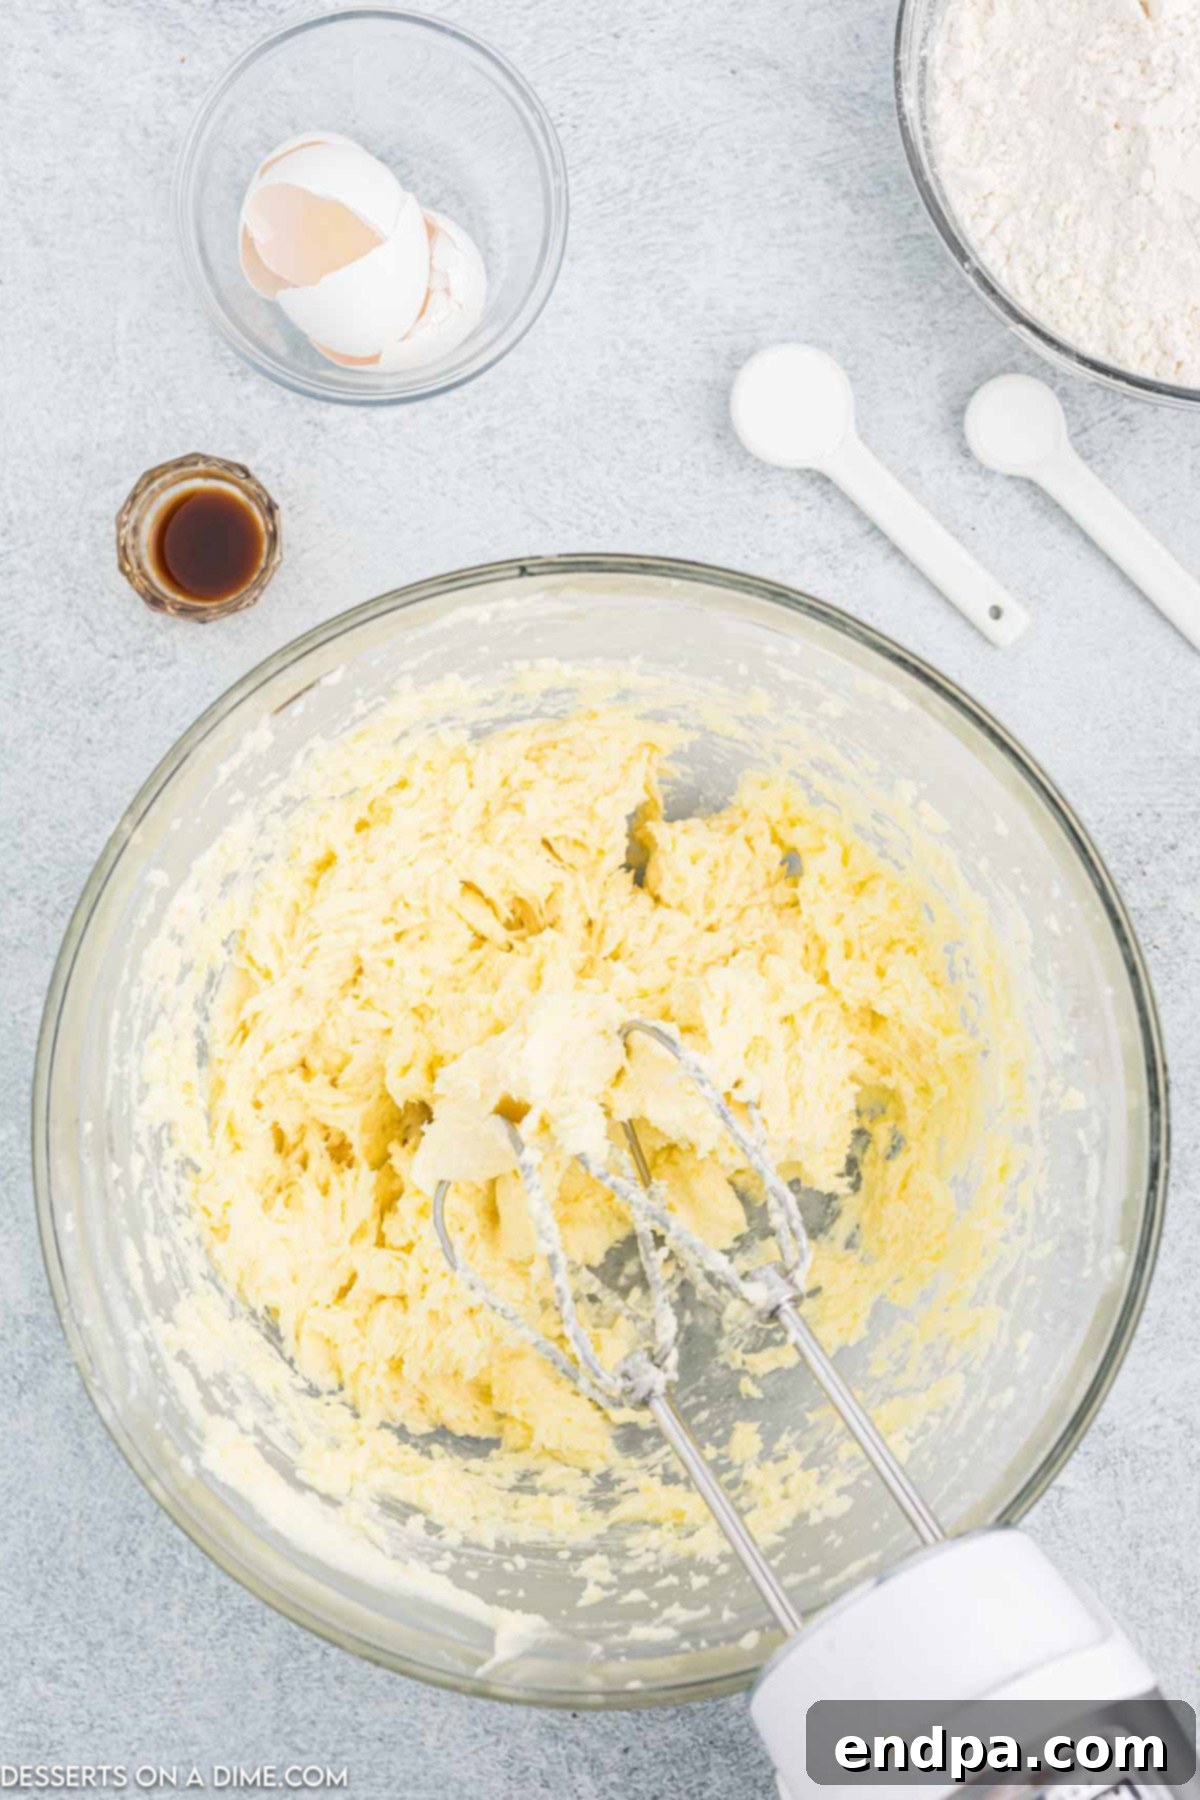
Step 2: Cream Butter and Sugar. In a large mixing bowl, combine the softened unsalted butter and granulated sugar. Using an electric mixer, cream them together on medium speed until the mixture is light, fluffy, and pale in color. This process incorporates air, which is essential for tender cookies. Scrape down the sides of the bowl as needed to ensure everything is well combined. Once light and fluffy, beat in the eggs, one at a time, until fully incorporated. Follow this with the vanilla extract, mixing until just combined. Be careful not to overmix at this stage.
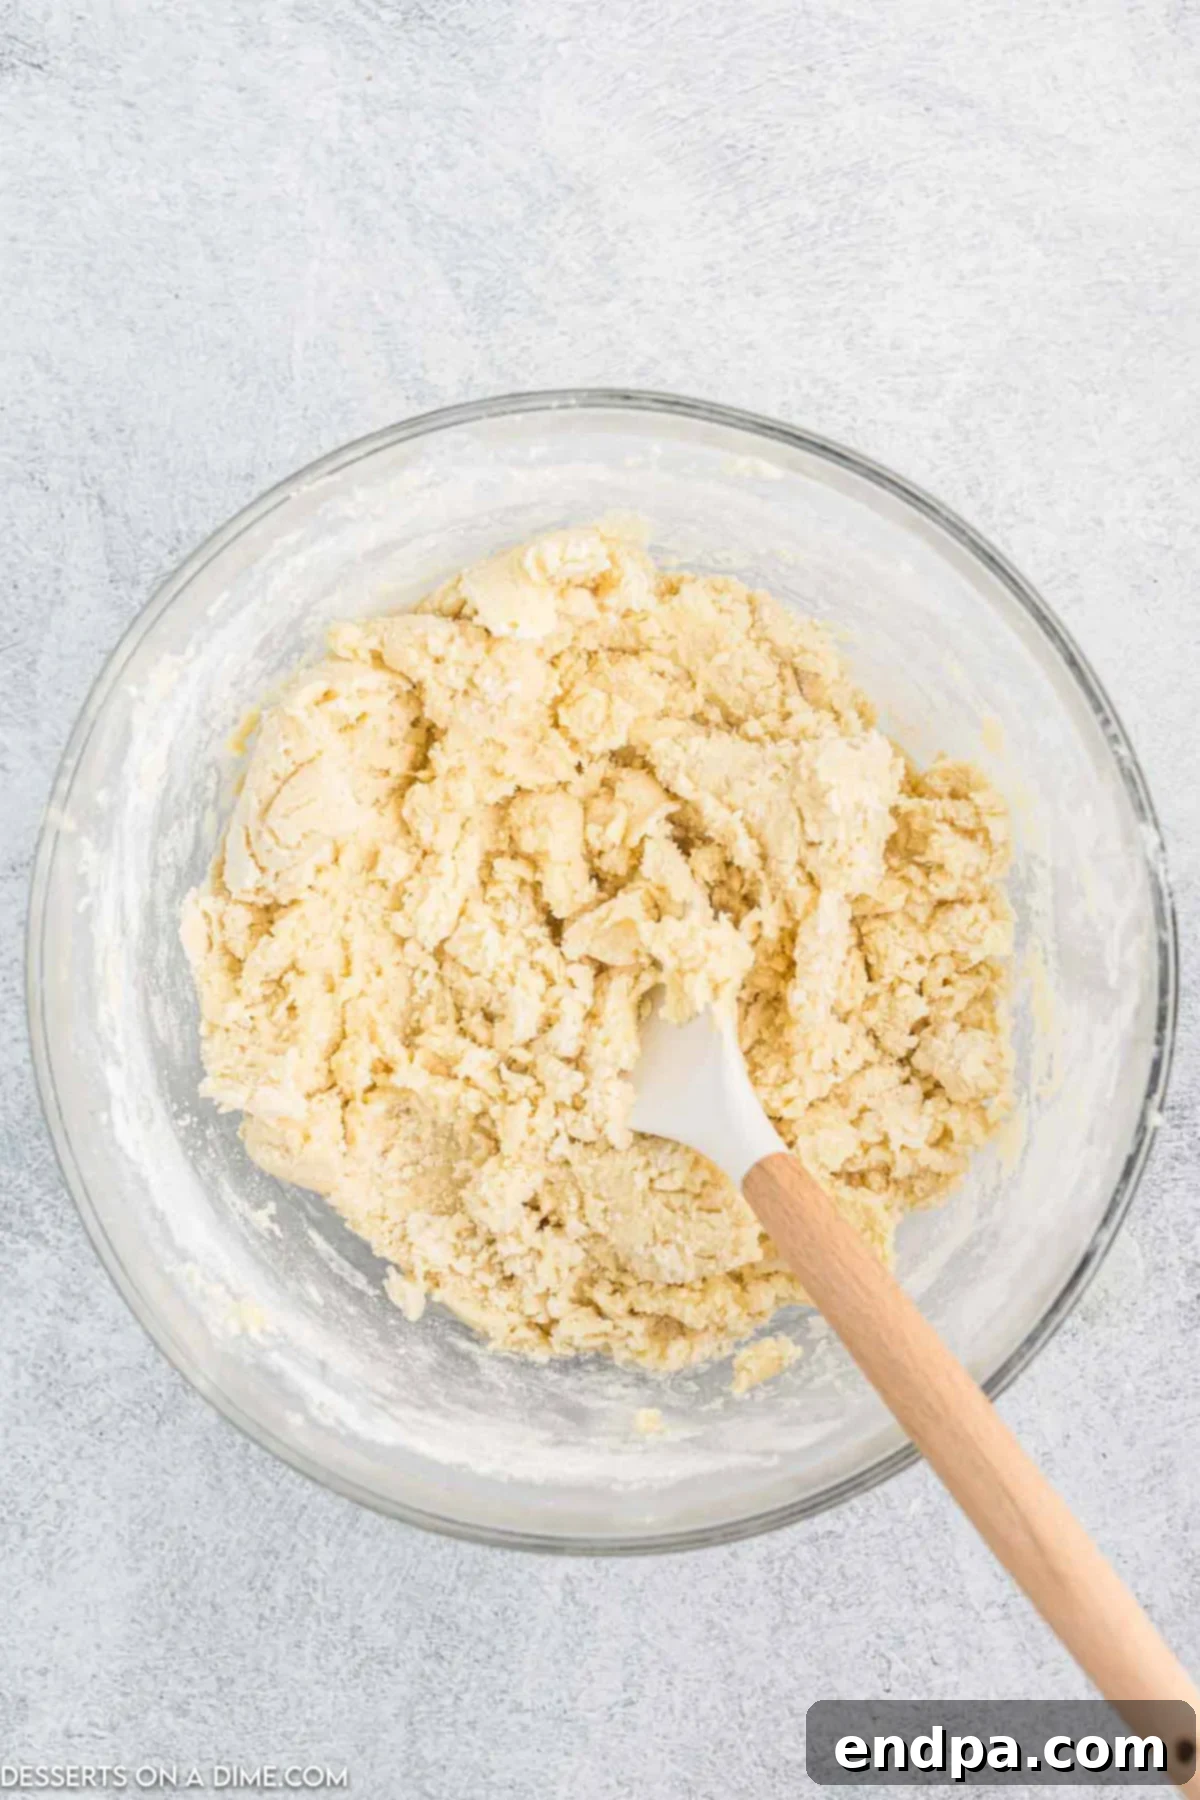
Step 3: Combine Dry Ingredients. In a separate medium-sized bowl, whisk together the all-purpose flour, baking powder, and baking soda. This ensures the leavening agents are evenly distributed throughout the dry mixture. Gradually add the dry ingredients to the wet ingredients, mixing on low speed until a soft, cohesive dough forms. Be careful not to overmix the dough once the flour is added, as this can lead to tough cookies.
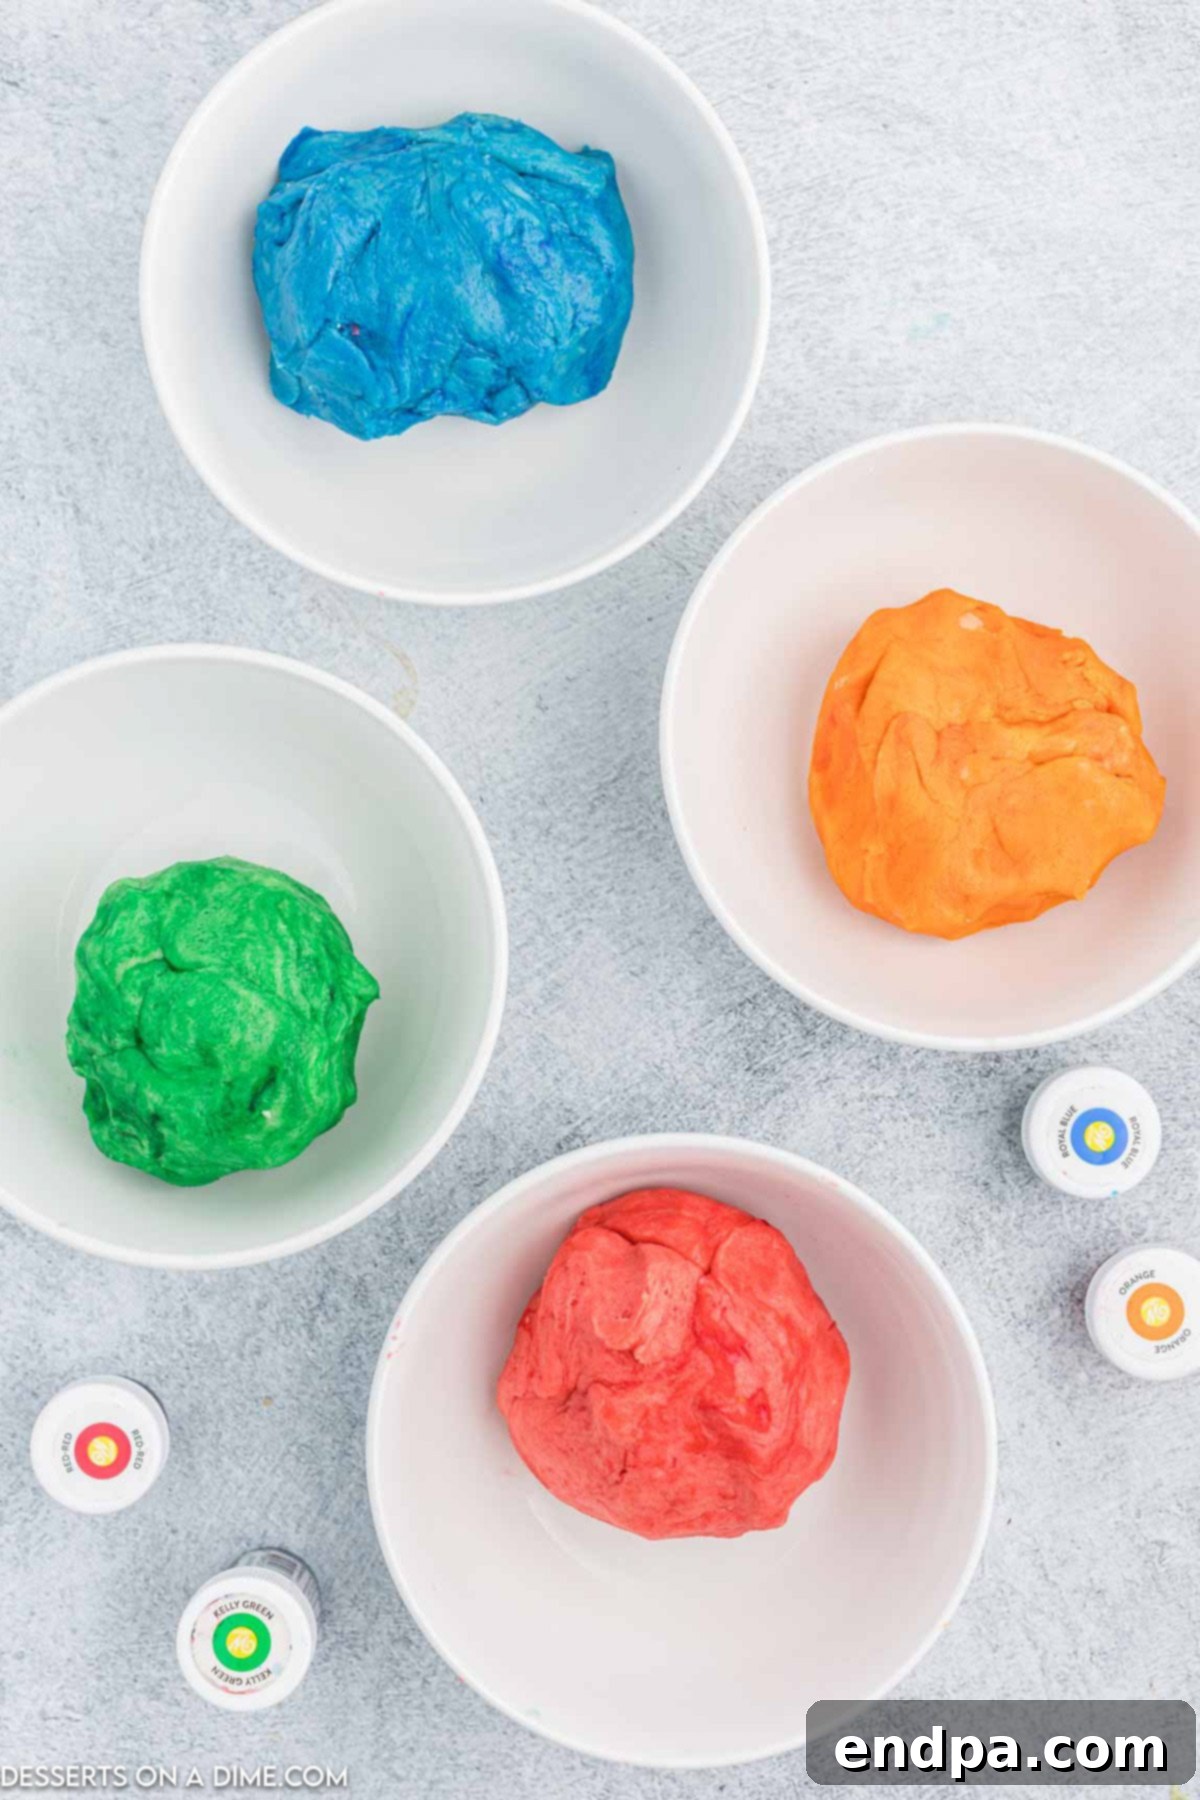
Step 4: Divide Dough and Add Jell-O. Now for the fun part! Divide the cookie dough evenly into four separate mixing bowls. This will allow you to create four distinct colors and flavors. To each bowl, add about two tablespoons of your chosen Jell-O mix (e.g., cherry Jell-O to one, lime to another, etc.). If desired, add a few drops of food coloring matching the Jell-O flavor to enhance the vibrancy of each dough. Knead each portion of dough by hand until the Jell-O powder and food coloring are thoroughly mixed in and the dough is uniformly colored. The kneading ensures the color and flavor are evenly distributed.
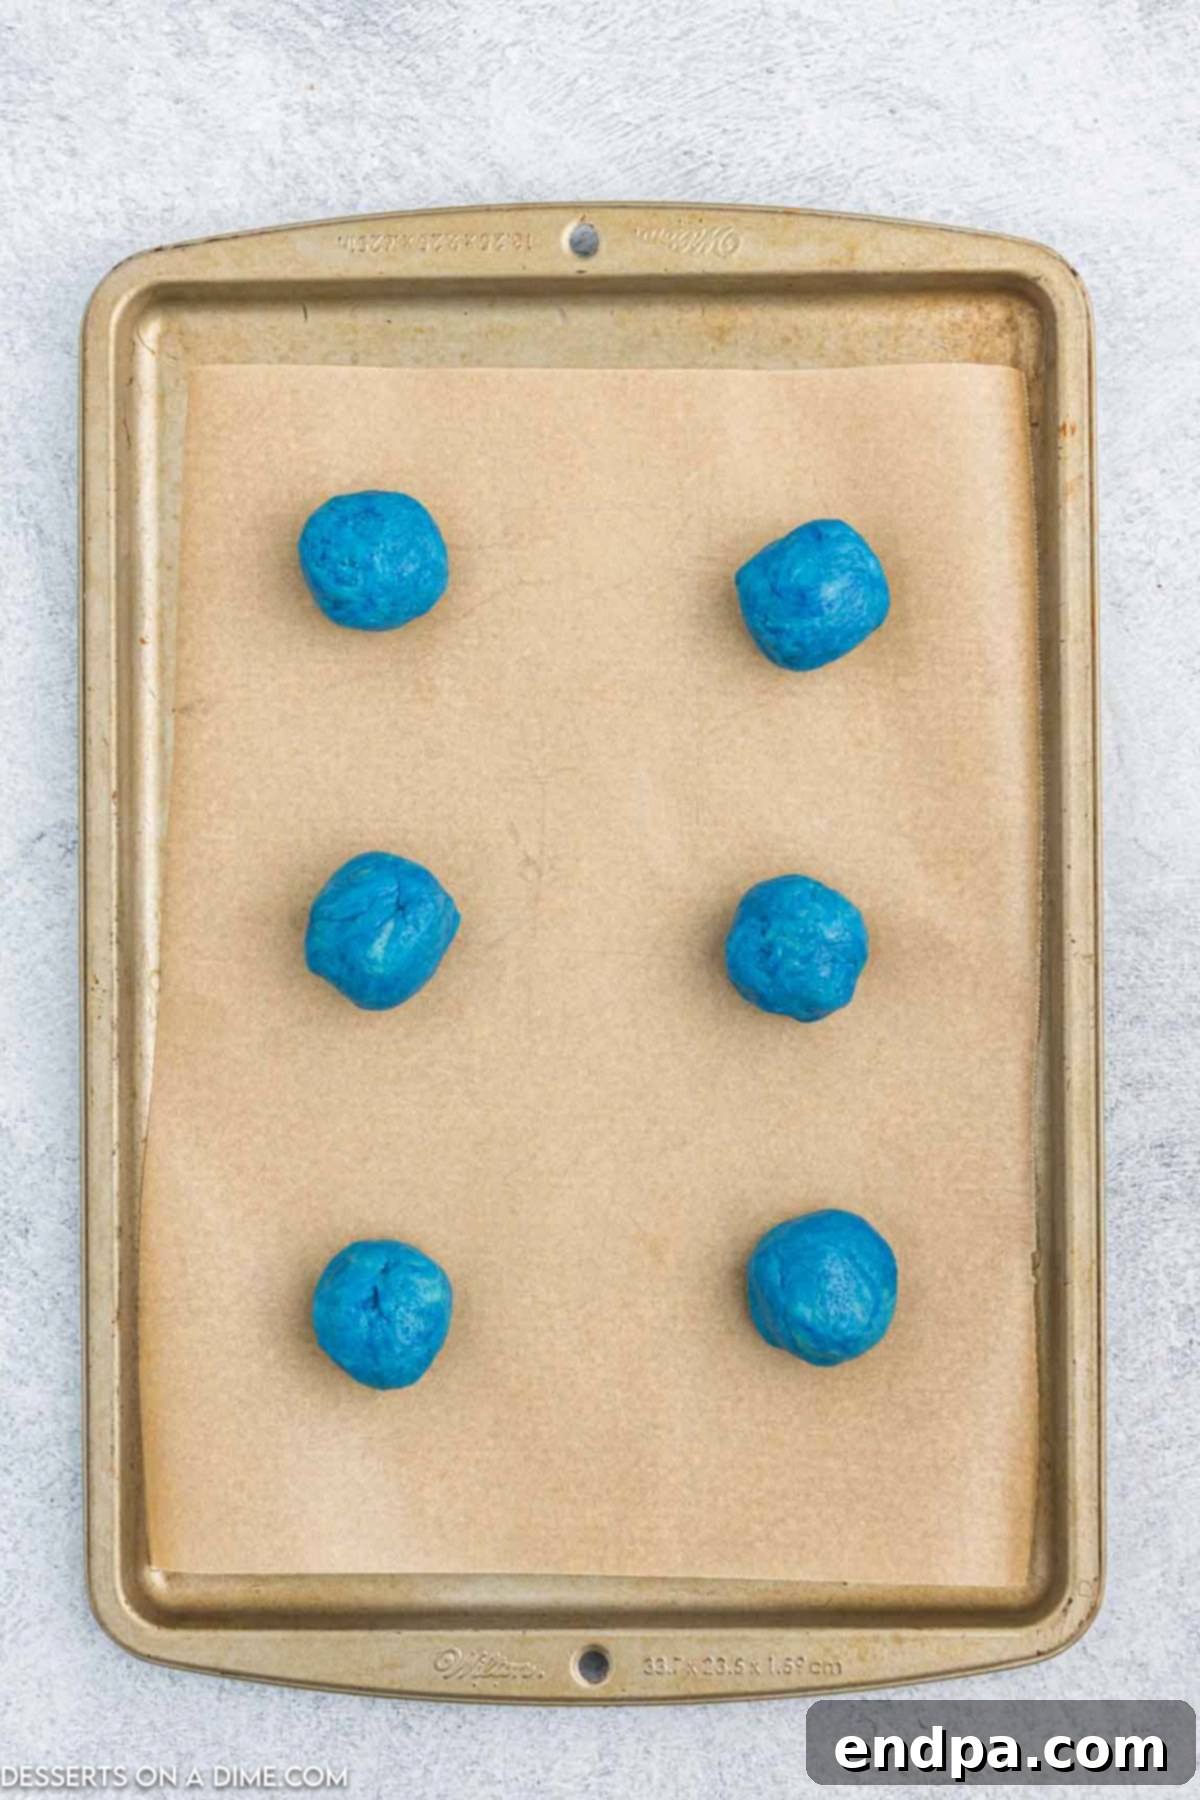
Step 5: Form and Coat the Cookies. Take each colored dough and roll it into 1-inch balls. For an extra pop of flavor and visual appeal, roll each dough ball in a small amount of the remaining Jell-O powder (from the corresponding flavor). This creates a sugary, slightly tart coating that intensifies both the taste and appearance. Place the coated dough balls on your prepared baking sheets, ensuring they are about 2 inches apart to allow for spreading during baking.
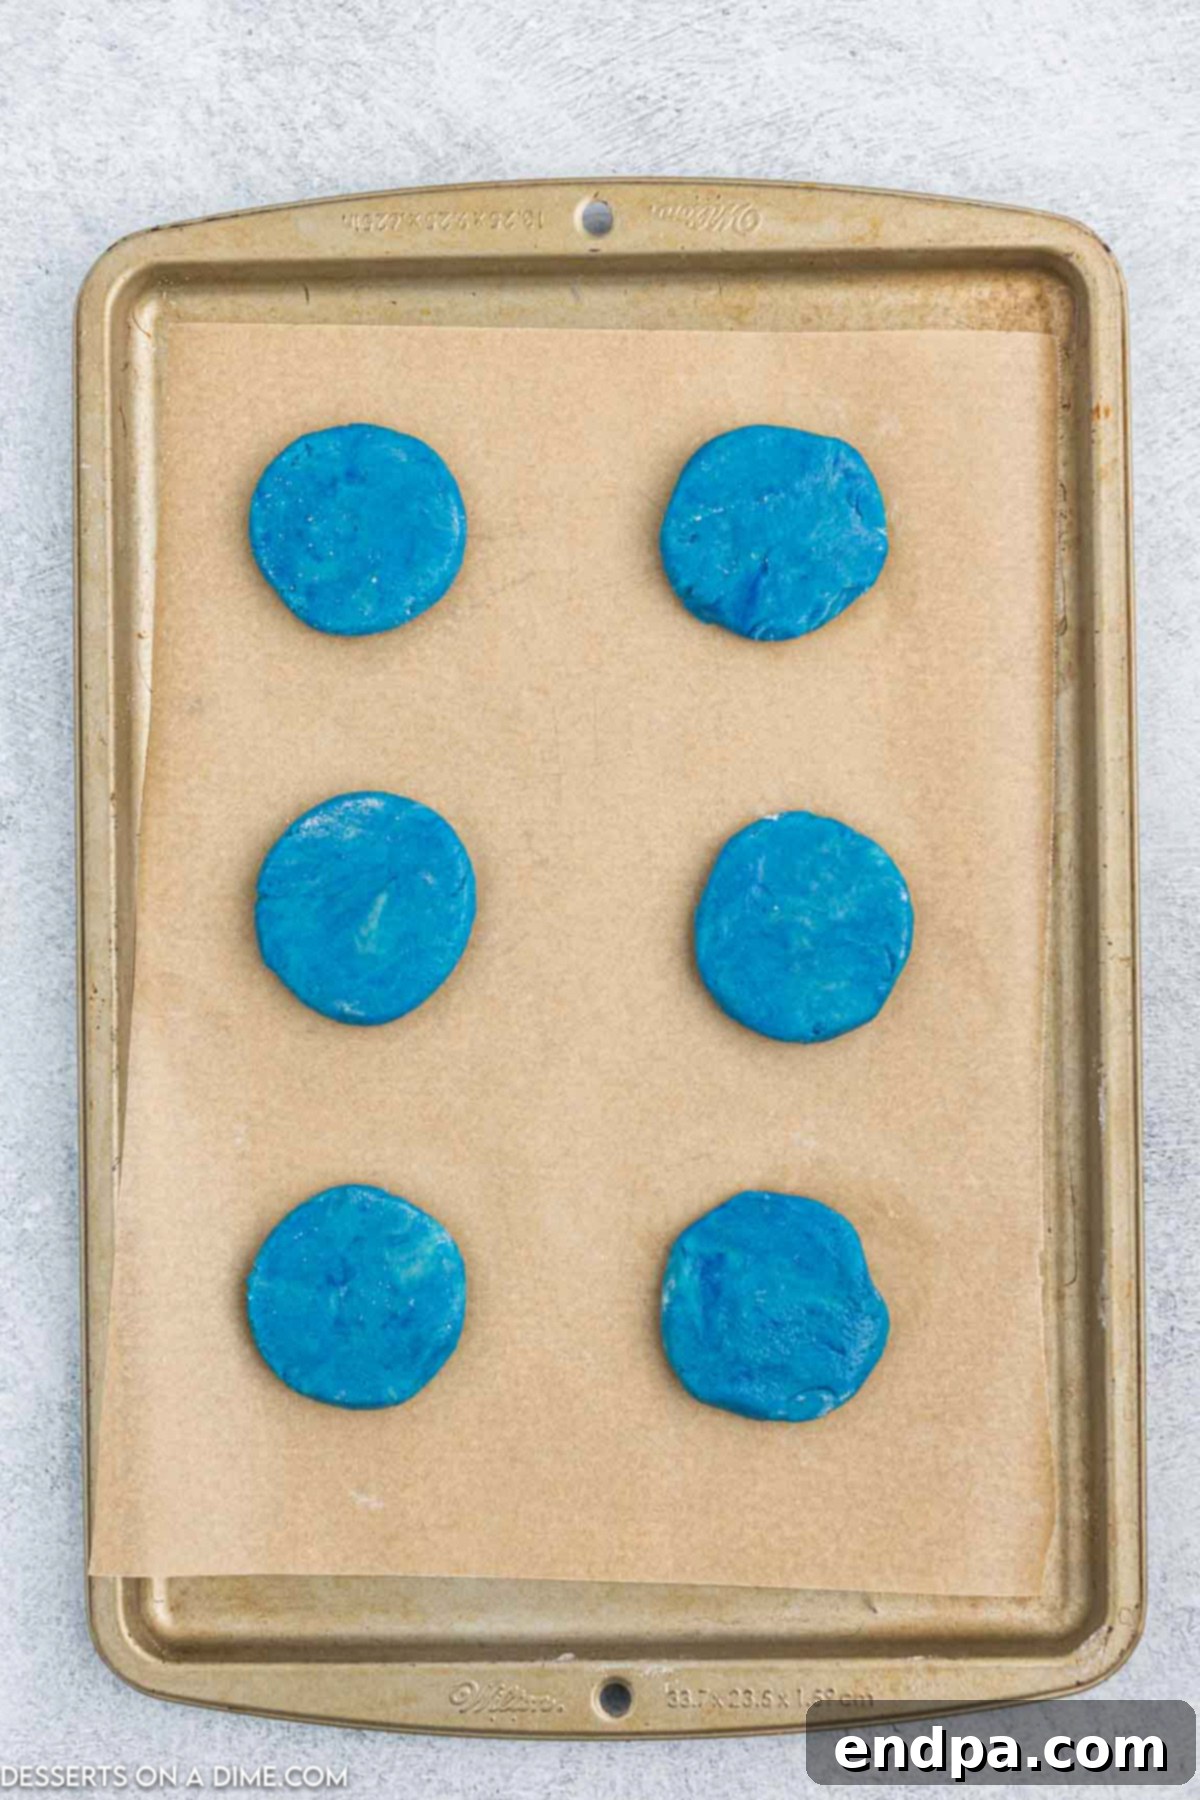
Step 6: Bake the Cookies. Gently flatten each dough ball with the bottom of a glass or the palm of your hand. This helps ensure even baking and creates that classic sugar cookie shape. Bake for 8-10 minutes, or until the edges are just set and slightly golden brown. The centers may still appear soft, but they will firm up as they cool. Avoid overbaking to maintain their soft and chewy texture.
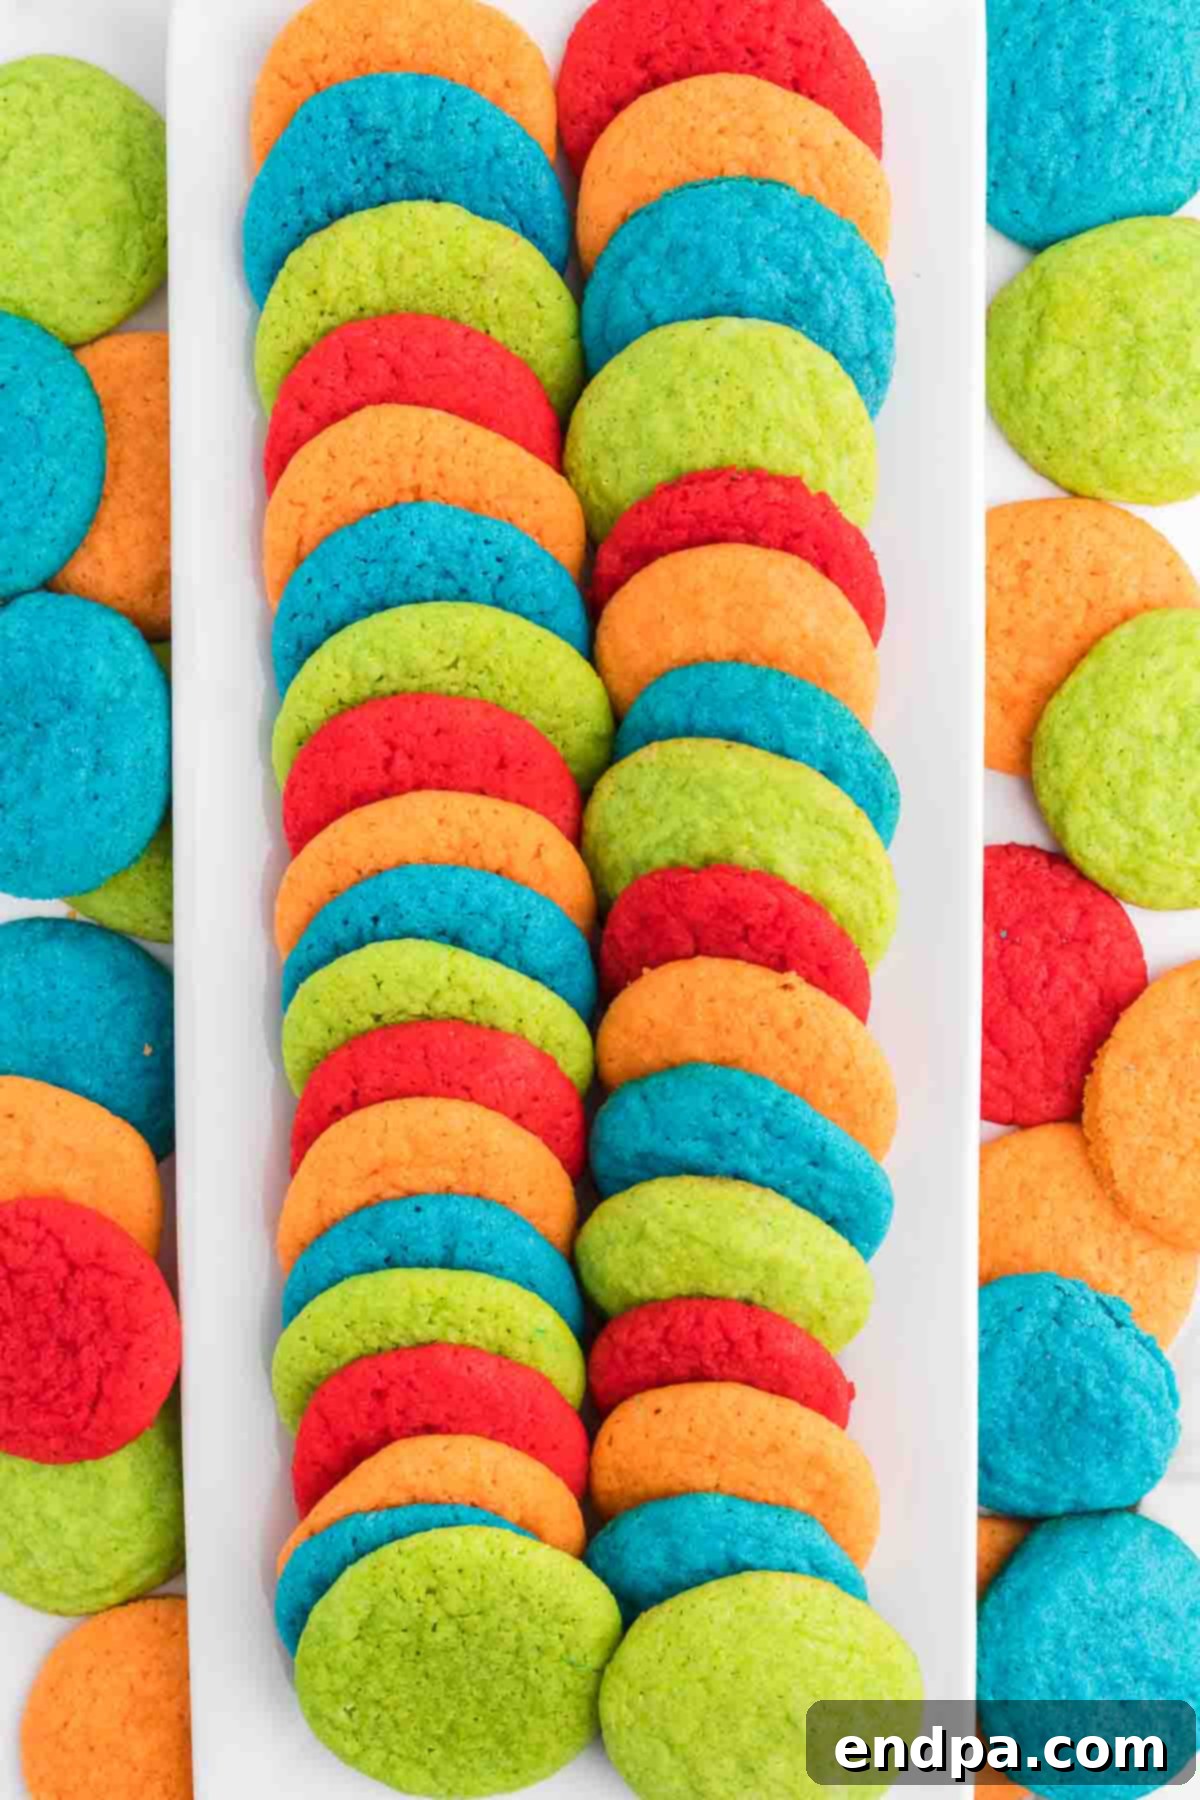
Step 7: Cool and Enjoy. Once baked, remove the cookies from the oven and let them sit on the hot baking sheet for 5 minutes. This allows them to firm up slightly before handling, preventing them from breaking apart. After 5 minutes, carefully transfer the cookies to a wire rack to cool completely. Allowing them to cool fully on a rack ensures they achieve their final texture and prevents sogginess. Once cooled, they are ready to be devoured!
Perfect Storage for Optimal Freshness
Ensuring your Jello Cookies stay soft, flavorful, and fresh long after they’ve come out of the oven is key to enjoying them to their fullest. Proper storage makes all the difference, preserving that delightful chewy texture and vibrant taste for days.
Once your Jello Cookies have cooled completely to room temperature (this is very important to prevent condensation and sogginess), store them in an airtight container. A cookie jar with a tight-fitting lid, a plastic food storage container, or even a zippered freezer bag will work perfectly. Place the container at room temperature, away from direct sunlight or heat sources. Stored this way, your Jello Cookies will remain wonderfully fresh and soft for up to 5 days. You can arrange them in a single layer or stack them with a piece of parchment paper between layers to prevent them from sticking together.
Here’s a little trick for maintaining ultimate moisture: place a fresh slice of plain bread inside the airtight container along with your cookies. The cookies will absorb moisture from the bread, keeping them incredibly soft and chewy, almost as if they were just baked. This simple yet effective method works wonders and is a favorite among experienced bakers for keeping homemade cookies at their peak. Just replace the slice of bread every day or two as it starts to dry out.
With these storage tips, you can enjoy your colorful Jello Cookies for several days, making them an excellent make-ahead treat for parties, lunchboxes, or simply to have on hand for a sweet craving.
Freezing Jello Cookies and Dough
Preparing Jello cookies ahead of time or simply extending their shelf life is incredibly easy thanks to the freezer. You have two fantastic options: freezing the cookie dough or freezing the already baked cookies.
Freezing Cookie Dough Balls:
This is a brilliant method for having fresh-baked cookies on demand with minimal effort. After you’ve divided the dough, mixed in the Jell-O, and rolled the dough into 1-inch balls, but before flattening them, arrange the dough balls on a baking sheet lined with parchment paper. Make sure they don’t touch each other. Flash freeze them for 1 to 2 hours, or until they are solid. This prevents them from sticking together once transferred to a bag. Once frozen, transfer the solid cookie dough balls to a freezer-safe airtight container or a heavy-duty freezer bag. Label with the date and flavor. Frozen cookie dough balls can be stored for up to 2 months.
When you’re ready to bake, you can bake them directly from frozen! Simply place them on a prepared baking sheet and add an additional 1 to 2 minutes to the original baking time. You may also notice they spread a little less, resulting in slightly thicker cookies, which some people prefer. No need to thaw beforehand, making fresh, warm Jello cookies just minutes away!
Freezing Baked Jello Cookies:
If you have leftover baked cookies or want to prepare a large batch in advance, freezing them is also an excellent option. Ensure the cookies have cooled completely to room temperature before freezing. This prevents ice crystals from forming and ruining their texture. Arrange the cooled cookies in a single layer on a baking sheet and flash freeze them for about 30 minutes to an hour, until firm. This initial freeze prevents them from sticking together. Once firm, stack them in a freezer-safe airtight container or a heavy-duty freezer bag. To prevent them from sticking or getting damaged, place a piece of parchment paper between each layer of cookies.
Baked Jello cookies can be stored in the freezer for up to 1 month. When you’re ready to enjoy them, simply remove them from the freezer and allow them to thaw overnight in the refrigerator, or at room temperature for a few hours. Freezing is a fantastic way to enjoy homemade goodness whenever the craving strikes. For more detailed tips on preserving your dough, learn How to Freeze Cookie Dough.
Expert Baking Tips for Jello Cookies
Achieving perfectly baked, vibrant, and delicious Jello Cookies is simple, especially when you keep a few expert tips in mind. These suggestions will help ensure your cookies turn out beautifully every time.
- Utilize a Cookie Scoop for Uniformity: We highly recommend using a cookie scoop to form your dough balls. This isn’t just a matter of convenience; it ensures that each cookie is precisely the same size. Uniformly sized cookies bake more evenly, preventing some from being underbaked while others are overbaked. It also significantly speeds up the process of shaping the dough into perfect 1-inch balls.
- Avoid Overbaking at All Costs: This is perhaps the most crucial tip for tender, chewy cookies. Jello cookies should be removed from the oven when their edges are just barely golden brown and the tops appear set and dry. The centers may still look slightly soft or underbaked, but they will continue to set as they cool on the baking sheet. Overbaking leads to dry, hard cookies, losing that wonderful soft texture we aim for.
- Always Line Your Baking Pan: To guarantee easy release and minimal cleanup, always line your baking sheets with parchment paper or a silicone baking mat. This prevents the cookies from sticking, promotes even baking, and eliminates the need for greasing, which can sometimes affect the cookie’s spread.
- Allow Adequate Setting Time: Once removed from the oven, resist the urge to immediately transfer your cookies to a cooling rack. Allow them to sit on the hot baking sheet for at least 5 minutes. This crucial resting period allows the cookies to firm up and set, making them less prone to breaking when you move them. After 5 minutes, they will be sturdy enough to transfer to a wire rack to cool completely.
- Ensure Butter is Properly Softened: For the best results, your unsalted butter should be genuinely softened to room temperature. This means it should be pliable enough to leave an indentation when gently pressed but not melted or greasy. Properly softened butter creams beautifully with sugar, creating an airy and smooth mixture that is essential for a tender, well-structured cookie dough. If your butter is too cold, it won’t cream properly, and if it’s too warm, the dough might be greasy and the cookies could spread too much.
- Don’t Rush the Cooling Process: While it’s tempting to dig into warm cookies, allowing them to cool completely on a wire rack is important. This helps them firm up to their ideal texture and ensures any coatings or glazes you add later will adhere properly.
- Experiment with Jell-O Flavors: Don’t be afraid to try different Jell-O flavors beyond the common ones. Pining for a unique cookie? Grape, peach, or even a mixed berry Jell-O could create surprisingly delicious and colorful results!
- Chill the Dough (Optional but Recommended): If your kitchen is warm or if you notice the dough is too sticky to handle easily, chilling the dough for 20-30 minutes before rolling can help. This makes it easier to work with and can also help prevent excessive spreading in the oven.
By following these tips, you’re well on your way to baking a batch of Jello Cookies that are not only visually stunning but also incredibly delicious and perfectly textured.
Frequently Asked Questions About Jello Cookies
Here are some common questions and helpful answers to ensure your Jello Cookie baking experience is a complete success:
Can I use a single Jell-O flavor for the entire batch?
Absolutely! While the recipe suggests using four different flavors for a colorful assortment, you can definitely use just one flavor of Jell-O mix for the entire batch. This is perfect if you have a strong favorite or are baking for a themed event where a single color or flavor is desired.
What if I don’t have food coloring? Will the cookies still be vibrant?
The Jell-O mix itself imparts a good amount of color to the dough. Food coloring is entirely optional and is used primarily to intensify the hue for a more striking visual impact. Without it, your cookies will still have a lovely pastel shade, but perhaps not the deep, saturated colors you see in some photos. The flavor will remain just as delicious!
My cookies spread too much. What went wrong?
Several factors can contribute to cookies spreading excessively:
- Butter too warm: Ensure your butter is softened, not melted or greasy.
- Over-creaming butter and sugar: While you want it light and fluffy, overdoing it can incorporate too much air, leading to excessive spreading.
- Incorrect flour measurement: Too little flour will make the dough too wet. Always spoon and level flour.
- Warm dough: If your kitchen is warm or the dough has been sitting out, it might be too soft. Chill the dough for 20-30 minutes before baking.
Can I make the dough ahead of time?
Yes, you can! You can prepare the dough, divide it, and mix in the Jell-O flavors. Then, wrap each colored dough tightly in plastic wrap and refrigerate for up to 2-3 days. When ready to bake, let the dough sit at room temperature for about 15-20 minutes to soften slightly before rolling into balls and baking. Alternatively, you can freeze the dough balls as described in the “How to Freeze” section.
Do Jello cookies taste overly artificial or sweet?
The Jell-O mix adds a wonderful fruity flavor that is distinct but typically not overly artificial, especially when balanced with the sugar cookie base. The sweetness is well-balanced, and the Jell-O adds a pleasant tang. If you’re concerned about sweetness, you can use sugar-free Jell-O varieties.
How can I make sure all my cookies bake evenly?
For even baking, always use a cookie scoop for uniform size, preheat your oven completely, and rotate your baking sheets halfway through the baking time. Also, avoid overcrowding the baking sheets, as this can affect air circulation and lead to uneven baking.
More Irresistible Cookie Recipes
If you’ve fallen in love with the ease and deliciousness of these Jello Cookies, you’re in for a treat! We have a fantastic collection of other simple and satisfying cookie recipes that are perfect for any occasion. Expand your baking repertoire with these crowd-pleasing favorites:
- Brown Sugar Cookie Recipe: Indulge in the rich, caramel-like flavor of these wonderfully chewy brown sugar cookies. A delightful twist on a classic!
- M&M Cookies: A colorful and fun cookie packed with everyone’s favorite candy-coated chocolate. Perfect for kids and adults alike!
- Cream Cheese Cookies Recipe: Discover the secret to incredibly soft, rich, and slightly tangy cookies with this simple cream cheese cookie recipe.
- Lemon Sugar Cookies Recipe: Brighten your day with these zesty and refreshing lemon-infused sugar cookies. They’re bursting with citrus flavor!
Each of these recipes offers a unique flavor profile and a straightforward baking process, ensuring your kitchen is always filled with the aroma of freshly baked cookies. Happy baking!
Pin
Jello Cookies Recipe
Ingredients
- 1 1/2 cups unsalted butter softened
- 1 cup sugar
- 2 eggs
- 1 teaspoon vanilla
- 3 1/4 cups all-purpose flour
- 1 teaspoon baking powder
- 1/2 teaspoon baking soda
- 4 Jell-o Mix 3 oz each, different flavors
- Food Coloring optional
Instructions
- Preheat the oven to 350 degrees F.
- In a large mixing bowl, cream together the butter with the sugar until the mixture is light and fluffy.
- Then add in the eggs (1 at a time) and the vanilla extract.
- In a separate mixing bowl, whisk together the flour, baking powder and baking soda.
- Then stir the dry ingredients into the wet ingredients until a dough is formed.
- Then divide the dough evenly into 4 different mixing bowls.
- Add 2 Tablespoons of each Jell-o mixture into each of the mixing bowls. Then add a few drops of food coloring into each dough as well (the same color as the Jell-O). Then knead each of the doughs until the Jell-o is mixed in and the dough is a vibrant color
- Roll the dough into 1 inch balls and roll them in the remaining jell-o powder.
- Then place on a baking sheet approximately 2 inches apart and flatten the dough out with the bottom of a glass.
- Bake for 8-10 minutes until the edges are set and slightly golden brown.
- Let the cookies sit on the baking sheet for 5 minutes.
- Then move them to a wire rack to cool completely.
Recipe Notes
Keep a slice of bread in the container for the cookies to keep them moist.
Nutrition Facts
We hope you try these yummy Jello Cookies and discover a new favorite! Don’t forget to leave a star rating and comment once you’ve baked your batch. Enjoy!
