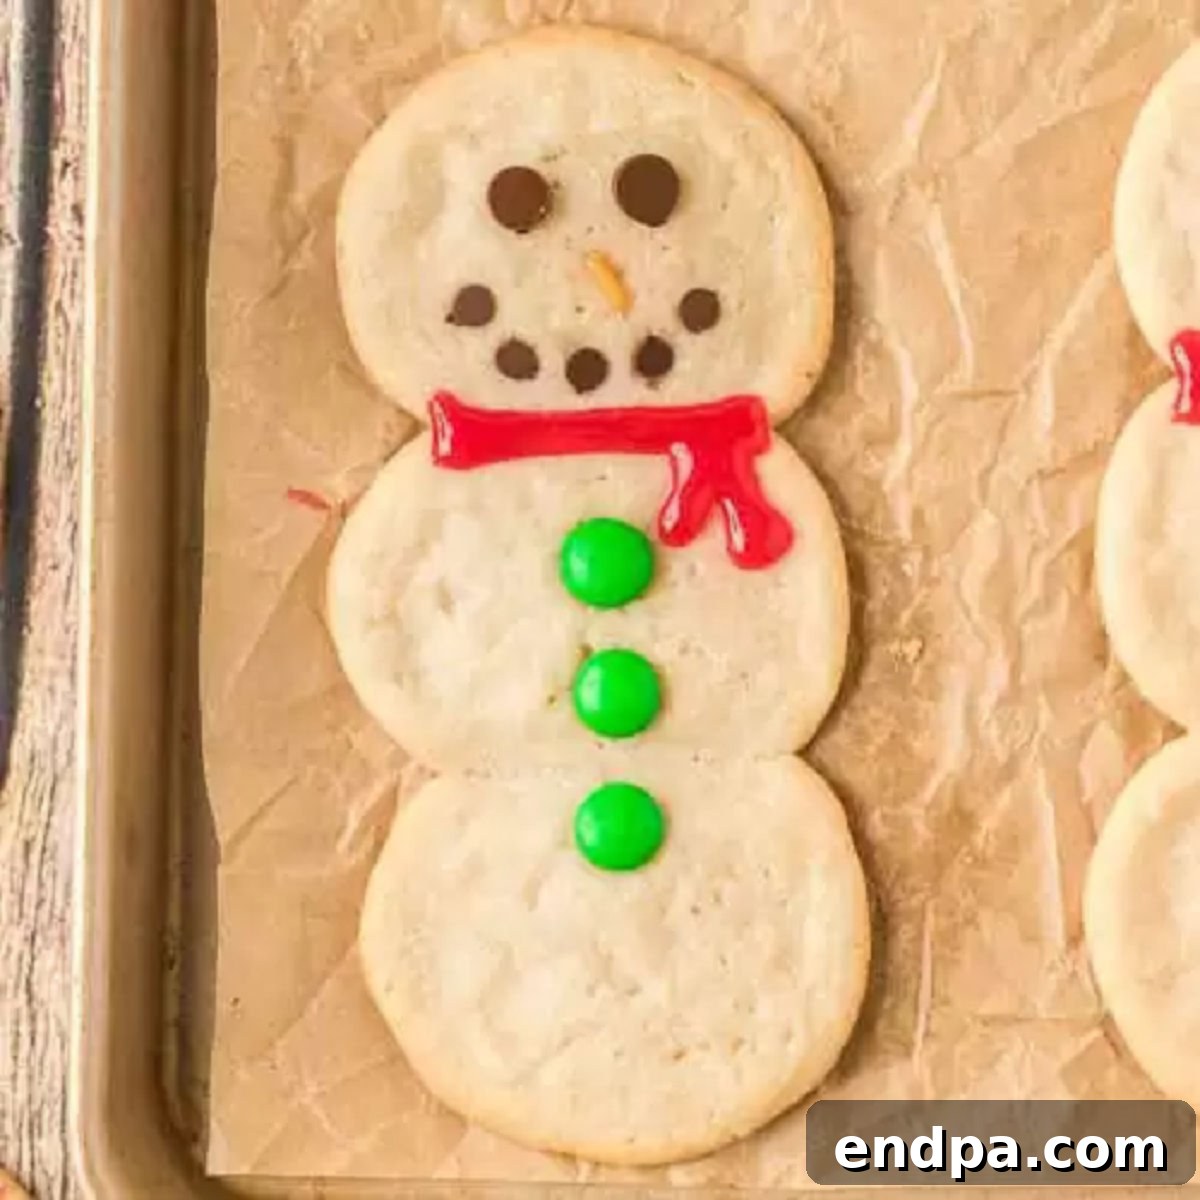
Easy Snowman Cookies Recipe: A Whimsical Holiday Treat for All Ages
Step into a world of winter wonder with our delightful and whimsical Easy Snowman Cookies Recipe. These soft, sweet sugar cookies are not only incredibly impressive in appearance, bringing smiles to every face, but they are also remarkably quick and simple to prepare. Perfect for busy holiday seasons, this recipe allows you to create festive masterpieces without the stress, making it an ideal choice for bakers of all skill levels.
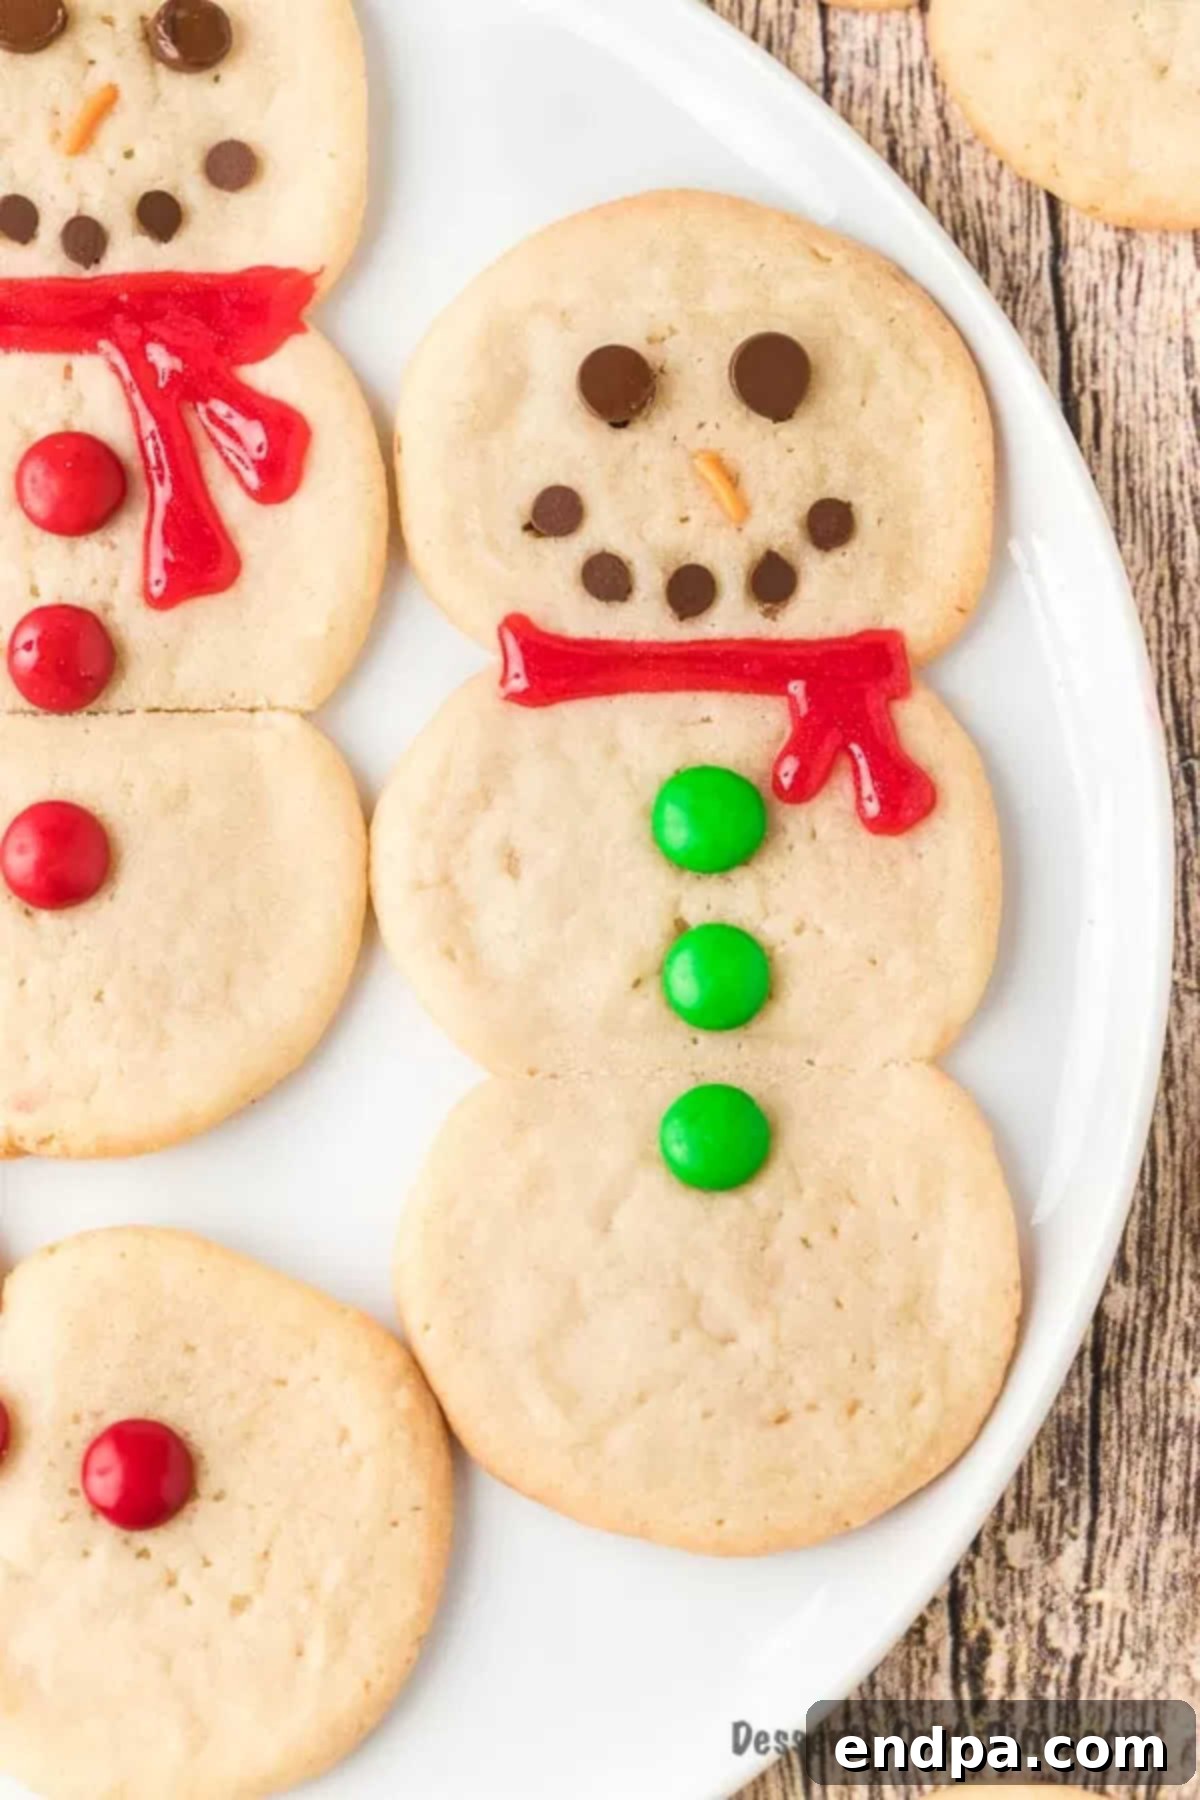
These enchanting Christmas Cookies are the quintessential holiday dessert, perfect for spreading cheer at festive parties, enriching a cozy movie night, or adding a touch of magic to your family gatherings. There’s something undeniably charming about snowman-themed treats, and this recipe captures that joy effortlessly. If you’ve previously enjoyed making our Christmas Tree Sugar Cookies, then this new snowman variation is guaranteed to be an instant hit, quickly becoming a cherished part of your annual holiday baking traditions. It’s a fantastic way to celebrate the season with edible artistry that everyone will adore.
Table of contents
- Why These Snowman Cookies Are a Must-Make
- Essential Ingredients for Perfect Snowman Cookies
- Creative Substitutions and Additions to Customize Your Snowmen
- Step-by-Step Guide: How to Make Snowman Cookies
- Frequently Asked Questions About Snowman Cookies
- Discover More Festive Snowman Recipes
Why These Snowman Cookies Are a Must-Make
Our Easy Snowman Cookies are more than just a dessert; they’re an experience waiting to happen. Here’s why this recipe deserves a top spot on your holiday baking list:
- A Delightful Family Activity: Baking these charming snowman cookies is an incredibly fun activity for all ages. Gather the family, put on some holiday music, and let everyone join in. Kids especially love shaping the dough and adding the decorative features, turning a simple baking session into a cherished memory and a wonderful opportunity for creativity. It’s a tasty treat that brings joy both in the making and the eating!
- The Ultimate Cookie Exchange Favorite: If you’re participating in a holiday cookie exchange, these snowman cookies are a guaranteed showstopper. Their unique shape and adorable decorations make them stand out from the crowd. They’re not only impressive to look at but also incredibly delicious and easy to transport, ensuring they’ll be a coveted item among fellow cookie enthusiasts. Prepare for compliments and requests for the recipe!
- Budget-Friendly Baking: Creating beautiful and festive treats doesn’t have to break the bank. This recipe utilizes simple, readily available, and inexpensive ingredients, especially if you opt for store-bought cookie dough. You can achieve stunning results without needing fancy equipment or rare components, making holiday baking accessible and enjoyable for everyone.
- Effortlessly Quick Preparation: In the hustle and bustle of the holiday season, time is a precious commodity. This recipe shines because it delivers impressive results with minimal effort and time commitment. From prep to decorating, you can have a batch of these adorable snowman cookies ready in minutes, allowing you more time to enjoy the festivities.
- Infinitely Customizable: While we provide a fantastic base recipe, these cookies are incredibly versatile. You can easily adapt them to suit different tastes, themes, or occasions. Experiment with various frostings, candies, and sprinkles to make each snowman unique, reflecting your personal style or celebrating different winter events beyond Christmas.
Essential Ingredients for Perfect Snowman Cookies
Crafting these cheerful snowman cookies requires just a few key ingredients. We prioritize simplicity without compromising on flavor or visual appeal:
- Refrigerated Sugar Cookie Dough: For ultimate convenience and speed, we recommend using your favorite brand of pre-made refrigerated sugar cookie dough. This saves significant time on mixing and chilling, allowing you to jump straight into shaping and baking. Ensure it’s a high-quality dough for the best taste and texture.
- Red Gel Icing: This vibrant, easy-to-use icing in a tube is perfect for drawing delicate details like scarves, smiles, or even rosy cheeks. Its precise applicator makes decorating simple, even for novice bakers. The bold red color truly pops against the white cookie, creating a festive contrast.
- Chocolate Chips: Standard-sized chocolate chips are ideal for creating the snowman’s eyes and buttons. Choose a good quality brand for a rich chocolate flavor that complements the sweet sugar cookie base. Their uniform size ensures consistent decoration.
- Mini Chocolate Chips: These tiny morsels are essential for crafting the snowman’s charming mouth. Their small size fits perfectly on the “face” portion of the cookie, allowing for detailed expressions that bring your snowmen to life.
- Red and Green M&M’s: A handful of seasonal red and green M&M’s adds a burst of color and fun. These can be used for extra buttons, hat details, or any other creative accents you envision for your festive snowmen.
Remember, the complete ingredient list with precise measurements can be found in the recipe card below.
Creative Substitutions and Additions to Customize Your Snowmen
One of the best aspects of this recipe is its flexibility! Feel free to get creative and personalize your snowman cookies with these simple substitutions and additions:
- Cookie Dough Variations: While store-bought refrigerated dough offers unmatched convenience, don’t hesitate to use your favorite homemade sugar cookie recipe or a trusted mix, such as Betty Crocker. If making from scratch or a mix, consider adding a dash of almond extract or clear vanilla extract to enhance the flavor profile and keep the dough white, ensuring a pristine snowman base.
- M&M’s and Candy Options: We love using traditional holiday red and green M&M’s for a classic festive look. However, you can adapt the colors to suit any occasion! Blue M&M’s would be beautiful for a January theme, or you could use pastel colors for a winter wonderland party. Beyond M&M’s, any similar-sized small candy can work wonders for buttons, eyes, or other embellishments. Skittles, tiny gummy candies, or even small jelly beans offer a variety of textures and colors.
- Icing and Frosting Alternatives: Instead of, or in addition to, gel icing, explore other frosting options for decorating. A classic royal icing recipe allows for intricate details and a smooth, hard finish. Alternatively, homemade cream cheese frosting offers a softer, tangier flavor. Both can be easily colored with gel food coloring to create vibrant scarves, facial features, and buttons. Having a few disposable piping bags and different tips on hand will give you excellent control for precise designs.
- Nose Inspiration: For the snowman’s iconic carrot nose, consider using small orange sprinkles, a tiny sliver of dried apricot, or shaping a small piece of orange-colored icing. A mini Reese’s Pieces or an orange M&M also works wonderfully to add that cheerful pop of color.
- Sparkling Sprinkles and Edible Glitter: Elevate your snowmen with a dash of sparkle! Before your icing sets, sprinkle on some white, silver, or blue edible glitter for a shimmering, snowy effect. You can also add colorful sprinkles to outline hats, create polka-dot scarves, or simply scatter them for extra cheer.
- Adding Pretzel Stick Arms: For an extra touch of whimsy, insert small pretzel sticks into the sides of the middle cookie body to create arms. This simple addition adds character and an appealing textural contrast, making your snowmen even more charming.
- “Melted” Snowman Effect: For a fun twist, place a large marshmallow on top of each baked cookie while it’s still warm, allowing it to soften and slightly “melt” over the cookie. Once cooled, decorate with eyes, nose, and a scarf for an adorable Melted Snowman Cookies look.
- Hats and Earmuffs: Get creative with hats! Use a small piece of chocolate wafer, a mini Oreo, or even a square of dark chocolate for a top hat. Mini marshmallows, two small candies, and a thin line of icing can form cute earmuffs.
Step-by-Step Guide: How to Make Snowman Cookies
Creating these adorable snowman cookies is a breeze with our clear, easy-to-follow instructions. Let’s get baking!
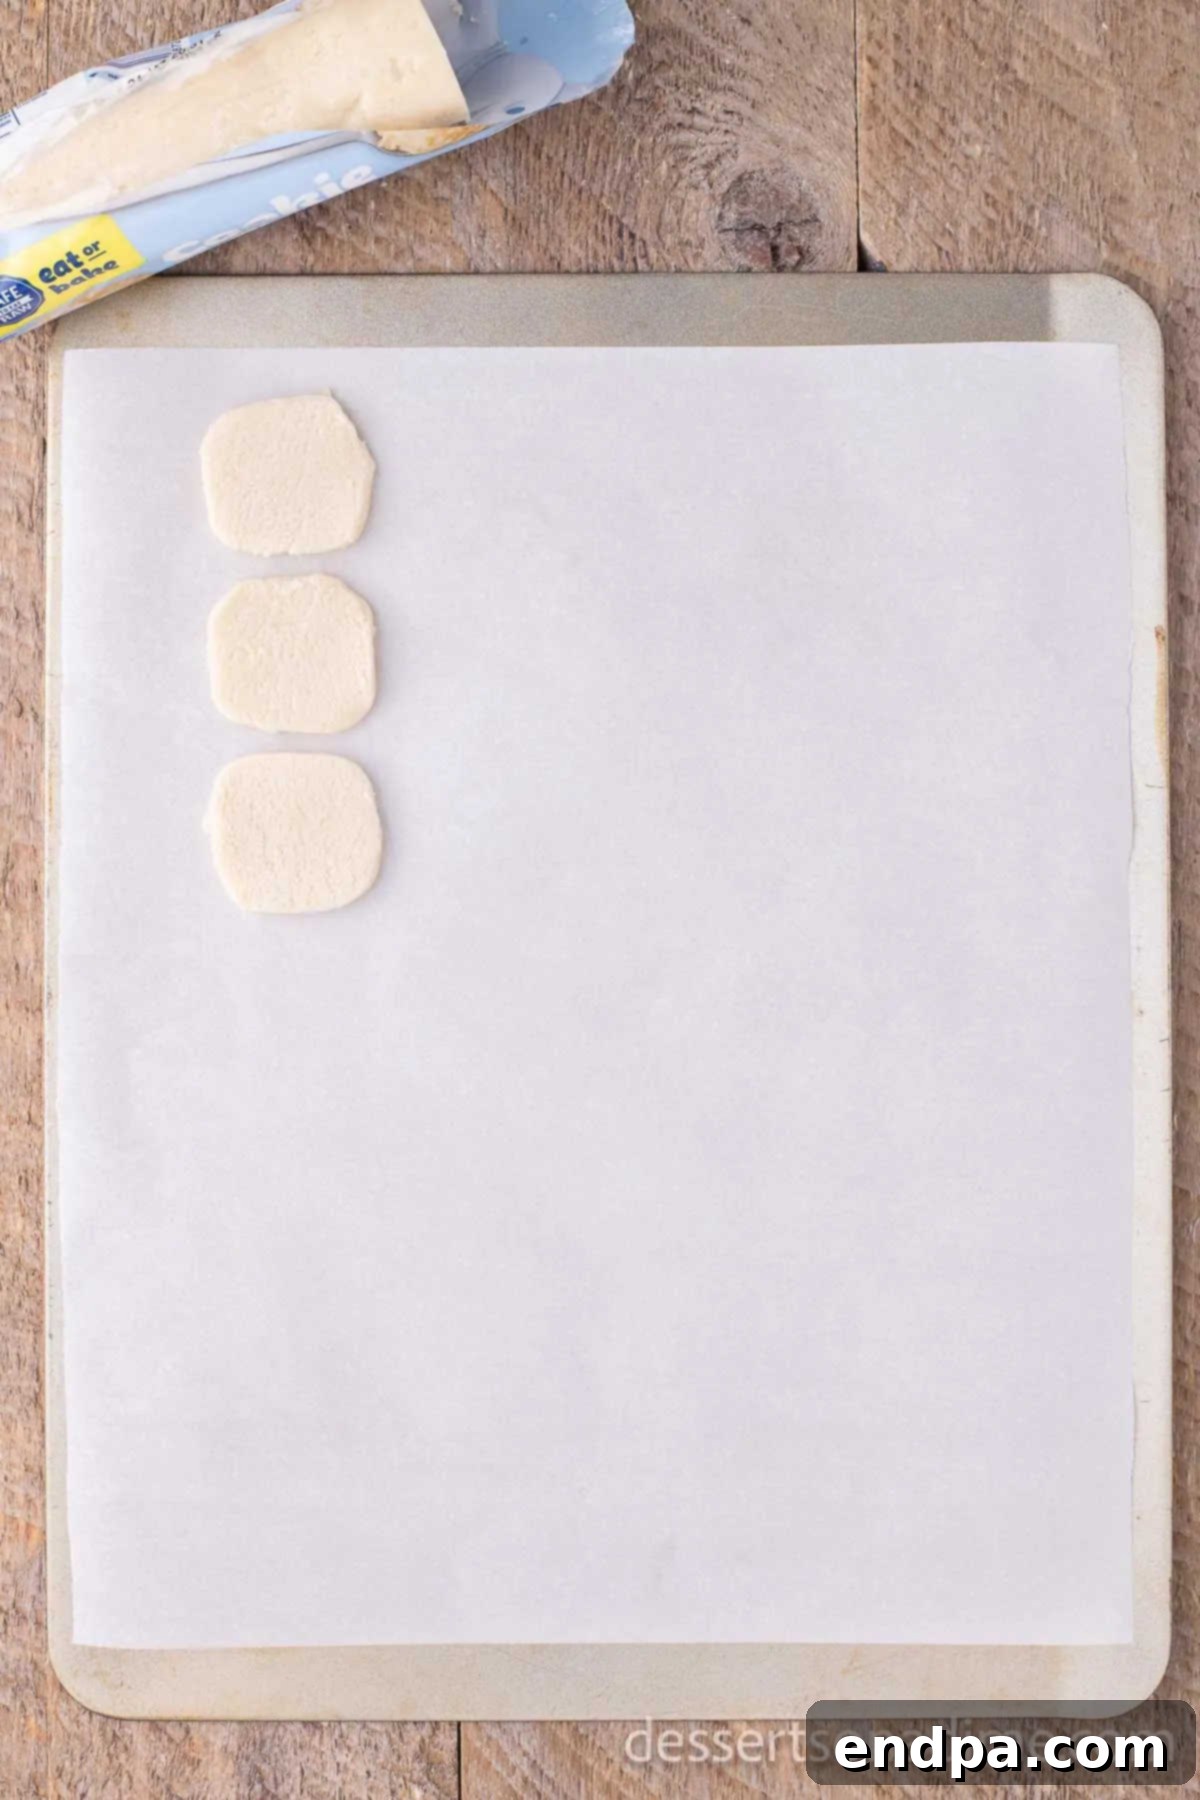
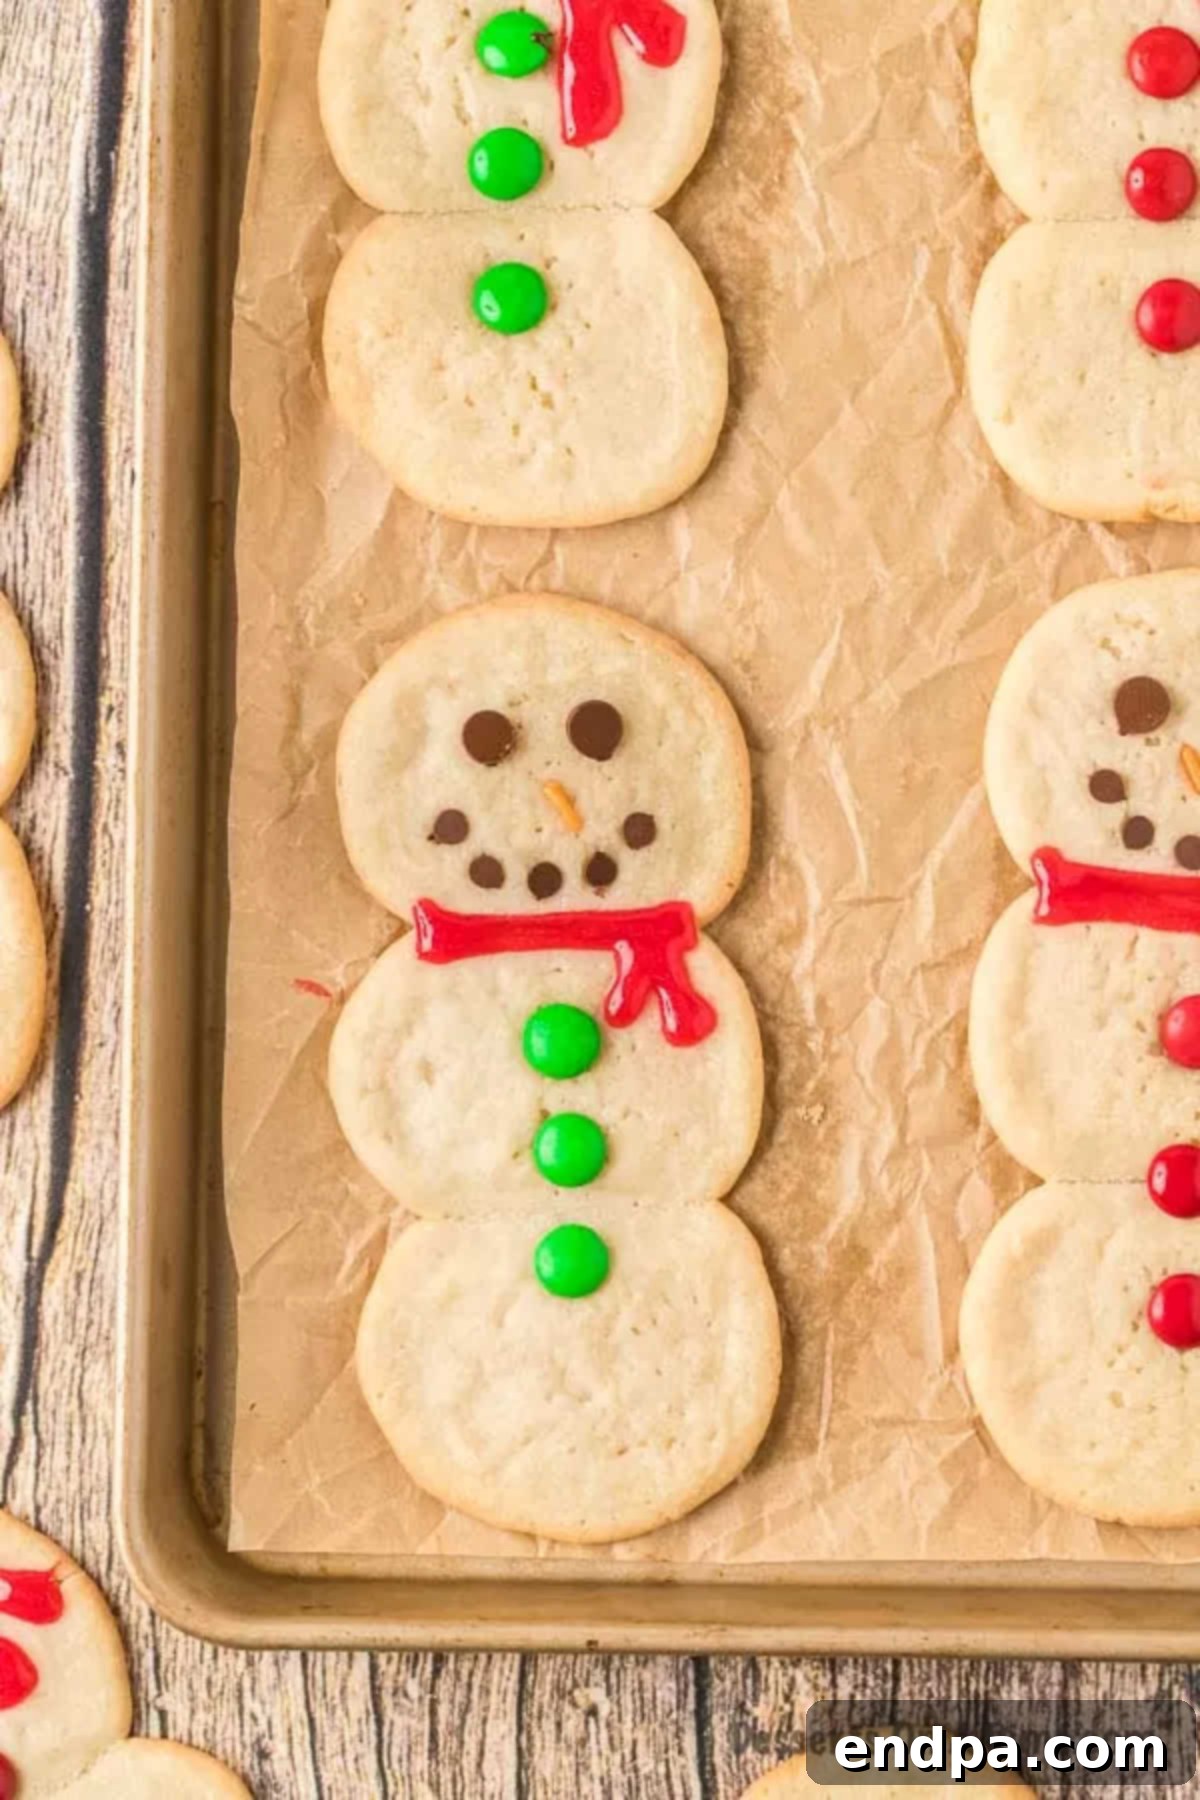
Step 1: Arrange the Dough. Begin by preheating your oven according to the instructions on your refrigerated sugar cookie dough package. While the oven heats, line a large baking sheet with parchment paper. This crucial step prevents sticking and makes for incredibly easy cleanup. Carefully place three portions of cookie dough together, forming a vertical snowman shape on the lined baking sheet. Ensure the edges of the dough balls are touching slightly so they bake together into a single, cohesive snowman figure.
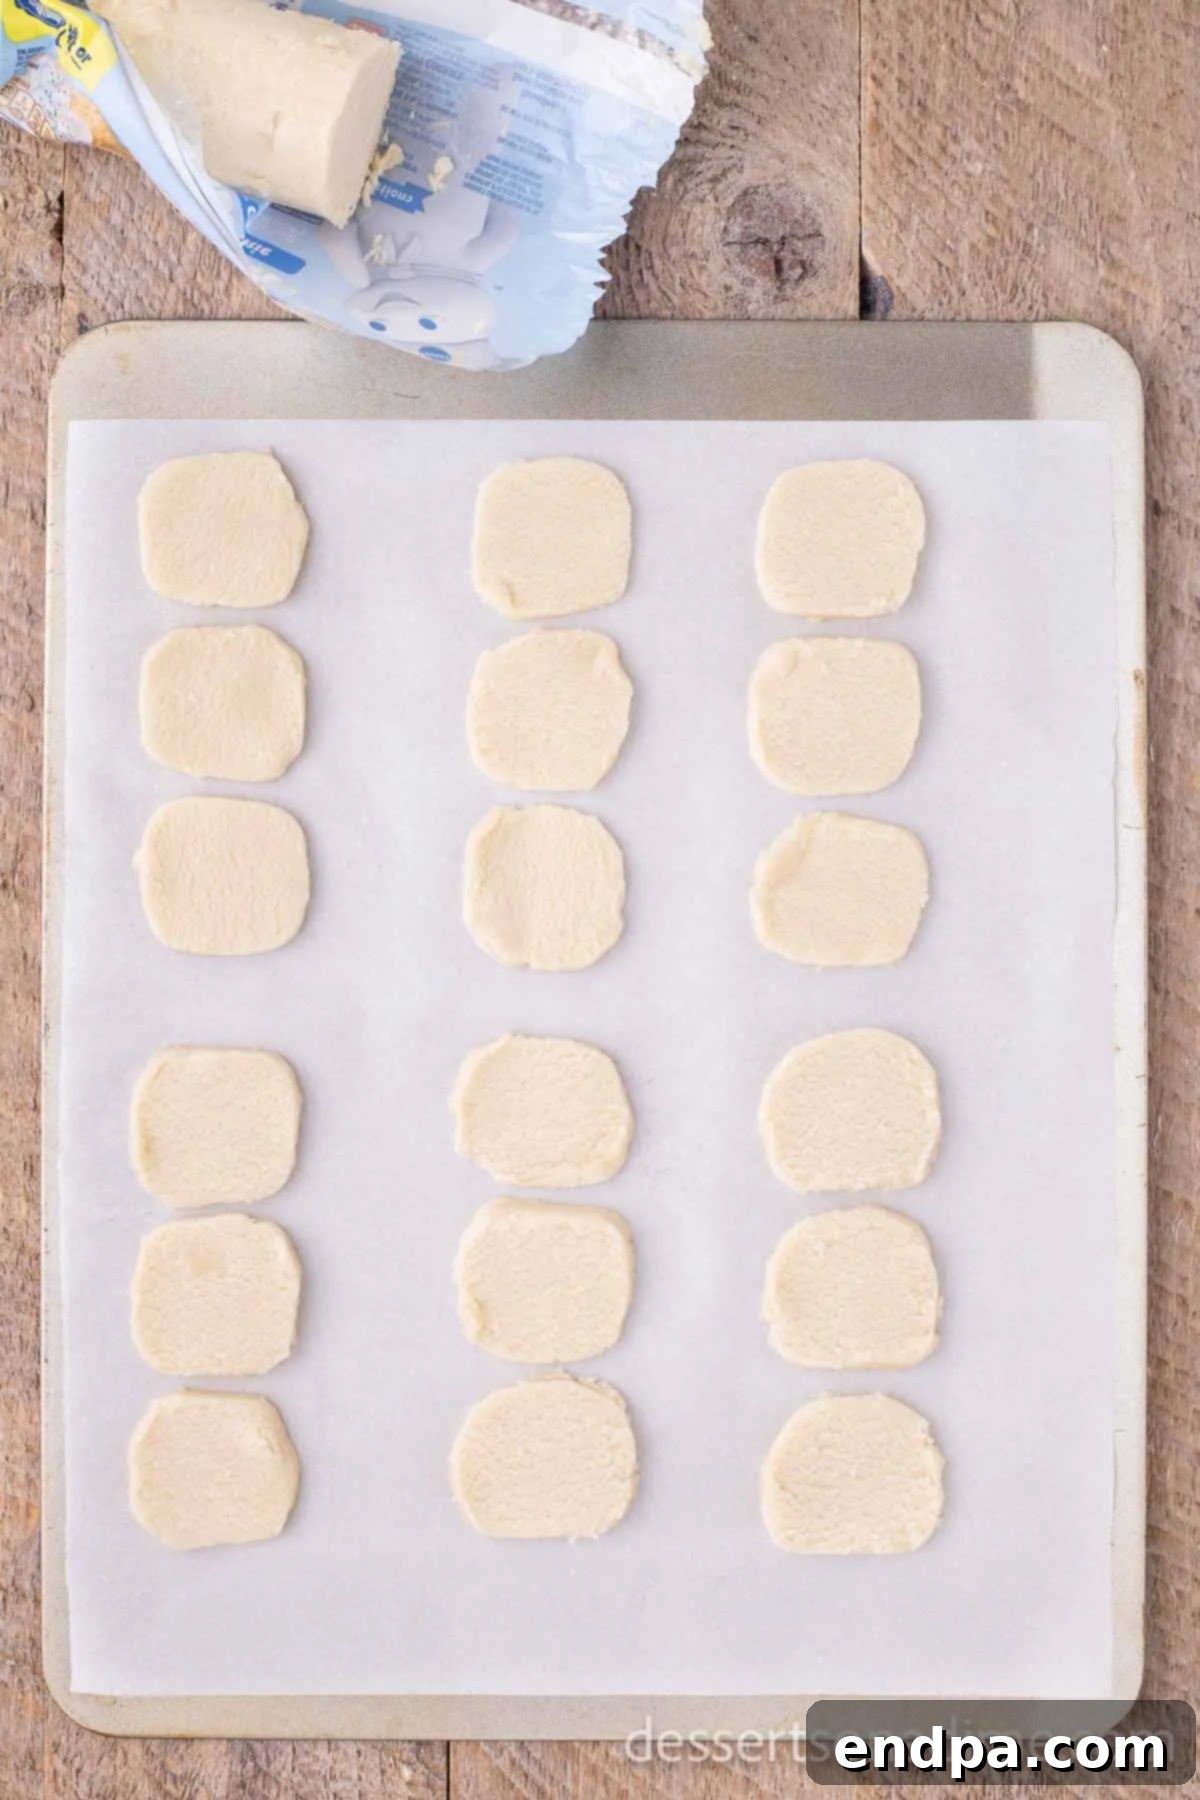
Step 2: Proper Spacing. For optimal baking and spread, make sure each snowman arrangement is approximately ½ inch apart from other cookies on the baking sheet. Using a large baking sheet allows ample space for the cookies to expand without merging into one giant cookie blob. The parchment paper isn’t just for easy cleaning; it also helps the cookies bake evenly and prevents burnt bottoms, ensuring a perfectly light and fluffy texture.
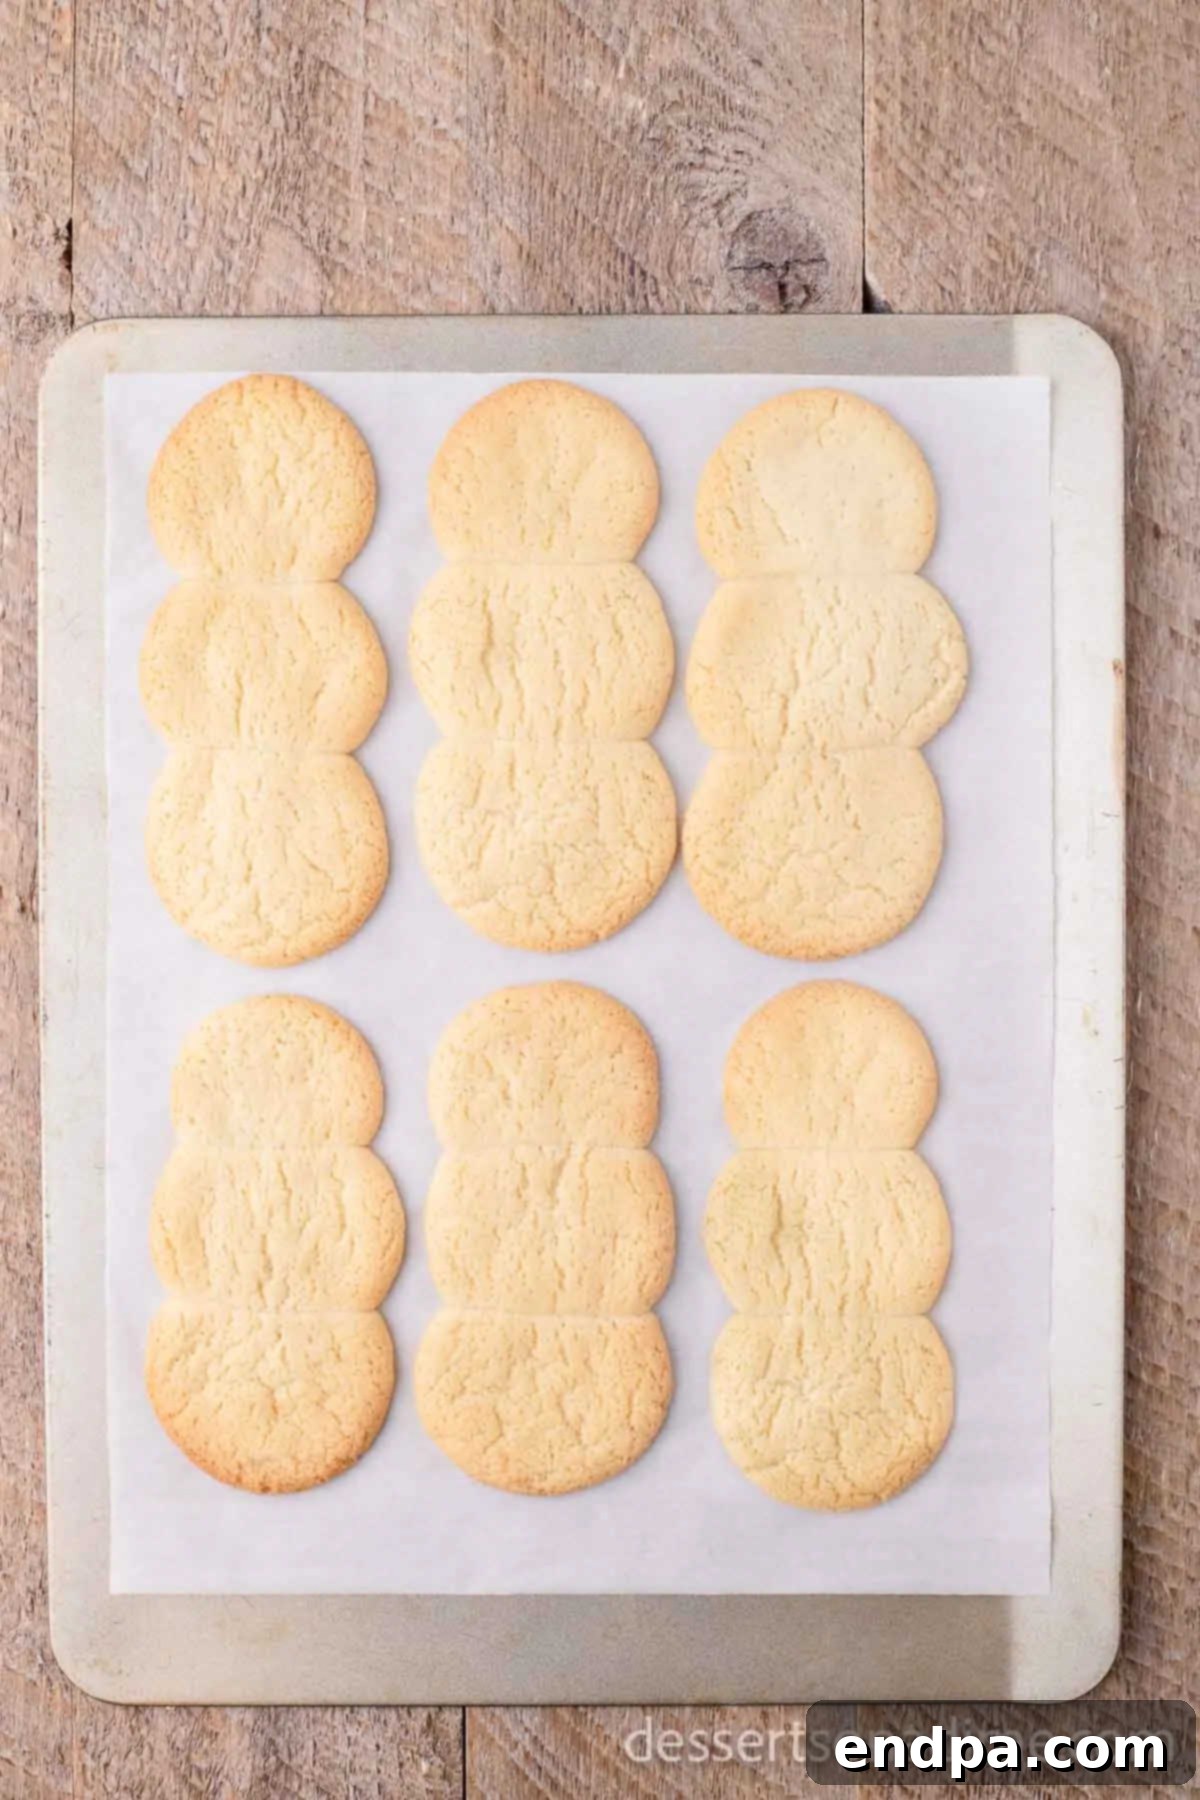
Step 3: Bake to Perfection. Bake the snowman cookies according to the precise directions on your cookie dough package. Keep a close eye on them, removing them from the oven once they are lightly golden brown around the edges, typically after 8-12 minutes depending on your oven and dough type. They will be beautifully light, fluffy, and slightly chewy—the perfect canvas for your decorations.
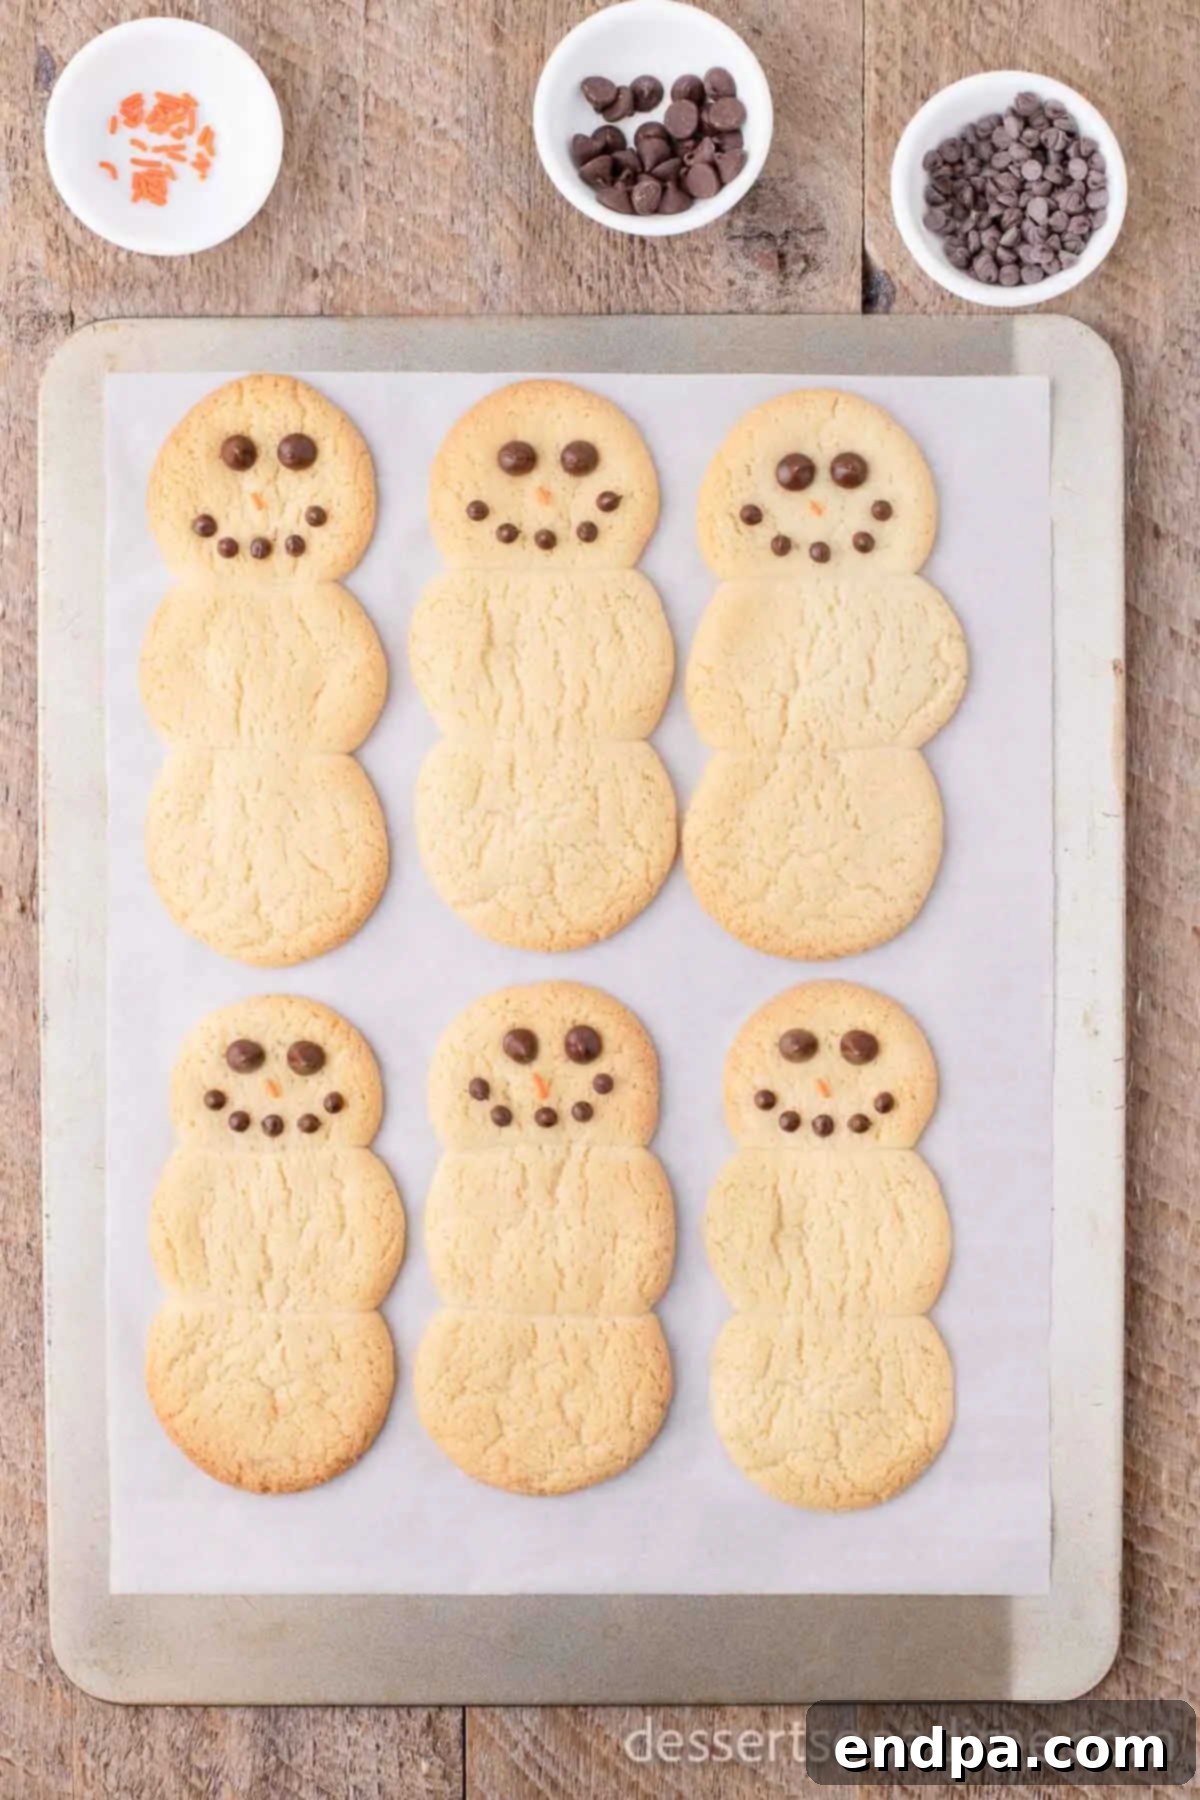
Step 4: Cool and Prepare for Decoration. Once baked, promptly remove the cookies from the hot oven. Allow them to cool on the baking sheet for a few minutes before carefully transferring them to a wire cooling rack to cool completely. This cooling process is crucial! While the cookies are still slightly warm (not hot!), you can begin to place the chocolate chips for the eyes and the mini chocolate chips for the mouth, as the warmth will help them adhere. However, it’s best to allow the cookies to cool completely before applying any gel icing or elaborate frosting, as heat can cause icing to melt and spread unevenly.
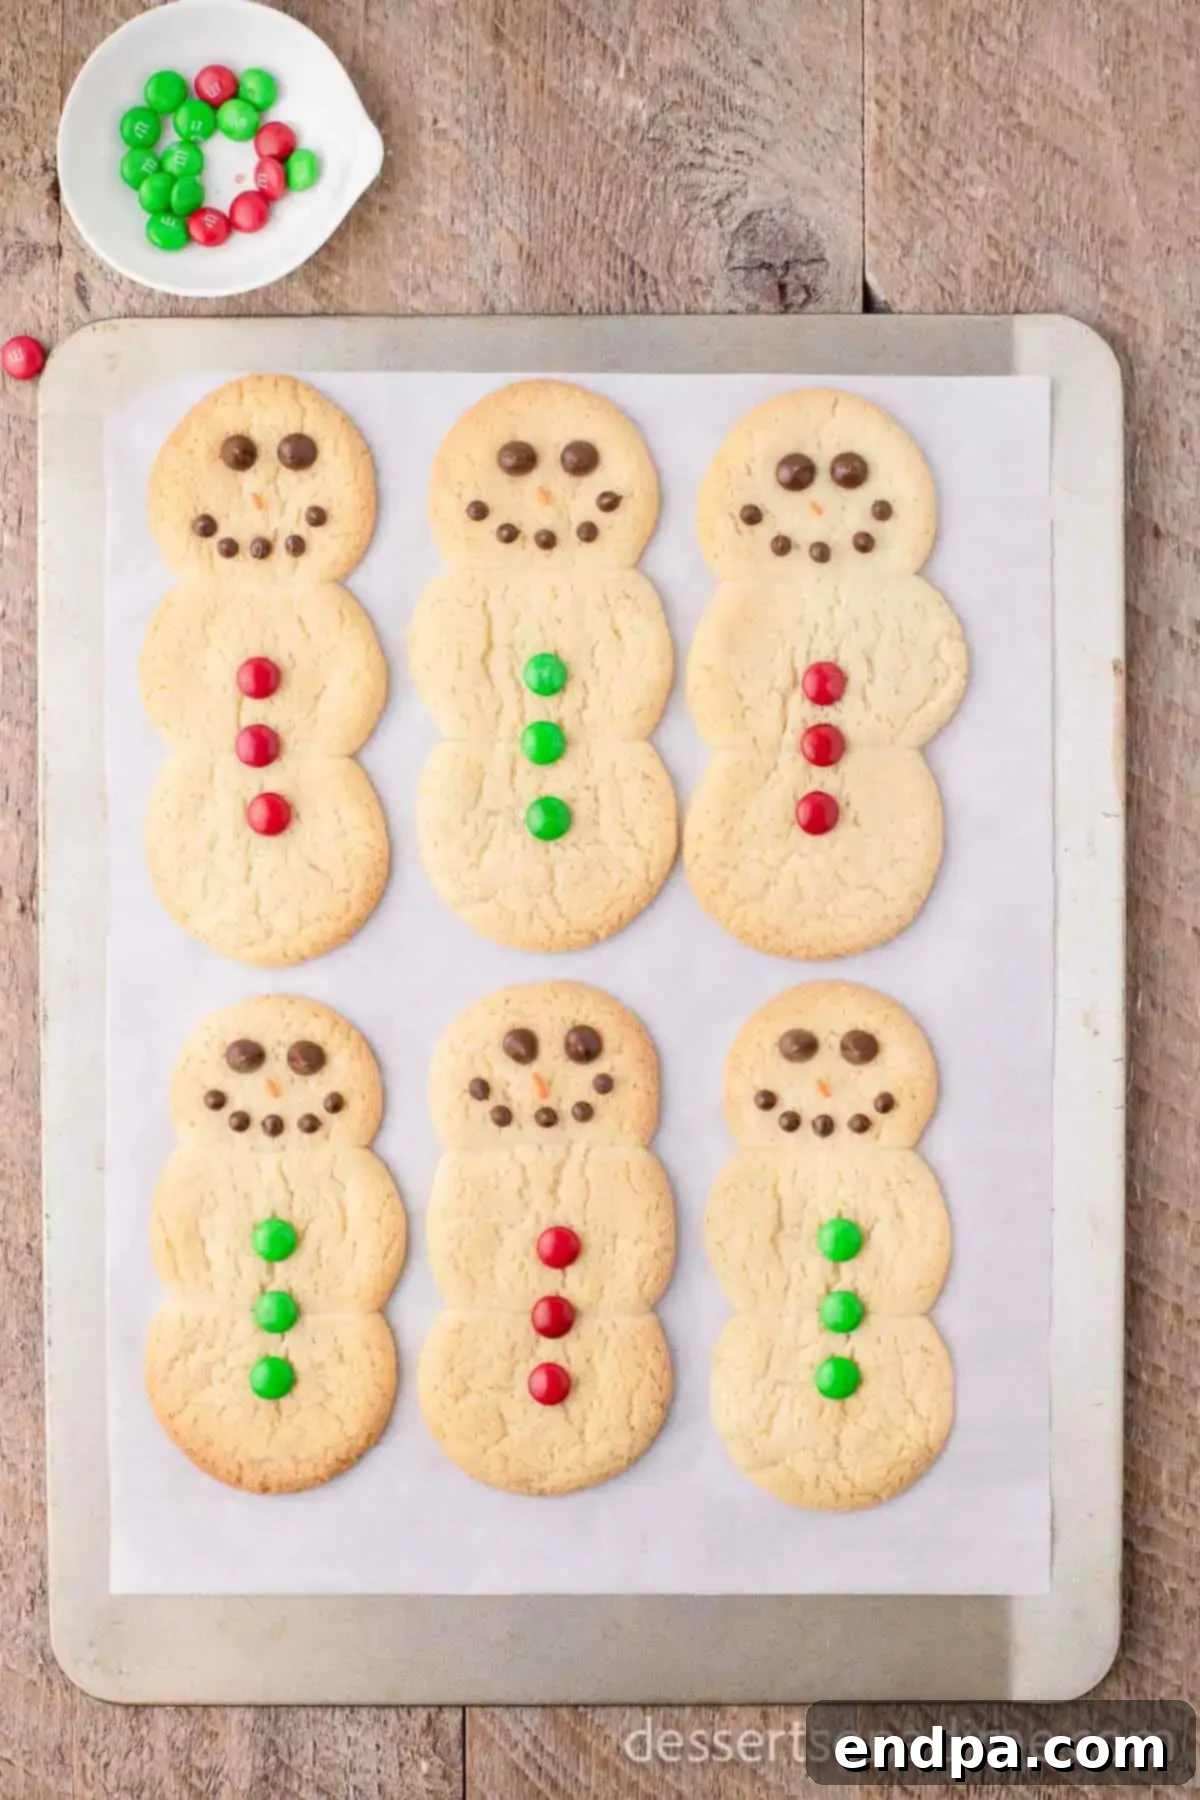
Step 5: Decorate the Face and Buttons. With the cookies cooled to room temperature, it’s time for the fun part! If you haven’t already, place the standard chocolate chips for the eyes and the mini chocolate chips for the mouth. Add your M&M’s or other small candies to form charming buttons down the snowman’s body. Press them gently into the cookie to ensure they stick. This is where your creativity can truly shine, giving each snowman its own unique personality!
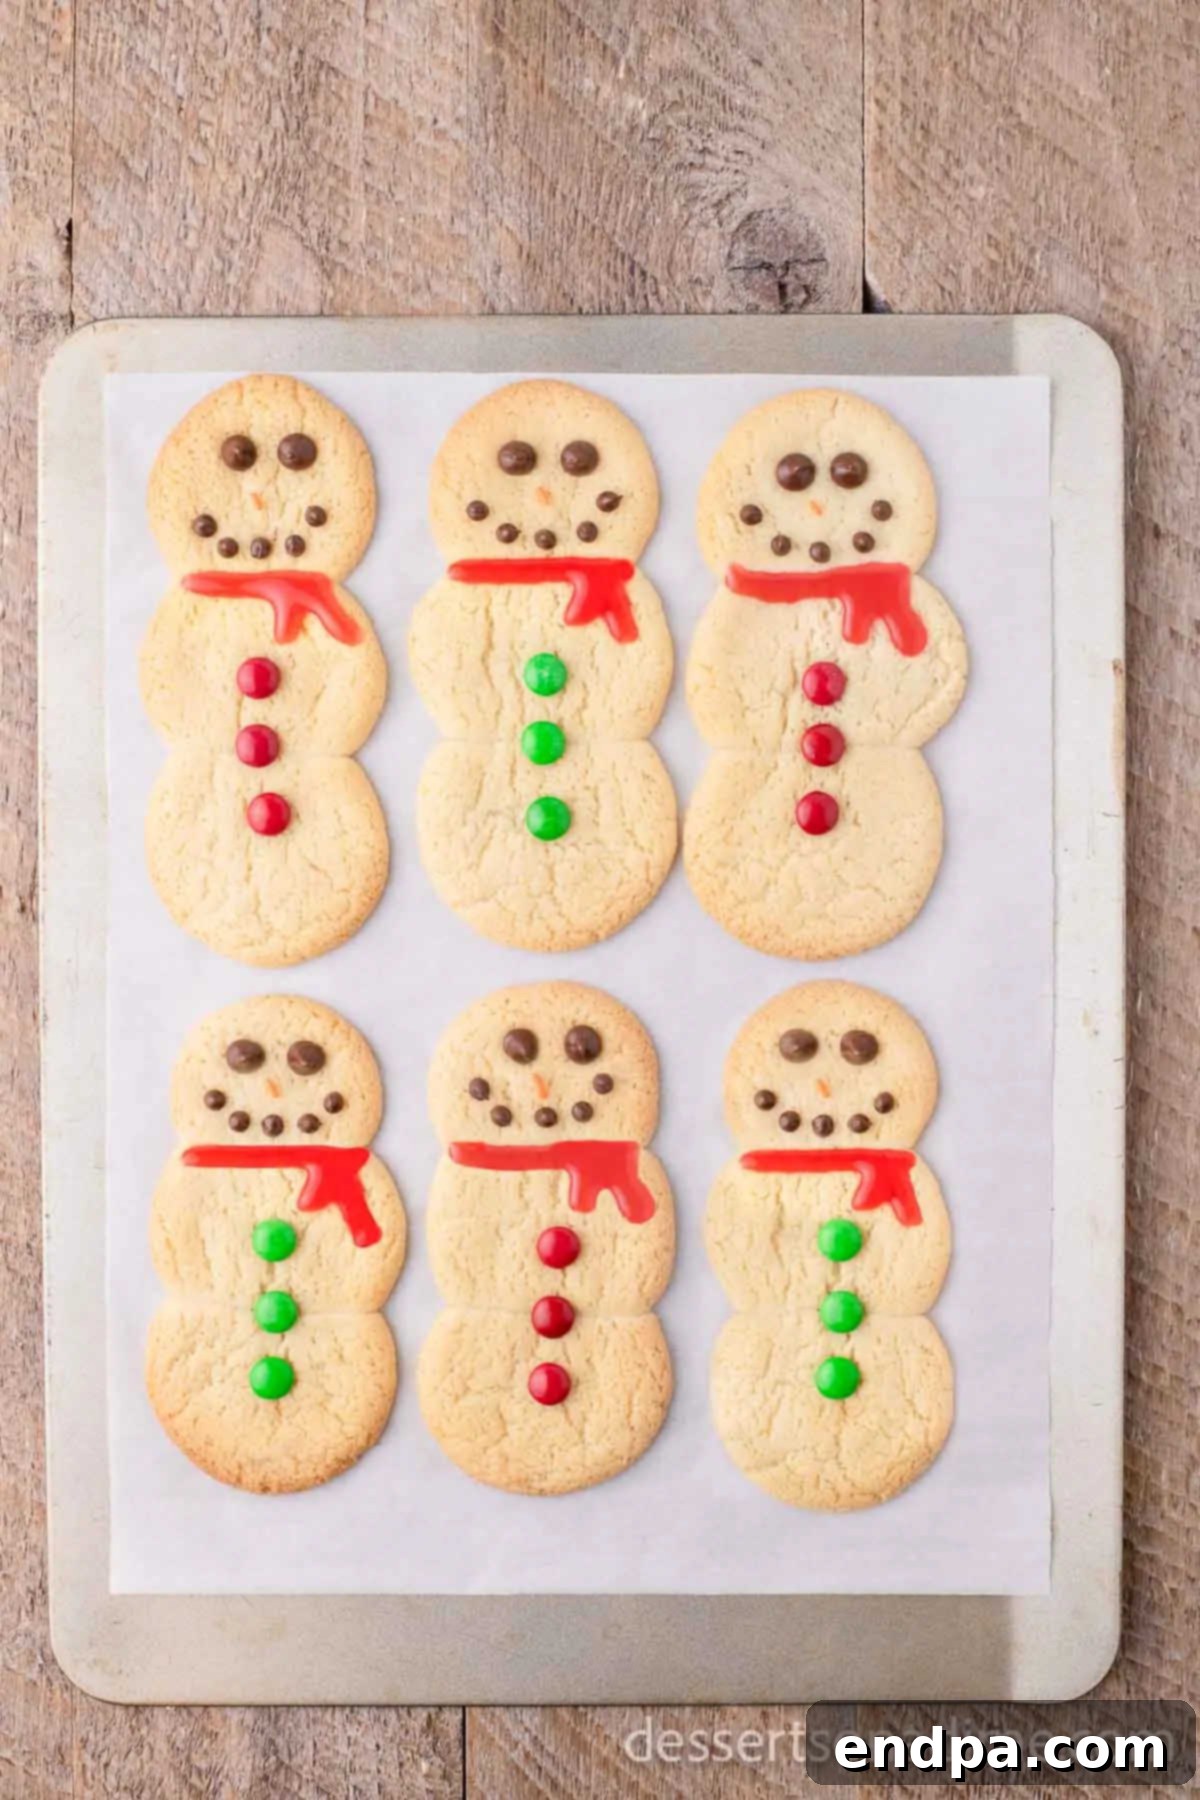
Step 6: Add the Scarf and Serve. Using your red (or green, or any preferred color!) gel icing, carefully pipe a “scarf” design around the neck area, where the top and middle cookies meet. You can create a simple band or add fringes for a more detailed look. Once all your snowmen are beautifully decorated and the icing has set, arrange them on a festive platter or in a decorative bowl. These charming treats are now ready to be served and enjoyed by all!
Frequently Asked Questions About Snowman Cookies
To maintain the freshness and crispness of your snowman cookies, store them in an airtight container at room temperature for up to 3-4 days. While our cookies rarely last that long because everyone loves them, refrigeration can extend their life slightly, especially if your kitchen is warm, up to 5 days. For best results and to prevent the decorations from sticking or smudging, place a layer of parchment paper or wax paper between each layer of cookies during storage.
Absolutely! Snowman cookies are excellent for freezing, allowing you to prepare them in advance for holiday parties or to enjoy them long after the festive season. Ensure the cookies are completely cool and the decorations (especially icing) are fully set before freezing. Place them in an airtight freezer-safe container, separating layers with parchment paper to protect the delicate decorations. They can be frozen for up to 3 months. When you’re ready to indulge, simply transfer the cookies from the freezer to the refrigerator overnight, then allow them to come to room temperature before serving for the best texture and flavor.
Yes, you absolutely can! While refrigerated store-bought dough offers convenience, homemade sugar cookie dough works wonderfully. Just ensure your dough is properly chilled before shaping to prevent excessive spreading. If using a cut-out cookie recipe, you might need to slightly adapt the shaping process, but the core idea of placing three dough balls together remains the same. The flavor of homemade dough can add an extra special touch!
Decorating snowman cookies is a fantastic activity for children! To make it fun and mess-free:
- Pre-bake and Cool: Have the cookies fully baked and cooled before involving the kids.
- Organize Toppings: Set out all the candies, sprinkles, and icing tubes in small bowls or containers for easy access.
- Disposable Workspace: Cover your work surface with newspaper or a disposable tablecloth for easy cleanup.
- Let Them Lead: Encourage creativity! There’s no right or wrong way to decorate a snowman. Let them experiment with different expressions and scarf designs.
- Easy Icing: For younger children, gel icing tubes are easier to handle than piping bags. For piping bags, pre-fill them for the kids and twist the top, leaving a small opening for them to squeeze.
Discover More Festive Snowman Recipes
If you’ve fallen in love with these adorable snowman cookies, you’ll be thrilled to explore our other fantastic snowman-themed treats. Each recipe brings its own unique charm and flavor to your holiday table:
- Melted Snowman Bark: A fun and easy no-bake treat featuring white chocolate bark adorned with “melted” snowman faces, perfect for a quick festive dessert.
- Melted Snowman Cookies Recipe: A playful twist on traditional cookies, these feature a marshmallow “snowman” that has adorably “melted” on a cookie base, complete with chocolate chip eyes and a candy nose.
- Snowman Cupcakes Recipe: Transform ordinary cupcakes into festive winter characters with simple frosting techniques and edible decorations.
- Snowman Chocolate Covered Oreos: An incredibly easy and impressive treat where classic Oreo cookies are dipped in white chocolate and decorated to look like cute snowmen.
We invite you to try this incredibly easy and heartwarming recipe today. We are always eager to hear about your baking adventures and feedback, so please do come back and share your comments!
Pin
Snowman Cookies
5 mins
10 mins
15 mins
12
American
Dessert
113
Carrie Barnard
Ingredients
- Refrigerated Sugar Cookie Dough
- Red Gel Icing
- Chocolate Chips
- Mini Chocolate Chips
- Red and Green M&M’s
Instructions
- Place your pre-made cookie dough on a lined cookie sheet so that they are about ½ inch apart.
- Bake as directed on package until lightly golden.
- Remove from oven, and while still slightly warm, add your chocolate chips for eyes and mouth, and M&M’s for buttons (the warmth helps them stick).
- Allow cookies to cool completely on a wire rack. Then, pipe on frosting gel around the top and middle cookies for a scarf.
- Store in an airtight container at room temperature or in the refrigerator.
Nutrition Facts
Pin This Now to Remember It Later
Pin Recipe
